Download to read offline


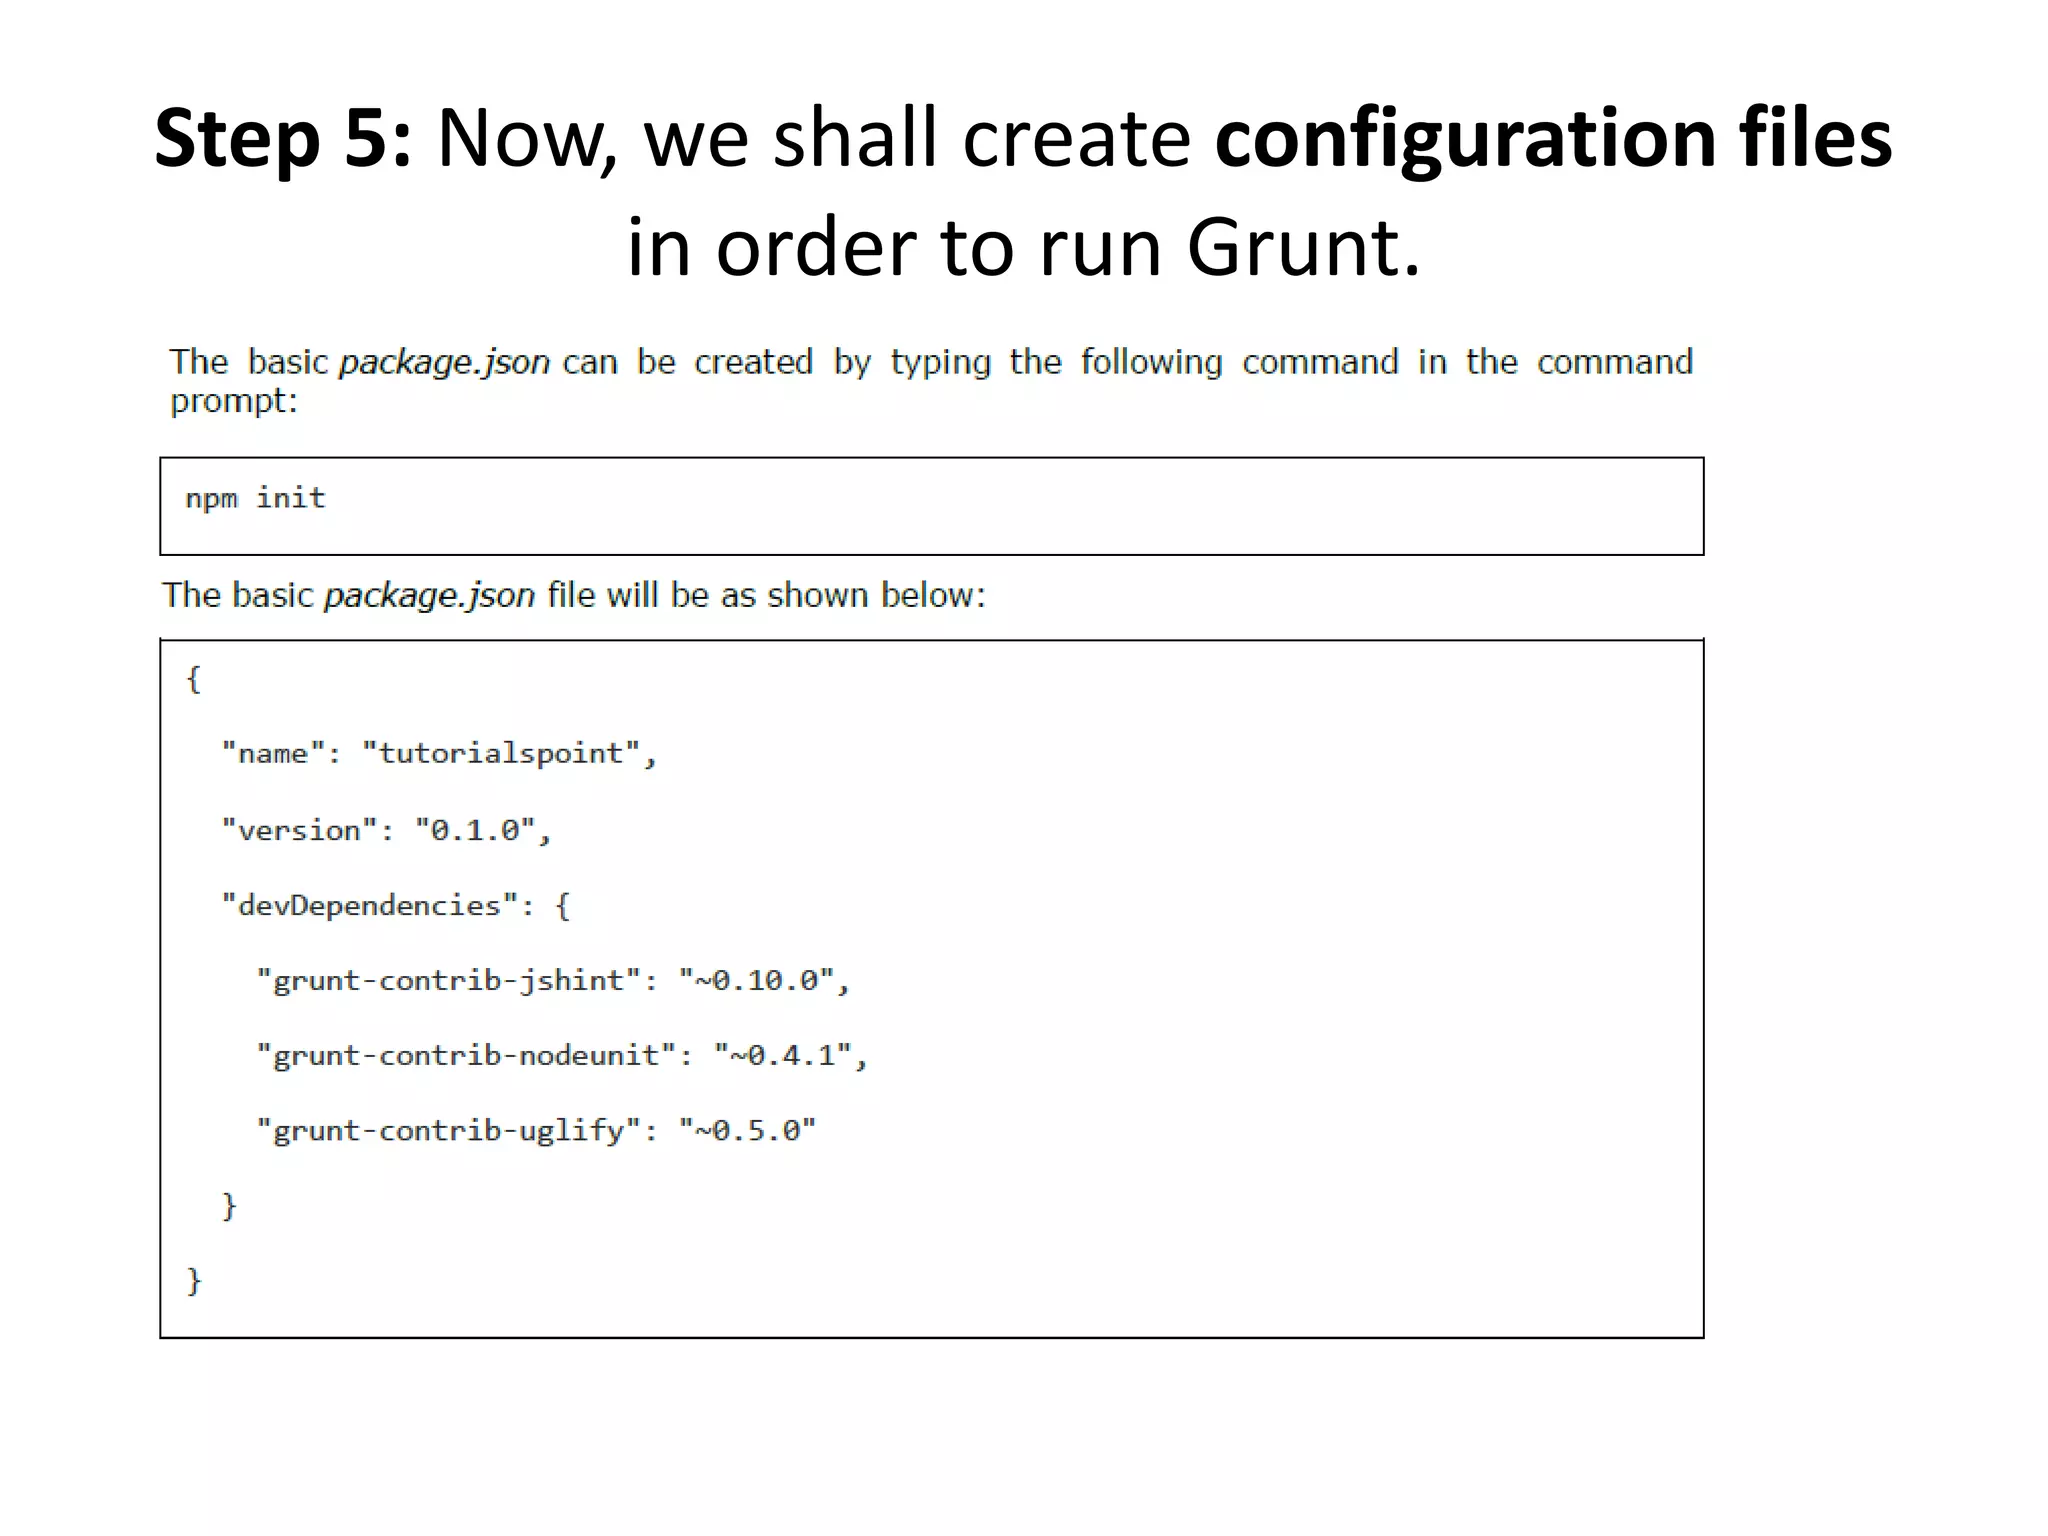
![Gruntfile.js :The Gruntfile.js file is used to define our configuration for Grunt. It is the place where our
settings will be written.
// our wrapper function (required by grunt and its plugins)
// all configuration goes inside this function
module.exports = function(grunt) {
// CONFIGURE GRUNT
grunt.initConfig({
// get the configuration info from package.json file
// this way we can use things like name and version (pkg.name)
pkg: grunt.file.readJSON('package.json'),
// all of our configuration goes here
uglify: {
// uglify task configuration
options: {
},
build: {
}
}
});
// log something
grunt.log.write('Hello world! Welcome to Tutorialspoint!!n');
// Load the plugin that provides the "uglify" task.
grunt.loadNpmTasks('grunt-contrib-uglify');
// Default task(s).
grunt.registerTask('default', ['uglify']);
};
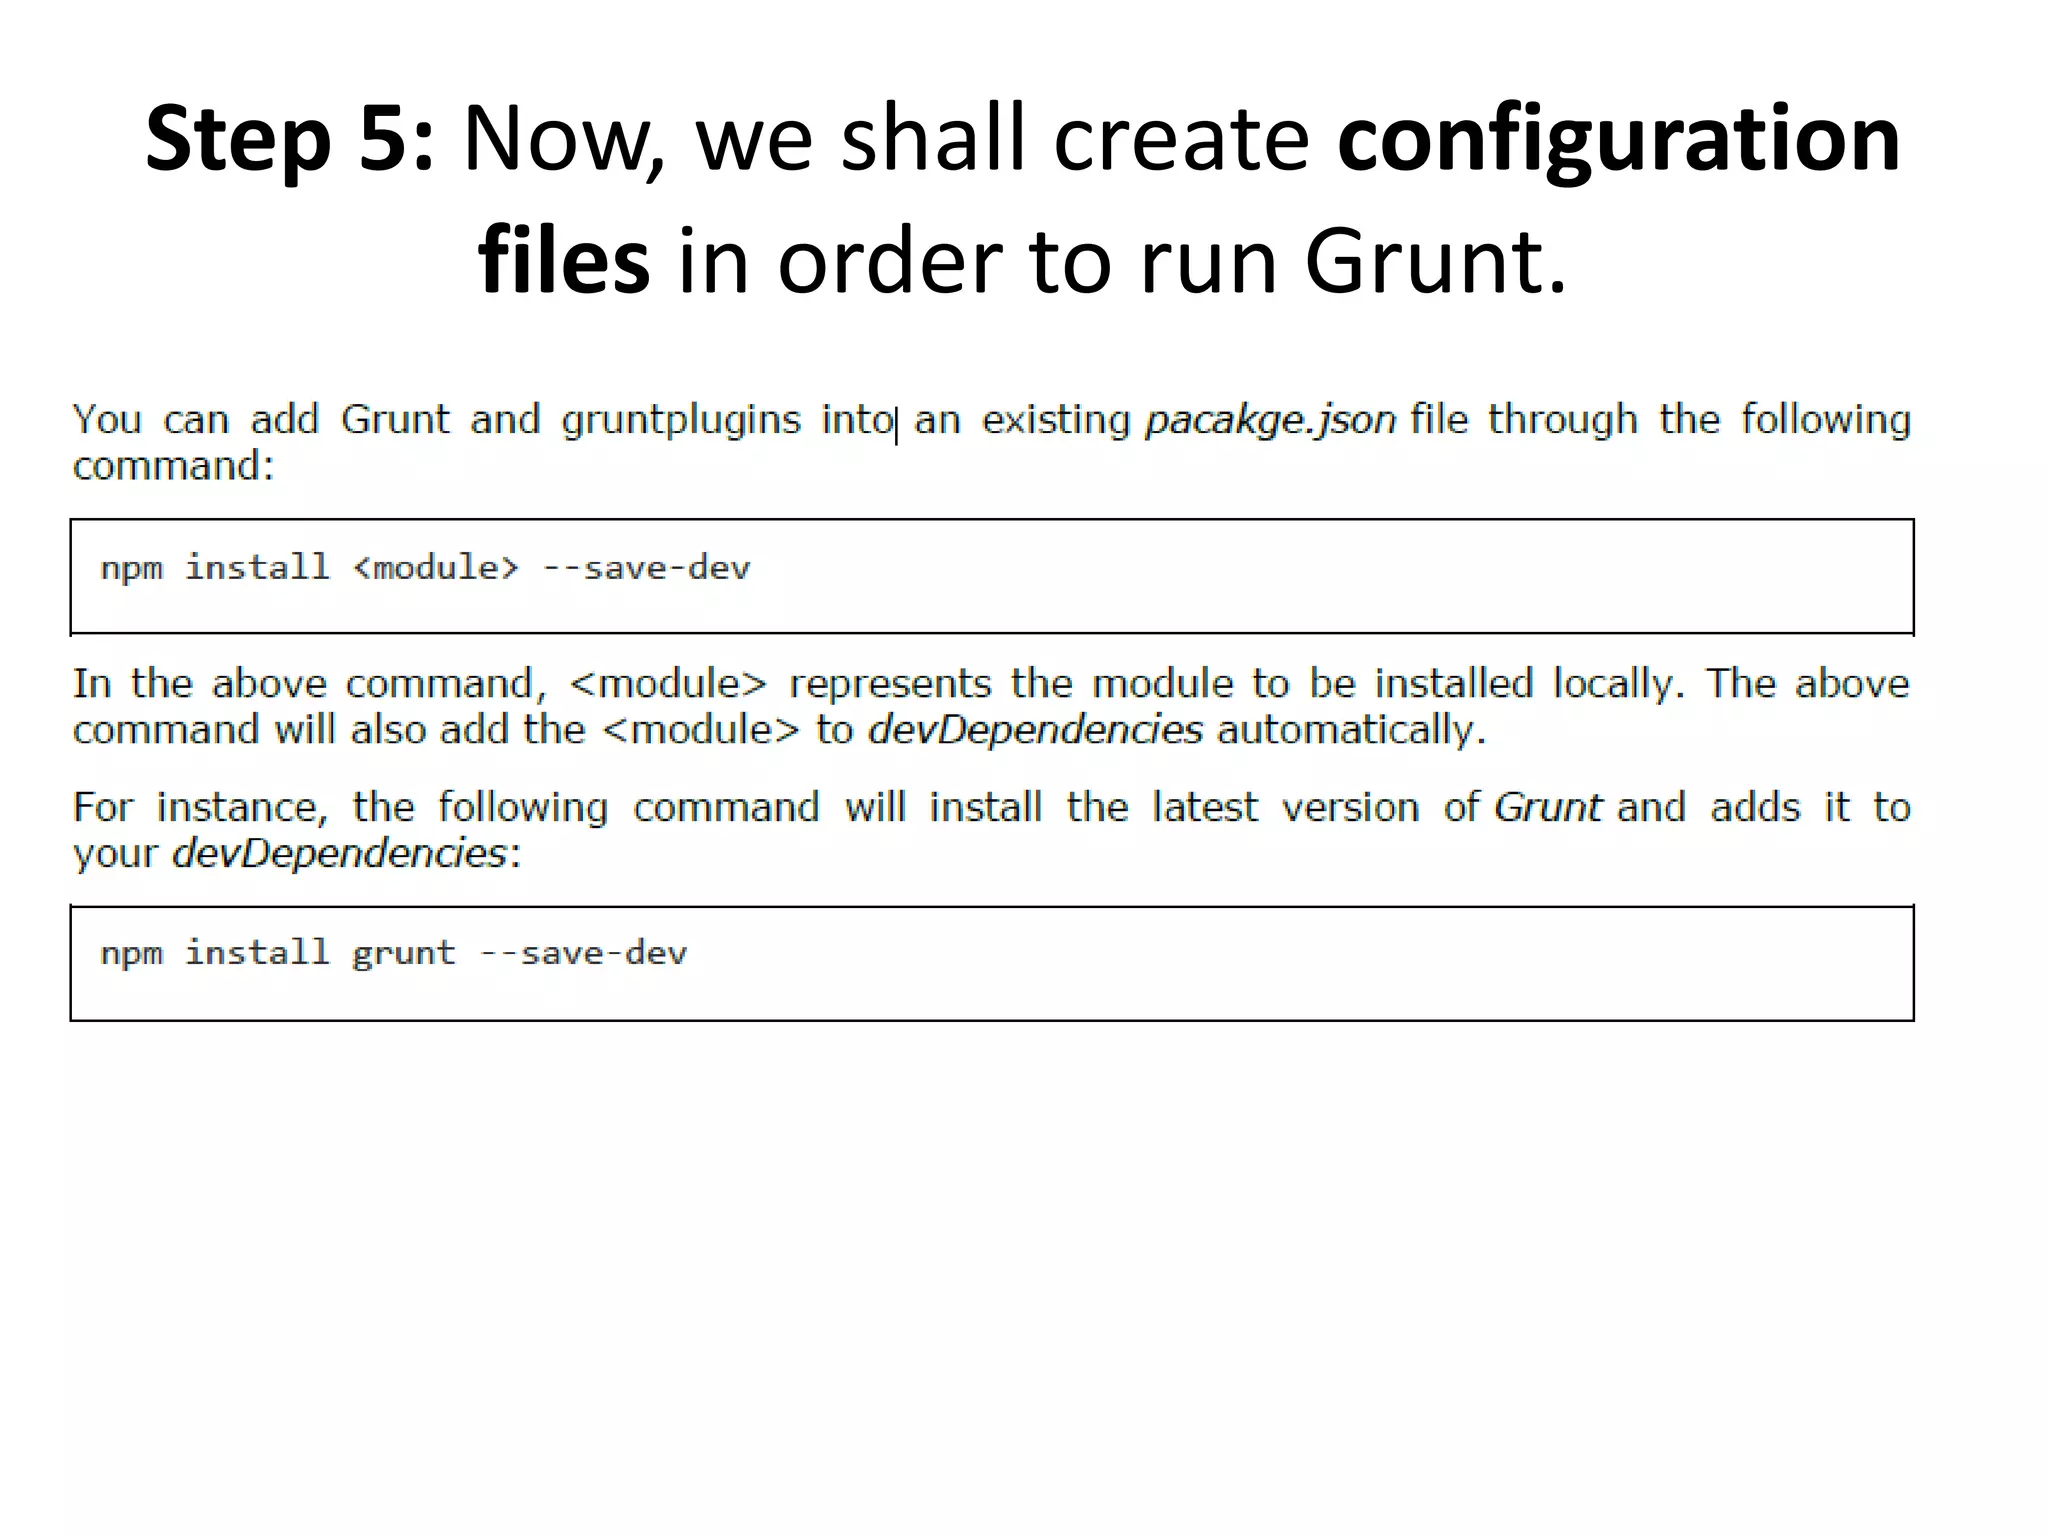
Step 5: Now, we shall create configuration
files in order to run Grunt.](https://image.slidesharecdn.com/frontenddevelopmentgurant-170427100920/75/Front-end-development-gurant-19-2048.jpg)


The document provides an overview of Node.js and Grunt, highlighting Node.js as a powerful JavaScript runtime for developing I/O intensive web apps and Grunt as a JavaScript task runner for automating tasks like compilation and testing. It outlines the installation steps for both Node.js and Grunt, including setting environment variables and creating configuration files. The document emphasizes Grunt's ability to streamline web development workflows and its role in maintaining multiple versions.