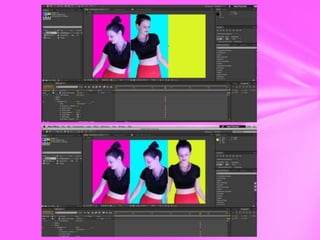
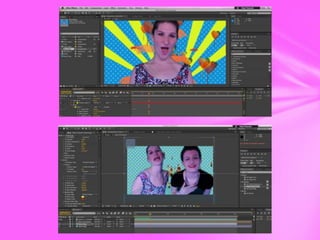
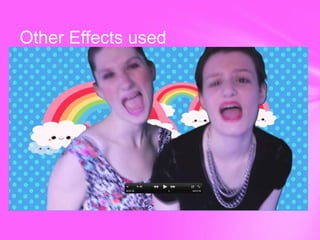
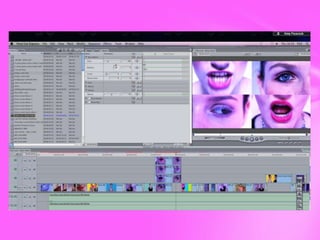
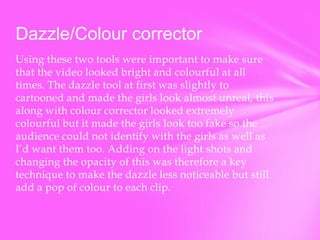
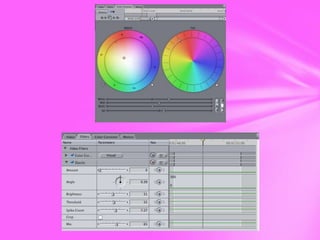
How did we use Final Cut and Adobe After
Effects technologies in our project?
Amy Peacock
After Effects Overview
We decided to use After Effects throughout our
project to make it look as creative and fun as possible.
Starting with many tutorials I started to get an idea of
what after effects techniques we could use to make
our media product look effective. We used green
screens throughout the video as I felt this would look
amazing when an audience would watch the video to
ensure they are entertained throughout by different
effects at every moment and not just paint shots
which could get tedious. I therefore filmed many
shots of the girls lip synching in front of the green
screen as well as many shots of them dancing so it
gave us plenty to play around with.
Three colour pop art effect
One effect we decided to use was to duplicate Natalie
so that she was on the screen three times instead of
just once giving the audience something different and
original to look at. I paused the clip as certain points
in the time line by using animation key frames and
told my group we needed to put these and the clip on
top of a screen split into three. I then changed each
colour for the three colours to be bright and
completely different to look exciting and fit in with
our pop art theme.
Lipstick Animation/Bridge Animation
By doing a lipstick animation I was able to make
lipstick burst out of the centre of the clip of the girls
lip syncing along with fireworks. This showed a girly
animation with creativity that made our video
emphasis the feministic nature. This was similar to a
bridge animation at the start of the video that had
yellow beams, lollipops and cars to make it very
visually exciting and something so busy the audience
are overwhelmed with different colours.
Other Effects used
Final Cut Express Overview
Final Cut Express was a familiar and easy programme
to use, this made it easy for me when deciding what
effects to use and how to edit the video as I had seen
and used the techniques in projects outside of school.
I used the programme to make our project have
transitions and effects that would make the clips look
very visually appealing to the audience and also help
us easily use conventional editing of pop in our
video.
Dip to colour dissolves
We used these throughout the video to give a
bright and colourful pop between each clip.
This not only breaks up the clips in a creative
way but it also keeps things fresh and moving
at a fast pace so that no clip is on screen that
would get tedious. We used very bright
colours for these transitions and made sure
they connoted the pop colours you would
normally expect to see in this kind of video.
Split screen effect
We decided to use a split screen effect in order to visually
appeal to our audience and be something different that they
would not normally see in other videos. In this way we actually
subverted conventions as I have never seen a quad screen that I
suggested to my group in any other video. This was at first too
in your face which we got back from audience feedback, we
then decided to change this so that after the first two lines we
changed the lips and eyes to different places so that the
transition broke up the clip for the audience to look extremely
creative as it constantly changed. This was easy to do as I only
had to put the four clips on top of each other and synch them so
that the lips were singing at the right time and the eyes were
constantly moving and change the scale of each clip so that all
four were the same size and fitted perfectly together to make
one entire shot.
Dazzle/Colour corrector
Using these two tools were important to make sure
that the video looked bright and colourful at all
times. The dazzle tool at first was slightly to
cartooned and made the girls look almost unreal, this
along with colour corrector looked extremely
colourful but it made the girls look too fake so the
audience could not identify with the girls as well as
I’d want them too. Adding on the light shots and
changing the opacity of this was therefore a key
technique to make the dazzle less noticeable but still
add a pop of colour to each clip.
Final cut evaluation

Final cut evaluation

  • 1.
    How did weuse Final Cut and Adobe After Effects technologies in our project? Amy Peacock
  • 2.
    After Effects Overview Wedecided to use After Effects throughout our project to make it look as creative and fun as possible. Starting with many tutorials I started to get an idea of what after effects techniques we could use to make our media product look effective. We used green screens throughout the video as I felt this would look amazing when an audience would watch the video to ensure they are entertained throughout by different effects at every moment and not just paint shots which could get tedious. I therefore filmed many shots of the girls lip synching in front of the green screen as well as many shots of them dancing so it gave us plenty to play around with.
  • 3.
    Three colour popart effect One effect we decided to use was to duplicate Natalie so that she was on the screen three times instead of just once giving the audience something different and original to look at. I paused the clip as certain points in the time line by using animation key frames and told my group we needed to put these and the clip on top of a screen split into three. I then changed each colour for the three colours to be bright and completely different to look exciting and fit in with our pop art theme.
  • 5.
    Lipstick Animation/Bridge Animation Bydoing a lipstick animation I was able to make lipstick burst out of the centre of the clip of the girls lip syncing along with fireworks. This showed a girly animation with creativity that made our video emphasis the feministic nature. This was similar to a bridge animation at the start of the video that had yellow beams, lollipops and cars to make it very visually exciting and something so busy the audience are overwhelmed with different colours.
  • 7.
  • 9.
    Final Cut ExpressOverview Final Cut Express was a familiar and easy programme to use, this made it easy for me when deciding what effects to use and how to edit the video as I had seen and used the techniques in projects outside of school. I used the programme to make our project have transitions and effects that would make the clips look very visually appealing to the audience and also help us easily use conventional editing of pop in our video.
  • 10.
    Dip to colourdissolves We used these throughout the video to give a bright and colourful pop between each clip. This not only breaks up the clips in a creative way but it also keeps things fresh and moving at a fast pace so that no clip is on screen that would get tedious. We used very bright colours for these transitions and made sure they connoted the pop colours you would normally expect to see in this kind of video.
  • 12.
    Split screen effect Wedecided to use a split screen effect in order to visually appeal to our audience and be something different that they would not normally see in other videos. In this way we actually subverted conventions as I have never seen a quad screen that I suggested to my group in any other video. This was at first too in your face which we got back from audience feedback, we then decided to change this so that after the first two lines we changed the lips and eyes to different places so that the transition broke up the clip for the audience to look extremely creative as it constantly changed. This was easy to do as I only had to put the four clips on top of each other and synch them so that the lips were singing at the right time and the eyes were constantly moving and change the scale of each clip so that all four were the same size and fitted perfectly together to make one entire shot.
  • 14.
    Dazzle/Colour corrector Using thesetwo tools were important to make sure that the video looked bright and colourful at all times. The dazzle tool at first was slightly to cartooned and made the girls look almost unreal, this along with colour corrector looked extremely colourful but it made the girls look too fake so the audience could not identify with the girls as well as I’d want them too. Adding on the light shots and changing the opacity of this was therefore a key technique to make the dazzle less noticeable but still add a pop of colour to each clip.