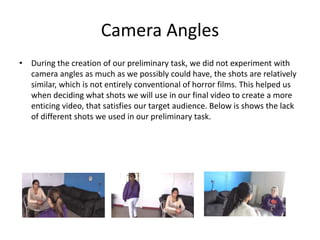
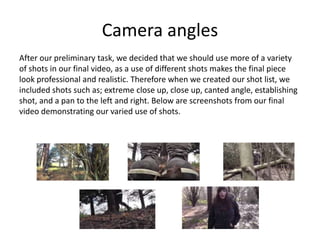
Evaluation Question 7 – Looking
back at your preliminary task, what
do you feel you have learnt in the
progression from it to the full
product?
180 Degree Rule and Shot Reverse
Shot
In our preliminary task, we aimed to stick to the 180 degree rule because we
felt it would be good practice for filming and editing, to create a coherent
video. The 180 degree rule is associated with shot reverse shot, because both
techniques are needed when editing. These two editing techniques combined
create a film that is continuity edited and the piece is clear and coherent for
audiences. Below is an example of where we have used the 180 degree rule
and shot reverse shot in our preliminary task.
180 Degree Rule and Shot Reverse
Shot
Following our preliminary task, we discovered the importance of including the
180 degree rule and shot reverse shot, to create a greater piece and conform
to the rules of continuity editing. However after having the practice from our
preliminary task, we learnt that we may be able to use both the 180 degree
rule and shot reverse shot in a slightly more subtle way, so it is less
noticeable, yet still creates continuity and it coherent for audiences. Below is
an example of where we have used the 180 degree rule and shot reverse shot
in our final piece.
Match on action
Our preliminary task was good practice for applying match on action to our
video, as it can sometimes be challenging to edit an action, so that it starts in
one shot and is finished in another. This is why we practiced this in our
preliminary task. Using match on action is important, because it creates a
smoother flowing video, as the action will look less staged and more natural,
and therefore the horror will look more realistic, having a greater impact on
the audience. Below is an example of where we have used match on action in
our preliminary task.
Match on action
• When creating our final video, we decided that we should use match on
action, as it is important for making actions look more natural. From the
preliminary task, we decided to use two cameras as opposed to one when
filming, this way we could set up two cameras in different places, and put
the footage together and edit it. Whereas before, we used only one
camera, and found it more challenging to film an action twice and then
edit the footage. Had we not practiced with the preliminary task, we may
not have known to use two cameras when filming our final video. Below is
an example of match on action we have included in our final video.
Camera Angles
• During the creation of our preliminary task, we did not experiment with
camera angles as much as we possibly could have, the shots are relatively
similar, which is not entirely conventional of horror films. This helped us
when deciding what shots we will use in our final video to create a more
enticing video, that satisfies our target audience. Below is shows the lack
of different shots we used in our preliminary task.
Camera angles
After our preliminary task, we decided that we should use more of a variety
of shots in our final video, as a use of different shots makes the final piece
look professional and realistic. Therefore when we created our shot list, we
included shots such as; extreme close up, close up, canted angle, establishing
shot, and a pan to the left and right. Below are screenshots from our final
video demonstrating our varied use of shots.
Conclusion
• To conclude, completing the preliminary task was
useful, as it taught my group and I the
importance of editing and camera angles. Also, I
believe that if we had not completed the
preliminary task, our final video would not be the
quality it is now, as we would have been
inexperienced, and we would be unfamiliar with
some editing techniques. Therefore it would be
correct to say that we have learnt many skills in
the process of creating our preliminary task to
our final video.

Evaluation 7

  • 1.
    Evaluation Question 7– Looking back at your preliminary task, what do you feel you have learnt in the progression from it to the full product?
  • 2.
    180 Degree Ruleand Shot Reverse Shot In our preliminary task, we aimed to stick to the 180 degree rule because we felt it would be good practice for filming and editing, to create a coherent video. The 180 degree rule is associated with shot reverse shot, because both techniques are needed when editing. These two editing techniques combined create a film that is continuity edited and the piece is clear and coherent for audiences. Below is an example of where we have used the 180 degree rule and shot reverse shot in our preliminary task.
  • 3.
    180 Degree Ruleand Shot Reverse Shot Following our preliminary task, we discovered the importance of including the 180 degree rule and shot reverse shot, to create a greater piece and conform to the rules of continuity editing. However after having the practice from our preliminary task, we learnt that we may be able to use both the 180 degree rule and shot reverse shot in a slightly more subtle way, so it is less noticeable, yet still creates continuity and it coherent for audiences. Below is an example of where we have used the 180 degree rule and shot reverse shot in our final piece.
  • 4.
    Match on action Ourpreliminary task was good practice for applying match on action to our video, as it can sometimes be challenging to edit an action, so that it starts in one shot and is finished in another. This is why we practiced this in our preliminary task. Using match on action is important, because it creates a smoother flowing video, as the action will look less staged and more natural, and therefore the horror will look more realistic, having a greater impact on the audience. Below is an example of where we have used match on action in our preliminary task.
  • 5.
    Match on action •When creating our final video, we decided that we should use match on action, as it is important for making actions look more natural. From the preliminary task, we decided to use two cameras as opposed to one when filming, this way we could set up two cameras in different places, and put the footage together and edit it. Whereas before, we used only one camera, and found it more challenging to film an action twice and then edit the footage. Had we not practiced with the preliminary task, we may not have known to use two cameras when filming our final video. Below is an example of match on action we have included in our final video.
  • 6.
    Camera Angles • Duringthe creation of our preliminary task, we did not experiment with camera angles as much as we possibly could have, the shots are relatively similar, which is not entirely conventional of horror films. This helped us when deciding what shots we will use in our final video to create a more enticing video, that satisfies our target audience. Below is shows the lack of different shots we used in our preliminary task.
  • 7.
    Camera angles After ourpreliminary task, we decided that we should use more of a variety of shots in our final video, as a use of different shots makes the final piece look professional and realistic. Therefore when we created our shot list, we included shots such as; extreme close up, close up, canted angle, establishing shot, and a pan to the left and right. Below are screenshots from our final video demonstrating our varied use of shots.
  • 8.
    Conclusion • To conclude,completing the preliminary task was useful, as it taught my group and I the importance of editing and camera angles. Also, I believe that if we had not completed the preliminary task, our final video would not be the quality it is now, as we would have been inexperienced, and we would be unfamiliar with some editing techniques. Therefore it would be correct to say that we have learnt many skills in the process of creating our preliminary task to our final video.