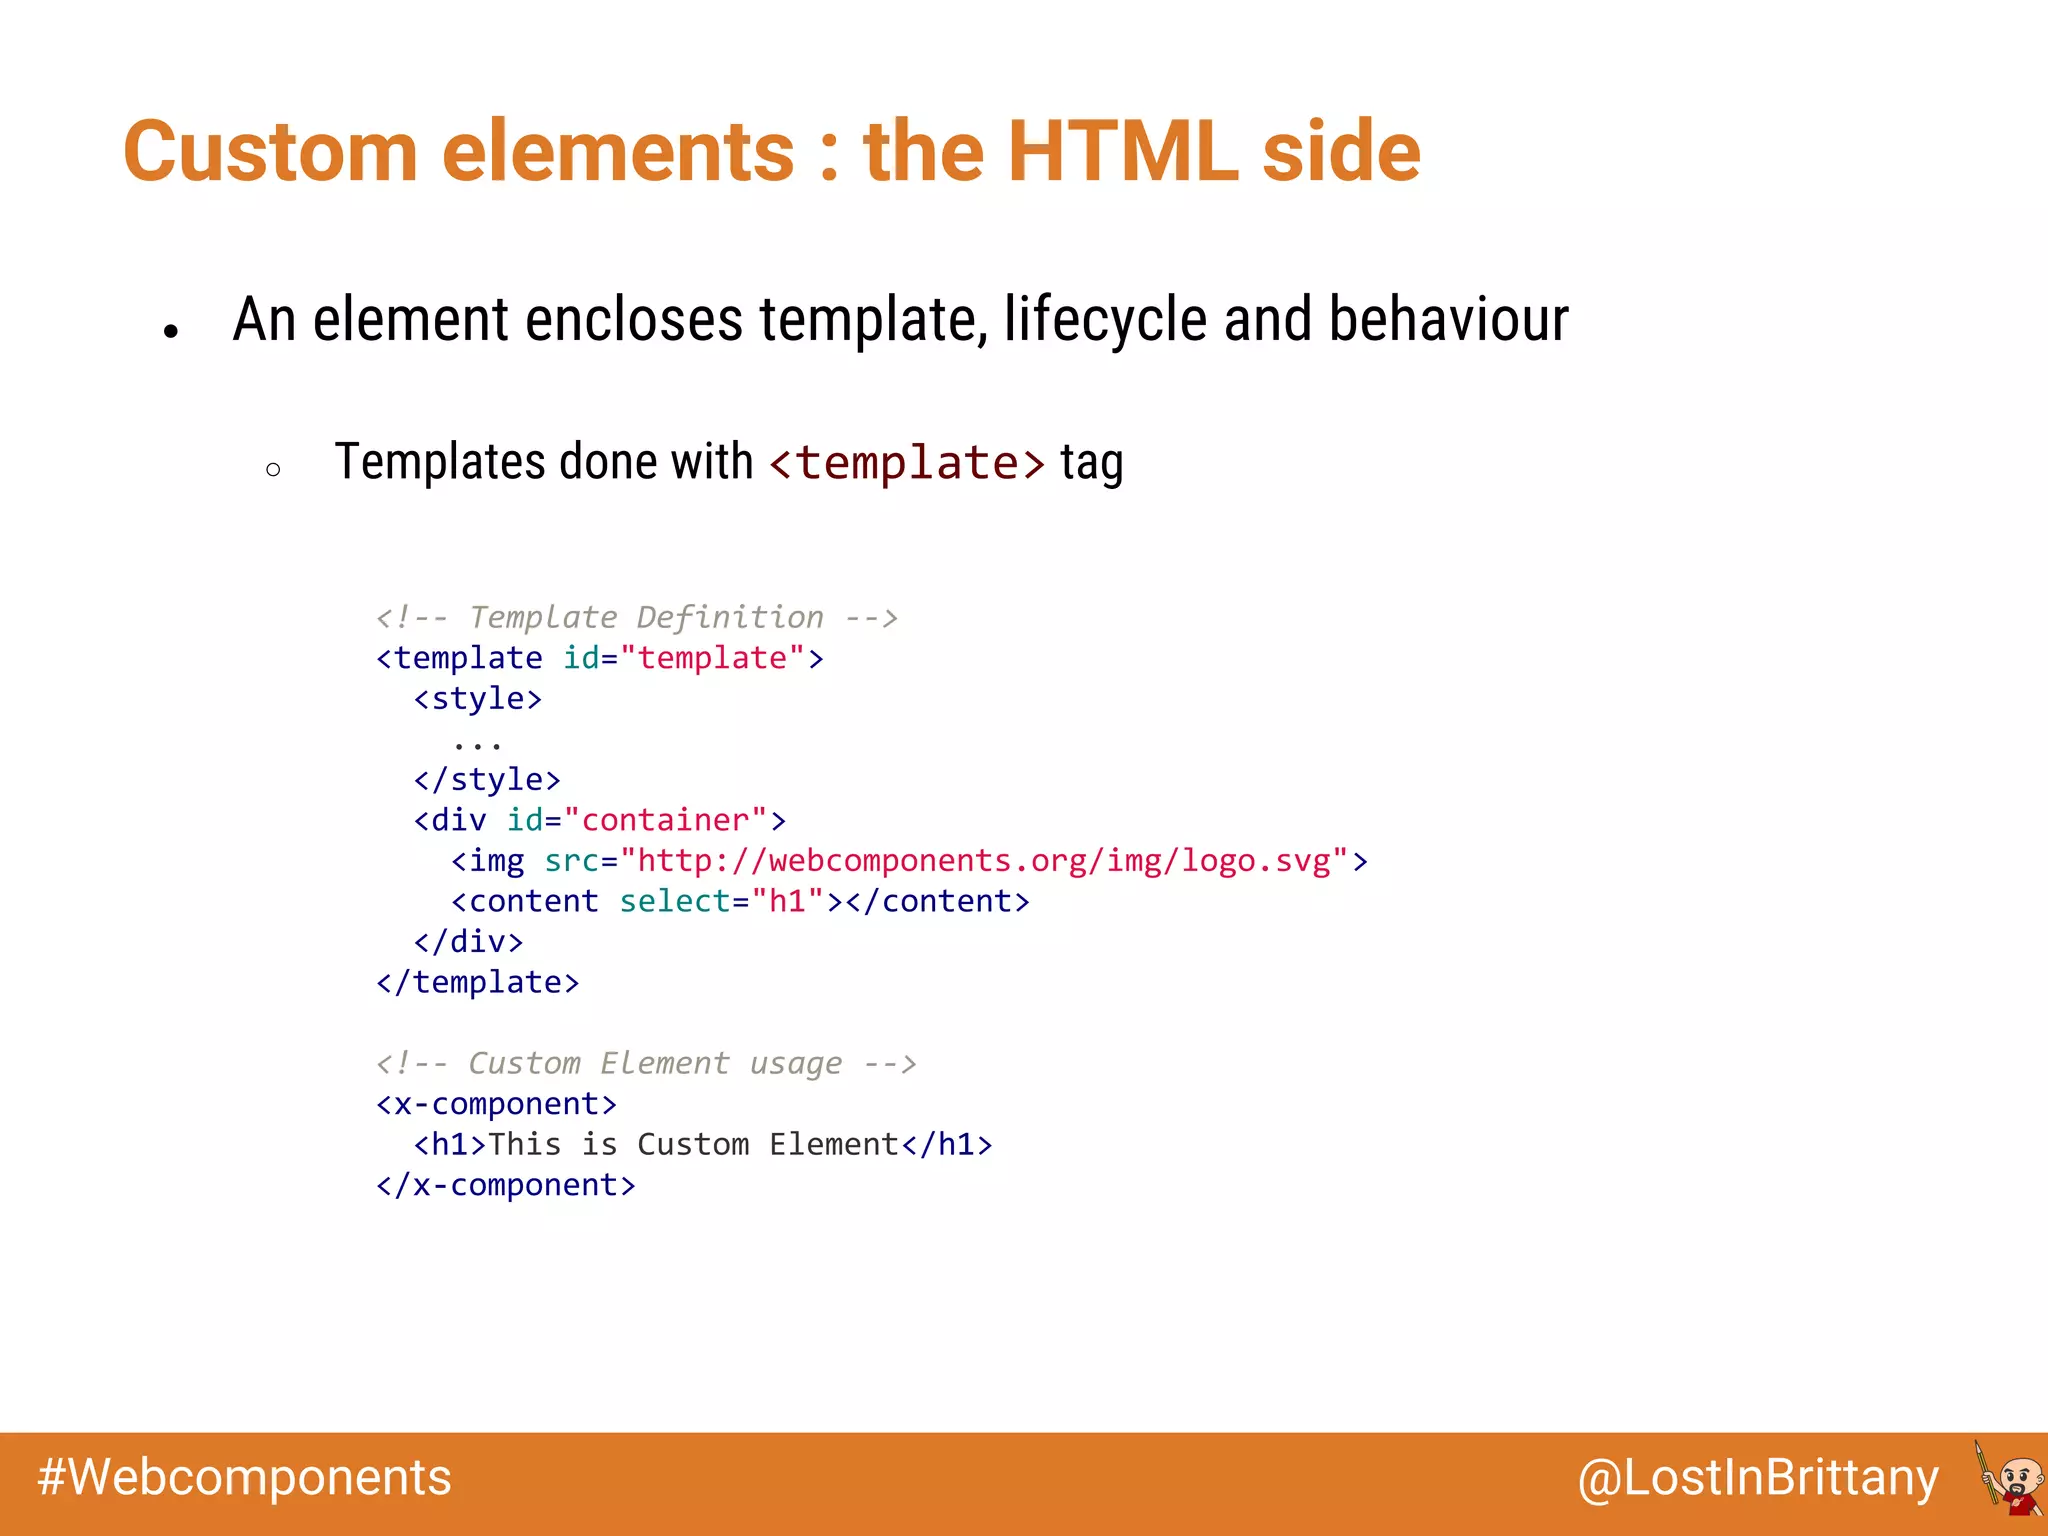
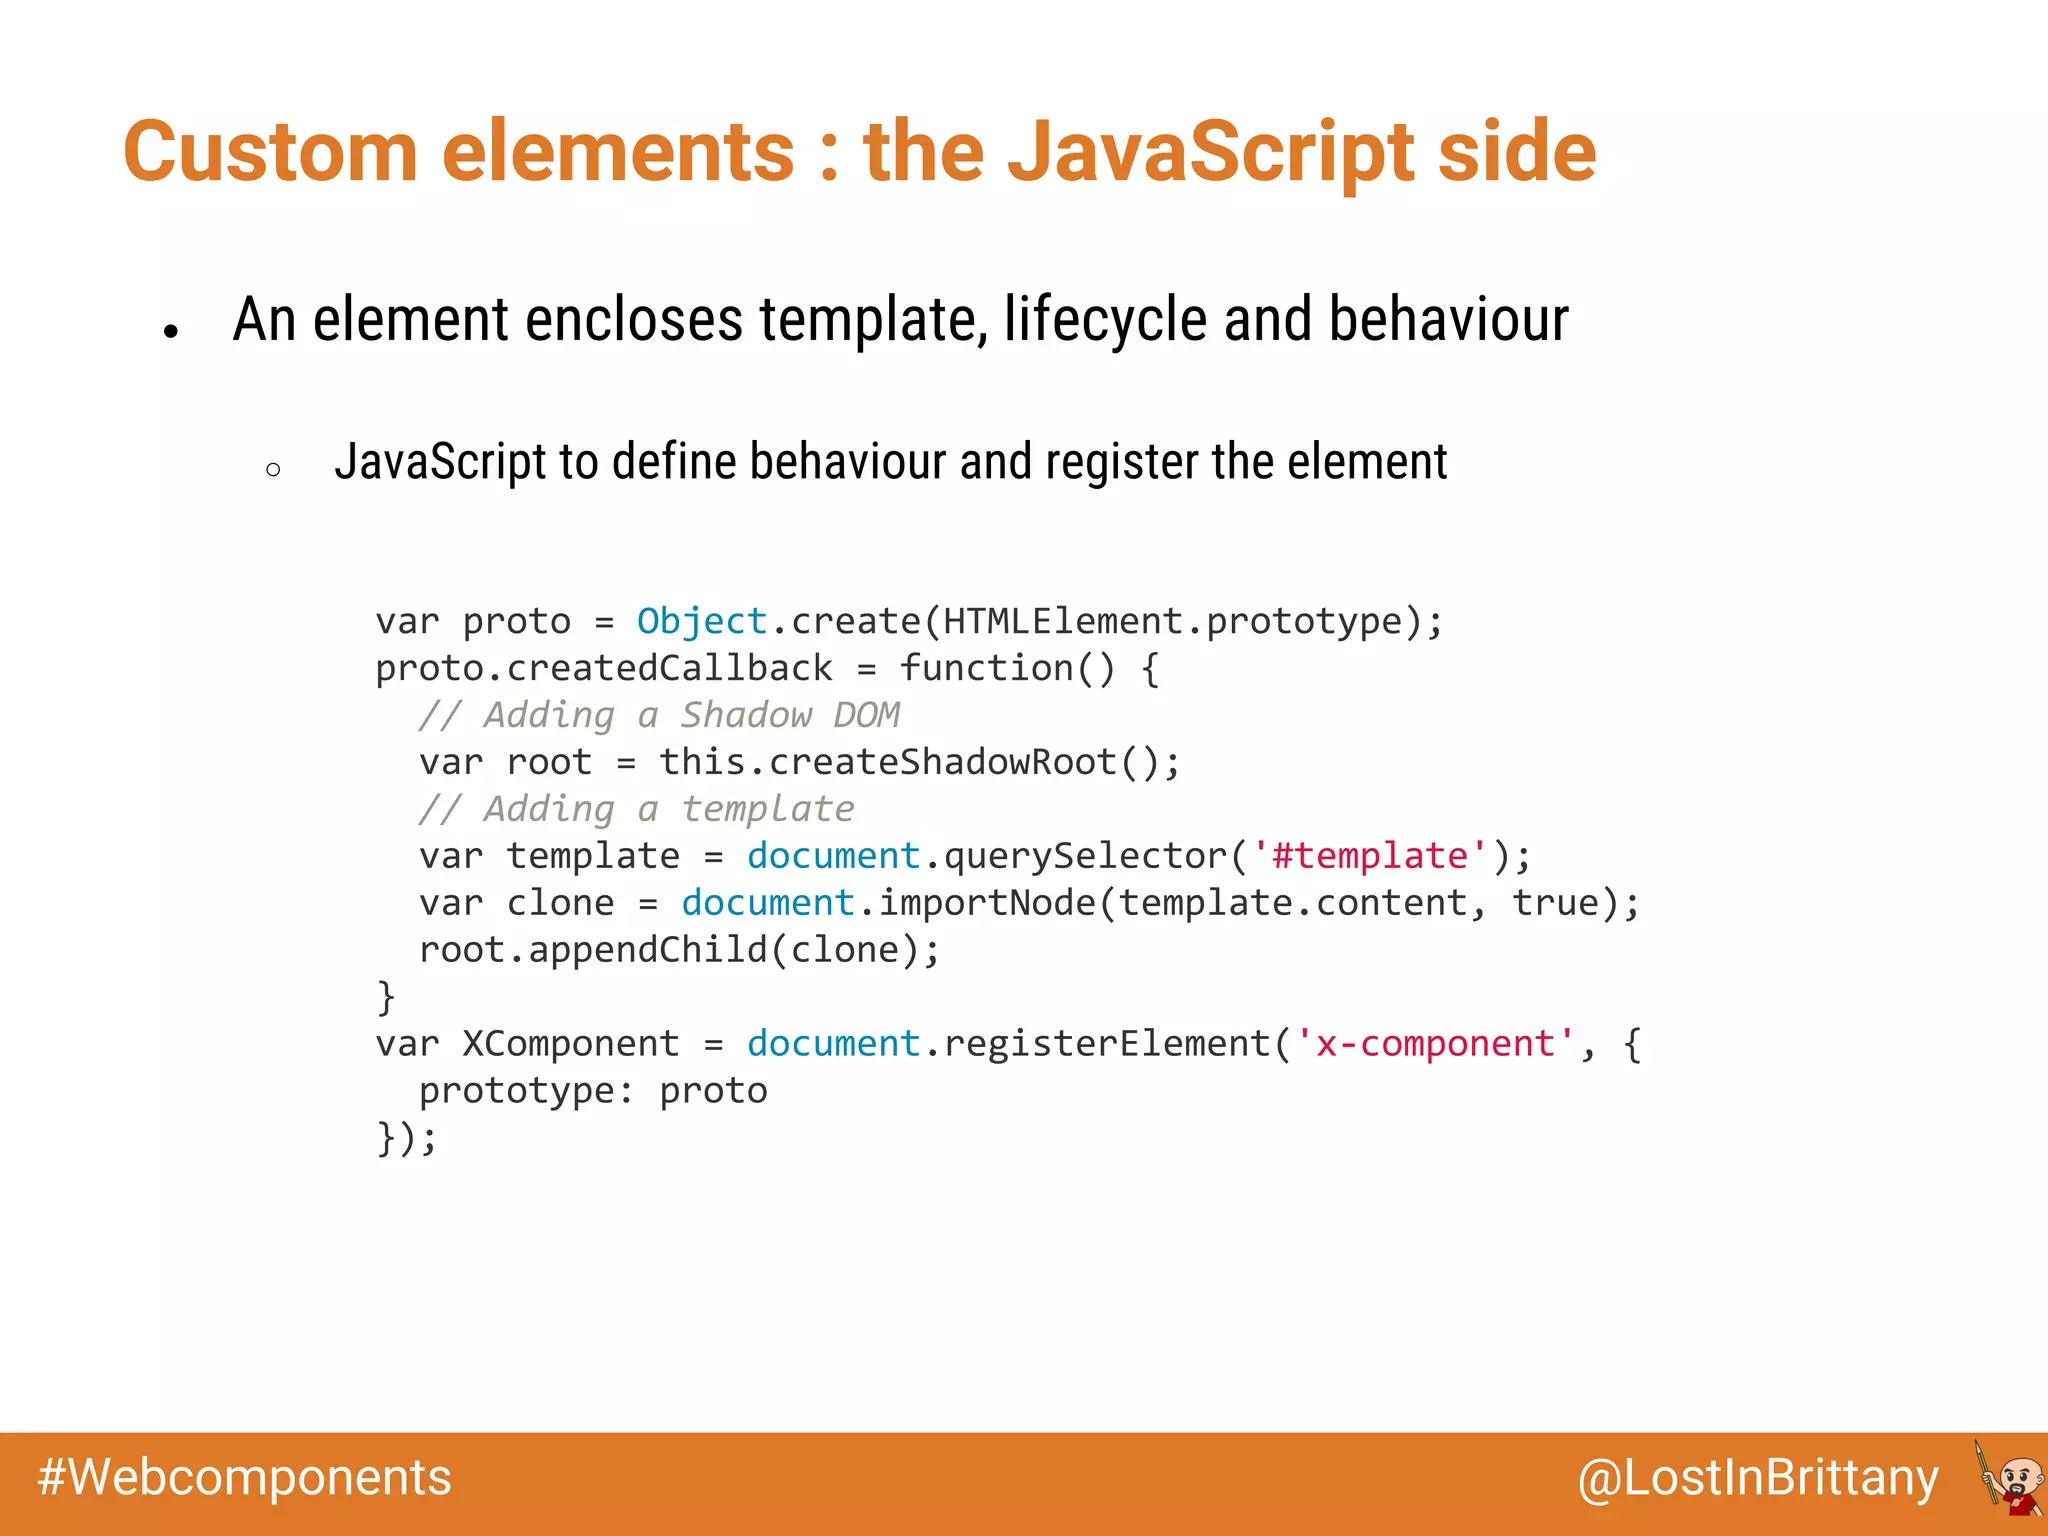
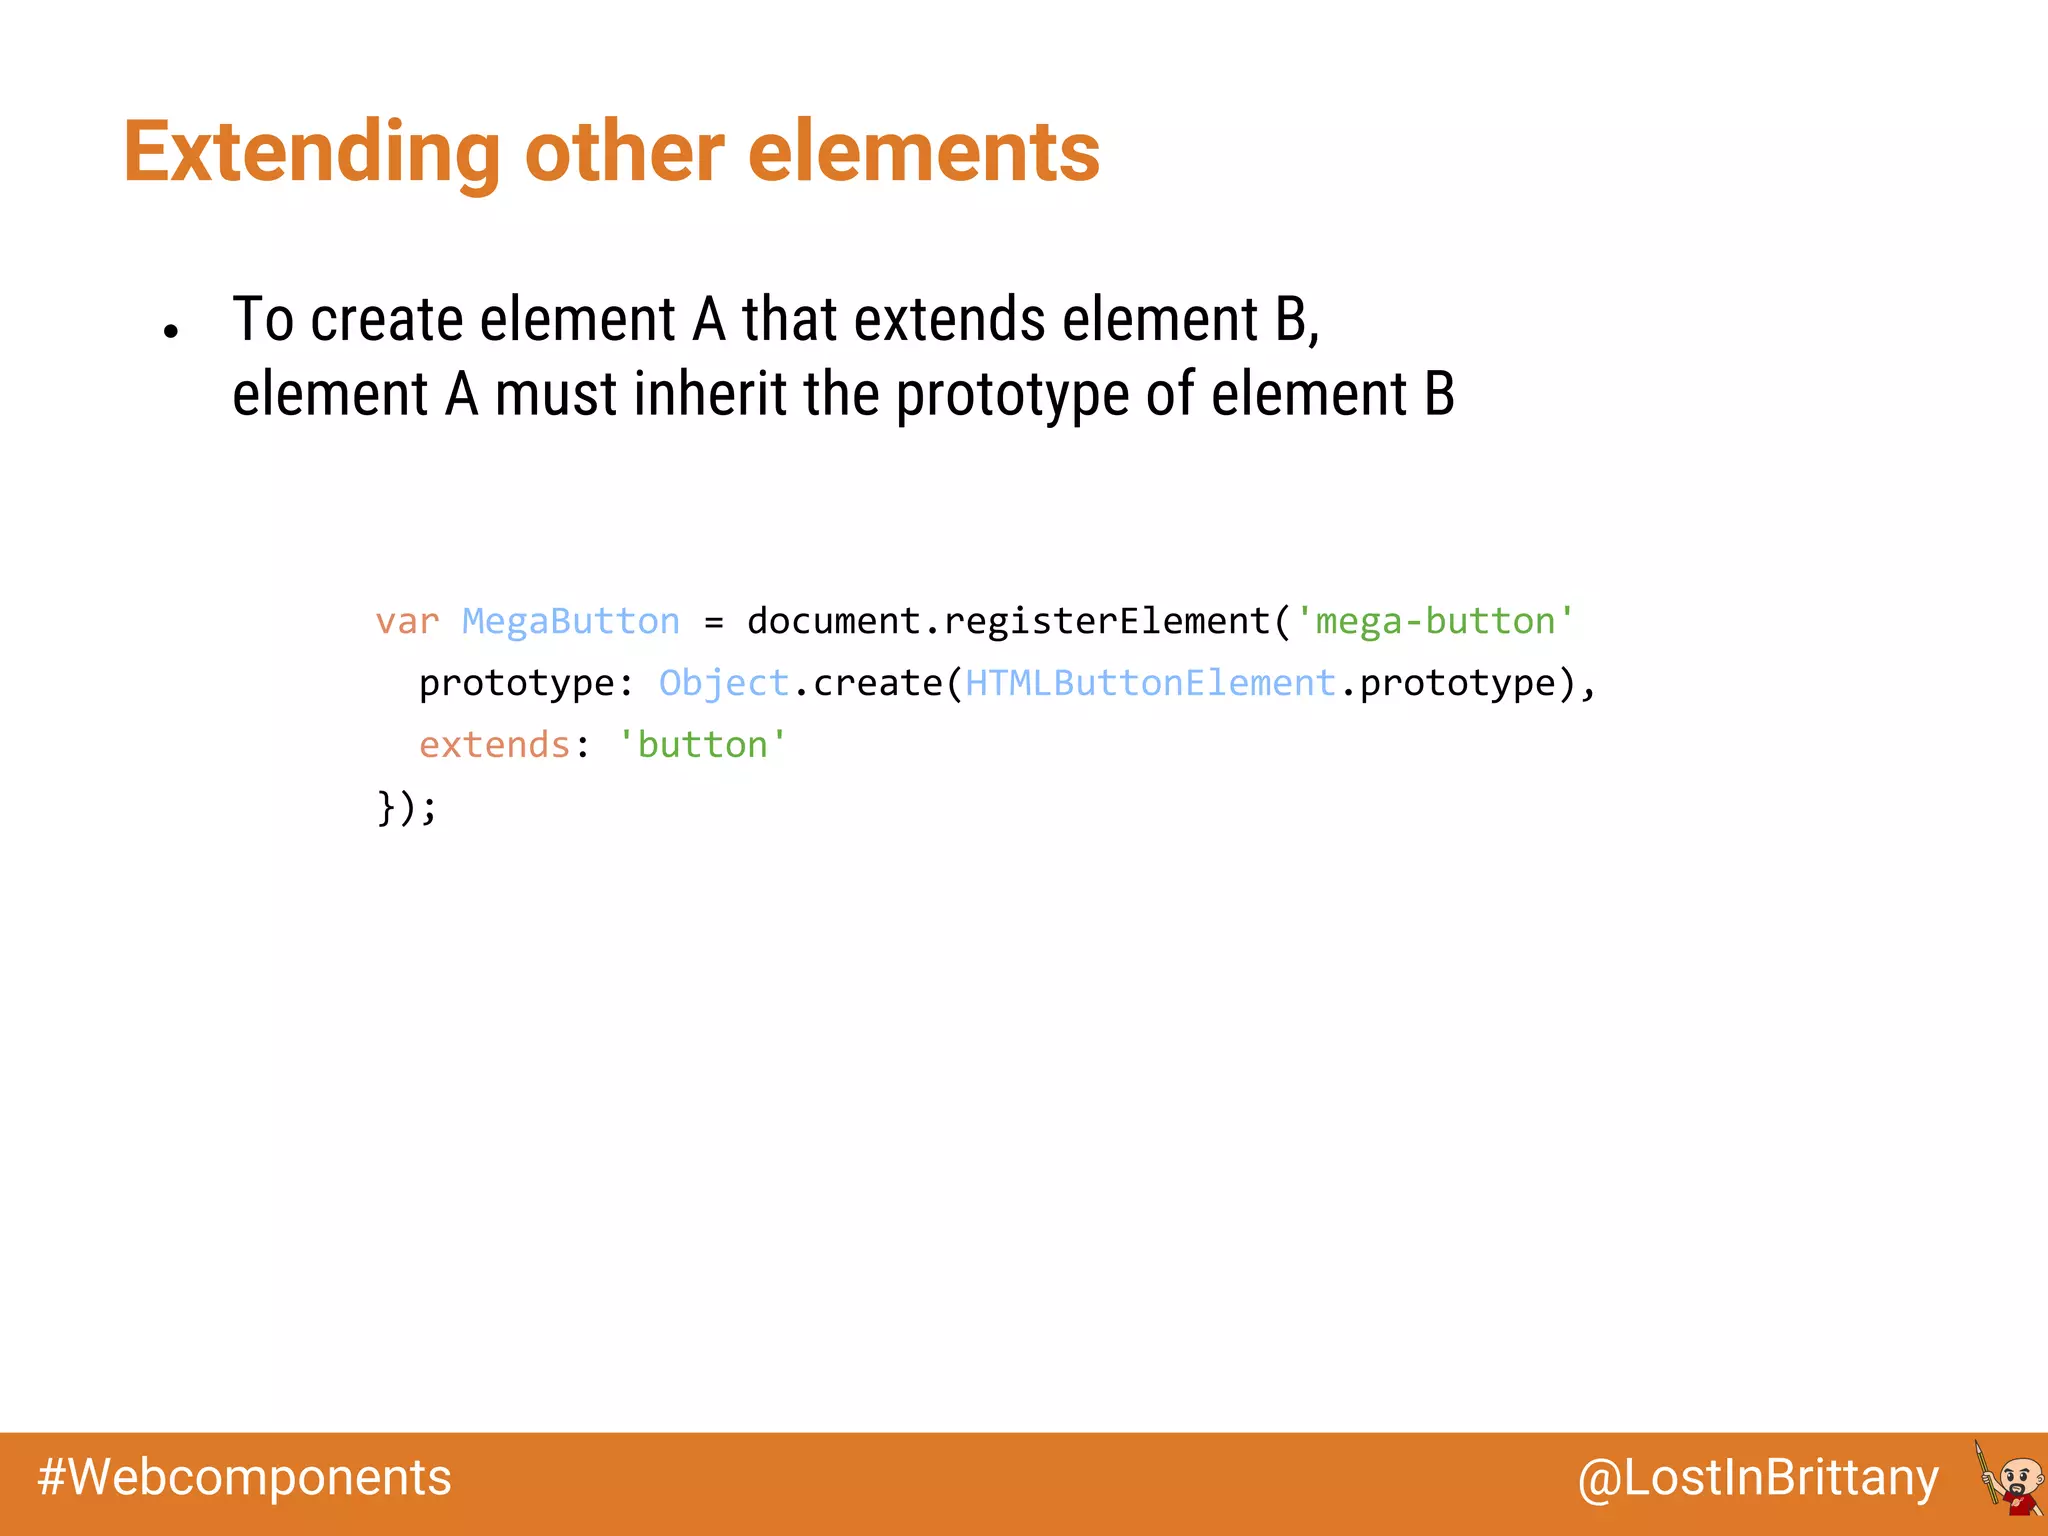
Downloaded 12 times

![@LostInBrittany#Webcomponents
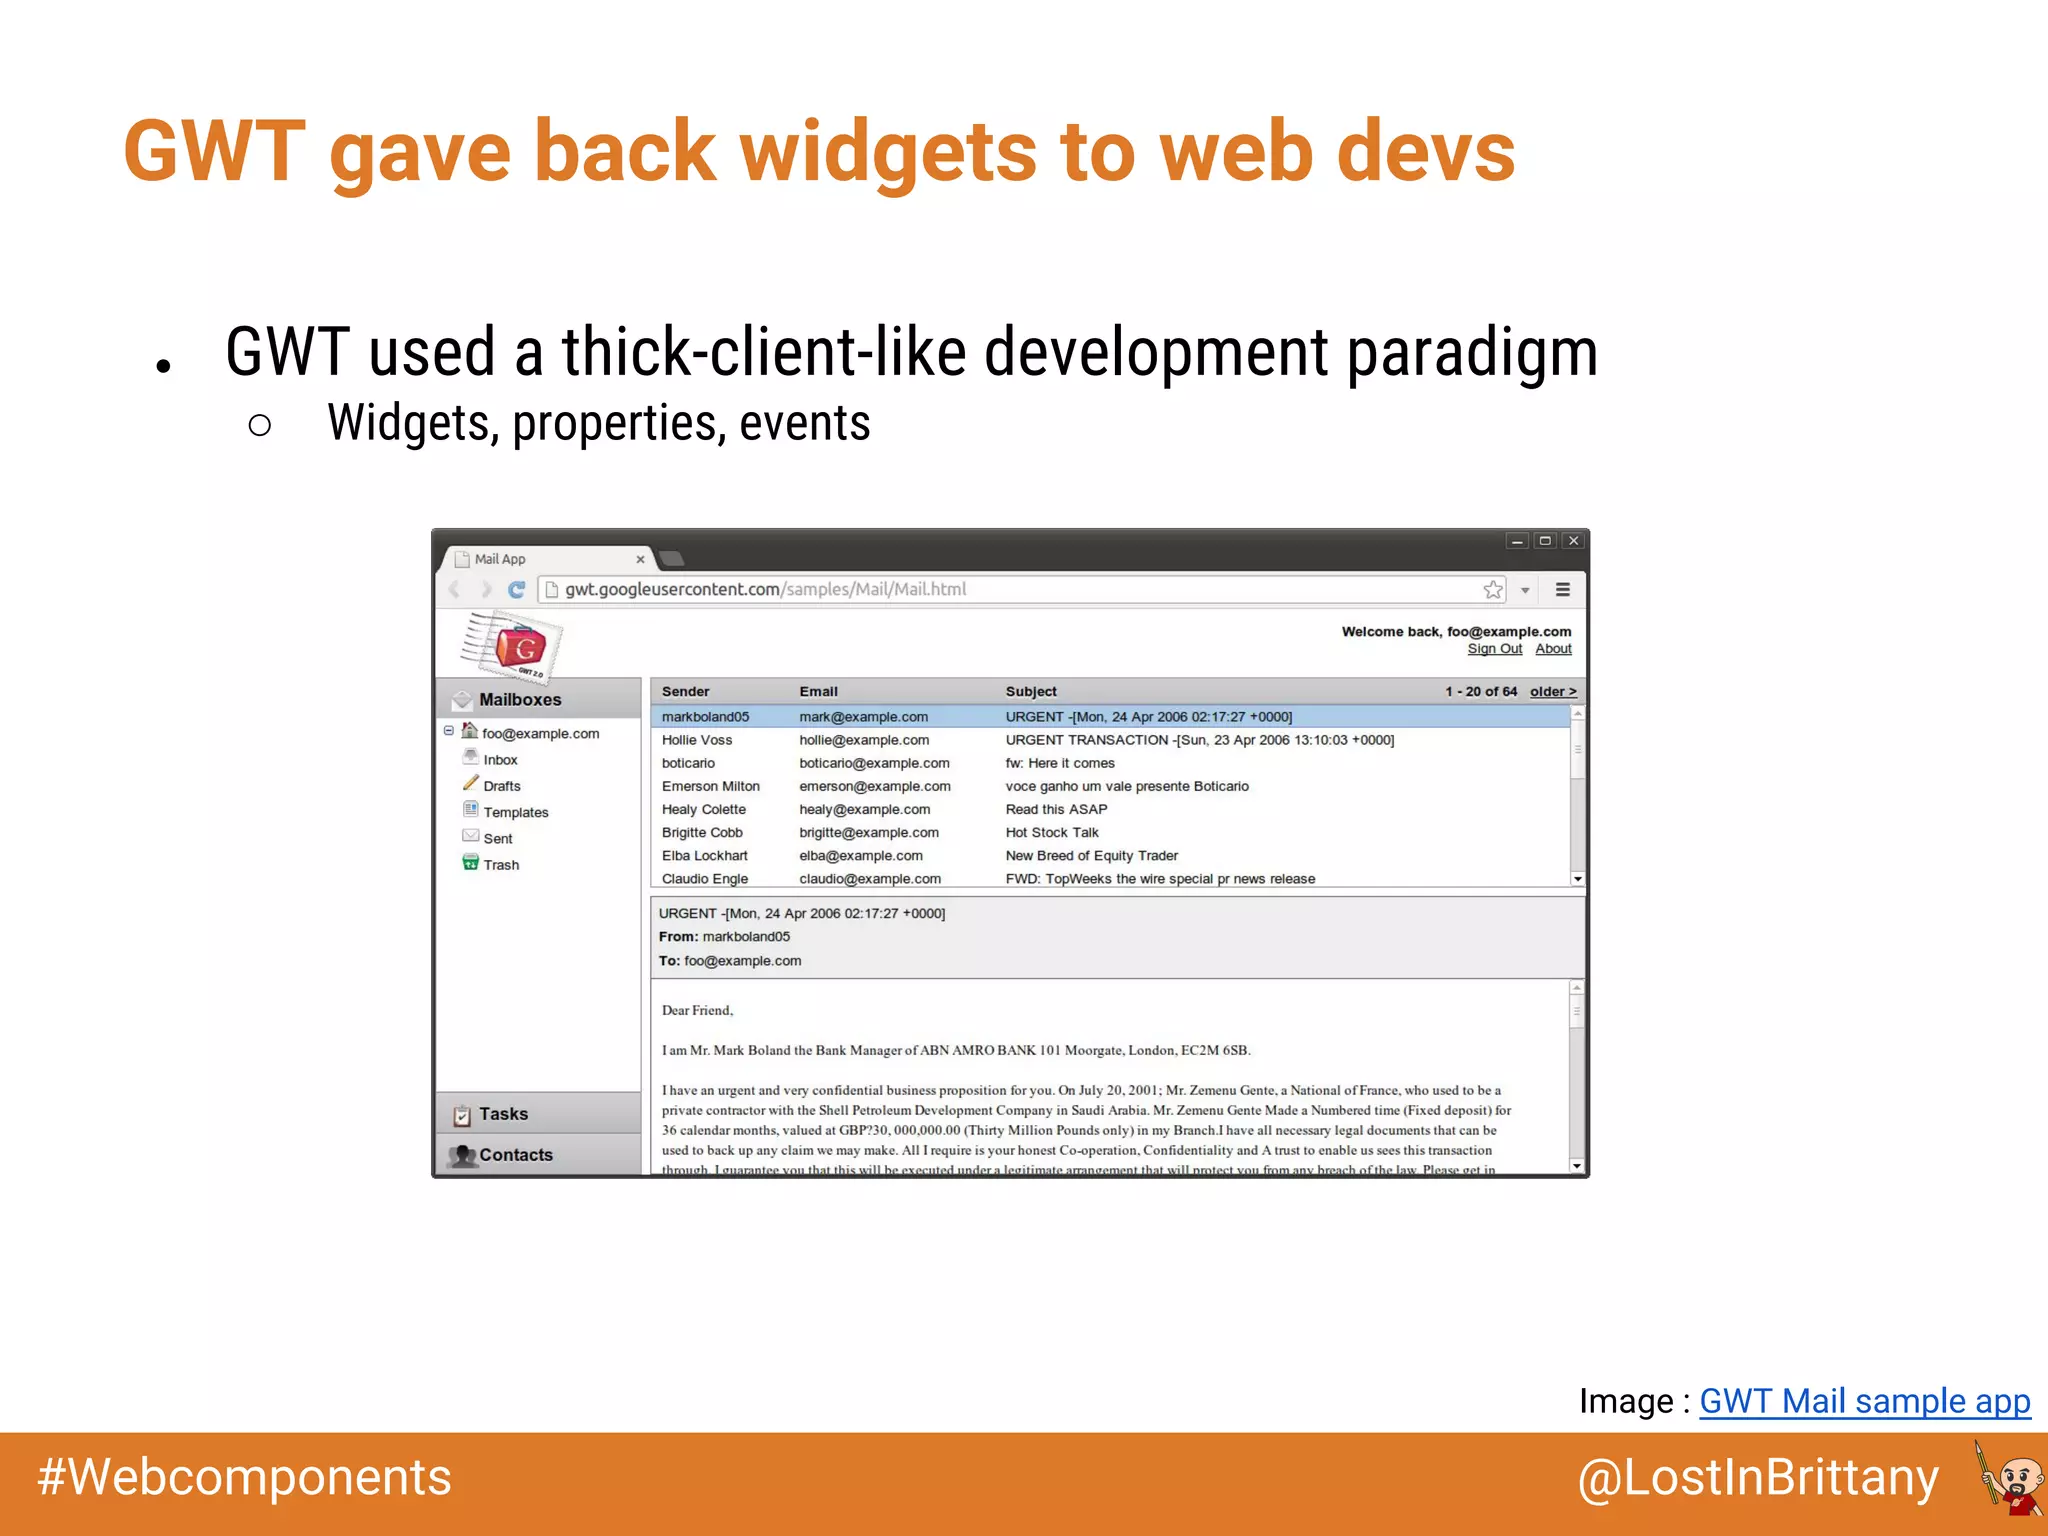
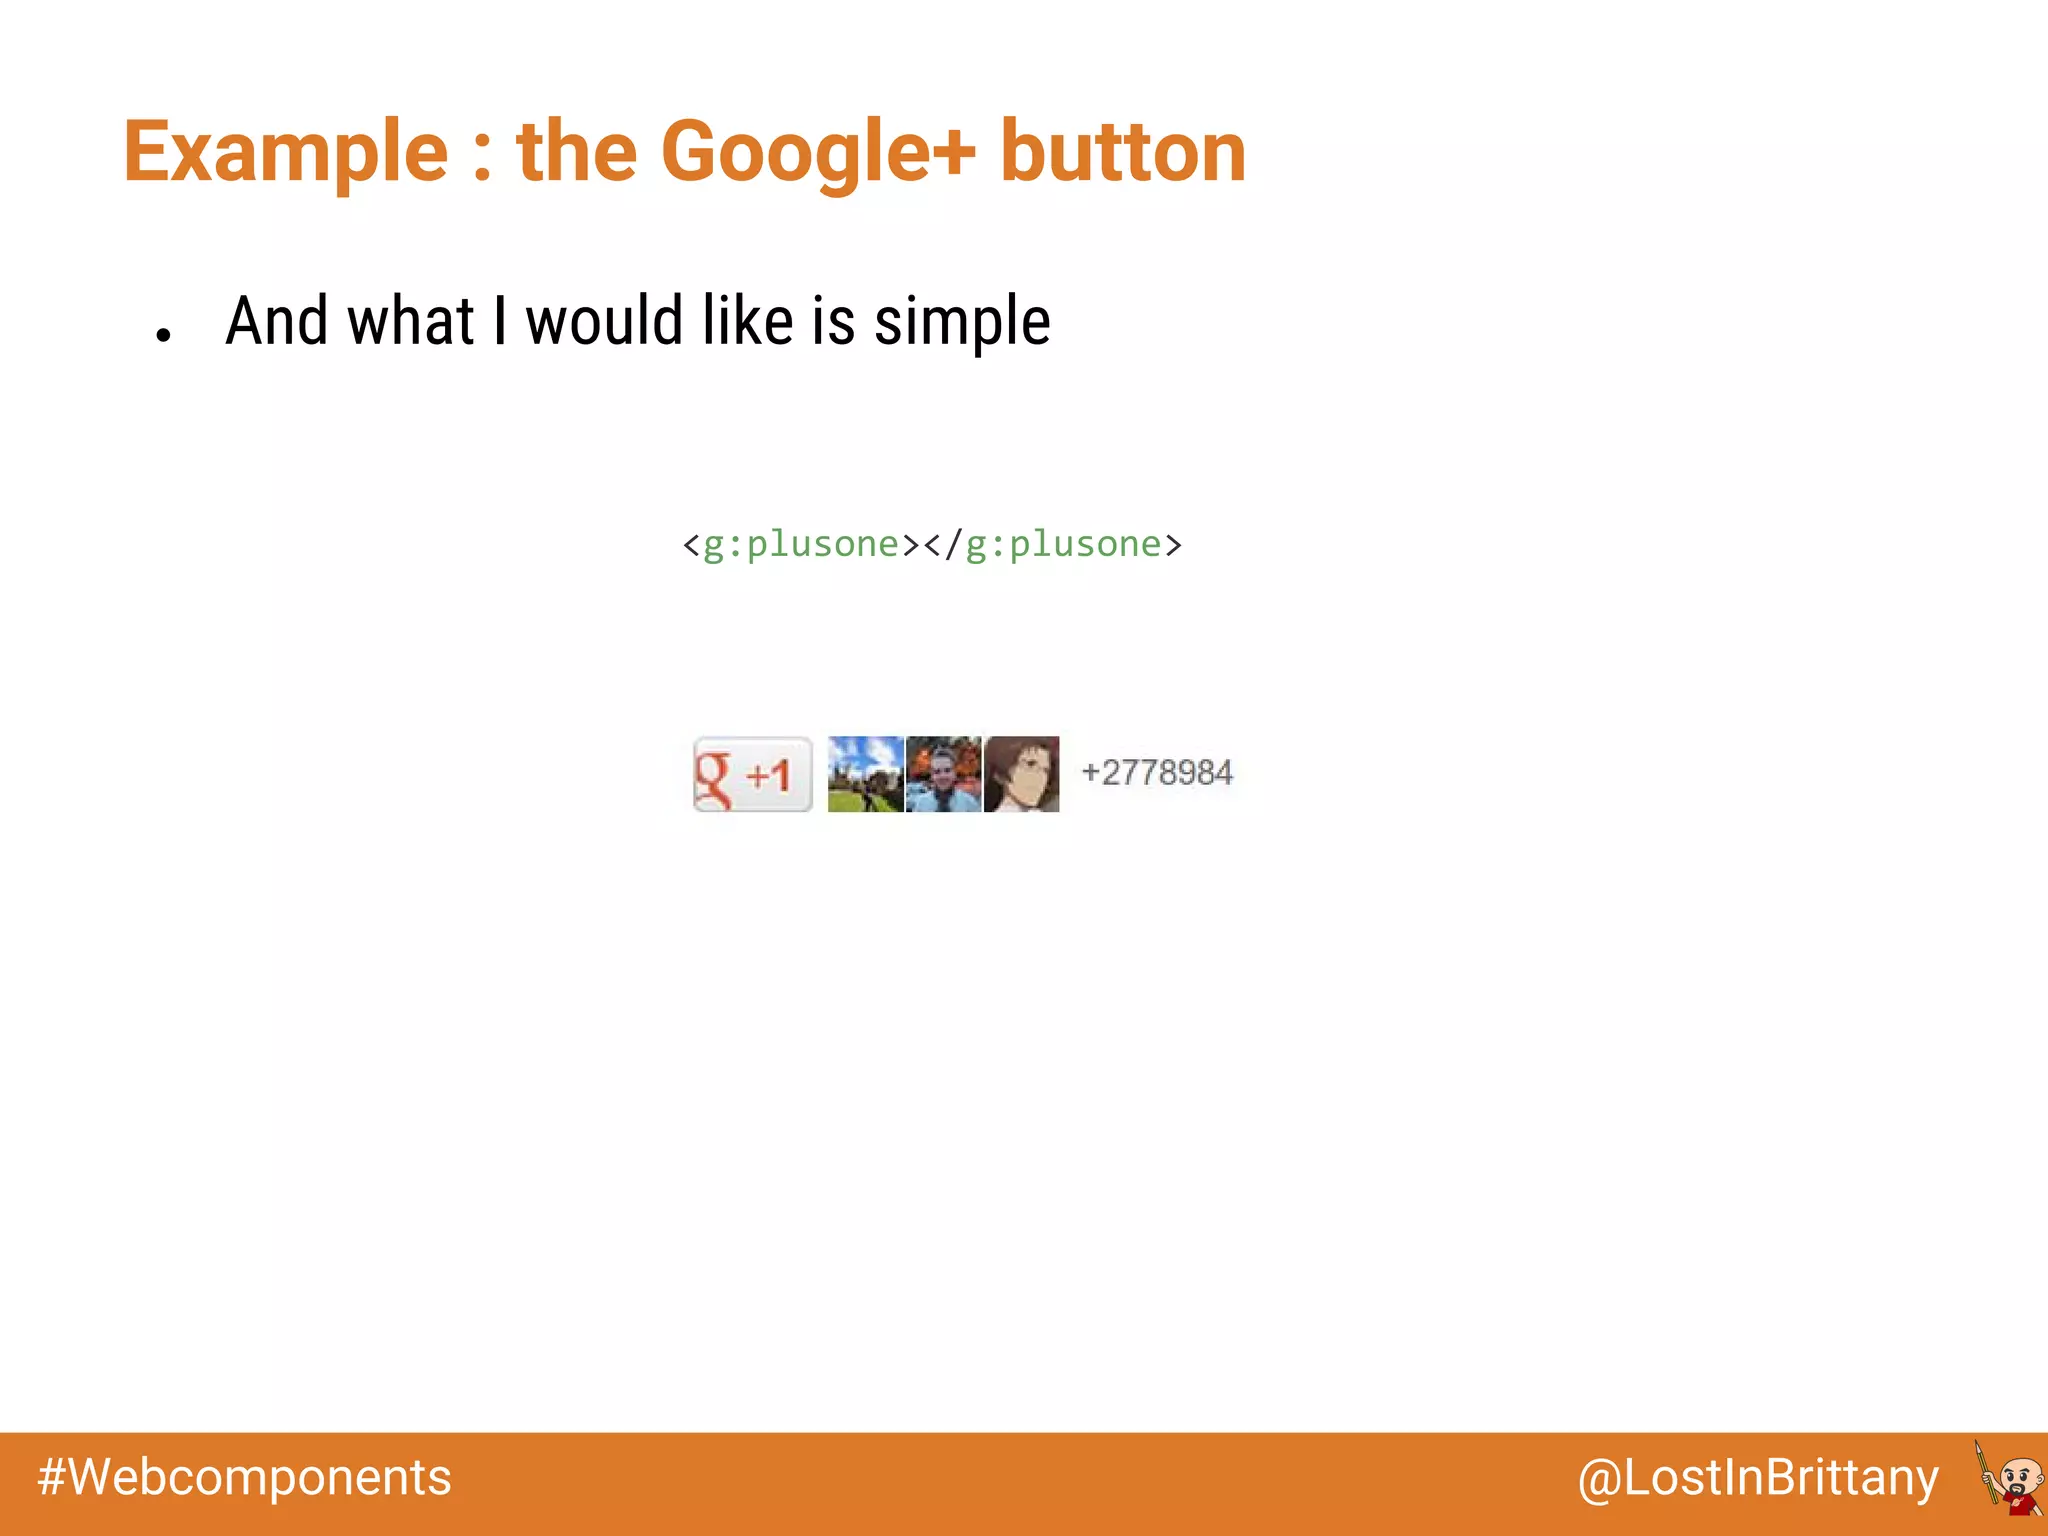
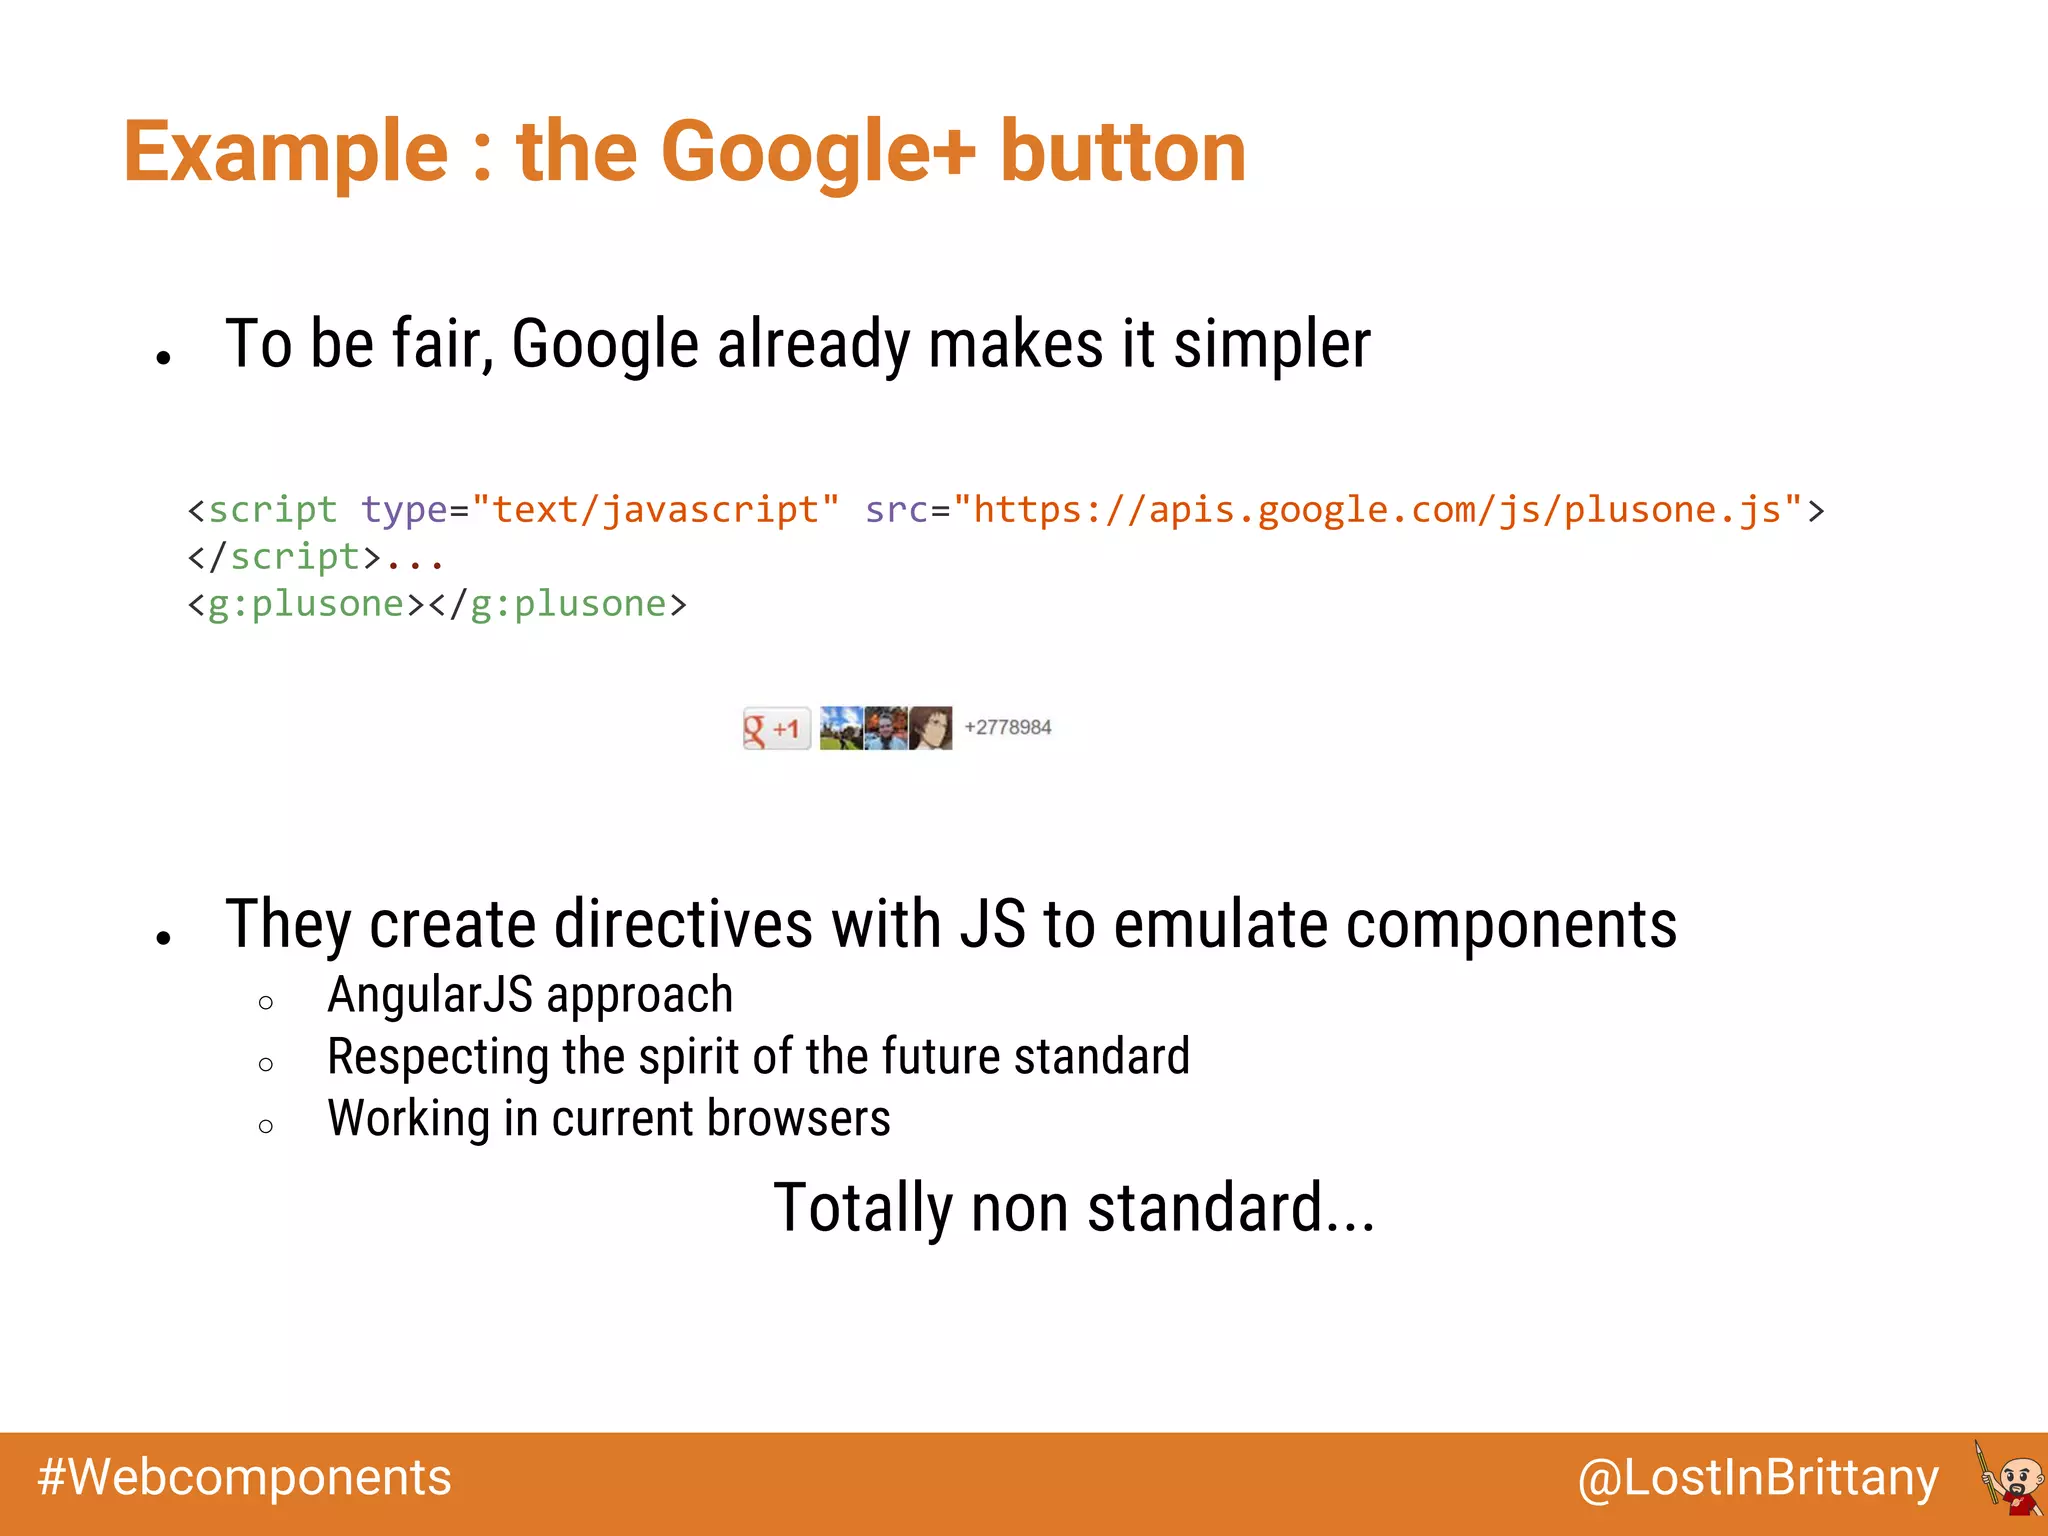
Example : the Google+ button
● If you want to place a Google+ button in your page
<!-- Place this tag where you want the +1 button to render. -->
<div class="g-plusone" data-annotation="inline" data-width="300"
></div>
<!-- Place this tag after the last +1 button tag. -->
<script type="text/javascript">
(function() {
var po = document.createElement('script');
po.type = 'text/javascript';
po.async = true;
po.src = 'https://apis.google.com/js/plusone.js';
var s = document.getElementsByTagName('script')[0];
s.parentNode.insertBefore(po, s);
})();
</script>](https://image.slidesharecdn.com/enib2015-2016-caiwebs01e01ctnavigateur33-webcomponentsavecpolymer-151124134021-lva1-app6892/75/ENIB-2015-2016-CAI-Web-S01E01-Cote-navigateur-3-3-Web-components-avec-Polymer-11-2048.jpg)


![@LostInBrittany#Webcomponents
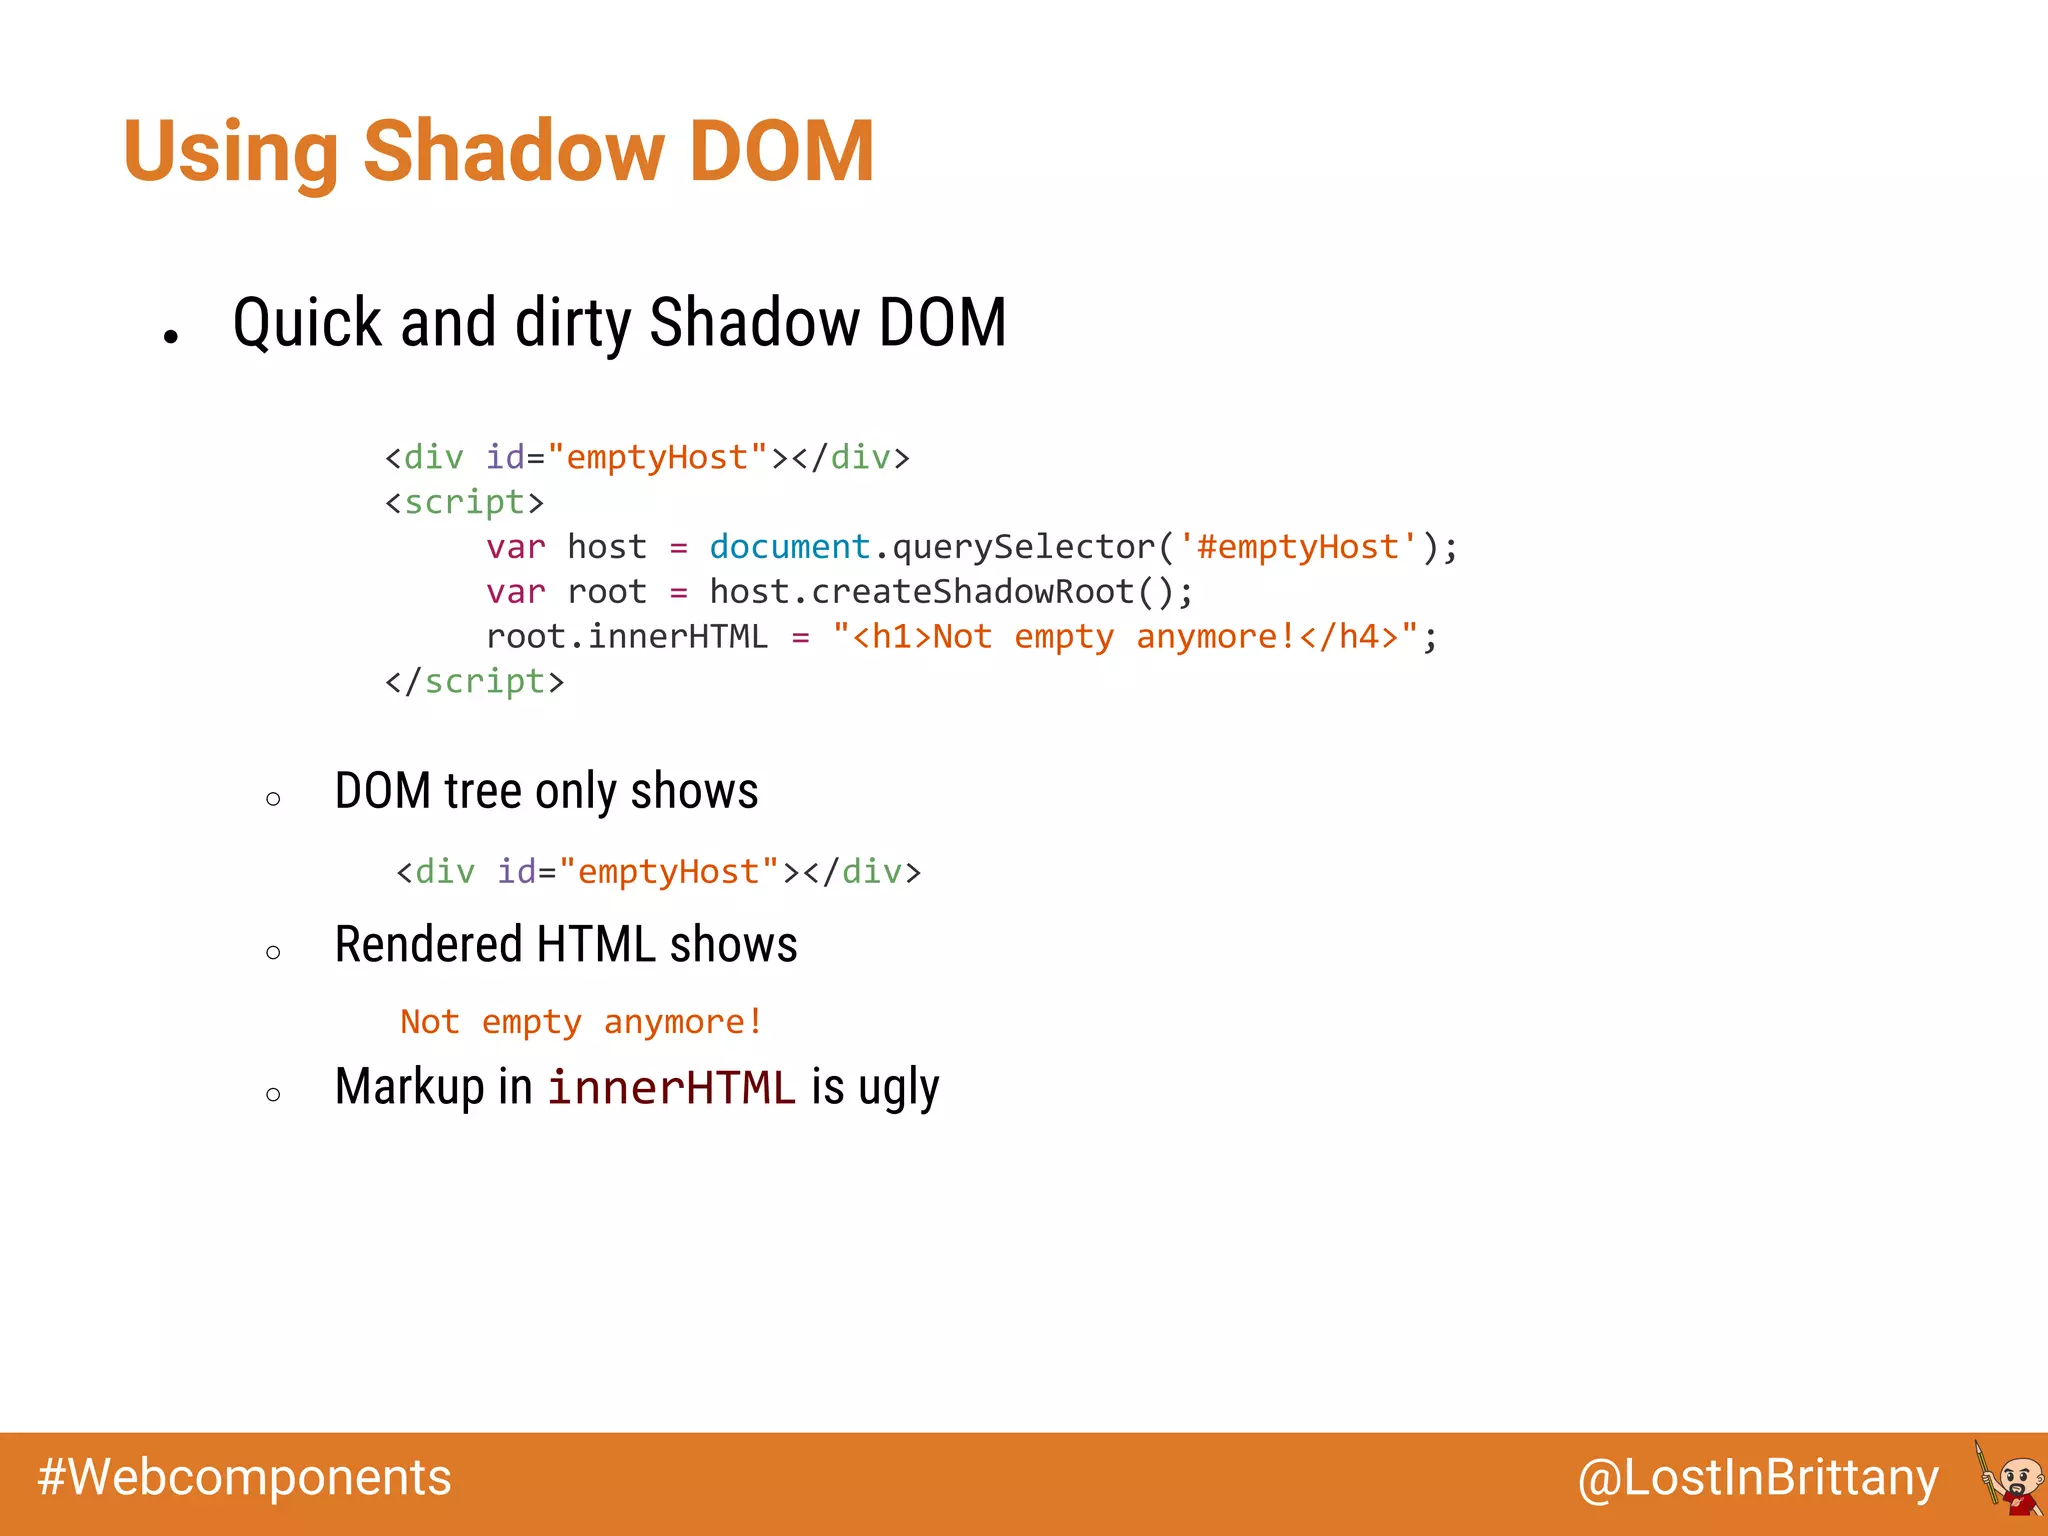
Using Shadow DOM
● Shadow DOM with templates
<div id="emptyHost"></div>
<template id="commentTemplate"> [...] </template>
<script>
var host = document.querySelector('#emptyHost');
var shadowRoot = host.webkitCreateShadowRoot();
function addComment(imageUrl, text) { [...] }
function addShadowedElement() {
var instanceTemplate =
addComment("http://lostinbrittany.org/avatar.png",
"This is a nice comment made by a nice guy");
shadowRoot.appendChild(instanceTemplate);
}
</script>](https://image.slidesharecdn.com/enib2015-2016-caiwebs01e01ctnavigateur33-webcomponentsavecpolymer-151124134021-lva1-app6892/75/ENIB-2015-2016-CAI-Web-S01E01-Cote-navigateur-3-3-Web-components-avec-Polymer-31-2048.jpg)


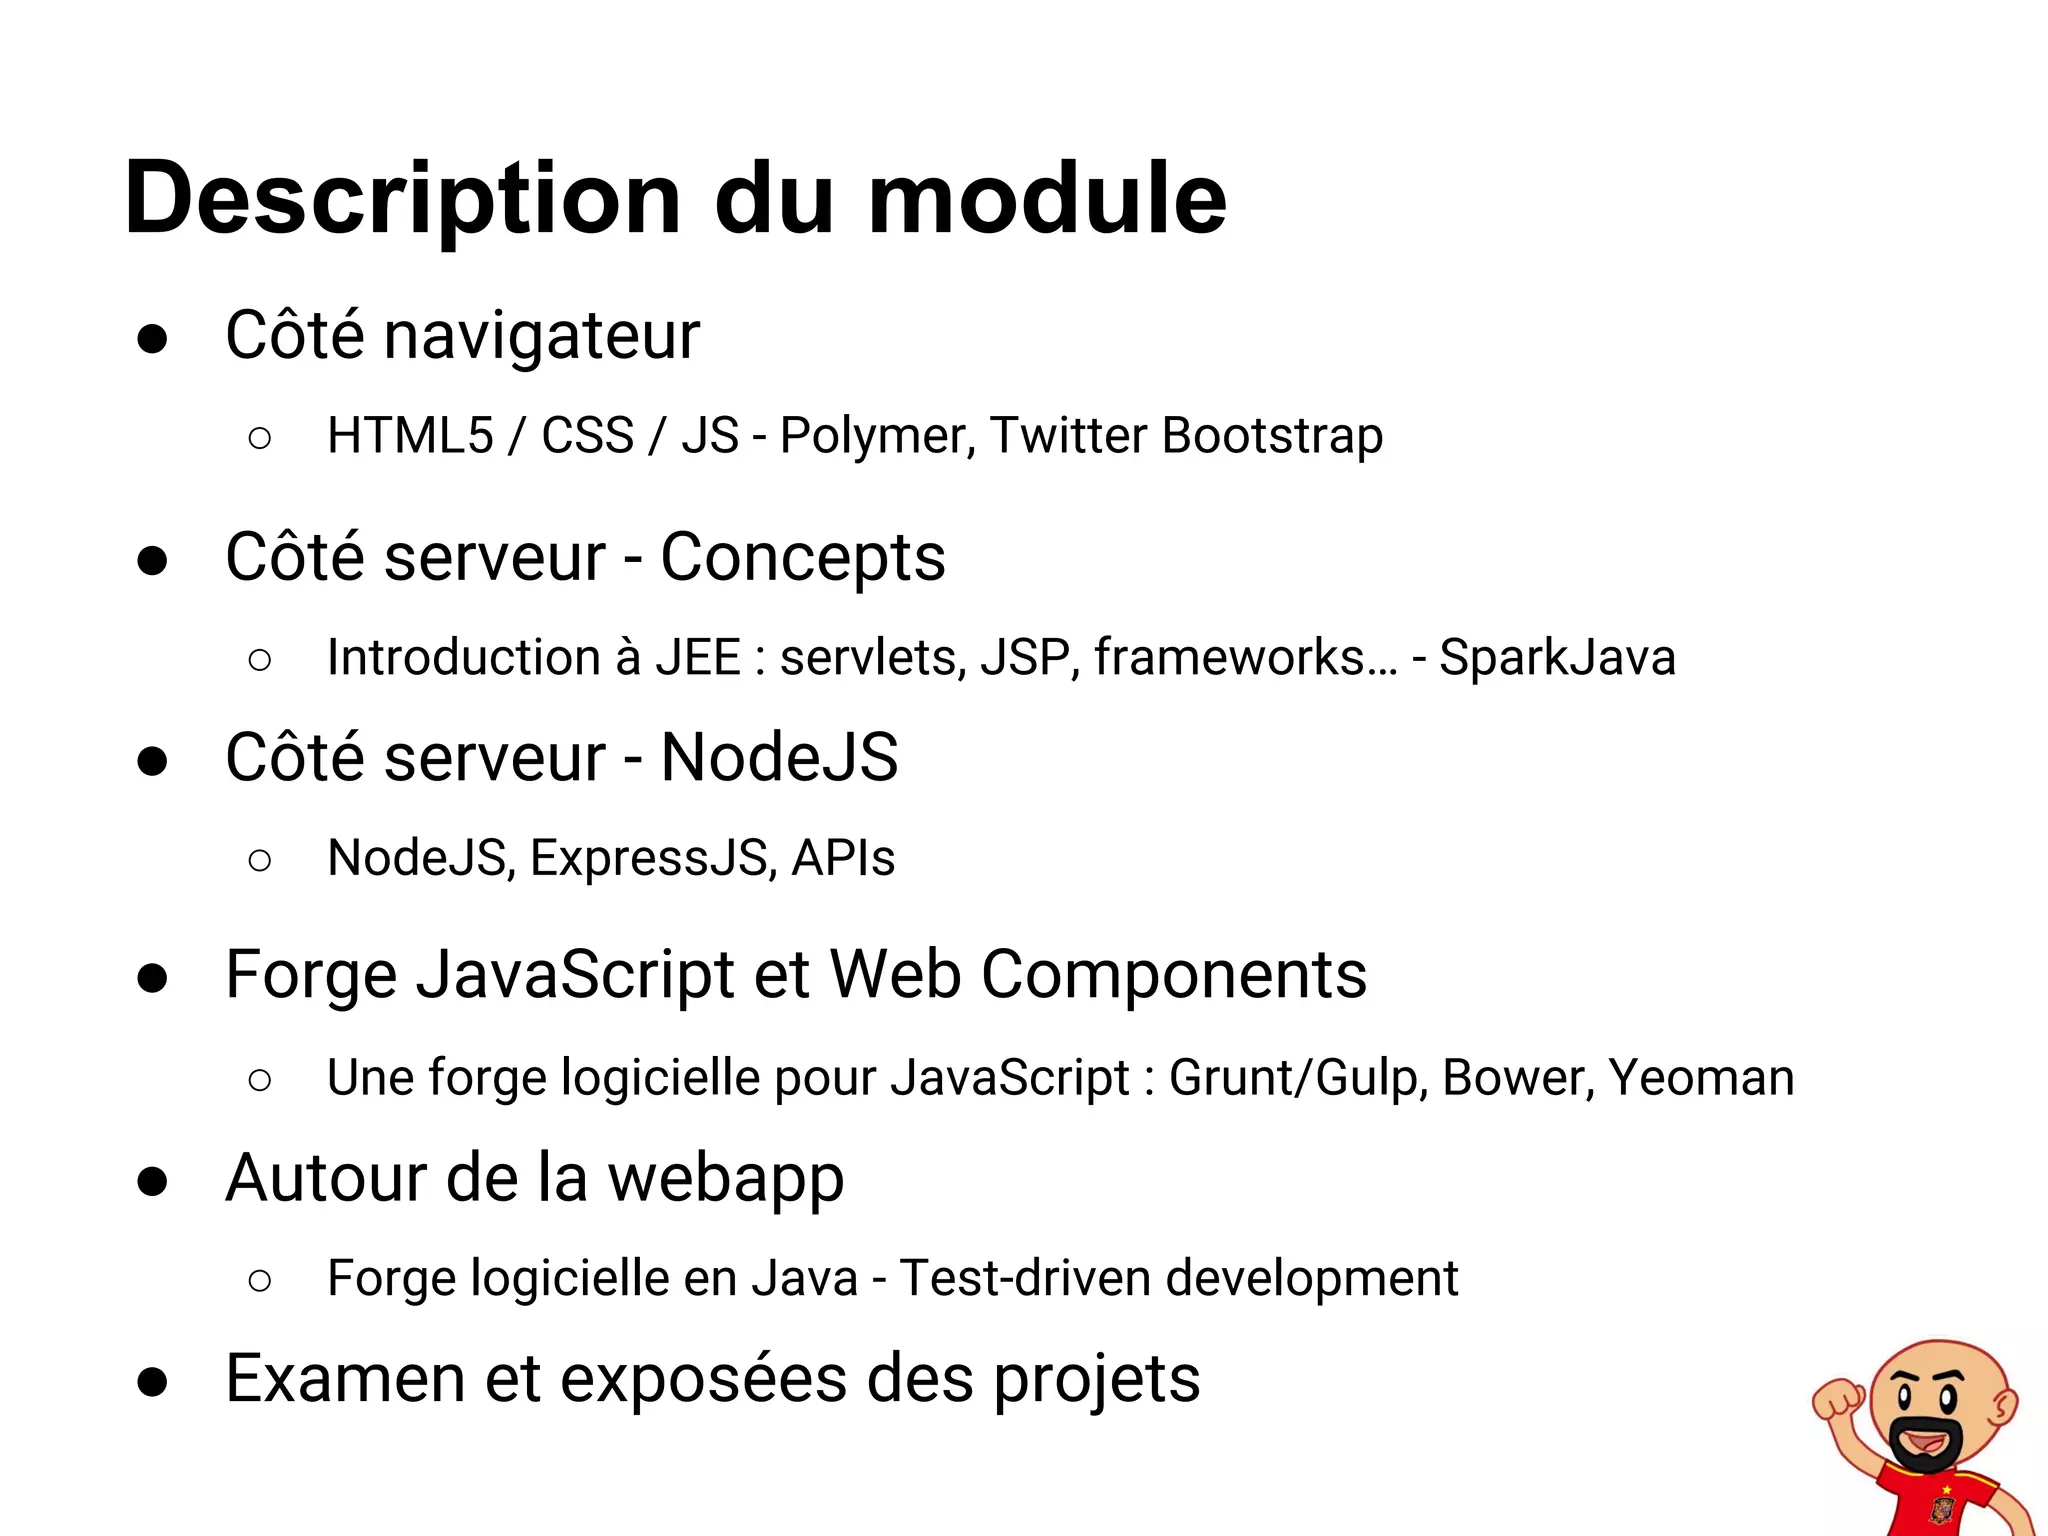
This document provides an overview and description of a module on interactive web application development. It covers front-end topics like HTML5, CSS, JavaScript, and the Polymer library, as well as back-end concepts using Java EE frameworks and Node.js. The module will include sections on: - Front-end with HTML5, CSS, JS, and the Polymer library - Back-end concepts using Java EE for servlets, JSP, and frameworks - Back-end using Node.js, ExpressJS, and APIs - JavaScript build tools like Grunt, Gulp, Bower, and Yeoman - Software development practices like test-driven development - An examination of student