Downloaded 29 times
![EFI and MP: Where am I? 7
cess. Next, the EFI and boot loader are loaded and run. After an operating
system is chosen, the operating system loader is loaded and run for the spe-
cific operating system being booted. Finally, the operating system itself is
loaded and run. There are no specific operating systems cited in Figure 1-4
because the process is the same regardless of the operating system being
loaded. In the examples in this book, Linux, HP-UX, and Windows are used
and all these operating systems would load in the same manner.
EFI and MP: Where am I?
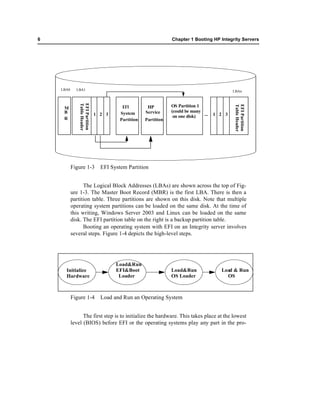
Before I show examples of EFI I want to cover one of the most confusing
aspects of it. When the system is shut down and you connect to the MP you
get the MP menu as shown in the first bullet below. At this point you can
issue a command such as pc -on from CM and begin the boot process and
select the console to see the boot take place or interrupt it. If you interrupt
the boot you work with EFI various menus without the operating system
loaded as shown in the second bullet below. If you select an operating sys-
tem to boot from EFI, or an operating system autoboots, you can follow the
boot process from the console. After the system boots you can issue ^b to
connect to the MP and work through its menu structure.
1. The system is shutdown and you connect to the MP to get access to the follow-
ing menu.
MP MAIN MENU:
CO: Console
VFP: Virtual Front Panel
CM: Command Menu
CL: Console Log
SL: Show Event Logs
HE: Main Help Menu
X: Exit Connection
[rx2600m] MP>
You can select CM and pc -on and then go to the console to see the
boot take place or interrupt it.
2. If you interrupt the boot process, from the console, to prevent an operating sys-
tem from loading you get the EFI Boot Manager and you’re working with EFI as
indicated by the EFI Boot Manager. This is accessible to you only before boot-
ing an operating system.](https://image.slidesharecdn.com/efi-booting-121124115538-phpapp01/85/Efi-booting-7-320.jpg)
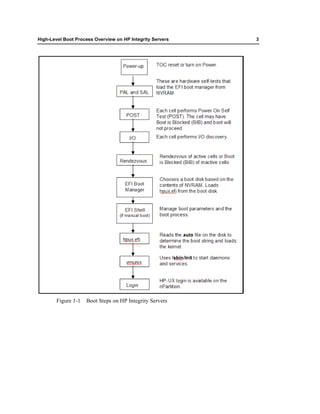
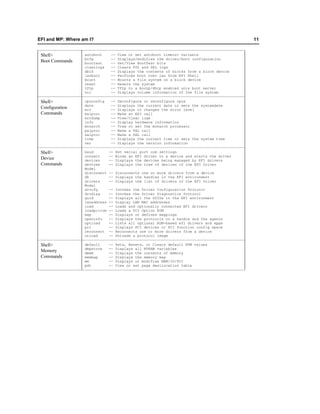
![8 Chapter 1 Booting HP Integrity Servers
EFI Boot Manager ver 1.10 [14.61] Firmware ver 2.31 [4411]
Please select a boot option
HP-UX Primary Boot: 0/1/1/1.2.0
Red Hat Enterprise Linux WS
Windows Server 2003, Enterprise
EFI Shell [Built-in]
Drive Explorer
Boot Option Maintenance Menu
System Configuration Menu
Use ^ and v to change option(s). Use Enter to select an option
You can go back to the MP with ^b or boot the system by selecting the
desired boot device.
3. Booting an HP VM guest and interrupting it (this is done by issuing hpvmcon-
sole -P hpvm1 -fi) gives you access to the same EFI boot manager, however, the
commands you can issue are scaled down. The info command that you would
issue from the Shell> prompt, for instance, is not available. The EFI boot man-
ager from an HP VM guest is shown in the following listing:
EFI Boot Manager ver 1.10 [14.62] [Build: Wed Aug 10 07:36:12 2005]
Please select a boot option
HP-UX Primary Boot: 0/0/1/0.0.0
EFI Shell [Built-in]
Boot option maintenance menu
Use ^ and v to change option(s). Use Enter to select an option
4. If an operating system is running and you enter ^b from an MP connection, you
get the MP MAIN MENU: which is covered in Chapter 4. The ^b works only if
you’re connected to the MP.
Table 1-1 gives a description of MP menu picks:](https://image.slidesharecdn.com/efi-booting-121124115538-phpapp01/85/Efi-booting-8-320.jpg)
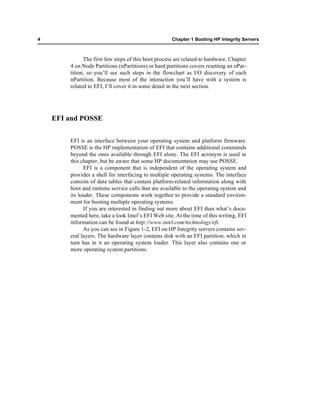
![EFI and MP: Where am I? 9
Table 1-1 MP Menu Picks
Example MP Top Menu Picks
Detail on some of these MP MAIN MENU:
menu picks appear in this CO: Console
table VFP: Virtual Front Panel
CM: Command Menu
CL: Console Log
SL: Show Event Logs
HE: Main Help Menu
X: Exit Connection
[rx2600m] MP>
VFP To see status of power, system state, and so on.
CM
BP : Reset BMC Passwords
commands MS : Modem Status
CA : Configure asynch/serial ports
PC : Remote Power Control
DATE: Display Date
PG : PaGing parameters setup
DC : Default Configuration
PR : Power Restore Policy Config.
DF : Display FRU Information
PS : Power management module Status
DI : DIsconnect users
RB : Reset BMC
DNS : Configure DHCP and DNS
RS : Reset System through RST signal
FW : Upgrade MP firmware
SA : Set MP Access
HE : Display Help
SO : Security Options
ID : System Information
SS : System processors Status
IT : Modify MP inactivity timeouts
SYSREV: Display System firmware Revs.
LC : Configure LAN, SSH and Web ports
TC : Reset system via INIT
LDAP: Configure LDAP parameters
TE : TEll- send a msg. to other users
LM : License Management
UC : User Configuration
LOC : Locator LED display
WHO : Display connected MP users
LS : LAN Status
XD : Diagnostics and reset of MP
MR : Modem Reset
CL To see console log.
SL To see event log.](https://image.slidesharecdn.com/efi-booting-121124115538-phpapp01/85/Efi-booting-9-320.jpg)
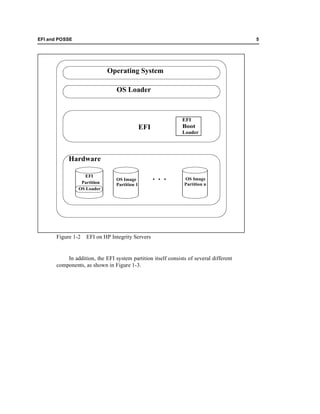
![10 Chapter 1 Booting HP Integrity Servers
Example MP Top Menu Picks
Detail on some of these MP MAIN MENU:
menu picks appear in this CO: Console
table VFP: Virtual Front Panel
CM: Command Menu
CL: Console Log
SL: Show Event Logs
HE: Main Help Menu
X: Exit Connection
[rx2600m] MP>
HE MP Help System
Enter a command at the help prompt:
OVerview : Launch the help overview
LIst : Show the list of MP Main Menu commands
<COMMAND> : Enter the command name for help
on individual command
TOPics : Show all MP Help topics and commands
HElp : Display this screen
Q : Quit help
Table 1-2 shows the EFI menu structure and provides sub-commands
for some of the menu selections.
Table 1-2 EFI Menu Structure
Example EFI Top Menu Picks
Top Level Menu EFI Boot Manager ver 1.10 [14.61] Firmware ver 2.31 [4411]
PIcks Showing Please select a boot option
Three Operating
System Selections HP-UX Primary Boot: 0/1/1/1.2.0
Red Hat Enterprise Linux WS
and Menu Picks Windows Server 2003, Enterprise
EFI Shell [Built-in]
Drive Explorer
Boot Option Maintenance Menu
System Configuration Menu
Use ^ and v to change option(s). Use Enter to select an option
Shell> Commands](https://image.slidesharecdn.com/efi-booting-121124115538-phpapp01/85/Efi-booting-10-320.jpg)
![12 Chapter 1 Booting HP Integrity Servers
Shell> alias -- Displays, creates, or deletes aliases in
the EFI shell
Shell attrib -- Displays or changes the attributes of files
Commands or directories
cd -- Displays or changes the current directory
cls -- Clears the standard output with an optional
background color
comp -- Compares the contents of two files
cp -- Copies one or more files/directories to another
location
edit -- Edits an ASCII or UNICODE file in full screen
eficompress -- Compress a file
efidecompress -- Compress a file
exit -- Exits the EFI Shell
help -- Displays help menus, command list, or verbose help
of a command
hexedit -- Edits with hex mode in full screen
ls -- Displays a list of files and subdirectories
in a directory
mkdir -- Creates one or more directories
mode -- Displays or changes the mode of the console
output device
mv -- Moves one or more files/directories to destination
rm -- Deletes one or more files or directories
set -- Displays, creates, changes or deletes
EFI environment variables
setsize -- Sets the size of the file
touch -- Updates time with current time
type -- Displays the contents of a file
xchar -- Turn on/off extended character features
Shell> echo -- Displays messages or turns command echoing on or off
for/endfor -- Executes commands for each item in a set of items
Script goto -- Makes batch file execution jump to another location
Commands if/endif -- Executes commands in specified conditions
pause -- Prints a message and suspends for keyboard input
stall -- Stalls the processor for some microseconds
Boot Option Maintenance Menu
There are sub- EFI Boot Maintenance Manager ver 1.10 [14.61]
menus in each of Main Menu. Select an Operation
these areas
Boot from a File
Add a Boot Option
Delete Boot Option(s)
Change Boot Order
Manage BootNext setting
Set Auto Boot TimeOut
Select Active Console Output Devices
Select Active Console Input Devices
Select Active Standard Error Devices
Cold Reset
Exit
Timeout-->[10] sec SystemGuid-->[7B8CA118-DA48-11D8-B39D-
28E83DA9F617]
SerialNumber-->[US42578894 ]](https://image.slidesharecdn.com/efi-booting-121124115538-phpapp01/85/Efi-booting-12-320.jpg)
![EFI Top Level Menu 13
System Configuration Menu
There are sub- System Configuration Menu. Select an Option
menus in each of
these areas Security/Password Menu
Advanced System Information Menu
Set System Date
Set System Time
Reset Configuration to Default
Help
Exit
An interesting aspect of the EFI commands is that you can accomplish
many of the same functions running BCH commands on HP 9000 (PA-
RISC) systems. To those of you who have PA-RISC system experience,
you’ll see many of the same functions performed in EFI.
Using EFI, you can control the boot-related setup on your Integrity
server. Because of the number of operating systems you can run on Integrity
servers, you use this interface often to coordinate and manage them.
I connect to the MP using the MP LAN as opposed to the MP console.
If you were to connect using the console you would also see the menu pick
CSP:Connect to Service Processor and SE:Enter OS Session menu picks.
The next sections cover working with EFI.
EFI Top Level Menu
When you get access to the EFI menu structure you can issue commands.
You make your desired selections and then traverse a menu hierarchy. To
start EFI, when the system self-test is complete, press any key to stop the
countdown timer. The main EFI screen appears. The following output shows
the EFI Boot Administration main screen, which is where you can make var-
ious boot-related selections:
EFI Boot Manager ver 1.10 [14.61] Firmware ver 2.31 [4411]
Please select a boot option
HP-UX Primary Boot: 0/1/1/1.2.0
Red Hat Enterprise Linux WS
Windows Server 2003, Enterprise
EFI Shell [Built-in]
Drive Explorer
Boot Option Maintenance Menu](https://image.slidesharecdn.com/efi-booting-121124115538-phpapp01/85/Efi-booting-13-320.jpg)
![14 Chapter 1 Booting HP Integrity Servers
System Configuration Menu
Use ^ and v to change option(s). Use Enter to select an option
This output shows the primary HP-UX boot device and other selec-
tions.
From the main screen, you can also choose EFI Shell [Built-in], Boot
option maintenance menu, and a variety of other selections. The first item
shown in the EFI main screen is the default. Use the arrow keys to scroll and
highlight a selection. After the item you need is highlighted, press Enter to
select it. For example, if you were to select Boot option maintenance menu,
you would see a screen resembling the one shown in the following output:
EFI Boot Maintenance Manager ver 1.10 [14.61]
Main Menu. Select an Operation
Boot from a File
Add a Boot Option
Delete Boot Option(s)
Change Boot Order
Manage BootNext setting
Set Auto Boot TimeOut
Select Active Console Output Devices
Select Active Console Input Devices
Select Active Standard Error Devices
Cold Reset
Exit
Timeout-->[10] sec SystemGuid-->[7B8CA118-DA48-11D8-B39D-28E83DA9F617]
SerialNumber-->[US42578894 ]
EFI Command Examples
As previously mentioned, traversing the EFI menu structure and issuing
commands is straightforward. When the system boots, you are given the
option to interrupt the autoboot. (If you don’t interrupt it, the autoboot loads
the first operating system listed, which, in our case, is HP-UX Primary
Boot). At system startup, the EFI Boot Manager presents the boot option
menu (as shown in the following output). Here, you have 10 seconds to enter
a selection before HP-UX Primary Boot is selected:](https://image.slidesharecdn.com/efi-booting-121124115538-phpapp01/85/Efi-booting-14-320.jpg)
![EFI Shell> Help 15
EFI Boot Manager ver 1.10 [14.61] Firmware ver 2.31 [4411]
Please select a boot option
HP-UX Primary Boot: 0/1/1/1.2.0
Red Hat Enterprise Linux WS
Windows Server 2003, Enterprise
EFI Shell [Built-in]
Drive Explorer
Boot Option Maintenance Menu
System Configuration Menu
Use ^ and v to change option(s). Use Enter to select an option
You can use the arrow keys to move up and down the menu structure.
EFI Shell> Help
I used the ↓ key (down arrow) to select EFI Shell [Built-in]. This brought
me to the Shell> prompt. From there, you can issue EFI commands. Simi-
larly, once you’re at the Shell> prompt, help is always available. To get a
listing of the classes of commands available in Shell>, simply enter help and
press Enter as shown in the following output:
Shell> help
List of classes of commands:
boot -- Booting options and disk-related commands
configuration -- Changing and retrieving system information
device -- Getting device, driver and handle information
memory -- Memory related commands
shell -- Basic shell navigation and customization
scripts -- EFI shell-script commands
Use 'help <class>' for a list of commands in that class
Use 'help <command>' for full documentation of a command
Use 'help -a' to display list of all commands
Shell>
When using a network connection from another system, you may have
to use the ^ and v to move up and down the menu structure respectively. The
main help commands are the same for both bus and cell-based systems.
You can also issue help requests for any EFI commands at any level.
For example, if you want to know more about your current CPU configura-
tion, you would start with help configuration to determine the help com-
mand for CPU configuration, and then use the help cpuconfig command:](https://image.slidesharecdn.com/efi-booting-121124115538-phpapp01/85/Efi-booting-15-320.jpg)

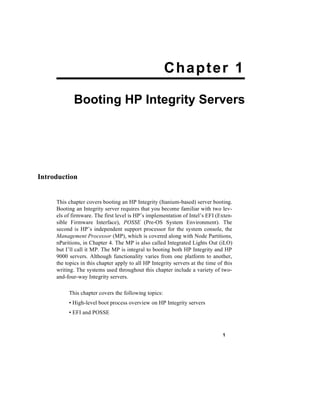
The document provides an overview of the boot process on HP Integrity servers. It discusses the two levels of firmware: EFI and the Management Processor (MP). EFI is further divided into POSSE and various components. The boot process involves initializing hardware, loading and running EFI/boot loader, loading and running the OS loader, and finally loading and running the operating system. The document also discusses where in the boot process the user interacts with EFI versus the MP and provides examples of their menus and commands.