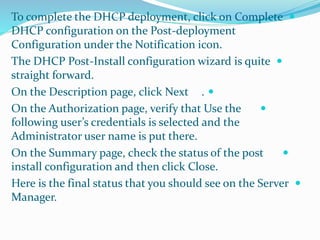
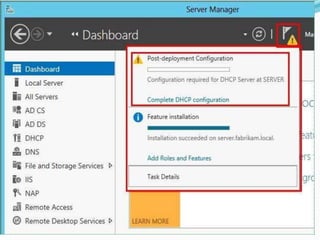
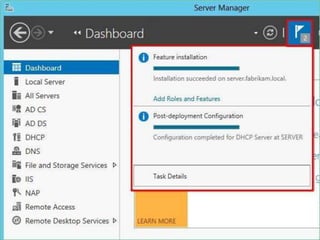
This document provides instructions for configuring a DHCP server on a Windows Server 2012 Essentials system. It describes adding the DHCP server role using the Add Roles and Features Wizard, completing the post-installation configuration, and configuring a new DHCP scope to assign IP addresses, default gateway, and DNS server to client computers on the network.


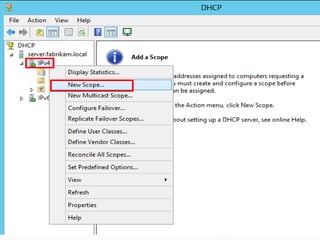
![It will open New Scope Wizard. Follow this wizard to
name the Scope conventionally, e.g. Scope [192.168.1.0]
fabrikam.local. Add the IP Address Range for the client
computers, e.g. 192.168.1.3 to 192.168.1.50. Add the Default
Gateway (IP of the router), DNS Server (IP of the Server
itself ), and activate the scope.](https://image.slidesharecdn.com/dhcp2-141123020657-conversion-gate02/85/Dhcp-windows-server-2012-10-320.jpg)


![How Big Brands are Taking Your Traffic in Alberta [Data Inside].pptx](https://cdn.slidesharecdn.com/ss_thumbnails/howbigbrandsaretakingyourtrafficinalbertadatainside-260123180142-42d276f3-thumbnail.jpg?width=640&height=640&fit=bounds)