
Recommended
More Related Content
What's hot
What's hot (20)
Similar to Design Principle: Balance
Similar to Design Principle: Balance (20)
Recently uploaded
Recently uploaded (20)
Design Principle: Balance
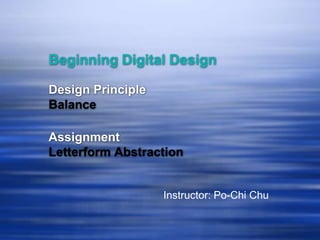
- 1. Beginning Digital Design Design Principle Balance Assignment Letterform Abstraction Instructor: Po-Chi Chu
- 2. Balance Definition: Balance refers to the equal distribution of weight or force among visual units. You can use either negative or positive shapes to create an equilibrium among compositional units, regardless of variations in their size, weight or shape.
- 3. When physical objects are of equal weight, they are in balance. Visual balance works in much the same way. However, the visual weight can be affected not only by the size of objects, but also their values, texture, colors and shapes. Visual Weight refers to: the inclination of shapes to float or sink; the relative importance of visual units within a design.
- 4. Types of Balance 1. Symmetrical Balance: occurs when shapes are mirrored on either side of an axis (i.e., vertically divided or horizontally divided).
- 5. Types of Balance 2. Asymmetrical Balance: creates an equilibrium among visual elements that do not mirror each other on either side of the axis.
- 6. Symmetrical Balance in 2-D Symmetrical balance communicates calmness and stability. (Student work/FSU, 2011) (Student work/FSU, 2010)
- 7. Symmetrical Balance in 3-D The Taj Mahal in India and Saint Peter’s Basilica in the Vatican are both built symmetrically. (Taj Mahal, India) (Saint Peter’s Basilica, Vatican)
- 8. Variations on Symmetry Approximate symmetry is created when similar imagery appears on either side of a central axis. (Student work/FSU, 2006)
- 9. Variations on Symmetry Here are more examples of approximate symmetry. (Example 2 also demonstrates inverted symmetry.) Example 1 Example 2
- 10. Variations on Symmetry When design elements are mirrored both vertically and horizontally, with the center of the composition acting as a focal point, it is called radial symmetry. Tibetan Mandala, early 13th century
- 11. Asymmetrical Balance Asymmetrical balance can be quite stable, very dynamic or nearly chaotic; it depends on the degree of asymmetry. You can use the following simple strategies to create asymmetrical balance. STABLE VERY DYNAMIC NEARLY CHAOTIC
- 12. Strategies for Asymmetrical Balance 1. Place a large shape in the center with a small shape farther away.
- 13. Strategies for Asymmetrical Balance 2. Multiple small shapes placed together can balance a large shape.
- 14. Strategies for Asymmetrical Balance 3. A solid, small shape can balance a large, open shape.
- 15. Strategies for Asymmetrical Balance 4. A textured shape placed near the fulcrum can balance a distant open shape.
- 16. Add Boundary to Asymmetrical Balance Asymmetry becomes even more interesting when a boundary is added. The negative shape will play an important role, and more complex composition can be achieved. The boundary makes the imagery seem symmetrical.
- 17. Balance Is Constantly Changing Balance in a composition changes each time a visual element is added or removed.
- 18. Any Questions?
- 20. • Objective Understand the design principles of unity and balance through the use of letterform. • Problem to Solve You will create a design based on the abstraction of the initials of your first and last names. The placement and juxtaposition of the two letters and the specific choice of the type will help you to develop the ability to create unique shapes using the principles of unity and balance.
- 21. • Steps (Adobe Illustrator) 1. Use two letters (your initials) for this exercise. The end result will be a design you could apply to your own brand or logo in the future. 2. Create a new document with an artboard of 4 inches by 6 inches. 3. Choose a specific typeface. Both letters must use the same typeface in 72 pts. 4. After you type the letters, choose the Select tool to select the letters.
- 22. Step 2
- 23. Step 4
- 24. • Steps (Adobe Illustrator) Cont. 5. Go to Type and choose “Create the outline”. This step will specify the letters you typed as the object/path (shape) for further manipulation. 6. While the letters are still highlighted, go to Object, then choose “Ungroup”. Now, you should have two individual shapes to manipulate with the Pen tool (P), the Direct Selection tool (A) or the Object Transform function.
- 25. Step 5
- 26. Step 6
- 27. • Steps (Adobe Illustrator) Cont. 7. Arrange and distort the letters to make them interesting. After you have completed the design, scale the design larger than 4 inches by 6 inches on your artboard. Group the letters together. 8. Create a 4 inch by 6 inch rectangle with the white fill and 1pt black stroke. Move the rectangle on top of the letter design. Change the opacity of the rectangle to 80%. You should be able to see through the rectangle now.
- 28. Step 8
- 29. • Steps (Adobe Illustrator) Cont. 9. Next, move and rotate the design you have created. You will compose a partial design that is both balanced and visually interesting within the 4 inch by 6 inch rectangle. 10. Now select all the objects on the artboard. Check the Layer palette to ensure the rectangular shape is above the other designs.
- 30. • Steps (Adobe Illustrator) Cont. 11. Go to Object and choose Clipping Mask, then Make. The design sitting outside the rectangle will become invisible, and only the part that was inside the “mask” will remain. 12. Save the file as letterform**.ai for future use.
- 31. Step 10 & 11
- 32. Step 11
- 33. Examples 1. 2.
- 34. Examples 3. 4.