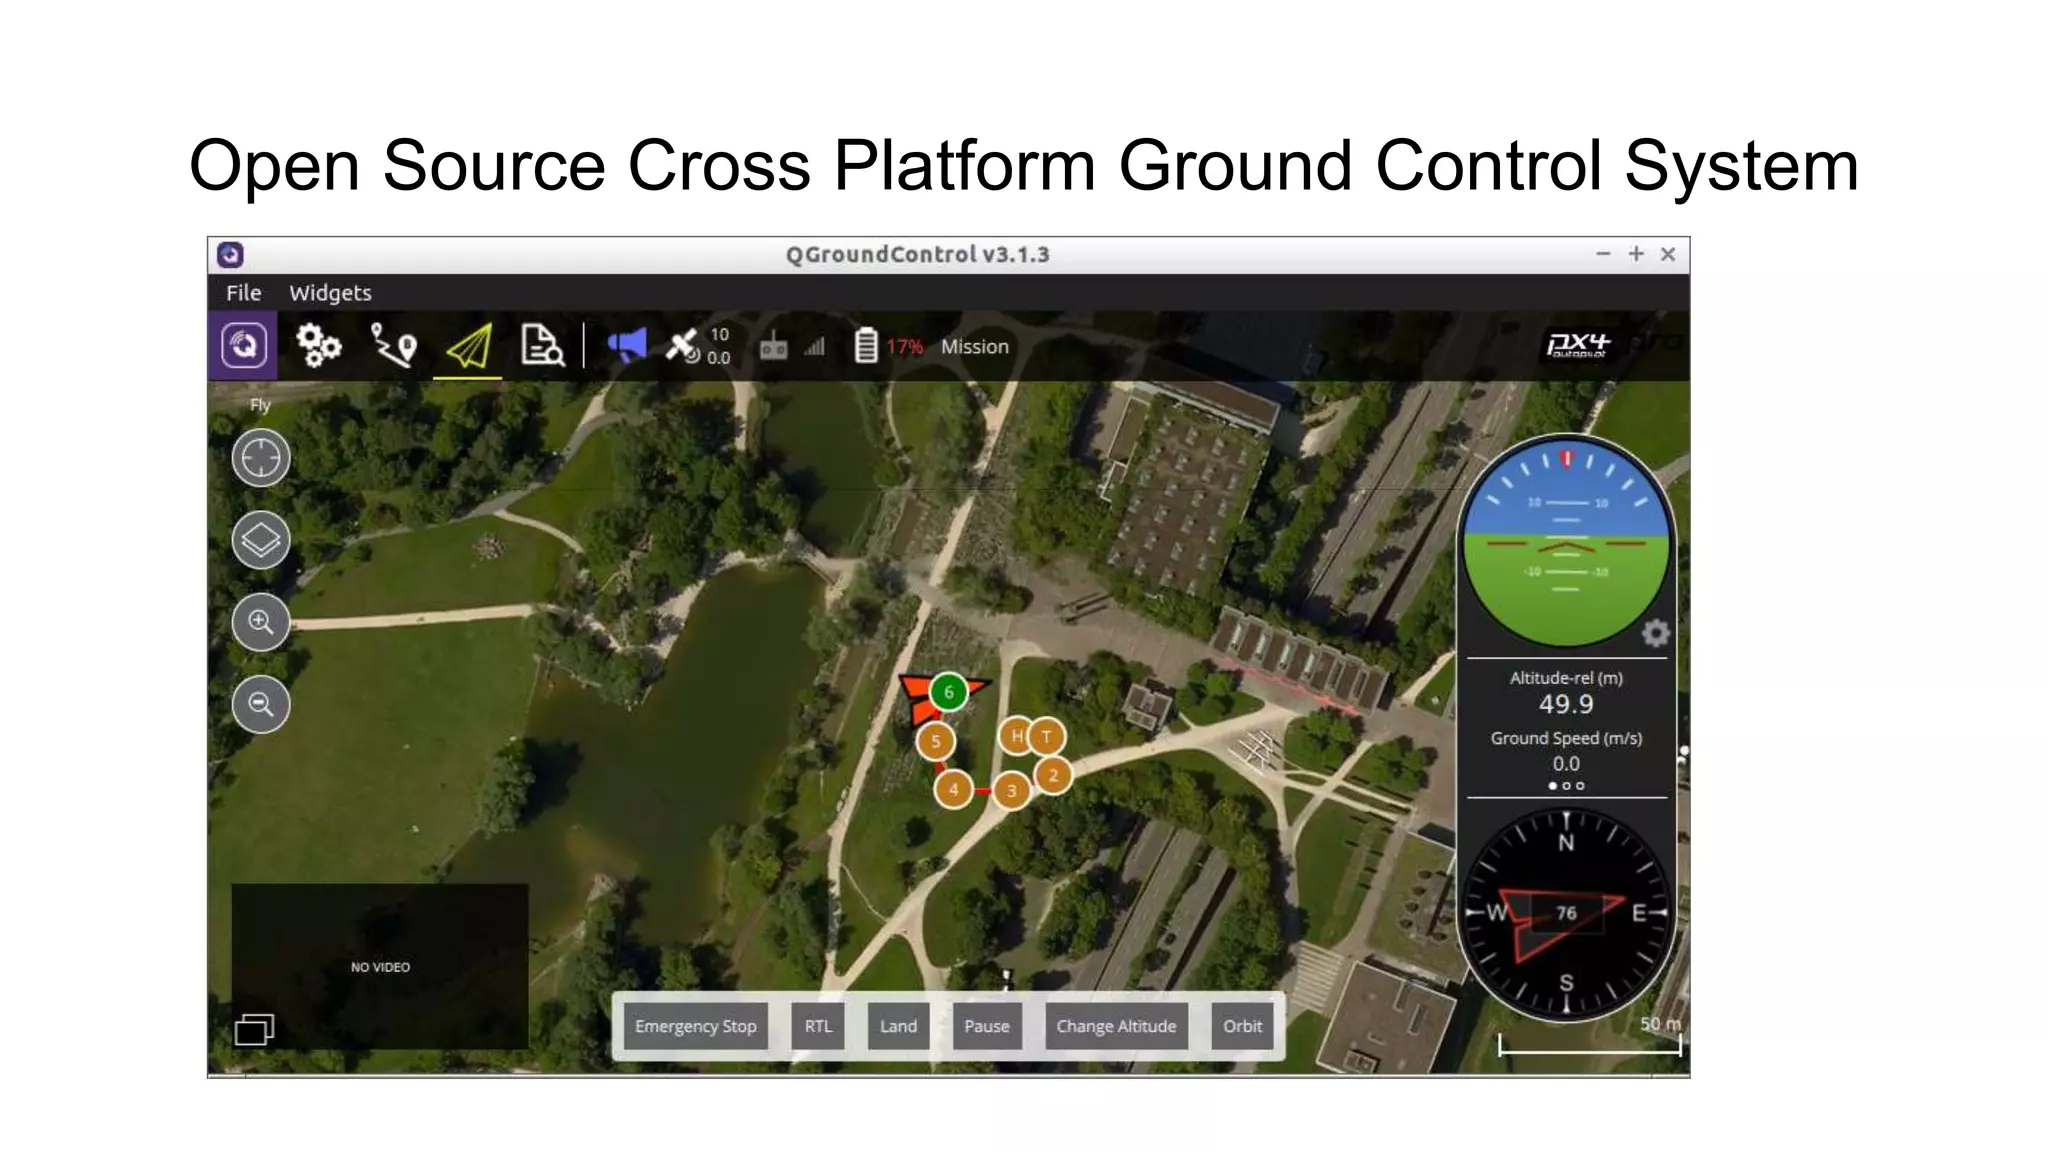
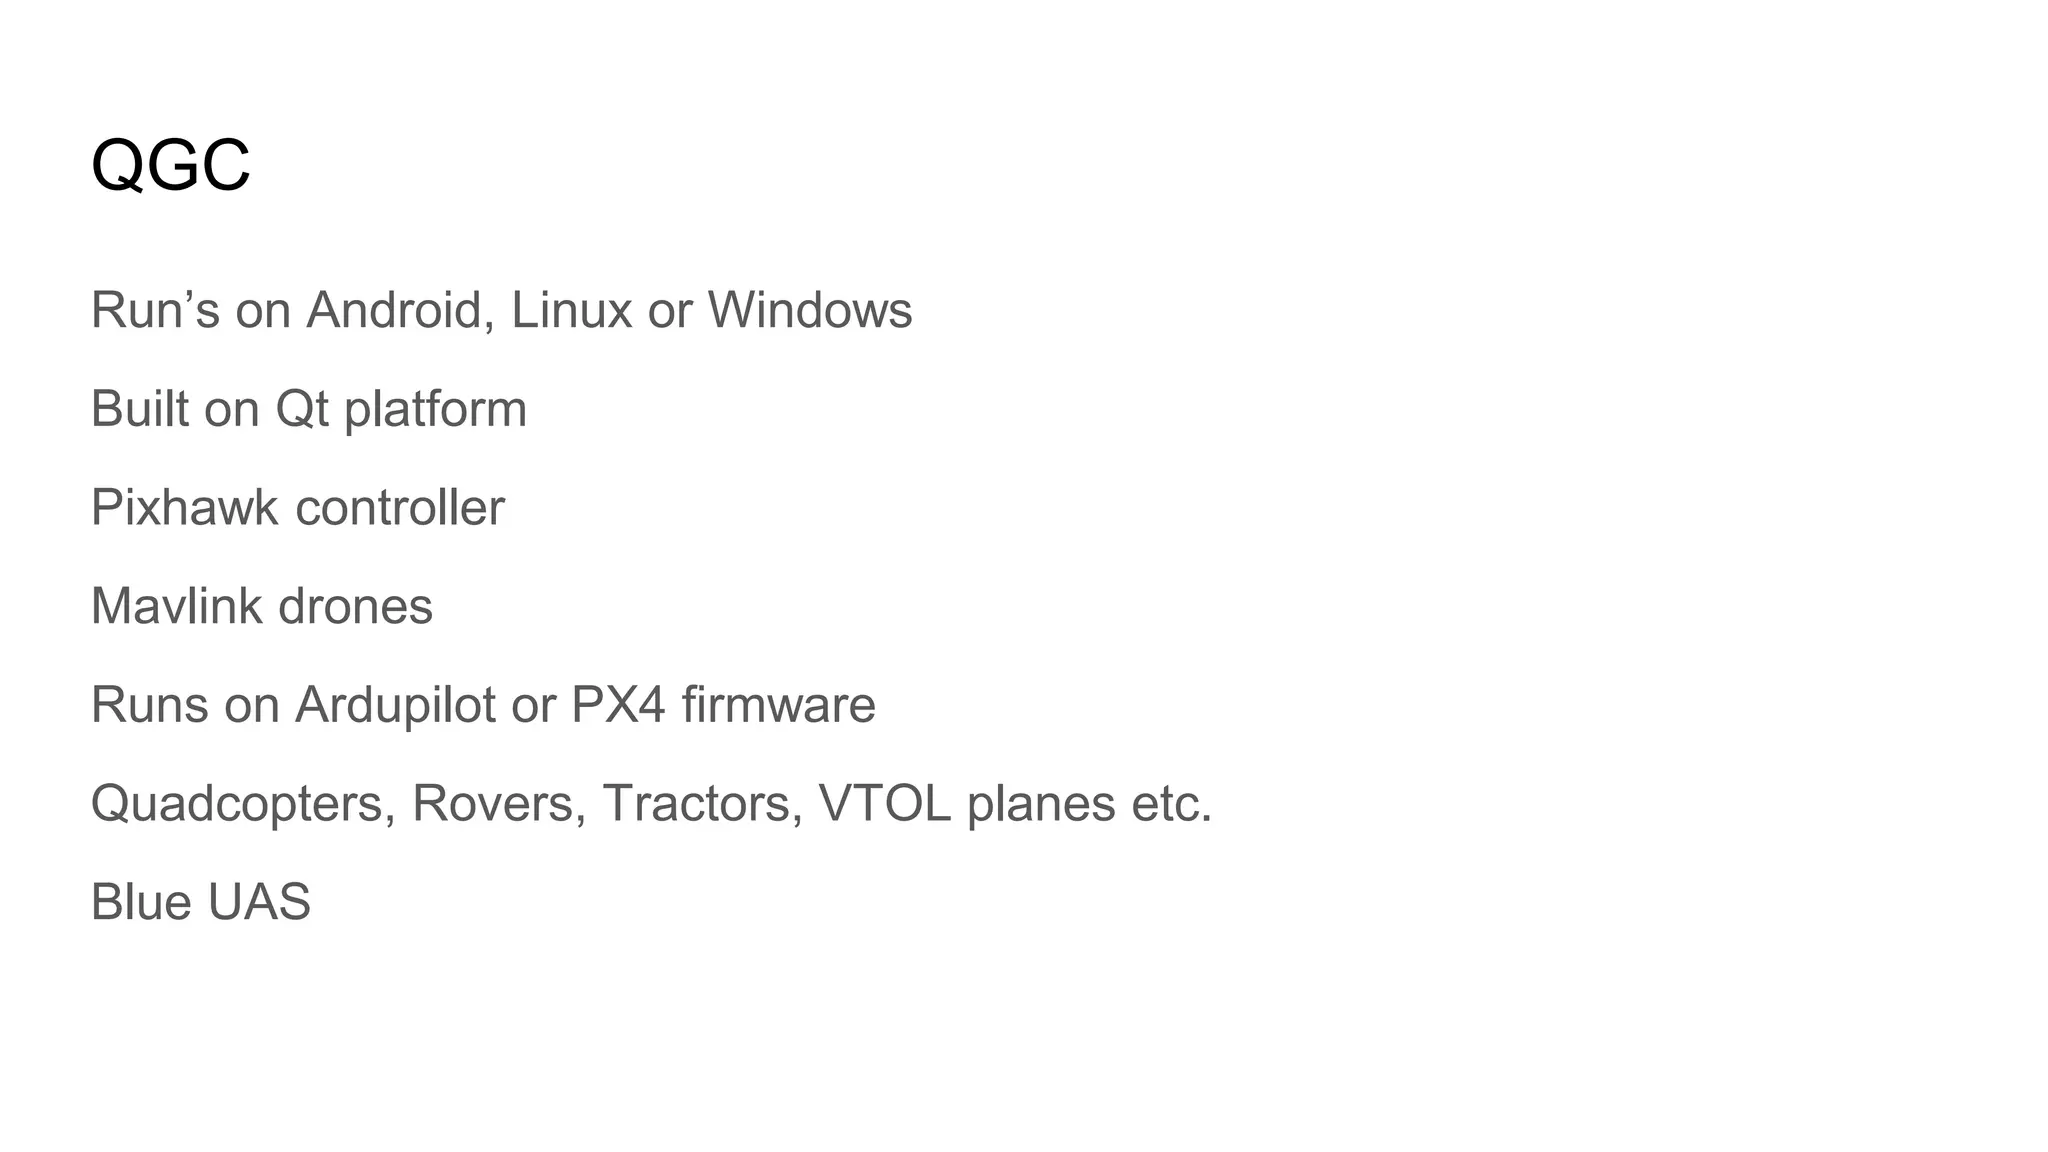
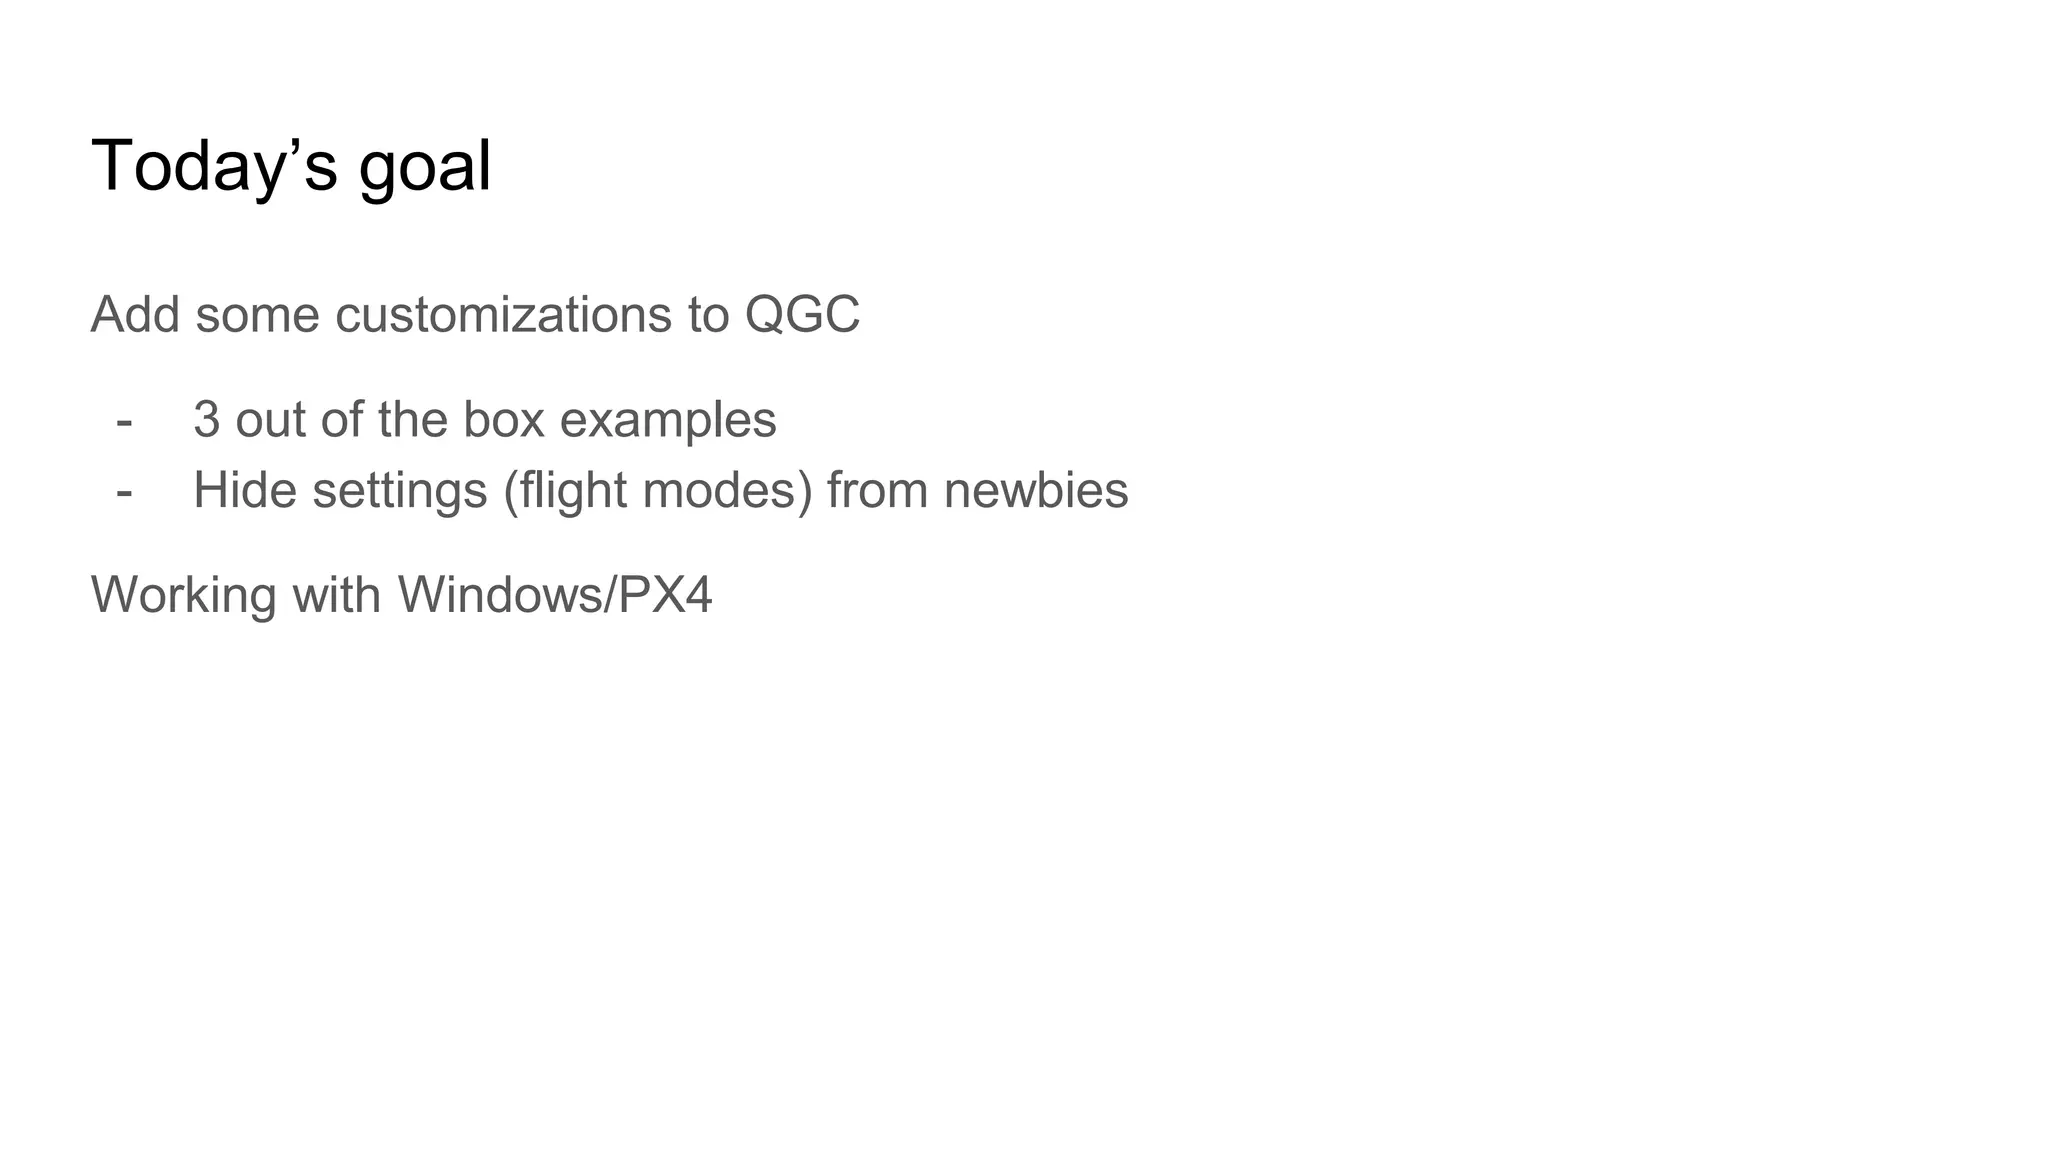
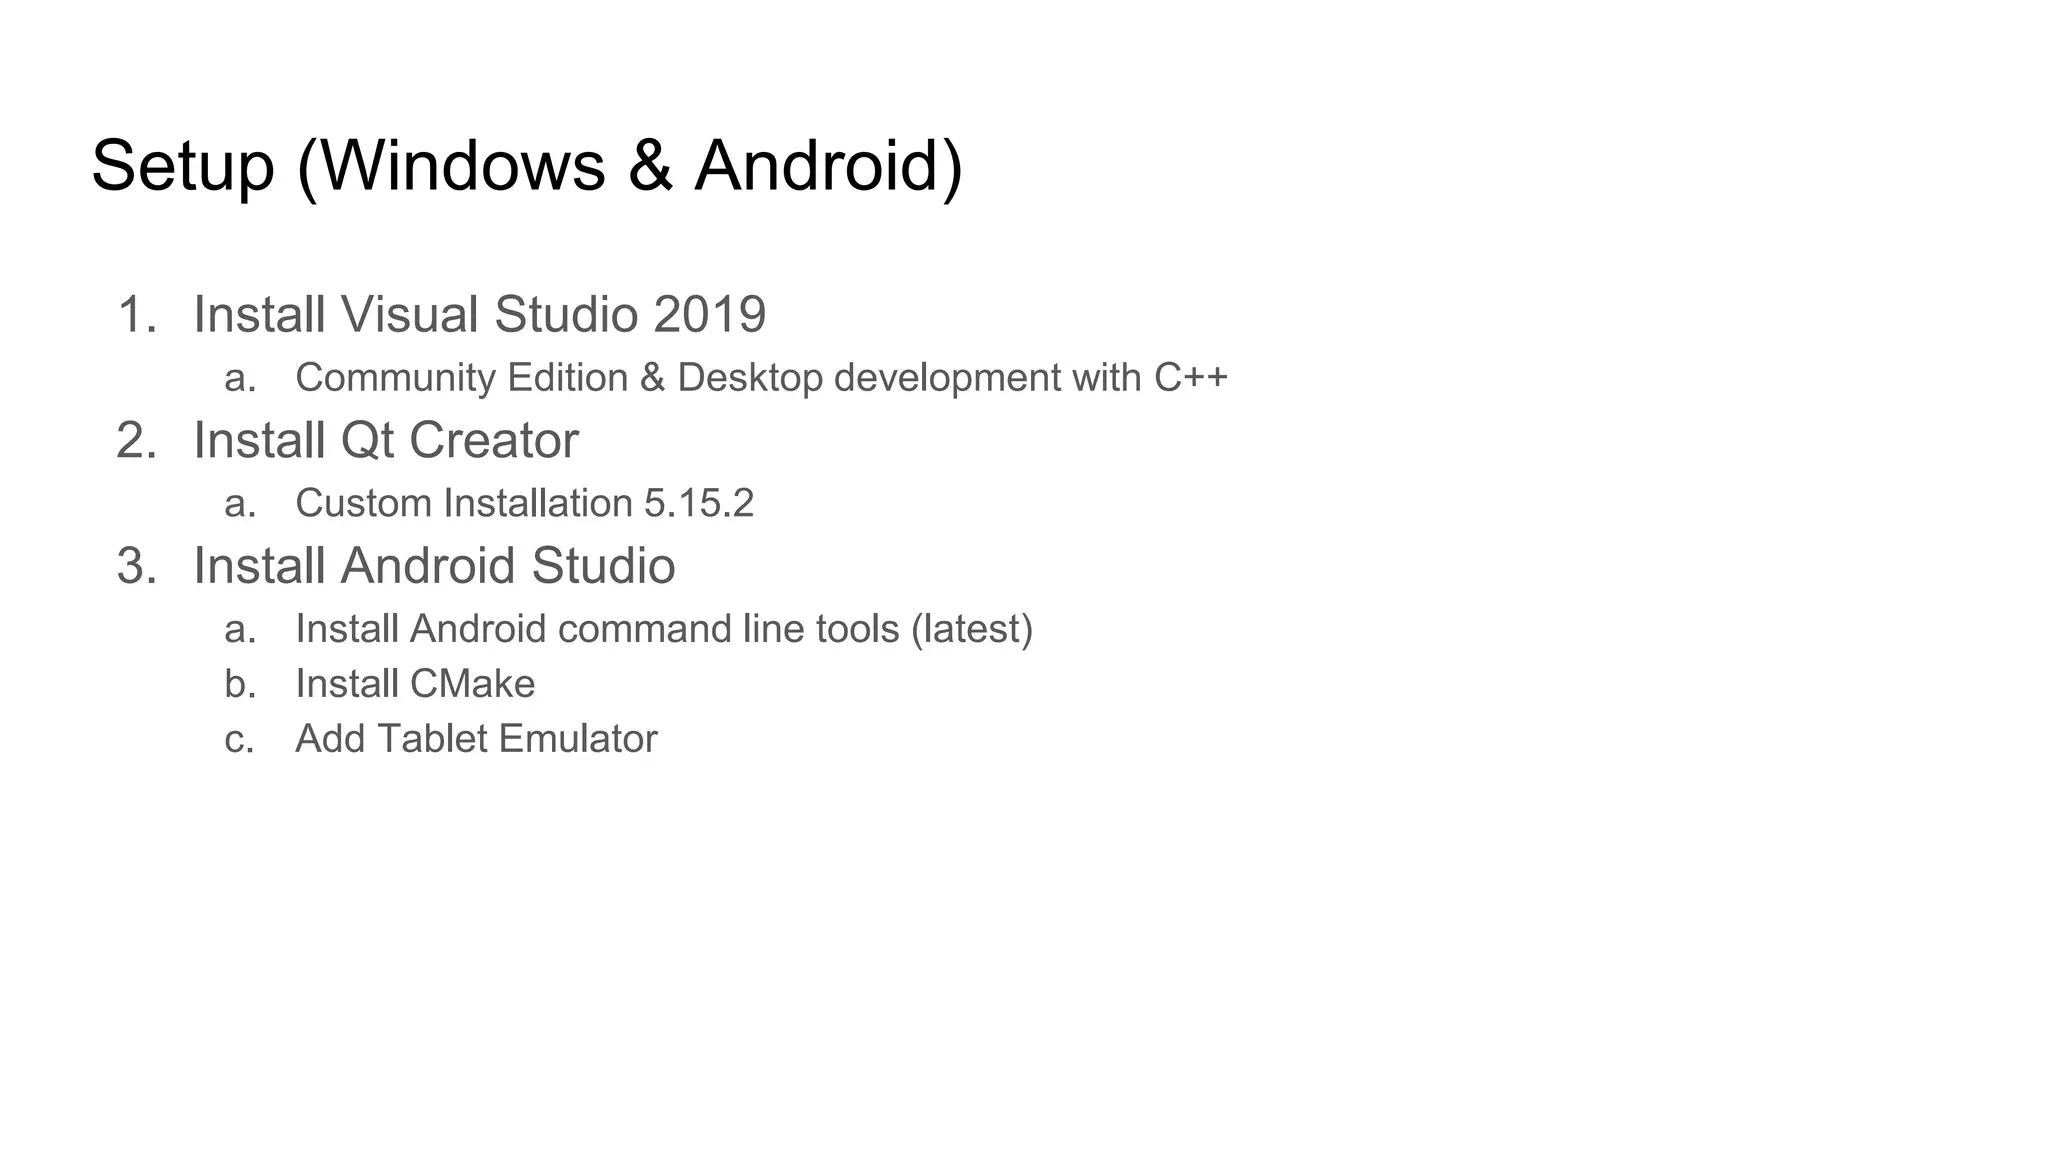
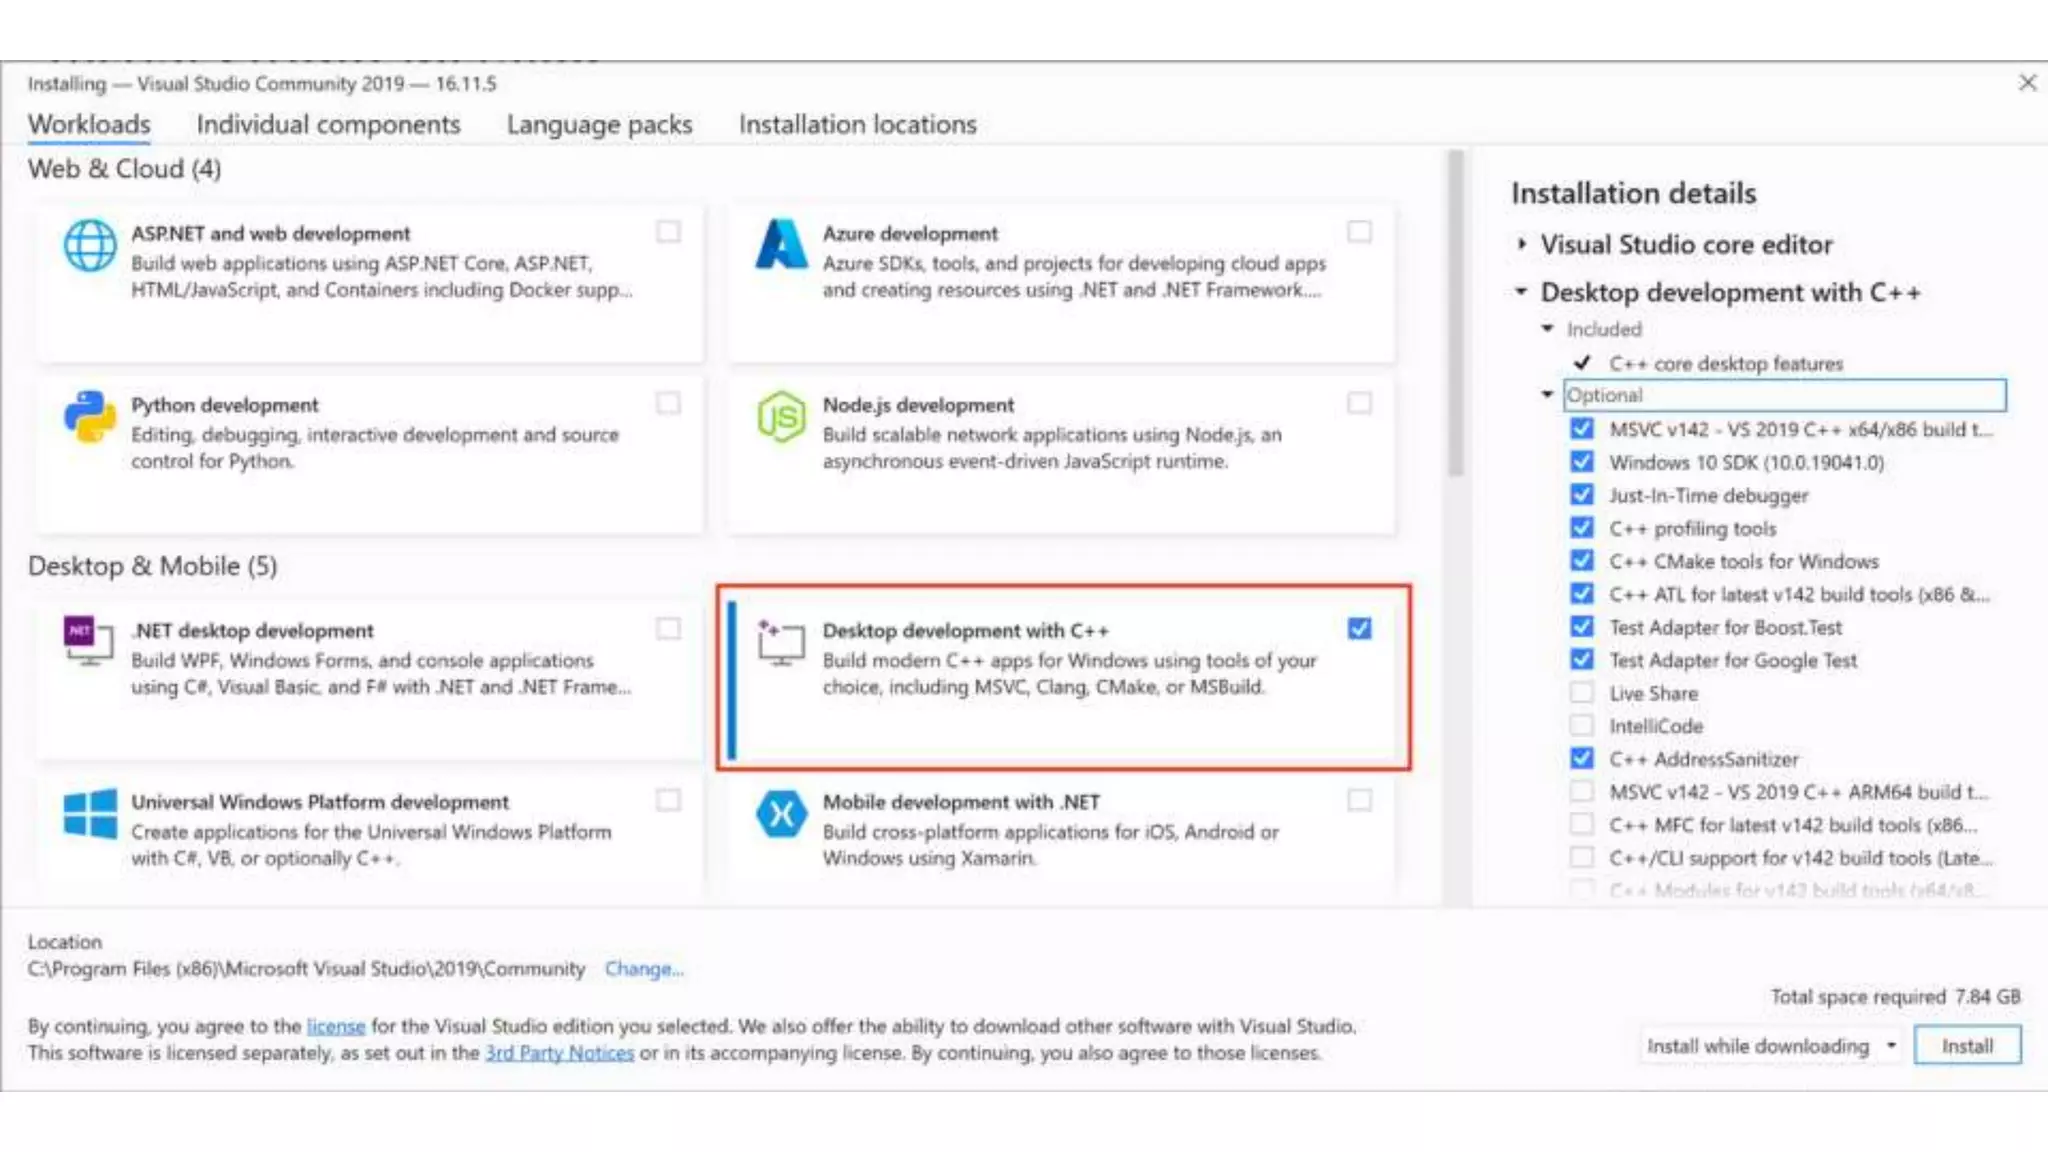
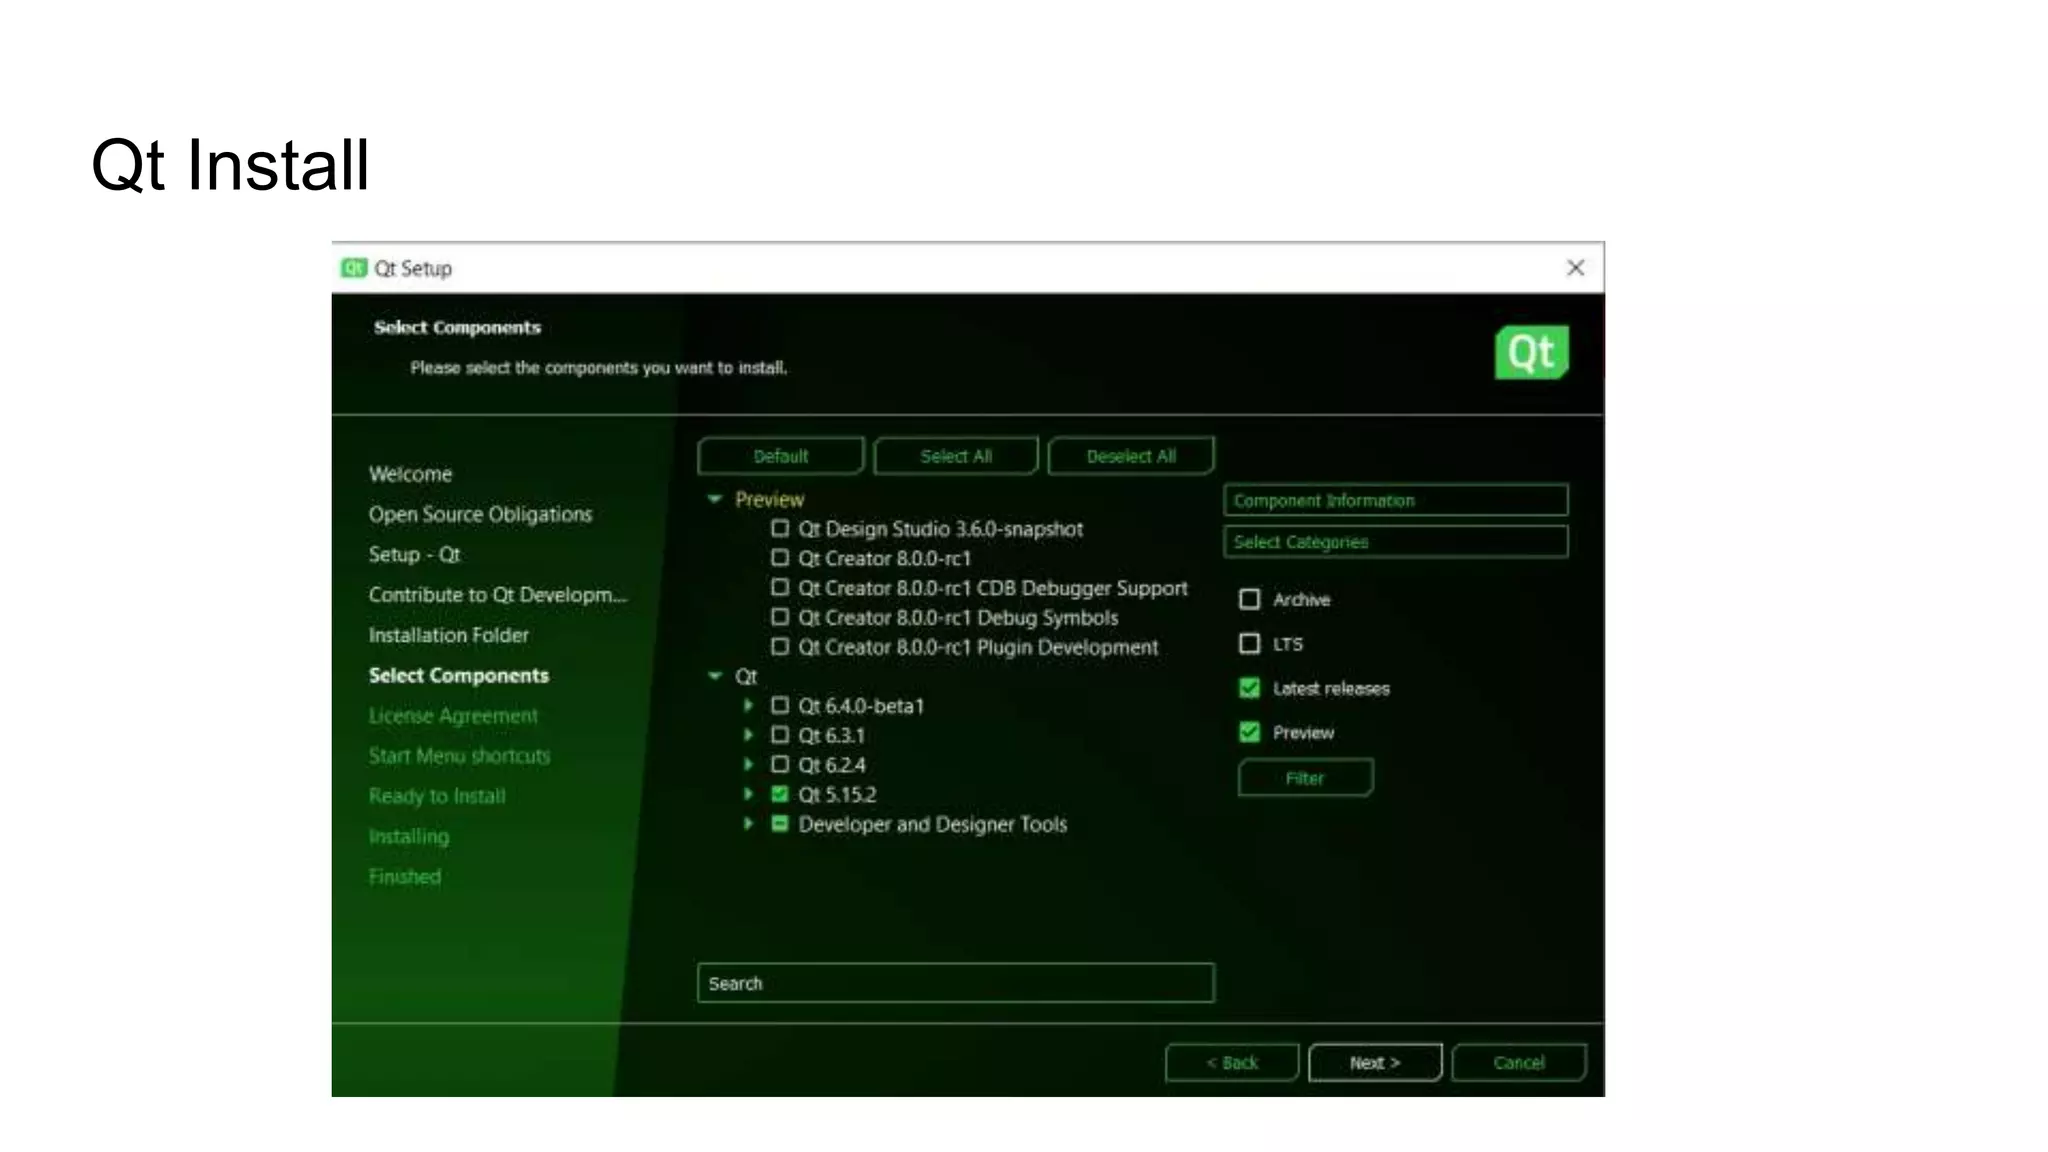
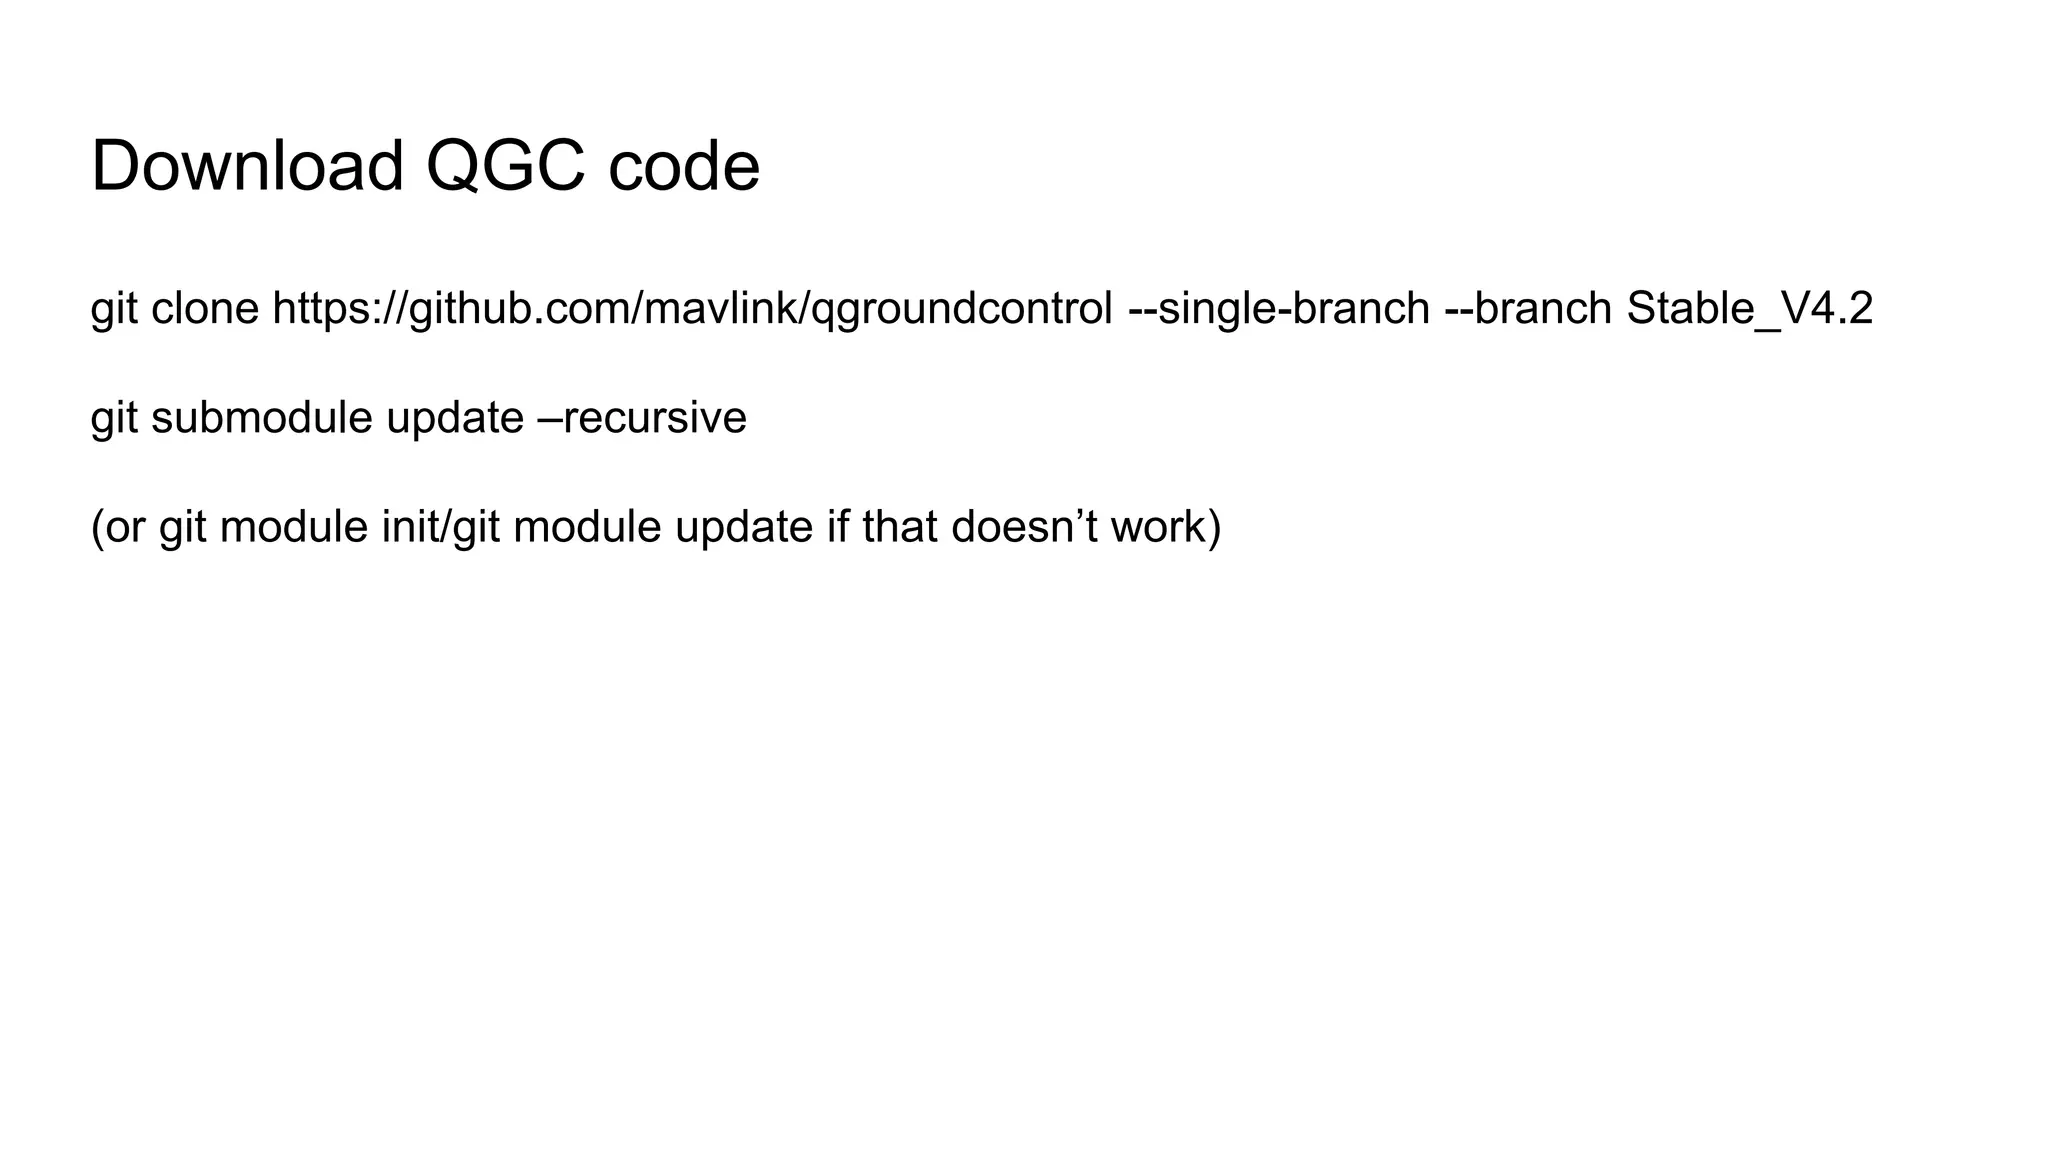
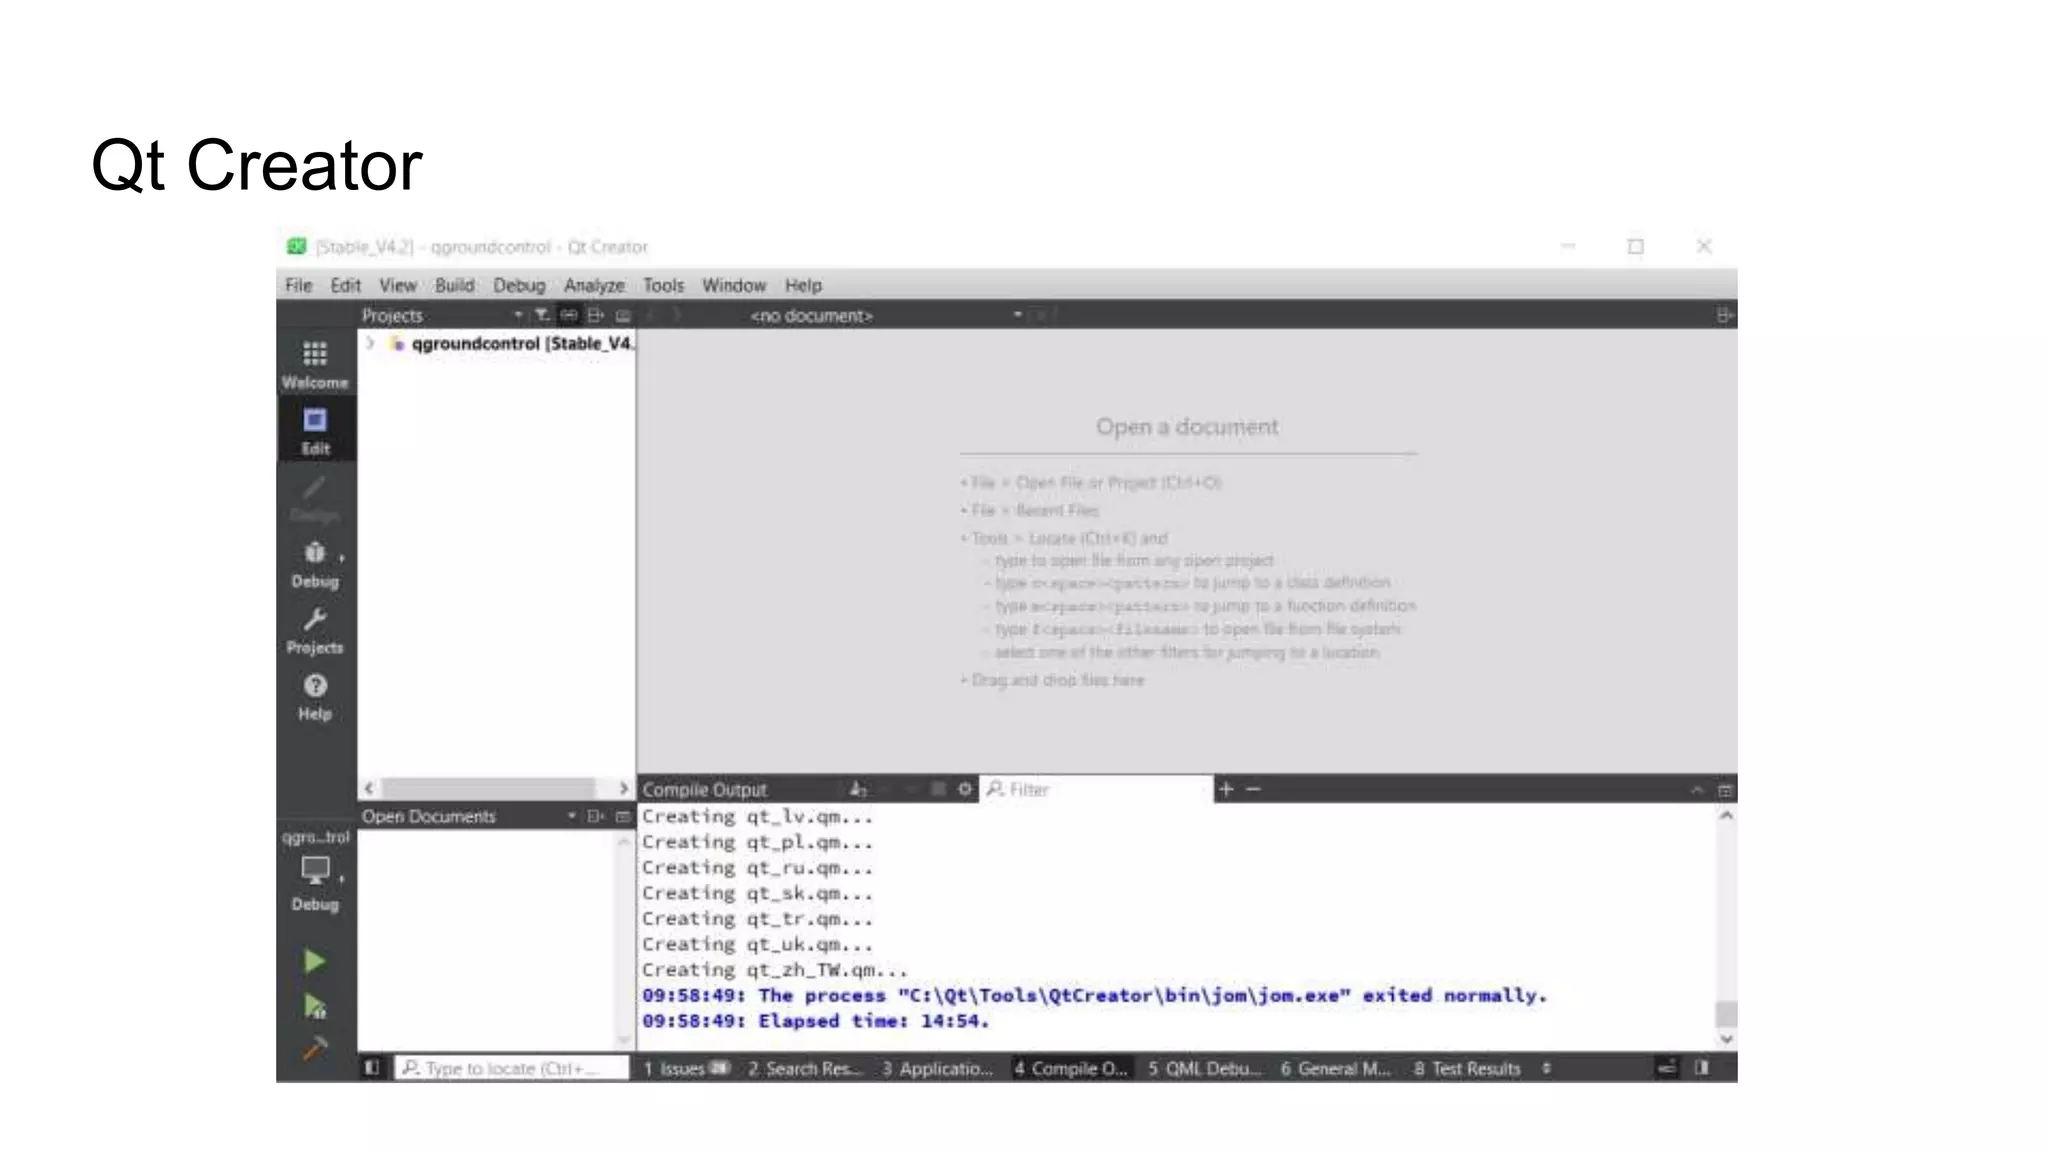
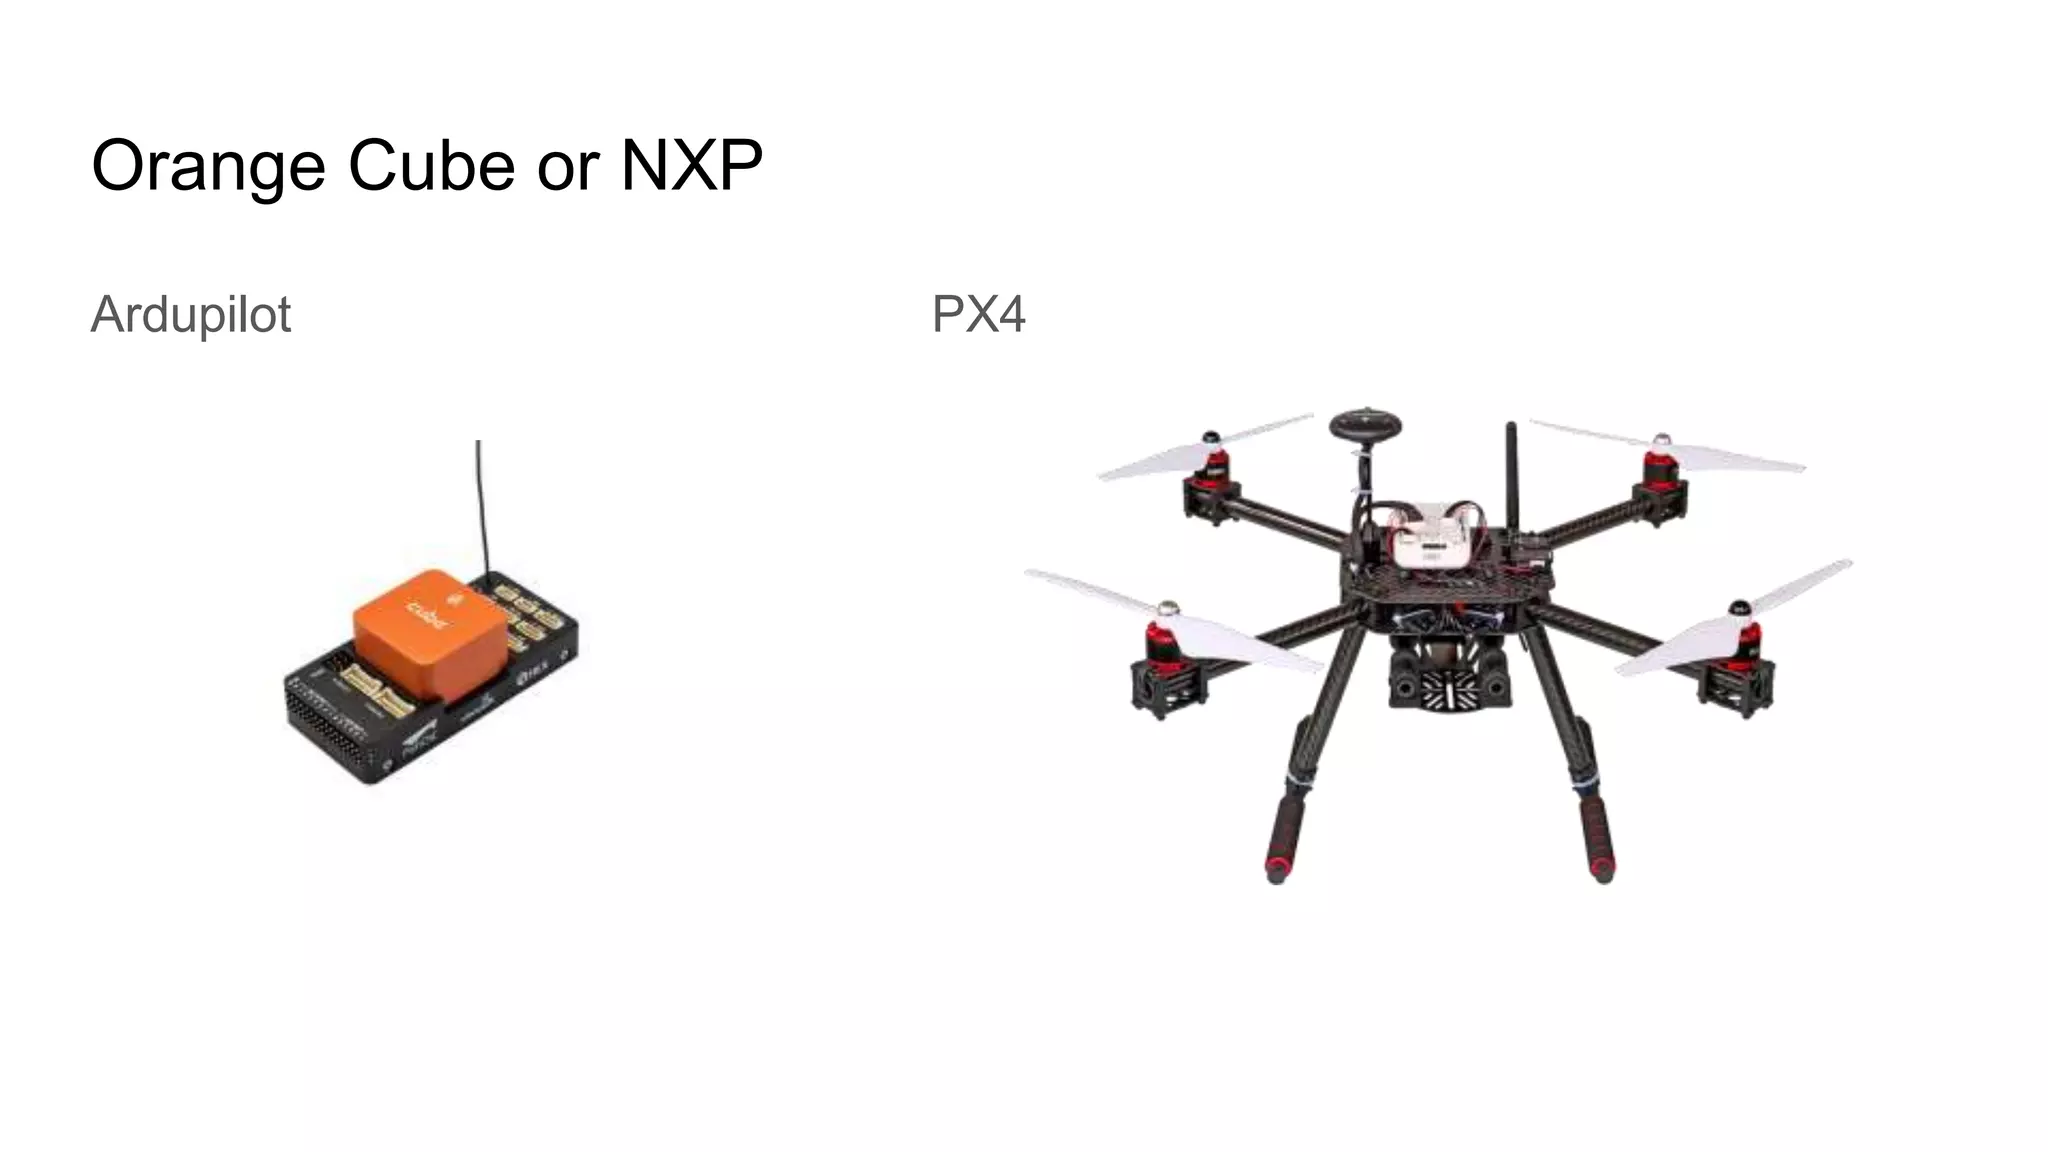
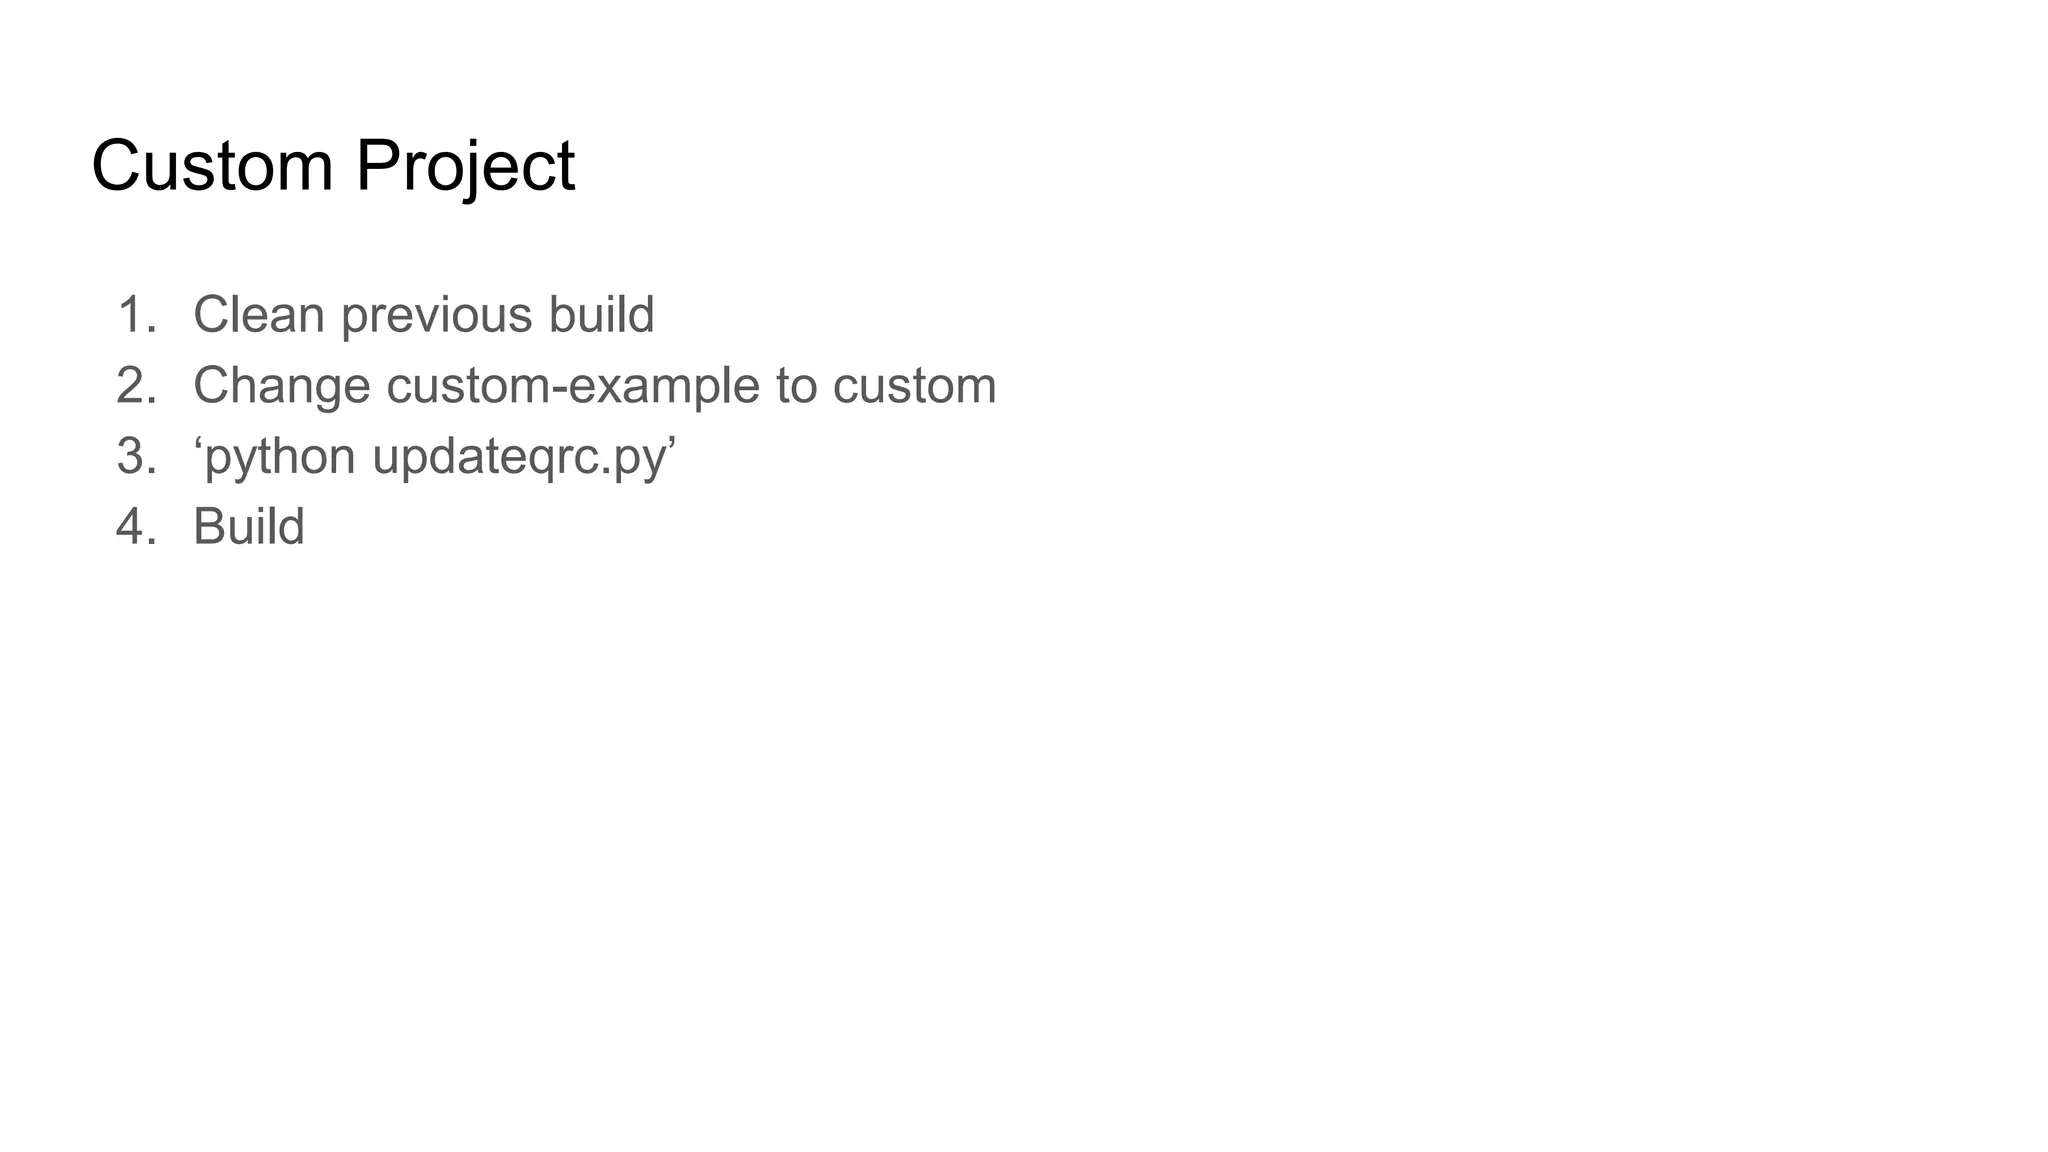
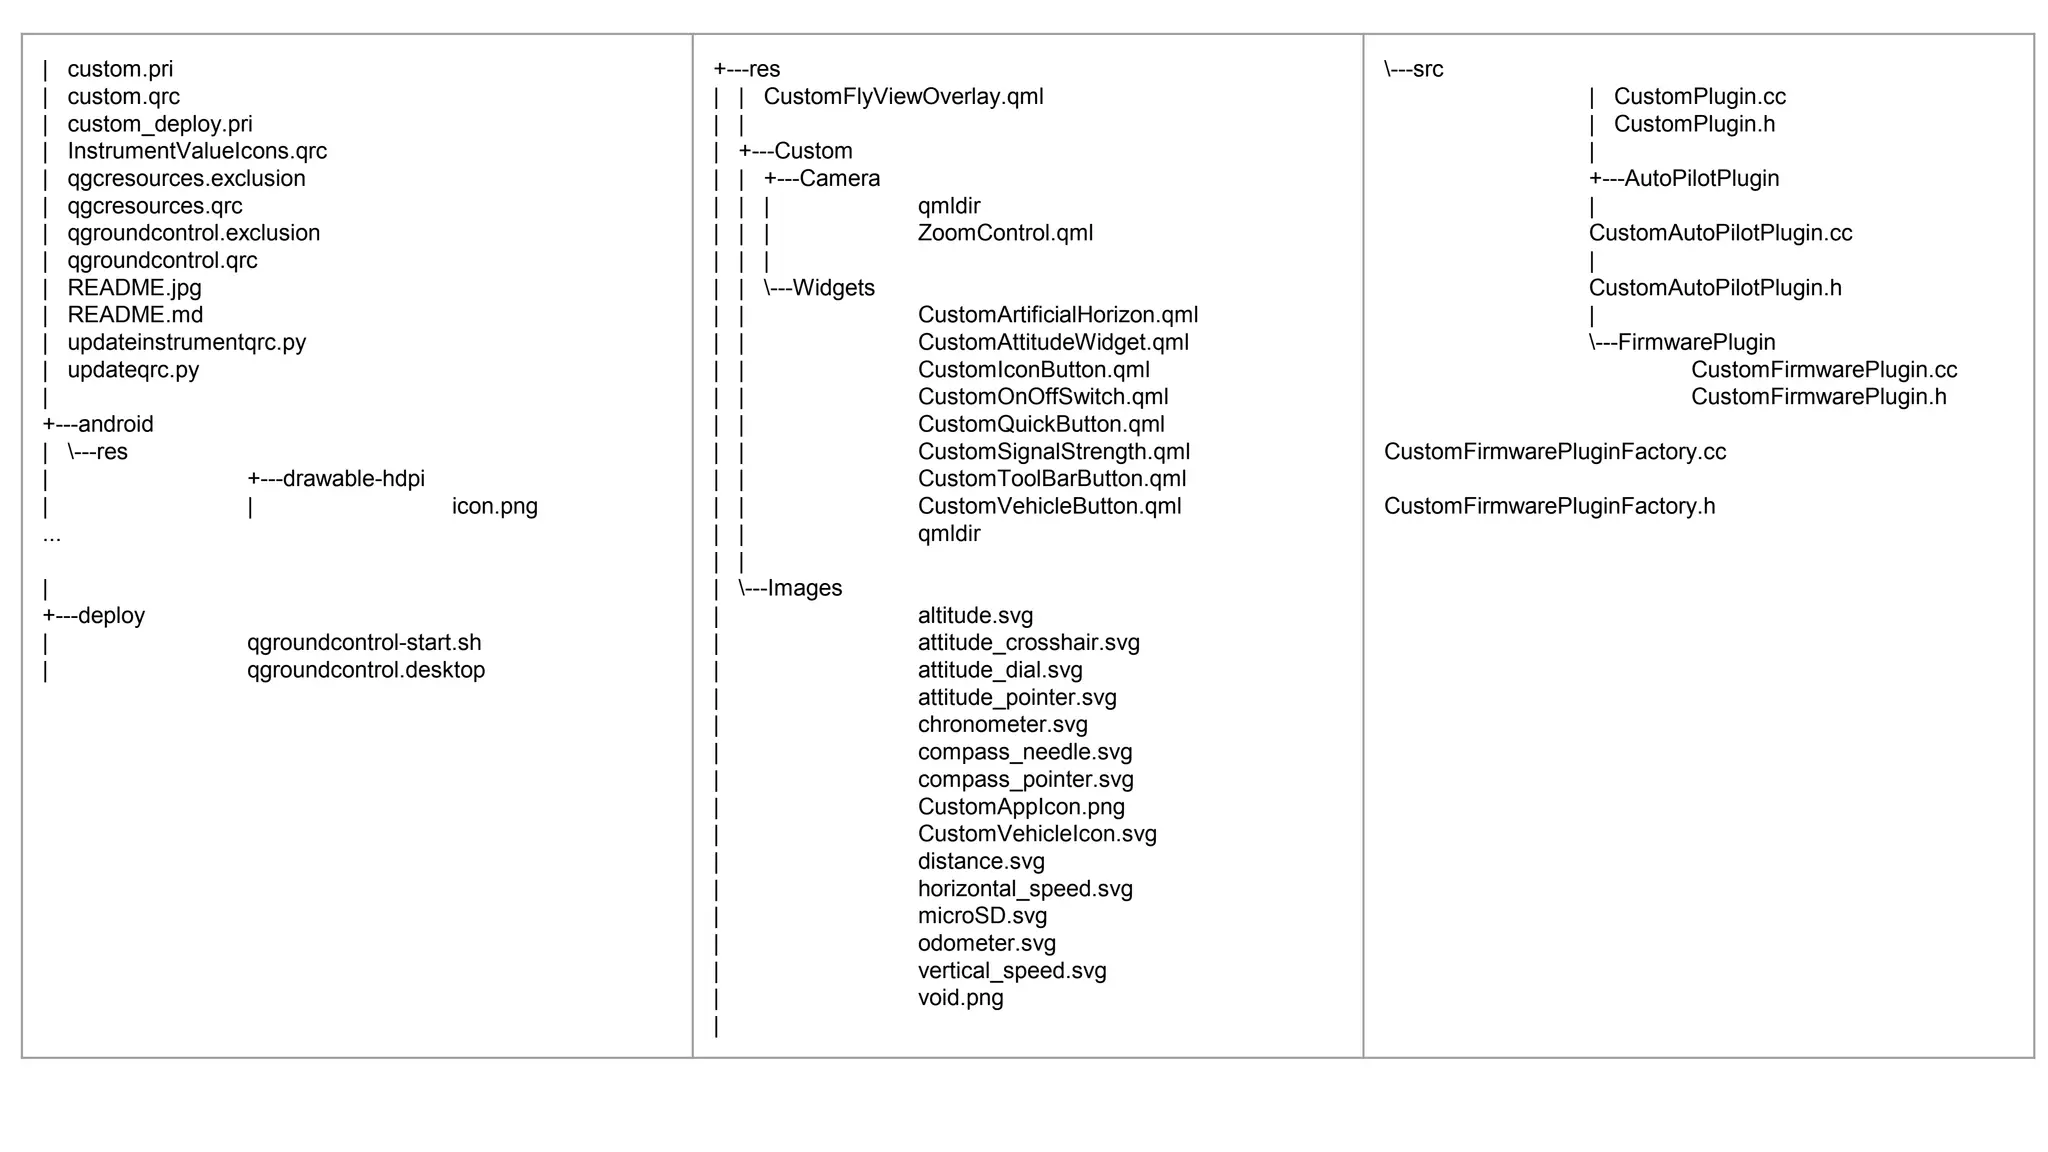
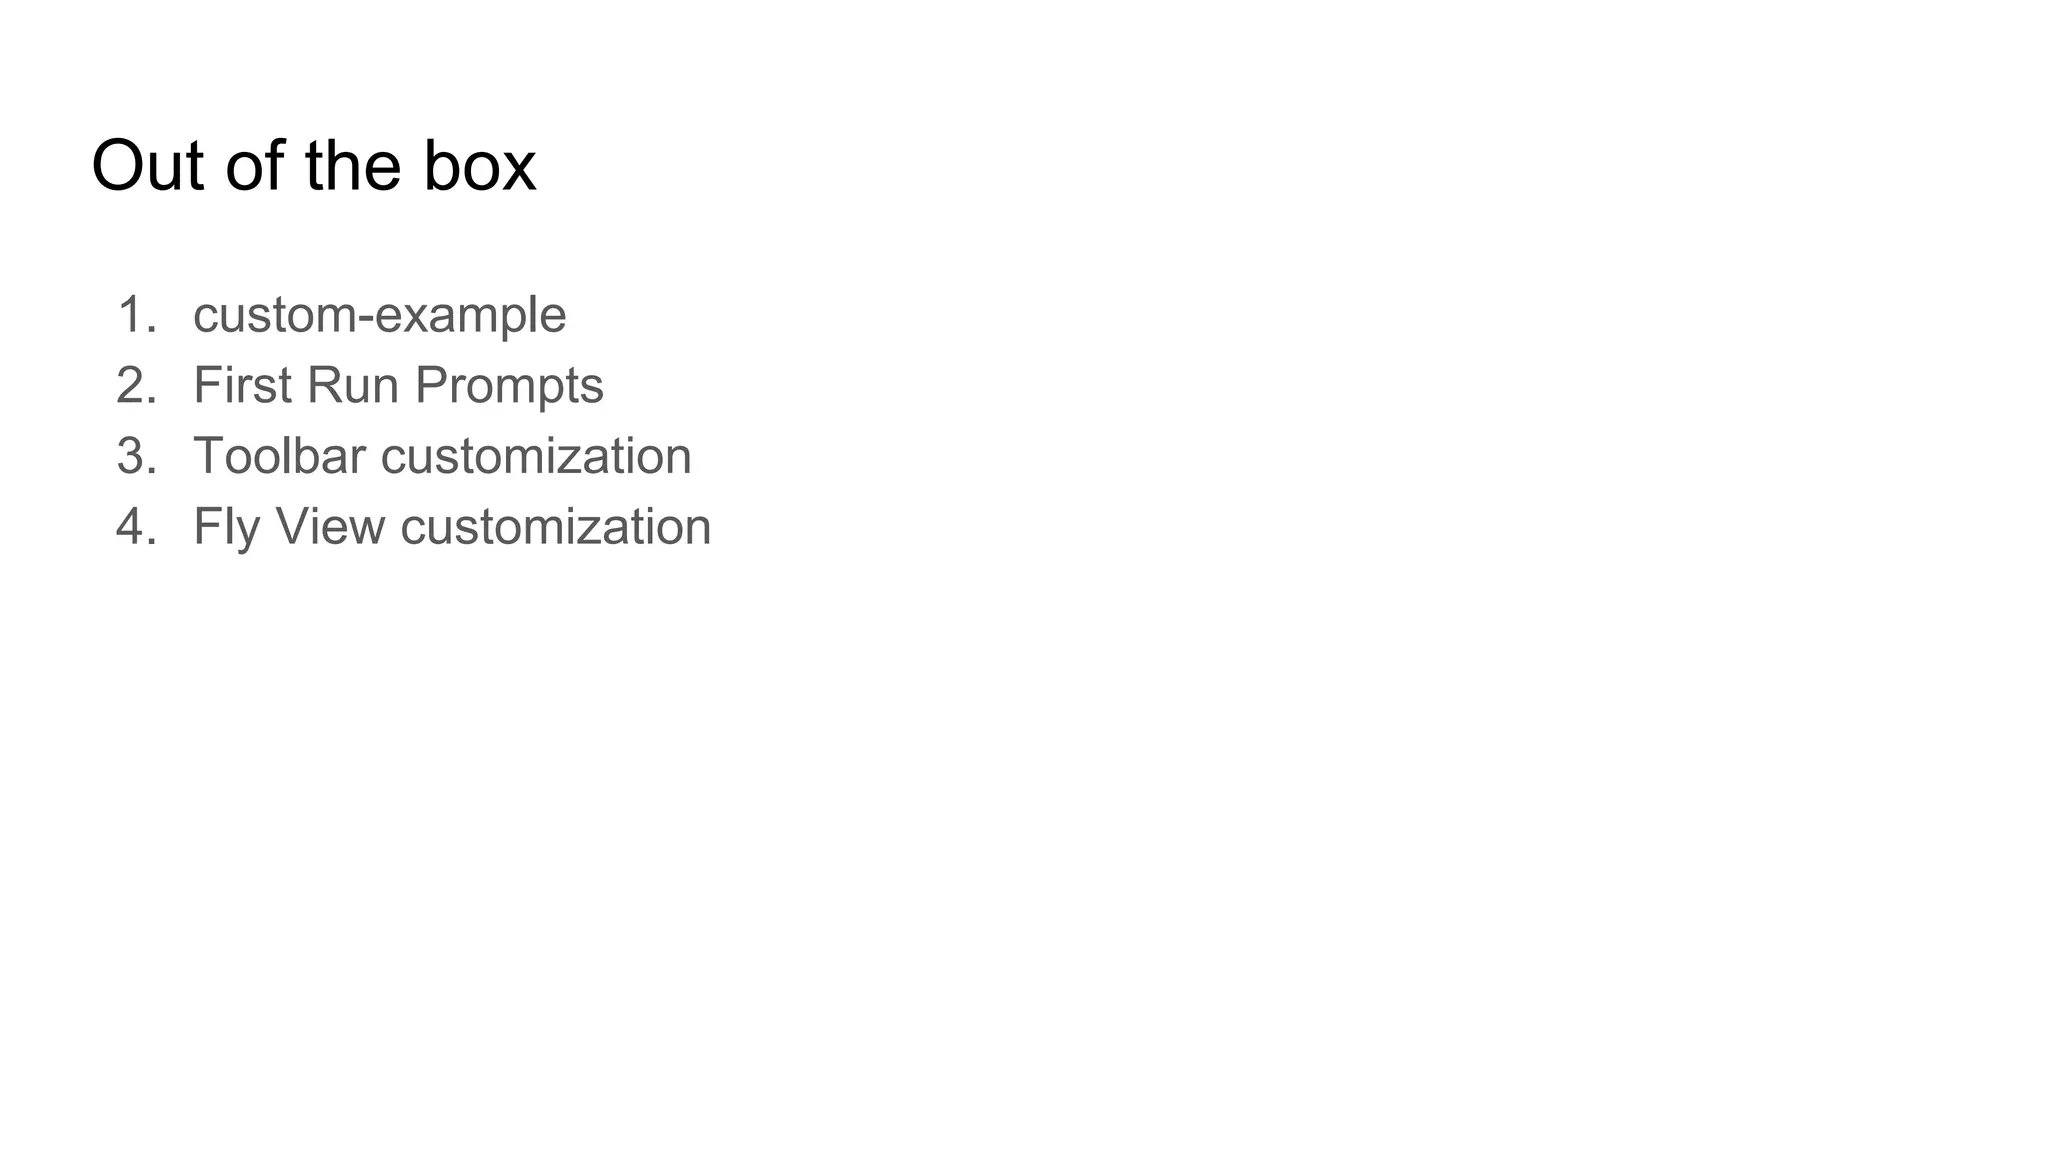
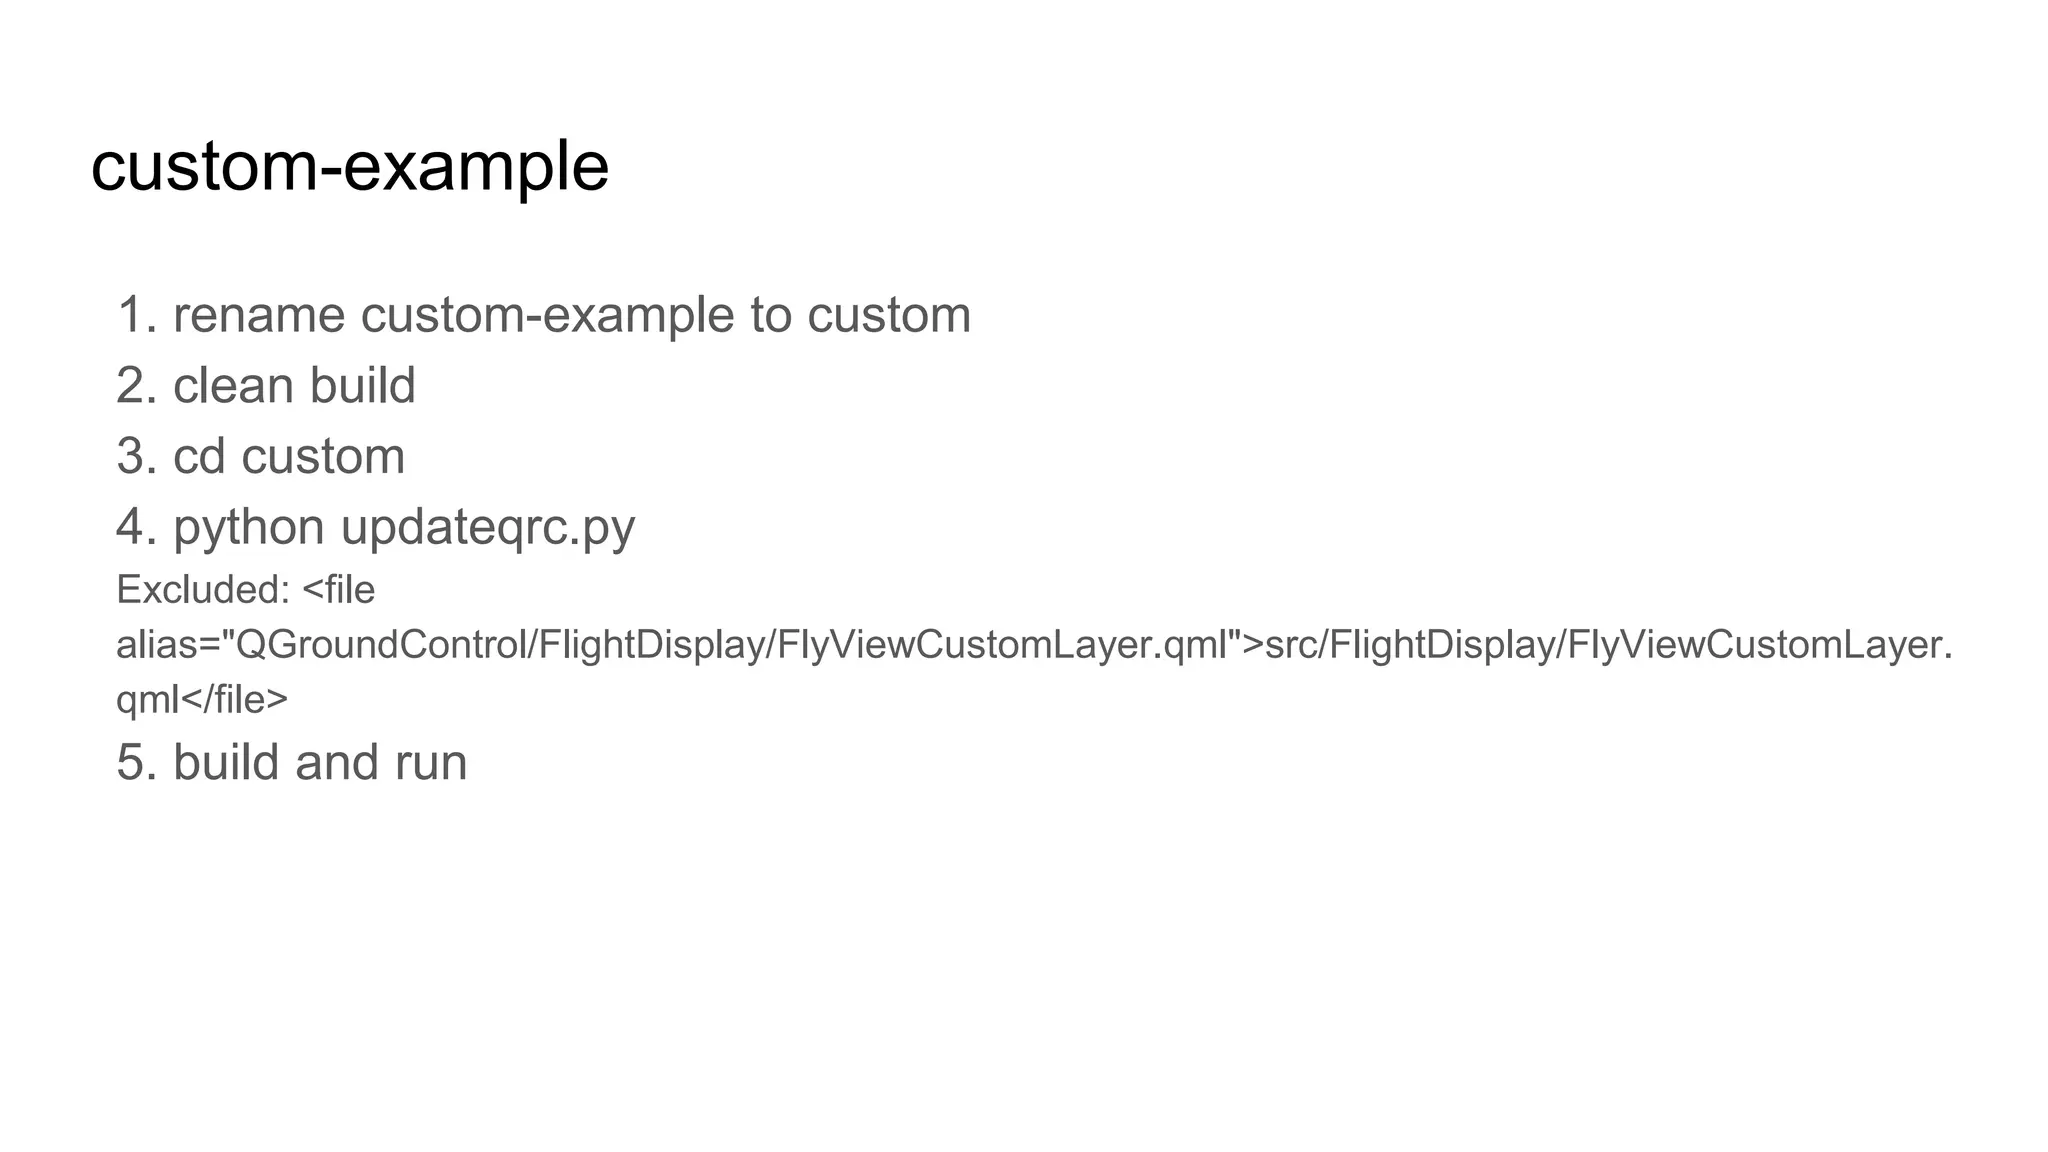
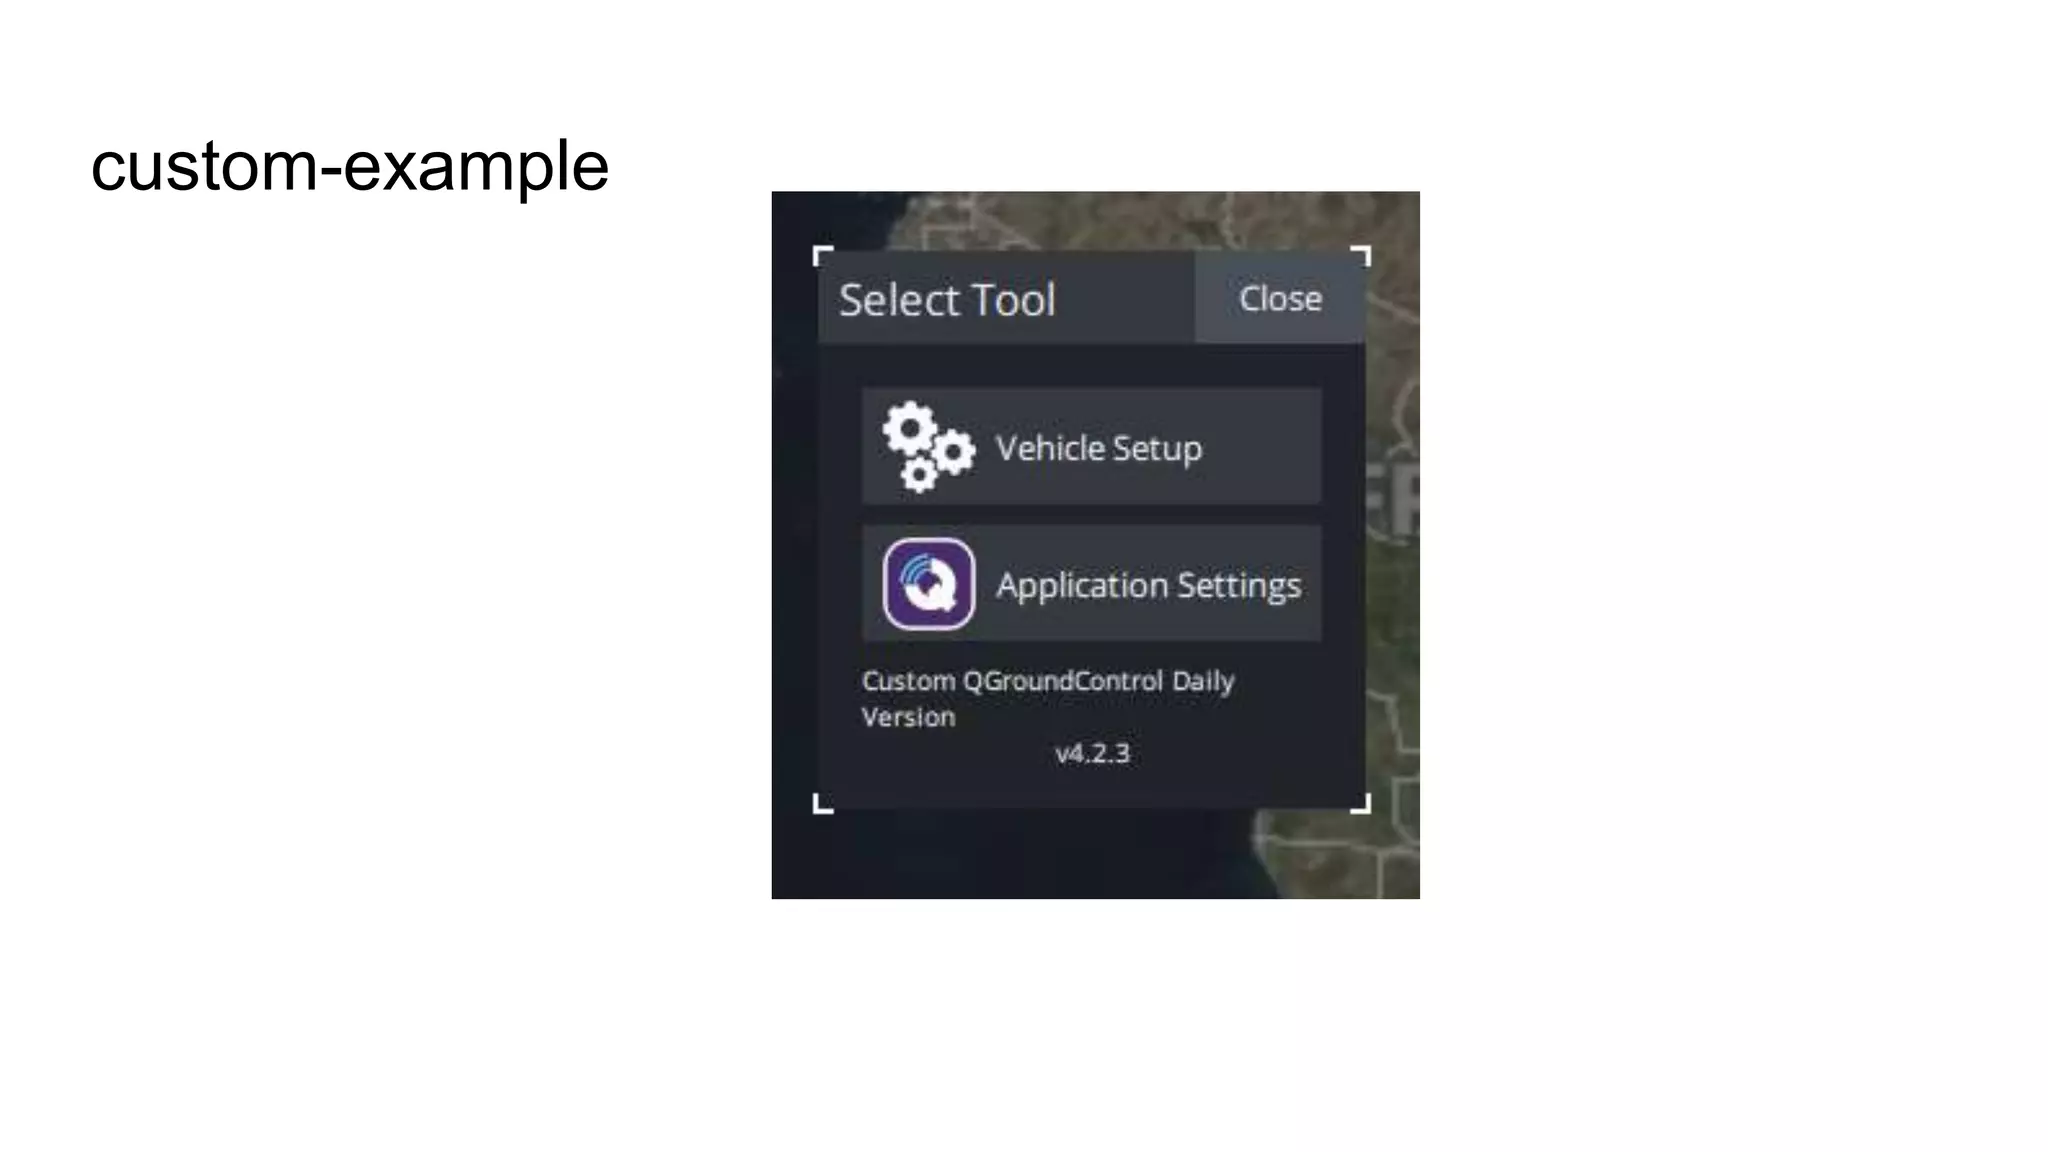
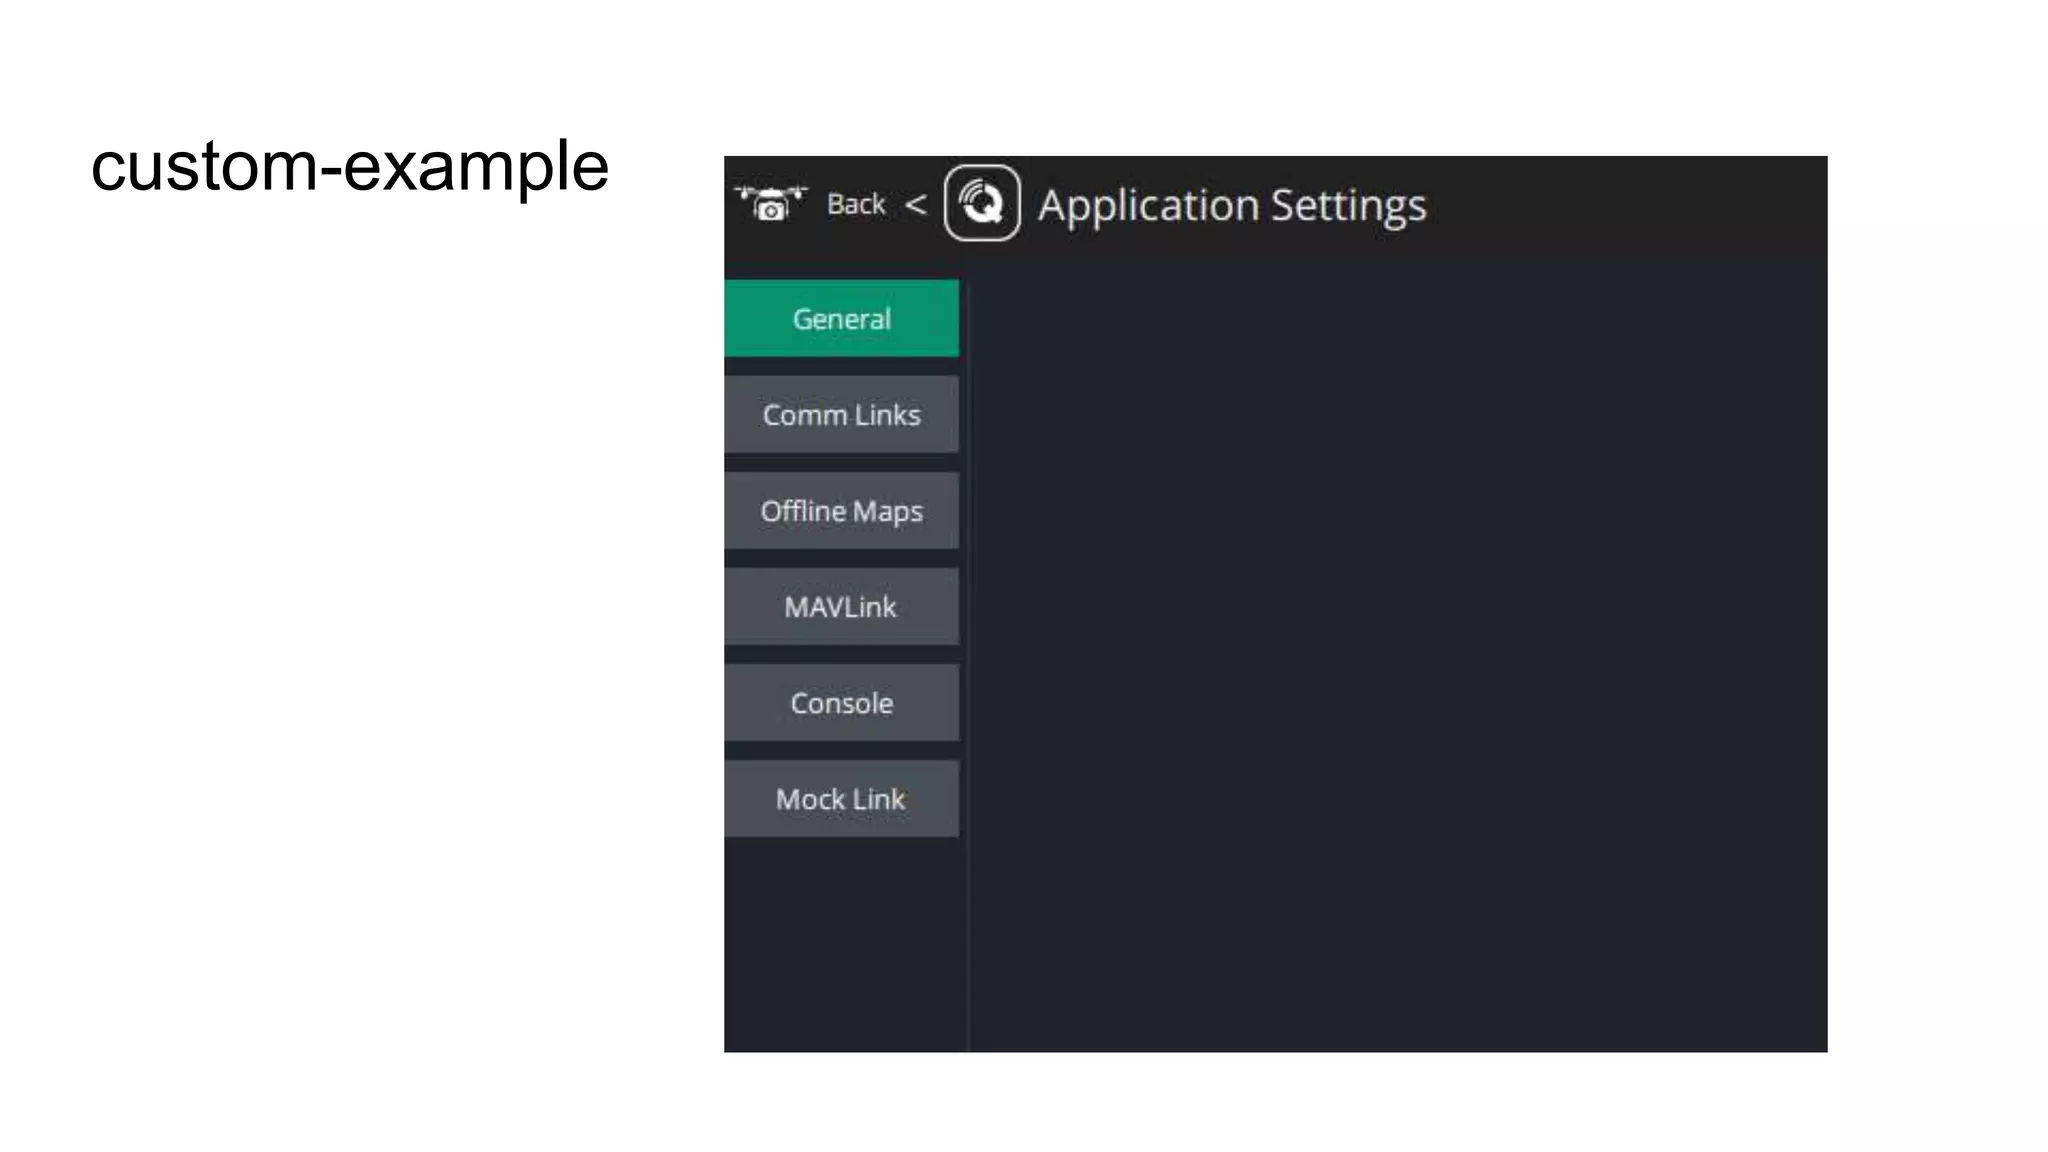
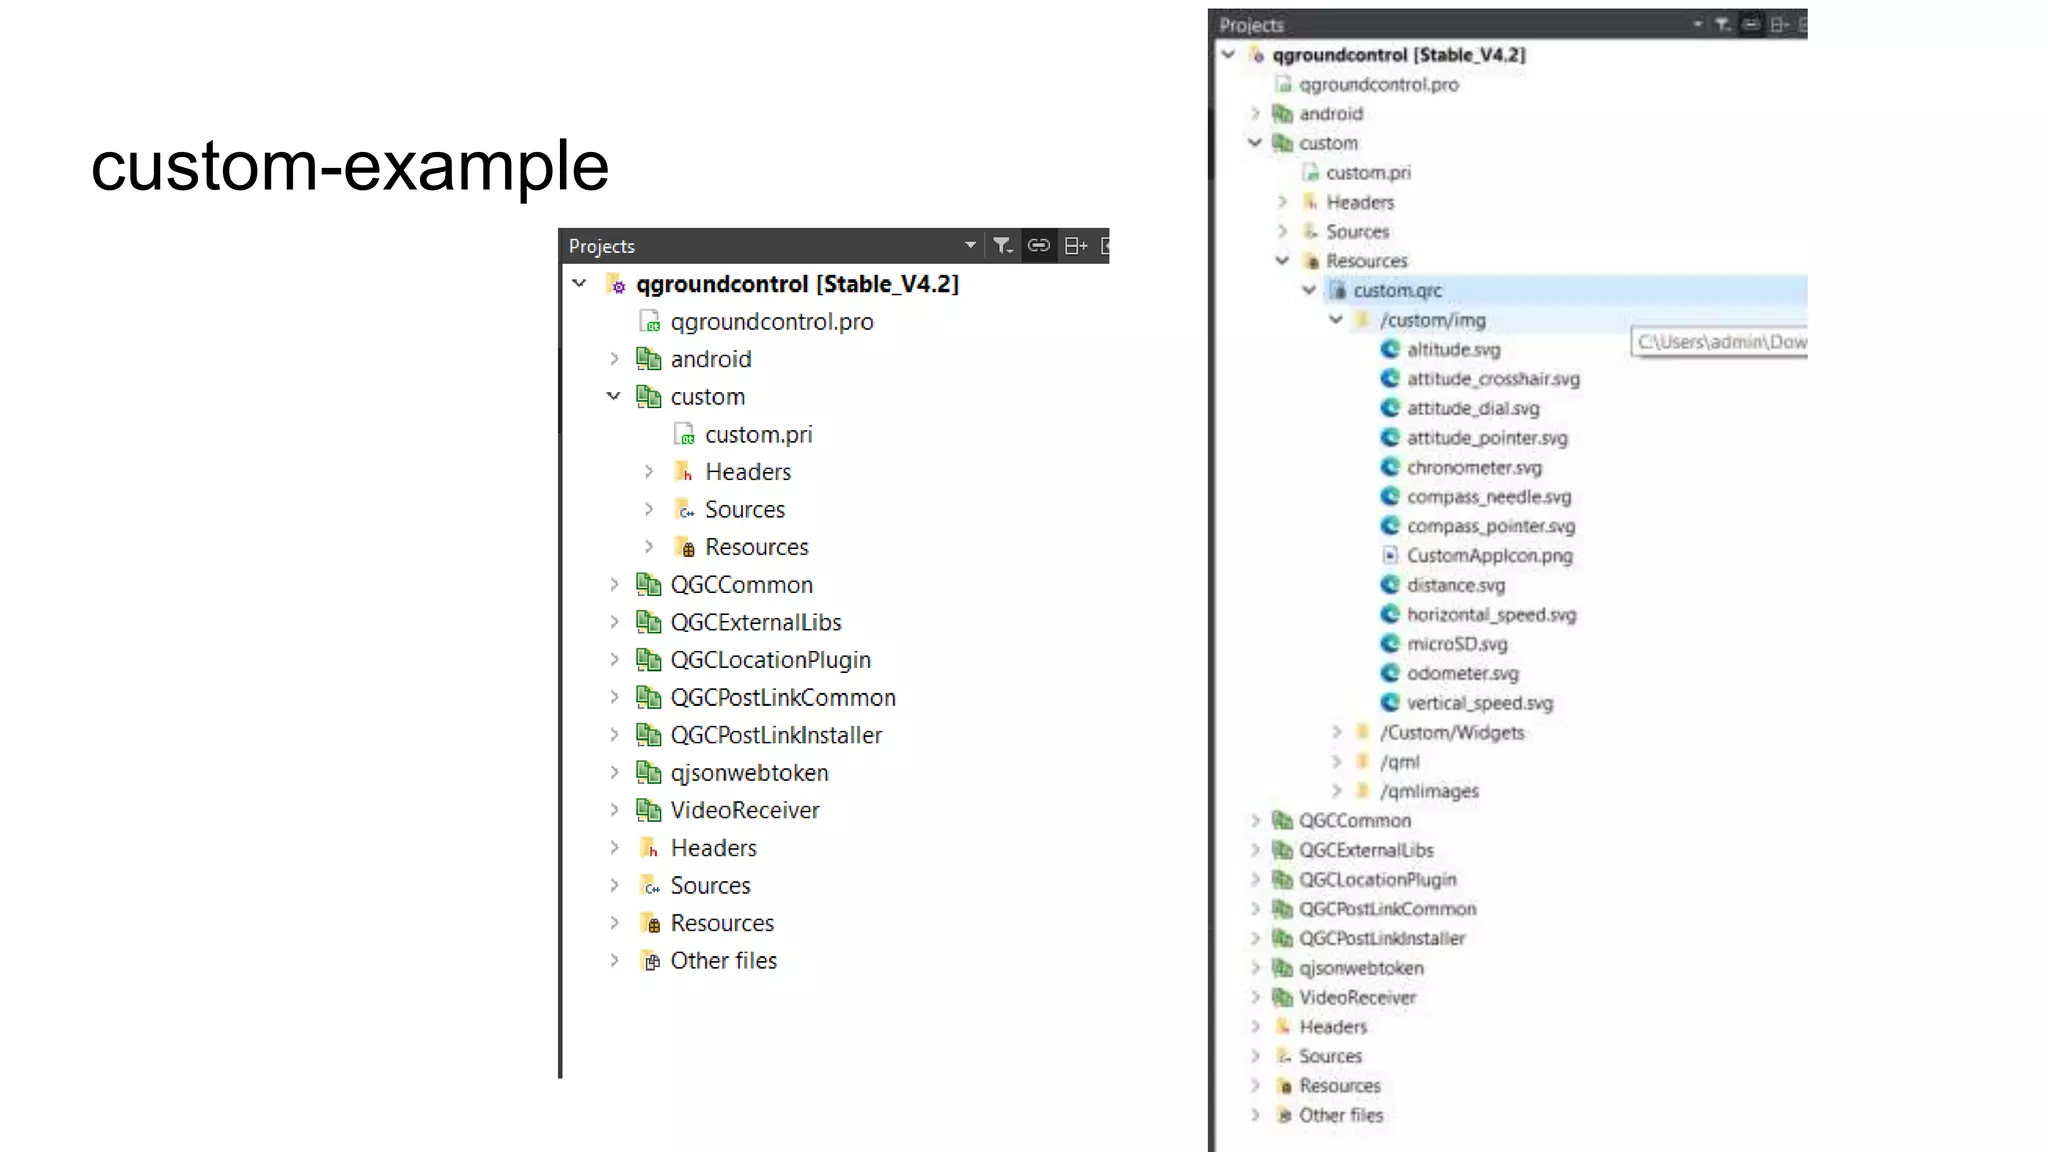
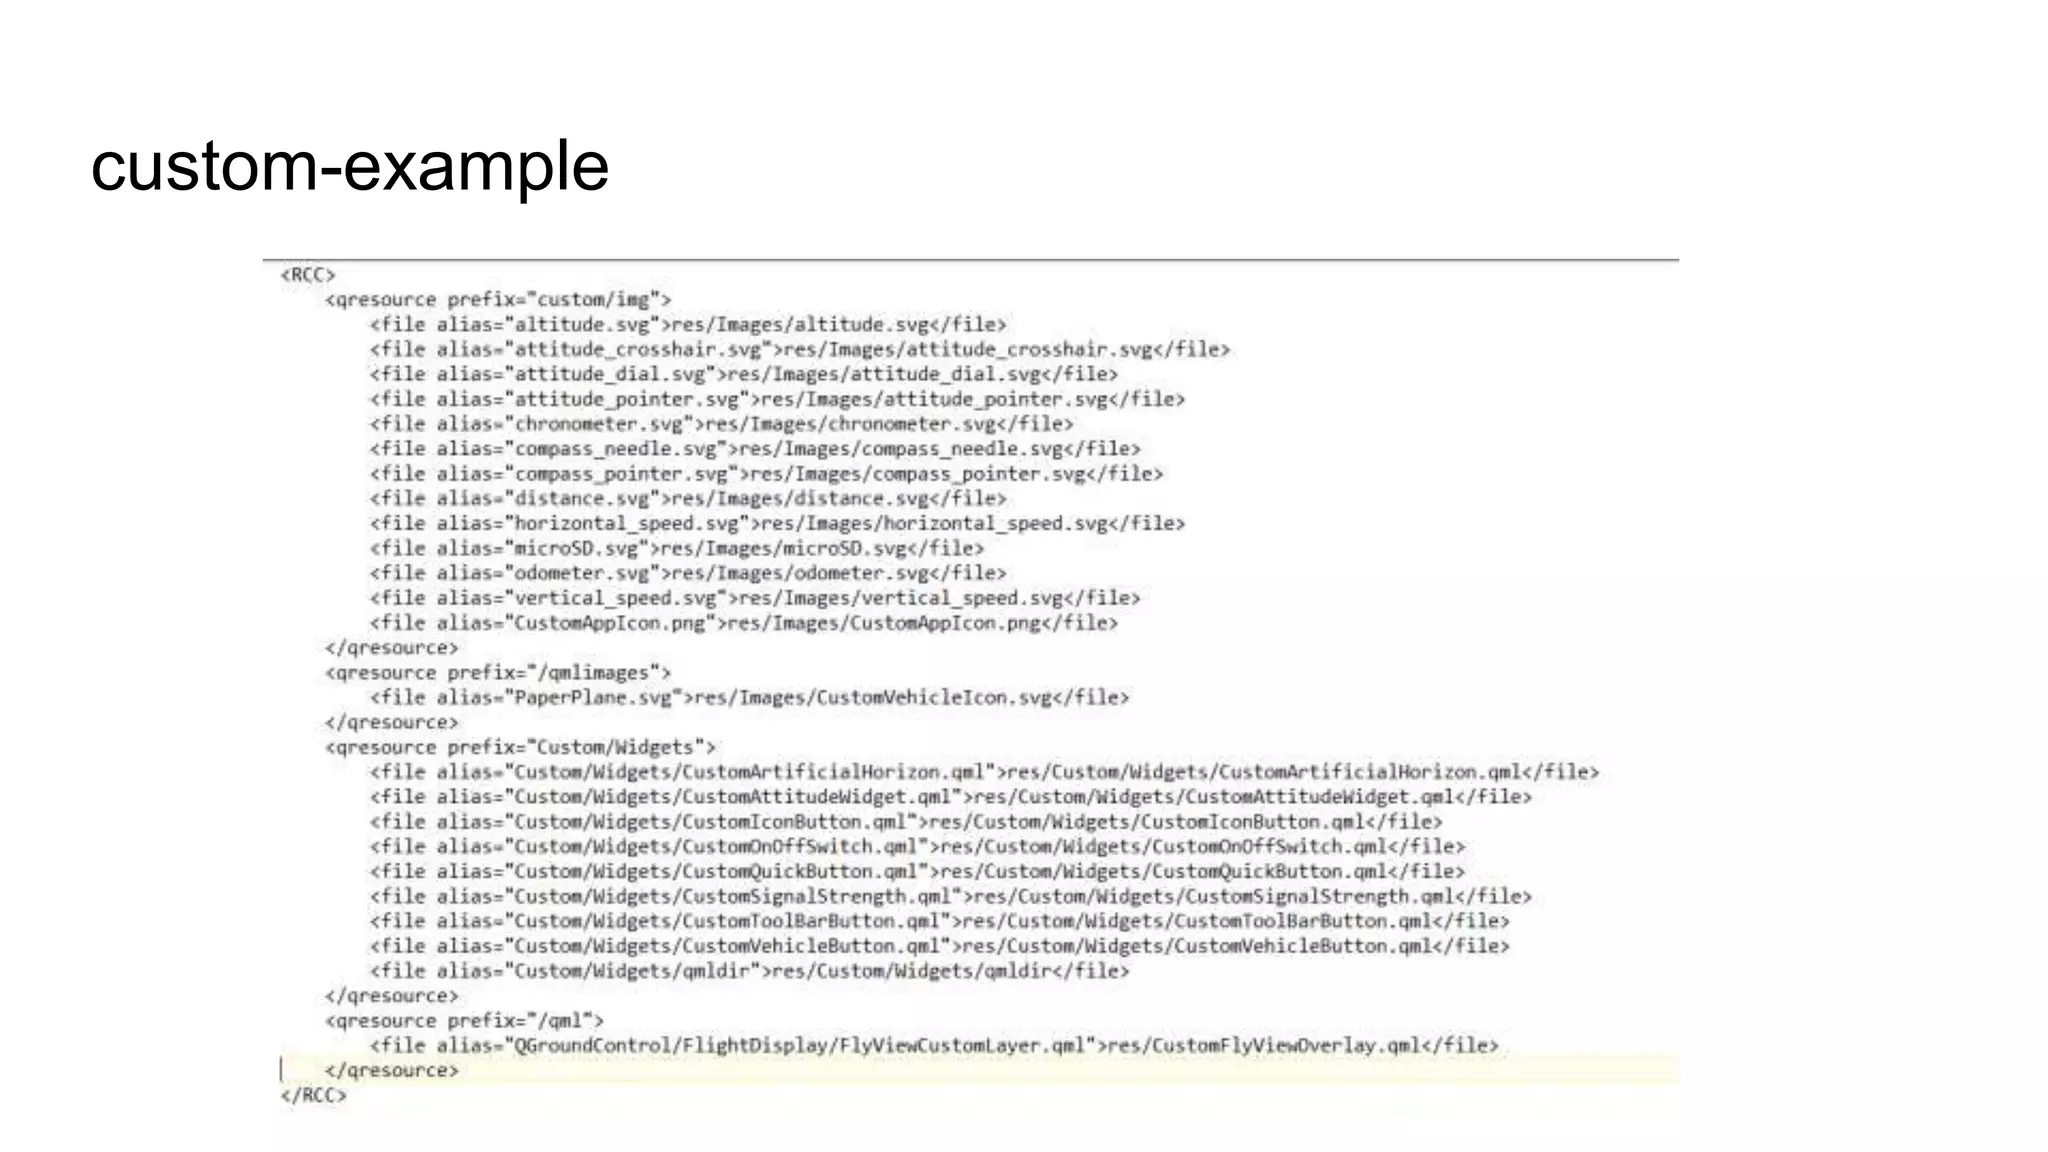
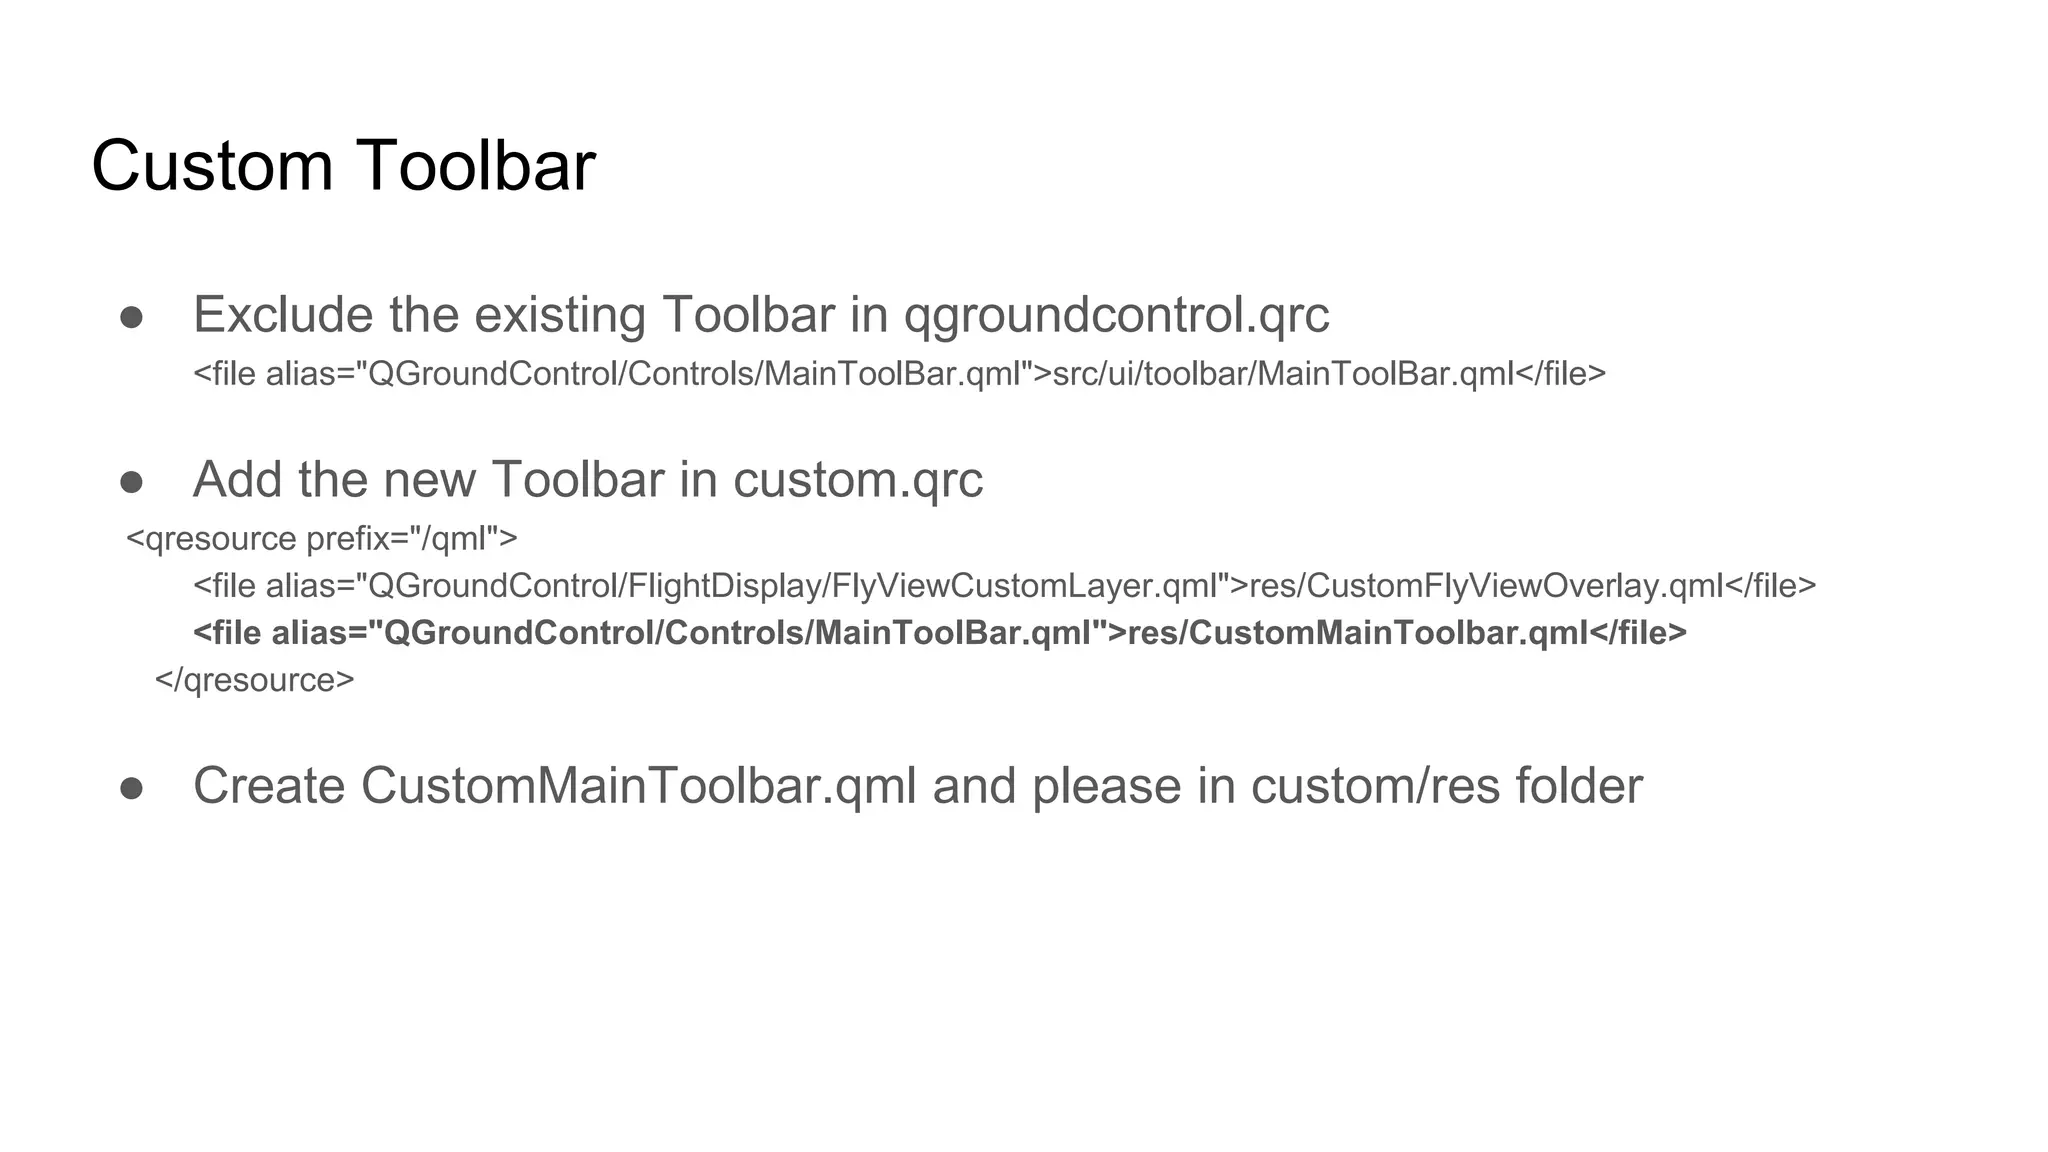
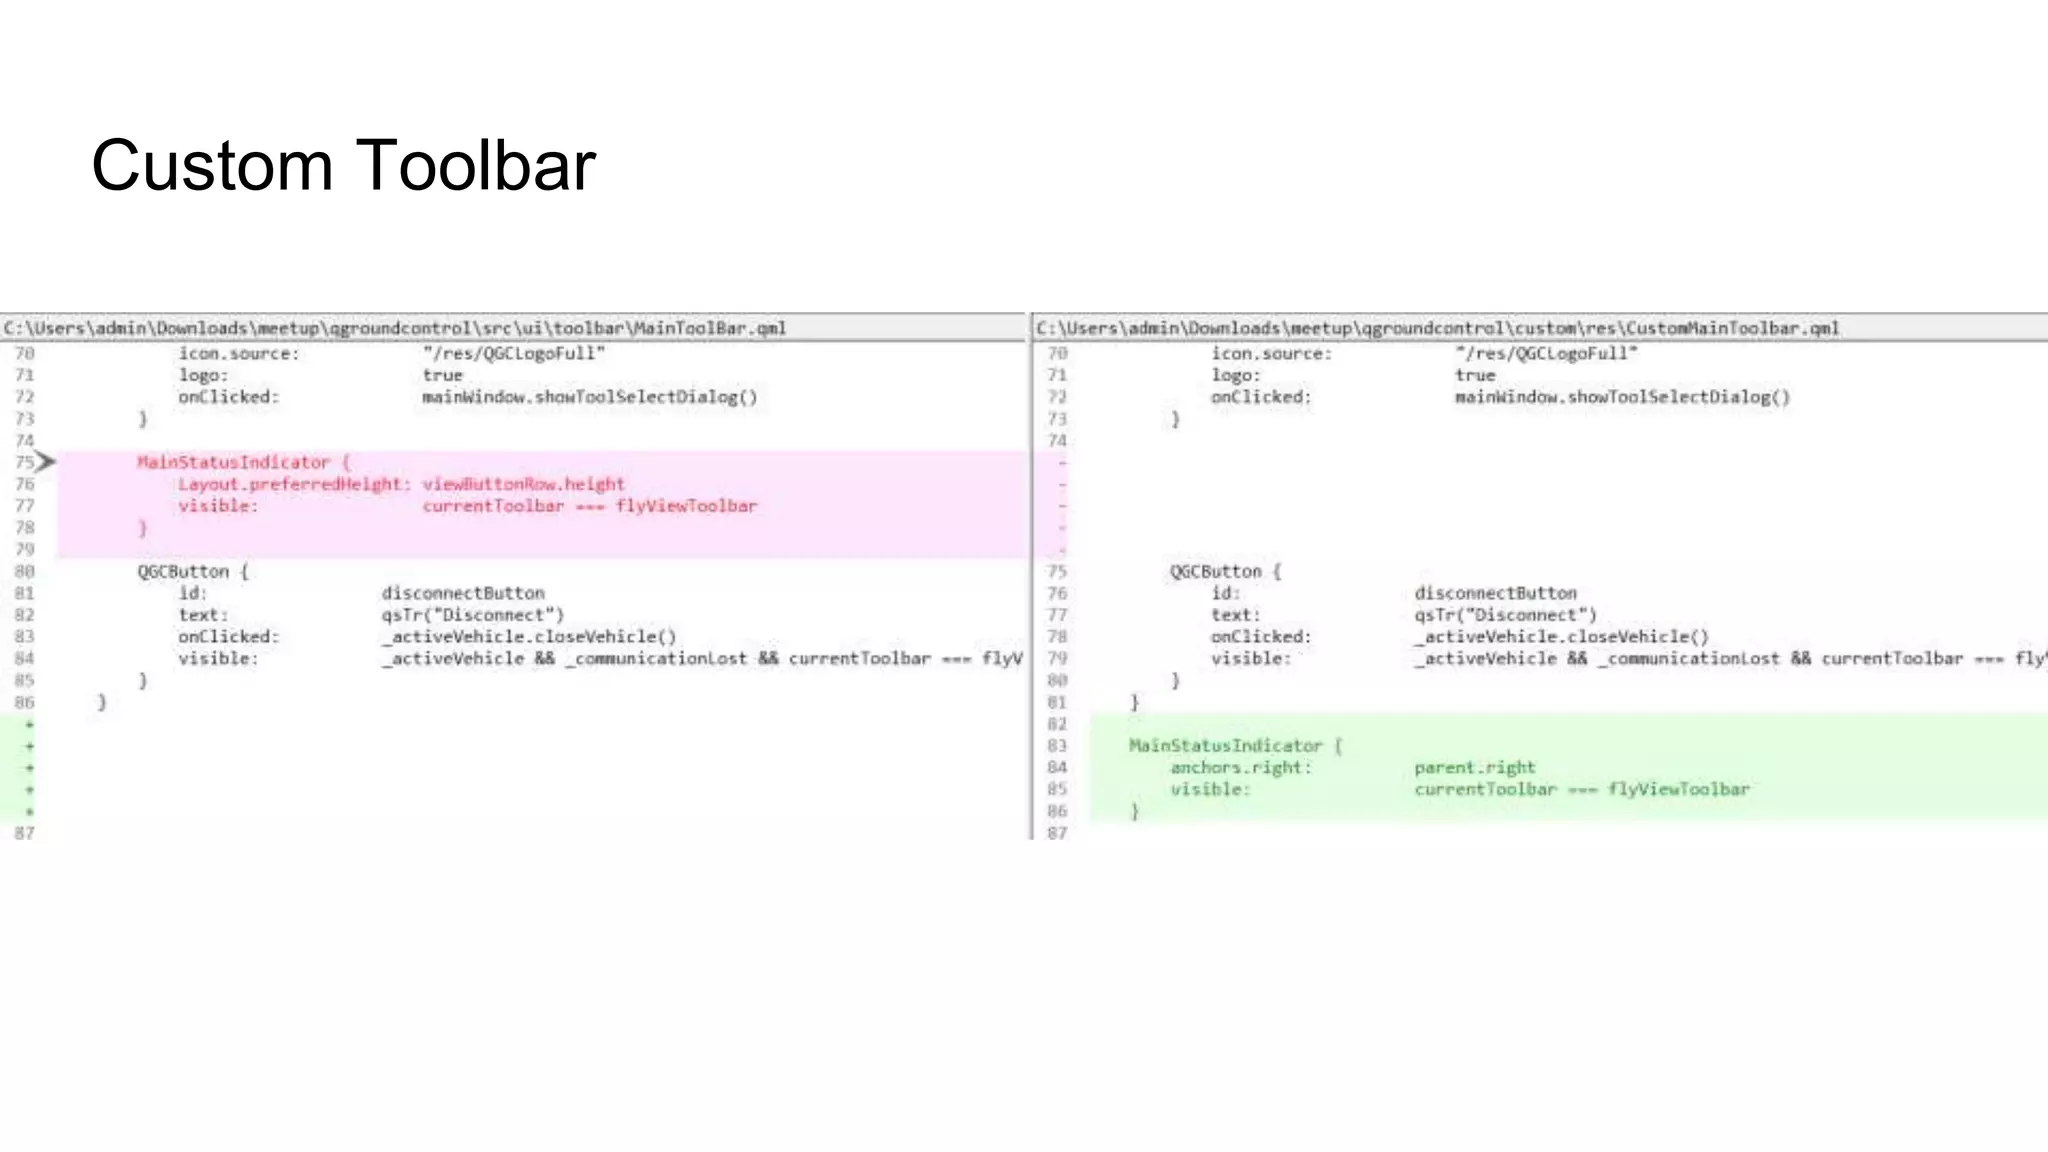
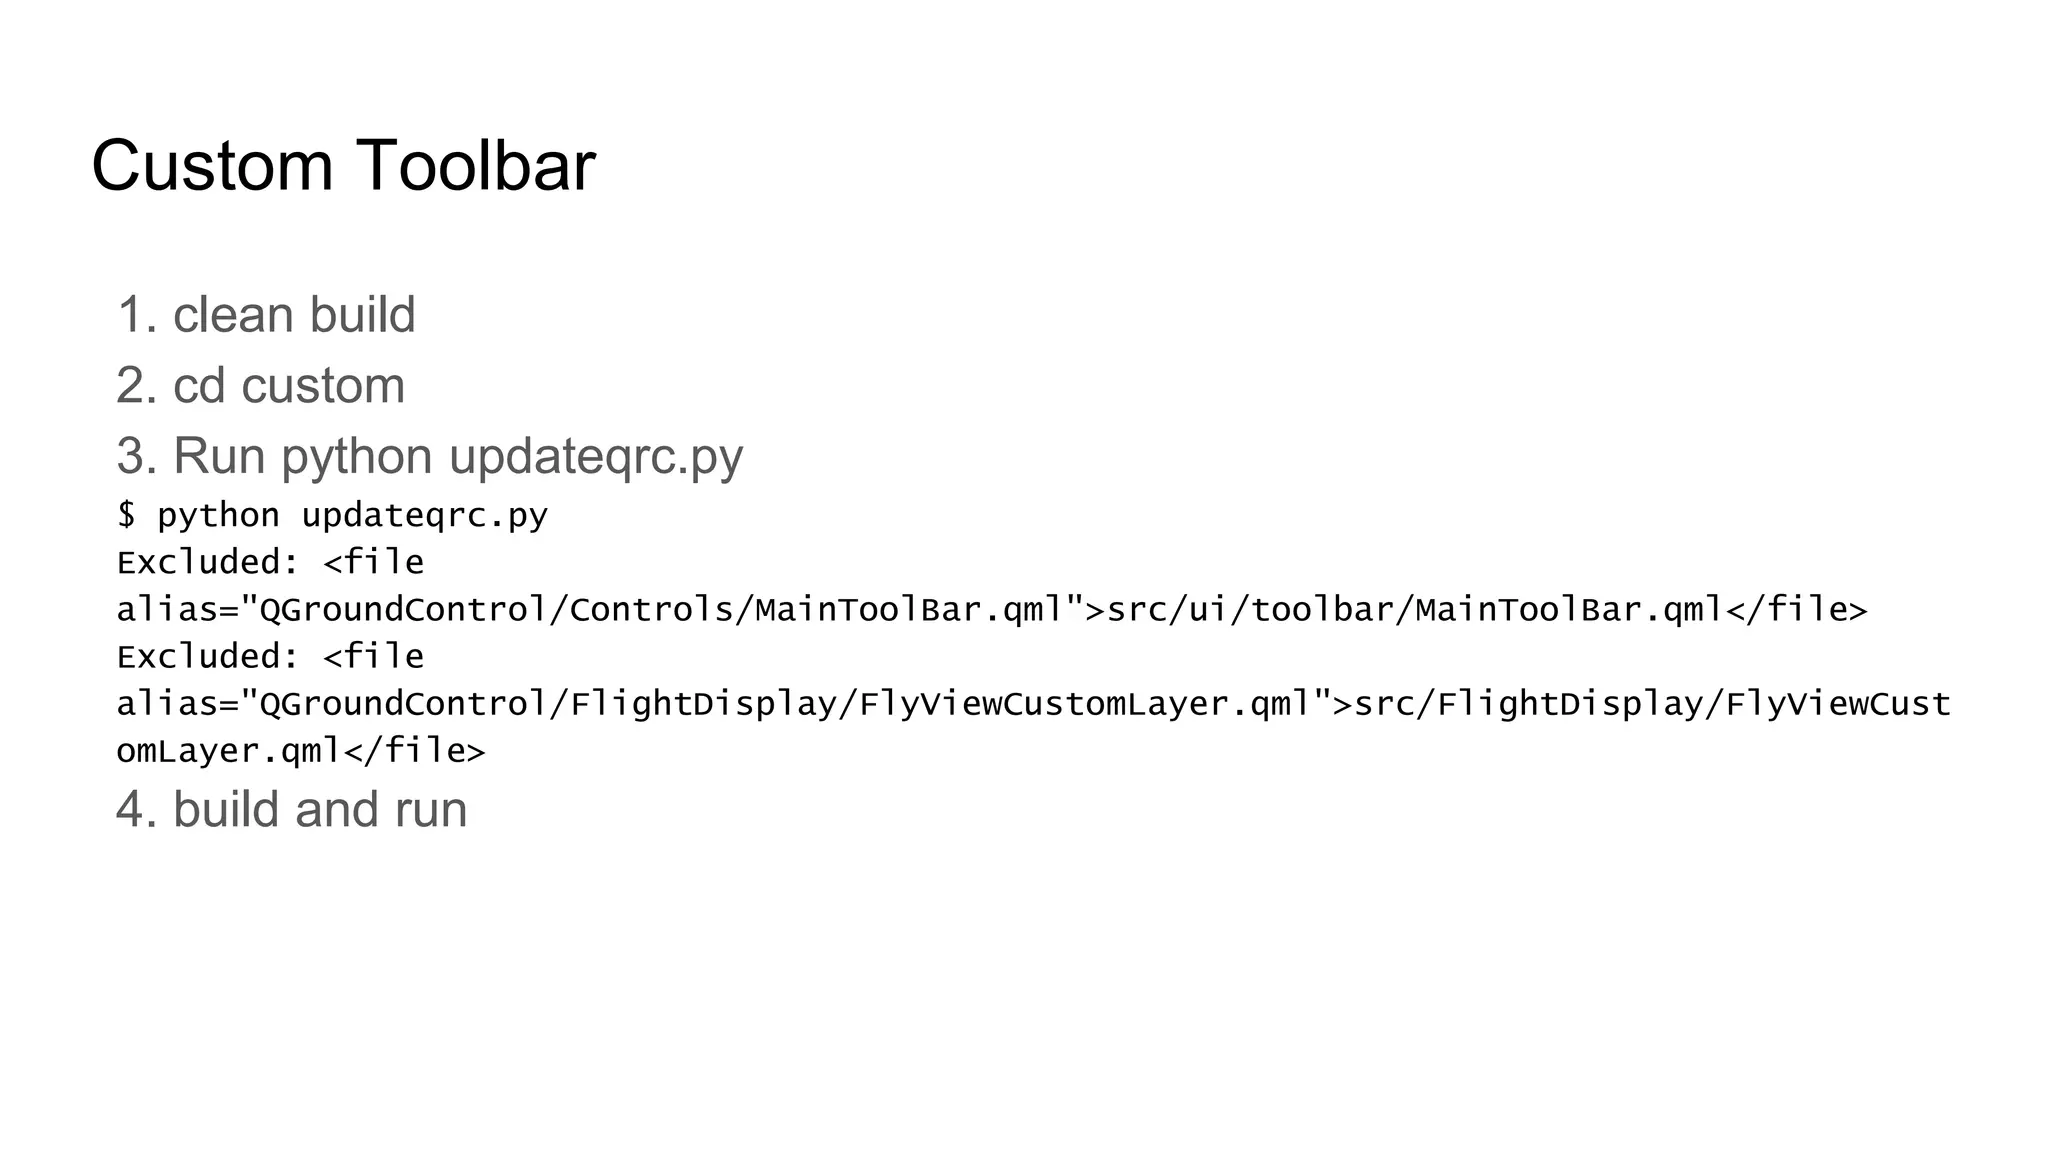
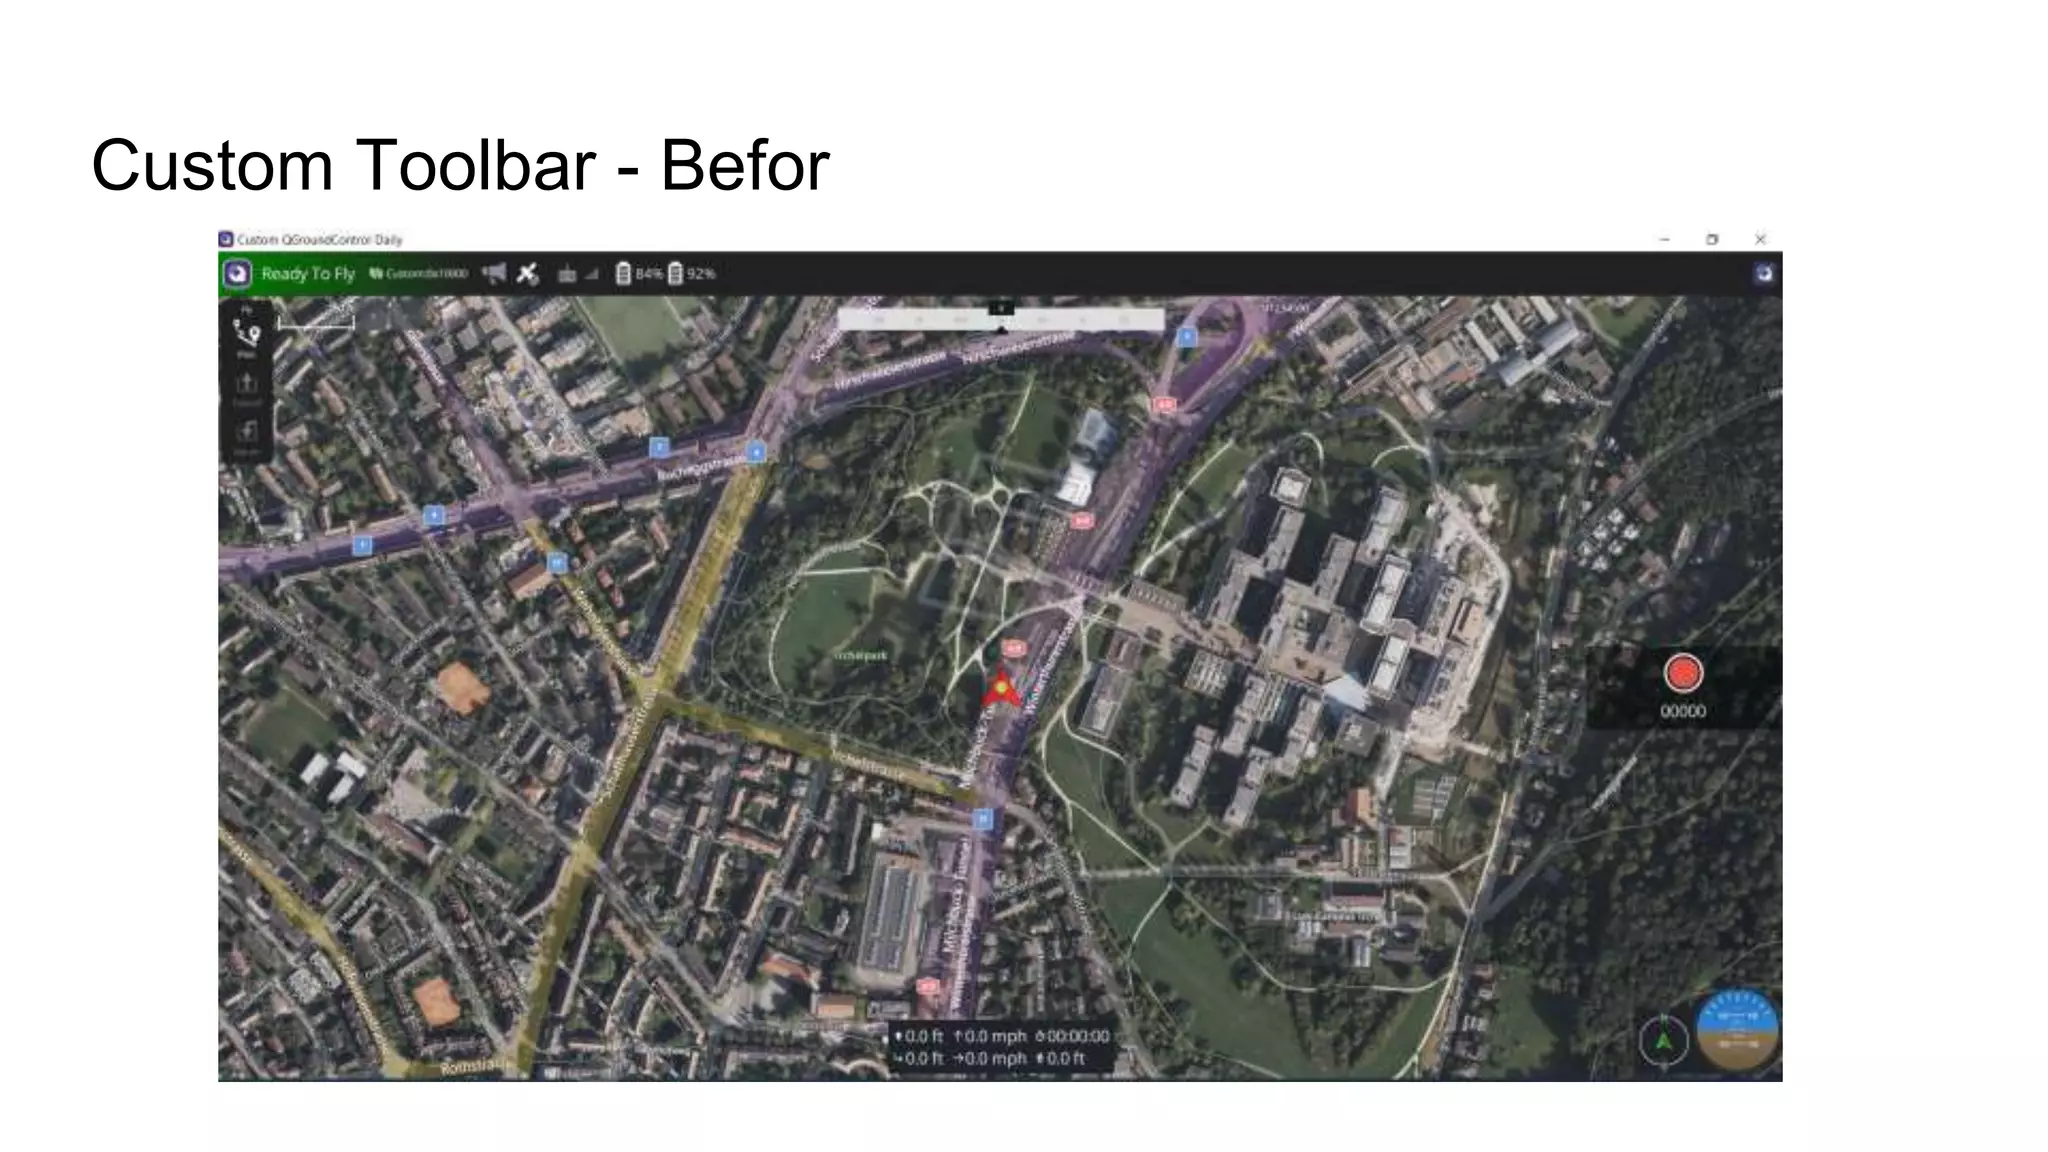
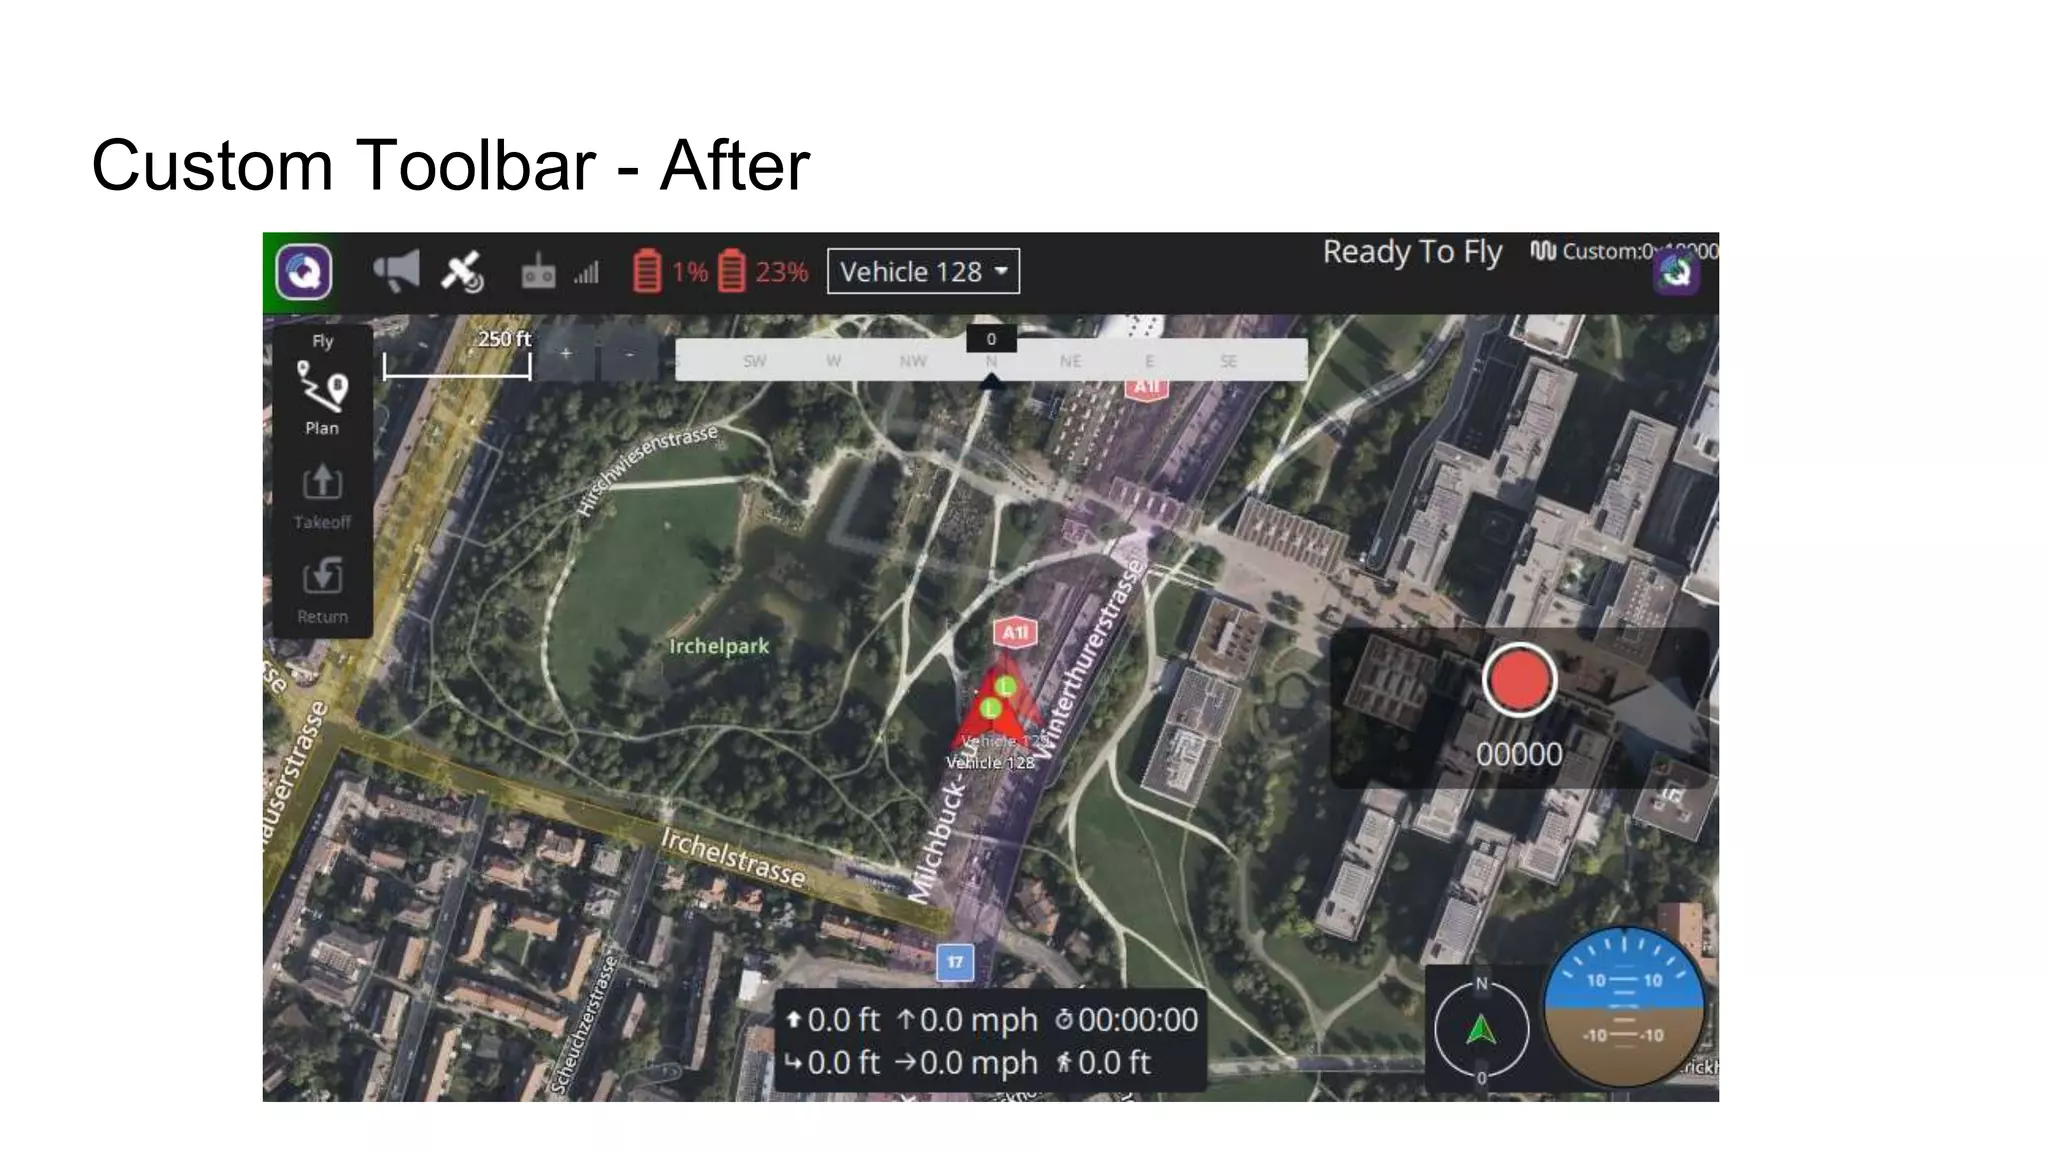
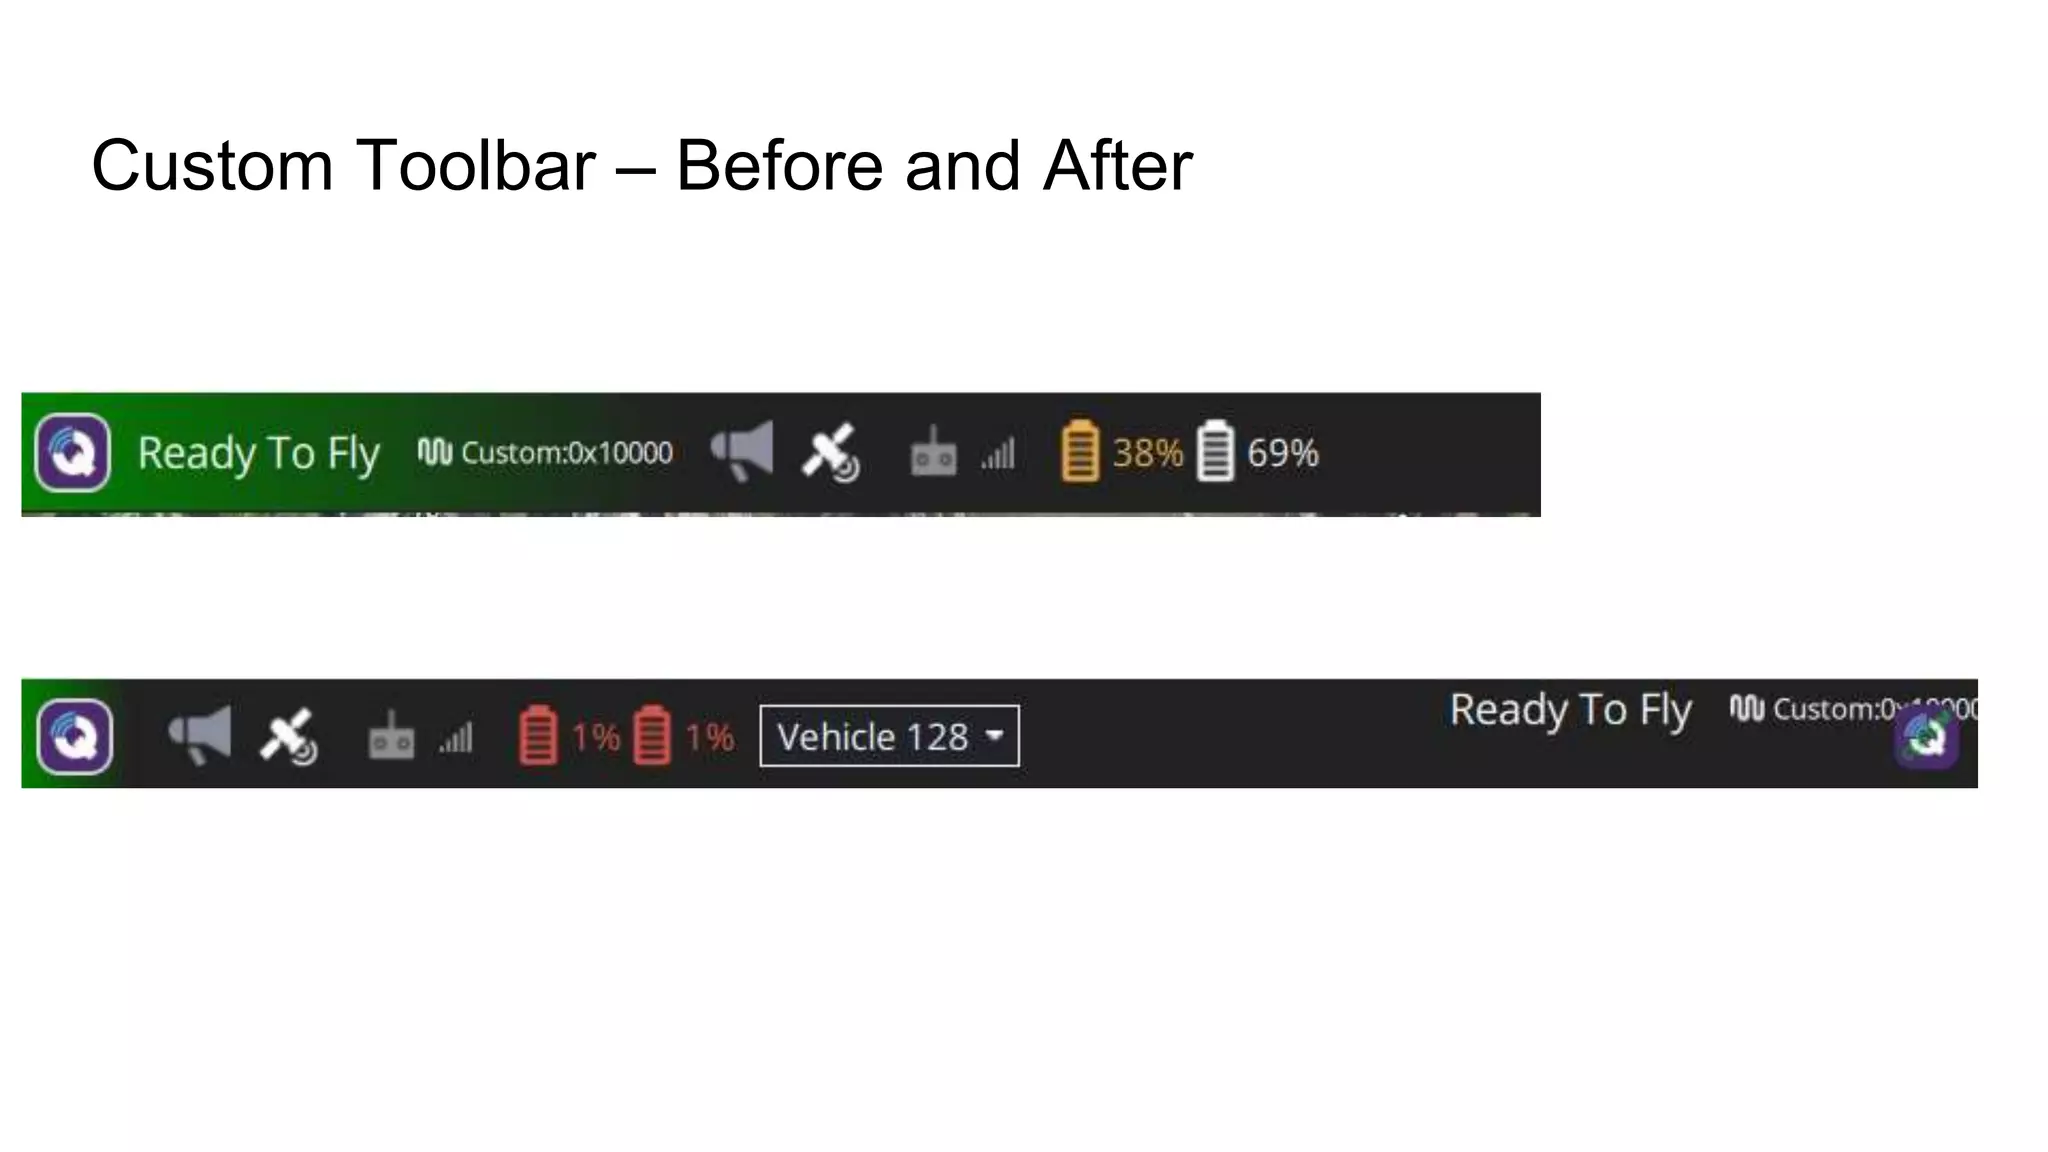
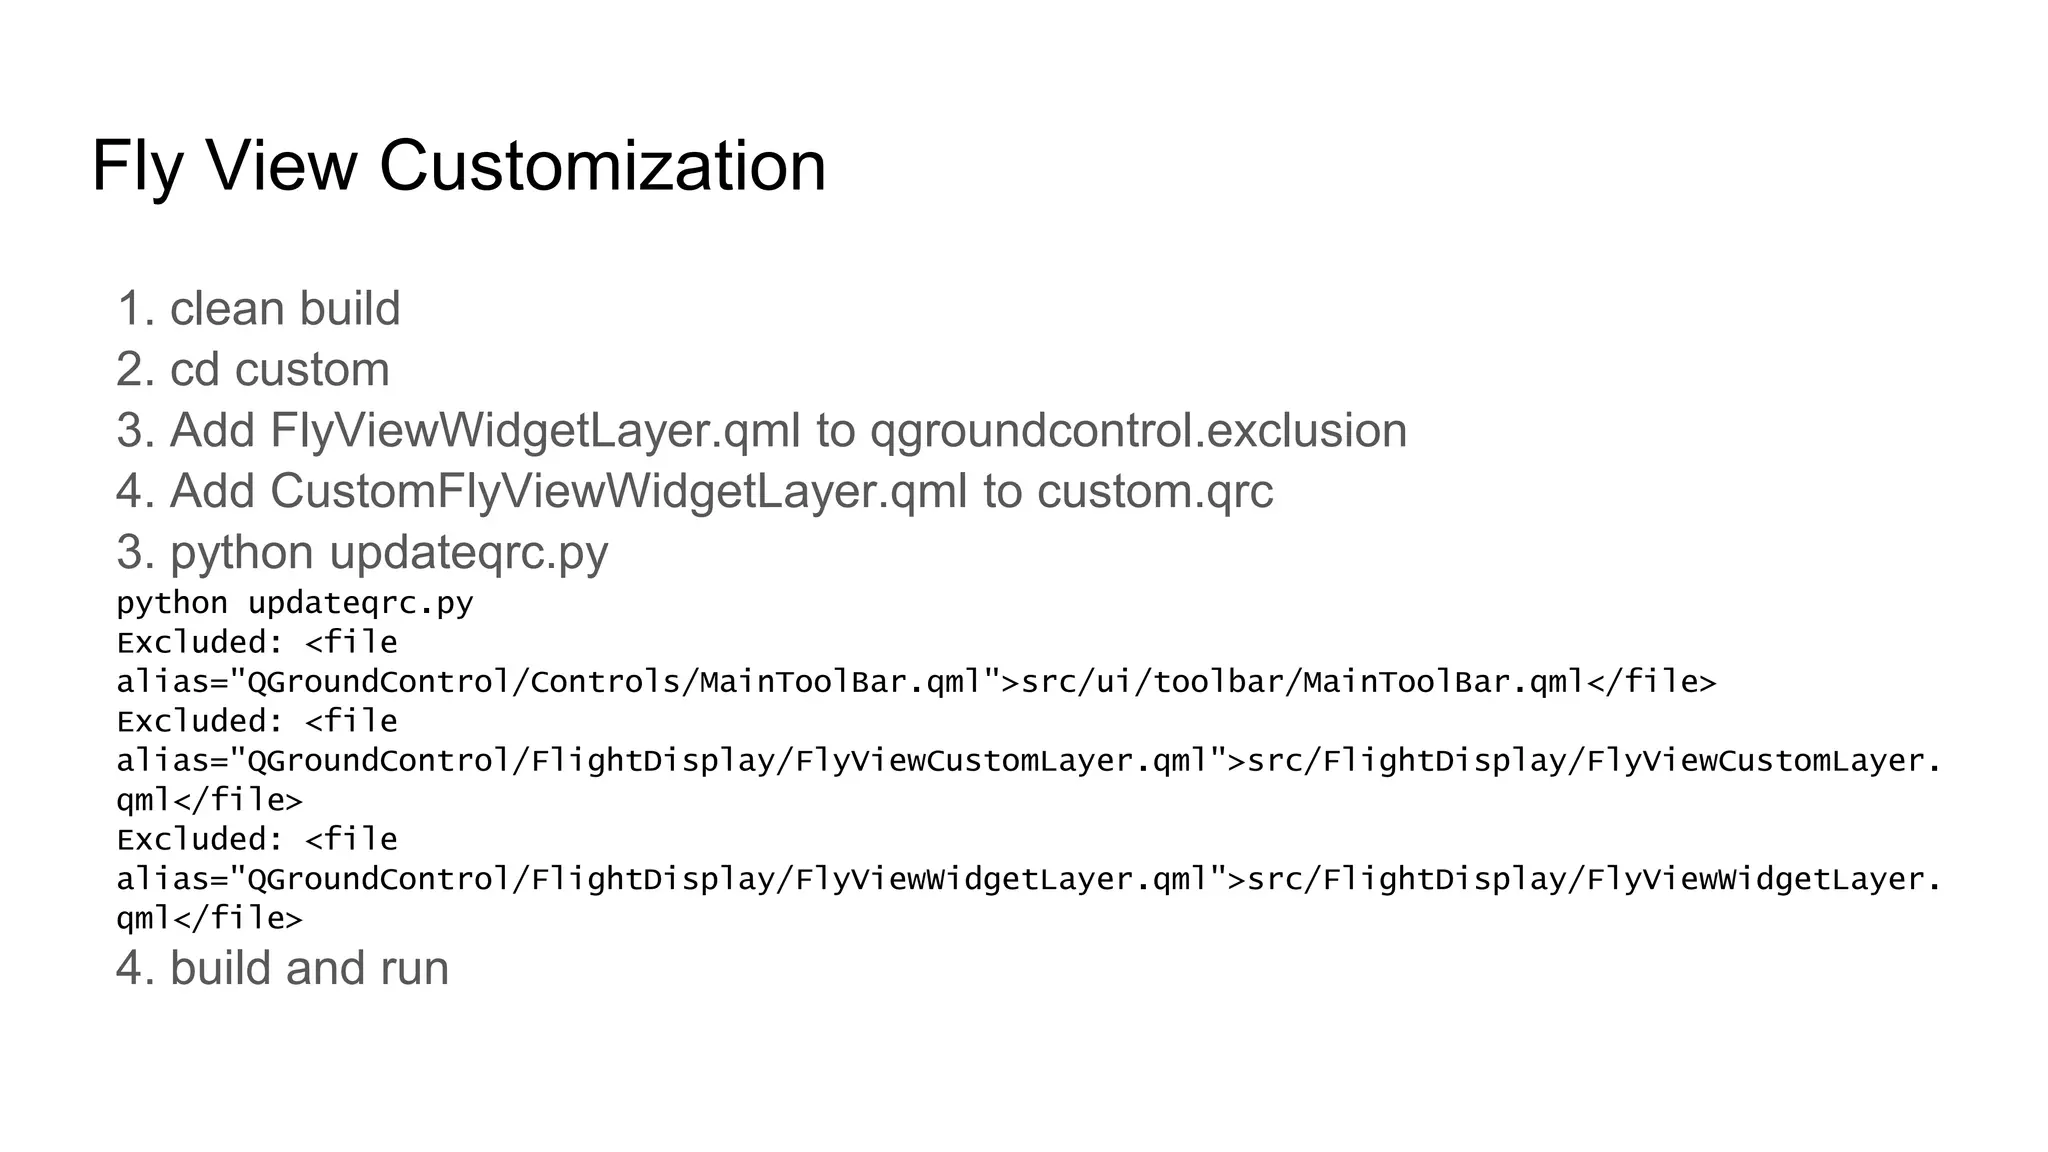
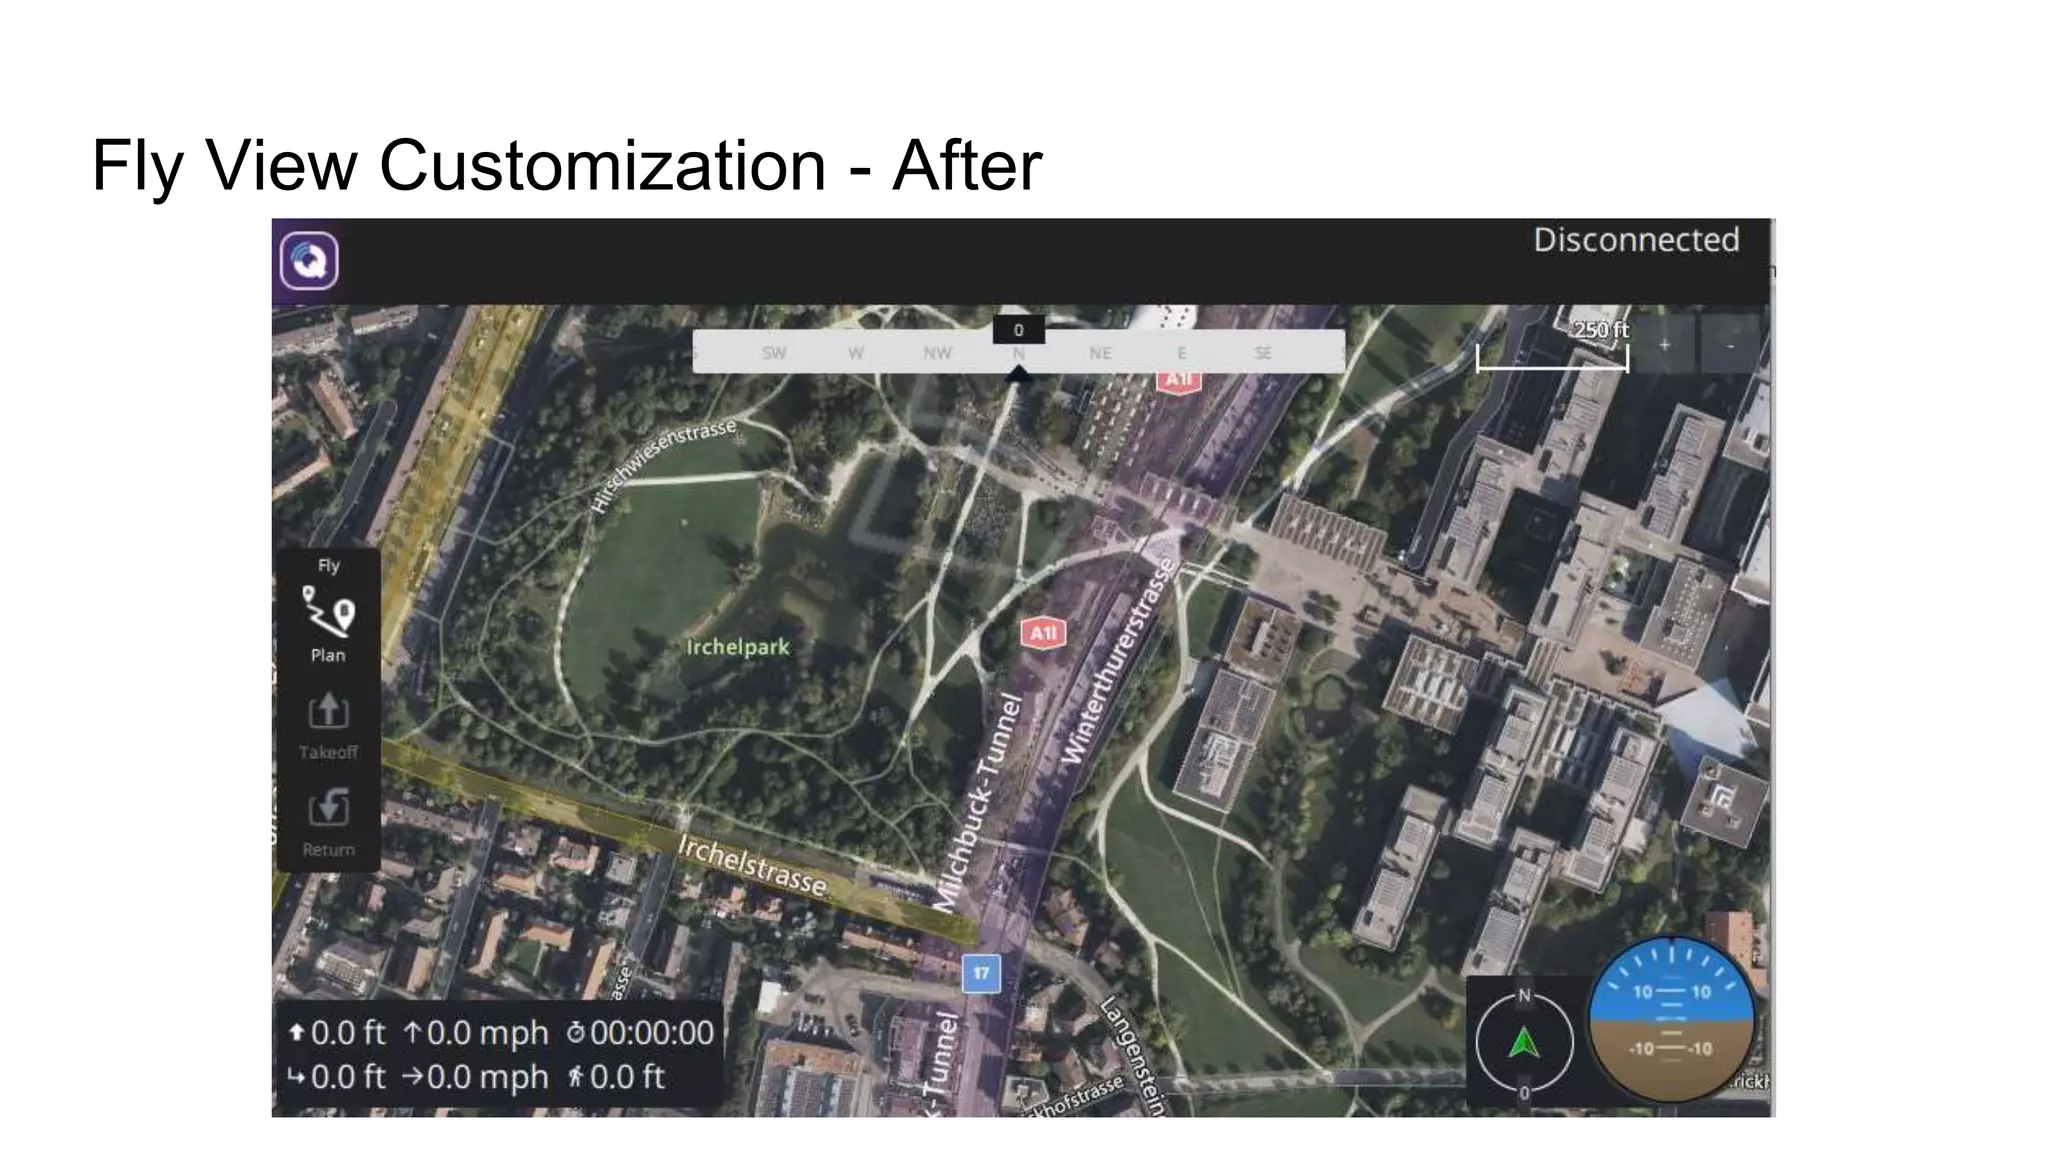
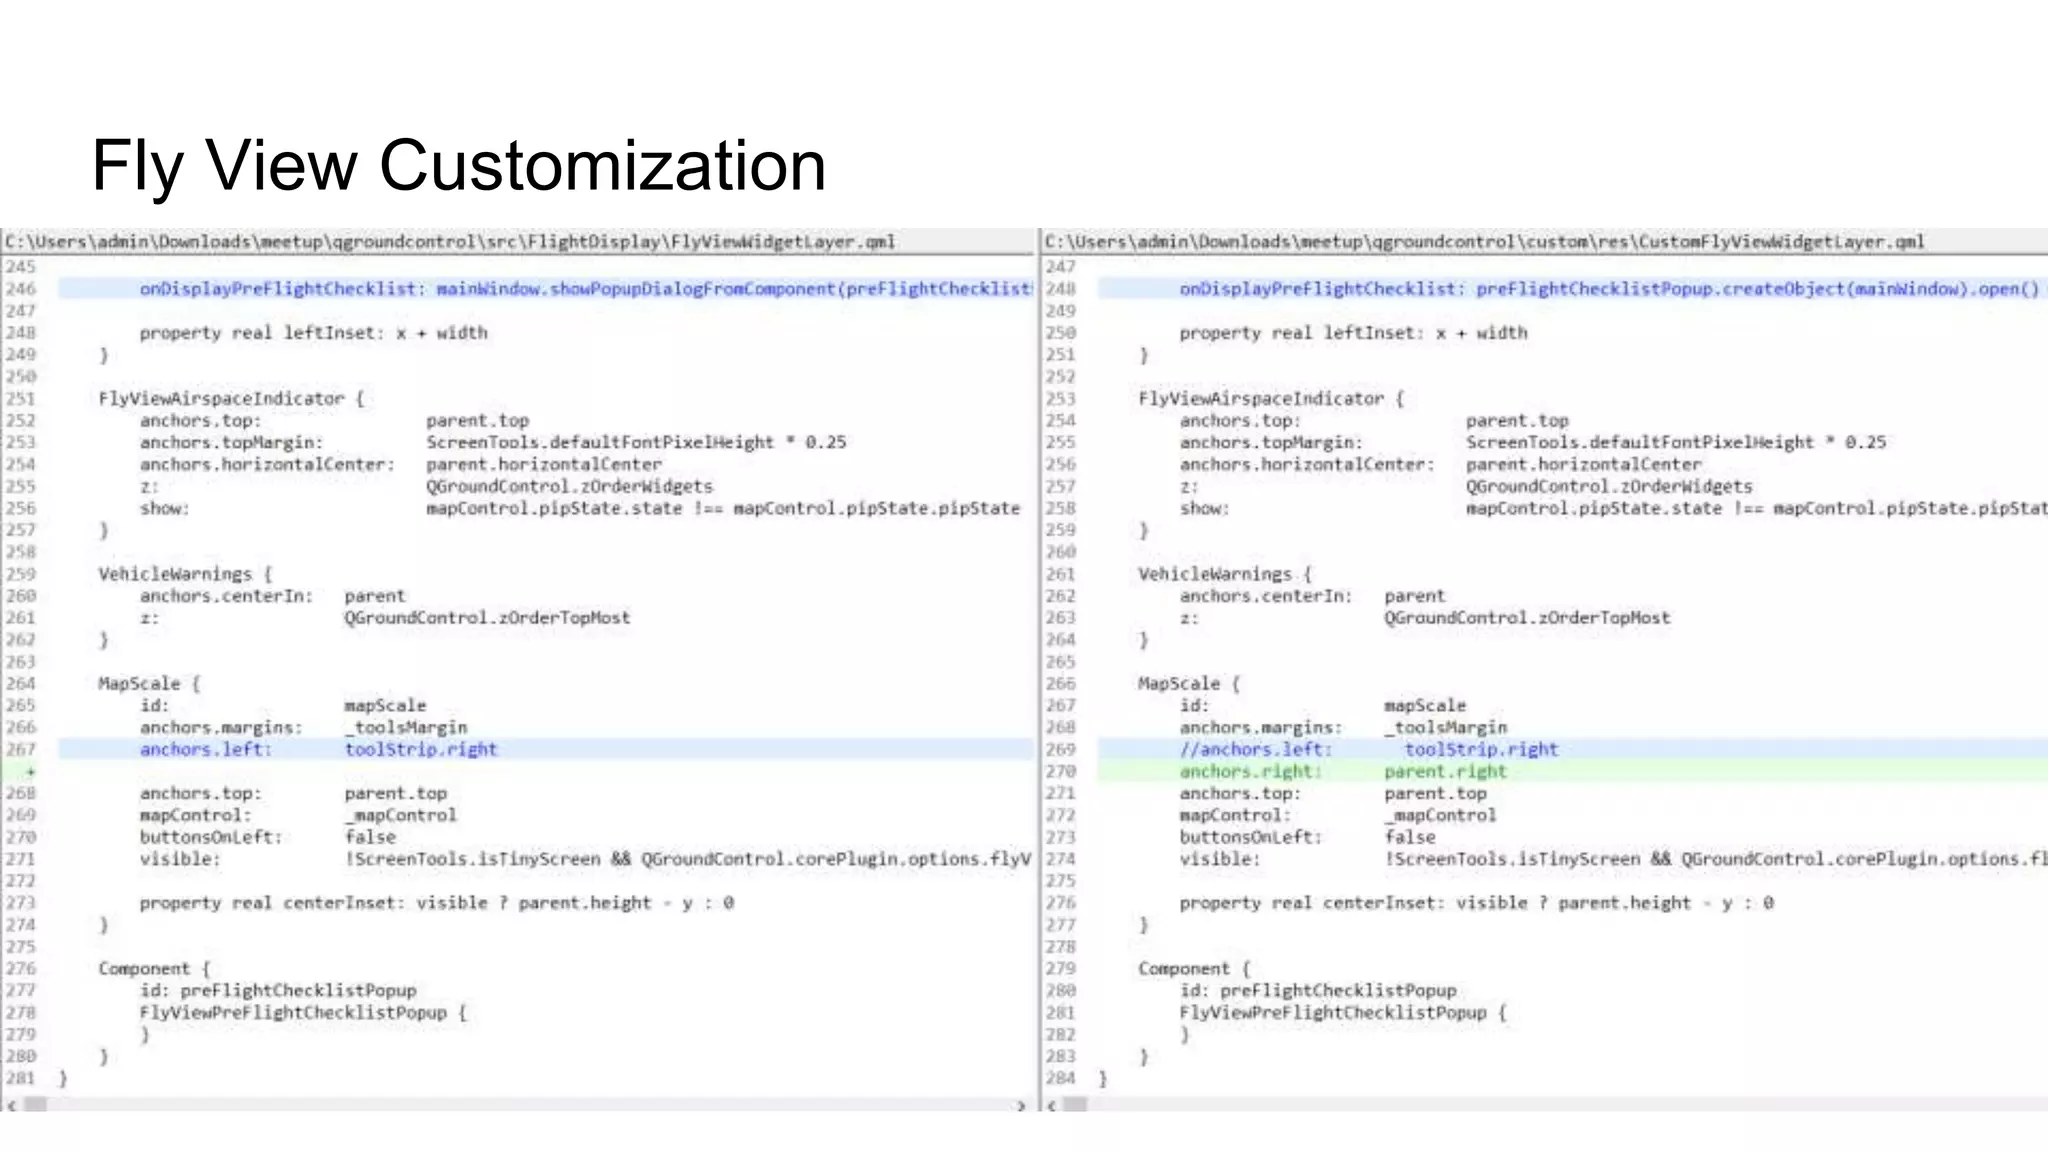
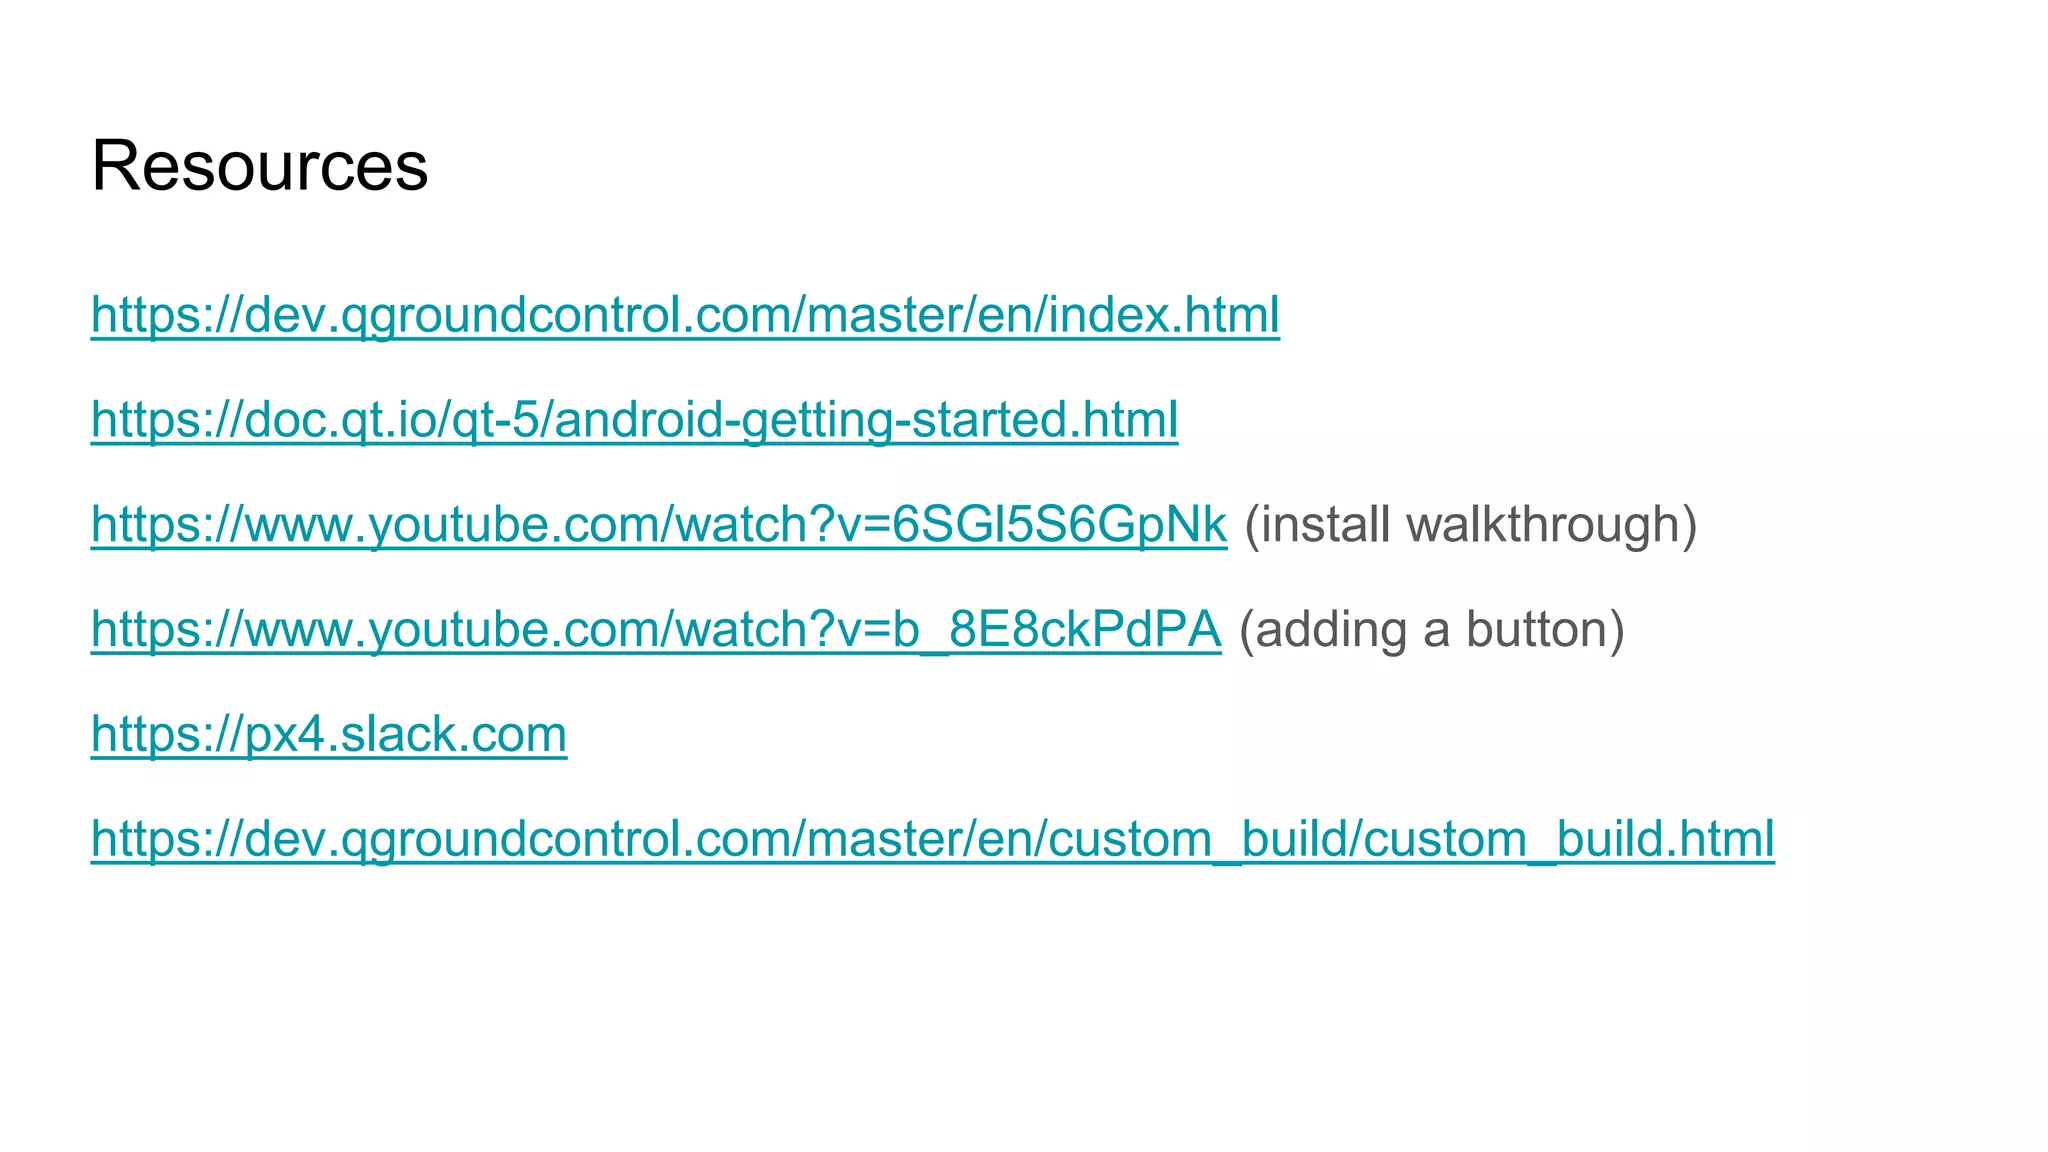
QGroundControl
Drone Software July 22 Meetup
Godfrey Nolan
Open Source Cross Platform Ground Control System
QGC
Run’s on Android, Linux or Windows
Built on Qt platform
Pixhawk controller
Mavlink drones
Runs on Ardupilot or PX4 firmware
Quadcopters, Rovers, Tractors, VTOL planes etc.
Blue UAS
Today’s goal
Add some customizations to QGC
- 3 out of the box examples
- Hide settings (flight modes) from newbies
Working with Windows/PX4
Setup (Windows & Android)
1. Install Visual Studio 2019
a. Community Edition & Desktop development with C++
2. Install Qt Creator
a. Custom Installation 5.15.2
3. Install Android Studio
a. Install Android command line tools (latest)
b. Install CMake
c. Add Tablet Emulator
Qt Install
Download QGC code
git clone https://github.com/mavlink/qgroundcontrol --single-branch --branch Stable_V4.2
git submodule update –recursive
(or git module init/git module update if that doesn’t work)
Qt Creator
Orange Cube or NXP
Ardupilot PX4
QGC setup
Custom Project
1. Clean previous build
2. Change custom-example to custom
3. ‘python updateqrc.py’
4. Build
| custom.pri
| custom.qrc
| custom_deploy.pri
| InstrumentValueIcons.qrc
| qgcresources.exclusion
| qgcresources.qrc
| qgroundcontrol.exclusion
| qgroundcontrol.qrc
| README.jpg
| README.md
| updateinstrumentqrc.py
| updateqrc.py
|
+---android
| ---res
| +---drawable-hdpi
| | icon.png
...
|
+---deploy
| qgroundcontrol-start.sh
| qgroundcontrol.desktop
+---res
| | CustomFlyViewOverlay.qml
| |
| +---Custom
| | +---Camera
| | | qmldir
| | | ZoomControl.qml
| | |
| | ---Widgets
| | CustomArtificialHorizon.qml
| | CustomAttitudeWidget.qml
| | CustomIconButton.qml
| | CustomOnOffSwitch.qml
| | CustomQuickButton.qml
| | CustomSignalStrength.qml
| | CustomToolBarButton.qml
| | CustomVehicleButton.qml
| | qmldir
| |
| ---Images
| altitude.svg
| attitude_crosshair.svg
| attitude_dial.svg
| attitude_pointer.svg
| chronometer.svg
| compass_needle.svg
| compass_pointer.svg
| CustomAppIcon.png
| CustomVehicleIcon.svg
| distance.svg
| horizontal_speed.svg
| microSD.svg
| odometer.svg
| vertical_speed.svg
| void.png
|
---src
| CustomPlugin.cc
| CustomPlugin.h
|
+---AutoPilotPlugin
|
CustomAutoPilotPlugin.cc
|
CustomAutoPilotPlugin.h
|
---FirmwarePlugin
CustomFirmwarePlugin.cc
CustomFirmwarePlugin.h
CustomFirmwarePluginFactory.cc
CustomFirmwarePluginFactory.h
Out of the box
1. custom-example
2. First Run Prompts
3. Toolbar customization
4. Fly View customization
custom-example
1. rename custom-example to custom
2. clean build
3. cd custom
4. python updateqrc.py
Excluded: <file
alias="QGroundControl/FlightDisplay/FlyViewCustomLayer.qml">src/FlightDisplay/FlyViewCustomLayer.
qml</file>
5. build and run
custom-example
custom-example
custom-example
custom-example
Custom Toolbar
● Exclude the existing Toolbar in qgroundcontrol.qrc
<file alias="QGroundControl/Controls/MainToolBar.qml">src/ui/toolbar/MainToolBar.qml</file>
● Add the new Toolbar in custom.qrc
<qresource prefix="/qml">
<file alias="QGroundControl/FlightDisplay/FlyViewCustomLayer.qml">res/CustomFlyViewOverlay.qml</file>
<file alias="QGroundControl/Controls/MainToolBar.qml">res/CustomMainToolbar.qml</file>
</qresource>
● Create CustomMainToolbar.qml and please in custom/res folder
Custom Toolbar
Custom Toolbar
1. clean build
2. cd custom
3. Run python updateqrc.py
$ python updateqrc.py
Excluded: <file
alias="QGroundControl/Controls/MainToolBar.qml">src/ui/toolbar/MainToolBar.qml</file>
Excluded: <file
alias="QGroundControl/FlightDisplay/FlyViewCustomLayer.qml">src/FlightDisplay/FlyViewCust
omLayer.qml</file>
4. build and run
Custom Toolbar - Befor
Custom Toolbar - After
Custom Toolbar – Before and After
Fly View Customization
1. clean build
2. cd custom
3. Add FlyViewWidgetLayer.qml to qgroundcontrol.exclusion
4. Add CustomFlyViewWidgetLayer.qml to custom.qrc
3. python updateqrc.py
python updateqrc.py
Excluded: <file
alias="QGroundControl/Controls/MainToolBar.qml">src/ui/toolbar/MainToolBar.qml</file>
Excluded: <file
alias="QGroundControl/FlightDisplay/FlyViewCustomLayer.qml">src/FlightDisplay/FlyViewCustomLayer.
qml</file>
Excluded: <file
alias="QGroundControl/FlightDisplay/FlyViewWidgetLayer.qml">src/FlightDisplay/FlyViewWidgetLayer.
qml</file>
4. build and run
Fly View Customization - Before
Fly View Customization - After
Fly View Customization
Resources
https://dev.qgroundcontrol.com/master/en/index.html
https://doc.qt.io/qt-5/android-getting-started.html
https://www.youtube.com/watch?v=6SGl5S6GpNk (install walkthrough)
https://www.youtube.com/watch?v=b_8E8ckPdPA (adding a button)
https://px4.slack.com
https://dev.qgroundcontrol.com/master/en/custom_build/custom_build.html
Resources

Customising QGroundControl

  • 1.
    QGroundControl Drone Software July22 Meetup Godfrey Nolan
  • 2.
    Open Source CrossPlatform Ground Control System
  • 3.
    QGC Run’s on Android,Linux or Windows Built on Qt platform Pixhawk controller Mavlink drones Runs on Ardupilot or PX4 firmware Quadcopters, Rovers, Tractors, VTOL planes etc. Blue UAS
  • 4.
    Today’s goal Add somecustomizations to QGC - 3 out of the box examples - Hide settings (flight modes) from newbies Working with Windows/PX4
  • 5.
    Setup (Windows &Android) 1. Install Visual Studio 2019 a. Community Edition & Desktop development with C++ 2. Install Qt Creator a. Custom Installation 5.15.2 3. Install Android Studio a. Install Android command line tools (latest) b. Install CMake c. Add Tablet Emulator
  • 7.
  • 8.
    Download QGC code gitclone https://github.com/mavlink/qgroundcontrol --single-branch --branch Stable_V4.2 git submodule update –recursive (or git module init/git module update if that doesn’t work)
  • 9.
  • 10.
    Orange Cube orNXP Ardupilot PX4
  • 11.
  • 12.
    Custom Project 1. Cleanprevious build 2. Change custom-example to custom 3. ‘python updateqrc.py’ 4. Build
  • 13.
    | custom.pri | custom.qrc |custom_deploy.pri | InstrumentValueIcons.qrc | qgcresources.exclusion | qgcresources.qrc | qgroundcontrol.exclusion | qgroundcontrol.qrc | README.jpg | README.md | updateinstrumentqrc.py | updateqrc.py | +---android | ---res | +---drawable-hdpi | | icon.png ... | +---deploy | qgroundcontrol-start.sh | qgroundcontrol.desktop +---res | | CustomFlyViewOverlay.qml | | | +---Custom | | +---Camera | | | qmldir | | | ZoomControl.qml | | | | | ---Widgets | | CustomArtificialHorizon.qml | | CustomAttitudeWidget.qml | | CustomIconButton.qml | | CustomOnOffSwitch.qml | | CustomQuickButton.qml | | CustomSignalStrength.qml | | CustomToolBarButton.qml | | CustomVehicleButton.qml | | qmldir | | | ---Images | altitude.svg | attitude_crosshair.svg | attitude_dial.svg | attitude_pointer.svg | chronometer.svg | compass_needle.svg | compass_pointer.svg | CustomAppIcon.png | CustomVehicleIcon.svg | distance.svg | horizontal_speed.svg | microSD.svg | odometer.svg | vertical_speed.svg | void.png | ---src | CustomPlugin.cc | CustomPlugin.h | +---AutoPilotPlugin | CustomAutoPilotPlugin.cc | CustomAutoPilotPlugin.h | ---FirmwarePlugin CustomFirmwarePlugin.cc CustomFirmwarePlugin.h CustomFirmwarePluginFactory.cc CustomFirmwarePluginFactory.h
  • 14.
    | custom.pri | custom.qrc |custom_deploy.pri | InstrumentValueIcons.qrc | qgcresources.exclusion | qgcresources.qrc | qgroundcontrol.exclusion | qgroundcontrol.qrc | README.jpg | README.md | updateinstrumentqrc.py | updateqrc.py | +---android | ---res | +---drawable-hdpi | | icon.png ... | +---deploy | qgroundcontrol-start.sh | qgroundcontrol.desktop +---res | | CustomFlyViewOverlay.qml | | | +---Custom | | +---Camera | | | qmldir | | | ZoomControl.qml | | | | | ---Widgets | | CustomArtificialHorizon.qml | | CustomAttitudeWidget.qml | | CustomIconButton.qml | | CustomOnOffSwitch.qml | | CustomQuickButton.qml | | CustomSignalStrength.qml | | CustomToolBarButton.qml | | CustomVehicleButton.qml | | qmldir | | | ---Images | altitude.svg | attitude_crosshair.svg | attitude_dial.svg | attitude_pointer.svg | chronometer.svg | compass_needle.svg | compass_pointer.svg | CustomAppIcon.png | CustomVehicleIcon.svg | distance.svg | horizontal_speed.svg | microSD.svg | odometer.svg | vertical_speed.svg | void.png | ---src | CustomPlugin.cc | CustomPlugin.h | +---AutoPilotPlugin | CustomAutoPilotPlugin.cc | CustomAutoPilotPlugin.h | ---FirmwarePlugin CustomFirmwarePlugin.cc CustomFirmwarePlugin.h CustomFirmwarePluginFactory.cc CustomFirmwarePluginFactory.h
  • 15.
    Out of thebox 1. custom-example 2. First Run Prompts 3. Toolbar customization 4. Fly View customization
  • 16.
    custom-example 1. rename custom-exampleto custom 2. clean build 3. cd custom 4. python updateqrc.py Excluded: <file alias="QGroundControl/FlightDisplay/FlyViewCustomLayer.qml">src/FlightDisplay/FlyViewCustomLayer. qml</file> 5. build and run
  • 17.
  • 18.
  • 19.
  • 20.
  • 21.
    Custom Toolbar ● Excludethe existing Toolbar in qgroundcontrol.qrc <file alias="QGroundControl/Controls/MainToolBar.qml">src/ui/toolbar/MainToolBar.qml</file> ● Add the new Toolbar in custom.qrc <qresource prefix="/qml"> <file alias="QGroundControl/FlightDisplay/FlyViewCustomLayer.qml">res/CustomFlyViewOverlay.qml</file> <file alias="QGroundControl/Controls/MainToolBar.qml">res/CustomMainToolbar.qml</file> </qresource> ● Create CustomMainToolbar.qml and please in custom/res folder
  • 22.
  • 23.
    Custom Toolbar 1. cleanbuild 2. cd custom 3. Run python updateqrc.py $ python updateqrc.py Excluded: <file alias="QGroundControl/Controls/MainToolBar.qml">src/ui/toolbar/MainToolBar.qml</file> Excluded: <file alias="QGroundControl/FlightDisplay/FlyViewCustomLayer.qml">src/FlightDisplay/FlyViewCust omLayer.qml</file> 4. build and run
  • 24.
  • 25.
  • 26.
    Custom Toolbar –Before and After
  • 27.
    Fly View Customization 1.clean build 2. cd custom 3. Add FlyViewWidgetLayer.qml to qgroundcontrol.exclusion 4. Add CustomFlyViewWidgetLayer.qml to custom.qrc 3. python updateqrc.py python updateqrc.py Excluded: <file alias="QGroundControl/Controls/MainToolBar.qml">src/ui/toolbar/MainToolBar.qml</file> Excluded: <file alias="QGroundControl/FlightDisplay/FlyViewCustomLayer.qml">src/FlightDisplay/FlyViewCustomLayer. qml</file> Excluded: <file alias="QGroundControl/FlightDisplay/FlyViewWidgetLayer.qml">src/FlightDisplay/FlyViewWidgetLayer. qml</file> 4. build and run
  • 28.
  • 29.
  • 30.
  • 31.
  • 32.

Editor's Notes

  • #4 Very different from the SDK’s we’ve looked at before, such as DJI SDK or Parrot SDK. We can still customise it, but we’re working with an already built system. There’s no reason why you couldn’t build your own GCS using Mavlink SDK or MAVSDK
  • #6 Visual Studio gets you the C++ compiler QT Creator is our IDE Android Studio if we want to push it to Android phone or tablet
  • #7 Just using this to get the compiler - Qt does all the hard work
  • #8 Only download the MSVC 2019 64-bit, Qt Charts and Android This will take a while
  • #9 Don’t download the latest version, it’s probably not going to compile correctly Cd into directory and the do the git submodule recursive command
  • #10 Hit the hammer to build and hit the green arrow to start the windows version.
  • #11 Approx $450 for the orange cube NXP drone approx $350 with the telemetry module RDDRONE-FMUK66FMU Easiest way to get there is to go to hovergames.com
  • #12 With the orangecube connected via USB do the following Click on the Q->Vehicle Setup and then firmware - using the orange cube is straightfoward It’s not going to fly but it’s good enough to get us started
  • #13 This changes colors, couple other things but it does give us the framework to add our own customizations QML = QT Modeling Language Javascript like language Also uses a lot of C++ WE MAKE CHANGES IN THE CUSTOM FOLDER SO WE DON’T LOSE ANY UPSTREAM IMPROVEMENTS WHILE STILL KEEPING OUR BRANDING
  • #14 Here’s the directory structure of the custom directory We already know updateqrc.py tells the compiler to compile the custom application Custom Build Plugins The mechanisms for customizing QGC for a custom build is through the existing FirmwarePlugin, AutoPilotPlugin and QGCCorePlugin architectures. By creating subclasses of these plugins in your custom build you can change the behavior of QGC to suit your needs without needed to modify the upstream code. QGCCorePlugin This allows you to modify the parts of QGC which are not directly related to vehicle but are related to the QGC application itself. This includes things like application settings, color palettes, branding and so forth.
  • #15 Resource Overrides A "resource" in QGC source code terminology is anything found in the qgroundcontrol.qrc and qgcresources.qrc file. By overriding a resource you can replace it with your own version of it. This could be as simple as a single icon, or as complex as replacing an entire Vehicle Setup page of qml ui code. Exclusion Files The first step to overriding a resource is to "exclude" it from the standard portion of the upstream build. This means that you are going to provide that resource in your own custom build resource file(s). There are two files which achieve this: qgroundcontrol.exclusion and qgcresources.exclusion. They correspond directly with the *.qrc counterparts. In order to exclude a resource, copy the resource line from the .qrc file into the appropriate .exclusion file. Custom version of excluded resources You must include the custom version of the overriden resouce in you custom build resource file. The resource alias must exactly match the upstream alias. The name and actual location of the resource can be anywhere within your custom directory structure. Generating the new modified versions of standard QGC resource file This is done using the updateqrc.py python script. It will read the upstream qgroundcontrol.qrc and qgcresources.qrc file and the corresponding exclusion files and output new versions of these files in your custom directory. These new versions will not have the resources you specified to exclude in them. The build system for custom builds uses these generated files (if they exist) to build with instead of the upstream versions. The generated version of these file should be added to your repo. Also whenever you update the upstream portion of QGC in your custom repo you must re-run python updateqrc.py to generate new version of the files since the upstream resources may have changed.
  • #16 Each time do the following Clean the build Change custom-example to custom Make changes Run ‘python updateqrc.py’ Build
  • #18 Two choices instead of 3
  • #19 Each time do the following Clean the build Change custom-example to custom Make changes Run ‘python updateqrc.py’ Build
  • #21 custom.qrc
  • #23 Moved MainStatusIndicator to upper right hand corner (“Disconnected” → if no vehicle is connected) Can tinker with the logo button in upper left corner through editing the QGCToolBarButton “currentButton”