SlideShare a Scribd company logo
remkohdev 9/25/2016
Creating Sentiment Line Chart for the News with Watson, Python, and D3js
remkohde.com/2016/09/25/creating-sentiment-line-chart-for-the-news-with-watson-python-and-d3js/
Requirements:
You must have Python installed. Check to see if you have Python installed from the commandline:
python --version
Table of Contents:
1. Create a Starterapp
2. Git Clone and Setup
3. Create Additional Folders and Files
4. Commit and Push Changes to Repository, Build and Deploy
5. Create an AlchemyAPI service
6. Create a Cloudant NoSQL service
7. Add the Basic Workflow for Request-Response
8. Get News using AlchemyAPI
9. Create Helper Functions
10. Save Responses in Cloudant
11. Parse Response for D3js
12. Draw the Line Chart in D3js
You can import AlchemyAPI requests into Postman with this Postman collection.
The source code for the application can be viewed or cloned from Github.
1. Create a Starterapp
1. Go to Catalog > Boilerplates
2. Click the ‘Python Flask’ starterapp
3. For name enter -newssentiment
4. Go to Overview
5. Under ‘Continuous Integration’ click ‘Add GIT Repo and Pipeline’ to add a DevOps platform, select ‘Populate the repo with the starterapp packageand
enable Build & Deploy pipeline’ > Click Continue > Click ‘CLOSE’.
6. Click ‘EDIT CODE’.
7. The very first time you login to the ‘DevOps’ environment you will need to pick a username for the ‘DevOps’ environment.
8. In the left menu of icons, click the top folder icon, and click ‘Git URL’ to copy the Git repository url.
9. If you prefer to edit in the online editor in Bluemix, click ‘EDIT CODE’ button and then click the second pencil icon in the left menu of icons.
10. I will continue to work on localhost instead.
2. Git Clone and Setup
1. To work on your localhost, from the commandline clone the remote repository from bluemix DevOps to your localhos:
git clone https://hub.jazz.net/git/<username>/remkohdev-newssentiment
cd remkohdev-newssentiment
2. Setup the virtualenv and activate virtualenv:
virtualenv venv
. venv/bin/activate
3. install Python3
virtualenv -p python3 venv
4. Install flask package into the right runtime, i.e. ‘python3.5’ thus using ‘pip3.5’:
pip3.5 install flask
5. Run Flask as follows with ‘python3.5’:
export FLASK_APP=welcome.py
python3.5 -m flask run
Open a browser and go to http://localhost:5000. You should see the following startup app.
1/29
3. Create additional folders and files
Open the editor:
1. Open the ‘Procfile’ and verify the startup command to ‘web: python welcome.py’,
2. To create a new folder in the online editor, click: File > New > Folder from the top menu ‘templates’,
3. Create the following folders:
‘~/templates’
‘~/static/js’
‘~/static/js/d3js’
‘~/static/js/jquery’
‘~/static/js/jquery-validation’
‘~/mymodule’ , a module folder to hold custom packages.
4. To create a new file in the online editor, click: File > New > File,
5. Create the following files:
‘~/.gitignore’,
‘~/.cfignore’,
‘~/templates/index.html’,
‘~/templates/report.html’,
‘~/mymodule/myalchemyapi.py’,
‘~/mymodule/mycloudant.py’,
‘~/mymodule/__init__.py’ , to make the ‘~/mymodule’ folder a Python module you have to create an empty file named ‘__init__.py’.
6. I am using version 3 of D3js, though recently version 4 was published. Download and unzip ‘https://github.com/d3/d3/releases/download/v3.5.17/d3.zip’
to the ‘~/static/js/d3js’ folder.
In the online editor, you can import libraries via the import feature. Select the ‘~/static/js/d3js’ folder, then from the top menu, click File > Import > HTTP,
paste ‘https://github.com/d3/d3/releases/download/v3.5.17/d3.zip’ and click ‘Submit’,
7. Also download and install JQuery and JQuery-Validation.
Download ‘https://code.jquery.com/jquery-3.1.1.min.js’ to the ‘~/static/js/jquery’ folder.
In the online editor, select the ‘~/static/js/jquery’ folder, then from the top menu, click File > Import > HTTP, paste ‘https://code.jquery.com/jquery-
3.1.1.min.js’ and click ‘Submit’,
Download and unzip ‘https://github.com/jzaefferer/jquery-validation/releases/download/1.15.1/jquery-validation-1.15.1.zip’ to the
‘~/static/js/jquery-validation’ folder.
Select the ‘~/static/js/jquery-validation’ folder, then from the top menu, click File > Import > HTTP, paste ‘https://github.com/jzaefferer/jquery-
validation/releases/download/1.15.1/jquery-validation-1.15.1.zip’ and click ‘Submit’.
4. Commit and Push Changes to Repository, Build and Deploy
From localhost using git:
2/29
1. Add the following directories to ‘~/.gitignore’ and ‘~/.cfignore’
venv/
__pycache__/
2. Verify the files that have changed
git status
You should see
.gitignore
mymodule/
static/js/
templates/
3. Add the files to the git index
git add *
4. Commit the files for push to the remote master branch
git commit -m "setup"
5. And push the files to the remote master
git push
From localhost using the CloudFoundry cli:
1. Make the changes to ‘~/.gitignore’ and ‘~/.cfignore’ as above,
2. Make sure the cf cli is installed or install it from ‘https://github.com/cloudfoundry/cli/releases’,
3. Connect to Bluemix
cf api https://api.ng.bluemix.net
You will be asked to login with your Bluemix username (registration email) and password, and select a space.
4. Push changes to Bluemix
cf push
From the online editor:
1. In the left menu of icons, click the third Git icon,
2. In the right commit message box, type ‘init1’ and click ‘Commit’,
3. In the left, in the ‘Outgoing’ section, make sure the commits appear and click ‘Push’,
4. Go to the top right ‘BUILD & DEPLOY’, the default Build stage and Deploy stage should be triggered,
5. If an error occurs, from the commandline on your localhost, use ‘cf login’ and ‘cf logs –recent -newssentiment’ to find detailed log output,
6. Alternatively to using the online Git, you can use in the online editor next to the application status box, the play button to ‘Deploy the App from the
Workspace’.
5. Create an AlchemyAPI service
1. Go back to the application overview page,
2. In ‘Connections’ in the ‘new-console’, click ‘Connect New’, or in classic ‘console’, click ‘ADD A SERVICE OR API’,
3. This takes you to the Catalog, select the ‘Watson’ category, search and click AlchemyAPI,
4. In ‘Service Name’ enter ‘-newssentiment-AlchemyAPI’, make sure in the left under ‘Connect to’ the application you created is selected, select the ‘Free’
plan and click ‘CREATE’, and ‘RESTAGE’.
5. In the ‘new-console’, go to ‘Runtime’ and ‘Environment Variables’, in classic console go to ‘Environment Variables’. Under ‘VCAP_SERVICES’ you will
find the credentials of the services or connections, with these you can access the AlchemyAPI.
6. Create a Cloudant NoSQL service
1. Go back to the application overview page again,
2. In ‘Connections’ in the ‘new-console’, click ‘Connect New’, or in classic console, click ‘ADD A SERVICE OR API’,
3. This takes you to the Catalog again, select the ‘Data and Analytics’ category, and click ‘Cloudant NoSQL DB’,
4. In ‘Service Name’ enter ‘-newssentiment-Cloudant’, make sure in the left under ‘Connect to’ the application you created is selected, select the free ‘Lite’
plan and click ‘CREATE’, and ‘RESTAGE’,
7. Add the Basic Workflow for Request-Response
Now we are ready to code and connect all the pieces.
I will:
1. Change the ‘index.html’ and ‘report.html’ pages,
3/29
2. Change code for the ‘/’ route, and create a ‘/search’ route.
In your editor, open the ‘welcome.py’ file,
look for the line ‘@app.route(‘/’)’ around line 20, and change the return value to return render_template('index.html')
At the top of the file add the ‘render_template’, ‘Response’ and ‘request’ packages to the import from flask’,
from flask import Flask, jsonify, render_template, Response, request
Remove the code for the routes ‘/myapp’, ‘/api/people’, ‘/api/people/‘.
Add the ‘/search’ route to the ‘welcome.py’ file, so that your ‘welcome.py’ code now looks as follows:
import os
from flask import Flask, jsonify, render_template, Response, request
app = Flask(__name__)
@app.route('/')
def Welcome():
#return app.send_static_file('index.html')
return render_template('index.html')
@app.route('/search')
def Search(startdate=None, enddate=None, searchterm=None, count=None):
startdate = request.args.get('startdate', '7daysago')
enddate = request.args.get('enddate', 'today')
searchterm = request.args.get('searchterm')
count = request.args.get('count')
response = {
'startdate' : startdate,
'enddate' : enddate,
'searchterm' : searchterm,
'count' : count
}
return render_template('report.html',
response=response)
port = os.getenv('PORT', '5000')
if __name__ == "__main__":
app.run(host='0.0.0.0', port=int(port))
4/29
view raw newssentiment_flask_server_routes.html hosted with by GitHub
Add the following code to the ‘~/templates/index.html’ file
<html>
<head>
<title>My News Sentiment</title>
<link href="{{ url_for('static', filename='stylesheets/style.css') }}">
<style type="text/css">
5/29
body {
margin: 50px;
}
label {
display: inline-block;
width: 200px;
}
button {
margin: 20px;
}
</style>
</link>
</head>
<body>
<h1>News Sentiment</h1>
<form action="" method="get" id="searchform">
<div>
<label for="startdate">Startdate:</label>
<input type="date" name="startdate">
</div>
<div>
<label for="enddate">Enddate:</label>
<input type="date" name="enddate">
</div>
<div>
<label for="searchterm">Search for:</label>
<input type="text" name="searchterm">
</div>
<div>
<label for="">Number of results</label>
<select name="count">
<option value="25">25</option>
<option value="100">100</option>
<option value="500">500</option>
6/29
<option value="1000">1000</option>
</select>
</div>
<div><button type="submit">Submit</button> </div>
</form>
<script type=text/javascript src="{{url_for('static', filename='js/jquery/jquery-3.1.1.min.js') }}"></script>
<script type=text/javascript src="{{url_for('static', filename='js/jquery-validation/jquery-validation-1.15.1/dist/jquery.validate.min.js') }}"></script>
<script type="text/javascript">
var validator =
$('#searchform').validate({
rules: {
startdate: {
required: true
},
enddate: {
required: true
},
searchterm: {
required: true
},
count: {
required: true
}
},
submitHandler: function (form) {
$('form#searchform').attr('action', '/search')
form.submit();
}
});
</script>
</body>
</html>
7/29
view raw newssentiment_flask_index.html hosted with by GitHub
Add the following code to the ‘~/templates/report.html’ file
<html>
<head>
<title>News Sentiment Response</title>
<link href="{{ url_for('static', filename='stylesheets/style.css') }}"></link>
<style type="text/css">
8/29
body {
margin: 50px;
}
</style>
</head>
<body>
<h1>News Sentiment Response</h1>
<div id="response"></div>
<script type=text/javascript src="{{url_for('static', filename='js/jquery/jquery-3.1.1.min.js') }}"></script>
<script type="text/javascript">
var response = {{ response|tojson|safe }};
var responseAsStr = JSON.stringify(response, undefined, 2);
document.getElementById("response").innerHTML = responseAsStr;
</script>
</body>
</html>
9/29
view raw newssentiment_flask_report.html hosted with by GitHub
In the online editor, deploy the app from the workspace. On localhost, restart the application
python3.5 -m flask run
and in your browser go to http://127.0.0.1:5000/.
Index.html
10/29
Report.html
8. Get News using AlchemyAPI
So far, the application allows a user to enter input information to do a news search, but the server just returns the input information.
Let’s take a look at the options for the AlchemyAPI News service.
Open a new browser tab and go to the AlchemyAPI Query Builder tool,
In ‘Search articles over’ select for startdate ‘August 1, 2016’ and for enddate select ‘September 16, 2016’, and click ‘Apply’,
Enter a ‘where’ search term, change ‘is mentioned’ to ‘anywhere’, change ‘and the Sentiment is’ to ‘Any’, select an appropriate Taxonomy, change ‘in the
article’ to ‘body’,
In the Return section to the right, select all fields to enrich the search results with all NLP analytics, and ‘Run Query’,
Now, let’s add the Watson AlchemyAPI News service, so that the search form actually will return real news results.
1. I am using a package called ‘http.client’, which is a Python3 package, so I have to change the Python version value in the ‘runtime.txt’ file to ‘python-
3.5.1’,
2. Add the following ‘import’ statement at the top of ‘welcome.py’ to import the custom packages of the ‘mymodule’ module we created earlier,
implementing the interaction with the AlchemyAPI and Cloudant services.
from mymodule import myalchemyapi, mycloudant
import json
3. In the ‘~/mymodule/myalchemyapi’ package, add a function ‘GetNews()’ as follows:
import http.client
import csv
apikey = "<your-apikey>"
def GetNews(searchterm=None, outputMode="json", startdate=None, enddate=None, count="5", returnfields="enriched.url.url"):
conn = http.client.HTTPSConnection("gateway-a.watsonplatform.net")
headers = {
11/29
'content-type': "application/json"
}
endpoint = ('/calls/data/GetNews?outputMode={0}&start={1}&end={2}&count={3}&q.enriched.url.enrichedTitle.keywords.keyword.text={4}&return=
{5}&apikey={6}').format(outputMode, startdate, enddate, count, searchterm, returnfields, apikey)
print("GetNews API. endpoint: %s", endpoint)
conn.request("GET", endpoint, headers=headers)
res = conn.getresponse()
logMsg = ("GetNews API. response: status[{0}], msg[{1}], reason[{2}]").format(res.status, res.msg, res.reason)
print(logMsg)
# HTTPResponse.read returns bytes[]
data = res.read()
responseStr = data.decode("utf-8")
return responseStr
12/29
view raw newssentiment_flask_f2f_getnews1.html hosted with by GitHub
4. Go to the application ‘Environment Variables’ page and in the ‘VCAP_SERVICES’ look for the ‘alchemy_api’ node, and copy the ‘apikey’ value in the
‘credentials’ node. Go back to the ‘~/mymodule/myalchemyapi’ file and paste the value in place of ‘’
apikey = ""
5. In the ‘welcome.py’ file, change the ‘Search’ function, as follows:
@app.route('/search')
def Search(startdate=None, enddate=None, searchterm=None, count=None):
startdateStr = request.args.get('startdate')
enddateStr = request.args.get('enddate')
13/29
searchterm = request.args.get('searchterm')
count = request.args.get('count')
# format the correct start and end formats
startdate = myalchemyapi.FormatDate(startdateStr)
enddate = myalchemyapi.FormatDate(enddateStr)
# GetNews with Sentiment
returnfields = 'enriched.url.url%2Cenriched.url.title%2Cenriched.url.publicationDate.date%2Cenriched.url.docSentiment.score'
articles = myalchemyapi.GetNews(searchterm=searchterm, returnfields=returnfields, startdate=startdate, enddate=enddate, count=count)
# prepare for d3js, calculate the average sentiment per day
uniqueSentimentList = myalchemyapi.ParseNews(articles, startdateStr, enddateStr)
response = {
'news' : uniqueSentimentList,
'startdate' : startdateStr,
'enddate' : enddateStr,
'searchterm' : searchterm
}
return render_template('report.html', response=response)
14/29
view raw newssentiment_flask_routes_search2 hosted with by GitHub
Some comments to the new ‘welcome.py’ code:
I added two helper functions ‘myalchemyapi.FormatDate(startdateStr)’ and ‘myalchemyapi.ParseNews(articles, startdateStr)’, so we need to add these
still to the ‘mymodule/myalchemyapi.py’ package. I will do that in the next step.
The AlchemyAPI GetNews API is more than just a News Search. The API combines news search with Watson NLP analytics in a single call. The real
power comes from the input parameters of the API that add complex configuration options that can include multiple NLP analytics to filter search results.
In the ‘returnfields’ input parameter, I set the ‘return’ parameter for the API, which defines what data and meta-data from the search results I want to
retrieve. There is a full list of Return values in the API documentation, the full list is accessible in this Google spreadsheet with currently 419 options. For
now, I am only going to retrieve 3 fields: title, publication date and the sentiment score of the overall document.
The sentiment score add for each search result a Sentiment Analysis API call. This will add the following return field:
"docSentiment": {
"score": -0.112443998
}
15/29
9. Create Helper Functions
Now, I will create the two helper methods ‘myalchemyapi.FormatDate(startdateStr)’ and ‘myalchemyapi.ParseNews(articles, startdateStr)’.
1. First, add the following code to the ‘mymodule/myalchemyapi.py’ package:
import http.client
import csv
from datetime import datetime
import json
from mymodule import mycloudant
apikey = ""
def GetNews(searchterm=None, outputMode="json", startdate=None, enddate=None, count="5", returnfields="enriched.url.url"):
conn = http.client.HTTPSConnection("gateway-a.watsonplatform.net")
headers = {
'content-type': "application/json"
}
endpoint = ('/calls/data/GetNews?
outputMode={0}&start={1}&end={2}&count={3}&q.enriched.url.enrichedTitle.keywords.keyword.text={4}&return={5}&apikey={6}').format(outputMode,
startdate, enddate, count, searchterm, returnfields, apikey)
print("==GetNews API. endpoint: %s", endpoint)
conn.request("GET", endpoint, headers=headers)
res = conn.getresponse()
logMsg = ("GetNews API. response: status[{0}], msg[{1}], reason[{2}]").format(res.status, res.msg, res.reason)
print(logMsg)
# HTTPResponse.read returns bytes[]
data = res.read()
responseStr = data.decode("utf-8")
return responseStr
'''
1. the GetNews Alchemy API takes date formats in UTC timezone in seconds,
it also has convenience methods, in the form of 'now-1M' for the last month,
'now-1d' for yesterday, so I here convert any datetime to 'now-{0}d',
so that start and end could be e.g. 'now-30d' to 'now-0d'.
'''
def FormatDate(dateStr=None):
now = datetime.now()
16/29
date1 = datetime.strptime(dateStr, '%Y-%m-%d')
delta1 = now-date1
date1 = ("now-{0}d").format(delta1.days)
return date1
'''
1. d3js takes an array of assiociative arrays as input, for convenience
I prepare that arrayon the server.
2. I create an array of unique days to be visualized in d3js and
have to order the set, cause d3js create a graph by drawing a line from
point to point, and i want to prevent the line to go back and forth,
creating a very messy graph.
'''
def ParseNews(articles=None, startdate1=None, enddate1=None):
#print(("=====Articles: {0}").format(articles))
status1 = ""
startdate1 = datetime.strptime(startdate1, '%Y-%m-%d')
enddate1 = datetime.strptime(enddate1, '%Y-%m-%d')
if (articles==None or articles==""):
logMsg = "GetNews API Error: no response. "
print(logMsg)
return logMsg
else:
logMsg = ("GetNews API response: {0}").format(articles)
#print(logMsg)
articlesJson = json.loads(articles)
status1 = articlesJson['status']
if status1=='ERROR':
statusInfo = articlesJson['statusInfo']
logMsg = ('GetNews API Error. StatusInfo: {0}').format(statusInfo)
print(logMsg)
return logMsg
elif status1=='OK':
logMsg = "GetNews API status: OK"
#print(logMsg)
17/29
# Here everything is OK
mycloudant.SaveNews(articles)
sentimentList = []
docs = articlesJson['result']['docs']
for doc in docs:
enrichedURL = doc['source']['enriched']['url']
# Get publicationDate
publicationDate = enrichedURL['publicationDate']['date']
sentiment = enrichedURL['docSentiment']['score']
# construct data array for d3js, append row
sentimentRow = {"publicationDate": publicationDate, "sentiment": sentiment}
sentimentList.append(sentimentRow)
#get unique publicationDates
uniqueSentimentList=[]
uniqueDates = set()
for dic in sentimentList:
pubdate1 = dic['publicationDate']
pubdate1 = datetime.strptime(pubdate1, '%Y%m%dT%H%M%S')
# make sure publicationdates are within range
if (startdate1 < pubdate1) and (pubdate1 < enddate1):
# set times for all dates to zero for Ymd comparison
pubdate1 = pubdate1.replace(hour=0, minute=0, second=0)
# only add the date if new date
if pubdate1 not in uniqueDates:
uniqueDates.add(pubdate1)
uniqueDates = sorted(uniqueDates)
# loop through the uniqueDates and calculate averages for duplicates by date
i1 = 0
for uniqueDate in uniqueDates:
i1+=1
sentiments = 0
i=0
for row in sentimentList:
rowDate = datetime.strptime(row['publicationDate'], '%Y%m%dT%H%M%S')
18/29
# set times for all dates to zero for Ymd comparison
rowDate = rowDate.replace(hour=0, minute=0, second=0)
if rowDate==uniqueDate:
i+=1
sentiments += row['sentiment']
avgSentiment = sentiments/i
shortUniqueDate = ("{0}-{1}-{2}").format(uniqueDate.strftime("%Y"), uniqueDate.strftime("%m"), uniqueDate.strftime("%d"))
uniqueSentimentRow = {"publicationDate": shortUniqueDate, "sentiment": avgSentiment}
uniqueSentimentList.append(uniqueSentimentRow)
return uniqueSentimentList
19/29
view raw newssentiment_flask_alchemyapi.py hosted with by GitHub
10. Save Responses in Cloudant
I want to save all search results. First, I have to create a database in cloudant to store all search results.
1. In the ‘new-console’ go to ‘All Items’ or in the classic console in the application overview page, under ‘Services’, click the ‘Cloudant NoSQL’ service, and
click the green ‘LAUNCH’ button,
2. In the left menu, click ‘Databases’,
3. In the top right of the page, click ‘Create Dababase’, enter ‘newssentiment’ and click ‘Create’.
Next configure the Python application to use Cloudant to save the search results. I am using the Python Cloudant package.
1. In your IDE, open the ‘~/mymodule/mycloudant.py’ file and add the following code:
20/29
from cloudant.client import Cloudant
import json
username = ""
password = ""
cloudantURL = ""
client = Cloudant(username, password, url=cloudantURL)
def SaveNews(doc):
print('Save Document')
# class should be 'dict'
if isinstance(doc, str):
doc = json.loads(doc)
client.connect()
my_database = client['newssentiment']
my_document = my_database.create_document(doc)
if my_document.exists():
print('Save Document: SUCCESS')
else:
print('Save Document: ERROR')
client.disconnect()
def GetNews():
client.connect()
my_database = client['newssentiment']
# document_id
news = my_database[document_id]
client.disconnect()
# json to string
news = json.dumps(news)
return news;
21/29
view raw newssentiment_flask_mycloudantdb.py hosted with by GitHub
In the application overview page, go to the ‘Environment Variables’ page and in the ‘VCAP_SERVICES’ look for the ‘cloudantNoSQLDB’ service. Copy
the credentials and configure the Cloudant credentials in the ‘~/mymodule/mycloudant.py’ file.
username = "<cloudant_username>"
password = "<cloudant_password>"
cloudantURL = "<cloudant_url>"
For the cloudantURL, use the format ‘.cloudant.com’ without ‘username:password@’.
2. The code in the ‘~/mymodule/mycloudant.py’ file, imports the Cloudant package from the ‘cloudant.client’ module, which is not yet installed:
from cloudant.client import Cloudant
22/29
3. To install the ‘Cloudant’ package for python3.5, from the commandline in the root of your project, run:
pip3.5 install cloudant
and make sure it gets installed in the ‘venv/lib/python3.5/site-packages/’.
Note the installation results:
Installing collected packages: requests, cloudant
Successfully installed cloudant-2.1.1 requests-2.11.1
4. Edit the file ‘requirements.txt’ to include the correct package version:
Flask==0.10.1
cloudant==2.1.1
Bluemix uses the ‘requirements.txt’ file to install dependencies, instead of running from a ‘virtualenv’ environment like I do on localhost.
5. Add the following line in the ‘mymodule/myalchemyapi.py’ package in the ‘ParseNews()’ function around line 70 before parsing the ‘result’:
# Here everything is OK
mycloudant.SaveNews(articles)
sentimentList = []
docs = articlesJson['result']['docs']
for doc in docs:
Report.html with AlchemyAPI GetNews API results.
11. Parse Response for D3js
The ‘def ParseNews(articles=None, startdate1=None):’ method in the ‘mymodule/myalchemyapi.py’ package, parses the JSON document from the
AlchemyAPI to a format that is used by D3js to load and draw the graph. D3js has its own functions to transform data, but I prefer to do it on the server.
The D3js format for the sentiment data is as follows:
[
{"publicationDate": publicationDate, "sentiment": sentiment},
{"publicationDate": publicationDate, "sentiment": sentiment}
]
The ‘ParseNews()’ method creates the correct format, but there are also multiple results per day. For a better display in the D3js graph, I average multiple
scores for a single day, and sort the results ascending by date, so D3js will draw a logical line forward in time. The result is a list of unique dates with average
sentiment per day.
12. Draw the Line Chart in D3js
I used Mike Bostock’s Line Chart as the base graph for the Sentiment by Day chart.
Add the following code to the ‘~/templates/report.html’ page.
<html>
<head>
<title>News Sentiment Response</title>
<link href="{{ url_for('static', filename='stylesheets/style.css') }}"></link>
<style type="text/css">
23/29
body {
margin: 50px;
font: 10px sans-serif;
}
.axis path,
.axis line {
fill: none;
stroke: #000;
shape-rendering: crispEdges;
}
.line {
fill: none;
stroke: steelblue;
stroke-width: 1.5px;
}
td, th {
padding: 1px 4px;
border: 1px solid black;
}
table {
border-collapse: collapse;
}
</style>
</head>
<body>
<script type=text/javascript src="{{url_for('static', filename='js/jquery/jquery-3.1.1.min.js') }}"></script>
<script type=text/javascript src="{{url_for('static', filename='js/d3js/d3/d3.min.js') }}"></script>
<script type="text/javascript">
var response = {{ response|tojson|safe }};
var responseAsStr = JSON.stringify(response);
var data = response.news;
var respStartDate = response.startdate;
24/29
var respEndDate = response.enddate;
var respSearchTerm = response.searchterm;
var body = d3.select("body");
body.append("p").text(responseAsStr);
body.append("h1")
.text("News Sentiment for '"+respSearchTerm+"'");
body.append("h3")
.text("from "+respStartDate+" to "+respEndDate);
var formatDate = d3.time.format("%Y-%m-%d");
var margin = {top: 20, right: 20, bottom: 30, left: 50},
width = 960 - margin.left - margin.right,
height = 500 - margin.top - margin.bottom;
var x = d3.time.scale().range([0, width]);
var y = d3.scale.linear().range([height, 0]);
var xAxis = d3.svg.axis()
.scale(x)
.orient("bottom");
var yAxis = d3.svg.axis()
.scale(y)
.orient("left");
var line = d3.svg.line()
.x(function(d) { return x(d.publicationDate); })
.y(function(d) { return y(d.sentiment); });
var svg = body.append("svg")
.attr("width", width + margin.left + margin.right)
.attr("height", height + margin.top + margin.bottom)
.append("g")
.attr("transform", "translate(" + margin.left + "," + margin.top + ")");
data.forEach(function(d){
d.publicationDate = formatDate.parse(d.publicationDate);
d.sentiment = parseFloat(d.sentiment);
});
25/29
x.domain(d3.extent(data, function(d) {
return d.publicationDate;
}));
y.domain(d3.extent(data, function(d) { return d.sentiment; }));
svg.append("g")
.attr("class", "x axis")
.attr("transform", "translate(0," + height + ")")
.call(xAxis);
svg.append("g")
.attr("class", "y axis")
.call(yAxis)
.append("text")
.attr("transform", "rotate(-90)")
.attr("y", 6)
.attr("dy", ".71em")
.style("text-anchor", "end")
.text("Sentiment");
svg.append("path")
.datum(data)
.attr("class", "line")
.attr("d", line);
function tabulate(data, columns) {
var table = d3.select('body').append('table')
var thead = table.append('thead')
var tbody = table.append('tbody');
// append the header row
thead.append('tr')
.selectAll('th')
.data(columns).enter()
.append('th')
.text(function (column) { return column; });
26/29
// create a row for each object in the data
var rows = tbody.selectAll('tr')
.data(data)
.enter()
.append('tr');
// create a cell in each row for each column
var cells = rows.selectAll('td')
.data(function (row) {
return columns.map(function (column) {
val = row[column];
if(row[column] instanceof Date){
val = row[column].getFullYear()+"-"+
(row[column].getMonth()+1)+"-"+row[column].getDate();
}
return {column: column, value: val};
});
})
.enter()
.append('td')
.text(function (d) { return d.value; });
return table;
}
var table = tabulate(data, ['publicationDate', 'sentiment']);
</script>
</body>
</html>
27/29
view raw newssentiment_flask_report_d3js.html hosted with by GitHub
To select elements and create new HTML elements, you can use d3 as follows:
var body = d3.select("body");
body.append("h1")
.text("News Sentiment for '"+respSearchTerm+"'");
D3js lets you define and nest functions, e.g.
var formatDate = d3.time.format("%Y-%m-%d");
var x = d3.time.scale().range([0, width]);
var y = d3.scale.linear().range([height, 0]);
var xAxis = d3.svg.axis().scale(x).orient("bottom");
var line = d3.svg.line()
.x(function(d) { return x(d.publicationDate); })
.y(function(d) { return y(d.sentiment); });
28/29
data.forEach(function(d){
d.publicationDate = formatDate.parse(d.publicationDate);
d.sentiment = parseFloat(d.sentiment);
});
In this example, I have passed the data a Response object from the Flask server, and parse the values to be of Object type date based on the strftime()
function using the d3js function d3.time.format(), and the sentiment to be a floating Number with the default JavaScript function.
Similarly, when I draw the line with the function ‘d3.svg.line()’ I can set the x and y coordinates by a custom callback function, which itself calls the previously
defined functions x and y which use a range() function. D3js uses a lot of these type of nested functions.
In this part:
svg.append("path")
.datum(data)
.attr("class", "line")
.attr("d", line);
D3js binds the data object to the svg object and in the attribute the ‘line’ function is called, which sets the x and y coordinates respectively by applying
‘d.publicationDate’ and ‘d.sentiment’ (see above).
Similarly, it draws an x-axis and y-axis as follows:
svg.append("g")
.attr("class", "y axis")
.call(yAxis)
.append("text")
.attr("transform", "rotate(-90)")
.attr("y", 6)
.attr("dy", ".71em")
.style("text-anchor", "end")
.text("Sentiment");
29/29

More Related Content

What's hot

Containers Lab
Containers Lab Containers Lab
Containers Lab
Dev_Events
 
PVS-Studio Is Now in Chocolatey: Checking Chocolatey under Azure DevOps
PVS-Studio Is Now in Chocolatey: Checking Chocolatey under Azure DevOpsPVS-Studio Is Now in Chocolatey: Checking Chocolatey under Azure DevOps
PVS-Studio Is Now in Chocolatey: Checking Chocolatey under Azure DevOps
Andrey Karpov
 
Architecting the Future: Abstractions and Metadata - BSidesKC
Architecting the Future: Abstractions and Metadata - BSidesKCArchitecting the Future: Abstractions and Metadata - BSidesKC
Architecting the Future: Abstractions and Metadata - BSidesKC
Daniel Barker
 
Bugzilla Installation Process
Bugzilla Installation ProcessBugzilla Installation Process
Bugzilla Installation ProcessVino Harikrishnan
 
Orangescrum Mobile API Add on User Manual
Orangescrum Mobile API Add on User ManualOrangescrum Mobile API Add on User Manual
Orangescrum Mobile API Add on User Manual
Orangescrum
 
Complete steps to Integrate Push Notification for Your Cocos2dx App with Push...
Complete steps to Integrate Push Notification for Your Cocos2dx App with Push...Complete steps to Integrate Push Notification for Your Cocos2dx App with Push...
Complete steps to Integrate Push Notification for Your Cocos2dx App with Push...
ShepHertz
 
Testing - Selenium? Rich-Clients? Containers?
Testing - Selenium? Rich-Clients? Containers?Testing - Selenium? Rich-Clients? Containers?
Testing - Selenium? Rich-Clients? Containers?
Tobias Schneck
 
Orangescrum In App Chat Add-on User Manual
Orangescrum In App Chat Add-on User ManualOrangescrum In App Chat Add-on User Manual
Orangescrum In App Chat Add-on User Manual
Orangescrum
 
OSLC4j FMI 1.1.0
OSLC4j FMI 1.1.0OSLC4j FMI 1.1.0
OSLC4j FMI 1.1.0
Vorachet Jaroensawas
 
Akmal Khaleeq Waheed - Challenge 3
Akmal Khaleeq Waheed - Challenge 3Akmal Khaleeq Waheed - Challenge 3
Akmal Khaleeq Waheed - Challenge 3
tovmug
 
What is CocoaPods and how to setup?
What is CocoaPods and how to setup?What is CocoaPods and how to setup?
What is CocoaPods and how to setup?
Milan Panchal
 
Orangescrum Client management Add on User Manual
Orangescrum Client management Add on User ManualOrangescrum Client management Add on User Manual
Orangescrum Client management Add on User Manual
Orangescrum
 
Installing java, eclipse and maven
Installing java, eclipse and mavenInstalling java, eclipse and maven
Installing java, eclipse and maven
inTwentyEight Minutes
 
OOP2017: Containerized End-2-End Testing – automate it!
OOP2017: Containerized End-2-End Testing – automate it!OOP2017: Containerized End-2-End Testing – automate it!
OOP2017: Containerized End-2-End Testing – automate it!
Tobias Schneck
 
PVS-Studio: analyzing pull requests in Azure DevOps using self-hosted agents
PVS-Studio: analyzing pull requests in Azure DevOps using self-hosted agentsPVS-Studio: analyzing pull requests in Azure DevOps using self-hosted agents
PVS-Studio: analyzing pull requests in Azure DevOps using self-hosted agents
Andrey Karpov
 
Asp.net tips
Asp.net tipsAsp.net tips
Asp.net tips
actacademy
 
Installatieverslag Oracle Apex 4.0
Installatieverslag Oracle Apex 4.0Installatieverslag Oracle Apex 4.0
Installatieverslag Oracle Apex 4.0
robinbuitenhuis
 
Php Conference Brazil - Phalcon Giant Killer
Php Conference Brazil - Phalcon Giant KillerPhp Conference Brazil - Phalcon Giant Killer
Php Conference Brazil - Phalcon Giant Killer
Jackson F. de A. Mafra
 
Intro to JavaScript Tooling in Visual Studio Code
Intro to JavaScript Tooling in Visual Studio CodeIntro to JavaScript Tooling in Visual Studio Code
Intro to JavaScript Tooling in Visual Studio Code
ColdFusionConference
 

What's hot (20)

Hudson_WhitePaper
Hudson_WhitePaperHudson_WhitePaper
Hudson_WhitePaper
 
Containers Lab
Containers Lab Containers Lab
Containers Lab
 
PVS-Studio Is Now in Chocolatey: Checking Chocolatey under Azure DevOps
PVS-Studio Is Now in Chocolatey: Checking Chocolatey under Azure DevOpsPVS-Studio Is Now in Chocolatey: Checking Chocolatey under Azure DevOps
PVS-Studio Is Now in Chocolatey: Checking Chocolatey under Azure DevOps
 
Architecting the Future: Abstractions and Metadata - BSidesKC
Architecting the Future: Abstractions and Metadata - BSidesKCArchitecting the Future: Abstractions and Metadata - BSidesKC
Architecting the Future: Abstractions and Metadata - BSidesKC
 
Bugzilla Installation Process
Bugzilla Installation ProcessBugzilla Installation Process
Bugzilla Installation Process
 
Orangescrum Mobile API Add on User Manual
Orangescrum Mobile API Add on User ManualOrangescrum Mobile API Add on User Manual
Orangescrum Mobile API Add on User Manual
 
Complete steps to Integrate Push Notification for Your Cocos2dx App with Push...
Complete steps to Integrate Push Notification for Your Cocos2dx App with Push...Complete steps to Integrate Push Notification for Your Cocos2dx App with Push...
Complete steps to Integrate Push Notification for Your Cocos2dx App with Push...
 
Testing - Selenium? Rich-Clients? Containers?
Testing - Selenium? Rich-Clients? Containers?Testing - Selenium? Rich-Clients? Containers?
Testing - Selenium? Rich-Clients? Containers?
 
Orangescrum In App Chat Add-on User Manual
Orangescrum In App Chat Add-on User ManualOrangescrum In App Chat Add-on User Manual
Orangescrum In App Chat Add-on User Manual
 
OSLC4j FMI 1.1.0
OSLC4j FMI 1.1.0OSLC4j FMI 1.1.0
OSLC4j FMI 1.1.0
 
Akmal Khaleeq Waheed - Challenge 3
Akmal Khaleeq Waheed - Challenge 3Akmal Khaleeq Waheed - Challenge 3
Akmal Khaleeq Waheed - Challenge 3
 
What is CocoaPods and how to setup?
What is CocoaPods and how to setup?What is CocoaPods and how to setup?
What is CocoaPods and how to setup?
 
Orangescrum Client management Add on User Manual
Orangescrum Client management Add on User ManualOrangescrum Client management Add on User Manual
Orangescrum Client management Add on User Manual
 
Installing java, eclipse and maven
Installing java, eclipse and mavenInstalling java, eclipse and maven
Installing java, eclipse and maven
 
OOP2017: Containerized End-2-End Testing – automate it!
OOP2017: Containerized End-2-End Testing – automate it!OOP2017: Containerized End-2-End Testing – automate it!
OOP2017: Containerized End-2-End Testing – automate it!
 
PVS-Studio: analyzing pull requests in Azure DevOps using self-hosted agents
PVS-Studio: analyzing pull requests in Azure DevOps using self-hosted agentsPVS-Studio: analyzing pull requests in Azure DevOps using self-hosted agents
PVS-Studio: analyzing pull requests in Azure DevOps using self-hosted agents
 
Asp.net tips
Asp.net tipsAsp.net tips
Asp.net tips
 
Installatieverslag Oracle Apex 4.0
Installatieverslag Oracle Apex 4.0Installatieverslag Oracle Apex 4.0
Installatieverslag Oracle Apex 4.0
 
Php Conference Brazil - Phalcon Giant Killer
Php Conference Brazil - Phalcon Giant KillerPhp Conference Brazil - Phalcon Giant Killer
Php Conference Brazil - Phalcon Giant Killer
 
Intro to JavaScript Tooling in Visual Studio Code
Intro to JavaScript Tooling in Visual Studio CodeIntro to JavaScript Tooling in Visual Studio Code
Intro to JavaScript Tooling in Visual Studio Code
 

Similar to Creating Sentiment Line Chart with Watson

Usage Note of SWIG for PHP
Usage Note of SWIG for PHPUsage Note of SWIG for PHP
Usage Note of SWIG for PHP
William Lee
 
AWS Lambda Hands-on: How to Create Phone Call Notifications in a Serverless Way
 AWS Lambda Hands-on: How to Create Phone Call Notifications in a Serverless Way AWS Lambda Hands-on: How to Create Phone Call Notifications in a Serverless Way
AWS Lambda Hands-on: How to Create Phone Call Notifications in a Serverless Way
Srushith Repakula
 
AWS Lambda Hands-on: How to Create Phone Call Notifications in a Serverless W...
AWS Lambda Hands-on: How to Create Phone Call Notifications in a Serverless W...AWS Lambda Hands-on: How to Create Phone Call Notifications in a Serverless W...
AWS Lambda Hands-on: How to Create Phone Call Notifications in a Serverless W...
CodeOps Technologies LLP
 
Setting up the hyperledger composer in ubuntu
Setting up the hyperledger composer in ubuntuSetting up the hyperledger composer in ubuntu
Setting up the hyperledger composer in ubuntu
kesavan N B
 
LvivPy - Flask in details
LvivPy - Flask in detailsLvivPy - Flask in details
LvivPy - Flask in details
Max Klymyshyn
 
Using JHipster for generating Angular/Spring Boot apps
Using JHipster for generating Angular/Spring Boot appsUsing JHipster for generating Angular/Spring Boot apps
Using JHipster for generating Angular/Spring Boot apps
Yakov Fain
 
web application.pptx
web application.pptxweb application.pptx
web application.pptx
vishal choudhary
 
Python Automation With Gauge + Selenium + API + Jenkins
Python Automation With Gauge + Selenium + API + JenkinsPython Automation With Gauge + Selenium + API + Jenkins
Python Automation With Gauge + Selenium + API + Jenkins
Fagun Priyadarshi
 
HotPush with Ionic 2 and CodePush
HotPush with Ionic 2 and CodePushHotPush with Ionic 2 and CodePush
HotPush with Ionic 2 and CodePushEvan Schultz
 
Apigility – Lightning Fast API Development - OSSCamp 2014
Apigility – Lightning Fast API Development - OSSCamp 2014 Apigility – Lightning Fast API Development - OSSCamp 2014
Apigility – Lightning Fast API Development - OSSCamp 2014
OSSCube
 
Remote Config REST API and Versioning
Remote Config REST API and VersioningRemote Config REST API and Versioning
Remote Config REST API and Versioning
Jumpei Matsuda
 
Python from zero to hero (Twitter Explorer)
Python from zero to hero (Twitter Explorer)Python from zero to hero (Twitter Explorer)
Python from zero to hero (Twitter Explorer)
Yuriy Senko
 
Microsoft Lync Server 2010 Installation
Microsoft Lync Server 2010 InstallationMicrosoft Lync Server 2010 Installation
Microsoft Lync Server 2010 Installation
Shahab Al Yamin Chawdhury
 
Openshift cheat rhce_r3v1 rhce
Openshift cheat rhce_r3v1 rhceOpenshift cheat rhce_r3v1 rhce
Openshift cheat rhce_r3v1 rhce
Darnette A
 
Joomla in the cloud with Openshift
Joomla in the cloud with OpenshiftJoomla in the cloud with Openshift
Joomla in the cloud with Openshift
Edoardo Schepis
 
Adding User Management to Node.js
Adding User Management to Node.jsAdding User Management to Node.js
Adding User Management to Node.js
Dev_Events
 
Building Mobile Friendly APIs in Rails
Building Mobile Friendly APIs in RailsBuilding Mobile Friendly APIs in Rails
Building Mobile Friendly APIs in Rails
Jim Jeffers
 
Open-E DSS V7 Remote Snapshot Control with CLI/API
Open-E DSS V7 Remote Snapshot Control with CLI/APIOpen-E DSS V7 Remote Snapshot Control with CLI/API
Open-E DSS V7 Remote Snapshot Control with CLI/API
open-e
 

Similar to Creating Sentiment Line Chart with Watson (20)

Usage Note of SWIG for PHP
Usage Note of SWIG for PHPUsage Note of SWIG for PHP
Usage Note of SWIG for PHP
 
AWS Lambda Hands-on: How to Create Phone Call Notifications in a Serverless Way
 AWS Lambda Hands-on: How to Create Phone Call Notifications in a Serverless Way AWS Lambda Hands-on: How to Create Phone Call Notifications in a Serverless Way
AWS Lambda Hands-on: How to Create Phone Call Notifications in a Serverless Way
 
AWS Lambda Hands-on: How to Create Phone Call Notifications in a Serverless W...
AWS Lambda Hands-on: How to Create Phone Call Notifications in a Serverless W...AWS Lambda Hands-on: How to Create Phone Call Notifications in a Serverless W...
AWS Lambda Hands-on: How to Create Phone Call Notifications in a Serverless W...
 
Setting up the hyperledger composer in ubuntu
Setting up the hyperledger composer in ubuntuSetting up the hyperledger composer in ubuntu
Setting up the hyperledger composer in ubuntu
 
Dvwkbm lab2 cli1
Dvwkbm lab2 cli1Dvwkbm lab2 cli1
Dvwkbm lab2 cli1
 
LvivPy - Flask in details
LvivPy - Flask in detailsLvivPy - Flask in details
LvivPy - Flask in details
 
Using JHipster for generating Angular/Spring Boot apps
Using JHipster for generating Angular/Spring Boot appsUsing JHipster for generating Angular/Spring Boot apps
Using JHipster for generating Angular/Spring Boot apps
 
web application.pptx
web application.pptxweb application.pptx
web application.pptx
 
Python Automation With Gauge + Selenium + API + Jenkins
Python Automation With Gauge + Selenium + API + JenkinsPython Automation With Gauge + Selenium + API + Jenkins
Python Automation With Gauge + Selenium + API + Jenkins
 
HotPush with Ionic 2 and CodePush
HotPush with Ionic 2 and CodePushHotPush with Ionic 2 and CodePush
HotPush with Ionic 2 and CodePush
 
Apigility – Lightning Fast API Development - OSSCamp 2014
Apigility – Lightning Fast API Development - OSSCamp 2014 Apigility – Lightning Fast API Development - OSSCamp 2014
Apigility – Lightning Fast API Development - OSSCamp 2014
 
Remote Config REST API and Versioning
Remote Config REST API and VersioningRemote Config REST API and Versioning
Remote Config REST API and Versioning
 
Python from zero to hero (Twitter Explorer)
Python from zero to hero (Twitter Explorer)Python from zero to hero (Twitter Explorer)
Python from zero to hero (Twitter Explorer)
 
Microsoft Lync Server 2010 Installation
Microsoft Lync Server 2010 InstallationMicrosoft Lync Server 2010 Installation
Microsoft Lync Server 2010 Installation
 
Openshift cheat rhce_r3v1 rhce
Openshift cheat rhce_r3v1 rhceOpenshift cheat rhce_r3v1 rhce
Openshift cheat rhce_r3v1 rhce
 
Joomla in the cloud with Openshift
Joomla in the cloud with OpenshiftJoomla in the cloud with Openshift
Joomla in the cloud with Openshift
 
Adding User Management to Node.js
Adding User Management to Node.jsAdding User Management to Node.js
Adding User Management to Node.js
 
Building Mobile Friendly APIs in Rails
Building Mobile Friendly APIs in RailsBuilding Mobile Friendly APIs in Rails
Building Mobile Friendly APIs in Rails
 
CodeShip
CodeShipCodeShip
CodeShip
 
Open-E DSS V7 Remote Snapshot Control with CLI/API
Open-E DSS V7 Remote Snapshot Control with CLI/APIOpen-E DSS V7 Remote Snapshot Control with CLI/API
Open-E DSS V7 Remote Snapshot Control with CLI/API
 

More from Dev_Events

Eclipse OMR: a modern, open-source toolkit for building language runtimes
Eclipse OMR: a modern, open-source toolkit for building language runtimesEclipse OMR: a modern, open-source toolkit for building language runtimes
Eclipse OMR: a modern, open-source toolkit for building language runtimes
Dev_Events
 
Eclipse MicroProfile: Accelerating the adoption of Java Microservices
Eclipse MicroProfile: Accelerating the adoption of Java MicroservicesEclipse MicroProfile: Accelerating the adoption of Java Microservices
Eclipse MicroProfile: Accelerating the adoption of Java Microservices
Dev_Events
 
From Science Fiction to Science Fact: How AI Will Change Our Approach to Buil...
From Science Fiction to Science Fact: How AI Will Change Our Approach to Buil...From Science Fiction to Science Fact: How AI Will Change Our Approach to Buil...
From Science Fiction to Science Fact: How AI Will Change Our Approach to Buil...
Dev_Events
 
Blockchain Hyperledger Lab
Blockchain Hyperledger LabBlockchain Hyperledger Lab
Blockchain Hyperledger Lab
Dev_Events
 
Introduction to Blockchain and Hyperledger
Introduction to Blockchain and HyperledgerIntroduction to Blockchain and Hyperledger
Introduction to Blockchain and Hyperledger
Dev_Events
 
Using GPUs to Achieve Massive Parallelism in Java 8
Using GPUs to Achieve Massive Parallelism in Java 8Using GPUs to Achieve Massive Parallelism in Java 8
Using GPUs to Achieve Massive Parallelism in Java 8
Dev_Events
 
Lean and Easy IoT Applications with OSGi and Eclipse Concierge
Lean and Easy IoT Applications with OSGi and Eclipse ConciergeLean and Easy IoT Applications with OSGi and Eclipse Concierge
Lean and Easy IoT Applications with OSGi and Eclipse Concierge
Dev_Events
 
Eclipse JDT Embraces Java 9 – An Insider’s View
Eclipse JDT Embraces Java 9 – An Insider’s ViewEclipse JDT Embraces Java 9 – An Insider’s View
Eclipse JDT Embraces Java 9 – An Insider’s View
Dev_Events
 
Node.js – ask us anything!
Node.js – ask us anything! Node.js – ask us anything!
Node.js – ask us anything!
Dev_Events
 
Swift on the Server
Swift on the Server Swift on the Server
Swift on the Server
Dev_Events
 
Being serverless and Swift... Is that allowed?
Being serverless and Swift... Is that allowed? Being serverless and Swift... Is that allowed?
Being serverless and Swift... Is that allowed?
Dev_Events
 
Secrets of building a debuggable runtime: Learn how language implementors sol...
Secrets of building a debuggable runtime: Learn how language implementors sol...Secrets of building a debuggable runtime: Learn how language implementors sol...
Secrets of building a debuggable runtime: Learn how language implementors sol...
Dev_Events
 
Tools in Action: Transforming everyday objects with the power of deeplearning...
Tools in Action: Transforming everyday objects with the power of deeplearning...Tools in Action: Transforming everyday objects with the power of deeplearning...
Tools in Action: Transforming everyday objects with the power of deeplearning...
Dev_Events
 
Microservices without Servers
Microservices without ServersMicroservices without Servers
Microservices without Servers
Dev_Events
 
The App Evolution
The App EvolutionThe App Evolution
The App Evolution
Dev_Events
 
Building Next Generation Applications and Microservices
Building Next Generation Applications and Microservices Building Next Generation Applications and Microservices
Building Next Generation Applications and Microservices
Dev_Events
 
Create and Manage APIs with API Connect, Swagger and Bluemix
Create and Manage APIs with API Connect, Swagger and BluemixCreate and Manage APIs with API Connect, Swagger and Bluemix
Create and Manage APIs with API Connect, Swagger and Bluemix
Dev_Events
 
OpenWhisk - Serverless Architecture
OpenWhisk - Serverless Architecture OpenWhisk - Serverless Architecture
OpenWhisk - Serverless Architecture
Dev_Events
 
Add Custom Model and ORM to Node.js
Add Custom Model and ORM to Node.jsAdd Custom Model and ORM to Node.js
Add Custom Model and ORM to Node.js
Dev_Events
 
OpenWhisk Lab
OpenWhisk Lab OpenWhisk Lab
OpenWhisk Lab
Dev_Events
 

More from Dev_Events (20)

Eclipse OMR: a modern, open-source toolkit for building language runtimes
Eclipse OMR: a modern, open-source toolkit for building language runtimesEclipse OMR: a modern, open-source toolkit for building language runtimes
Eclipse OMR: a modern, open-source toolkit for building language runtimes
 
Eclipse MicroProfile: Accelerating the adoption of Java Microservices
Eclipse MicroProfile: Accelerating the adoption of Java MicroservicesEclipse MicroProfile: Accelerating the adoption of Java Microservices
Eclipse MicroProfile: Accelerating the adoption of Java Microservices
 
From Science Fiction to Science Fact: How AI Will Change Our Approach to Buil...
From Science Fiction to Science Fact: How AI Will Change Our Approach to Buil...From Science Fiction to Science Fact: How AI Will Change Our Approach to Buil...
From Science Fiction to Science Fact: How AI Will Change Our Approach to Buil...
 
Blockchain Hyperledger Lab
Blockchain Hyperledger LabBlockchain Hyperledger Lab
Blockchain Hyperledger Lab
 
Introduction to Blockchain and Hyperledger
Introduction to Blockchain and HyperledgerIntroduction to Blockchain and Hyperledger
Introduction to Blockchain and Hyperledger
 
Using GPUs to Achieve Massive Parallelism in Java 8
Using GPUs to Achieve Massive Parallelism in Java 8Using GPUs to Achieve Massive Parallelism in Java 8
Using GPUs to Achieve Massive Parallelism in Java 8
 
Lean and Easy IoT Applications with OSGi and Eclipse Concierge
Lean and Easy IoT Applications with OSGi and Eclipse ConciergeLean and Easy IoT Applications with OSGi and Eclipse Concierge
Lean and Easy IoT Applications with OSGi and Eclipse Concierge
 
Eclipse JDT Embraces Java 9 – An Insider’s View
Eclipse JDT Embraces Java 9 – An Insider’s ViewEclipse JDT Embraces Java 9 – An Insider’s View
Eclipse JDT Embraces Java 9 – An Insider’s View
 
Node.js – ask us anything!
Node.js – ask us anything! Node.js – ask us anything!
Node.js – ask us anything!
 
Swift on the Server
Swift on the Server Swift on the Server
Swift on the Server
 
Being serverless and Swift... Is that allowed?
Being serverless and Swift... Is that allowed? Being serverless and Swift... Is that allowed?
Being serverless and Swift... Is that allowed?
 
Secrets of building a debuggable runtime: Learn how language implementors sol...
Secrets of building a debuggable runtime: Learn how language implementors sol...Secrets of building a debuggable runtime: Learn how language implementors sol...
Secrets of building a debuggable runtime: Learn how language implementors sol...
 
Tools in Action: Transforming everyday objects with the power of deeplearning...
Tools in Action: Transforming everyday objects with the power of deeplearning...Tools in Action: Transforming everyday objects with the power of deeplearning...
Tools in Action: Transforming everyday objects with the power of deeplearning...
 
Microservices without Servers
Microservices without ServersMicroservices without Servers
Microservices without Servers
 
The App Evolution
The App EvolutionThe App Evolution
The App Evolution
 
Building Next Generation Applications and Microservices
Building Next Generation Applications and Microservices Building Next Generation Applications and Microservices
Building Next Generation Applications and Microservices
 
Create and Manage APIs with API Connect, Swagger and Bluemix
Create and Manage APIs with API Connect, Swagger and BluemixCreate and Manage APIs with API Connect, Swagger and Bluemix
Create and Manage APIs with API Connect, Swagger and Bluemix
 
OpenWhisk - Serverless Architecture
OpenWhisk - Serverless Architecture OpenWhisk - Serverless Architecture
OpenWhisk - Serverless Architecture
 
Add Custom Model and ORM to Node.js
Add Custom Model and ORM to Node.jsAdd Custom Model and ORM to Node.js
Add Custom Model and ORM to Node.js
 
OpenWhisk Lab
OpenWhisk Lab OpenWhisk Lab
OpenWhisk Lab
 

Recently uploaded

The Future of Platform Engineering
The Future of Platform EngineeringThe Future of Platform Engineering
The Future of Platform Engineering
Jemma Hussein Allen
 
Introduction to CHERI technology - Cybersecurity
Introduction to CHERI technology - CybersecurityIntroduction to CHERI technology - Cybersecurity
Introduction to CHERI technology - Cybersecurity
mikeeftimakis1
 
How world-class product teams are winning in the AI era by CEO and Founder, P...
How world-class product teams are winning in the AI era by CEO and Founder, P...How world-class product teams are winning in the AI era by CEO and Founder, P...
How world-class product teams are winning in the AI era by CEO and Founder, P...
Product School
 
State of ICS and IoT Cyber Threat Landscape Report 2024 preview
State of ICS and IoT Cyber Threat Landscape Report 2024 previewState of ICS and IoT Cyber Threat Landscape Report 2024 preview
State of ICS and IoT Cyber Threat Landscape Report 2024 preview
Prayukth K V
 
Smart TV Buyer Insights Survey 2024 by 91mobiles.pdf
Smart TV Buyer Insights Survey 2024 by 91mobiles.pdfSmart TV Buyer Insights Survey 2024 by 91mobiles.pdf
Smart TV Buyer Insights Survey 2024 by 91mobiles.pdf
91mobiles
 
Encryption in Microsoft 365 - ExpertsLive Netherlands 2024
Encryption in Microsoft 365 - ExpertsLive Netherlands 2024Encryption in Microsoft 365 - ExpertsLive Netherlands 2024
Encryption in Microsoft 365 - ExpertsLive Netherlands 2024
Albert Hoitingh
 
UiPath Test Automation using UiPath Test Suite series, part 3
UiPath Test Automation using UiPath Test Suite series, part 3UiPath Test Automation using UiPath Test Suite series, part 3
UiPath Test Automation using UiPath Test Suite series, part 3
DianaGray10
 
When stars align: studies in data quality, knowledge graphs, and machine lear...
When stars align: studies in data quality, knowledge graphs, and machine lear...When stars align: studies in data quality, knowledge graphs, and machine lear...
When stars align: studies in data quality, knowledge graphs, and machine lear...
Elena Simperl
 
PHP Frameworks: I want to break free (IPC Berlin 2024)
PHP Frameworks: I want to break free (IPC Berlin 2024)PHP Frameworks: I want to break free (IPC Berlin 2024)
PHP Frameworks: I want to break free (IPC Berlin 2024)
Ralf Eggert
 
Leading Change strategies and insights for effective change management pdf 1.pdf
Leading Change strategies and insights for effective change management pdf 1.pdfLeading Change strategies and insights for effective change management pdf 1.pdf
Leading Change strategies and insights for effective change management pdf 1.pdf
OnBoard
 
FIDO Alliance Osaka Seminar: Overview.pdf
FIDO Alliance Osaka Seminar: Overview.pdfFIDO Alliance Osaka Seminar: Overview.pdf
FIDO Alliance Osaka Seminar: Overview.pdf
FIDO Alliance
 
GenAISummit 2024 May 28 Sri Ambati Keynote: AGI Belongs to The Community in O...
GenAISummit 2024 May 28 Sri Ambati Keynote: AGI Belongs to The Community in O...GenAISummit 2024 May 28 Sri Ambati Keynote: AGI Belongs to The Community in O...
GenAISummit 2024 May 28 Sri Ambati Keynote: AGI Belongs to The Community in O...
Sri Ambati
 
FIDO Alliance Osaka Seminar: The WebAuthn API and Discoverable Credentials.pdf
FIDO Alliance Osaka Seminar: The WebAuthn API and Discoverable Credentials.pdfFIDO Alliance Osaka Seminar: The WebAuthn API and Discoverable Credentials.pdf
FIDO Alliance Osaka Seminar: The WebAuthn API and Discoverable Credentials.pdf
FIDO Alliance
 
Elevating Tactical DDD Patterns Through Object Calisthenics
Elevating Tactical DDD Patterns Through Object CalisthenicsElevating Tactical DDD Patterns Through Object Calisthenics
Elevating Tactical DDD Patterns Through Object Calisthenics
Dorra BARTAGUIZ
 
Monitoring Java Application Security with JDK Tools and JFR Events
Monitoring Java Application Security with JDK Tools and JFR EventsMonitoring Java Application Security with JDK Tools and JFR Events
Monitoring Java Application Security with JDK Tools and JFR Events
Ana-Maria Mihalceanu
 
FIDO Alliance Osaka Seminar: Passkeys and the Road Ahead.pdf
FIDO Alliance Osaka Seminar: Passkeys and the Road Ahead.pdfFIDO Alliance Osaka Seminar: Passkeys and the Road Ahead.pdf
FIDO Alliance Osaka Seminar: Passkeys and the Road Ahead.pdf
FIDO Alliance
 
By Design, not by Accident - Agile Venture Bolzano 2024
By Design, not by Accident - Agile Venture Bolzano 2024By Design, not by Accident - Agile Venture Bolzano 2024
By Design, not by Accident - Agile Venture Bolzano 2024
Pierluigi Pugliese
 
Accelerate your Kubernetes clusters with Varnish Caching
Accelerate your Kubernetes clusters with Varnish CachingAccelerate your Kubernetes clusters with Varnish Caching
Accelerate your Kubernetes clusters with Varnish Caching
Thijs Feryn
 
Generative AI Deep Dive: Advancing from Proof of Concept to Production
Generative AI Deep Dive: Advancing from Proof of Concept to ProductionGenerative AI Deep Dive: Advancing from Proof of Concept to Production
Generative AI Deep Dive: Advancing from Proof of Concept to Production
Aggregage
 
Welocme to ViralQR, your best QR code generator.
Welocme to ViralQR, your best QR code generator.Welocme to ViralQR, your best QR code generator.
Welocme to ViralQR, your best QR code generator.
ViralQR
 

Recently uploaded (20)

The Future of Platform Engineering
The Future of Platform EngineeringThe Future of Platform Engineering
The Future of Platform Engineering
 
Introduction to CHERI technology - Cybersecurity
Introduction to CHERI technology - CybersecurityIntroduction to CHERI technology - Cybersecurity
Introduction to CHERI technology - Cybersecurity
 
How world-class product teams are winning in the AI era by CEO and Founder, P...
How world-class product teams are winning in the AI era by CEO and Founder, P...How world-class product teams are winning in the AI era by CEO and Founder, P...
How world-class product teams are winning in the AI era by CEO and Founder, P...
 
State of ICS and IoT Cyber Threat Landscape Report 2024 preview
State of ICS and IoT Cyber Threat Landscape Report 2024 previewState of ICS and IoT Cyber Threat Landscape Report 2024 preview
State of ICS and IoT Cyber Threat Landscape Report 2024 preview
 
Smart TV Buyer Insights Survey 2024 by 91mobiles.pdf
Smart TV Buyer Insights Survey 2024 by 91mobiles.pdfSmart TV Buyer Insights Survey 2024 by 91mobiles.pdf
Smart TV Buyer Insights Survey 2024 by 91mobiles.pdf
 
Encryption in Microsoft 365 - ExpertsLive Netherlands 2024
Encryption in Microsoft 365 - ExpertsLive Netherlands 2024Encryption in Microsoft 365 - ExpertsLive Netherlands 2024
Encryption in Microsoft 365 - ExpertsLive Netherlands 2024
 
UiPath Test Automation using UiPath Test Suite series, part 3
UiPath Test Automation using UiPath Test Suite series, part 3UiPath Test Automation using UiPath Test Suite series, part 3
UiPath Test Automation using UiPath Test Suite series, part 3
 
When stars align: studies in data quality, knowledge graphs, and machine lear...
When stars align: studies in data quality, knowledge graphs, and machine lear...When stars align: studies in data quality, knowledge graphs, and machine lear...
When stars align: studies in data quality, knowledge graphs, and machine lear...
 
PHP Frameworks: I want to break free (IPC Berlin 2024)
PHP Frameworks: I want to break free (IPC Berlin 2024)PHP Frameworks: I want to break free (IPC Berlin 2024)
PHP Frameworks: I want to break free (IPC Berlin 2024)
 
Leading Change strategies and insights for effective change management pdf 1.pdf
Leading Change strategies and insights for effective change management pdf 1.pdfLeading Change strategies and insights for effective change management pdf 1.pdf
Leading Change strategies and insights for effective change management pdf 1.pdf
 
FIDO Alliance Osaka Seminar: Overview.pdf
FIDO Alliance Osaka Seminar: Overview.pdfFIDO Alliance Osaka Seminar: Overview.pdf
FIDO Alliance Osaka Seminar: Overview.pdf
 
GenAISummit 2024 May 28 Sri Ambati Keynote: AGI Belongs to The Community in O...
GenAISummit 2024 May 28 Sri Ambati Keynote: AGI Belongs to The Community in O...GenAISummit 2024 May 28 Sri Ambati Keynote: AGI Belongs to The Community in O...
GenAISummit 2024 May 28 Sri Ambati Keynote: AGI Belongs to The Community in O...
 
FIDO Alliance Osaka Seminar: The WebAuthn API and Discoverable Credentials.pdf
FIDO Alliance Osaka Seminar: The WebAuthn API and Discoverable Credentials.pdfFIDO Alliance Osaka Seminar: The WebAuthn API and Discoverable Credentials.pdf
FIDO Alliance Osaka Seminar: The WebAuthn API and Discoverable Credentials.pdf
 
Elevating Tactical DDD Patterns Through Object Calisthenics
Elevating Tactical DDD Patterns Through Object CalisthenicsElevating Tactical DDD Patterns Through Object Calisthenics
Elevating Tactical DDD Patterns Through Object Calisthenics
 
Monitoring Java Application Security with JDK Tools and JFR Events
Monitoring Java Application Security with JDK Tools and JFR EventsMonitoring Java Application Security with JDK Tools and JFR Events
Monitoring Java Application Security with JDK Tools and JFR Events
 
FIDO Alliance Osaka Seminar: Passkeys and the Road Ahead.pdf
FIDO Alliance Osaka Seminar: Passkeys and the Road Ahead.pdfFIDO Alliance Osaka Seminar: Passkeys and the Road Ahead.pdf
FIDO Alliance Osaka Seminar: Passkeys and the Road Ahead.pdf
 
By Design, not by Accident - Agile Venture Bolzano 2024
By Design, not by Accident - Agile Venture Bolzano 2024By Design, not by Accident - Agile Venture Bolzano 2024
By Design, not by Accident - Agile Venture Bolzano 2024
 
Accelerate your Kubernetes clusters with Varnish Caching
Accelerate your Kubernetes clusters with Varnish CachingAccelerate your Kubernetes clusters with Varnish Caching
Accelerate your Kubernetes clusters with Varnish Caching
 
Generative AI Deep Dive: Advancing from Proof of Concept to Production
Generative AI Deep Dive: Advancing from Proof of Concept to ProductionGenerative AI Deep Dive: Advancing from Proof of Concept to Production
Generative AI Deep Dive: Advancing from Proof of Concept to Production
 
Welocme to ViralQR, your best QR code generator.
Welocme to ViralQR, your best QR code generator.Welocme to ViralQR, your best QR code generator.
Welocme to ViralQR, your best QR code generator.
 

Creating Sentiment Line Chart with Watson

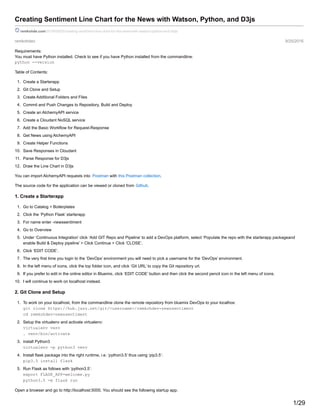
  • 1. remkohdev 9/25/2016 Creating Sentiment Line Chart for the News with Watson, Python, and D3js remkohde.com/2016/09/25/creating-sentiment-line-chart-for-the-news-with-watson-python-and-d3js/ Requirements: You must have Python installed. Check to see if you have Python installed from the commandline: python --version Table of Contents: 1. Create a Starterapp 2. Git Clone and Setup 3. Create Additional Folders and Files 4. Commit and Push Changes to Repository, Build and Deploy 5. Create an AlchemyAPI service 6. Create a Cloudant NoSQL service 7. Add the Basic Workflow for Request-Response 8. Get News using AlchemyAPI 9. Create Helper Functions 10. Save Responses in Cloudant 11. Parse Response for D3js 12. Draw the Line Chart in D3js You can import AlchemyAPI requests into Postman with this Postman collection. The source code for the application can be viewed or cloned from Github. 1. Create a Starterapp 1. Go to Catalog > Boilerplates 2. Click the ‘Python Flask’ starterapp 3. For name enter -newssentiment 4. Go to Overview 5. Under ‘Continuous Integration’ click ‘Add GIT Repo and Pipeline’ to add a DevOps platform, select ‘Populate the repo with the starterapp packageand enable Build & Deploy pipeline’ > Click Continue > Click ‘CLOSE’. 6. Click ‘EDIT CODE’. 7. The very first time you login to the ‘DevOps’ environment you will need to pick a username for the ‘DevOps’ environment. 8. In the left menu of icons, click the top folder icon, and click ‘Git URL’ to copy the Git repository url. 9. If you prefer to edit in the online editor in Bluemix, click ‘EDIT CODE’ button and then click the second pencil icon in the left menu of icons. 10. I will continue to work on localhost instead. 2. Git Clone and Setup 1. To work on your localhost, from the commandline clone the remote repository from bluemix DevOps to your localhos: git clone https://hub.jazz.net/git/<username>/remkohdev-newssentiment cd remkohdev-newssentiment 2. Setup the virtualenv and activate virtualenv: virtualenv venv . venv/bin/activate 3. install Python3 virtualenv -p python3 venv 4. Install flask package into the right runtime, i.e. ‘python3.5’ thus using ‘pip3.5’: pip3.5 install flask 5. Run Flask as follows with ‘python3.5’: export FLASK_APP=welcome.py python3.5 -m flask run Open a browser and go to http://localhost:5000. You should see the following startup app. 1/29
  • 2. 3. Create additional folders and files Open the editor: 1. Open the ‘Procfile’ and verify the startup command to ‘web: python welcome.py’, 2. To create a new folder in the online editor, click: File > New > Folder from the top menu ‘templates’, 3. Create the following folders: ‘~/templates’ ‘~/static/js’ ‘~/static/js/d3js’ ‘~/static/js/jquery’ ‘~/static/js/jquery-validation’ ‘~/mymodule’ , a module folder to hold custom packages. 4. To create a new file in the online editor, click: File > New > File, 5. Create the following files: ‘~/.gitignore’, ‘~/.cfignore’, ‘~/templates/index.html’, ‘~/templates/report.html’, ‘~/mymodule/myalchemyapi.py’, ‘~/mymodule/mycloudant.py’, ‘~/mymodule/__init__.py’ , to make the ‘~/mymodule’ folder a Python module you have to create an empty file named ‘__init__.py’. 6. I am using version 3 of D3js, though recently version 4 was published. Download and unzip ‘https://github.com/d3/d3/releases/download/v3.5.17/d3.zip’ to the ‘~/static/js/d3js’ folder. In the online editor, you can import libraries via the import feature. Select the ‘~/static/js/d3js’ folder, then from the top menu, click File > Import > HTTP, paste ‘https://github.com/d3/d3/releases/download/v3.5.17/d3.zip’ and click ‘Submit’, 7. Also download and install JQuery and JQuery-Validation. Download ‘https://code.jquery.com/jquery-3.1.1.min.js’ to the ‘~/static/js/jquery’ folder. In the online editor, select the ‘~/static/js/jquery’ folder, then from the top menu, click File > Import > HTTP, paste ‘https://code.jquery.com/jquery- 3.1.1.min.js’ and click ‘Submit’, Download and unzip ‘https://github.com/jzaefferer/jquery-validation/releases/download/1.15.1/jquery-validation-1.15.1.zip’ to the ‘~/static/js/jquery-validation’ folder. Select the ‘~/static/js/jquery-validation’ folder, then from the top menu, click File > Import > HTTP, paste ‘https://github.com/jzaefferer/jquery- validation/releases/download/1.15.1/jquery-validation-1.15.1.zip’ and click ‘Submit’. 4. Commit and Push Changes to Repository, Build and Deploy From localhost using git: 2/29
  • 3. 1. Add the following directories to ‘~/.gitignore’ and ‘~/.cfignore’ venv/ __pycache__/ 2. Verify the files that have changed git status You should see .gitignore mymodule/ static/js/ templates/ 3. Add the files to the git index git add * 4. Commit the files for push to the remote master branch git commit -m "setup" 5. And push the files to the remote master git push From localhost using the CloudFoundry cli: 1. Make the changes to ‘~/.gitignore’ and ‘~/.cfignore’ as above, 2. Make sure the cf cli is installed or install it from ‘https://github.com/cloudfoundry/cli/releases’, 3. Connect to Bluemix cf api https://api.ng.bluemix.net You will be asked to login with your Bluemix username (registration email) and password, and select a space. 4. Push changes to Bluemix cf push From the online editor: 1. In the left menu of icons, click the third Git icon, 2. In the right commit message box, type ‘init1’ and click ‘Commit’, 3. In the left, in the ‘Outgoing’ section, make sure the commits appear and click ‘Push’, 4. Go to the top right ‘BUILD & DEPLOY’, the default Build stage and Deploy stage should be triggered, 5. If an error occurs, from the commandline on your localhost, use ‘cf login’ and ‘cf logs –recent -newssentiment’ to find detailed log output, 6. Alternatively to using the online Git, you can use in the online editor next to the application status box, the play button to ‘Deploy the App from the Workspace’. 5. Create an AlchemyAPI service 1. Go back to the application overview page, 2. In ‘Connections’ in the ‘new-console’, click ‘Connect New’, or in classic ‘console’, click ‘ADD A SERVICE OR API’, 3. This takes you to the Catalog, select the ‘Watson’ category, search and click AlchemyAPI, 4. In ‘Service Name’ enter ‘-newssentiment-AlchemyAPI’, make sure in the left under ‘Connect to’ the application you created is selected, select the ‘Free’ plan and click ‘CREATE’, and ‘RESTAGE’. 5. In the ‘new-console’, go to ‘Runtime’ and ‘Environment Variables’, in classic console go to ‘Environment Variables’. Under ‘VCAP_SERVICES’ you will find the credentials of the services or connections, with these you can access the AlchemyAPI. 6. Create a Cloudant NoSQL service 1. Go back to the application overview page again, 2. In ‘Connections’ in the ‘new-console’, click ‘Connect New’, or in classic console, click ‘ADD A SERVICE OR API’, 3. This takes you to the Catalog again, select the ‘Data and Analytics’ category, and click ‘Cloudant NoSQL DB’, 4. In ‘Service Name’ enter ‘-newssentiment-Cloudant’, make sure in the left under ‘Connect to’ the application you created is selected, select the free ‘Lite’ plan and click ‘CREATE’, and ‘RESTAGE’, 7. Add the Basic Workflow for Request-Response Now we are ready to code and connect all the pieces. I will: 1. Change the ‘index.html’ and ‘report.html’ pages, 3/29
  • 4. 2. Change code for the ‘/’ route, and create a ‘/search’ route. In your editor, open the ‘welcome.py’ file, look for the line ‘@app.route(‘/’)’ around line 20, and change the return value to return render_template('index.html') At the top of the file add the ‘render_template’, ‘Response’ and ‘request’ packages to the import from flask’, from flask import Flask, jsonify, render_template, Response, request Remove the code for the routes ‘/myapp’, ‘/api/people’, ‘/api/people/‘. Add the ‘/search’ route to the ‘welcome.py’ file, so that your ‘welcome.py’ code now looks as follows: import os from flask import Flask, jsonify, render_template, Response, request app = Flask(__name__) @app.route('/') def Welcome(): #return app.send_static_file('index.html') return render_template('index.html') @app.route('/search') def Search(startdate=None, enddate=None, searchterm=None, count=None): startdate = request.args.get('startdate', '7daysago') enddate = request.args.get('enddate', 'today') searchterm = request.args.get('searchterm') count = request.args.get('count') response = { 'startdate' : startdate, 'enddate' : enddate, 'searchterm' : searchterm, 'count' : count } return render_template('report.html', response=response) port = os.getenv('PORT', '5000') if __name__ == "__main__": app.run(host='0.0.0.0', port=int(port)) 4/29
  • 5. view raw newssentiment_flask_server_routes.html hosted with by GitHub Add the following code to the ‘~/templates/index.html’ file <html> <head> <title>My News Sentiment</title> <link href="{{ url_for('static', filename='stylesheets/style.css') }}"> <style type="text/css"> 5/29
  • 6. body { margin: 50px; } label { display: inline-block; width: 200px; } button { margin: 20px; } </style> </link> </head> <body> <h1>News Sentiment</h1> <form action="" method="get" id="searchform"> <div> <label for="startdate">Startdate:</label> <input type="date" name="startdate"> </div> <div> <label for="enddate">Enddate:</label> <input type="date" name="enddate"> </div> <div> <label for="searchterm">Search for:</label> <input type="text" name="searchterm"> </div> <div> <label for="">Number of results</label> <select name="count"> <option value="25">25</option> <option value="100">100</option> <option value="500">500</option> 6/29
  • 7. <option value="1000">1000</option> </select> </div> <div><button type="submit">Submit</button> </div> </form> <script type=text/javascript src="{{url_for('static', filename='js/jquery/jquery-3.1.1.min.js') }}"></script> <script type=text/javascript src="{{url_for('static', filename='js/jquery-validation/jquery-validation-1.15.1/dist/jquery.validate.min.js') }}"></script> <script type="text/javascript"> var validator = $('#searchform').validate({ rules: { startdate: { required: true }, enddate: { required: true }, searchterm: { required: true }, count: { required: true } }, submitHandler: function (form) { $('form#searchform').attr('action', '/search') form.submit(); } }); </script> </body> </html> 7/29
  • 8. view raw newssentiment_flask_index.html hosted with by GitHub Add the following code to the ‘~/templates/report.html’ file <html> <head> <title>News Sentiment Response</title> <link href="{{ url_for('static', filename='stylesheets/style.css') }}"></link> <style type="text/css"> 8/29
  • 9. body { margin: 50px; } </style> </head> <body> <h1>News Sentiment Response</h1> <div id="response"></div> <script type=text/javascript src="{{url_for('static', filename='js/jquery/jquery-3.1.1.min.js') }}"></script> <script type="text/javascript"> var response = {{ response|tojson|safe }}; var responseAsStr = JSON.stringify(response, undefined, 2); document.getElementById("response").innerHTML = responseAsStr; </script> </body> </html> 9/29
  • 10. view raw newssentiment_flask_report.html hosted with by GitHub In the online editor, deploy the app from the workspace. On localhost, restart the application python3.5 -m flask run and in your browser go to http://127.0.0.1:5000/. Index.html 10/29
  • 11. Report.html 8. Get News using AlchemyAPI So far, the application allows a user to enter input information to do a news search, but the server just returns the input information. Let’s take a look at the options for the AlchemyAPI News service. Open a new browser tab and go to the AlchemyAPI Query Builder tool, In ‘Search articles over’ select for startdate ‘August 1, 2016’ and for enddate select ‘September 16, 2016’, and click ‘Apply’, Enter a ‘where’ search term, change ‘is mentioned’ to ‘anywhere’, change ‘and the Sentiment is’ to ‘Any’, select an appropriate Taxonomy, change ‘in the article’ to ‘body’, In the Return section to the right, select all fields to enrich the search results with all NLP analytics, and ‘Run Query’, Now, let’s add the Watson AlchemyAPI News service, so that the search form actually will return real news results. 1. I am using a package called ‘http.client’, which is a Python3 package, so I have to change the Python version value in the ‘runtime.txt’ file to ‘python- 3.5.1’, 2. Add the following ‘import’ statement at the top of ‘welcome.py’ to import the custom packages of the ‘mymodule’ module we created earlier, implementing the interaction with the AlchemyAPI and Cloudant services. from mymodule import myalchemyapi, mycloudant import json 3. In the ‘~/mymodule/myalchemyapi’ package, add a function ‘GetNews()’ as follows: import http.client import csv apikey = "<your-apikey>" def GetNews(searchterm=None, outputMode="json", startdate=None, enddate=None, count="5", returnfields="enriched.url.url"): conn = http.client.HTTPSConnection("gateway-a.watsonplatform.net") headers = { 11/29
  • 12. 'content-type': "application/json" } endpoint = ('/calls/data/GetNews?outputMode={0}&start={1}&end={2}&count={3}&q.enriched.url.enrichedTitle.keywords.keyword.text={4}&return= {5}&apikey={6}').format(outputMode, startdate, enddate, count, searchterm, returnfields, apikey) print("GetNews API. endpoint: %s", endpoint) conn.request("GET", endpoint, headers=headers) res = conn.getresponse() logMsg = ("GetNews API. response: status[{0}], msg[{1}], reason[{2}]").format(res.status, res.msg, res.reason) print(logMsg) # HTTPResponse.read returns bytes[] data = res.read() responseStr = data.decode("utf-8") return responseStr 12/29
  • 13. view raw newssentiment_flask_f2f_getnews1.html hosted with by GitHub 4. Go to the application ‘Environment Variables’ page and in the ‘VCAP_SERVICES’ look for the ‘alchemy_api’ node, and copy the ‘apikey’ value in the ‘credentials’ node. Go back to the ‘~/mymodule/myalchemyapi’ file and paste the value in place of ‘’ apikey = "" 5. In the ‘welcome.py’ file, change the ‘Search’ function, as follows: @app.route('/search') def Search(startdate=None, enddate=None, searchterm=None, count=None): startdateStr = request.args.get('startdate') enddateStr = request.args.get('enddate') 13/29
  • 14. searchterm = request.args.get('searchterm') count = request.args.get('count') # format the correct start and end formats startdate = myalchemyapi.FormatDate(startdateStr) enddate = myalchemyapi.FormatDate(enddateStr) # GetNews with Sentiment returnfields = 'enriched.url.url%2Cenriched.url.title%2Cenriched.url.publicationDate.date%2Cenriched.url.docSentiment.score' articles = myalchemyapi.GetNews(searchterm=searchterm, returnfields=returnfields, startdate=startdate, enddate=enddate, count=count) # prepare for d3js, calculate the average sentiment per day uniqueSentimentList = myalchemyapi.ParseNews(articles, startdateStr, enddateStr) response = { 'news' : uniqueSentimentList, 'startdate' : startdateStr, 'enddate' : enddateStr, 'searchterm' : searchterm } return render_template('report.html', response=response) 14/29
  • 15. view raw newssentiment_flask_routes_search2 hosted with by GitHub Some comments to the new ‘welcome.py’ code: I added two helper functions ‘myalchemyapi.FormatDate(startdateStr)’ and ‘myalchemyapi.ParseNews(articles, startdateStr)’, so we need to add these still to the ‘mymodule/myalchemyapi.py’ package. I will do that in the next step. The AlchemyAPI GetNews API is more than just a News Search. The API combines news search with Watson NLP analytics in a single call. The real power comes from the input parameters of the API that add complex configuration options that can include multiple NLP analytics to filter search results. In the ‘returnfields’ input parameter, I set the ‘return’ parameter for the API, which defines what data and meta-data from the search results I want to retrieve. There is a full list of Return values in the API documentation, the full list is accessible in this Google spreadsheet with currently 419 options. For now, I am only going to retrieve 3 fields: title, publication date and the sentiment score of the overall document. The sentiment score add for each search result a Sentiment Analysis API call. This will add the following return field: "docSentiment": { "score": -0.112443998 } 15/29
  • 16. 9. Create Helper Functions Now, I will create the two helper methods ‘myalchemyapi.FormatDate(startdateStr)’ and ‘myalchemyapi.ParseNews(articles, startdateStr)’. 1. First, add the following code to the ‘mymodule/myalchemyapi.py’ package: import http.client import csv from datetime import datetime import json from mymodule import mycloudant apikey = "" def GetNews(searchterm=None, outputMode="json", startdate=None, enddate=None, count="5", returnfields="enriched.url.url"): conn = http.client.HTTPSConnection("gateway-a.watsonplatform.net") headers = { 'content-type': "application/json" } endpoint = ('/calls/data/GetNews? outputMode={0}&start={1}&end={2}&count={3}&q.enriched.url.enrichedTitle.keywords.keyword.text={4}&return={5}&apikey={6}').format(outputMode, startdate, enddate, count, searchterm, returnfields, apikey) print("==GetNews API. endpoint: %s", endpoint) conn.request("GET", endpoint, headers=headers) res = conn.getresponse() logMsg = ("GetNews API. response: status[{0}], msg[{1}], reason[{2}]").format(res.status, res.msg, res.reason) print(logMsg) # HTTPResponse.read returns bytes[] data = res.read() responseStr = data.decode("utf-8") return responseStr ''' 1. the GetNews Alchemy API takes date formats in UTC timezone in seconds, it also has convenience methods, in the form of 'now-1M' for the last month, 'now-1d' for yesterday, so I here convert any datetime to 'now-{0}d', so that start and end could be e.g. 'now-30d' to 'now-0d'. ''' def FormatDate(dateStr=None): now = datetime.now() 16/29
  • 17. date1 = datetime.strptime(dateStr, '%Y-%m-%d') delta1 = now-date1 date1 = ("now-{0}d").format(delta1.days) return date1 ''' 1. d3js takes an array of assiociative arrays as input, for convenience I prepare that arrayon the server. 2. I create an array of unique days to be visualized in d3js and have to order the set, cause d3js create a graph by drawing a line from point to point, and i want to prevent the line to go back and forth, creating a very messy graph. ''' def ParseNews(articles=None, startdate1=None, enddate1=None): #print(("=====Articles: {0}").format(articles)) status1 = "" startdate1 = datetime.strptime(startdate1, '%Y-%m-%d') enddate1 = datetime.strptime(enddate1, '%Y-%m-%d') if (articles==None or articles==""): logMsg = "GetNews API Error: no response. " print(logMsg) return logMsg else: logMsg = ("GetNews API response: {0}").format(articles) #print(logMsg) articlesJson = json.loads(articles) status1 = articlesJson['status'] if status1=='ERROR': statusInfo = articlesJson['statusInfo'] logMsg = ('GetNews API Error. StatusInfo: {0}').format(statusInfo) print(logMsg) return logMsg elif status1=='OK': logMsg = "GetNews API status: OK" #print(logMsg) 17/29
  • 18. # Here everything is OK mycloudant.SaveNews(articles) sentimentList = [] docs = articlesJson['result']['docs'] for doc in docs: enrichedURL = doc['source']['enriched']['url'] # Get publicationDate publicationDate = enrichedURL['publicationDate']['date'] sentiment = enrichedURL['docSentiment']['score'] # construct data array for d3js, append row sentimentRow = {"publicationDate": publicationDate, "sentiment": sentiment} sentimentList.append(sentimentRow) #get unique publicationDates uniqueSentimentList=[] uniqueDates = set() for dic in sentimentList: pubdate1 = dic['publicationDate'] pubdate1 = datetime.strptime(pubdate1, '%Y%m%dT%H%M%S') # make sure publicationdates are within range if (startdate1 < pubdate1) and (pubdate1 < enddate1): # set times for all dates to zero for Ymd comparison pubdate1 = pubdate1.replace(hour=0, minute=0, second=0) # only add the date if new date if pubdate1 not in uniqueDates: uniqueDates.add(pubdate1) uniqueDates = sorted(uniqueDates) # loop through the uniqueDates and calculate averages for duplicates by date i1 = 0 for uniqueDate in uniqueDates: i1+=1 sentiments = 0 i=0 for row in sentimentList: rowDate = datetime.strptime(row['publicationDate'], '%Y%m%dT%H%M%S') 18/29
  • 19. # set times for all dates to zero for Ymd comparison rowDate = rowDate.replace(hour=0, minute=0, second=0) if rowDate==uniqueDate: i+=1 sentiments += row['sentiment'] avgSentiment = sentiments/i shortUniqueDate = ("{0}-{1}-{2}").format(uniqueDate.strftime("%Y"), uniqueDate.strftime("%m"), uniqueDate.strftime("%d")) uniqueSentimentRow = {"publicationDate": shortUniqueDate, "sentiment": avgSentiment} uniqueSentimentList.append(uniqueSentimentRow) return uniqueSentimentList 19/29
  • 20. view raw newssentiment_flask_alchemyapi.py hosted with by GitHub 10. Save Responses in Cloudant I want to save all search results. First, I have to create a database in cloudant to store all search results. 1. In the ‘new-console’ go to ‘All Items’ or in the classic console in the application overview page, under ‘Services’, click the ‘Cloudant NoSQL’ service, and click the green ‘LAUNCH’ button, 2. In the left menu, click ‘Databases’, 3. In the top right of the page, click ‘Create Dababase’, enter ‘newssentiment’ and click ‘Create’. Next configure the Python application to use Cloudant to save the search results. I am using the Python Cloudant package. 1. In your IDE, open the ‘~/mymodule/mycloudant.py’ file and add the following code: 20/29
  • 21. from cloudant.client import Cloudant import json username = "" password = "" cloudantURL = "" client = Cloudant(username, password, url=cloudantURL) def SaveNews(doc): print('Save Document') # class should be 'dict' if isinstance(doc, str): doc = json.loads(doc) client.connect() my_database = client['newssentiment'] my_document = my_database.create_document(doc) if my_document.exists(): print('Save Document: SUCCESS') else: print('Save Document: ERROR') client.disconnect() def GetNews(): client.connect() my_database = client['newssentiment'] # document_id news = my_database[document_id] client.disconnect() # json to string news = json.dumps(news) return news; 21/29
  • 22. view raw newssentiment_flask_mycloudantdb.py hosted with by GitHub In the application overview page, go to the ‘Environment Variables’ page and in the ‘VCAP_SERVICES’ look for the ‘cloudantNoSQLDB’ service. Copy the credentials and configure the Cloudant credentials in the ‘~/mymodule/mycloudant.py’ file. username = "<cloudant_username>" password = "<cloudant_password>" cloudantURL = "<cloudant_url>" For the cloudantURL, use the format ‘.cloudant.com’ without ‘username:password@’. 2. The code in the ‘~/mymodule/mycloudant.py’ file, imports the Cloudant package from the ‘cloudant.client’ module, which is not yet installed: from cloudant.client import Cloudant 22/29
  • 23. 3. To install the ‘Cloudant’ package for python3.5, from the commandline in the root of your project, run: pip3.5 install cloudant and make sure it gets installed in the ‘venv/lib/python3.5/site-packages/’. Note the installation results: Installing collected packages: requests, cloudant Successfully installed cloudant-2.1.1 requests-2.11.1 4. Edit the file ‘requirements.txt’ to include the correct package version: Flask==0.10.1 cloudant==2.1.1 Bluemix uses the ‘requirements.txt’ file to install dependencies, instead of running from a ‘virtualenv’ environment like I do on localhost. 5. Add the following line in the ‘mymodule/myalchemyapi.py’ package in the ‘ParseNews()’ function around line 70 before parsing the ‘result’: # Here everything is OK mycloudant.SaveNews(articles) sentimentList = [] docs = articlesJson['result']['docs'] for doc in docs: Report.html with AlchemyAPI GetNews API results. 11. Parse Response for D3js The ‘def ParseNews(articles=None, startdate1=None):’ method in the ‘mymodule/myalchemyapi.py’ package, parses the JSON document from the AlchemyAPI to a format that is used by D3js to load and draw the graph. D3js has its own functions to transform data, but I prefer to do it on the server. The D3js format for the sentiment data is as follows: [ {"publicationDate": publicationDate, "sentiment": sentiment}, {"publicationDate": publicationDate, "sentiment": sentiment} ] The ‘ParseNews()’ method creates the correct format, but there are also multiple results per day. For a better display in the D3js graph, I average multiple scores for a single day, and sort the results ascending by date, so D3js will draw a logical line forward in time. The result is a list of unique dates with average sentiment per day. 12. Draw the Line Chart in D3js I used Mike Bostock’s Line Chart as the base graph for the Sentiment by Day chart. Add the following code to the ‘~/templates/report.html’ page. <html> <head> <title>News Sentiment Response</title> <link href="{{ url_for('static', filename='stylesheets/style.css') }}"></link> <style type="text/css"> 23/29
  • 24. body { margin: 50px; font: 10px sans-serif; } .axis path, .axis line { fill: none; stroke: #000; shape-rendering: crispEdges; } .line { fill: none; stroke: steelblue; stroke-width: 1.5px; } td, th { padding: 1px 4px; border: 1px solid black; } table { border-collapse: collapse; } </style> </head> <body> <script type=text/javascript src="{{url_for('static', filename='js/jquery/jquery-3.1.1.min.js') }}"></script> <script type=text/javascript src="{{url_for('static', filename='js/d3js/d3/d3.min.js') }}"></script> <script type="text/javascript"> var response = {{ response|tojson|safe }}; var responseAsStr = JSON.stringify(response); var data = response.news; var respStartDate = response.startdate; 24/29
  • 25. var respEndDate = response.enddate; var respSearchTerm = response.searchterm; var body = d3.select("body"); body.append("p").text(responseAsStr); body.append("h1") .text("News Sentiment for '"+respSearchTerm+"'"); body.append("h3") .text("from "+respStartDate+" to "+respEndDate); var formatDate = d3.time.format("%Y-%m-%d"); var margin = {top: 20, right: 20, bottom: 30, left: 50}, width = 960 - margin.left - margin.right, height = 500 - margin.top - margin.bottom; var x = d3.time.scale().range([0, width]); var y = d3.scale.linear().range([height, 0]); var xAxis = d3.svg.axis() .scale(x) .orient("bottom"); var yAxis = d3.svg.axis() .scale(y) .orient("left"); var line = d3.svg.line() .x(function(d) { return x(d.publicationDate); }) .y(function(d) { return y(d.sentiment); }); var svg = body.append("svg") .attr("width", width + margin.left + margin.right) .attr("height", height + margin.top + margin.bottom) .append("g") .attr("transform", "translate(" + margin.left + "," + margin.top + ")"); data.forEach(function(d){ d.publicationDate = formatDate.parse(d.publicationDate); d.sentiment = parseFloat(d.sentiment); }); 25/29
  • 26. x.domain(d3.extent(data, function(d) { return d.publicationDate; })); y.domain(d3.extent(data, function(d) { return d.sentiment; })); svg.append("g") .attr("class", "x axis") .attr("transform", "translate(0," + height + ")") .call(xAxis); svg.append("g") .attr("class", "y axis") .call(yAxis) .append("text") .attr("transform", "rotate(-90)") .attr("y", 6) .attr("dy", ".71em") .style("text-anchor", "end") .text("Sentiment"); svg.append("path") .datum(data) .attr("class", "line") .attr("d", line); function tabulate(data, columns) { var table = d3.select('body').append('table') var thead = table.append('thead') var tbody = table.append('tbody'); // append the header row thead.append('tr') .selectAll('th') .data(columns).enter() .append('th') .text(function (column) { return column; }); 26/29
  • 27. // create a row for each object in the data var rows = tbody.selectAll('tr') .data(data) .enter() .append('tr'); // create a cell in each row for each column var cells = rows.selectAll('td') .data(function (row) { return columns.map(function (column) { val = row[column]; if(row[column] instanceof Date){ val = row[column].getFullYear()+"-"+ (row[column].getMonth()+1)+"-"+row[column].getDate(); } return {column: column, value: val}; }); }) .enter() .append('td') .text(function (d) { return d.value; }); return table; } var table = tabulate(data, ['publicationDate', 'sentiment']); </script> </body> </html> 27/29
  • 28. view raw newssentiment_flask_report_d3js.html hosted with by GitHub To select elements and create new HTML elements, you can use d3 as follows: var body = d3.select("body"); body.append("h1") .text("News Sentiment for '"+respSearchTerm+"'"); D3js lets you define and nest functions, e.g. var formatDate = d3.time.format("%Y-%m-%d"); var x = d3.time.scale().range([0, width]); var y = d3.scale.linear().range([height, 0]); var xAxis = d3.svg.axis().scale(x).orient("bottom"); var line = d3.svg.line() .x(function(d) { return x(d.publicationDate); }) .y(function(d) { return y(d.sentiment); }); 28/29
  • 29. data.forEach(function(d){ d.publicationDate = formatDate.parse(d.publicationDate); d.sentiment = parseFloat(d.sentiment); }); In this example, I have passed the data a Response object from the Flask server, and parse the values to be of Object type date based on the strftime() function using the d3js function d3.time.format(), and the sentiment to be a floating Number with the default JavaScript function. Similarly, when I draw the line with the function ‘d3.svg.line()’ I can set the x and y coordinates by a custom callback function, which itself calls the previously defined functions x and y which use a range() function. D3js uses a lot of these type of nested functions. In this part: svg.append("path") .datum(data) .attr("class", "line") .attr("d", line); D3js binds the data object to the svg object and in the attribute the ‘line’ function is called, which sets the x and y coordinates respectively by applying ‘d.publicationDate’ and ‘d.sentiment’ (see above). Similarly, it draws an x-axis and y-axis as follows: svg.append("g") .attr("class", "y axis") .call(yAxis) .append("text") .attr("transform", "rotate(-90)") .attr("y", 6) .attr("dy", ".71em") .style("text-anchor", "end") .text("Sentiment"); 29/29