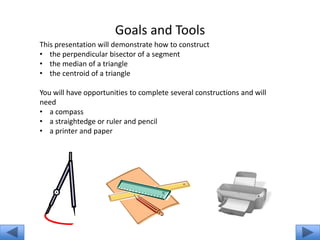
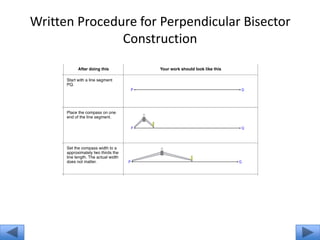
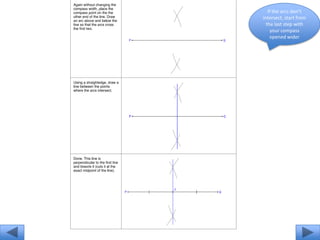
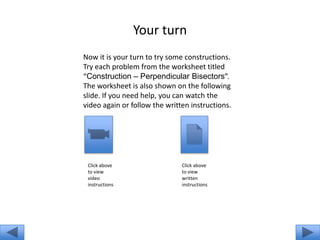
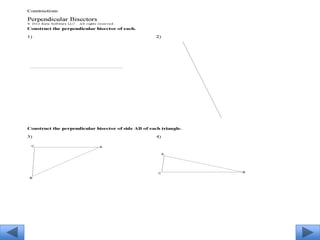
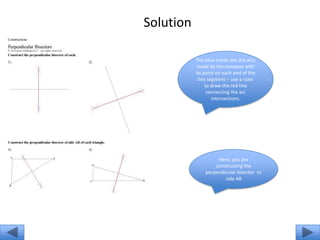
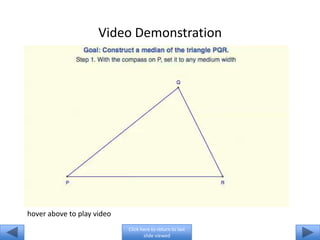
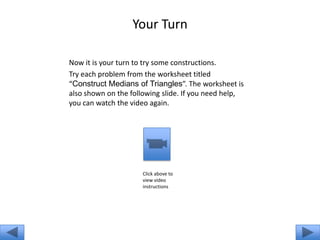
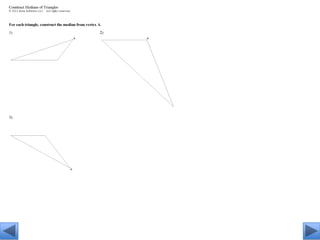
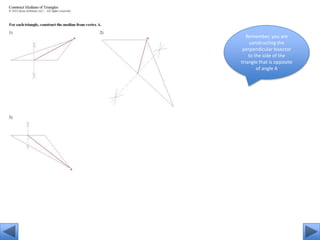
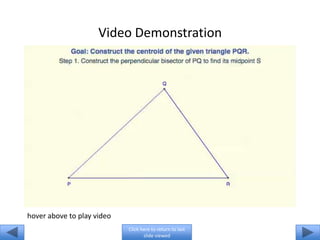
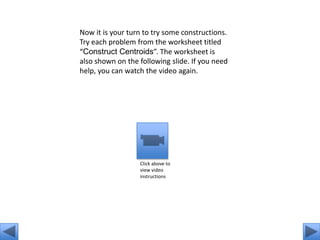
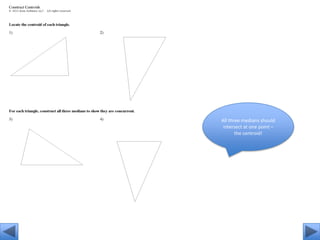
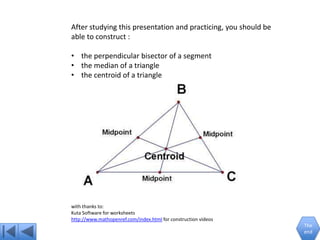
Click here to add slide title


Add text, video, or file here
Add Video title here


hover above to play video


                            Click here to return to last
                                   slide viewed
Learning and Applying the
Perpendicular Bisector Construction
Goals and Tools
This presentation will demonstrate how to construct
• the perpendicular bisector of a segment
• the median of a triangle
• the centroid of a triangle

You will have opportunities to complete several constructions and will
need
• a compass
• a straightedge or ruler and pencil
• a printer and paper
Video Demonstration


hover above to play video


                            Click here to return to last
                                   slide viewed
Written Procedure for Perpendicular Bisector
               Construction
If the arcs don’t
intersect, start from
  the last step with
     your compass
    opened wider
Your turn
Now it is your turn to try some constructions.
Try each problem from the worksheet titled
“Construction – Perpendicular Bisectors”.
The worksheet is also shown on the following
slide. If you need help, you can watch the
video again or follow the written instructions.


 Click above                   Click above
 to view                       to view
 video                         written
 instructions                  instructions
Solution

           The blue marks are the arcs
            made by the compass with
           its point on each end of the
            line segment – use a ruler
                to draw the red line
                 connecting the arc
                   intersections.


                    Here, you are
                   constructing the
               perpendicular bisector to
                       side AB
Video Demonstration


hover above to play video
                            Click here to return to last
                                   slide viewed
Your Turn

Now it is your turn to try some constructions.
Try each problem from the worksheet titled
“Construct Medians of Triangles”. The worksheet is
also shown on the following slide. If you need help,
you can watch the video again.


                     Click above to
                     view video
                     instructions
Remember, you are
     constructing the
 perpendicular bisector
    to the side of the
triangle that is opposite
        of angle A
Video Demonstration


hover above to play video
                            Click here to return to last
                                   slide viewed
Now it is your turn to try some constructions.
Try each problem from the worksheet titled
“Construct Centroids”. The worksheet is
also shown on the following slide. If you need
help, you can watch the video again.


                  Click above to
                  view video
                  instructions
All three medians should
 intersect at one point –
       the centroid!
After studying this presentation and practicing, you should be
able to construct :

• the perpendicular bisector of a segment
• the median of a triangle
• the centroid of a triangle


with thanks to:
Kuta Software for worksheets
http://www.mathopenref.com/index.html for construction videos
                                                                 The
                                                                 end

Constructions

  • 1.
    Click here toadd slide title Add text, video, or file here
  • 2.
    Add Video titlehere hover above to play video Click here to return to last slide viewed
  • 3.
    Learning and Applyingthe Perpendicular Bisector Construction
  • 4.
    Goals and Tools Thispresentation will demonstrate how to construct • the perpendicular bisector of a segment • the median of a triangle • the centroid of a triangle You will have opportunities to complete several constructions and will need • a compass • a straightedge or ruler and pencil • a printer and paper
  • 5.
    Video Demonstration hover aboveto play video Click here to return to last slide viewed
  • 6.
    Written Procedure forPerpendicular Bisector Construction
  • 7.
    If the arcsdon’t intersect, start from the last step with your compass opened wider
  • 8.
    Your turn Now itis your turn to try some constructions. Try each problem from the worksheet titled “Construction – Perpendicular Bisectors”. The worksheet is also shown on the following slide. If you need help, you can watch the video again or follow the written instructions. Click above Click above to view to view video written instructions instructions
  • 10.
    Solution The blue marks are the arcs made by the compass with its point on each end of the line segment – use a ruler to draw the red line connecting the arc intersections. Here, you are constructing the perpendicular bisector to side AB
  • 11.
    Video Demonstration hover aboveto play video Click here to return to last slide viewed
  • 12.
    Your Turn Now itis your turn to try some constructions. Try each problem from the worksheet titled “Construct Medians of Triangles”. The worksheet is also shown on the following slide. If you need help, you can watch the video again. Click above to view video instructions
  • 14.
    Remember, you are constructing the perpendicular bisector to the side of the triangle that is opposite of angle A
  • 15.
    Video Demonstration hover aboveto play video Click here to return to last slide viewed
  • 16.
    Now it isyour turn to try some constructions. Try each problem from the worksheet titled “Construct Centroids”. The worksheet is also shown on the following slide. If you need help, you can watch the video again. Click above to view video instructions
  • 17.
    All three mediansshould intersect at one point – the centroid!
  • 19.
    After studying thispresentation and practicing, you should be able to construct : • the perpendicular bisector of a segment • the median of a triangle • the centroid of a triangle with thanks to: Kuta Software for worksheets http://www.mathopenref.com/index.html for construction videos The end