Downloaded 13 times

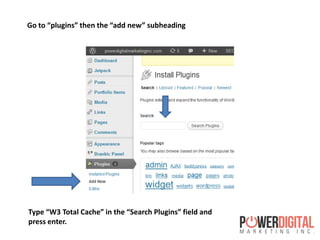


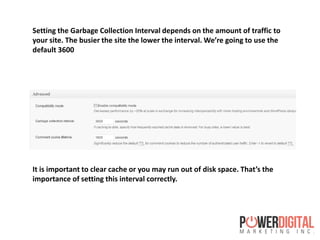
![Go to either the sidebar admin panel or the top of the W3 page and go to
Page Cache and the General section
Ensure the following options are enabled: “Cache Feeds:
site, categories, tags, comments”, “Cache SSL (https)
requests”, “Cache requests only for *your sitename]
hostname”, and “Don’t cache pages for logged in users”](https://image.slidesharecdn.com/configuringwordpressw3totalcache-130429162224-phpapp02/85/Configuring-Wordpress-W3-Total-Cache-11-320.jpg)
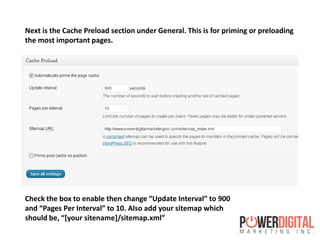
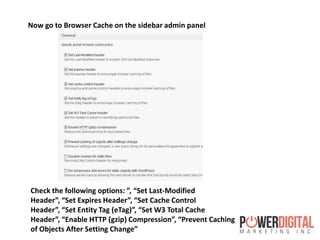
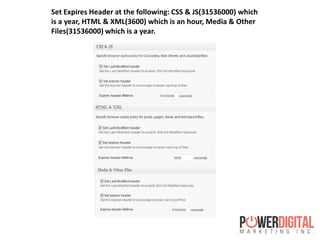
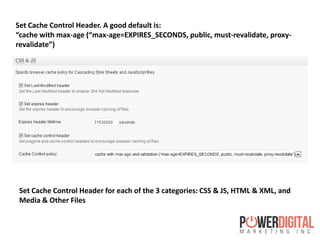

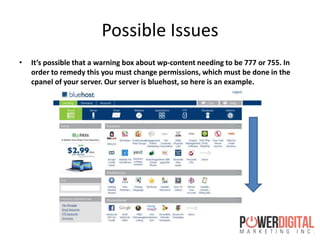
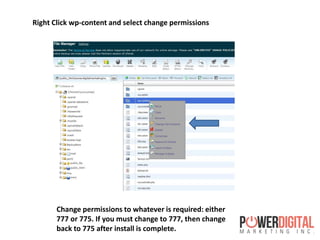
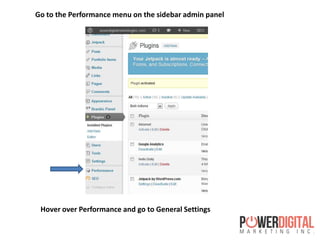
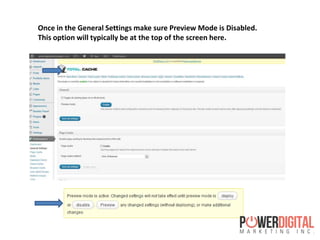
W3 Total Cache is a WordPress plugin that optimizes site performance. To install it, search for the plugin and click install, then activate it. Some permissions may need changed to 777 or 775 temporarily during install. General settings to configure include enabling page, object, and browser caches. The cache preload section should be configured to prime important pages. Browser cache settings like last-modified headers and expires headers for assets should also be set.