SlideShare a Scribd company logo
1
2
Accurate measurement of moisture levels in a
concrete slab, wood subfloor, and/or wood floors
is the most important step in mitigating or allevi-
ating flooring failures. Regardless of the measure-
ment tools you use, Wagner Meters has prepared
this resource booklet to help you gain a basic
understanding of the process and rationale for test-
ing moisture levels in these different areas. We hope
this guide will lessen your likelihood of financial
losses resulting from preventable flooring failures.
What You Should Know about Concrete and Moisture
Test for Moisture Before Installation to Avoid Flooring Failure
Every flooring and general contractor is best served by having a basic
understanding of the importance and proper protocol for testing moisture levels in
concrete. Withoutthisknowledge,acontractorfacesagreaterlikelihoodofflooring
failures which may lead to wasted time and financial loss.
All types of flooring are susceptible to failure if moisture conditions are not
properly monitored and maintained. When the subfloor is concrete, a moisture
problem may begin long before the flooring is installed. If the concrete slab has not
been properly dried and cured before the flooring is installed, moisture problems
are almost guaranteed. What’s more, moisture-related problems in flooring can
also raise health and safety risks resulting from mildew, mold, gaps, bumps and
unsecured flooring.
Having to remediate a flooring failure or worse, having to correct a concrete
subsurface will increase project costs and possibly tarnish your reputation. That’s
why it’s so important to learn to identify and correct moisture problems during
the installation process, eliminating moisture problems so they don’t lead to
unnecessary and costly repairs of an entire floor system.
Fortunately there are some preventive measures to greatly reduce the risks of
excess moisture in concrete slabs and failures to subsequently applied flooring
or coating. But in order to properly understand the ideal conditions for flooring
installation, some basic knowledge about concrete is important.
3
The Difference Between Cement and Concrete
You may hear “cement” and “concrete” used interchangeably but they are
not the same thing. Cement powder is the (typically) grey powder added to the
concrete mix that binds all the components together. Cement is only one of the
ingredients of concrete. Sand,
water, and rocks (or other
aggregates) are mixed with
cement powder to form the
finished product – concrete.
There are two basic types
of cement: hydraulic and
anhydrous. A common cement
likePortlandcementisahydraulic
cement. It hardens regardless of
surrounding moisture conditions.
The chemical reactions that
bind hydraulic cement can even occur underwater! On the other hand,
anhydrous cements, like gypsum plaster, must be dry to keep their strength. Both
of these kinds of cement are blended with additives such as fly ash, lime, silica
fume, blast furnace slag and others to give a variety of strengths and colors.
Concrete is formed when the various ingredients are combined (cement, sand,
water and aggregate) to create a chemical reaction that binds the materials together.
In a 4-inch slab, it takes approximately four weeks for this chemical process to
be complete. This is the process known as “curing.” But a cured slab may still be
holding a significant amount (approximately two thirds) of the moisture from the
original concrete mixture.
Drying continues after curing is complete through a process that moves
moisture to the surface of the slab to then evaporate away and be replaced by more
moisture drawn up through the entire slab. If the slab has cured, but not dried, it
is certainly not ready for a flooring installation. And even “dry” may not be dry
enough because the drying process may be greatly impacted by environmental
conditions like temperature and air humidity. The only way to be sure a slab is
dry enough to apply a floor covering is through adequate moisture testing.
4
Why Accurate Moisture Testing Is Critical
Accurate moisture testing is critical to understanding the complete moisture
levels of any concrete slab. It’s not enough to perform only one test at the surface
of the slab to make a go or no-go decision about installing flooring. Different
areas of a slab may dry unevenly so it’s necessary to test several different spots
on each slab including spots below the surface of the slab (at service conditions).
ASTM International has provided several standards related to testing for moisture
with two different test methods before installing flooring over a concrete slab: in
situ probes (ASTM F2170) and calcium chloride testing (ASTM F1869).
The calcium chloride test method is used to determine the moisture vapor
emission rate (or MVER) from a concrete slab. The test involves sealing a small
dish of calcium chloride on a clean section of concrete under a plastic dome.
The salt absorbs moisture in that environment (and presumably coming from the
concrete slab) and the weight gain after three days is used to calculate the MVER.
While this method is still specified by some flooring manufacturers, architects
and adhesive manufacturers, the calcium chloride test really only tests the surface
conditions of the slab. (Note: calcium chloride testing has also been disallowed as
an appropriate method for testing on lightweight concrete.)
To test the moisture conditions within the slab, best indicator of the overall
moisture condition of the floor is
relative humidity (RH) testing using in
situ probes, ASTM F2170. A series of
test holes are drilled into the slab and a
small probe is placed into the hole where
it is allowed to equilibrate with the slab
before readings are taken. Research
has found that placing the probe
internally, at a depth of 40% of the
slab’s total thickness (if drying one side),
provides the best indicator of what moisture conditions will be encountered by
the adhesive and finished flooring product upon installation.
Understanding the basic concepts about concrete, and correctly monitoring its RH
as it dries, can significantly reduce the risk of moisture-related flooring problems.
5
Every professional on a building site, whether specifying the correct concrete for
a given time frame, choosing the proper adhesive for the condition of the slab, or
determining if it’s safe to go ahead with the flooring installation, will benefit by
having correct information regarding moisture levels in concrete.
Performing Correct and Accurate RH Testing
Ensure Accurate Moisture Readings for Your Concrete Slabs
To prevent a moisture-related failure to a floor covering or coating installation,
it is necessary for the slab to be at the proper moisture level. Therefore, obtaining
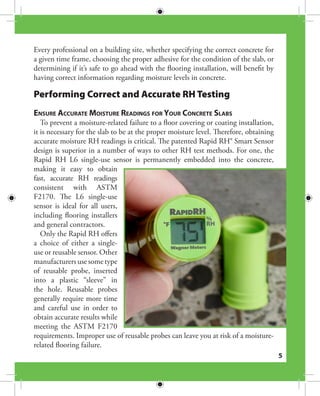
accurate moisture RH readings is critical. The patented Rapid RH® Smart Sensor
design is superior in a number of ways to other RH test methods. For one, the
Rapid RH L6 single-use sensor is permanently embedded into the concrete,
making it easy to obtain
fast, accurate RH readings
consistent with ASTM
F2170. The L6 single-use
sensor is ideal for all users,
including flooring installers
and general contractors.
Only the Rapid RH offers
a choice of either a single-
use or reusable sensor. Other
manufacturersusesometype
of reusable probe, inserted
into a plastic “sleeve” in
the hole. Reusable probes
generally require more time
and careful use in order to
obtain accurate results while
meeting the ASTM F2170
requirements. Improper use of reusable probes can leave you at risk of a moisture-
related flooring failure.
6
Regardless of the methods or tools you use, we want you to be aware of the
following issues, so you can obtain accurate RH readings and mitigate your risk
of a flooring failure.
Problems with “Leapfrogging”		
Per ASTM F2170*, RH probes require 24 hours to equilibrate in the concrete
slab before official, documentable readings can be taken. Some users of reusable
probes expect to move probes quickly from hole to hole (leapfrogging) without
giving the probes ample equilibration time. With leapfrogging, you can expect
inaccurate readings, usually significantly underestimating the true RH. With the
patented single-use Rapid RH method, you do not have to be concerned with
waiting for the Rapid RH L6 sensors to equilibrate each time you need to take a
reading. After the initial required equilibration time of 24 hours, you can obtain
subsequent readings from each probe anytime thereafter with no wait time.
Lack of Calibration Verification		
ASTM F2170 indicates that probe calibration must be verified for accuracy
within 30 days of each use. All reusable RH probes eventually fall out of
calibration (due to contaminants, etc). Contamination of reusable probes can
lead to inaccurate readings. Section 8 in ASTM F2170 requires verification of a
probe’s measurement accuracy using a salt solution or a humidity chamber.
Rapid RH sensors come with a certificate of NIST-traceable calibration. If
you use the Rapid RH single-use method, you never need to be concerned with
verifying calibration and the associated costs. Or for anyone who prefers a reusable
sensor, the Rapid RH 5.0 reusable is uniquely designed for fast calibration checks
using the innovative EasyCare CalCheck®, a feature that moisture inspectors and
others who perform frequent concrete moisture tests will appreciate.
Out of Compliance RH Testing Equipment		
ASTM F2170 requires that RH readings be performed at 40% depth in the
concrete slab (if the slab is drying from one side; 20% if drying from two sides).
The standard is also very specific that sensors be located within ⅝ inch of the
bottom of the hole, have isolation fins at the bottom of the “sleeve”, between the
7
sleeve and the concrete, to ensure that RH readings take place at the proper depth.
Lastly, the “sleeve” must line the entire depth of the hole. Make sure you only use
equipment that conforms to the specifications.
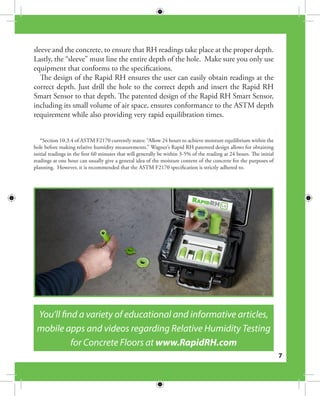
The design of the Rapid RH ensures the user can easily obtain readings at the
correct depth. Just drill the hole to the correct depth and insert the Rapid RH
Smart Sensor to that depth. The patented design of the Rapid RH Smart Sensor,
including its small volume of air space, ensures conformance to the ASTM depth
requirement while also providing very rapid equilibration times.
*Section 10.3.4 of ASTM F2170 currently states: “Allow 24 hours to achieve moisture equilibrium within the
hole before making relative humidity measurements.” Wagner’s Rapid RH patented design allows for obtaining
initial readings in the first 60 minutes that will generally be within 3-5% of the reading at 24 hours. The initial
readings at one hour can usually give a general idea of the moisture content of the concrete for the purposes of
planning. However, it is recommended that the ASTM F2170 specification is strictly adhered to.
You’ll find a variety of educational and informative articles,
mobile apps and videos regarding Relative Humidity Testing
for Concrete Floors at www.RapidRH.com
8
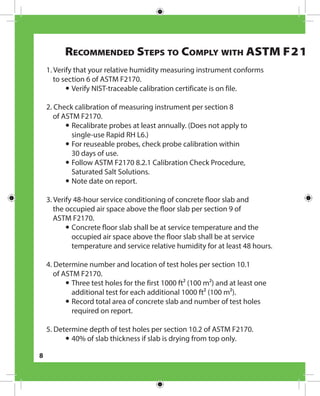
1. Verify that your relative humidity measuring instrument conforms
to section 6 of ASTM F2170.
	
y Verify NIST-traceable calibration certificate is on file.
2. Check calibration of measuring instrument per section 8
of ASTM F2170.
	
y Recalibrate probes at least annually. (Does not apply to
single-use Rapid RH L6.)
	
y For reuseable probes, check probe calibration within
30 days of use.
	
y Follow ASTM F2170 8.2.1 Calibration Check Procedure,
Saturated Salt Solutions.
	
y Note date on report.
3. Verify 48-hour service conditioning of concrete floor slab and
the occupied air space above the floor slab per section 9 of
ASTM F2170.
	
y Concrete floor slab shall be at service temperature and the
occupied air space above the floor slab shall be at service
temperature and service relative humidity for at least 48 hours.
4. Determine number and location of test holes per section 10.1
of ASTM F2170.
	
y Three test holes for the first 1000 ft2 (100 m2) and at least one
additional test for each additional 1000 ft2 (100 m2).
	
y Record total area of concrete slab and number of test holes
required on report.
5. Determine depth of test holes per section 10.2 of ASTM F2170.
	
y 40% of slab thickness if slab is drying from top only.
Recommended Steps to Comply with ASTM F2170
9
	
y 20% of slab thickness if slab is drying from top and bottom.
	
y Record concrete slab thickness and depth of test holes on report.
6. Drill and prepare test holes per section 10.3 of ASTM F2170.
	
y Note location of test holes on site map.
	
y For Rapid RH, place serial number decal of sensor with
corresponding test hole on report.
7. Verify 24-hour moisture equilibrium period for each test hole per
section 10.3.5 of ASTM F2170.
8. Perform relative humidity measurements per section 10.5
of ASTM F2170.
	
y Verify that meter reading does not drift more than 1% relative
humidity over a 5 minute period.
	
y A Rapid RH Total Reader® can be read immediately after insertion
into each test hole since the sensor has already been equilibrated
for at least 24 hours.
	
y Reusable probes should equilibrate at least one (1) hour in each
test hole to help ensure an accurate measurement.
9. Record and report the results per section 11 of ASTM F2170.
We highly recommended that you obtain your
own copy of ASTM F2170 at
www.astm.org/Standards/F2170.htm
TM F2170 Standards for Relative Humidity Testing
10
The Whole Flooring Picture
When working to prevent moisture-related problems with wood flooring,
there are multiple layers that can contribute to moisture issues. Simply acclimating
and installing the flooring product itself is only one step in a series that should be
included when installing wood flooring products.
11
From the Ground Up
Concrete Slabs for Wood Flooring Professionals
“I’m a wood flooring specialist – why would I need to know about concrete?”
When a wood floor is installed over a concrete slab (whether that includes
separate subfloor or not), the moisture picture in the concrete slab can have real
ramifications for the finished floor. If a new slab has not dried completely to
finished specifications, that moisture will continue to wick up through the surface
of the concrete and can cause anything from adhesive failure to wood warping or
cupping. If an older slab has developed cracks or moist patches, those can also
work their way to the surface and provide an avenue for moisture to compromise
a wood floor. Even with a vapor barrier, moisture can still be an issue if the slab has
not properly dried. It pays to have an understanding of concrete moisture testing.
Concrete moisture conditions are most reliably established with RH testing
that uses in situ probes. Other test methods, including calcium chloride testing
or the poly-film test, have proven problematic in the past and are slowly being
discontinued. Other varieties of meters, like surface concrete meters, might help
to determine the most likely areas for necessary RH testing, but keep in mind that
surface concrete meters do not provide an in-depth picture of moisture conditions
within the slab. True quantitative testing must be done to protect your flooring
installation.
It pays to check what the job specs have called for,
have performed the appropriate moisture testing,
and have the manufacturer acceptable results on
file, prior to beginning your installation. Moisture
problems in the concrete slab may not ultimately be
your responsibility, but left unchecked they might
still end up becoming your problem.
The Wood Subfloor
Just like moisture problems with a concrete slab subfloor, improper moisture
conditions in a wooden subfloor can lead to moisture-related issues in a finished
floor. Two types of moisture meters are often used to determine the moisture
12
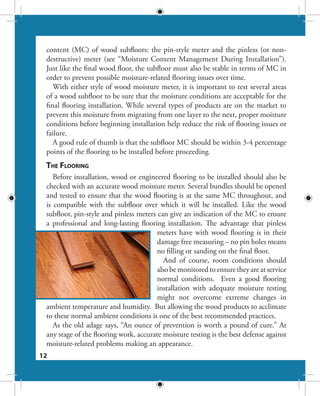
content (MC) of wood subfloors: the pin-style meter and the pinless (or non-
destructive) meter (see “Moisture Content Management During Installation”).
Just like the final wood floor, the subfloor must also be stable in terms of MC in
order to prevent possible moisture-related flooring issues over time.
With either style of wood moisture meter, it is important to test several areas
of a wood subfloor to be sure that the moisture conditions are acceptable for the
final flooring installation. While several types of products are on the market to
prevent this moisture from migrating from one layer to the next, proper moisture
conditions before beginning installation help reduce the risk of flooring issues or
failure.
A good rule of thumb is that the subfloor MC should be within 3-4 percentage
points of the flooring to be installed before proceeding.
The Flooring
Before installation, wood or engineered flooring to be installed should also be
checked with an accurate wood moisture meter. Several bundles should be opened
and tested to ensure that the wood flooring is at the same MC throughout, and
is compatible with the subfloor over which it will be installed. Like the wood
subfloor, pin-style and pinless meters can give an indication of the MC to ensure
a professional and long-lasting flooring installation. The advantage that pinless
meters have with wood flooring is in their
damage free measuring – no pin holes means
no filling or sanding on the final floor.
And of course, room conditions should
alsobemonitoredtoensuretheyareatservice
normal conditions. Even a good flooring
installation with adequate moisture testing
might not overcome extreme changes in
ambient temperature and humidity. But allowing the wood products to acclimate
to these normal ambient conditions is one of the best recommended practices.
As the old adage says, “An ounce of prevention is worth a pound of cure.” At
any stage of the flooring work, accurate moisture testing is the best defense against
moisture-related problems making an appearance.
13
Wood Floors
Wooden floors can be as durable as they are beautiful. But there’s a big IF
in a statement like that. Wooden floors can be as durable as they are beautiful
IF they are installed properly. And any proper installation must begin with an
understanding of the continuous relationship between wood and moisture.
Wood and Water – A Continuous Interaction
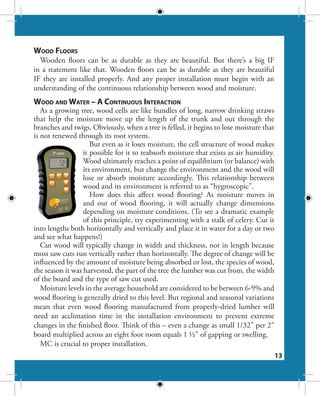
As a growing tree, wood cells are like bundles of long, narrow drinking straws
that help the moisture move up the length of the trunk and out through the
branches and twigs. Obviously, when a tree is felled, it begins to lose moisture that
is not renewed through its root system.
But even as it loses moisture, the cell structure of wood makes
it possible for it to reabsorb moisture that exists as air humidity.
Wood ultimately reaches a point of equilibrium (or balance) with
its environment, but change the environment and the wood will
lose or absorb moisture accordingly. This relationship between
wood and its environment is referred to as “hygroscopic”.
How does this affect wood flooring? As moisture moves in
and out of wood flooring, it will actually change dimensions
depending on moisture conditions. (To see a dramatic example
of this principle, try experimenting with a stalk of celery. Cut it
into lengths both horizontally and vertically and place it in water for a day or two
and see what happens!)
Cut wood will typically change in width and thickness, not in length because
most saw cuts run vertically rather than horizontally. The degree of change will be
influenced by the amount of moisture being absorbed or lost, the species of wood,
the season it was harvested, the part of the tree the lumber was cut from, the width
of the board and the type of saw cut used.
Moisture levels in the average household are considered to be between 6-9% and
wood flooring is generally dried to this level. But regional and seasonal variations
mean that even wood flooring manufactured from properly-dried lumber will
need an acclimation time in the installation environment to prevent extreme
changes in the finished floor. Think of this – even a change as small 1/32” per 2”
board multiplied across an eight foot room equals 1 ½” of gapping or swelling.
MC is crucial to proper installation.
14
A Note on Engineered Wood Products
Engineered wood also needs the same acclimation time as natural wood
products. During the manufacturing process, layers of wood or wood
products are joined together to create the finished product. In the event that
producers use layers of different wood species, the moisture management
imperative is even greater. Each wood layer (even equilibrated) responds
differently to changes in RH. Add the chemical and MC of industrial wood
glues, and one gets a clear sense of the challenge to produce outstanding
engineered flooring.
When installed, engineered wood flooring tends to be more dimensionally
stable but it can still be susceptible to moisture damage. And when installed
with adhesive products, MC becomes just as critical as with any other
flooring product.
Moisture Content Management During Installation
Because of the hygroscopic nature of wood, thorough acclimation is critical
when installing wood flooring. And there are a number of tools available to help
all stages of the installation process.
1. Ambient RH & Temperature Data Logger – Whether you are renovating
a home or building a hospital, monitoring ambient temperature and humidity
conditions at your project can help you avoid costly and time-consuming damage
as well as expensive call backs later. The only way to be sure service conditions
remain is constant observation and recording. The
Wagner Meters Smart Logger™ monitor and the
Smart Logger™ app are your eyes on the job site
24 hours a day.
2. Wood moisture meters – Wood
moisture meters assess MC in wood through
a couple different types of underlying
technology, and so are often referred to as
“pin-style” or “pinless” moisture meters.
Wood moisture meters can be designed or programmed for different depths
of readings, as well as species settings (or adjustment tables) and a range of
features designed to help maintain accurate MC assessment on the job site.
15
A Comprehensive Guide to MoistureTesting- Prepared byWagner Meters
a. Pin-style moisture meters - A pin meter measures the MC of wood by
running an electrical signal between the tips of two narrow metal probes that
are inserted into the wood. One advantage of pin-style meters (only those that
use longer pins with insulated shafts) is that you can test at different depths in
the wood. The major disadvantages are the relatively small area tested with each
insertion, their sensitivity to wood temperature, and the damage the pins do to
the wood surface with each test. The nature of pin-style meter design also mean
that pins can be broken, or improperly driven pins will not give accurate readings
b. Pinless moisture meters - Pinless meters use an electromagnetic signal to
penetrate the wood surface. Their design lets users “scan” many board feet of wood
product simply and quickly for ease of use when checking flooring bundles or for
doing a quick check of current conditions. Also referred to as “non-damaging
moisture meters”, their pin-free style means they do not damage wood surfaces.
Pinless meters do require adequate pressure to be reading correctly, and also take
readings at a fixed depth. They may be susceptible to scratches or damage on the
sensing pad as well.
As with any other tool on the job site, wood moisture meter accuracy depends
on proper maintenance and use. If, for example, your moisture meter is taking
readings at 1 ½” depth, but your flooring is ¾” stock, the readings may be
reflecting ambient conditions under the board you are testing, or even subfloor
conditions under existing floors. If the insulation is peeling from the probes of
your pin-style meter, the readings will not have the same pin-point accuracy as is
necessary for crucial MC information.
Of course, all the tools in the world cannot fix existing MC problems in wood
flooring. If the wood did not reach it’s equilibrium moisture content (EMC)
during drying or manufacturing; if installers pay little attention to the initial
MC of the wood flooring previous to and during installation; if the RH of the
room was not monitored before and during installation or if the RH changes after
installation, MC problems and issues can arise. But proper attention to matters
during installation means increased confidence in the longevity and durability of
each flooring installation.
16
502-RTEST-001 REV E
CHECK OUT
moisturewebinar.com
for the latest up-to-date webinar

More Related Content

What's hot

Greyhound Chromatography Gas Chromatography (GC) Septa 2020
Greyhound Chromatography Gas Chromatography (GC) Septa 2020Greyhound Chromatography Gas Chromatography (GC) Septa 2020
Greyhound Chromatography Gas Chromatography (GC) Septa 2020
Greyhound Chromatography and Allied Chemicals
 
Report1
Report1Report1
Report1
Jason Statham
 
FDR Mix Design
FDR Mix DesignFDR Mix Design
FDR Mix Designciviloscar
 
Eifs Sample
Eifs SampleEifs Sample
Eifs Sample
C.L.I. Group, LLC
 
Marciniak M-MM-JD-JJ_IMAPS2014_Paper-Published
Marciniak M-MM-JD-JJ_IMAPS2014_Paper-PublishedMarciniak M-MM-JD-JJ_IMAPS2014_Paper-Published
Marciniak M-MM-JD-JJ_IMAPS2014_Paper-PublishedMonika Marciniak
 
HKPCA-IPC-BHLee_2003
HKPCA-IPC-BHLee_2003HKPCA-IPC-BHLee_2003
HKPCA-IPC-BHLee_2003
Babhui Lee
 
Pestan Brochure with Product List
Pestan Brochure with Product ListPestan Brochure with Product List
Pestan Brochure with Product ListNesh Nastic
 
2015_GM_Summer_Final_Presenation_Hanover
2015_GM_Summer_Final_Presenation_Hanover2015_GM_Summer_Final_Presenation_Hanover
2015_GM_Summer_Final_Presenation_HanoverDrew Hanover
 
Ficha técnica TEMP-COAT-101 (Ingés)
Ficha técnica TEMP-COAT-101 (Ingés)Ficha técnica TEMP-COAT-101 (Ingés)
Ficha técnica TEMP-COAT-101 (Ingés)
ThCoat®
 
Bruperite Testing Report
Bruperite Testing ReportBruperite Testing Report
Bruperite Testing Report
strama3
 
Design, Construction and Test of Corrosion
Design, Construction and Test of CorrosionDesign, Construction and Test of Corrosion
Design, Construction and Test of CorrosionAmir Reza James Oskui
 
What is Water Repellent & Stone Sealer
What is Water Repellent & Stone SealerWhat is Water Repellent & Stone Sealer
What is Water Repellent & Stone Sealer
hemal Shanischara
 
Gas Chromatography(GC) Ferrules and Seals
Gas Chromatography(GC)  Ferrules and SealsGas Chromatography(GC)  Ferrules and Seals
Gas Chromatography(GC) Ferrules and Seals
Greyhound Chromatography and Allied Chemicals
 
NASA Preferred Reliability Practices Vacuum Seals Design Criteria
NASA Preferred Reliability Practices Vacuum Seals Design CriteriaNASA Preferred Reliability Practices Vacuum Seals Design Criteria
NASA Preferred Reliability Practices Vacuum Seals Design Criteria
Belilove Company-Engineers
 
Billet defects - transverse cracking formation prevention and evolution
Billet defects -  transverse cracking formation prevention and evolutionBillet defects -  transverse cracking formation prevention and evolution
Billet defects - transverse cracking formation prevention and evolution
Jorge Madias
 
Goel Scientific General information and introduction
Goel Scientific General information and introductionGoel Scientific General information and introduction
Goel Scientific General information and introduction
Goel Scientific
 
Liquid Penetrant Testing L-III presentation prepared by MAHESH PANDIT,OMNDT,J...
Liquid Penetrant Testing L-III presentation prepared by MAHESH PANDIT,OMNDT,J...Liquid Penetrant Testing L-III presentation prepared by MAHESH PANDIT,OMNDT,J...
Liquid Penetrant Testing L-III presentation prepared by MAHESH PANDIT,OMNDT,J...
MAHESH PANDIT
 

What's hot (20)

Greyhound Chromatography Gas Chromatography (GC) Septa 2020
Greyhound Chromatography Gas Chromatography (GC) Septa 2020Greyhound Chromatography Gas Chromatography (GC) Septa 2020
Greyhound Chromatography Gas Chromatography (GC) Septa 2020
 
Report1
Report1Report1
Report1
 
FDR Mix Design
FDR Mix DesignFDR Mix Design
FDR Mix Design
 
Eifs Sample
Eifs SampleEifs Sample
Eifs Sample
 
Marciniak M-MM-JD-JJ_IMAPS2014_Paper-Published
Marciniak M-MM-JD-JJ_IMAPS2014_Paper-PublishedMarciniak M-MM-JD-JJ_IMAPS2014_Paper-Published
Marciniak M-MM-JD-JJ_IMAPS2014_Paper-Published
 
HKPCA-IPC-BHLee_2003
HKPCA-IPC-BHLee_2003HKPCA-IPC-BHLee_2003
HKPCA-IPC-BHLee_2003
 
Pestan Brochure with Product List
Pestan Brochure with Product ListPestan Brochure with Product List
Pestan Brochure with Product List
 
2011 Barrier Bac AIA - With Notes
2011 Barrier Bac AIA - With Notes2011 Barrier Bac AIA - With Notes
2011 Barrier Bac AIA - With Notes
 
2015_GM_Summer_Final_Presenation_Hanover
2015_GM_Summer_Final_Presenation_Hanover2015_GM_Summer_Final_Presenation_Hanover
2015_GM_Summer_Final_Presenation_Hanover
 
200804_aogr_drilling
200804_aogr_drilling200804_aogr_drilling
200804_aogr_drilling
 
Ficha técnica TEMP-COAT-101 (Ingés)
Ficha técnica TEMP-COAT-101 (Ingés)Ficha técnica TEMP-COAT-101 (Ingés)
Ficha técnica TEMP-COAT-101 (Ingés)
 
Bruperite Testing Report
Bruperite Testing ReportBruperite Testing Report
Bruperite Testing Report
 
Design, Construction and Test of Corrosion
Design, Construction and Test of CorrosionDesign, Construction and Test of Corrosion
Design, Construction and Test of Corrosion
 
What is Water Repellent & Stone Sealer
What is Water Repellent & Stone SealerWhat is Water Repellent & Stone Sealer
What is Water Repellent & Stone Sealer
 
17_HSPDS_copy
17_HSPDS_copy17_HSPDS_copy
17_HSPDS_copy
 
Gas Chromatography(GC) Ferrules and Seals
Gas Chromatography(GC)  Ferrules and SealsGas Chromatography(GC)  Ferrules and Seals
Gas Chromatography(GC) Ferrules and Seals
 
NASA Preferred Reliability Practices Vacuum Seals Design Criteria
NASA Preferred Reliability Practices Vacuum Seals Design CriteriaNASA Preferred Reliability Practices Vacuum Seals Design Criteria
NASA Preferred Reliability Practices Vacuum Seals Design Criteria
 
Billet defects - transverse cracking formation prevention and evolution
Billet defects -  transverse cracking formation prevention and evolutionBillet defects -  transverse cracking formation prevention and evolution
Billet defects - transverse cracking formation prevention and evolution
 
Goel Scientific General information and introduction
Goel Scientific General information and introductionGoel Scientific General information and introduction
Goel Scientific General information and introduction
 
Liquid Penetrant Testing L-III presentation prepared by MAHESH PANDIT,OMNDT,J...
Liquid Penetrant Testing L-III presentation prepared by MAHESH PANDIT,OMNDT,J...Liquid Penetrant Testing L-III presentation prepared by MAHESH PANDIT,OMNDT,J...
Liquid Penetrant Testing L-III presentation prepared by MAHESH PANDIT,OMNDT,J...
 

Similar to Comprehensive Guide To Moisture Testing

HaisunExteriorStone_Presentation
HaisunExteriorStone_PresentationHaisunExteriorStone_Presentation
HaisunExteriorStone_PresentationShazli Patel (F)
 
Selecting the Correct Underslab Membrane
Selecting the Correct Underslab MembraneSelecting the Correct Underslab Membrane
Selecting the Correct Underslab Membrane
W. R. Meadows
 
Waterproof Membranes at Best Price in Australia 📞+61 1800 418 495
 Waterproof Membranes at Best Price in Australia 📞+61 1800 418 495  Waterproof Membranes at Best Price in Australia 📞+61 1800 418 495
Waterproof Membranes at Best Price in Australia 📞+61 1800 418 495
kodexcc
 
AIA Accredited Course: FLOOR COVERINGS: Performance Challenges in Installatio...
AIA Accredited Course: FLOOR COVERINGS: Performance Challenges in Installatio...AIA Accredited Course: FLOOR COVERINGS: Performance Challenges in Installatio...
AIA Accredited Course: FLOOR COVERINGS: Performance Challenges in Installatio...
Custom Concrete Prep & Polish
 
Folleto Colorex Conductivo SD-EC
Folleto Colorex Conductivo SD-EC Folleto Colorex Conductivo SD-EC
Folleto Colorex Conductivo SD-EC
Forbo Pavimentos, S.A.
 
Moisture_Issues_in_Concrete_Floors
Moisture_Issues_in_Concrete_FloorsMoisture_Issues_in_Concrete_Floors
Moisture_Issues_in_Concrete_FloorsMike Murray
 
Construction Testing Cement Testing
Construction Testing  Cement TestingConstruction Testing  Cement Testing
Construction Testing Cement TestingShambhudayal
 
Curing of Concret
Curing of ConcretCuring of Concret
Curing of Concret
IRJET Journal
 
Week 01 Preliminaries Works, Soil Investigate & Ground Water Control
Week 01 Preliminaries Works, Soil Investigate & Ground Water ControlWeek 01 Preliminaries Works, Soil Investigate & Ground Water Control
Week 01 Preliminaries Works, Soil Investigate & Ground Water Controlnik kin
 
Waterproofing dublin09 1
Waterproofing dublin09 1Waterproofing dublin09 1
Waterproofing dublin09 1
BPA-GmbH, Waterproofing is our Passion!
 
25 incredible tips for concrete repair with epoxy
25 incredible tips for concrete repair with epoxy25 incredible tips for concrete repair with epoxy
25 incredible tips for concrete repair with epoxy
jbors
 
Introduction to linings
Introduction to liningsIntroduction to linings
Introduction to linings
International Paint
 
Hot weather-guidelines-3
Hot weather-guidelines-3Hot weather-guidelines-3
Hot weather-guidelines-3
mojeed bolaji
 
uv_bpm.pdf
uv_bpm.pdfuv_bpm.pdf
uv_bpm.pdf
osamaanter1
 
Why Concrete Coatings Fail
Why Concrete Coatings FailWhy Concrete Coatings Fail
Why Concrete Coatings Fail
Will Fowler
 
waterproofing
waterproofingwaterproofing
waterproofing
modern metallurgicals
 
444926084 water-proofing-ppt-pptx
444926084 water-proofing-ppt-pptx444926084 water-proofing-ppt-pptx
444926084 water-proofing-ppt-pptx
balaji chikkam
 

Similar to Comprehensive Guide To Moisture Testing (20)

HaisunExteriorStone_Presentation
HaisunExteriorStone_PresentationHaisunExteriorStone_Presentation
HaisunExteriorStone_Presentation
 
Selecting the Correct Underslab Membrane
Selecting the Correct Underslab MembraneSelecting the Correct Underslab Membrane
Selecting the Correct Underslab Membrane
 
Assignment 1
Assignment 1Assignment 1
Assignment 1
 
Waterproof Membranes at Best Price in Australia 📞+61 1800 418 495
 Waterproof Membranes at Best Price in Australia 📞+61 1800 418 495  Waterproof Membranes at Best Price in Australia 📞+61 1800 418 495
Waterproof Membranes at Best Price in Australia 📞+61 1800 418 495
 
AIA Accredited Course: FLOOR COVERINGS: Performance Challenges in Installatio...
AIA Accredited Course: FLOOR COVERINGS: Performance Challenges in Installatio...AIA Accredited Course: FLOOR COVERINGS: Performance Challenges in Installatio...
AIA Accredited Course: FLOOR COVERINGS: Performance Challenges in Installatio...
 
Folleto Colorex Conductivo SD-EC
Folleto Colorex Conductivo SD-EC Folleto Colorex Conductivo SD-EC
Folleto Colorex Conductivo SD-EC
 
Moisture_Issues_in_Concrete_Floors
Moisture_Issues_in_Concrete_FloorsMoisture_Issues_in_Concrete_Floors
Moisture_Issues_in_Concrete_Floors
 
Construction Testing Cement Testing
Construction Testing  Cement TestingConstruction Testing  Cement Testing
Construction Testing Cement Testing
 
Curing of Concret
Curing of ConcretCuring of Concret
Curing of Concret
 
ISOMAT_Epoxy flooring systems
ISOMAT_Epoxy flooring systemsISOMAT_Epoxy flooring systems
ISOMAT_Epoxy flooring systems
 
Week 01 Preliminaries Works, Soil Investigate & Ground Water Control
Week 01 Preliminaries Works, Soil Investigate & Ground Water ControlWeek 01 Preliminaries Works, Soil Investigate & Ground Water Control
Week 01 Preliminaries Works, Soil Investigate & Ground Water Control
 
Waterproofing dublin09 1
Waterproofing dublin09 1Waterproofing dublin09 1
Waterproofing dublin09 1
 
25 incredible tips for concrete repair with epoxy
25 incredible tips for concrete repair with epoxy25 incredible tips for concrete repair with epoxy
25 incredible tips for concrete repair with epoxy
 
Introduction to linings
Introduction to liningsIntroduction to linings
Introduction to linings
 
Hot weather-guidelines-3
Hot weather-guidelines-3Hot weather-guidelines-3
Hot weather-guidelines-3
 
Issue 05
Issue 05Issue 05
Issue 05
 
uv_bpm.pdf
uv_bpm.pdfuv_bpm.pdf
uv_bpm.pdf
 
Why Concrete Coatings Fail
Why Concrete Coatings FailWhy Concrete Coatings Fail
Why Concrete Coatings Fail
 
waterproofing
waterproofingwaterproofing
waterproofing
 
444926084 water-proofing-ppt-pptx
444926084 water-proofing-ppt-pptx444926084 water-proofing-ppt-pptx
444926084 water-proofing-ppt-pptx
 

Recently uploaded

Model Attribute Check Company Auto Property
Model Attribute  Check Company Auto PropertyModel Attribute  Check Company Auto Property
Model Attribute Check Company Auto Property
Celine George
 
The geography of Taylor Swift - some ideas
The geography of Taylor Swift - some ideasThe geography of Taylor Swift - some ideas
The geography of Taylor Swift - some ideas
GeoBlogs
 
Mule 4.6 & Java 17 Upgrade | MuleSoft Mysore Meetup #46
Mule 4.6 & Java 17 Upgrade | MuleSoft Mysore Meetup #46Mule 4.6 & Java 17 Upgrade | MuleSoft Mysore Meetup #46
Mule 4.6 & Java 17 Upgrade | MuleSoft Mysore Meetup #46
MysoreMuleSoftMeetup
 
How to Break the cycle of negative Thoughts
How to Break the cycle of negative ThoughtsHow to Break the cycle of negative Thoughts
How to Break the cycle of negative Thoughts
Col Mukteshwar Prasad
 
1.4 modern child centered education - mahatma gandhi-2.pptx
1.4 modern child centered education - mahatma gandhi-2.pptx1.4 modern child centered education - mahatma gandhi-2.pptx
1.4 modern child centered education - mahatma gandhi-2.pptx
JosvitaDsouza2
 
Digital Tools and AI for Teaching Learning and Research
Digital Tools and AI for Teaching Learning and ResearchDigital Tools and AI for Teaching Learning and Research
Digital Tools and AI for Teaching Learning and Research
Vikramjit Singh
 
Home assignment II on Spectroscopy 2024 Answers.pdf
Home assignment II on Spectroscopy 2024 Answers.pdfHome assignment II on Spectroscopy 2024 Answers.pdf
Home assignment II on Spectroscopy 2024 Answers.pdf
Tamralipta Mahavidyalaya
 
Basic phrases for greeting and assisting costumers
Basic phrases for greeting and assisting costumersBasic phrases for greeting and assisting costumers
Basic phrases for greeting and assisting costumers
PedroFerreira53928
 
Synthetic Fiber Construction in lab .pptx
Synthetic Fiber Construction in lab .pptxSynthetic Fiber Construction in lab .pptx
Synthetic Fiber Construction in lab .pptx
Pavel ( NSTU)
 
The Challenger.pdf DNHS Official Publication
The Challenger.pdf DNHS Official PublicationThe Challenger.pdf DNHS Official Publication
The Challenger.pdf DNHS Official Publication
Delapenabediema
 
The approach at University of Liverpool.pptx
The approach at University of Liverpool.pptxThe approach at University of Liverpool.pptx
The approach at University of Liverpool.pptx
Jisc
 
Ethnobotany and Ethnopharmacology ......
Ethnobotany and Ethnopharmacology ......Ethnobotany and Ethnopharmacology ......
Ethnobotany and Ethnopharmacology ......
Ashokrao Mane college of Pharmacy Peth-Vadgaon
 
aaaaaaaaaaaaaaaaaaaaaaaaaaaaaaaaaaaaaaaaa
aaaaaaaaaaaaaaaaaaaaaaaaaaaaaaaaaaaaaaaaaaaaaaaaaaaaaaaaaaaaaaaaaaaaaaaaaaaaaaaaaa
aaaaaaaaaaaaaaaaaaaaaaaaaaaaaaaaaaaaaaaaa
siemaillard
 
Template Jadual Bertugas Kelas (Boleh Edit)
Template Jadual Bertugas Kelas (Boleh Edit)Template Jadual Bertugas Kelas (Boleh Edit)
Template Jadual Bertugas Kelas (Boleh Edit)
rosedainty
 
CLASS 11 CBSE B.St Project AIDS TO TRADE - INSURANCE
CLASS 11 CBSE B.St Project AIDS TO TRADE - INSURANCECLASS 11 CBSE B.St Project AIDS TO TRADE - INSURANCE
CLASS 11 CBSE B.St Project AIDS TO TRADE - INSURANCE
BhavyaRajput3
 
Thesis Statement for students diagnonsed withADHD.ppt
Thesis Statement for students diagnonsed withADHD.pptThesis Statement for students diagnonsed withADHD.ppt
Thesis Statement for students diagnonsed withADHD.ppt
EverAndrsGuerraGuerr
 
The French Revolution Class 9 Study Material pdf free download
The French Revolution Class 9 Study Material pdf free downloadThe French Revolution Class 9 Study Material pdf free download
The French Revolution Class 9 Study Material pdf free download
Vivekanand Anglo Vedic Academy
 
GIÁO ÁN DẠY THÊM (KẾ HOẠCH BÀI BUỔI 2) - TIẾNG ANH 8 GLOBAL SUCCESS (2 CỘT) N...
GIÁO ÁN DẠY THÊM (KẾ HOẠCH BÀI BUỔI 2) - TIẾNG ANH 8 GLOBAL SUCCESS (2 CỘT) N...GIÁO ÁN DẠY THÊM (KẾ HOẠCH BÀI BUỔI 2) - TIẾNG ANH 8 GLOBAL SUCCESS (2 CỘT) N...
GIÁO ÁN DẠY THÊM (KẾ HOẠCH BÀI BUỔI 2) - TIẾNG ANH 8 GLOBAL SUCCESS (2 CỘT) N...
Nguyen Thanh Tu Collection
 
How to Create Map Views in the Odoo 17 ERP
How to Create Map Views in the Odoo 17 ERPHow to Create Map Views in the Odoo 17 ERP
How to Create Map Views in the Odoo 17 ERP
Celine George
 
Operation Blue Star - Saka Neela Tara
Operation Blue Star   -  Saka Neela TaraOperation Blue Star   -  Saka Neela Tara
Operation Blue Star - Saka Neela Tara
Balvir Singh
 

Recently uploaded (20)

Model Attribute Check Company Auto Property
Model Attribute  Check Company Auto PropertyModel Attribute  Check Company Auto Property
Model Attribute Check Company Auto Property
 
The geography of Taylor Swift - some ideas
The geography of Taylor Swift - some ideasThe geography of Taylor Swift - some ideas
The geography of Taylor Swift - some ideas
 
Mule 4.6 & Java 17 Upgrade | MuleSoft Mysore Meetup #46
Mule 4.6 & Java 17 Upgrade | MuleSoft Mysore Meetup #46Mule 4.6 & Java 17 Upgrade | MuleSoft Mysore Meetup #46
Mule 4.6 & Java 17 Upgrade | MuleSoft Mysore Meetup #46
 
How to Break the cycle of negative Thoughts
How to Break the cycle of negative ThoughtsHow to Break the cycle of negative Thoughts
How to Break the cycle of negative Thoughts
 
1.4 modern child centered education - mahatma gandhi-2.pptx
1.4 modern child centered education - mahatma gandhi-2.pptx1.4 modern child centered education - mahatma gandhi-2.pptx
1.4 modern child centered education - mahatma gandhi-2.pptx
 
Digital Tools and AI for Teaching Learning and Research
Digital Tools and AI for Teaching Learning and ResearchDigital Tools and AI for Teaching Learning and Research
Digital Tools and AI for Teaching Learning and Research
 
Home assignment II on Spectroscopy 2024 Answers.pdf
Home assignment II on Spectroscopy 2024 Answers.pdfHome assignment II on Spectroscopy 2024 Answers.pdf
Home assignment II on Spectroscopy 2024 Answers.pdf
 
Basic phrases for greeting and assisting costumers
Basic phrases for greeting and assisting costumersBasic phrases for greeting and assisting costumers
Basic phrases for greeting and assisting costumers
 
Synthetic Fiber Construction in lab .pptx
Synthetic Fiber Construction in lab .pptxSynthetic Fiber Construction in lab .pptx
Synthetic Fiber Construction in lab .pptx
 
The Challenger.pdf DNHS Official Publication
The Challenger.pdf DNHS Official PublicationThe Challenger.pdf DNHS Official Publication
The Challenger.pdf DNHS Official Publication
 
The approach at University of Liverpool.pptx
The approach at University of Liverpool.pptxThe approach at University of Liverpool.pptx
The approach at University of Liverpool.pptx
 
Ethnobotany and Ethnopharmacology ......
Ethnobotany and Ethnopharmacology ......Ethnobotany and Ethnopharmacology ......
Ethnobotany and Ethnopharmacology ......
 
aaaaaaaaaaaaaaaaaaaaaaaaaaaaaaaaaaaaaaaaa
aaaaaaaaaaaaaaaaaaaaaaaaaaaaaaaaaaaaaaaaaaaaaaaaaaaaaaaaaaaaaaaaaaaaaaaaaaaaaaaaaa
aaaaaaaaaaaaaaaaaaaaaaaaaaaaaaaaaaaaaaaaa
 
Template Jadual Bertugas Kelas (Boleh Edit)
Template Jadual Bertugas Kelas (Boleh Edit)Template Jadual Bertugas Kelas (Boleh Edit)
Template Jadual Bertugas Kelas (Boleh Edit)
 
CLASS 11 CBSE B.St Project AIDS TO TRADE - INSURANCE
CLASS 11 CBSE B.St Project AIDS TO TRADE - INSURANCECLASS 11 CBSE B.St Project AIDS TO TRADE - INSURANCE
CLASS 11 CBSE B.St Project AIDS TO TRADE - INSURANCE
 
Thesis Statement for students diagnonsed withADHD.ppt
Thesis Statement for students diagnonsed withADHD.pptThesis Statement for students diagnonsed withADHD.ppt
Thesis Statement for students diagnonsed withADHD.ppt
 
The French Revolution Class 9 Study Material pdf free download
The French Revolution Class 9 Study Material pdf free downloadThe French Revolution Class 9 Study Material pdf free download
The French Revolution Class 9 Study Material pdf free download
 
GIÁO ÁN DẠY THÊM (KẾ HOẠCH BÀI BUỔI 2) - TIẾNG ANH 8 GLOBAL SUCCESS (2 CỘT) N...
GIÁO ÁN DẠY THÊM (KẾ HOẠCH BÀI BUỔI 2) - TIẾNG ANH 8 GLOBAL SUCCESS (2 CỘT) N...GIÁO ÁN DẠY THÊM (KẾ HOẠCH BÀI BUỔI 2) - TIẾNG ANH 8 GLOBAL SUCCESS (2 CỘT) N...
GIÁO ÁN DẠY THÊM (KẾ HOẠCH BÀI BUỔI 2) - TIẾNG ANH 8 GLOBAL SUCCESS (2 CỘT) N...
 
How to Create Map Views in the Odoo 17 ERP
How to Create Map Views in the Odoo 17 ERPHow to Create Map Views in the Odoo 17 ERP
How to Create Map Views in the Odoo 17 ERP
 
Operation Blue Star - Saka Neela Tara
Operation Blue Star   -  Saka Neela TaraOperation Blue Star   -  Saka Neela Tara
Operation Blue Star - Saka Neela Tara
 

Comprehensive Guide To Moisture Testing

  • 1. 1
  • 2. 2 Accurate measurement of moisture levels in a concrete slab, wood subfloor, and/or wood floors is the most important step in mitigating or allevi- ating flooring failures. Regardless of the measure- ment tools you use, Wagner Meters has prepared this resource booklet to help you gain a basic understanding of the process and rationale for test- ing moisture levels in these different areas. We hope this guide will lessen your likelihood of financial losses resulting from preventable flooring failures. What You Should Know about Concrete and Moisture Test for Moisture Before Installation to Avoid Flooring Failure Every flooring and general contractor is best served by having a basic understanding of the importance and proper protocol for testing moisture levels in concrete. Withoutthisknowledge,acontractorfacesagreaterlikelihoodofflooring failures which may lead to wasted time and financial loss. All types of flooring are susceptible to failure if moisture conditions are not properly monitored and maintained. When the subfloor is concrete, a moisture problem may begin long before the flooring is installed. If the concrete slab has not been properly dried and cured before the flooring is installed, moisture problems are almost guaranteed. What’s more, moisture-related problems in flooring can also raise health and safety risks resulting from mildew, mold, gaps, bumps and unsecured flooring. Having to remediate a flooring failure or worse, having to correct a concrete subsurface will increase project costs and possibly tarnish your reputation. That’s why it’s so important to learn to identify and correct moisture problems during the installation process, eliminating moisture problems so they don’t lead to unnecessary and costly repairs of an entire floor system. Fortunately there are some preventive measures to greatly reduce the risks of excess moisture in concrete slabs and failures to subsequently applied flooring or coating. But in order to properly understand the ideal conditions for flooring installation, some basic knowledge about concrete is important.
  • 3. 3 The Difference Between Cement and Concrete You may hear “cement” and “concrete” used interchangeably but they are not the same thing. Cement powder is the (typically) grey powder added to the concrete mix that binds all the components together. Cement is only one of the ingredients of concrete. Sand, water, and rocks (or other aggregates) are mixed with cement powder to form the finished product – concrete. There are two basic types of cement: hydraulic and anhydrous. A common cement likePortlandcementisahydraulic cement. It hardens regardless of surrounding moisture conditions. The chemical reactions that bind hydraulic cement can even occur underwater! On the other hand, anhydrous cements, like gypsum plaster, must be dry to keep their strength. Both of these kinds of cement are blended with additives such as fly ash, lime, silica fume, blast furnace slag and others to give a variety of strengths and colors. Concrete is formed when the various ingredients are combined (cement, sand, water and aggregate) to create a chemical reaction that binds the materials together. In a 4-inch slab, it takes approximately four weeks for this chemical process to be complete. This is the process known as “curing.” But a cured slab may still be holding a significant amount (approximately two thirds) of the moisture from the original concrete mixture. Drying continues after curing is complete through a process that moves moisture to the surface of the slab to then evaporate away and be replaced by more moisture drawn up through the entire slab. If the slab has cured, but not dried, it is certainly not ready for a flooring installation. And even “dry” may not be dry enough because the drying process may be greatly impacted by environmental conditions like temperature and air humidity. The only way to be sure a slab is dry enough to apply a floor covering is through adequate moisture testing.
  • 4. 4 Why Accurate Moisture Testing Is Critical Accurate moisture testing is critical to understanding the complete moisture levels of any concrete slab. It’s not enough to perform only one test at the surface of the slab to make a go or no-go decision about installing flooring. Different areas of a slab may dry unevenly so it’s necessary to test several different spots on each slab including spots below the surface of the slab (at service conditions). ASTM International has provided several standards related to testing for moisture with two different test methods before installing flooring over a concrete slab: in situ probes (ASTM F2170) and calcium chloride testing (ASTM F1869). The calcium chloride test method is used to determine the moisture vapor emission rate (or MVER) from a concrete slab. The test involves sealing a small dish of calcium chloride on a clean section of concrete under a plastic dome. The salt absorbs moisture in that environment (and presumably coming from the concrete slab) and the weight gain after three days is used to calculate the MVER. While this method is still specified by some flooring manufacturers, architects and adhesive manufacturers, the calcium chloride test really only tests the surface conditions of the slab. (Note: calcium chloride testing has also been disallowed as an appropriate method for testing on lightweight concrete.) To test the moisture conditions within the slab, best indicator of the overall moisture condition of the floor is relative humidity (RH) testing using in situ probes, ASTM F2170. A series of test holes are drilled into the slab and a small probe is placed into the hole where it is allowed to equilibrate with the slab before readings are taken. Research has found that placing the probe internally, at a depth of 40% of the slab’s total thickness (if drying one side), provides the best indicator of what moisture conditions will be encountered by the adhesive and finished flooring product upon installation. Understanding the basic concepts about concrete, and correctly monitoring its RH as it dries, can significantly reduce the risk of moisture-related flooring problems.
  • 5. 5 Every professional on a building site, whether specifying the correct concrete for a given time frame, choosing the proper adhesive for the condition of the slab, or determining if it’s safe to go ahead with the flooring installation, will benefit by having correct information regarding moisture levels in concrete. Performing Correct and Accurate RH Testing Ensure Accurate Moisture Readings for Your Concrete Slabs To prevent a moisture-related failure to a floor covering or coating installation, it is necessary for the slab to be at the proper moisture level. Therefore, obtaining accurate moisture RH readings is critical. The patented Rapid RH® Smart Sensor design is superior in a number of ways to other RH test methods. For one, the Rapid RH L6 single-use sensor is permanently embedded into the concrete, making it easy to obtain fast, accurate RH readings consistent with ASTM F2170. The L6 single-use sensor is ideal for all users, including flooring installers and general contractors. Only the Rapid RH offers a choice of either a single- use or reusable sensor. Other manufacturersusesometype of reusable probe, inserted into a plastic “sleeve” in the hole. Reusable probes generally require more time and careful use in order to obtain accurate results while meeting the ASTM F2170 requirements. Improper use of reusable probes can leave you at risk of a moisture- related flooring failure.
  • 6. 6 Regardless of the methods or tools you use, we want you to be aware of the following issues, so you can obtain accurate RH readings and mitigate your risk of a flooring failure. Problems with “Leapfrogging” Per ASTM F2170*, RH probes require 24 hours to equilibrate in the concrete slab before official, documentable readings can be taken. Some users of reusable probes expect to move probes quickly from hole to hole (leapfrogging) without giving the probes ample equilibration time. With leapfrogging, you can expect inaccurate readings, usually significantly underestimating the true RH. With the patented single-use Rapid RH method, you do not have to be concerned with waiting for the Rapid RH L6 sensors to equilibrate each time you need to take a reading. After the initial required equilibration time of 24 hours, you can obtain subsequent readings from each probe anytime thereafter with no wait time. Lack of Calibration Verification ASTM F2170 indicates that probe calibration must be verified for accuracy within 30 days of each use. All reusable RH probes eventually fall out of calibration (due to contaminants, etc). Contamination of reusable probes can lead to inaccurate readings. Section 8 in ASTM F2170 requires verification of a probe’s measurement accuracy using a salt solution or a humidity chamber. Rapid RH sensors come with a certificate of NIST-traceable calibration. If you use the Rapid RH single-use method, you never need to be concerned with verifying calibration and the associated costs. Or for anyone who prefers a reusable sensor, the Rapid RH 5.0 reusable is uniquely designed for fast calibration checks using the innovative EasyCare CalCheck®, a feature that moisture inspectors and others who perform frequent concrete moisture tests will appreciate. Out of Compliance RH Testing Equipment ASTM F2170 requires that RH readings be performed at 40% depth in the concrete slab (if the slab is drying from one side; 20% if drying from two sides). The standard is also very specific that sensors be located within ⅝ inch of the bottom of the hole, have isolation fins at the bottom of the “sleeve”, between the
  • 7. 7 sleeve and the concrete, to ensure that RH readings take place at the proper depth. Lastly, the “sleeve” must line the entire depth of the hole. Make sure you only use equipment that conforms to the specifications. The design of the Rapid RH ensures the user can easily obtain readings at the correct depth. Just drill the hole to the correct depth and insert the Rapid RH Smart Sensor to that depth. The patented design of the Rapid RH Smart Sensor, including its small volume of air space, ensures conformance to the ASTM depth requirement while also providing very rapid equilibration times. *Section 10.3.4 of ASTM F2170 currently states: “Allow 24 hours to achieve moisture equilibrium within the hole before making relative humidity measurements.” Wagner’s Rapid RH patented design allows for obtaining initial readings in the first 60 minutes that will generally be within 3-5% of the reading at 24 hours. The initial readings at one hour can usually give a general idea of the moisture content of the concrete for the purposes of planning. However, it is recommended that the ASTM F2170 specification is strictly adhered to. You’ll find a variety of educational and informative articles, mobile apps and videos regarding Relative Humidity Testing for Concrete Floors at www.RapidRH.com
  • 8. 8 1. Verify that your relative humidity measuring instrument conforms to section 6 of ASTM F2170. y Verify NIST-traceable calibration certificate is on file. 2. Check calibration of measuring instrument per section 8 of ASTM F2170. y Recalibrate probes at least annually. (Does not apply to single-use Rapid RH L6.) y For reuseable probes, check probe calibration within 30 days of use. y Follow ASTM F2170 8.2.1 Calibration Check Procedure, Saturated Salt Solutions. y Note date on report. 3. Verify 48-hour service conditioning of concrete floor slab and the occupied air space above the floor slab per section 9 of ASTM F2170. y Concrete floor slab shall be at service temperature and the occupied air space above the floor slab shall be at service temperature and service relative humidity for at least 48 hours. 4. Determine number and location of test holes per section 10.1 of ASTM F2170. y Three test holes for the first 1000 ft2 (100 m2) and at least one additional test for each additional 1000 ft2 (100 m2). y Record total area of concrete slab and number of test holes required on report. 5. Determine depth of test holes per section 10.2 of ASTM F2170. y 40% of slab thickness if slab is drying from top only. Recommended Steps to Comply with ASTM F2170
  • 9. 9 y 20% of slab thickness if slab is drying from top and bottom. y Record concrete slab thickness and depth of test holes on report. 6. Drill and prepare test holes per section 10.3 of ASTM F2170. y Note location of test holes on site map. y For Rapid RH, place serial number decal of sensor with corresponding test hole on report. 7. Verify 24-hour moisture equilibrium period for each test hole per section 10.3.5 of ASTM F2170. 8. Perform relative humidity measurements per section 10.5 of ASTM F2170. y Verify that meter reading does not drift more than 1% relative humidity over a 5 minute period. y A Rapid RH Total Reader® can be read immediately after insertion into each test hole since the sensor has already been equilibrated for at least 24 hours. y Reusable probes should equilibrate at least one (1) hour in each test hole to help ensure an accurate measurement. 9. Record and report the results per section 11 of ASTM F2170. We highly recommended that you obtain your own copy of ASTM F2170 at www.astm.org/Standards/F2170.htm TM F2170 Standards for Relative Humidity Testing
  • 10. 10 The Whole Flooring Picture When working to prevent moisture-related problems with wood flooring, there are multiple layers that can contribute to moisture issues. Simply acclimating and installing the flooring product itself is only one step in a series that should be included when installing wood flooring products.
  • 11. 11 From the Ground Up Concrete Slabs for Wood Flooring Professionals “I’m a wood flooring specialist – why would I need to know about concrete?” When a wood floor is installed over a concrete slab (whether that includes separate subfloor or not), the moisture picture in the concrete slab can have real ramifications for the finished floor. If a new slab has not dried completely to finished specifications, that moisture will continue to wick up through the surface of the concrete and can cause anything from adhesive failure to wood warping or cupping. If an older slab has developed cracks or moist patches, those can also work their way to the surface and provide an avenue for moisture to compromise a wood floor. Even with a vapor barrier, moisture can still be an issue if the slab has not properly dried. It pays to have an understanding of concrete moisture testing. Concrete moisture conditions are most reliably established with RH testing that uses in situ probes. Other test methods, including calcium chloride testing or the poly-film test, have proven problematic in the past and are slowly being discontinued. Other varieties of meters, like surface concrete meters, might help to determine the most likely areas for necessary RH testing, but keep in mind that surface concrete meters do not provide an in-depth picture of moisture conditions within the slab. True quantitative testing must be done to protect your flooring installation. It pays to check what the job specs have called for, have performed the appropriate moisture testing, and have the manufacturer acceptable results on file, prior to beginning your installation. Moisture problems in the concrete slab may not ultimately be your responsibility, but left unchecked they might still end up becoming your problem. The Wood Subfloor Just like moisture problems with a concrete slab subfloor, improper moisture conditions in a wooden subfloor can lead to moisture-related issues in a finished floor. Two types of moisture meters are often used to determine the moisture
  • 12. 12 content (MC) of wood subfloors: the pin-style meter and the pinless (or non- destructive) meter (see “Moisture Content Management During Installation”). Just like the final wood floor, the subfloor must also be stable in terms of MC in order to prevent possible moisture-related flooring issues over time. With either style of wood moisture meter, it is important to test several areas of a wood subfloor to be sure that the moisture conditions are acceptable for the final flooring installation. While several types of products are on the market to prevent this moisture from migrating from one layer to the next, proper moisture conditions before beginning installation help reduce the risk of flooring issues or failure. A good rule of thumb is that the subfloor MC should be within 3-4 percentage points of the flooring to be installed before proceeding. The Flooring Before installation, wood or engineered flooring to be installed should also be checked with an accurate wood moisture meter. Several bundles should be opened and tested to ensure that the wood flooring is at the same MC throughout, and is compatible with the subfloor over which it will be installed. Like the wood subfloor, pin-style and pinless meters can give an indication of the MC to ensure a professional and long-lasting flooring installation. The advantage that pinless meters have with wood flooring is in their damage free measuring – no pin holes means no filling or sanding on the final floor. And of course, room conditions should alsobemonitoredtoensuretheyareatservice normal conditions. Even a good flooring installation with adequate moisture testing might not overcome extreme changes in ambient temperature and humidity. But allowing the wood products to acclimate to these normal ambient conditions is one of the best recommended practices. As the old adage says, “An ounce of prevention is worth a pound of cure.” At any stage of the flooring work, accurate moisture testing is the best defense against moisture-related problems making an appearance.
  • 13. 13 Wood Floors Wooden floors can be as durable as they are beautiful. But there’s a big IF in a statement like that. Wooden floors can be as durable as they are beautiful IF they are installed properly. And any proper installation must begin with an understanding of the continuous relationship between wood and moisture. Wood and Water – A Continuous Interaction As a growing tree, wood cells are like bundles of long, narrow drinking straws that help the moisture move up the length of the trunk and out through the branches and twigs. Obviously, when a tree is felled, it begins to lose moisture that is not renewed through its root system. But even as it loses moisture, the cell structure of wood makes it possible for it to reabsorb moisture that exists as air humidity. Wood ultimately reaches a point of equilibrium (or balance) with its environment, but change the environment and the wood will lose or absorb moisture accordingly. This relationship between wood and its environment is referred to as “hygroscopic”. How does this affect wood flooring? As moisture moves in and out of wood flooring, it will actually change dimensions depending on moisture conditions. (To see a dramatic example of this principle, try experimenting with a stalk of celery. Cut it into lengths both horizontally and vertically and place it in water for a day or two and see what happens!) Cut wood will typically change in width and thickness, not in length because most saw cuts run vertically rather than horizontally. The degree of change will be influenced by the amount of moisture being absorbed or lost, the species of wood, the season it was harvested, the part of the tree the lumber was cut from, the width of the board and the type of saw cut used. Moisture levels in the average household are considered to be between 6-9% and wood flooring is generally dried to this level. But regional and seasonal variations mean that even wood flooring manufactured from properly-dried lumber will need an acclimation time in the installation environment to prevent extreme changes in the finished floor. Think of this – even a change as small 1/32” per 2” board multiplied across an eight foot room equals 1 ½” of gapping or swelling. MC is crucial to proper installation.
  • 14. 14 A Note on Engineered Wood Products Engineered wood also needs the same acclimation time as natural wood products. During the manufacturing process, layers of wood or wood products are joined together to create the finished product. In the event that producers use layers of different wood species, the moisture management imperative is even greater. Each wood layer (even equilibrated) responds differently to changes in RH. Add the chemical and MC of industrial wood glues, and one gets a clear sense of the challenge to produce outstanding engineered flooring. When installed, engineered wood flooring tends to be more dimensionally stable but it can still be susceptible to moisture damage. And when installed with adhesive products, MC becomes just as critical as with any other flooring product. Moisture Content Management During Installation Because of the hygroscopic nature of wood, thorough acclimation is critical when installing wood flooring. And there are a number of tools available to help all stages of the installation process. 1. Ambient RH & Temperature Data Logger – Whether you are renovating a home or building a hospital, monitoring ambient temperature and humidity conditions at your project can help you avoid costly and time-consuming damage as well as expensive call backs later. The only way to be sure service conditions remain is constant observation and recording. The Wagner Meters Smart Logger™ monitor and the Smart Logger™ app are your eyes on the job site 24 hours a day. 2. Wood moisture meters – Wood moisture meters assess MC in wood through a couple different types of underlying technology, and so are often referred to as “pin-style” or “pinless” moisture meters. Wood moisture meters can be designed or programmed for different depths of readings, as well as species settings (or adjustment tables) and a range of features designed to help maintain accurate MC assessment on the job site.
  • 15. 15 A Comprehensive Guide to MoistureTesting- Prepared byWagner Meters a. Pin-style moisture meters - A pin meter measures the MC of wood by running an electrical signal between the tips of two narrow metal probes that are inserted into the wood. One advantage of pin-style meters (only those that use longer pins with insulated shafts) is that you can test at different depths in the wood. The major disadvantages are the relatively small area tested with each insertion, their sensitivity to wood temperature, and the damage the pins do to the wood surface with each test. The nature of pin-style meter design also mean that pins can be broken, or improperly driven pins will not give accurate readings b. Pinless moisture meters - Pinless meters use an electromagnetic signal to penetrate the wood surface. Their design lets users “scan” many board feet of wood product simply and quickly for ease of use when checking flooring bundles or for doing a quick check of current conditions. Also referred to as “non-damaging moisture meters”, their pin-free style means they do not damage wood surfaces. Pinless meters do require adequate pressure to be reading correctly, and also take readings at a fixed depth. They may be susceptible to scratches or damage on the sensing pad as well. As with any other tool on the job site, wood moisture meter accuracy depends on proper maintenance and use. If, for example, your moisture meter is taking readings at 1 ½” depth, but your flooring is ¾” stock, the readings may be reflecting ambient conditions under the board you are testing, or even subfloor conditions under existing floors. If the insulation is peeling from the probes of your pin-style meter, the readings will not have the same pin-point accuracy as is necessary for crucial MC information. Of course, all the tools in the world cannot fix existing MC problems in wood flooring. If the wood did not reach it’s equilibrium moisture content (EMC) during drying or manufacturing; if installers pay little attention to the initial MC of the wood flooring previous to and during installation; if the RH of the room was not monitored before and during installation or if the RH changes after installation, MC problems and issues can arise. But proper attention to matters during installation means increased confidence in the longevity and durability of each flooring installation.
  • 16. 16 502-RTEST-001 REV E CHECK OUT moisturewebinar.com for the latest up-to-date webinar