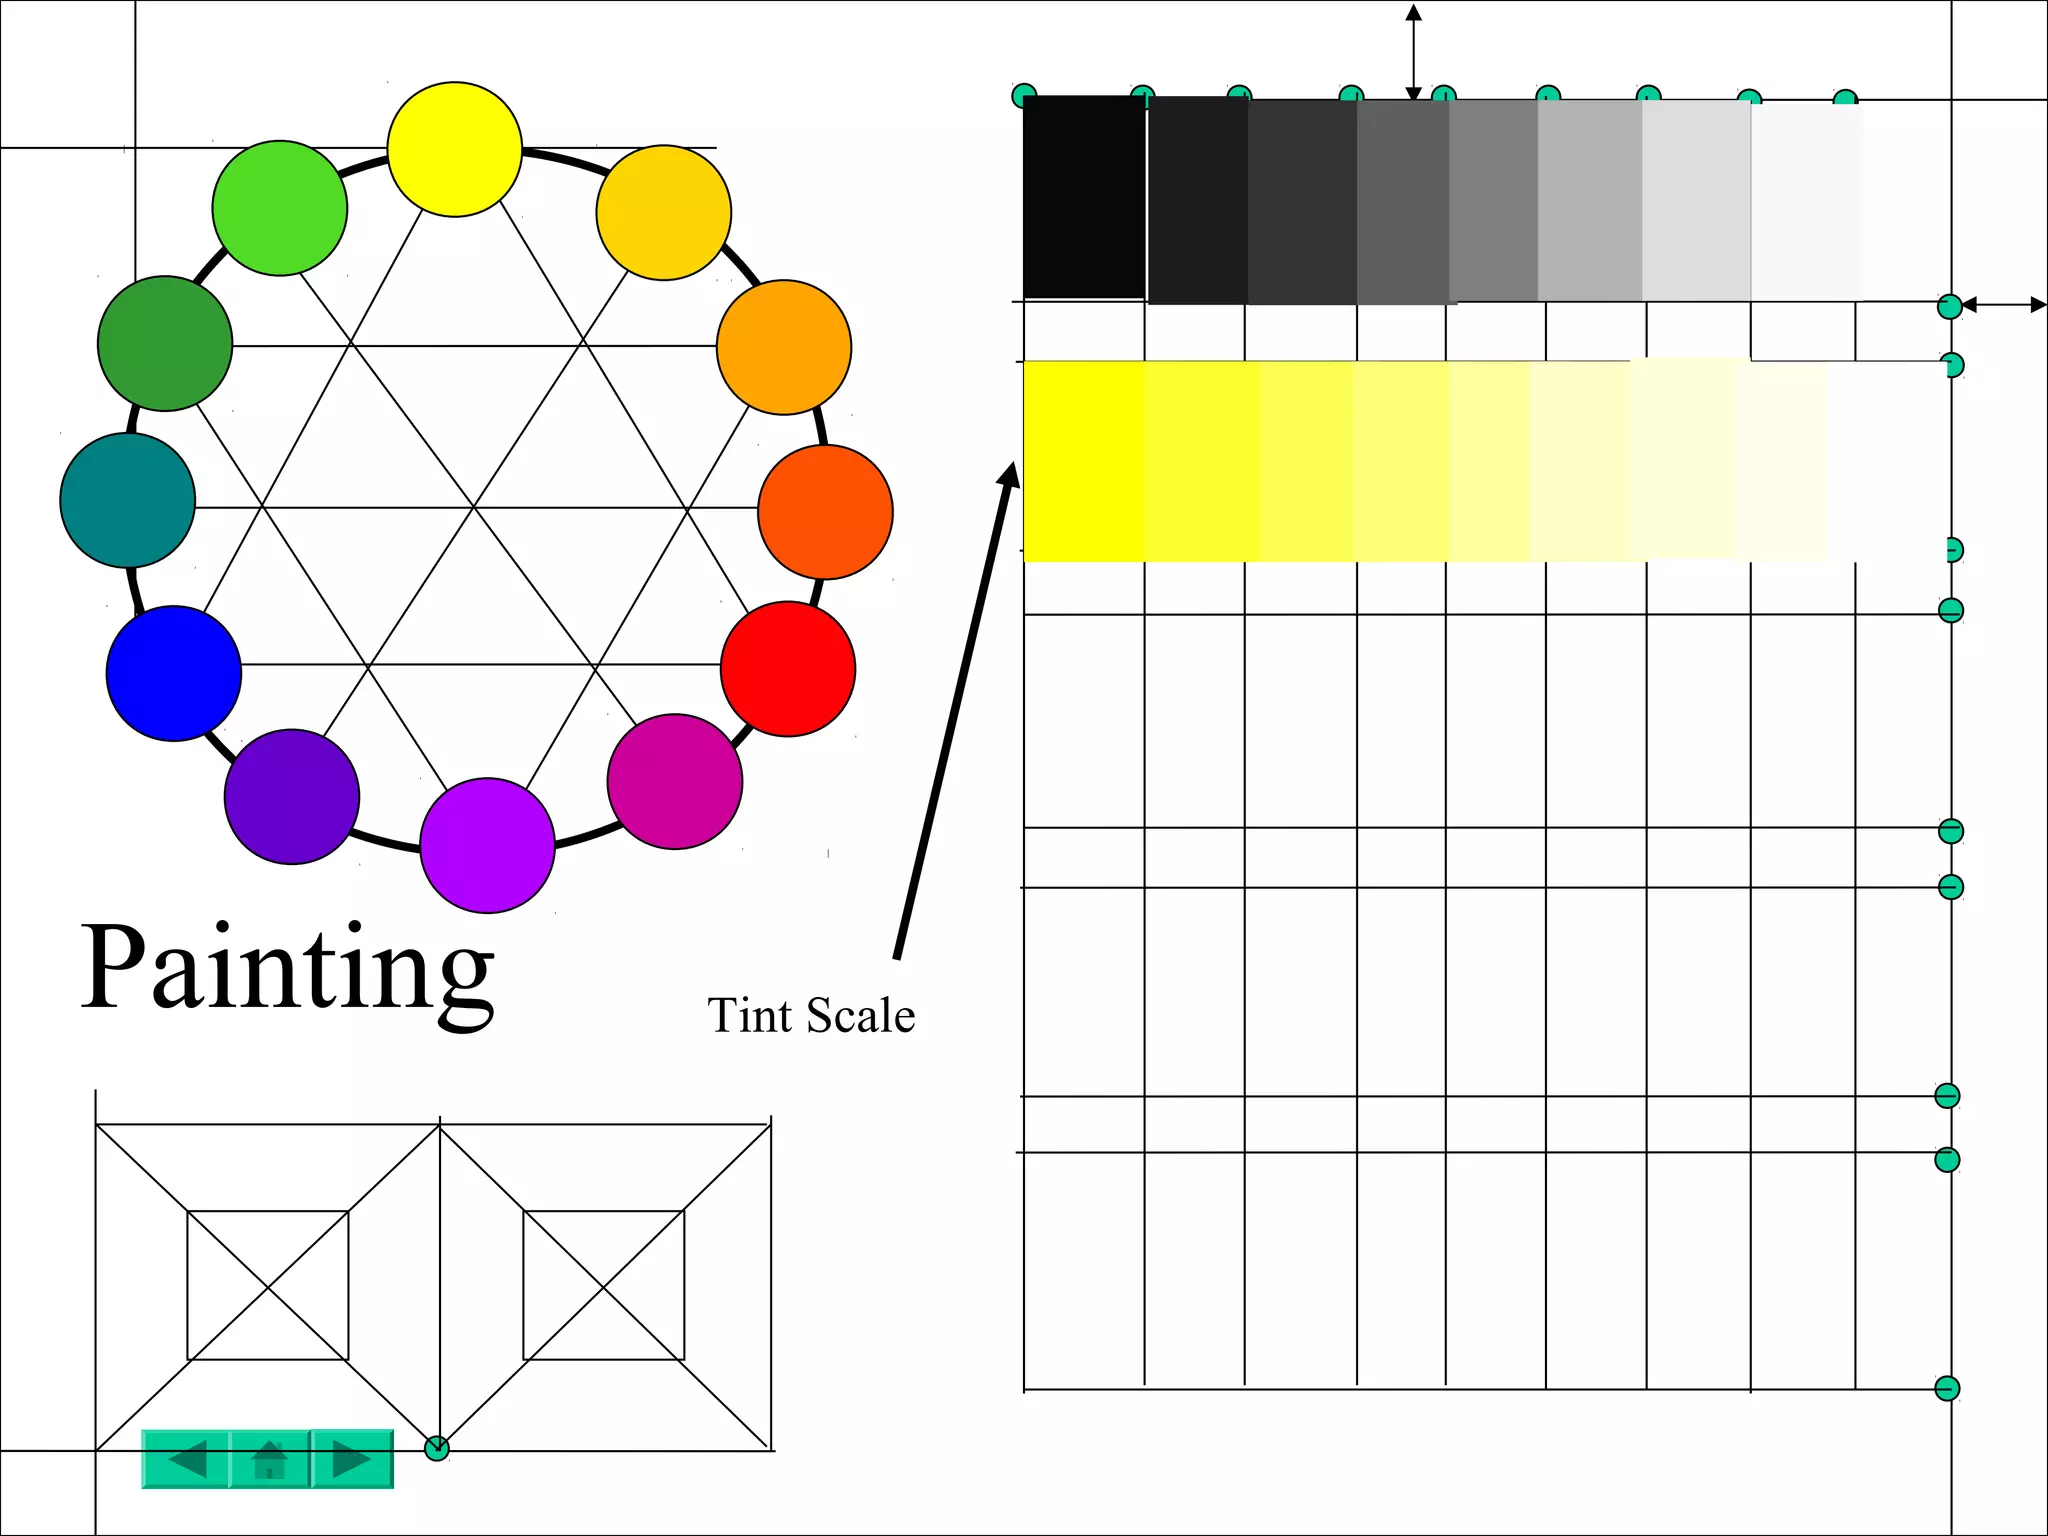
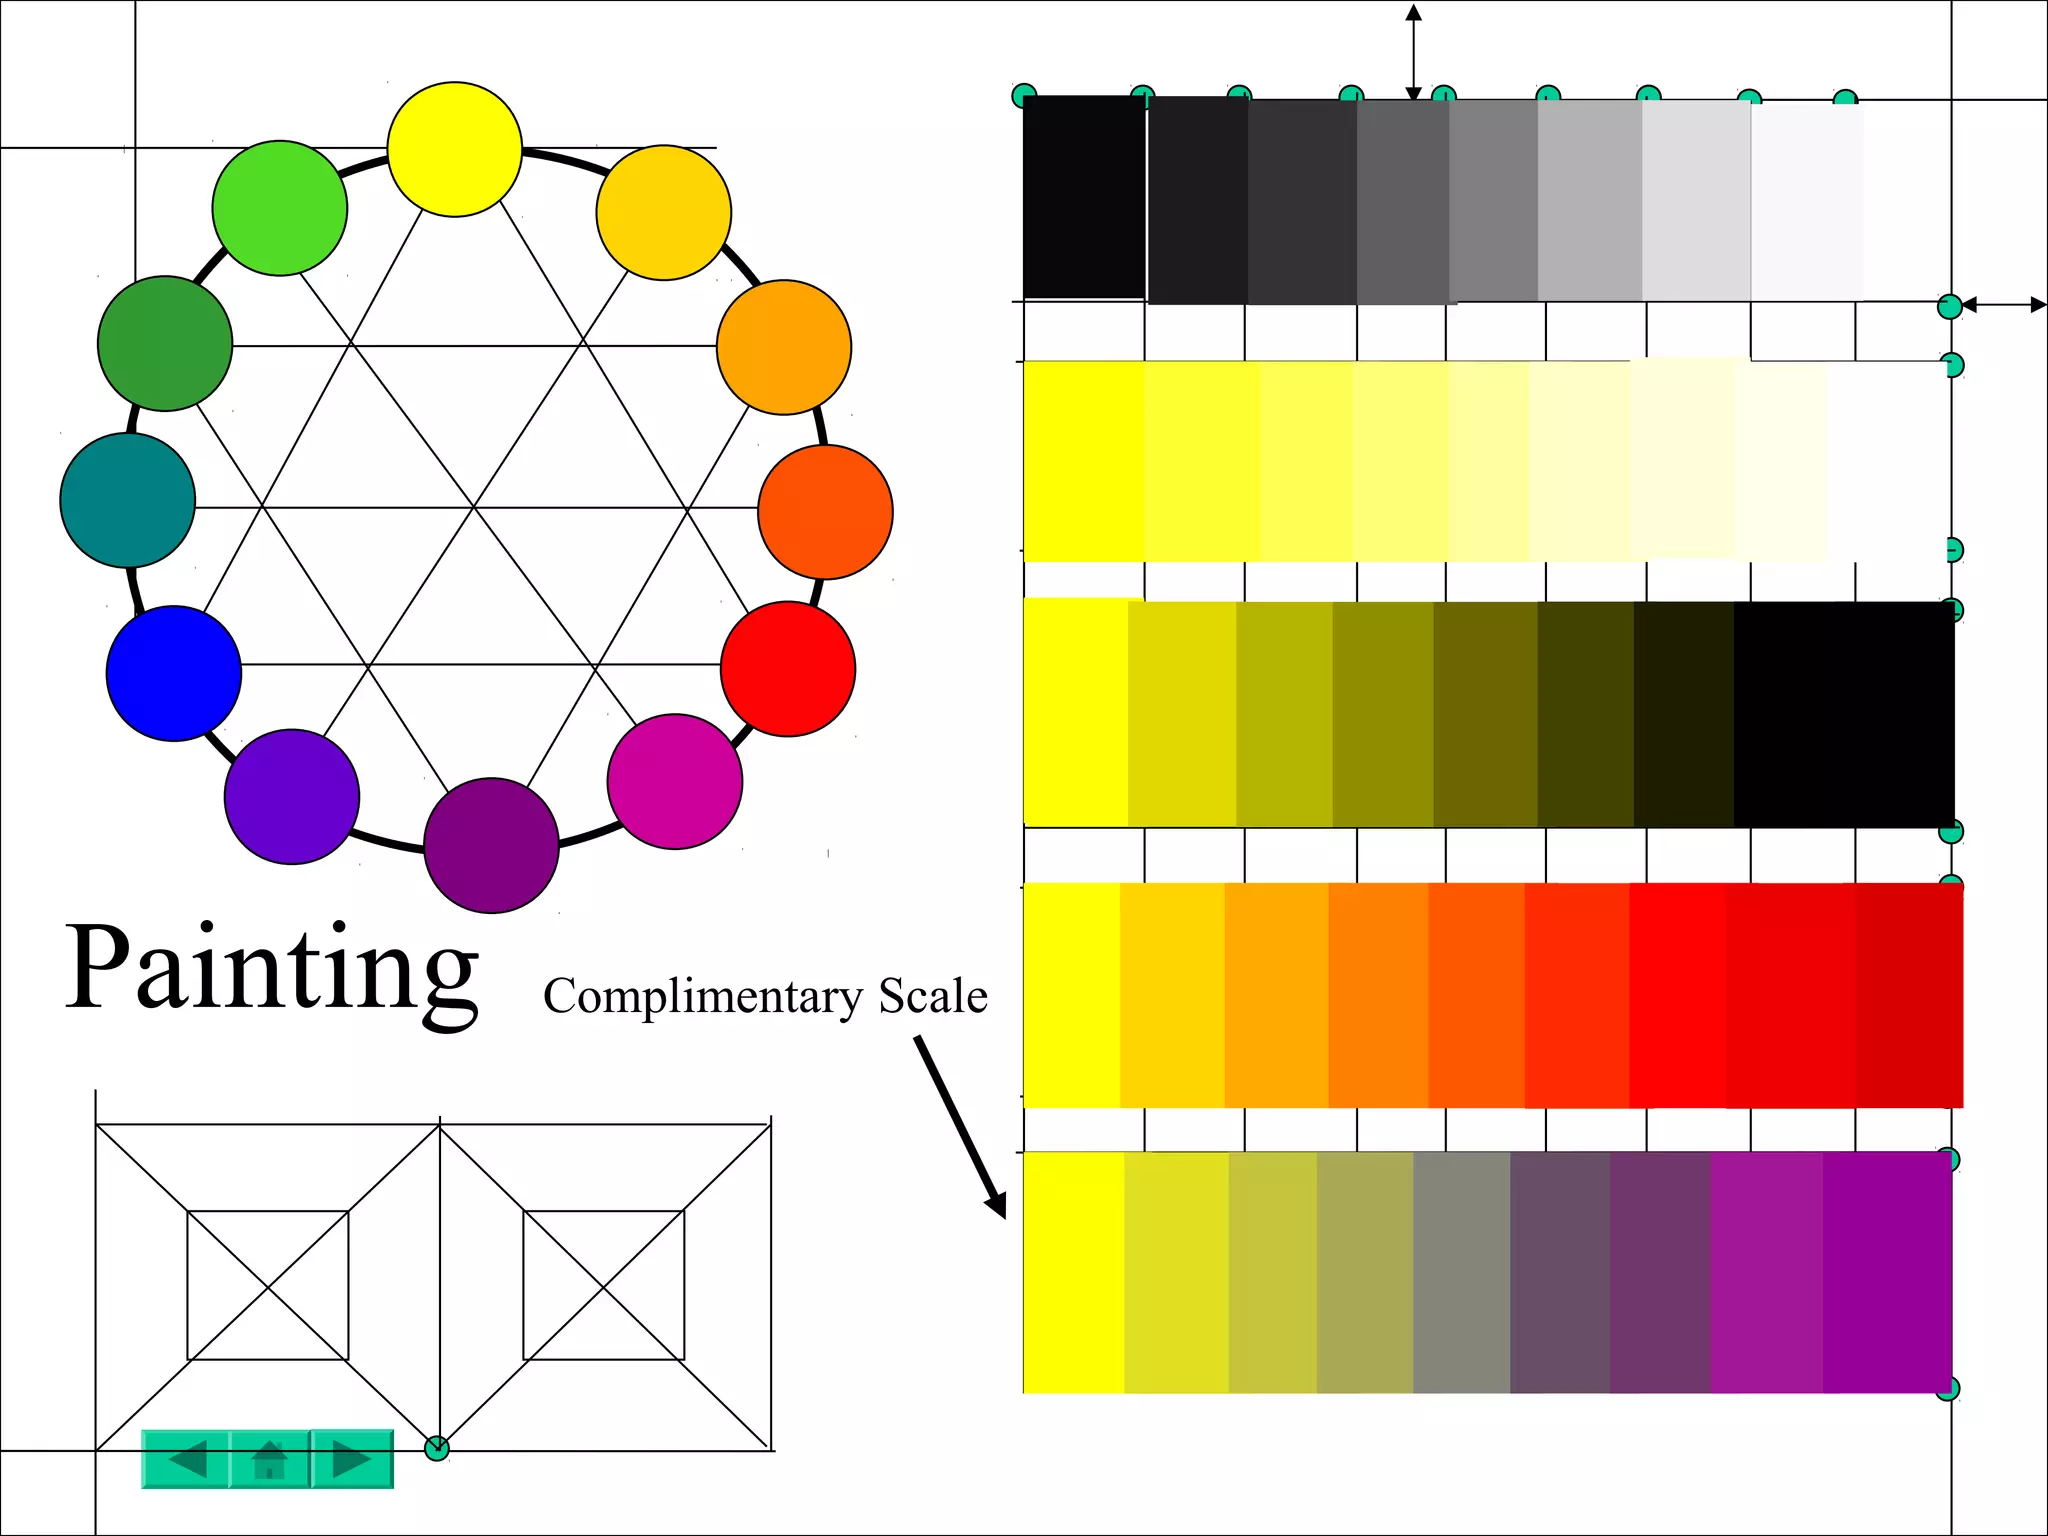
Color Theory
It’s like a tetanus shot:
It isn’t fun but you need to get it.
Supplies
• Layout
– 15”*22” watercolor
paper
– 30-60-90 triangle
– 18”ruler
– Compass
– Tape
– Eraser
– Pencil
• Painting
– Water dish
– Mixing pan(s)
– Test paper
– Paper toweling
– Brush
Vocabulary
• Primary
• Secondary
• Tertiary/Intermediate
• Hue
• Intensity
• Value
• Tint
• Shade
• Complementary
• Analogous
• Black/White
Layout
On the Left hand side of
your paper measure 2”
down from the top and
draw a horizontal line
segment about 10” long
2”
Layout
On the Left hand side of
your paper measure in 2”
from the left and draw a
vertical line segment about
10” long
2”
2”
Layout
Measure from here
Measure in 3 ½”
from the
intersection
point of the two
lines and draw a
mark
Layout
Measure from here
Measure 3 ½”
down from the
intersection
point of the two
lines and draw a
mark
Layout
Set your
compass from
the intersection
point to the
measured point.
Layout
Place the point
of the compass
on the measured
point and draw a
circle, repeat for
the other point
Layout
Leave the compass set
to the same size. Place
the point on the
intersection point of
the two circles and
draw a third circle
Layout
Leave the compass set
to the same size. Place
the pencil on the upper
intersection point of
the circle and the
horizontal line. Place
the point on the edge
of the circle and strike
an arc through the
center of circle
pencil
point
Layout
Place the point of
the compass on the
lower intersection
point and strike
another arc.
pencil
point
Layout
Continue to work
around the circle
using each new
intersection to
create a new arc.
You should get a
flower pattern
Layout
Connect every other
point on the
compass to form a
triangle
( this is also how to layout
an equilateral triangle)
Layout
Connect the three
remaining points
( this is also how to layout
hexagon)
Layout
Draw a line that
connects the
opposing corners of
the hexagon and
extent the line to
touch the outer edge
of the circle.
Layout
Draw lines through
the remaining
points.
Layout
Draw an 1 ½” circle
centered on each
point.
Layout
Draw an 1 ½” circle
centered on each
point.
Layout
Measure 1” in the right
hand edge of the paper.
Measure down 1” from
the top of your paper.
(10” across).
Layout
Measure 9 points along
the top edge 1”apart
Layout
Measure down
the side line,
putting marks at:
2”
2 ½”
4 ½”
5”
7”
7 ½”
9 ½”
12”
10”
Layout
Use these points
to make a grid:
Layout
Measure in 1” from
the lower left edge and
draw a line segment 4”
long
Layout
Measure up 1” from
the lower edge and
draw a line segment 7”
long
Layout
Measure in 3” in from
the intersection point
and place a mark
Layout Draw a line segment
3” up from that point
and from the end.
Layout Close off the rectangle
Layout Find the center of each
square.
Layout Draw a 1” square in
the middle of each
larger square.
Painting Primaries
Painting Secondary
Painting Intermediate
Painting Grey Scale
Painting Tint Scale
Painting Shade Scale
Painting Analagous Scale
Painting Complimentary Scale
Painting Color and Ground
Painting Procedure
1. Make sure you are set up
2. Never overload your brush.
3. Keep the paint to the lower half of the bristle.
4. Check the consistency of the paint. It should be the
consistency of heavy cream.
5. You should always be able to see the edge of the shape
and the tip of your brush. The tip of the brush should be
aimed at the edge of the shape you are painting.
6. Try all the colors out on a separate sheet of paper and
Dry them with a hairdryer.
7. Mix colors from the lightest to the darkest.
Color theory

Color theory