Download to read offline
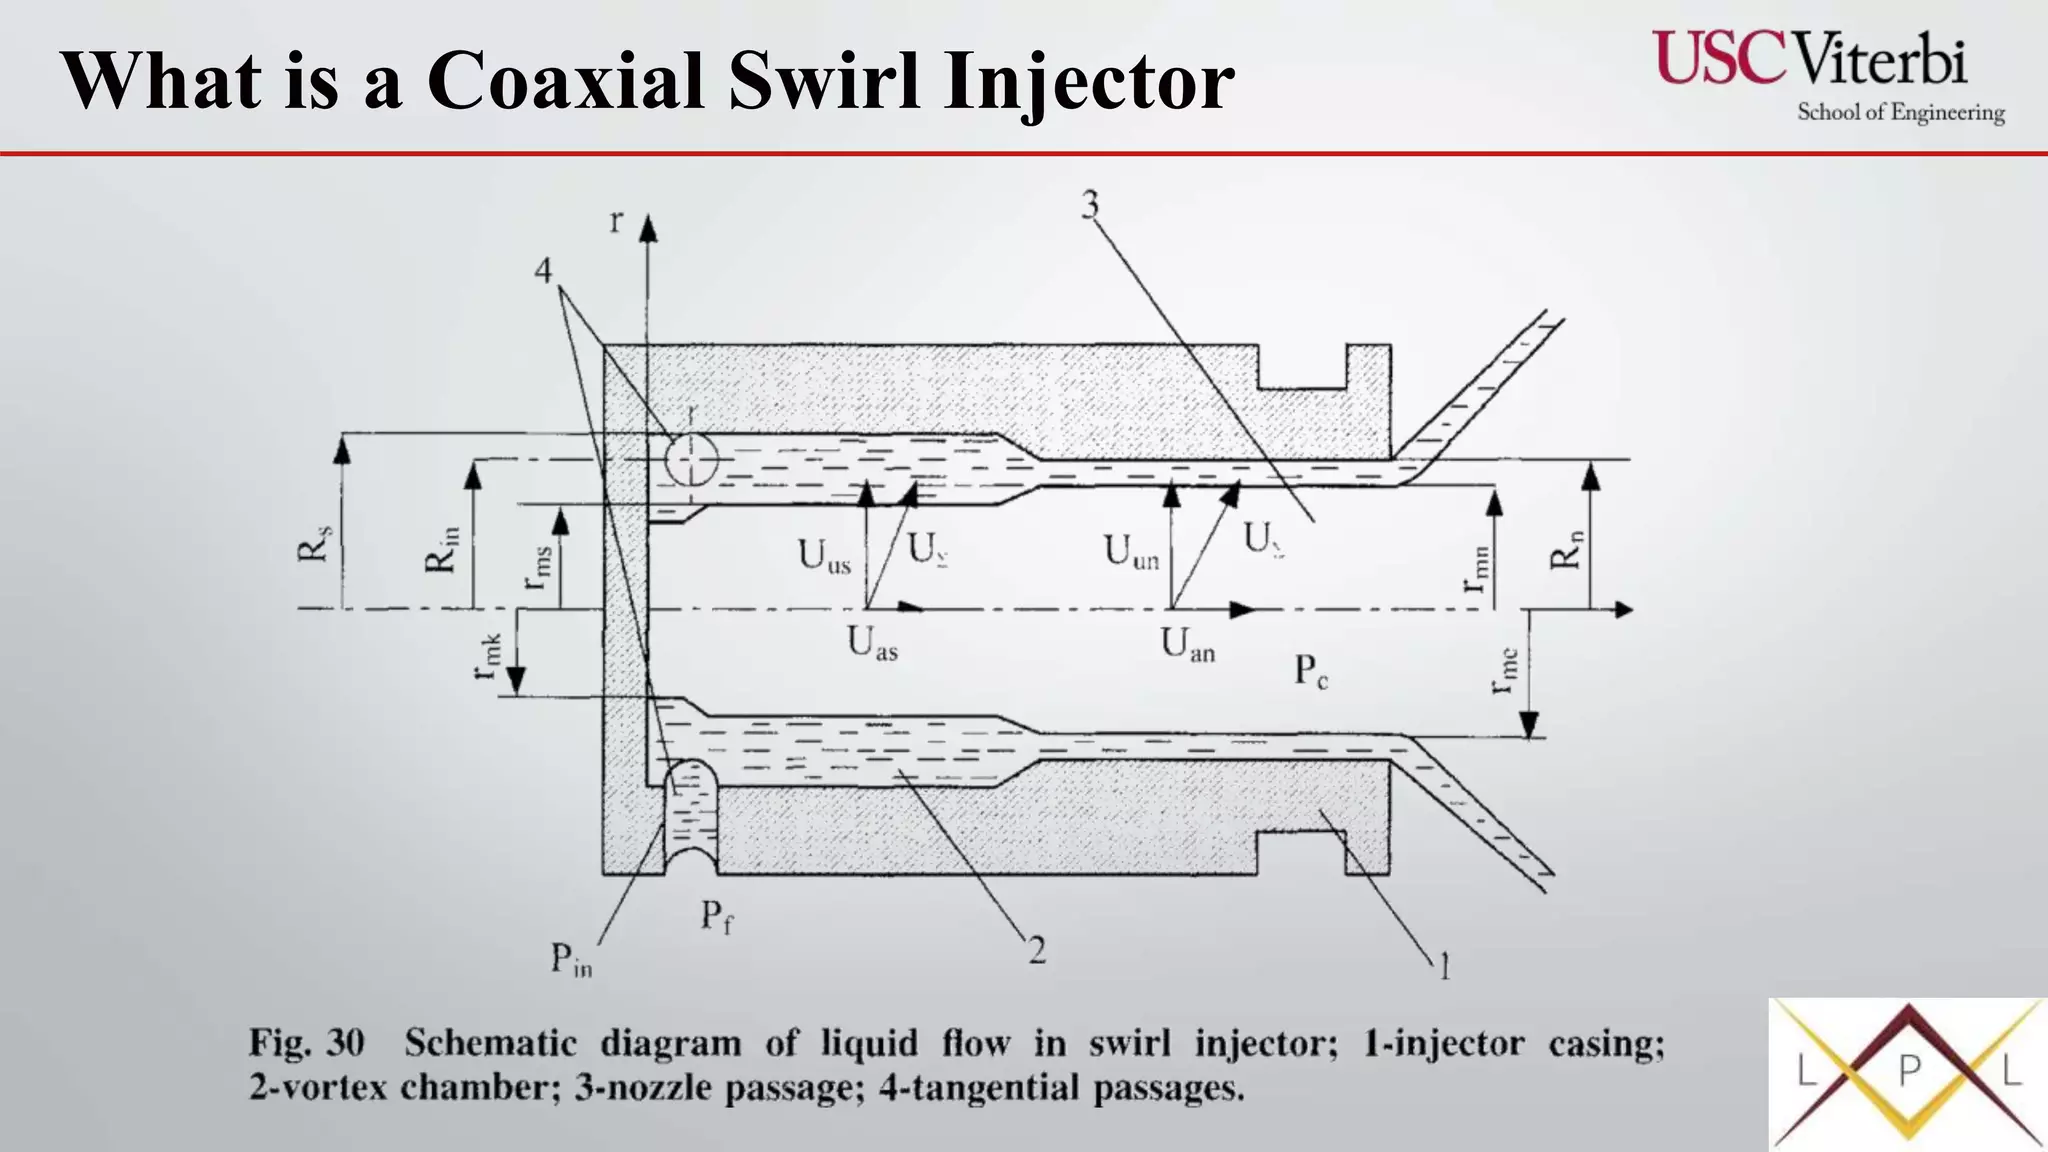

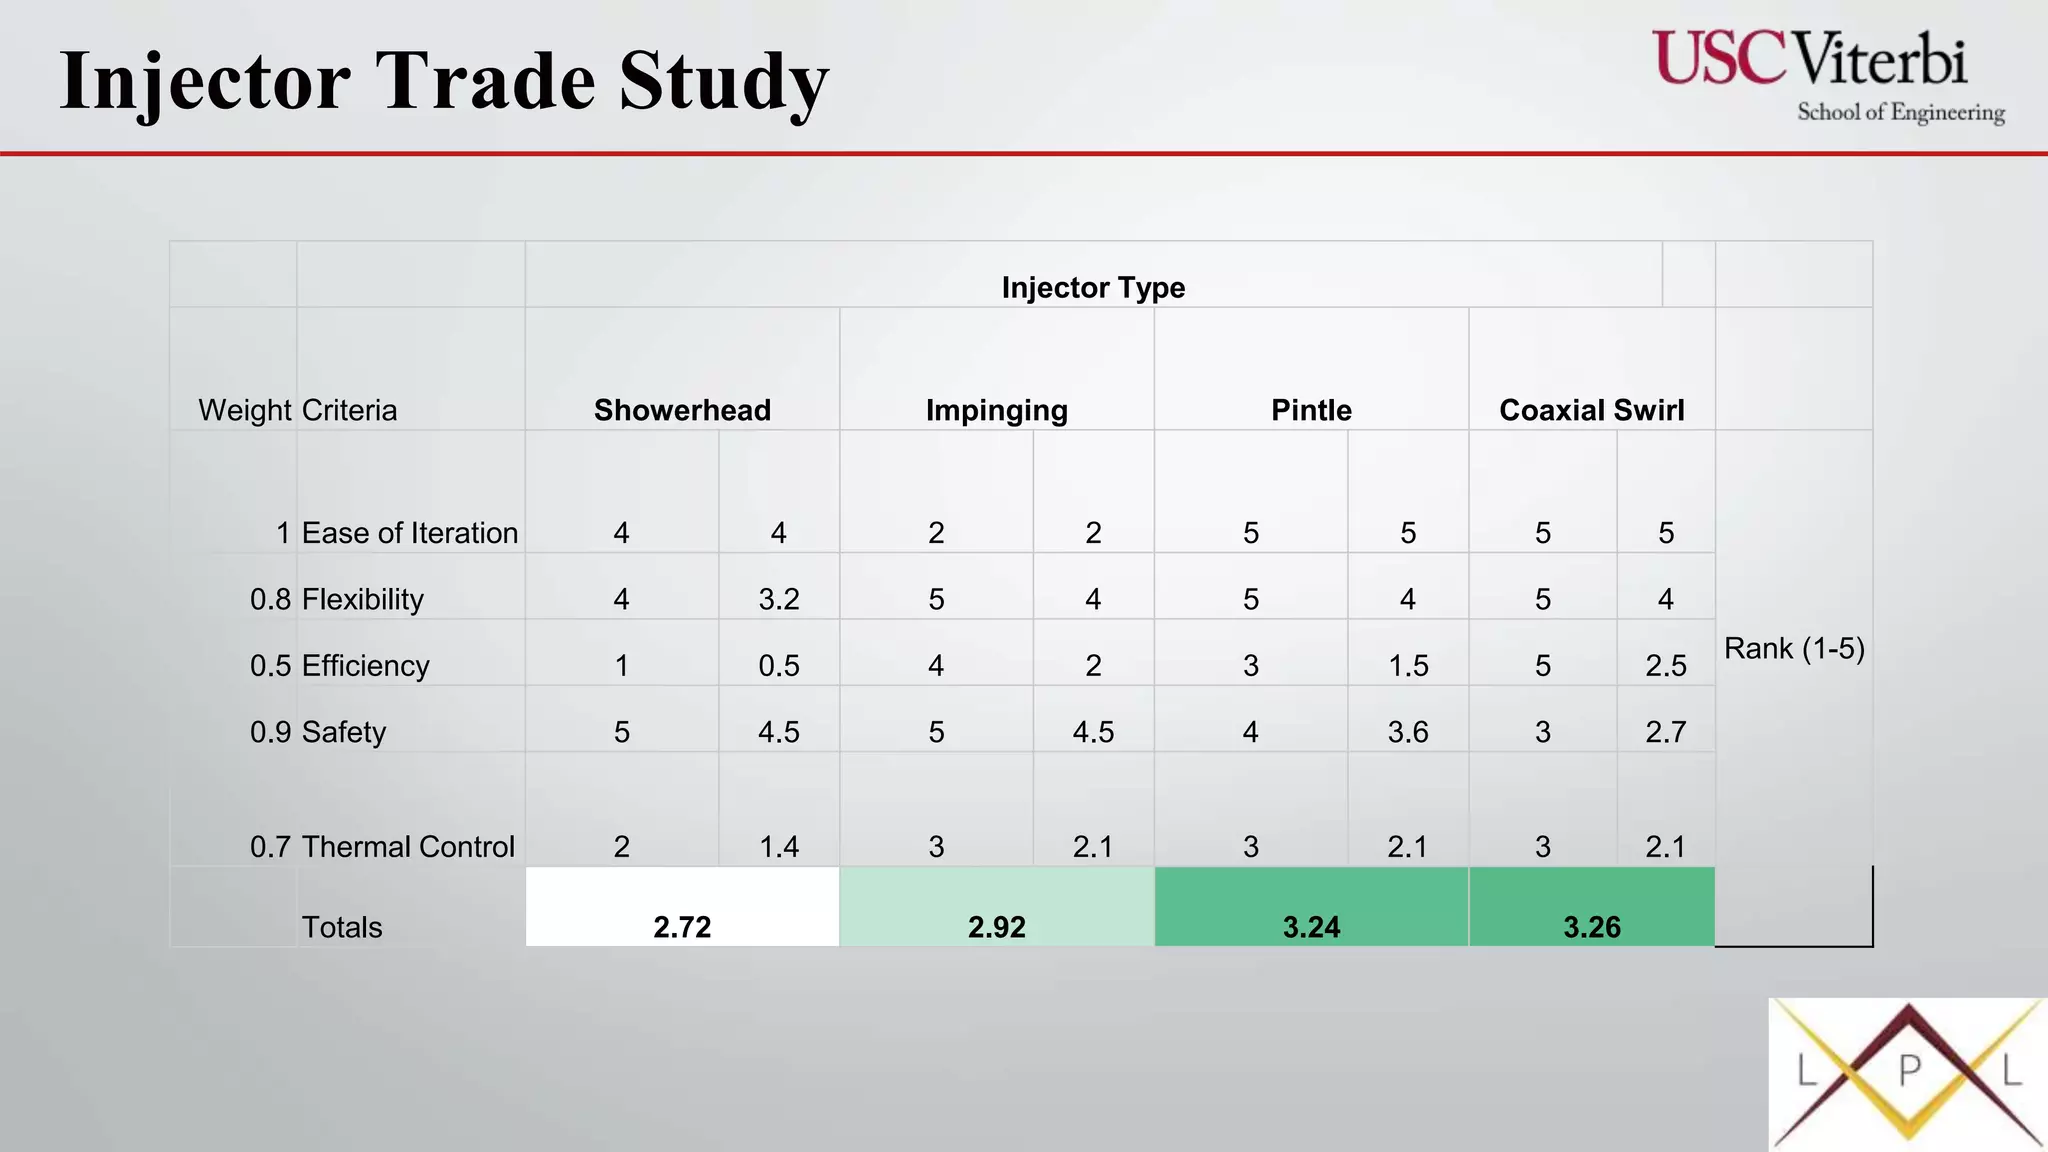


The document discusses the design and testing of a coaxial swirl injector for liquid propulsion, highlighting its advantages such as improved atomization and efficiency. It includes a trade study comparing injector types, design parameters, and machining processes, emphasizing the need for reliability and safety. The budget and next steps for finalizing CAD, ordering parts, and initiating a testing campaign are also outlined.


![ME 312 Mechanical Machine Design [Screws, Bolts, Nuts]](https://cdn.slidesharecdn.com/ss_thumbnails/me312-dsulec10-screws-170213050612-thumbnail.jpg?width=640&height=640&fit=bounds)


