
Recommended
More Related Content
What's hot
What's hot (19)
Viewers also liked
Viewers also liked (19)
Similar to Class 1
Similar to Class 1 (20)
Recently uploaded
Recently uploaded (20)
Class 1
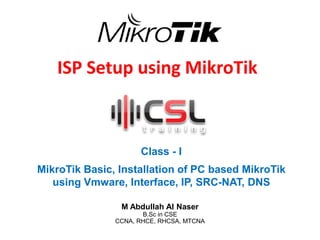
- 1. ISP Setup using MikroTik Class - I MikroTik Basic, Installation of PC based MikroTik using Vmware, Interface, IP, SRC-NAT, DNS M Abdullah Al Naser B.Sc in CSE CCNA, RHCE, RHCSA, MTCNA
- 2. About MikroTik 2 Prepared by- M Abdullah Al Naser (mail.naserbd@yahoo.com)
- 3. Installing VMware in PC 1. Collect VMware installation file with License key and run the setup.exe 3 Prepared by- M Abdullah Al Naser (mail.naserbd@yahoo.com)
- 4. Installing VMware in PC 2. VMware Workstation 8 initializing…….. 4 Prepared by- M Abdullah Al Naser (mail.naserbd@yahoo.com)
- 5. Installing VMware in PC 3. Click Next 5 Prepared by- M Abdullah Al Naser (mail.naserbd@yahoo.com)
- 6. Installing VMware in PC 4. Click Typical 6 Prepared by- M Abdullah Al Naser (mail.naserbd@yahoo.com)
- 7. Installing VMware in PC 5. You can Change installation directory (Optional) 6. Click Next 7 Prepared by- M Abdullah Al Naser (mail.naserbd@yahoo.com)
- 8. Installing VMware in PC 7. Click Next 8 Prepared by- M Abdullah Al Naser (mail.naserbd@yahoo.com)
- 9. Installing VMware in PC 8. Click Next 9 Prepared by- M Abdullah Al Naser (mail.naserbd@yahoo.com)
- 10. Installing VMware in PC 9. Click Next 10 Prepared by- M Abdullah Al Naser (mail.naserbd@yahoo.com)
- 11. Installing VMware in PC 10. Click Continue 11 Prepared by- M Abdullah Al Naser (mail.naserbd@yahoo.com)
- 12. Installing VMware in PC 11. Installation is in progress….. 12 Prepared by- M Abdullah Al Naser (mail.naserbd@yahoo.com)
- 13. Installing VMware in PC 12. Put License Key and click Enter 13 Prepared by- M Abdullah Al Naser (mail.naserbd@yahoo.com)
- 14. Installing VMware in PC 13. Click Finish 14 Prepared by- M Abdullah Al Naser (mail.naserbd@yahoo.com)
- 15. Customize Network Setting 1. Run VMware Workstation 15 Prepared by- M Abdullah Al Naser (mail.naserbd@yahoo.com)
- 16. Customize Network Setting 2. Accept License Agreement and click OK 16 Prepared by- M Abdullah Al Naser (mail.naserbd@yahoo.com)
- 17. Customize Network Setting 3. Sample Topology 17 Prepared by- M Abdullah Al Naser (mail.naserbd@yahoo.com)
- 18. Customize Network Setting 4. Click Edit --> Virtual Network Editor… 18 Prepared by- M Abdullah Al Naser (mail.naserbd@yahoo.com)
- 19. Customize Network Setting 5. Select VMnet1, configure parameters accordingly and then select VMnet8 19 Prepared by- M Abdullah Al Naser (mail.naserbd@yahoo.com) VMnet1 for Local LAN
- 20. Customize Network Setting 6. Configure parameters accordingly and then click OK 20 Prepared by- M Abdullah Al Naser (mail.naserbd@yahoo.com) VMnet8 for WAN
- 21. Create Virtual Machine 1. Click File --> New Virtual Machine… 21 Prepared by- M Abdullah Al Naser (mail.naserbd@yahoo.com)
- 22. Create Virtual Machine 2. Select Typical and click Next 22 Prepared by- M Abdullah Al Naser (mail.naserbd@yahoo.com)
- 23. Create Virtual Machine 3. Select last option here and click Next 23 Prepared by- M Abdullah Al Naser (mail.naserbd@yahoo.com)
- 24. Create Virtual Machine 4. Select OS Other, Version Other and click Next 24 Prepared by- M Abdullah Al Naser (mail.naserbd@yahoo.com)
- 25. Create Virtual Machine 5. Enter Machine Name, select Location, and click Next 25 Prepared by- M Abdullah Al Naser (mail.naserbd@yahoo.com)
- 26. Create Virtual Machine 6. Put Disk Size, select Single storage file, and click Next 26 Prepared by- M Abdullah Al Naser (mail.naserbd@yahoo.com)
- 27. Create Virtual Machine 7. Click Finish 27 Prepared by- M Abdullah Al Naser (mail.naserbd@yahoo.com)
- 28. Edit Virtual Machine 1. Double-click MT1 and click Edit VM Settings 28 Prepared by- M Abdullah Al Naser (mail.naserbd@yahoo.com)
- 29. Edit Virtual Machine 2. Select Network Adapter, select VMnet1 29 Prepared by- M Abdullah Al Naser (mail.naserbd@yahoo.com)
- 30. Edit Virtual Machine 3. Click Add to add another adapter 30 Prepared by- M Abdullah Al Naser (mail.naserbd@yahoo.com)
- 31. Edit Virtual Machine 4. Select Network Adapter and click Next 31 Prepared by- M Abdullah Al Naser (mail.naserbd@yahoo.com)
- 32. Edit Virtual Machine 5. Choose VMnet8 and click Finish 32 Prepared by- M Abdullah Al Naser (mail.naserbd@yahoo.com)
- 33. Edit Virtual Machine 5. Select CD/DVD, locate MikroTik IOS image file and click Ok 33 Prepared by- M Abdullah Al Naser (mail.naserbd@yahoo.com)
- 34. Install PC Based MikroTik on VM 1. Double-click MT1 and click Power on this VM 34 Prepared by- M Abdullah Al Naser (mail.naserbd@yahoo.com)
- 35. Install PC Based MikroTik on VM 2. Installation initializing…… 35 Prepared by- M Abdullah Al Naser (mail.naserbd@yahoo.com)
- 36. Install PC Based MikroTik on VM 3. Displaying available packages 36 Prepared by- M Abdullah Al Naser (mail.naserbd@yahoo.com)
- 37. Install PC Based MikroTik on VM 4. Press a to select all packages and press i to start installation 37 Prepared by- M Abdullah Al Naser (mail.naserbd@yahoo.com)
- 38. Install PC Based MikroTik on VM 5. Firstly Press n and then press y for appropriate prompt 38 Prepared by- M Abdullah Al Naser (mail.naserbd@yahoo.com)
- 39. Install PC Based MikroTik on VM 6. Installation is in progress 39 Prepared by- M Abdullah Al Naser (mail.naserbd@yahoo.com)
- 40. Install PC Based MikroTik on VM 7. Press Enter to reboot 40 Prepared by- M Abdullah Al Naser (mail.naserbd@yahoo.com)
- 41. Install PC Based MikroTik on VM 8. MikroTik is booting up 41 Prepared by- M Abdullah Al Naser (mail.naserbd@yahoo.com)
- 42. Install PC Based MikroTik on VM 9. Login in to MikroTik using username admin and password null [no password] (By Default) 42 Prepared by- M Abdullah Al Naser (mail.naserbd@yahoo.com)
- 43. Install PC Based MikroTik on VM 10. MikroTik is now ready to configure in CLI Mode 43 Prepared by- M Abdullah Al Naser (mail.naserbd@yahoo.com)
- 44. Install PC Based MikroTik on VM 11. Verify interfaces using following command 44 Prepared by- M Abdullah Al Naser (mail.naserbd@yahoo.com)
- 45. Install PC Based MikroTik on VM 12. Set IP address on ether1 for LAN connectivity using given command 45 Prepared by- M Abdullah Al Naser (mail.naserbd@yahoo.com)
- 46. Install PC Based MikroTik on VM 13. Set IP address on PC 46 Prepared by- M Abdullah Al Naser (mail.naserbd@yahoo.com)
- 47. Install PC Based MikroTik on VM 14. Set IP address on PC 47 Prepared by- M Abdullah Al Naser (mail.naserbd@yahoo.com)
- 48. Install PC Based MikroTik on VM 15. Disable VMnet8 adapter for the time being 48 Prepared by- M Abdullah Al Naser (mail.naserbd@yahoo.com)
- 49. Install PC Based MikroTik on VM 16. Verify connectivity between PC and MikroTik’s LAN interface 49 Prepared by- M Abdullah Al Naser (mail.naserbd@yahoo.com)
- 50. Install PC Based MikroTik on VM 17. Browse 192.168.100.1 and download Winbox 50 Prepared by- M Abdullah Al Naser (mail.naserbd@yahoo.com)
- 51. Install PC Based MikroTik on VM 18. Save Winbox in your PC 51 Prepared by- M Abdullah Al Naser (mail.naserbd@yahoo.com)
- 52. Install PC Based MikroTik on VM 19. login in to the MikroTik using 192.168.100.1 Username admin and password null [no password] (By default) and click Connect 52 Prepared by- M Abdullah Al Naser (mail.naserbd@yahoo.com)
- 53. Install PC Based MikroTik on VM 20. Finally the MikroTik is ready to configure using Winbox 53 Prepared by- M Abdullah Al Naser (mail.naserbd@yahoo.com)
- 54. RB750GL It is a MikroTik Router Board with five FastEthernet Interfaces 54 Prepared by- M Abdullah Al Naser (mail.naserbd@yahoo.com)
- 55. Configuration Hands-on Lab Topology 55 Prepared by- M Abdullah Al Naser (mail.naserbd@yahoo.com)
- 56. Configuration Hands-on Login in to router using Winbox 56 Prepared by- M Abdullah Al Naser (mail.naserbd@yahoo.com)
- 57. Login in to MikroTik Put Default Username, Password and click Connect 57 Prepared by- M Abdullah Al Naser (mail.naserbd@yahoo.com)
- 58. Login in to MikroTik Remove default configuration 58 Prepared by- M Abdullah Al Naser (mail.naserbd@yahoo.com)
- 59. About Winbox Winbox navigation 59 Prepared by- M Abdullah Al Naser (mail.naserbd@yahoo.com)
- 60. Interfaces Interfaces --> Interface 60 Prepared by- M Abdullah Al Naser (mail.naserbd@yahoo.com)
- 61. Rename Interfaces Double-click on an interface --> General --> Name: ether2-LAN --> OK 61 Prepared by- M Abdullah Al Naser (mail.naserbd@yahoo.com)
- 62. Rename Interfaces Renaming is done 62 Prepared by- M Abdullah Al Naser (mail.naserbd@yahoo.com)
- 63. Rename Interfaces Similarly rename another interface 63 Prepared by- M Abdullah Al Naser (mail.naserbd@yahoo.com)
- 64. Assign IP Address IP --> Addresses --> + 64 Prepared by- M Abdullah Al Naser (mail.naserbd@yahoo.com)
- 65. Assign IP Address IP --> Addresses --> + 65 Prepared by- M Abdullah Al Naser (mail.naserbd@yahoo.com)
- 66. Assign IP Address Enter IP with CIDR, Select Interface and click OK 66 Prepared by- M Abdullah Al Naser (mail.naserbd@yahoo.com)
- 67. Assign IP Address Assigning IP address is done 67 Prepared by- M Abdullah Al Naser (mail.naserbd@yahoo.com)
- 68. Assign IP Address Similarly assign another IP address 68 Prepared by- M Abdullah Al Naser (mail.naserbd@yahoo.com)
- 69. Assign IP Address Similarly assign another IP address 69 Prepared by- M Abdullah Al Naser (mail.naserbd@yahoo.com)
- 70. Add default route 70 Prepared by- M Abdullah Al Naser (mail.naserbd@yahoo.com)
- 71. Add default route 71 Prepared by- M Abdullah Al Naser (mail.naserbd@yahoo.com)
- 72. Add default route 72 Prepared by- M Abdullah Al Naser (mail.naserbd@yahoo.com)
- 73. Verify connectivity between router and ISP 73 Prepared by- M Abdullah Al Naser (mail.naserbd@yahoo.com)
- 74. Verify connectivity between router and ISP 74 Prepared by- M Abdullah Al Naser (mail.naserbd@yahoo.com) Successful !!
- 75. Verify connectivity between PC and router 75 Prepared by- M Abdullah Al Naser (mail.naserbd@yahoo.com) Successful !!
- 76. Verify connectivity between PC and ISP 76 Prepared by- M Abdullah Al Naser (mail.naserbd@yahoo.com) Not Successful !! What is the problem ??
- 77. Configure Src-NAT 77 Prepared by- M Abdullah Al Naser (mail.naserbd@yahoo.com)
- 78. Configure Src-NAT 78 Prepared by- M Abdullah Al Naser (mail.naserbd@yahoo.com)
- 79. Configure Src-NAT 79 Prepared by- M Abdullah Al Naser (mail.naserbd@yahoo.com)
- 80. Configure Src-NAT 80 Prepared by- M Abdullah Al Naser (mail.naserbd@yahoo.com) OR
- 81. Configure Src-NAT 81 Prepared by- M Abdullah Al Naser (mail.naserbd@yahoo.com) OR
- 82. Configure Src-NAT 82 Prepared by- M Abdullah Al Naser (mail.naserbd@yahoo.com)
- 83. Verify connectivity between PC and ISP 83 Prepared by- M Abdullah Al Naser (mail.naserbd@yahoo.com) Now Successful !! Reason was: NAT
- 84. Configure DNS 84 Prepared by- M Abdullah Al Naser (mail.naserbd@yahoo.com)
- 85. Configure DNS 85 Prepared by- M Abdullah Al Naser (mail.naserbd@yahoo.com)
- 86. Thank you very much 86 Prepared by- M Abdullah Al Naser (mail.naserbd@yahoo.com)