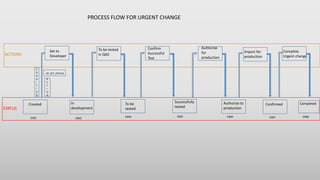
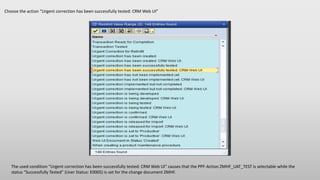
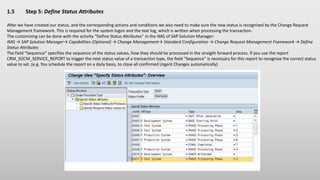
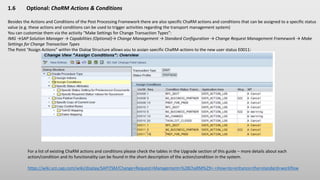
This document describes the process for customizing the ChaRM workflow in SAP to add an additional approval step called "UAT Test". It involves 6 steps:
1. Create a new status profile and value for the new "UAT Test" status.
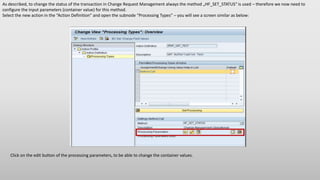
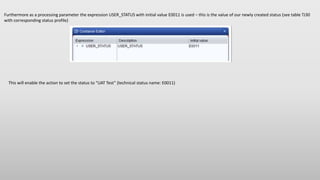
2. Define a new ChaRM action to set the status to "UAT Test" and configure its processing parameters.
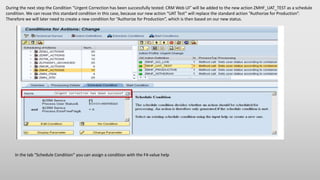
3. Define a new condition for the action to check when it can be selected.
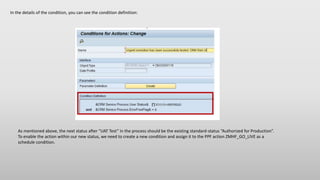
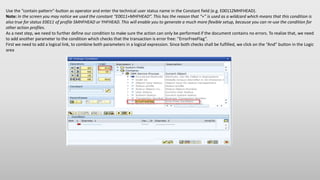
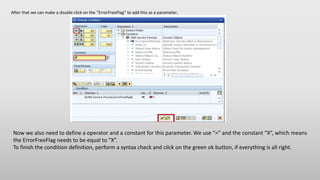
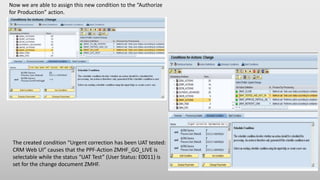
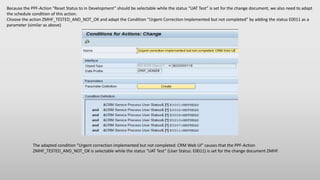
4. Create a new condition for the "Authorize for Production" action to check when it can be selected after "UAT Test".
5. Define status attributes for the new status to integrate it with ChaRM frameworks