Download to read offline
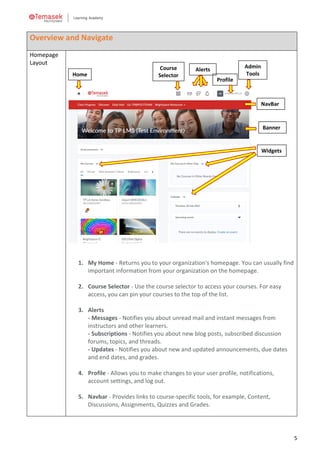
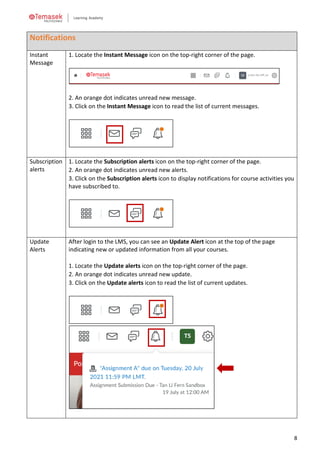
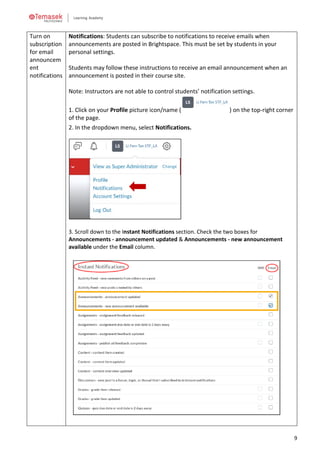
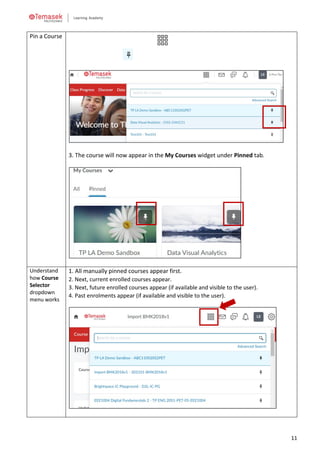

1. The document provides instructions for students on how to navigate and use the key features of the Brightspace learning management system (LMS) at Temasek Polytechnic, including how to log in, find courses, access course content and materials, view notifications and grades, and change notification settings. 2. Key aspects of the LMS covered include navigating the homepage and course pages, using the course selector and pinned courses, accessing content, assignments, grades and other tools, and turning on email notifications for announcements. 3. Students are instructed to approach their lecturer or tutor for any issues related to the LMS and to visit the IT help desk for password resets.


