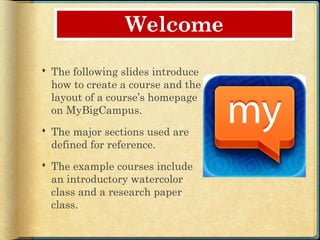
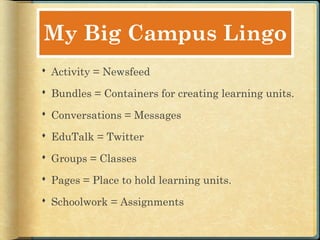
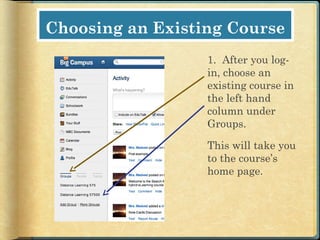
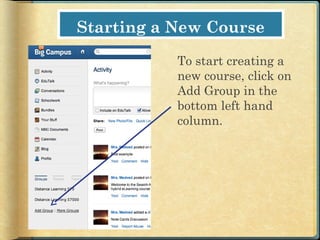
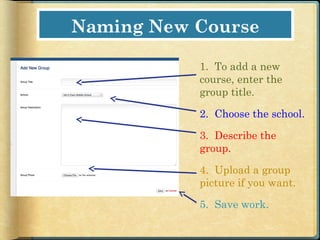
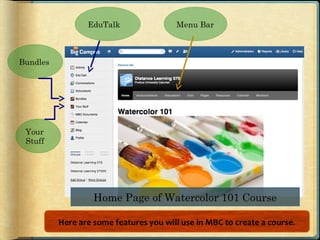
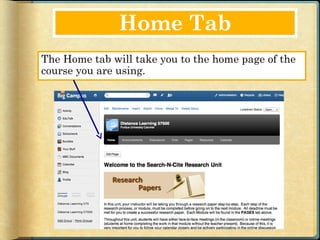
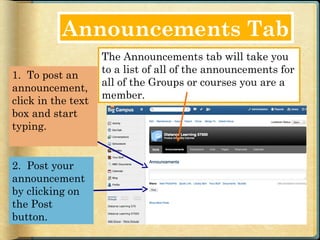
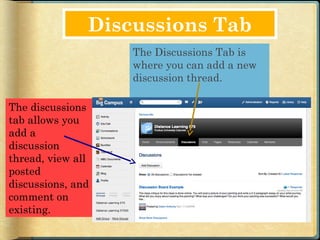
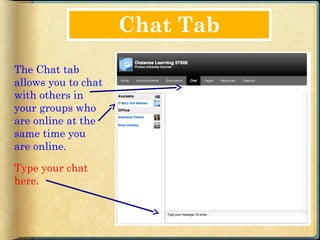
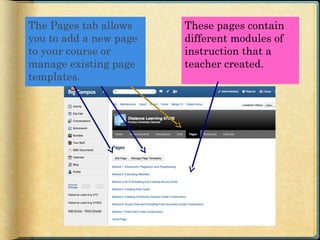
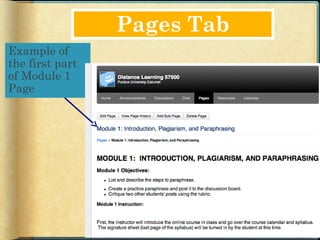
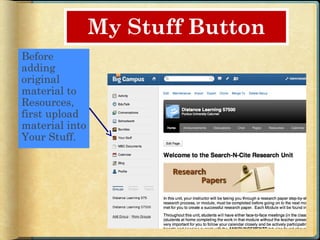
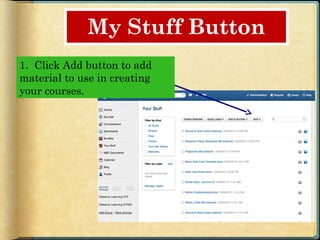
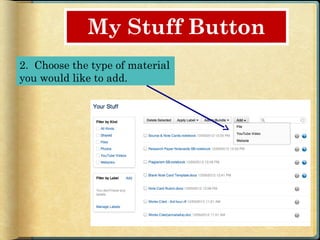
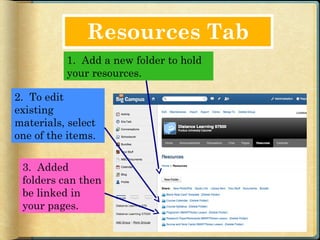
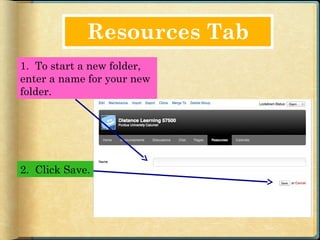
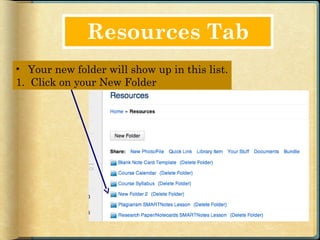
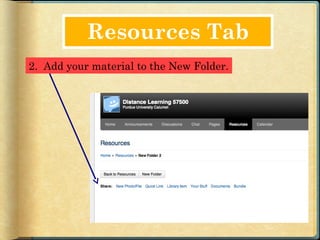
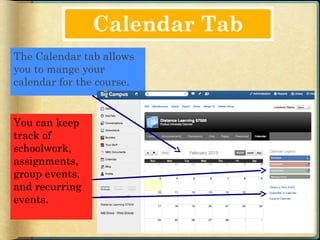
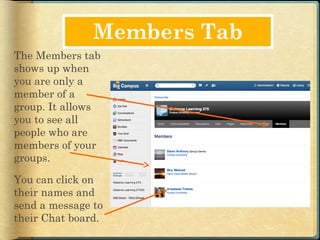
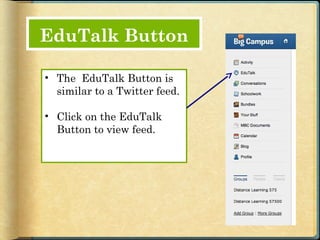
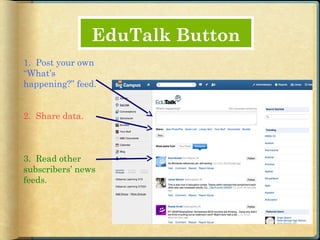
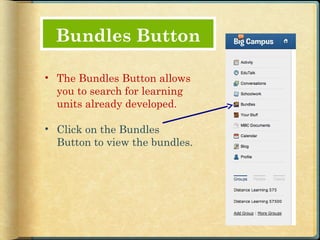
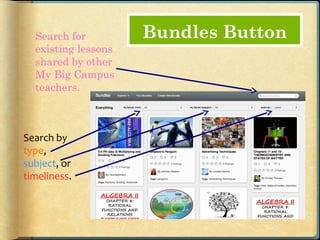
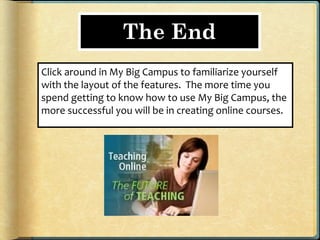
Welcome

 The following slides introduce
  how to create a course and the
  layout of a course’s homepage
  on MyBigCampus.
 The major sections used are
  defined for reference.
 The example courses include
  an introductory watercolor
  class and a research paper
  class.
My Big Campus Lingo
 Activity = Newsfeed

 Bundles = Containers for creating learning units.

 Conversations = Messages

 EduTalk = Twitter

 Groups = Classes

 Pages = Place to hold learning units.

 Schoolwork = Assignments
Choosing an Existing Course
                  1. After you log-
                  in, choose an
                  existing course in
                  the left hand
                  column under
                  Groups.

                  This will take you
                  to the course’s
                  home page.
Starting a New Course

           To start creating a
           new course, click on
           Add Group in the
           bottom left hand
           column.
Naming New Course

           1. To add a new
           course, enter the
           group title.

           2. Choose the school.

           3. Describe the
           group.

           4. Upload a group
           picture if you want.

           5. Save work.
Menu Bar


We will first focus on the top menu bar in each
course. The tabs are colored in grey and white
and are underlined when you hover over them.
They turn into a black background when you
select them.
The top menu bar includes links to Home,
Announcements, Discussion, Chat, Pages,
Resources, Calendar, and Members.
Home Tab
The Home tab will take you to the home page of the
course you are using.
Announcements Tab
                    The Announcements tab will take you
                    to a list of all of the announcements for
1. To post an
                    all of the Groups or courses you are a
announcement,
                    member.
click in the text
box and start
typing.


2. Post your
announcement
by clicking on
the Post
button.
Discussions Tab
                   The Discussions Tab is
                   where you can add a new
                   discussion thread.

The discussions
tab allows you
add a
discussion
thread, view all
posted
discussions, and
comment on
existing.
Chat Tab
The Chat tab
allows you to chat
with others in
your groups who
are online at the
same time you
are online.

Type your chat
here.
Pages Tab


Pages
contains all
of your
created
instructional
materials.
The Pages tab allows    These pages contain
you to add a new page   different modules of
to your course or       instruction that a
manage existing page    teacher created.
templates.
Pages Tab
Example of
the first part
of Module 1
Page
My Stuff Button
Before
adding
original
material to
Resources,
first upload
material into
Your Stuff.
My Stuff Button
1. Click Add button to add
material to use in creating
your courses.
My Stuff Button
2. Choose the type of material
you would like to add.
Resources Tab
          1. Add a new folder to hold
          your resources.

2. To edit
existing
materials, select
one of the items.

 3. Added
 folders can then
 be linked in
 your pages.
Resources Tab
1. To start a new folder,
enter a name for your new
folder.


2. Click Save.
Resources Tab
• Your new folder will show up in this list.
1. Click on your New Folder
Resources Tab
2. Add your material to the New Folder.
Calendar Tab
The Calendar tab allows
you to mange your
calendar for the course.


You can keep
track of
schoolwork,
assignments,
group events,
and recurring
events.
Members Tab
The Members tab
shows up when
you are only a
member of a
group. It allows
you to see all
people who are
members of your
groups.

You can click on
their names and
send a message to
their Chat board.
EduTalk Button

• The EduTalk Button is
  similar to a Twitter feed.

• Click on the EduTalk
  Button to view feed.
EduTalk Button
1. Post your own
“What’s
happening?” feed.


2. Share data.


3. Read other
subscribers’ news
feeds.
Bundles Button

• The Bundles Button allows
  you to search for learning
  units already developed.

• Click on the Bundles
  Button to view the bundles.
Search for         Bundles Button
  existing lessons
  shared by other
  My Big Campus
  teachers.


Search by
type,
subject, or
timeliness.
The End
Click around in My Big Campus to familiarize yourself
with the layout of the features. The more time you
spend getting to know how to use My Big Campus, the
more successful you will be in creating online courses.

Mbc teacher layout

  • 2.
    Welcome  The followingslides introduce how to create a course and the layout of a course’s homepage on MyBigCampus.  The major sections used are defined for reference.  The example courses include an introductory watercolor class and a research paper class.
  • 3.
    My Big CampusLingo  Activity = Newsfeed  Bundles = Containers for creating learning units.  Conversations = Messages  EduTalk = Twitter  Groups = Classes  Pages = Place to hold learning units.  Schoolwork = Assignments
  • 4.
    Choosing an ExistingCourse 1. After you log- in, choose an existing course in the left hand column under Groups. This will take you to the course’s home page.
  • 5.
    Starting a NewCourse To start creating a new course, click on Add Group in the bottom left hand column.
  • 6.
    Naming New Course 1. To add a new course, enter the group title. 2. Choose the school. 3. Describe the group. 4. Upload a group picture if you want. 5. Save work.
  • 8.
    Menu Bar We willfirst focus on the top menu bar in each course. The tabs are colored in grey and white and are underlined when you hover over them. They turn into a black background when you select them. The top menu bar includes links to Home, Announcements, Discussion, Chat, Pages, Resources, Calendar, and Members.
  • 9.
    Home Tab The Hometab will take you to the home page of the course you are using.
  • 10.
    Announcements Tab The Announcements tab will take you to a list of all of the announcements for 1. To post an all of the Groups or courses you are a announcement, member. click in the text box and start typing. 2. Post your announcement by clicking on the Post button.
  • 11.
    Discussions Tab The Discussions Tab is where you can add a new discussion thread. The discussions tab allows you add a discussion thread, view all posted discussions, and comment on existing.
  • 12.
    Chat Tab The Chattab allows you to chat with others in your groups who are online at the same time you are online. Type your chat here.
  • 13.
    Pages Tab Pages contains all ofyour created instructional materials.
  • 14.
    The Pages taballows These pages contain you to add a new page different modules of to your course or instruction that a manage existing page teacher created. templates.
  • 15.
    Pages Tab Example of thefirst part of Module 1 Page
  • 16.
    My Stuff Button Before adding original materialto Resources, first upload material into Your Stuff.
  • 17.
    My Stuff Button 1.Click Add button to add material to use in creating your courses.
  • 18.
    My Stuff Button 2.Choose the type of material you would like to add.
  • 19.
    Resources Tab 1. Add a new folder to hold your resources. 2. To edit existing materials, select one of the items. 3. Added folders can then be linked in your pages.
  • 20.
    Resources Tab 1. Tostart a new folder, enter a name for your new folder. 2. Click Save.
  • 21.
    Resources Tab • Yournew folder will show up in this list. 1. Click on your New Folder
  • 22.
    Resources Tab 2. Addyour material to the New Folder.
  • 23.
    Calendar Tab The Calendartab allows you to mange your calendar for the course. You can keep track of schoolwork, assignments, group events, and recurring events.
  • 24.
    Members Tab The Memberstab shows up when you are only a member of a group. It allows you to see all people who are members of your groups. You can click on their names and send a message to their Chat board.
  • 25.
    EduTalk Button • TheEduTalk Button is similar to a Twitter feed. • Click on the EduTalk Button to view feed.
  • 26.
    EduTalk Button 1. Postyour own “What’s happening?” feed. 2. Share data. 3. Read other subscribers’ news feeds.
  • 27.
    Bundles Button • TheBundles Button allows you to search for learning units already developed. • Click on the Bundles Button to view the bundles.
  • 28.
    Search for Bundles Button existing lessons shared by other My Big Campus teachers. Search by type, subject, or timeliness.
  • 29.
    The End Click aroundin My Big Campus to familiarize yourself with the layout of the features. The more time you spend getting to know how to use My Big Campus, the more successful you will be in creating online courses.