Download as PDF, PPTX


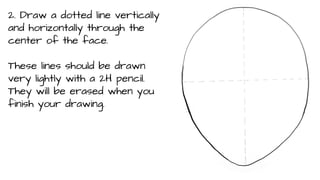
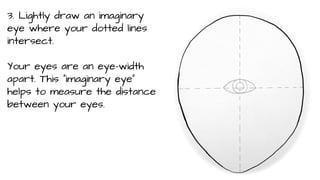
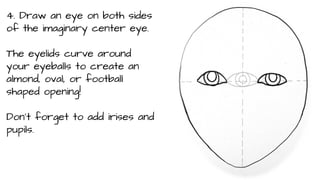
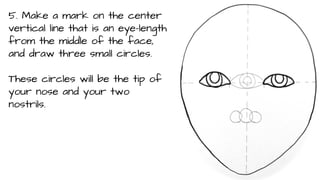
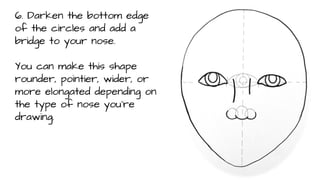
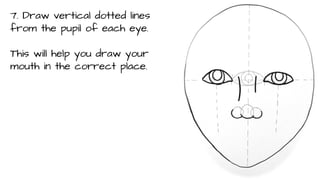
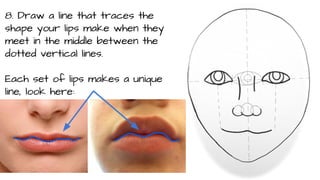
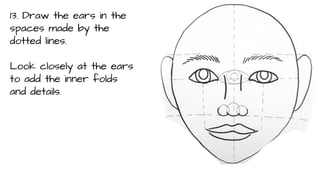
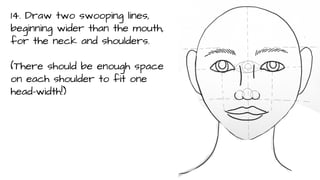
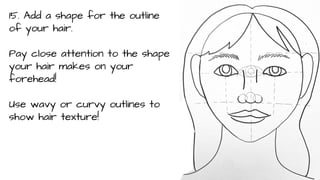
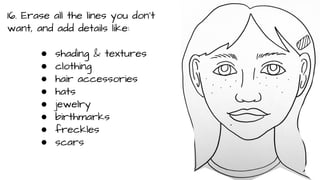


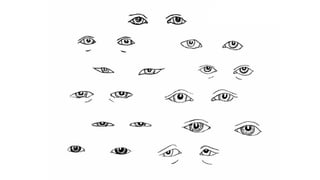

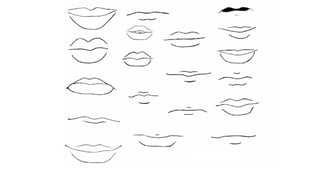


This document provides a step-by-step tutorial for drawing the human face, beginning with an egg shape and adding features like eyes, nose, mouth, ears and hair. It instructs to first draw vertical and horizontal center lines on the egg shape and place features in relation to these guide lines. Key steps include drawing almond shaped eyes spaced an eye-width apart, placing the nose an eye-length below the center, and using dotted guide lines to correctly place the mouth. The document emphasizes careful observation of proportions and unique details for an accurate likeness.


