SlideShare a Scribd company logo
1 of 18
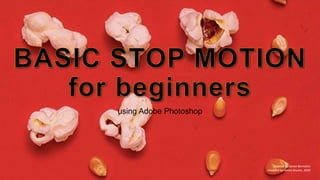
using Adobe Photoshop
created by Aaron Bernstein
modified by James Bryans, 2020
Photos don’t have to stand still. With a few quick steps, you can easily add
movement to your images. In this tutorial, see how you can manipulate your
photos using masks, then animate them using the Timeline feature in Adobe
Photoshop.
This tutorial assumes that you have some working knowledge of Photoshop
tools.
BEFORE YOU START
To practise, before you animate your own images, your teacher has provided
this popcorn sample file for you to play with…
ADD SOME POP (PART ONE)
The practice file has two layers, the kernel layer and the popcorn layer.
Create a layer mask on the popcorn layer by using the ‘add vector mask’
button (see arrow)…
ADD SOME POP (PART TWO)
Then press the Command Key + I (on Mac) to invert the mask.
(the mask should be coloured black now, and the popcorn layer disappears)
SNEAK A PEAK AT THE POPCORN
Make sure the mask is selected on the layer (a white border appears).
Select the Brush Tool (soft edge, approx 35 px in size).
Set your foreground colour to white.
Then carefully paint over the first kernel to reveal the first piece of popcorn
(see image)
REVEAL IN STAGES (PART ONE)
The following steps are the most time consuming. You’re literally creating each
‘frame’ of your animation.
To start this step,right-click on the popcorn layer and select ‘Duplicate Layer…’.
A window appears, just click OK.
REVEAL IN STAGES (PART TWO)
Then paint out another set of kernels to reveal more popcorn, the same way
as shown previously, selecting the mask on the layer, and erasing the kernels
with a white coloured brush tool (see image)…
KEEP GOING…
Continue repeating these steps (duplicate layer, select mask, erase kernels…)
until, line by line, all the kernels are erased and all the popcorn is revealed
(see image, note the layers, one by one more popcorn is shown).
If you make a mistake, change the colour of the brush to black. This will
reverse what you painted.
HALF WAY, FRAMES ALL DONE!
When completed I ended up with thirteen (13) duplicated layers.
CREATE THE TIMELINE
Go to the drop-down menu, select Window > Timeline.
The Timeline tab will appear at the bottom of Photoshop.
Click on the ‘Create Frame Animation’ button.
MAKE ANIMATION FRAMES
To create each frame of the animation, chose ‘Make Frames From Layers’ from
the Timeline tab menu (see image).
FIX THE GLITCH!
There is a slight glitch in this method. Only the edited images, without the
background appears. It’s easily fixed by clicking the visibility button (the little
eye) off the kernel layer, then clicking it back on again (see arrow).
IN PHOTOSHOP PRESS PLAY!
LOOP IT…
At the moment the animation just goes ‘one way’. To loop your animation
follow this sequence…
From the Timeline tab menu ‘Select All Frames’; then ‘Copy Frames’; then
’Paste Frames…’ (choose paste after selection); then ‘Reverse Frames’ (see
image).
EXPORT YOUR ANIMATION AS A GIF… (PART ONE)
To save your animation choose the ‘Save For Web’ feature in File > Export.
EXPORT YOUR ANIMATION AS A GIF… (PART TWO)
A new window appears. Copy the setting shown in the image…
and click ‘Save…’.
DONE!

More Related Content

Similar to BasicStopMotion(beginninglesson).pptx

adobephotoshop_frerking
adobephotoshop_frerking adobephotoshop_frerking
adobephotoshop_frerking Agung Yuwono
 
Digital work station intro
Digital work station introDigital work station intro
Digital work station introWhitney Brooks
 
Unit 7 - Case Study/Tutorials
Unit 7 - Case Study/TutorialsUnit 7 - Case Study/Tutorials
Unit 7 - Case Study/TutorialsMrLawler
 
3Dimenssion_lessonO_PostProcessingEffects.pptx
3Dimenssion_lessonO_PostProcessingEffects.pptx3Dimenssion_lessonO_PostProcessingEffects.pptx
3Dimenssion_lessonO_PostProcessingEffects.pptxFaris Abuhashish
 
Power pointlabs quick tutorial
Power pointlabs quick tutorialPower pointlabs quick tutorial
Power pointlabs quick tutorialDa Huang
 
How to add a drop shadow to your product images in Adobe Photoshop
How to add a drop shadow to your product images in Adobe PhotoshopHow to add a drop shadow to your product images in Adobe Photoshop
How to add a drop shadow to your product images in Adobe PhotoshopPixc
 
Photo shop cs5-watercolor-painting-effect-tutorial
Photo shop cs5-watercolor-painting-effect-tutorialPhoto shop cs5-watercolor-painting-effect-tutorial
Photo shop cs5-watercolor-painting-effect-tutorialMenSagam Technologies
 
Crazy Photos: An Introduction to GIMP
Crazy Photos: An Introduction to GIMPCrazy Photos: An Introduction to GIMP
Crazy Photos: An Introduction to GIMPRino Landa
 
Create a Photo Collage in Photoshop.pdf
Create a Photo Collage in Photoshop.pdfCreate a Photo Collage in Photoshop.pdf
Create a Photo Collage in Photoshop.pdfPinkverge
 
Photoshop Blending Modes_ Beginner’s Tips and Tricks
Photoshop Blending Modes_ Beginner’s Tips and TricksPhotoshop Blending Modes_ Beginner’s Tips and Tricks
Photoshop Blending Modes_ Beginner’s Tips and TricksZenith Clipping
 
Paths, Masks And Blend Modes
Paths, Masks And Blend ModesPaths, Masks And Blend Modes
Paths, Masks And Blend ModesShan
 
Photoshop Blending Modes_ Beginner’s Tips and Tricks
Photoshop Blending Modes_ Beginner’s Tips and TricksPhotoshop Blending Modes_ Beginner’s Tips and Tricks
Photoshop Blending Modes_ Beginner’s Tips and TricksZenith Clipping
 
Pencil animation tutorials
Pencil animation tutorialsPencil animation tutorials
Pencil animation tutorialsnataliasmile
 

Similar to BasicStopMotion(beginninglesson).pptx (20)

Cours photoshop
Cours photoshopCours photoshop
Cours photoshop
 
adobephotoshop_frerking
adobephotoshop_frerking adobephotoshop_frerking
adobephotoshop_frerking
 
Digital work station intro
Digital work station introDigital work station intro
Digital work station intro
 
Tutorial in Gimp 2.10.2
Tutorial in Gimp 2.10.2Tutorial in Gimp 2.10.2
Tutorial in Gimp 2.10.2
 
Photoshop basics
Photoshop basicsPhotoshop basics
Photoshop basics
 
Unit 7 - Case Study/Tutorials
Unit 7 - Case Study/TutorialsUnit 7 - Case Study/Tutorials
Unit 7 - Case Study/Tutorials
 
3Dimenssion_lessonO_PostProcessingEffects.pptx
3Dimenssion_lessonO_PostProcessingEffects.pptx3Dimenssion_lessonO_PostProcessingEffects.pptx
3Dimenssion_lessonO_PostProcessingEffects.pptx
 
Power pointlabs quick tutorial
Power pointlabs quick tutorialPower pointlabs quick tutorial
Power pointlabs quick tutorial
 
How to add a drop shadow to your product images in Adobe Photoshop
How to add a drop shadow to your product images in Adobe PhotoshopHow to add a drop shadow to your product images in Adobe Photoshop
How to add a drop shadow to your product images in Adobe Photoshop
 
HOW TO use PENCIL
HOW TO use PENCILHOW TO use PENCIL
HOW TO use PENCIL
 
Photo shop cs5-watercolor-painting-effect-tutorial
Photo shop cs5-watercolor-painting-effect-tutorialPhoto shop cs5-watercolor-painting-effect-tutorial
Photo shop cs5-watercolor-painting-effect-tutorial
 
Adobe photoshop
Adobe photoshopAdobe photoshop
Adobe photoshop
 
Crazy Photos: An Introduction to GIMP
Crazy Photos: An Introduction to GIMPCrazy Photos: An Introduction to GIMP
Crazy Photos: An Introduction to GIMP
 
Edgy Colors
Edgy ColorsEdgy Colors
Edgy Colors
 
Create a Photo Collage in Photoshop.pdf
Create a Photo Collage in Photoshop.pdfCreate a Photo Collage in Photoshop.pdf
Create a Photo Collage in Photoshop.pdf
 
Photoshop Blending Modes_ Beginner’s Tips and Tricks
Photoshop Blending Modes_ Beginner’s Tips and TricksPhotoshop Blending Modes_ Beginner’s Tips and Tricks
Photoshop Blending Modes_ Beginner’s Tips and Tricks
 
Paths, Masks And Blend Modes
Paths, Masks And Blend ModesPaths, Masks And Blend Modes
Paths, Masks And Blend Modes
 
Photoshop Blending Modes_ Beginner’s Tips and Tricks
Photoshop Blending Modes_ Beginner’s Tips and TricksPhotoshop Blending Modes_ Beginner’s Tips and Tricks
Photoshop Blending Modes_ Beginner’s Tips and Tricks
 
Learn photoshop
Learn photoshopLearn photoshop
Learn photoshop
 
Pencil animation tutorials
Pencil animation tutorialsPencil animation tutorials
Pencil animation tutorials
 

Recently uploaded

Presentation by Andreas Schleicher Tackling the School Absenteeism Crisis 30 ...
Presentation by Andreas Schleicher Tackling the School Absenteeism Crisis 30 ...Presentation by Andreas Schleicher Tackling the School Absenteeism Crisis 30 ...
Presentation by Andreas Schleicher Tackling the School Absenteeism Crisis 30 ...EduSkills OECD
 
Introduction to Nonprofit Accounting: The Basics
Introduction to Nonprofit Accounting: The BasicsIntroduction to Nonprofit Accounting: The Basics
Introduction to Nonprofit Accounting: The BasicsTechSoup
 
9548086042 for call girls in Indira Nagar with room service
9548086042  for call girls in Indira Nagar  with room service9548086042  for call girls in Indira Nagar  with room service
9548086042 for call girls in Indira Nagar with room servicediscovermytutordmt
 
1029-Danh muc Sach Giao Khoa khoi 6.pdf
1029-Danh muc Sach Giao Khoa khoi  6.pdf1029-Danh muc Sach Giao Khoa khoi  6.pdf
1029-Danh muc Sach Giao Khoa khoi 6.pdfQucHHunhnh
 
Sports & Fitness Value Added Course FY..
Sports & Fitness Value Added Course FY..Sports & Fitness Value Added Course FY..
Sports & Fitness Value Added Course FY..Disha Kariya
 
Holdier Curriculum Vitae (April 2024).pdf
Holdier Curriculum Vitae (April 2024).pdfHoldier Curriculum Vitae (April 2024).pdf
Holdier Curriculum Vitae (April 2024).pdfagholdier
 
Measures of Dispersion and Variability: Range, QD, AD and SD
Measures of Dispersion and Variability: Range, QD, AD and SDMeasures of Dispersion and Variability: Range, QD, AD and SD
Measures of Dispersion and Variability: Range, QD, AD and SDThiyagu K
 
The Most Excellent Way | 1 Corinthians 13
The Most Excellent Way | 1 Corinthians 13The Most Excellent Way | 1 Corinthians 13
The Most Excellent Way | 1 Corinthians 13Steve Thomason
 
Disha NEET Physics Guide for classes 11 and 12.pdf
Disha NEET Physics Guide for classes 11 and 12.pdfDisha NEET Physics Guide for classes 11 and 12.pdf
Disha NEET Physics Guide for classes 11 and 12.pdfchloefrazer622
 
Software Engineering Methodologies (overview)
Software Engineering Methodologies (overview)Software Engineering Methodologies (overview)
Software Engineering Methodologies (overview)eniolaolutunde
 
The basics of sentences session 2pptx copy.pptx
The basics of sentences session 2pptx copy.pptxThe basics of sentences session 2pptx copy.pptx
The basics of sentences session 2pptx copy.pptxheathfieldcps1
 
General AI for Medical Educators April 2024
General AI for Medical Educators April 2024General AI for Medical Educators April 2024
General AI for Medical Educators April 2024Janet Corral
 
APM Welcome, APM North West Network Conference, Synergies Across Sectors
APM Welcome, APM North West Network Conference, Synergies Across SectorsAPM Welcome, APM North West Network Conference, Synergies Across Sectors
APM Welcome, APM North West Network Conference, Synergies Across SectorsAssociation for Project Management
 
Ecosystem Interactions Class Discussion Presentation in Blue Green Lined Styl...
Ecosystem Interactions Class Discussion Presentation in Blue Green Lined Styl...Ecosystem Interactions Class Discussion Presentation in Blue Green Lined Styl...
Ecosystem Interactions Class Discussion Presentation in Blue Green Lined Styl...fonyou31
 
Interactive Powerpoint_How to Master effective communication
Interactive Powerpoint_How to Master effective communicationInteractive Powerpoint_How to Master effective communication
Interactive Powerpoint_How to Master effective communicationnomboosow
 
Paris 2024 Olympic Geographies - an activity
Paris 2024 Olympic Geographies - an activityParis 2024 Olympic Geographies - an activity
Paris 2024 Olympic Geographies - an activityGeoBlogs
 
Explore beautiful and ugly buildings. Mathematics helps us create beautiful d...
Explore beautiful and ugly buildings. Mathematics helps us create beautiful d...Explore beautiful and ugly buildings. Mathematics helps us create beautiful d...
Explore beautiful and ugly buildings. Mathematics helps us create beautiful d...christianmathematics
 
BAG TECHNIQUE Bag technique-a tool making use of public health bag through wh...
BAG TECHNIQUE Bag technique-a tool making use of public health bag through wh...BAG TECHNIQUE Bag technique-a tool making use of public health bag through wh...
BAG TECHNIQUE Bag technique-a tool making use of public health bag through wh...Sapna Thakur
 
Advanced Views - Calendar View in Odoo 17
Advanced Views - Calendar View in Odoo 17Advanced Views - Calendar View in Odoo 17
Advanced Views - Calendar View in Odoo 17Celine George
 
Web & Social Media Analytics Previous Year Question Paper.pdf
Web & Social Media Analytics Previous Year Question Paper.pdfWeb & Social Media Analytics Previous Year Question Paper.pdf
Web & Social Media Analytics Previous Year Question Paper.pdfJayanti Pande
 

Recently uploaded (20)

Presentation by Andreas Schleicher Tackling the School Absenteeism Crisis 30 ...
Presentation by Andreas Schleicher Tackling the School Absenteeism Crisis 30 ...Presentation by Andreas Schleicher Tackling the School Absenteeism Crisis 30 ...
Presentation by Andreas Schleicher Tackling the School Absenteeism Crisis 30 ...
 
Introduction to Nonprofit Accounting: The Basics
Introduction to Nonprofit Accounting: The BasicsIntroduction to Nonprofit Accounting: The Basics
Introduction to Nonprofit Accounting: The Basics
 
9548086042 for call girls in Indira Nagar with room service
9548086042  for call girls in Indira Nagar  with room service9548086042  for call girls in Indira Nagar  with room service
9548086042 for call girls in Indira Nagar with room service
 
1029-Danh muc Sach Giao Khoa khoi 6.pdf
1029-Danh muc Sach Giao Khoa khoi  6.pdf1029-Danh muc Sach Giao Khoa khoi  6.pdf
1029-Danh muc Sach Giao Khoa khoi 6.pdf
 
Sports & Fitness Value Added Course FY..
Sports & Fitness Value Added Course FY..Sports & Fitness Value Added Course FY..
Sports & Fitness Value Added Course FY..
 
Holdier Curriculum Vitae (April 2024).pdf
Holdier Curriculum Vitae (April 2024).pdfHoldier Curriculum Vitae (April 2024).pdf
Holdier Curriculum Vitae (April 2024).pdf
 
Measures of Dispersion and Variability: Range, QD, AD and SD
Measures of Dispersion and Variability: Range, QD, AD and SDMeasures of Dispersion and Variability: Range, QD, AD and SD
Measures of Dispersion and Variability: Range, QD, AD and SD
 
The Most Excellent Way | 1 Corinthians 13
The Most Excellent Way | 1 Corinthians 13The Most Excellent Way | 1 Corinthians 13
The Most Excellent Way | 1 Corinthians 13
 
Disha NEET Physics Guide for classes 11 and 12.pdf
Disha NEET Physics Guide for classes 11 and 12.pdfDisha NEET Physics Guide for classes 11 and 12.pdf
Disha NEET Physics Guide for classes 11 and 12.pdf
 
Software Engineering Methodologies (overview)
Software Engineering Methodologies (overview)Software Engineering Methodologies (overview)
Software Engineering Methodologies (overview)
 
The basics of sentences session 2pptx copy.pptx
The basics of sentences session 2pptx copy.pptxThe basics of sentences session 2pptx copy.pptx
The basics of sentences session 2pptx copy.pptx
 
General AI for Medical Educators April 2024
General AI for Medical Educators April 2024General AI for Medical Educators April 2024
General AI for Medical Educators April 2024
 
APM Welcome, APM North West Network Conference, Synergies Across Sectors
APM Welcome, APM North West Network Conference, Synergies Across SectorsAPM Welcome, APM North West Network Conference, Synergies Across Sectors
APM Welcome, APM North West Network Conference, Synergies Across Sectors
 
Ecosystem Interactions Class Discussion Presentation in Blue Green Lined Styl...
Ecosystem Interactions Class Discussion Presentation in Blue Green Lined Styl...Ecosystem Interactions Class Discussion Presentation in Blue Green Lined Styl...
Ecosystem Interactions Class Discussion Presentation in Blue Green Lined Styl...
 
Interactive Powerpoint_How to Master effective communication
Interactive Powerpoint_How to Master effective communicationInteractive Powerpoint_How to Master effective communication
Interactive Powerpoint_How to Master effective communication
 
Paris 2024 Olympic Geographies - an activity
Paris 2024 Olympic Geographies - an activityParis 2024 Olympic Geographies - an activity
Paris 2024 Olympic Geographies - an activity
 
Explore beautiful and ugly buildings. Mathematics helps us create beautiful d...
Explore beautiful and ugly buildings. Mathematics helps us create beautiful d...Explore beautiful and ugly buildings. Mathematics helps us create beautiful d...
Explore beautiful and ugly buildings. Mathematics helps us create beautiful d...
 
BAG TECHNIQUE Bag technique-a tool making use of public health bag through wh...
BAG TECHNIQUE Bag technique-a tool making use of public health bag through wh...BAG TECHNIQUE Bag technique-a tool making use of public health bag through wh...
BAG TECHNIQUE Bag technique-a tool making use of public health bag through wh...
 
Advanced Views - Calendar View in Odoo 17
Advanced Views - Calendar View in Odoo 17Advanced Views - Calendar View in Odoo 17
Advanced Views - Calendar View in Odoo 17
 
Web & Social Media Analytics Previous Year Question Paper.pdf
Web & Social Media Analytics Previous Year Question Paper.pdfWeb & Social Media Analytics Previous Year Question Paper.pdf
Web & Social Media Analytics Previous Year Question Paper.pdf
 

BasicStopMotion(beginninglesson).pptx

  • 1. using Adobe Photoshop created by Aaron Bernstein modified by James Bryans, 2020
  • 2. Photos don’t have to stand still. With a few quick steps, you can easily add movement to your images. In this tutorial, see how you can manipulate your photos using masks, then animate them using the Timeline feature in Adobe Photoshop. This tutorial assumes that you have some working knowledge of Photoshop tools.
  • 3. BEFORE YOU START To practise, before you animate your own images, your teacher has provided this popcorn sample file for you to play with…
  • 4. ADD SOME POP (PART ONE) The practice file has two layers, the kernel layer and the popcorn layer. Create a layer mask on the popcorn layer by using the ‘add vector mask’ button (see arrow)…
  • 5. ADD SOME POP (PART TWO) Then press the Command Key + I (on Mac) to invert the mask. (the mask should be coloured black now, and the popcorn layer disappears)
  • 6. SNEAK A PEAK AT THE POPCORN Make sure the mask is selected on the layer (a white border appears). Select the Brush Tool (soft edge, approx 35 px in size). Set your foreground colour to white. Then carefully paint over the first kernel to reveal the first piece of popcorn (see image)
  • 7. REVEAL IN STAGES (PART ONE) The following steps are the most time consuming. You’re literally creating each ‘frame’ of your animation. To start this step,right-click on the popcorn layer and select ‘Duplicate Layer…’. A window appears, just click OK.
  • 8. REVEAL IN STAGES (PART TWO) Then paint out another set of kernels to reveal more popcorn, the same way as shown previously, selecting the mask on the layer, and erasing the kernels with a white coloured brush tool (see image)…
  • 9. KEEP GOING… Continue repeating these steps (duplicate layer, select mask, erase kernels…) until, line by line, all the kernels are erased and all the popcorn is revealed (see image, note the layers, one by one more popcorn is shown). If you make a mistake, change the colour of the brush to black. This will reverse what you painted.
  • 10. HALF WAY, FRAMES ALL DONE! When completed I ended up with thirteen (13) duplicated layers.
  • 11. CREATE THE TIMELINE Go to the drop-down menu, select Window > Timeline. The Timeline tab will appear at the bottom of Photoshop. Click on the ‘Create Frame Animation’ button.
  • 12. MAKE ANIMATION FRAMES To create each frame of the animation, chose ‘Make Frames From Layers’ from the Timeline tab menu (see image).
  • 13. FIX THE GLITCH! There is a slight glitch in this method. Only the edited images, without the background appears. It’s easily fixed by clicking the visibility button (the little eye) off the kernel layer, then clicking it back on again (see arrow).
  • 15. LOOP IT… At the moment the animation just goes ‘one way’. To loop your animation follow this sequence… From the Timeline tab menu ‘Select All Frames’; then ‘Copy Frames’; then ’Paste Frames…’ (choose paste after selection); then ‘Reverse Frames’ (see image).
  • 16. EXPORT YOUR ANIMATION AS A GIF… (PART ONE) To save your animation choose the ‘Save For Web’ feature in File > Export.
  • 17. EXPORT YOUR ANIMATION AS A GIF… (PART TWO) A new window appears. Copy the setting shown in the image… and click ‘Save…’.
  • 18. DONE!