Downloaded 1,707 times


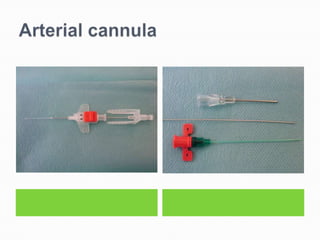


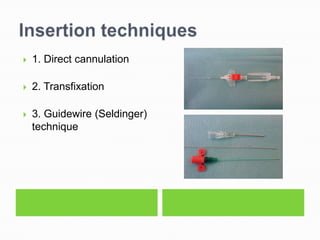


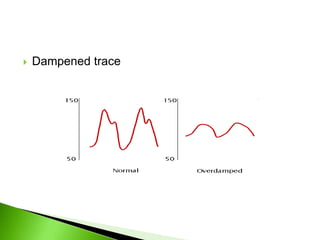

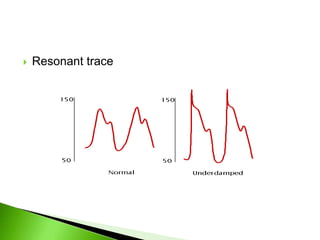


This document provides information about arterial line insertion and monitoring. It discusses: 1. The radial artery is commonly used for insertion due to its low complication rates and accessibility. The Allen's test is recommended to ensure adequate blood flow if the radial artery is used. 2. Insertion involves locating the artery, prepping the skin, puncturing at a 45-60 degree angle, advancing the catheter, securing it, and dressing the site. 3. The arterial monitoring system works by transmitting pressure changes via saline from the arterial line to a transducer, which converts it to an electrical signal displayed as a waveform on the monitor. Problems can cause dampened or resonant traces.


