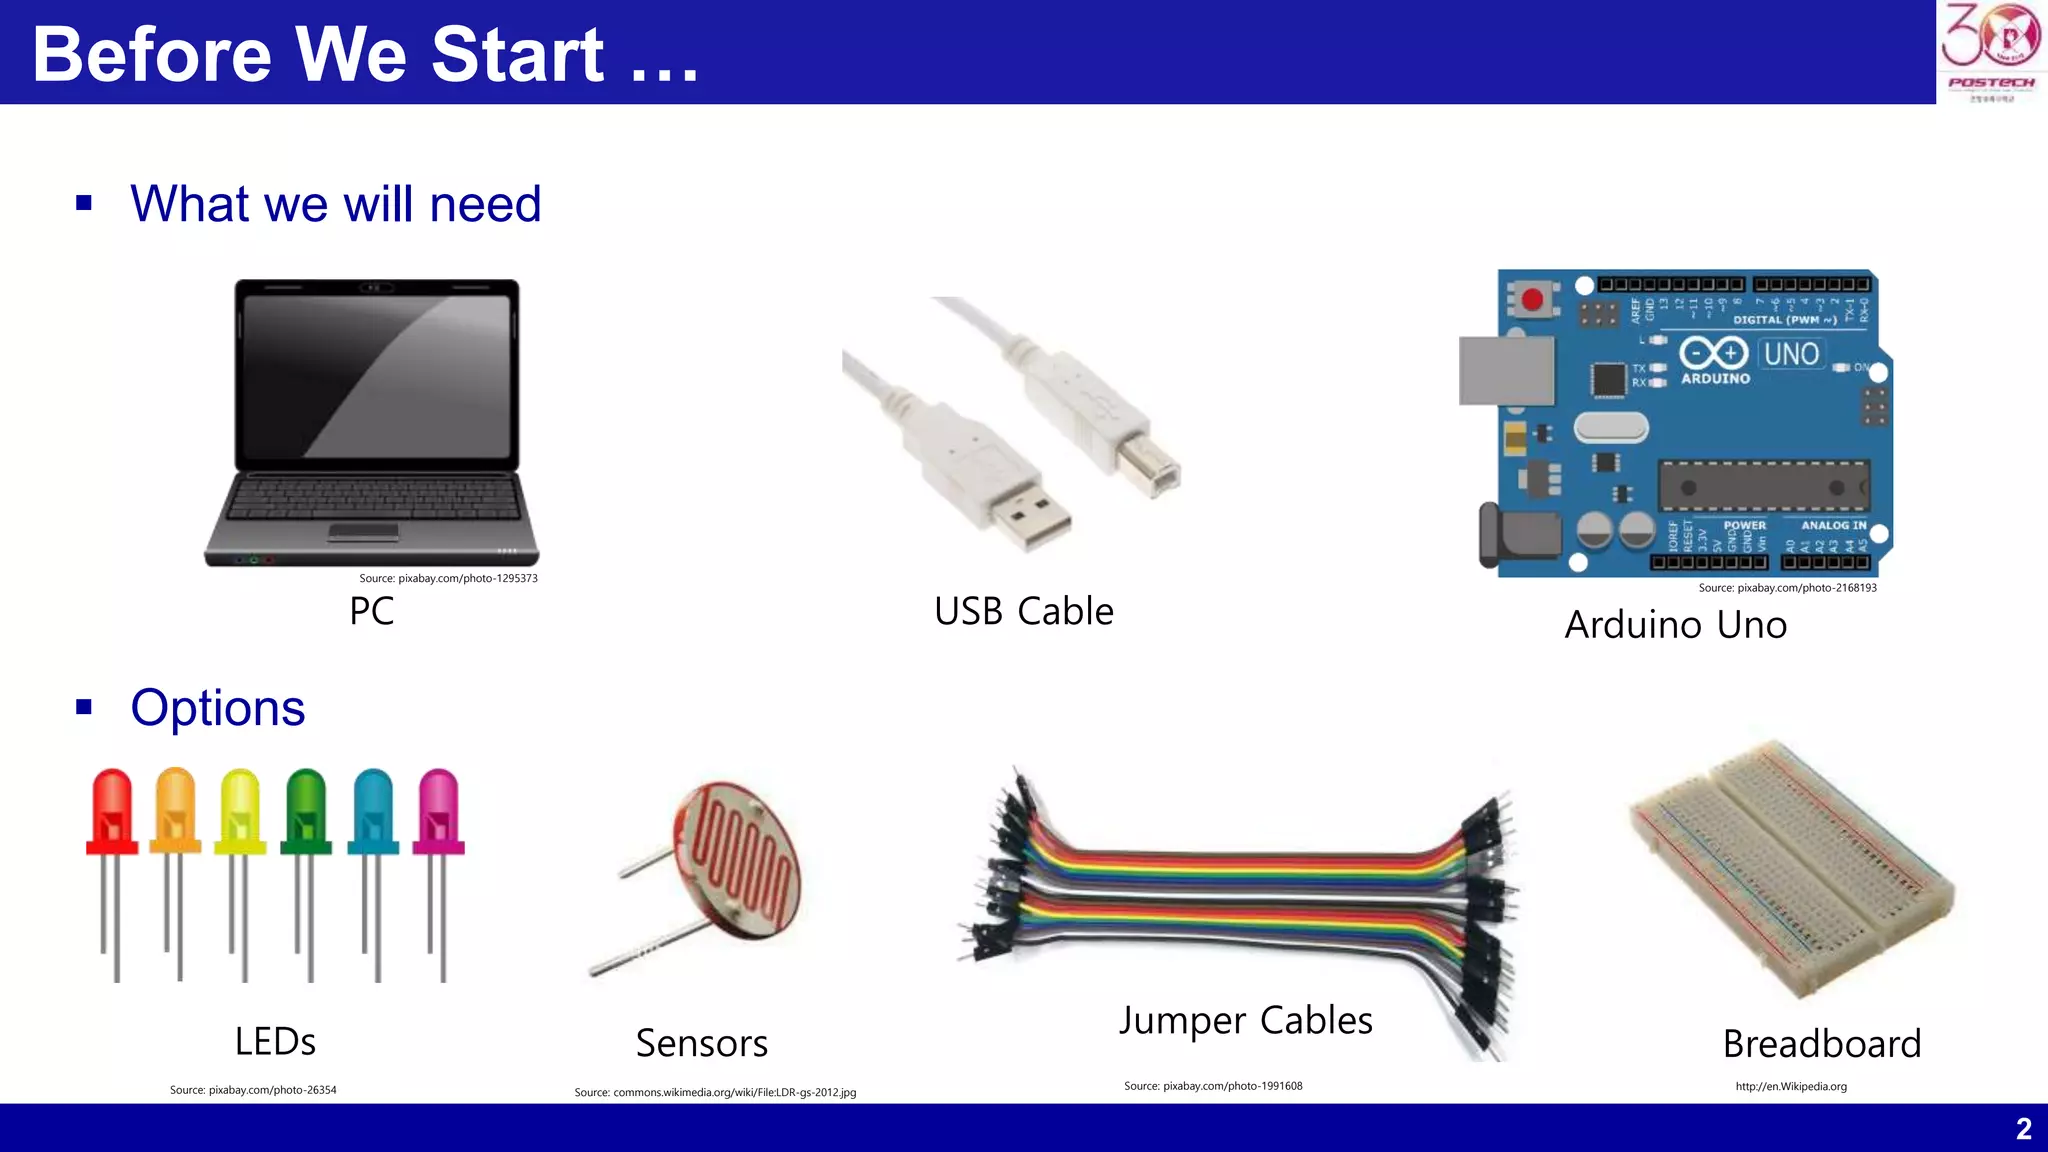
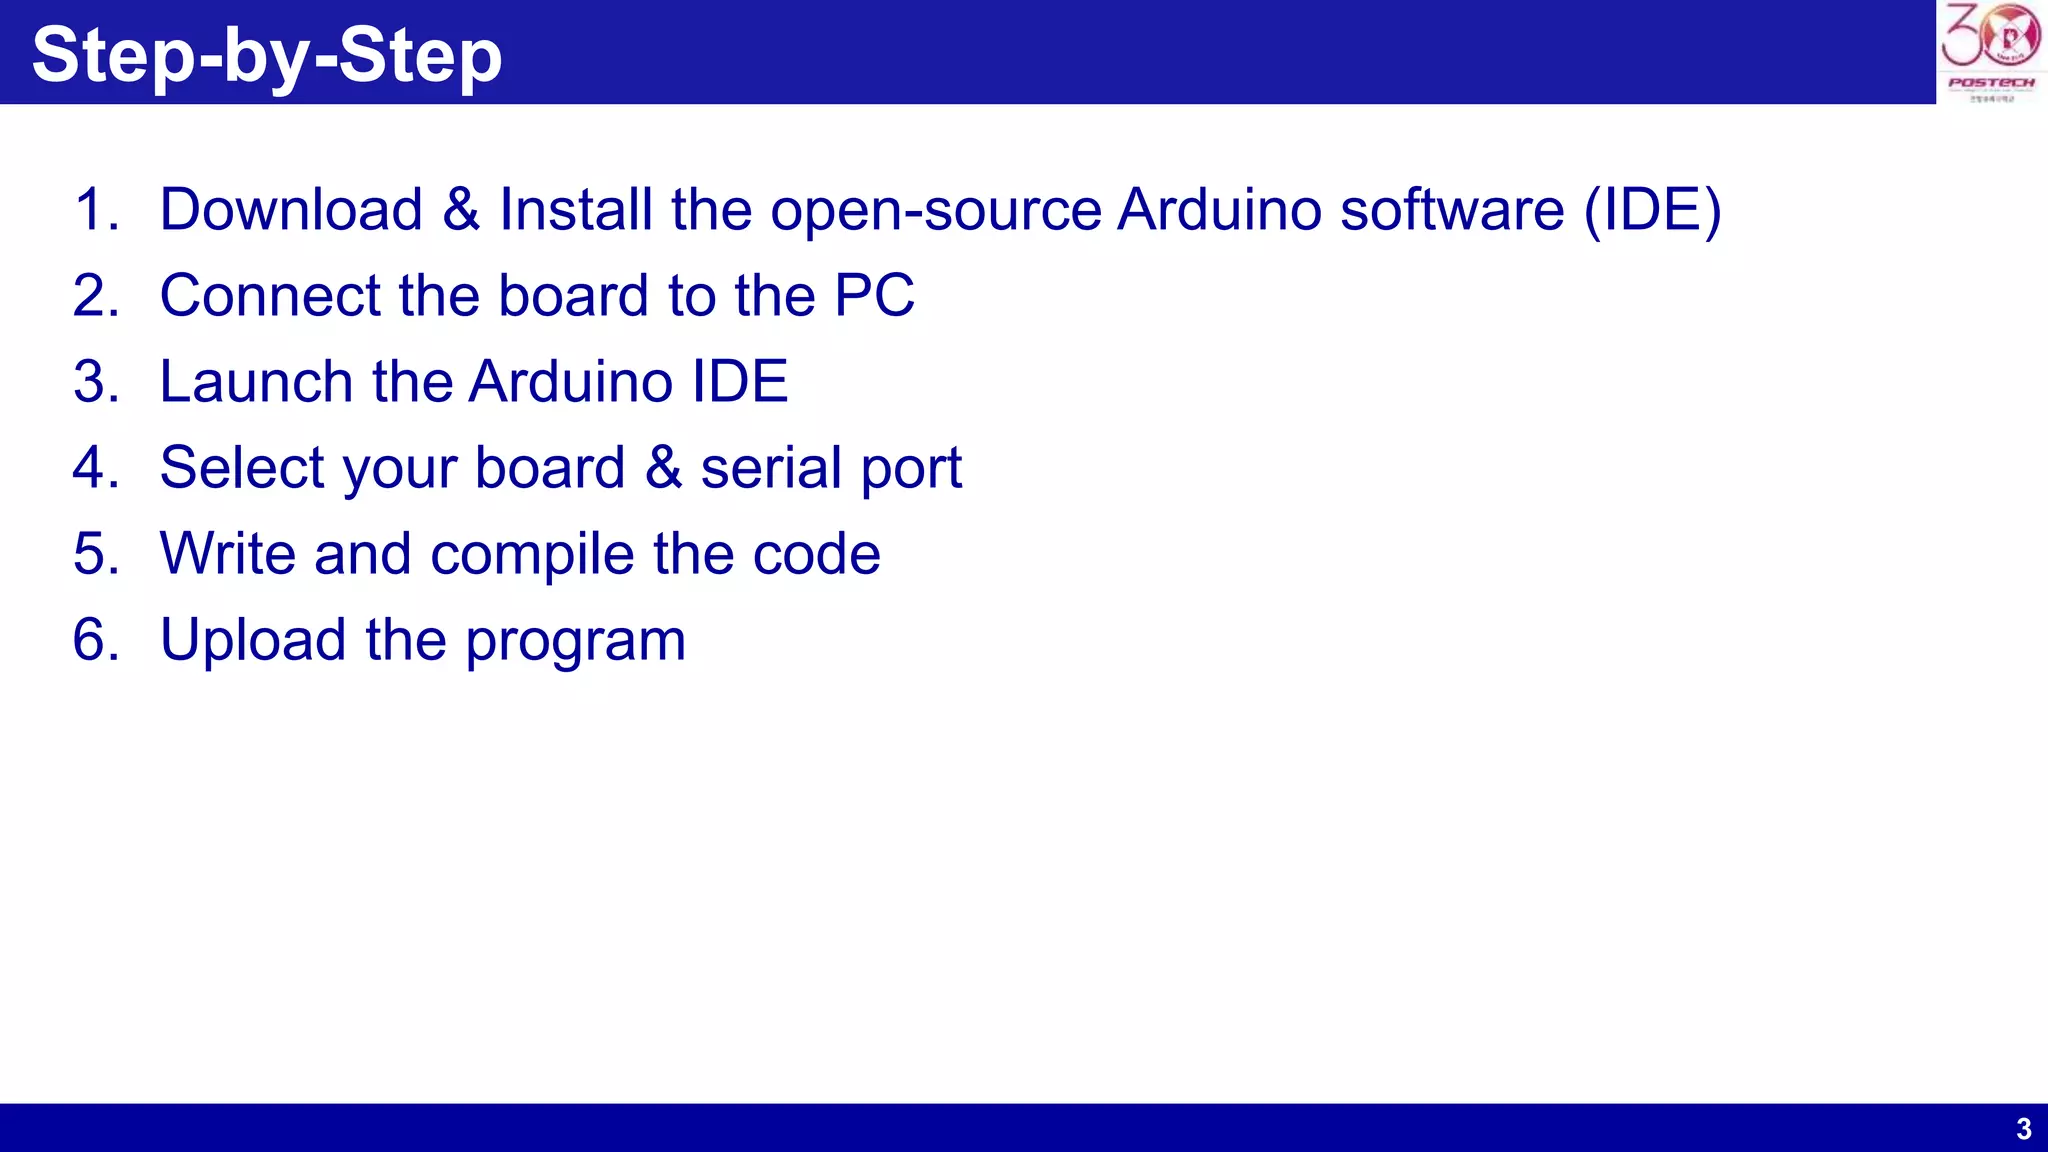
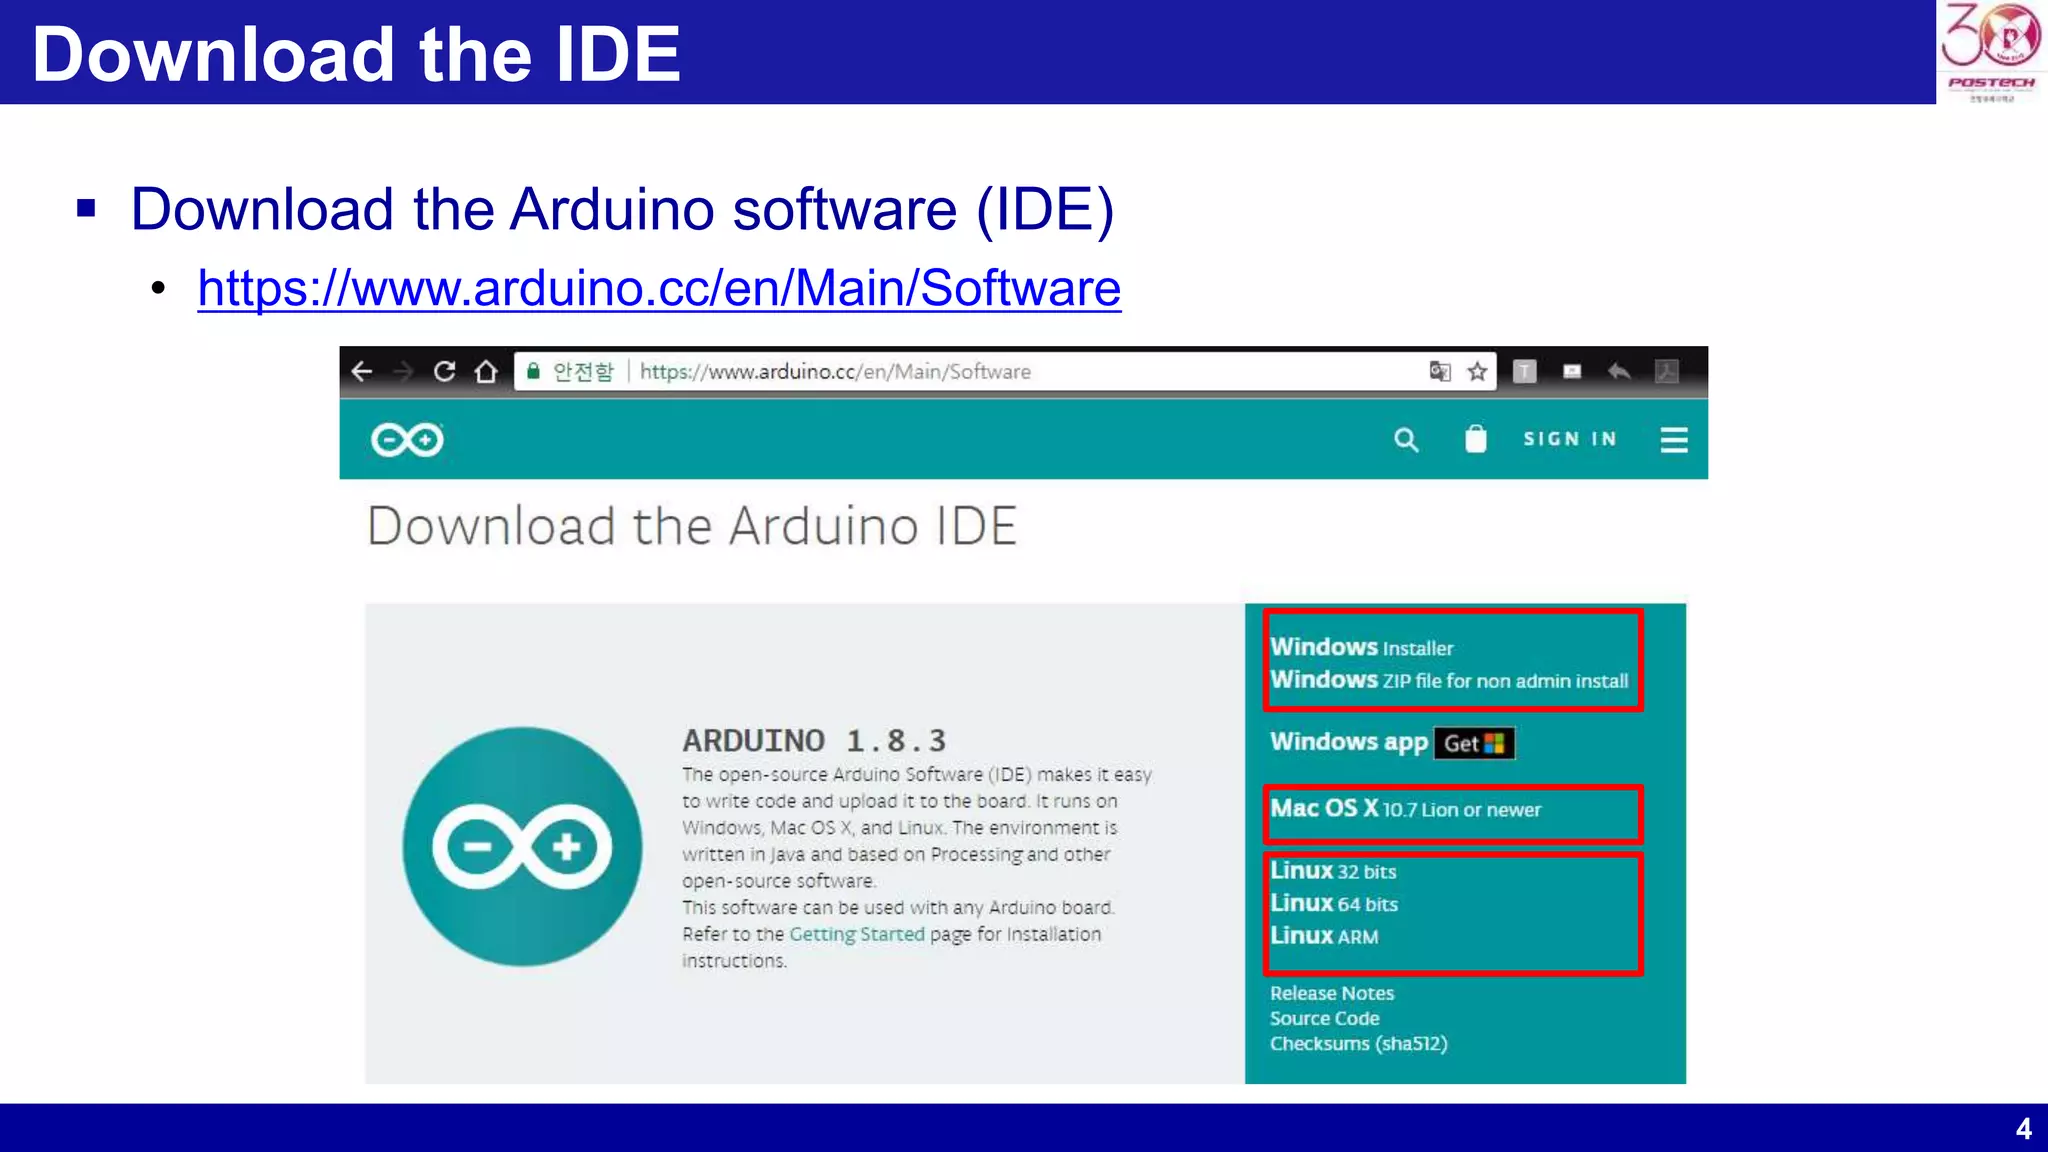
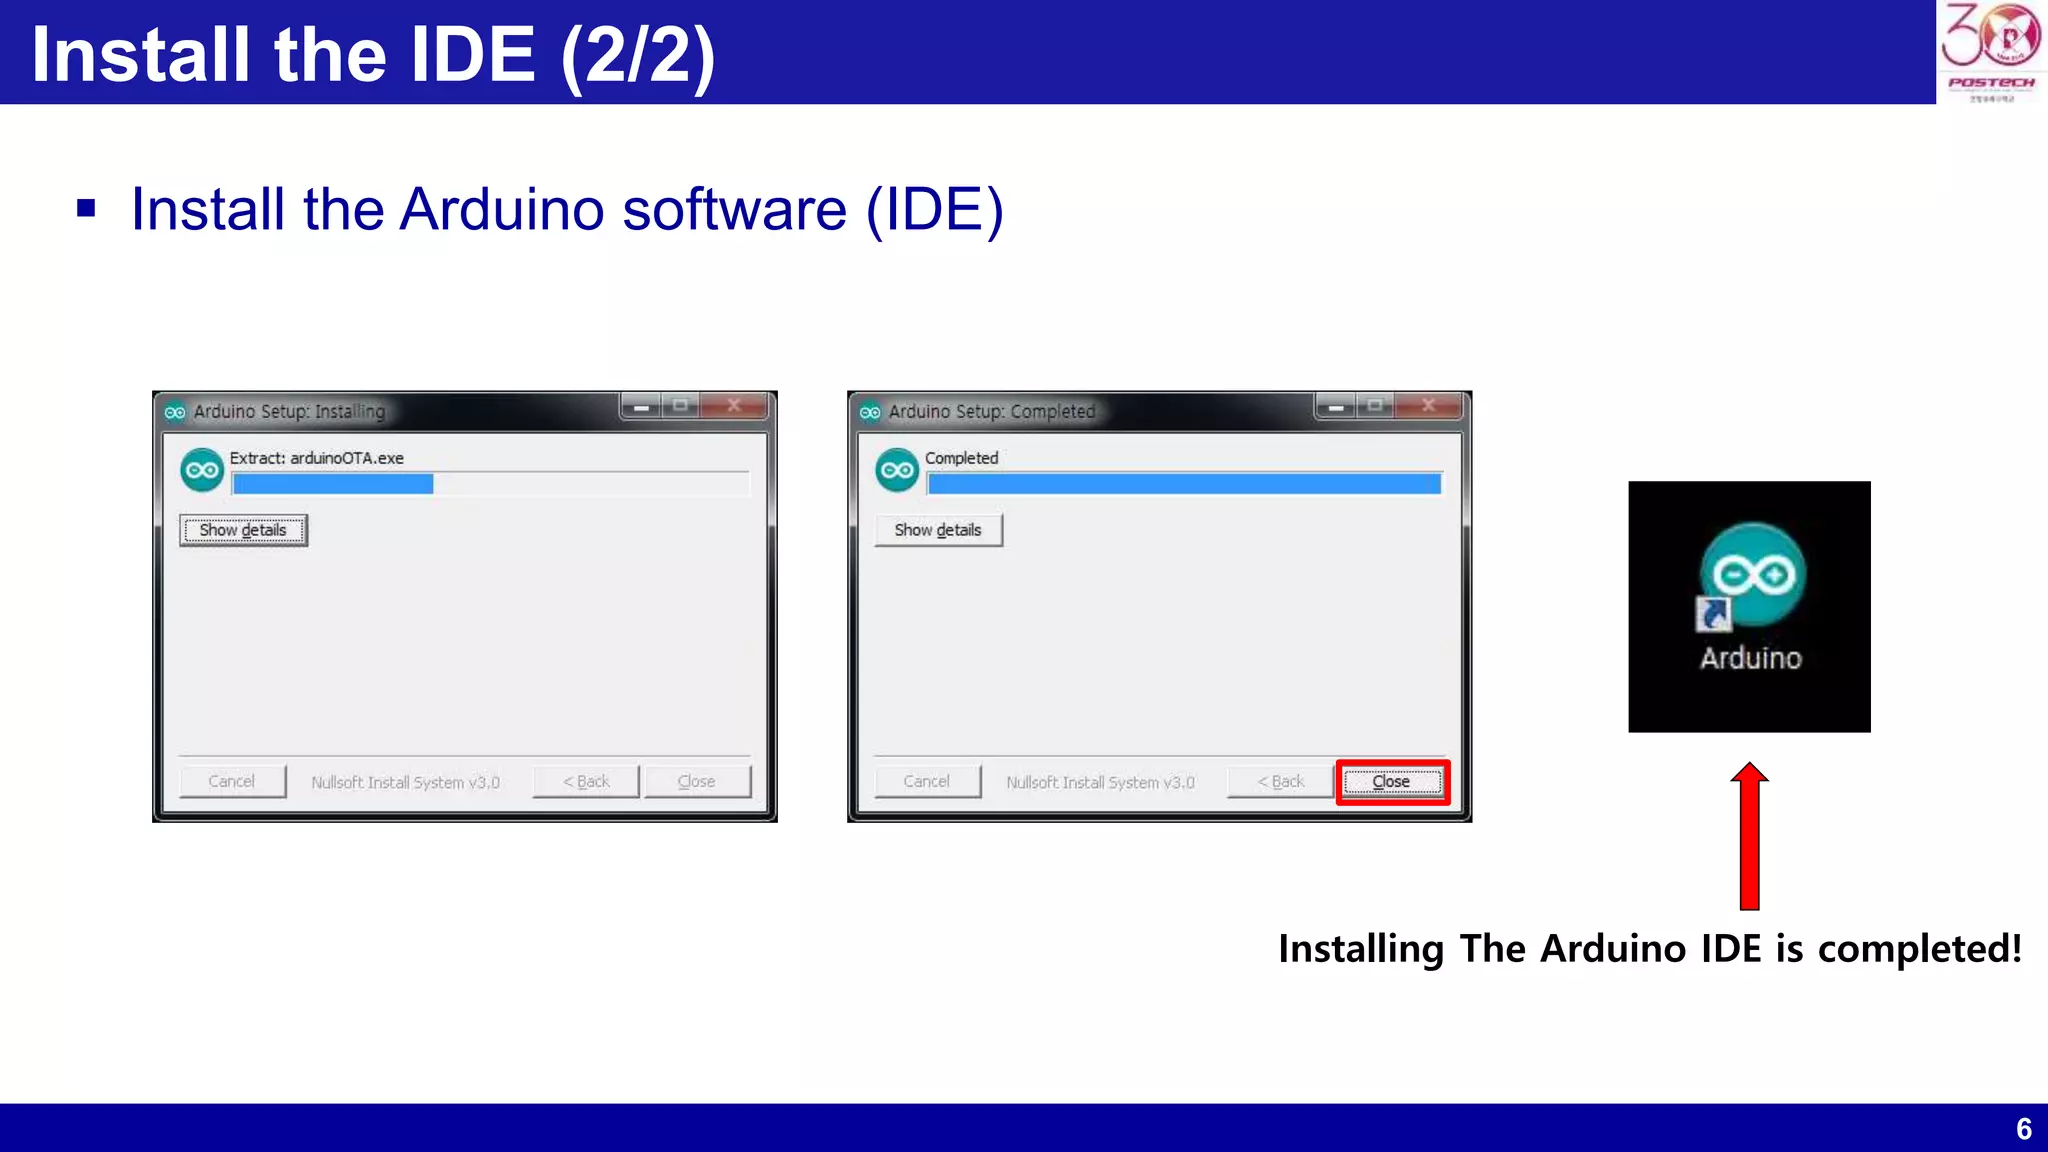
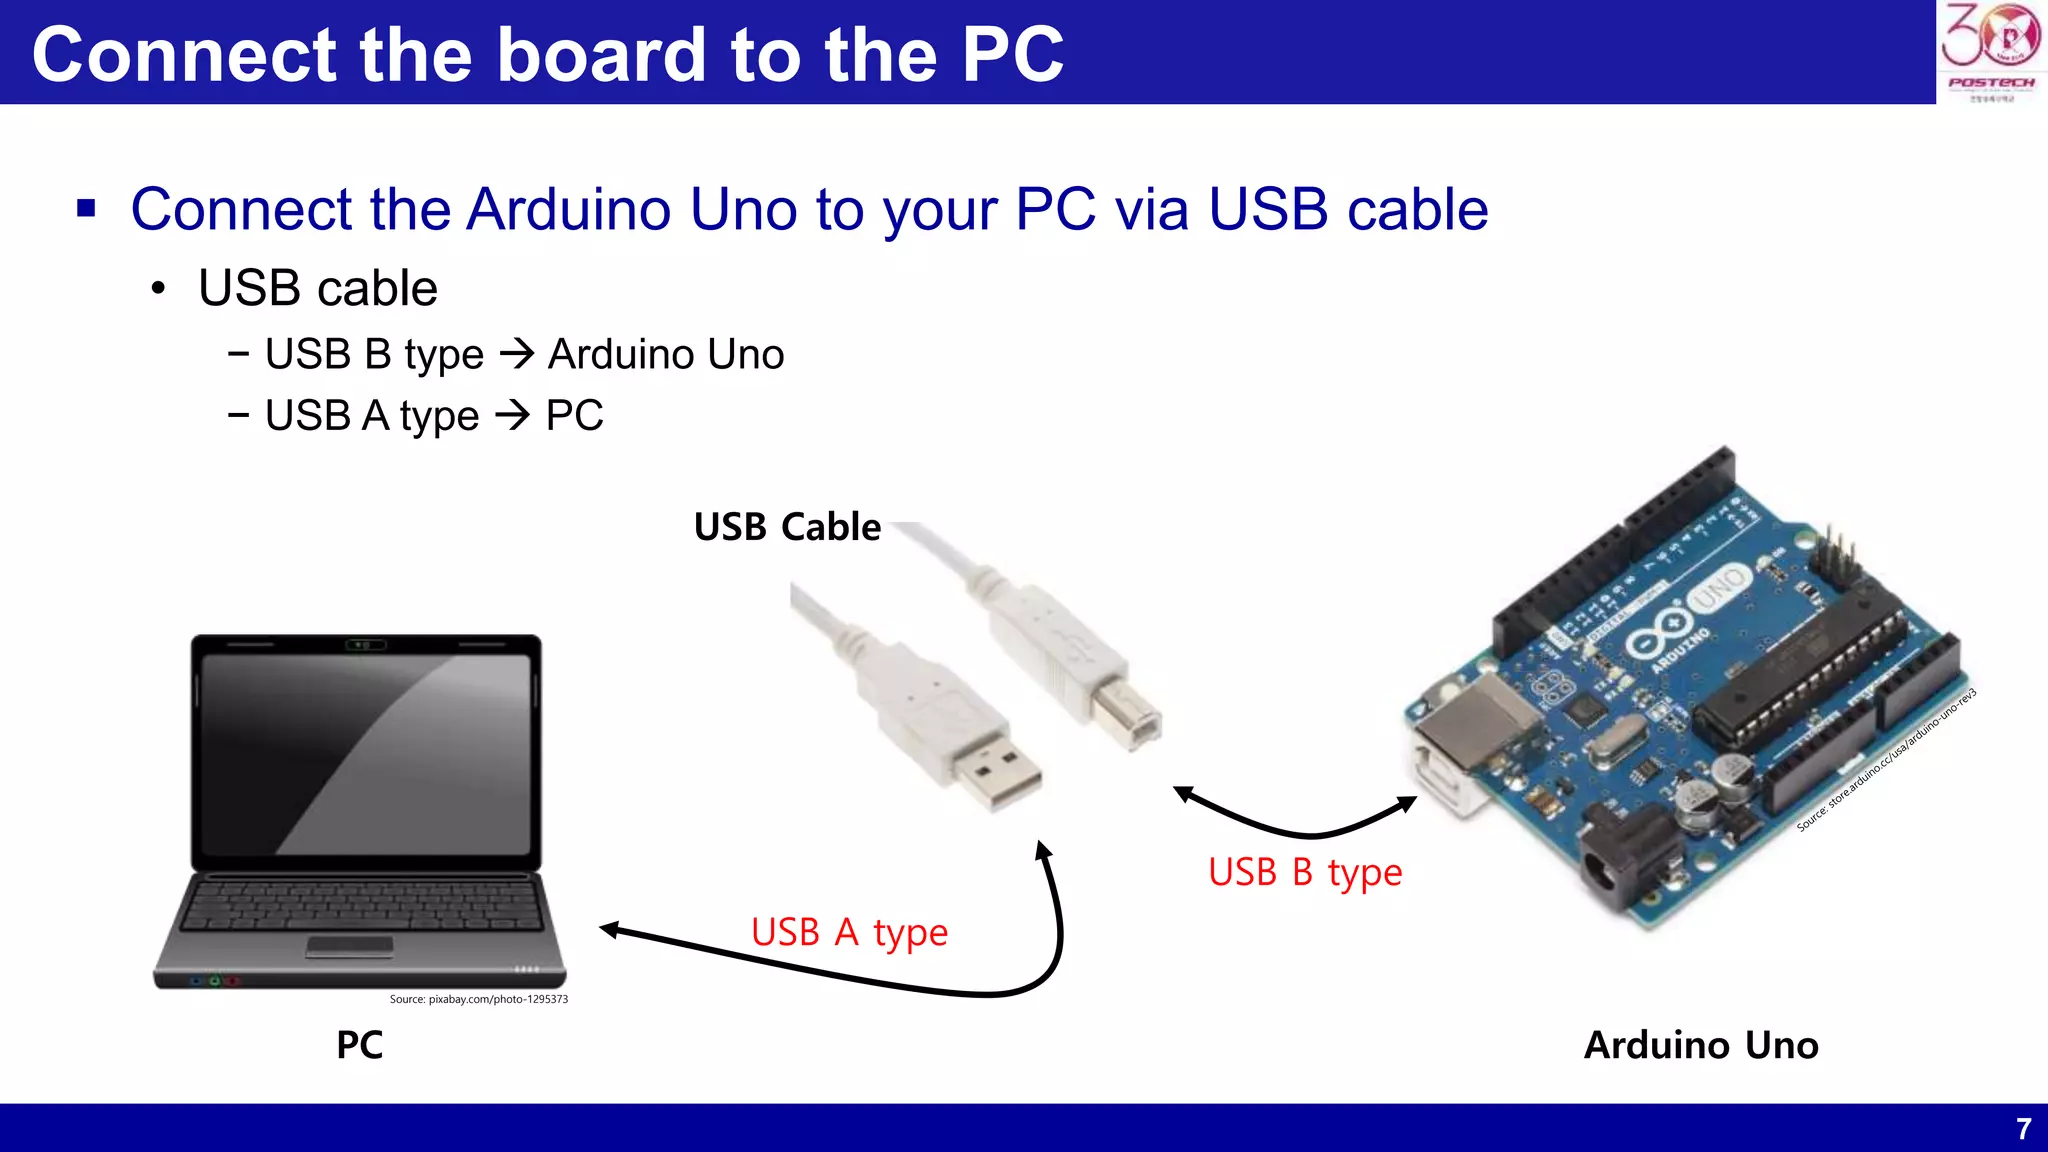
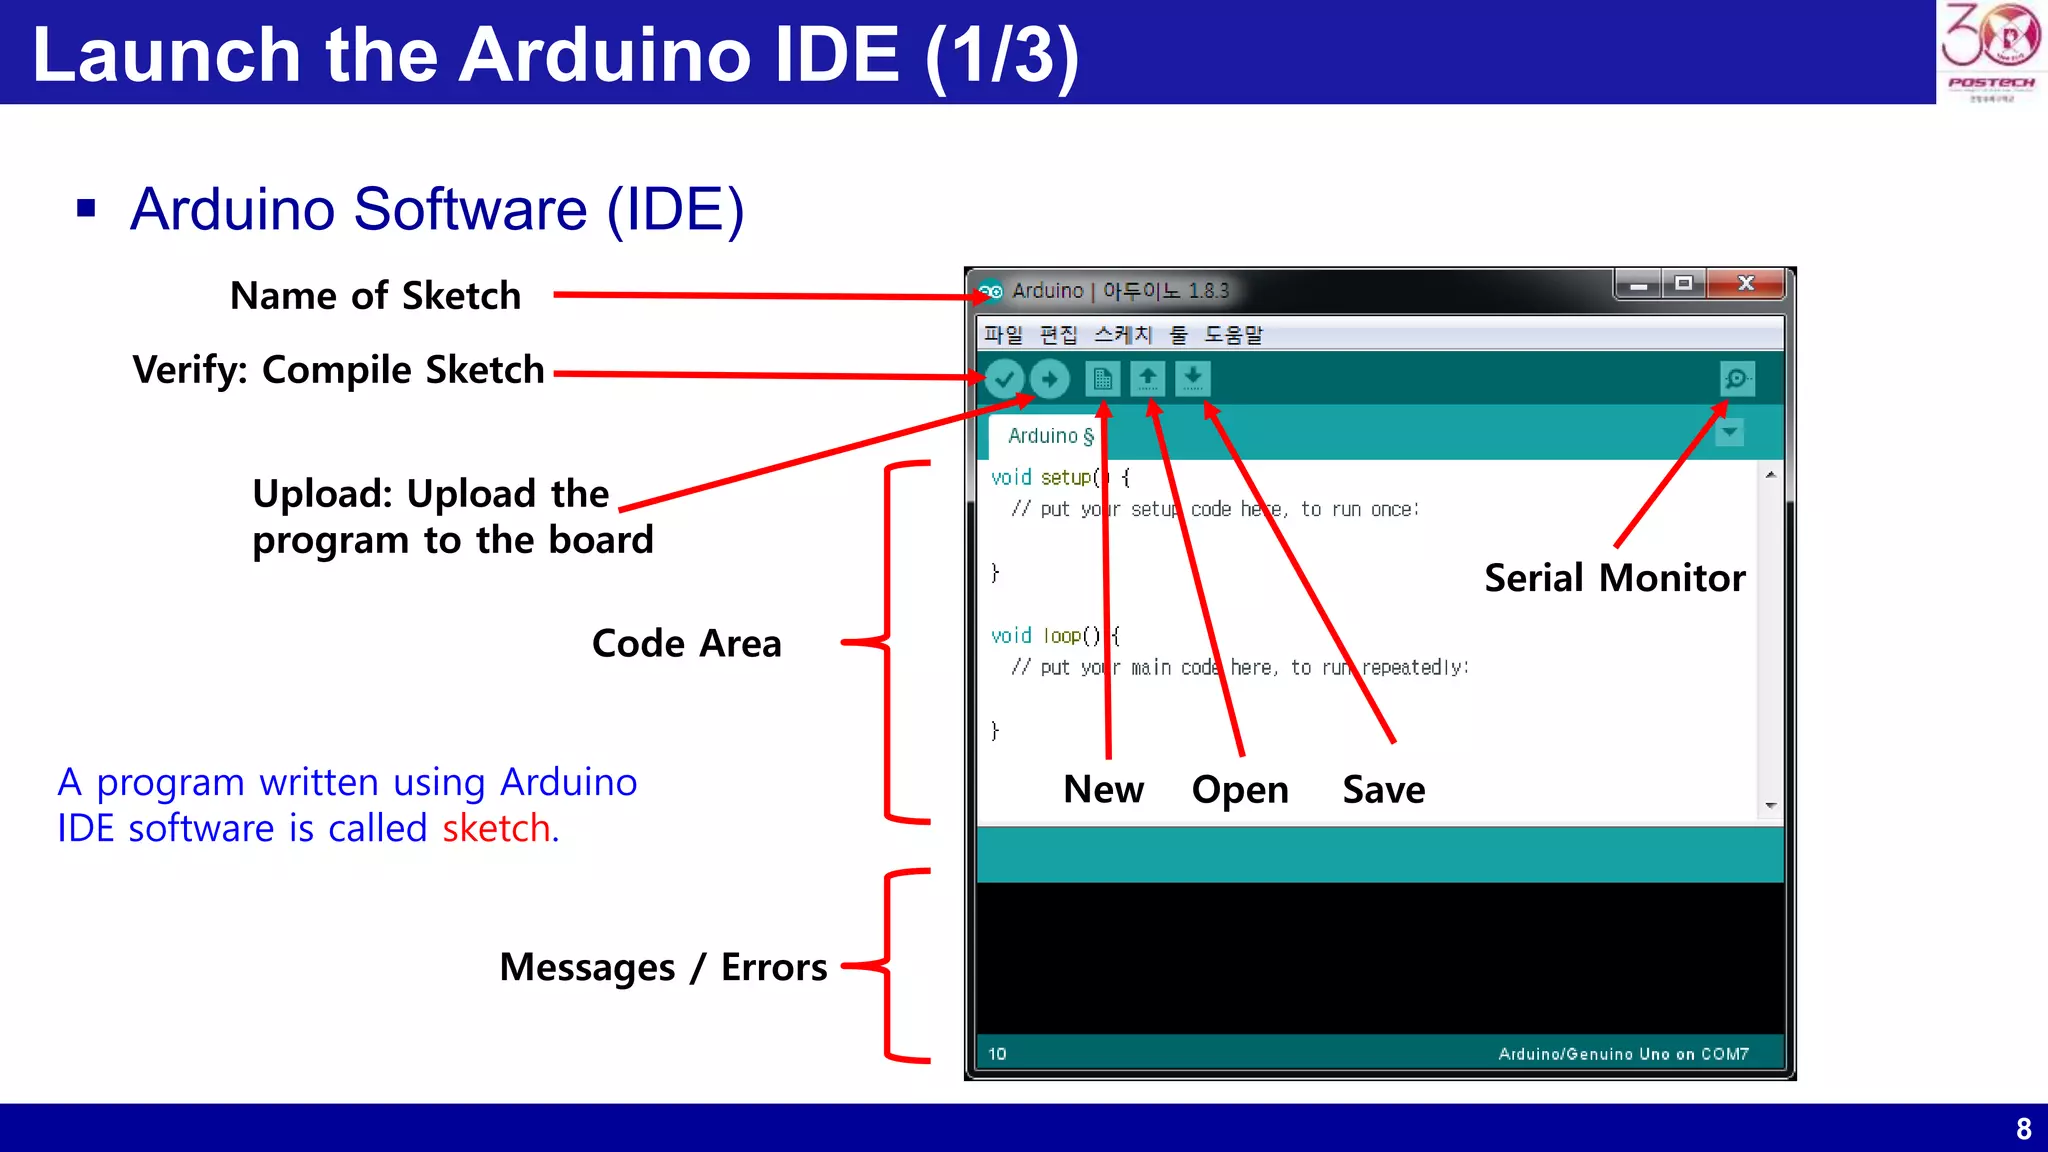
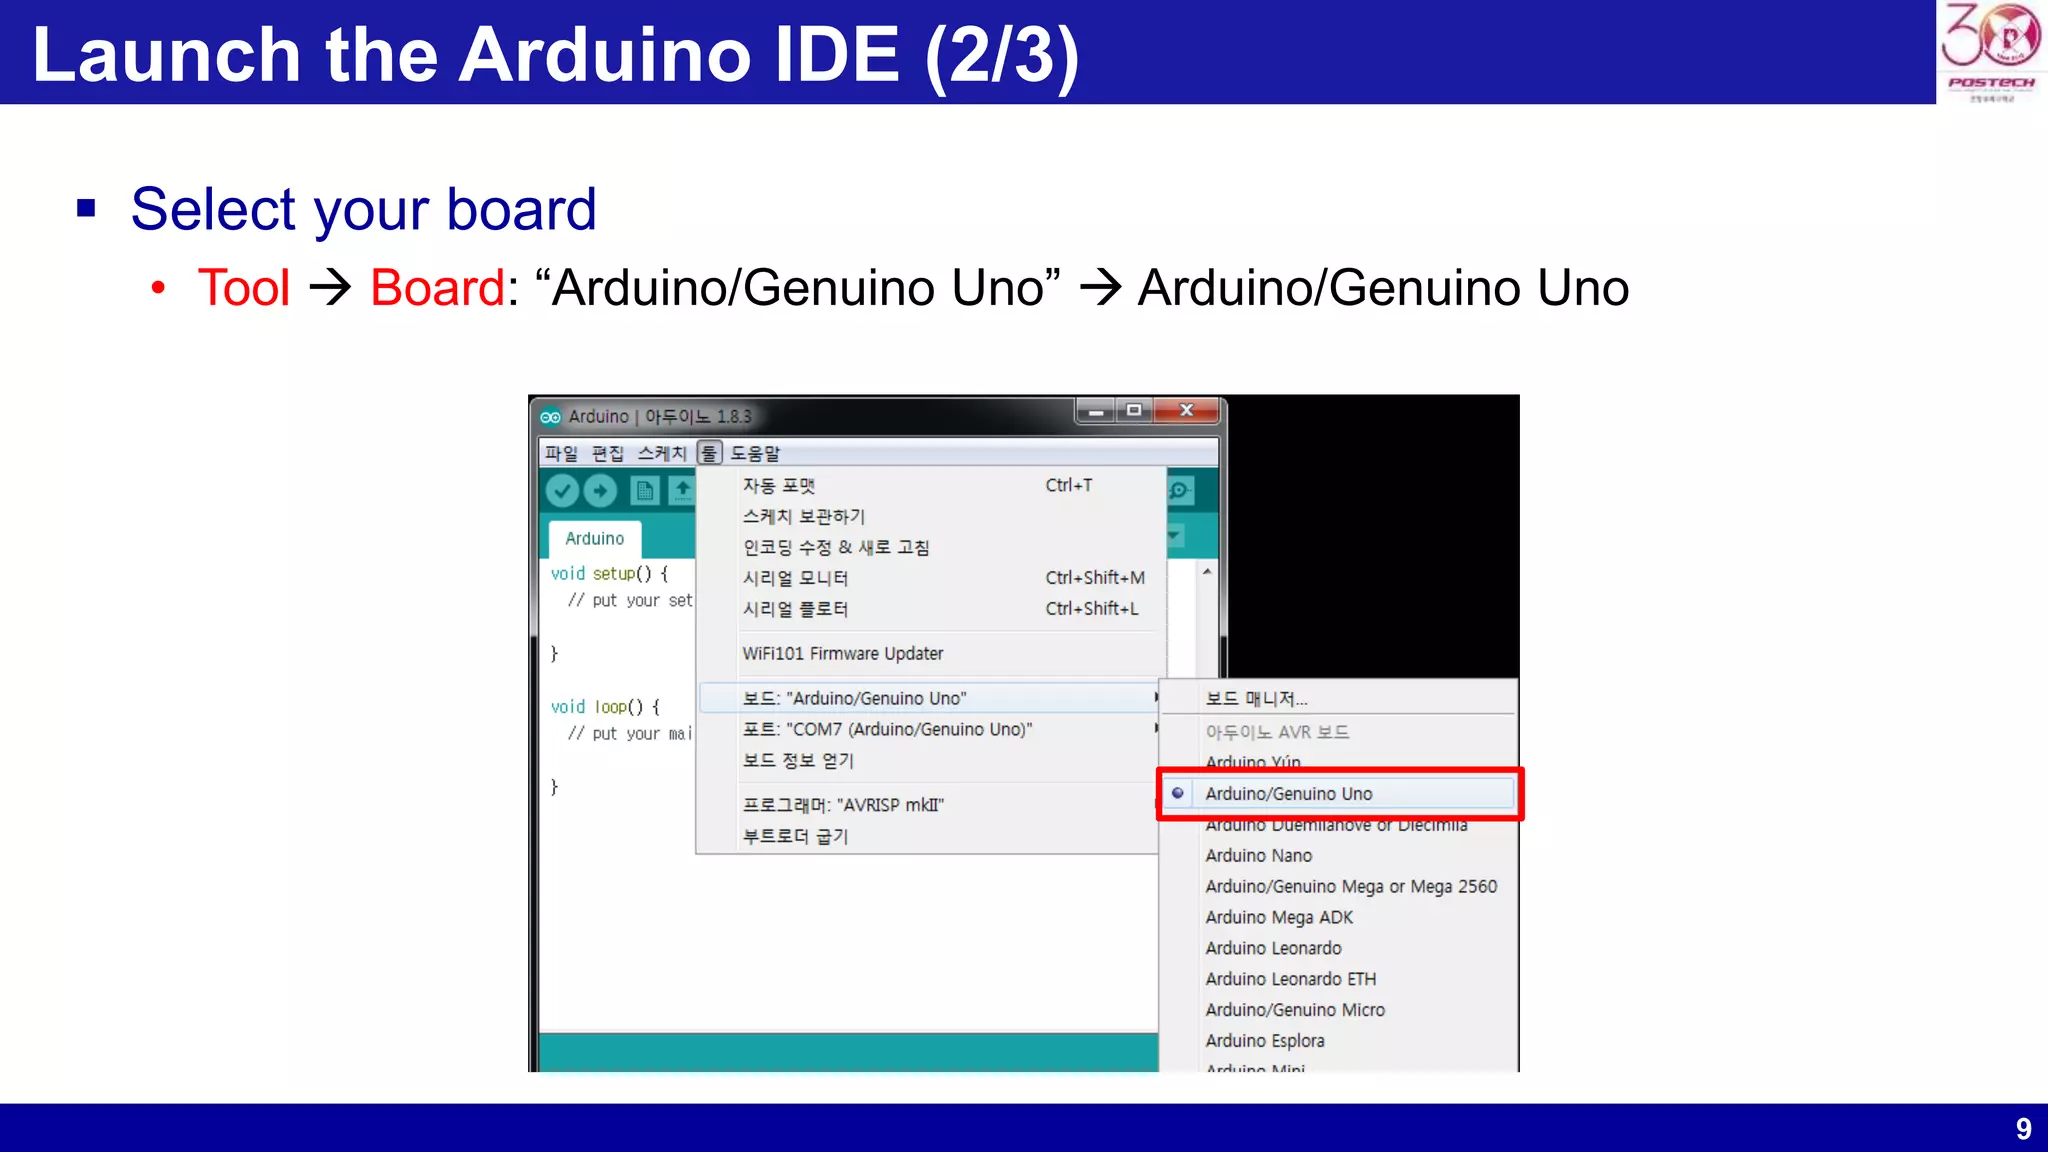
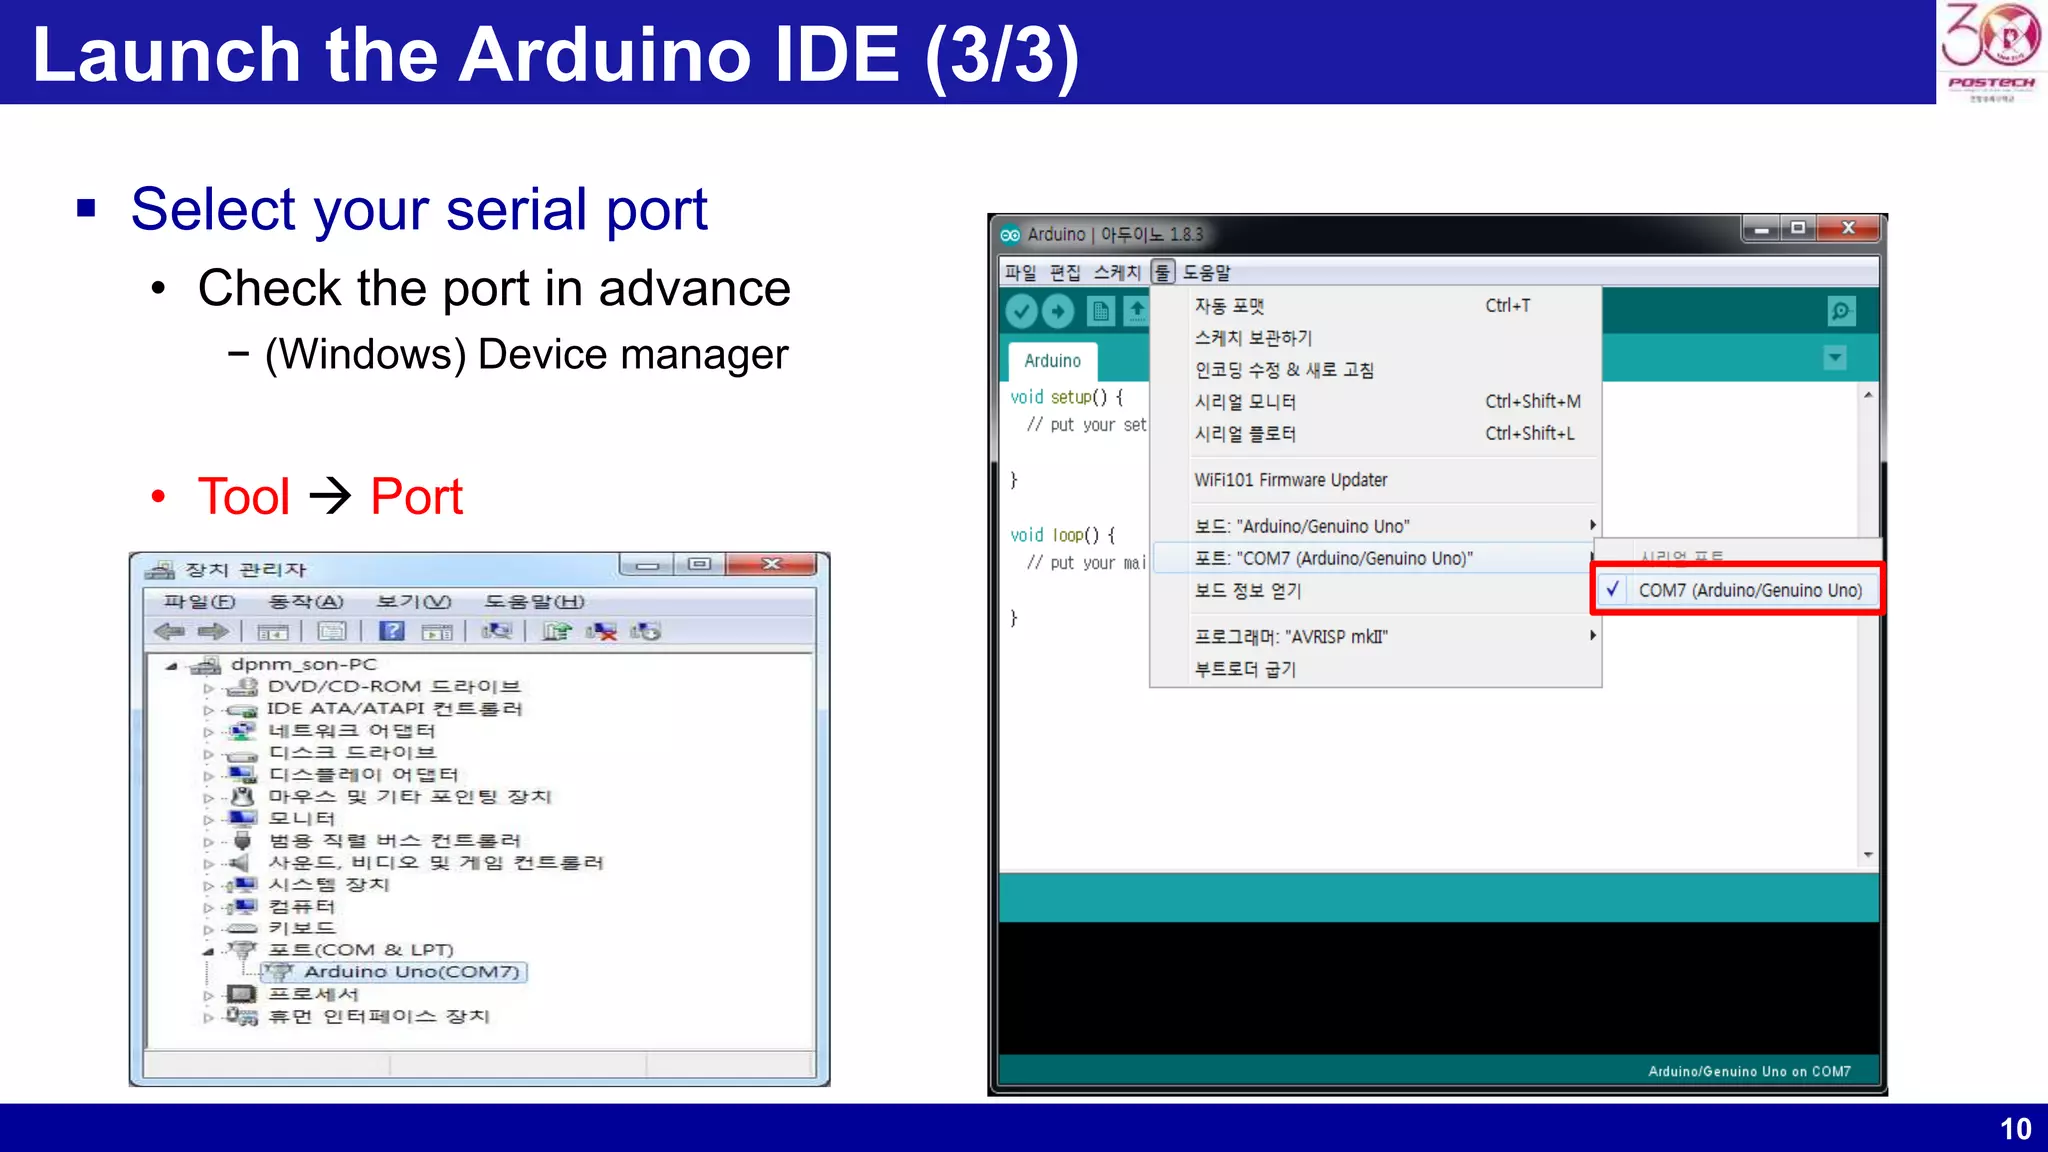
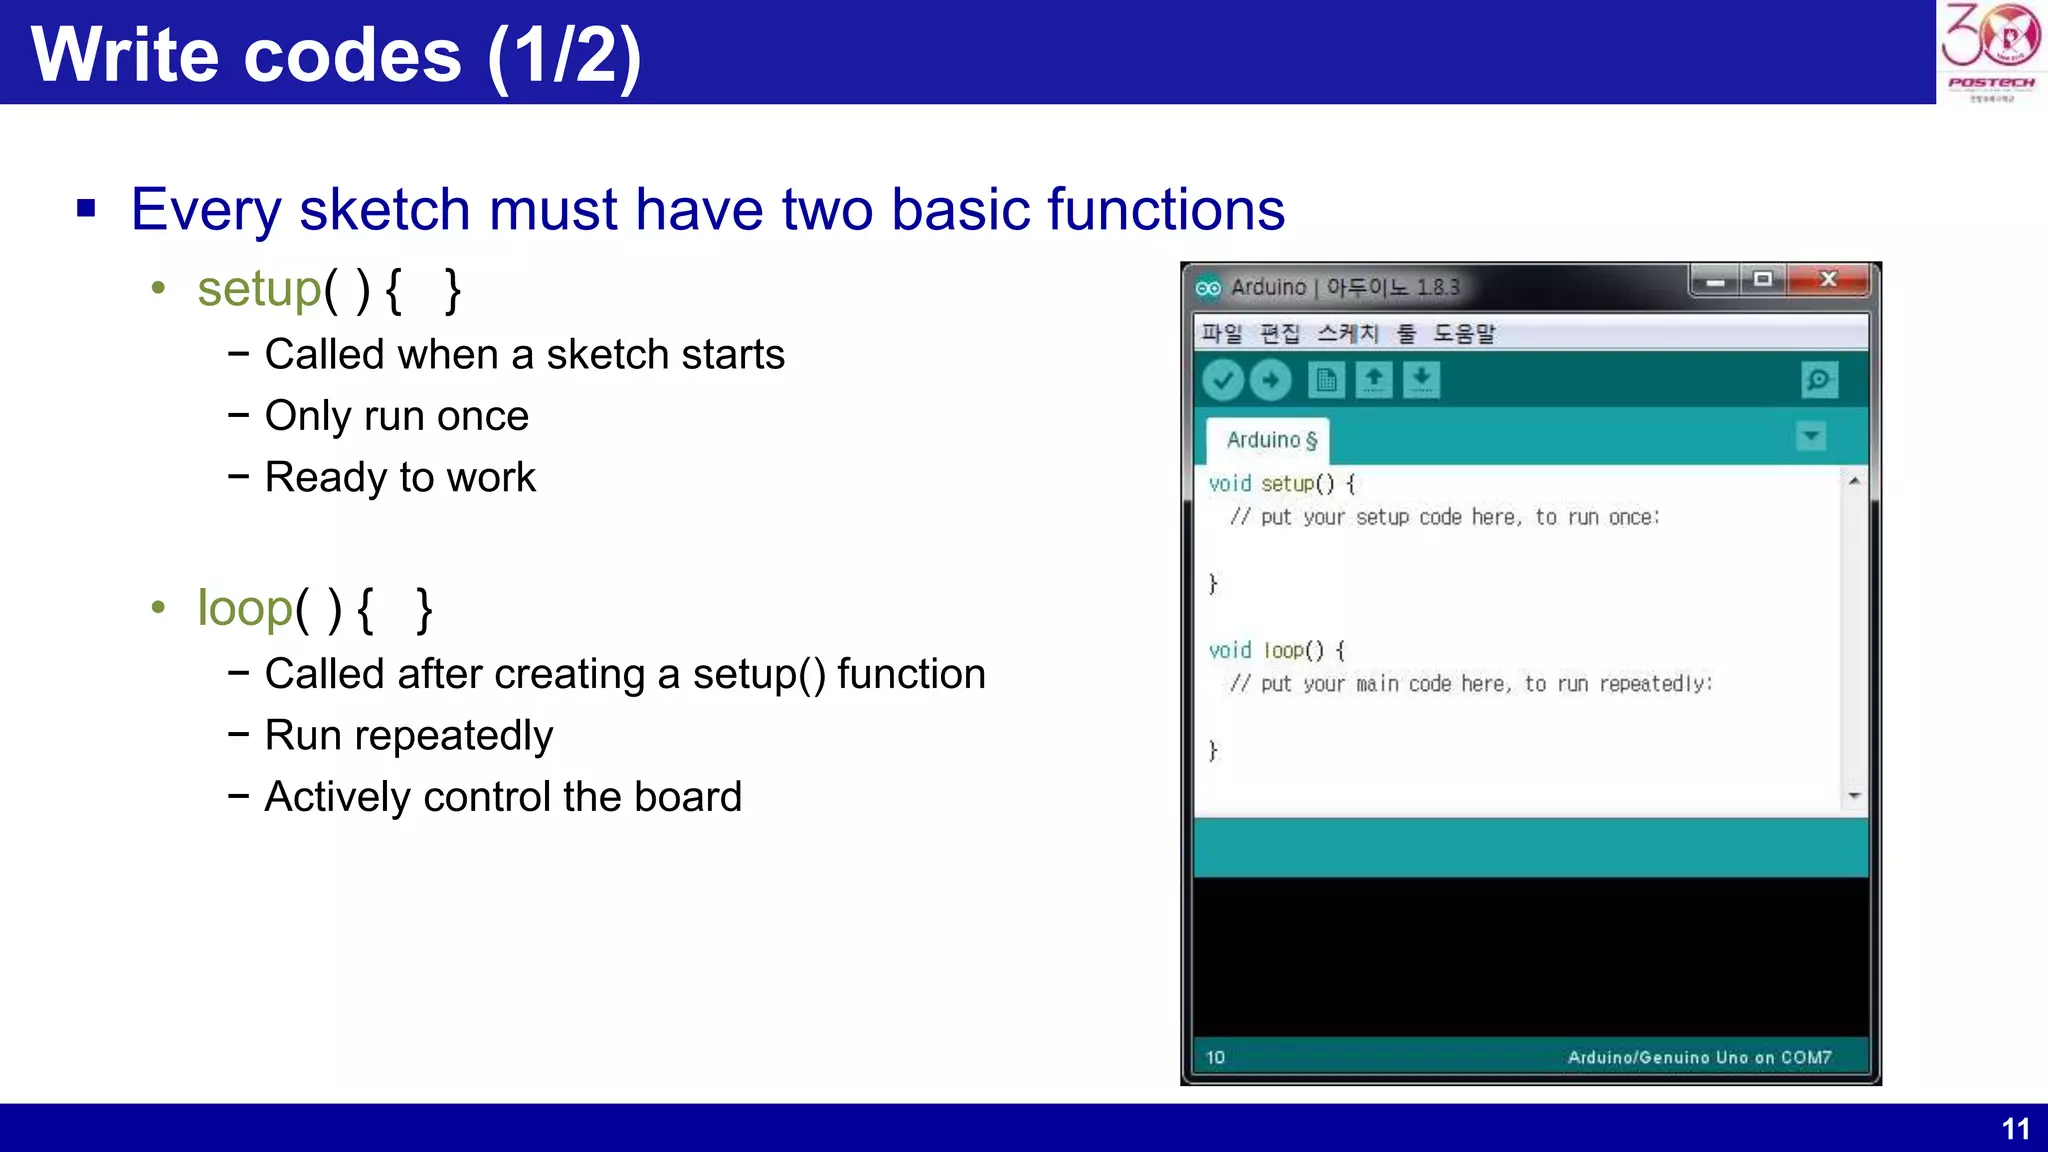
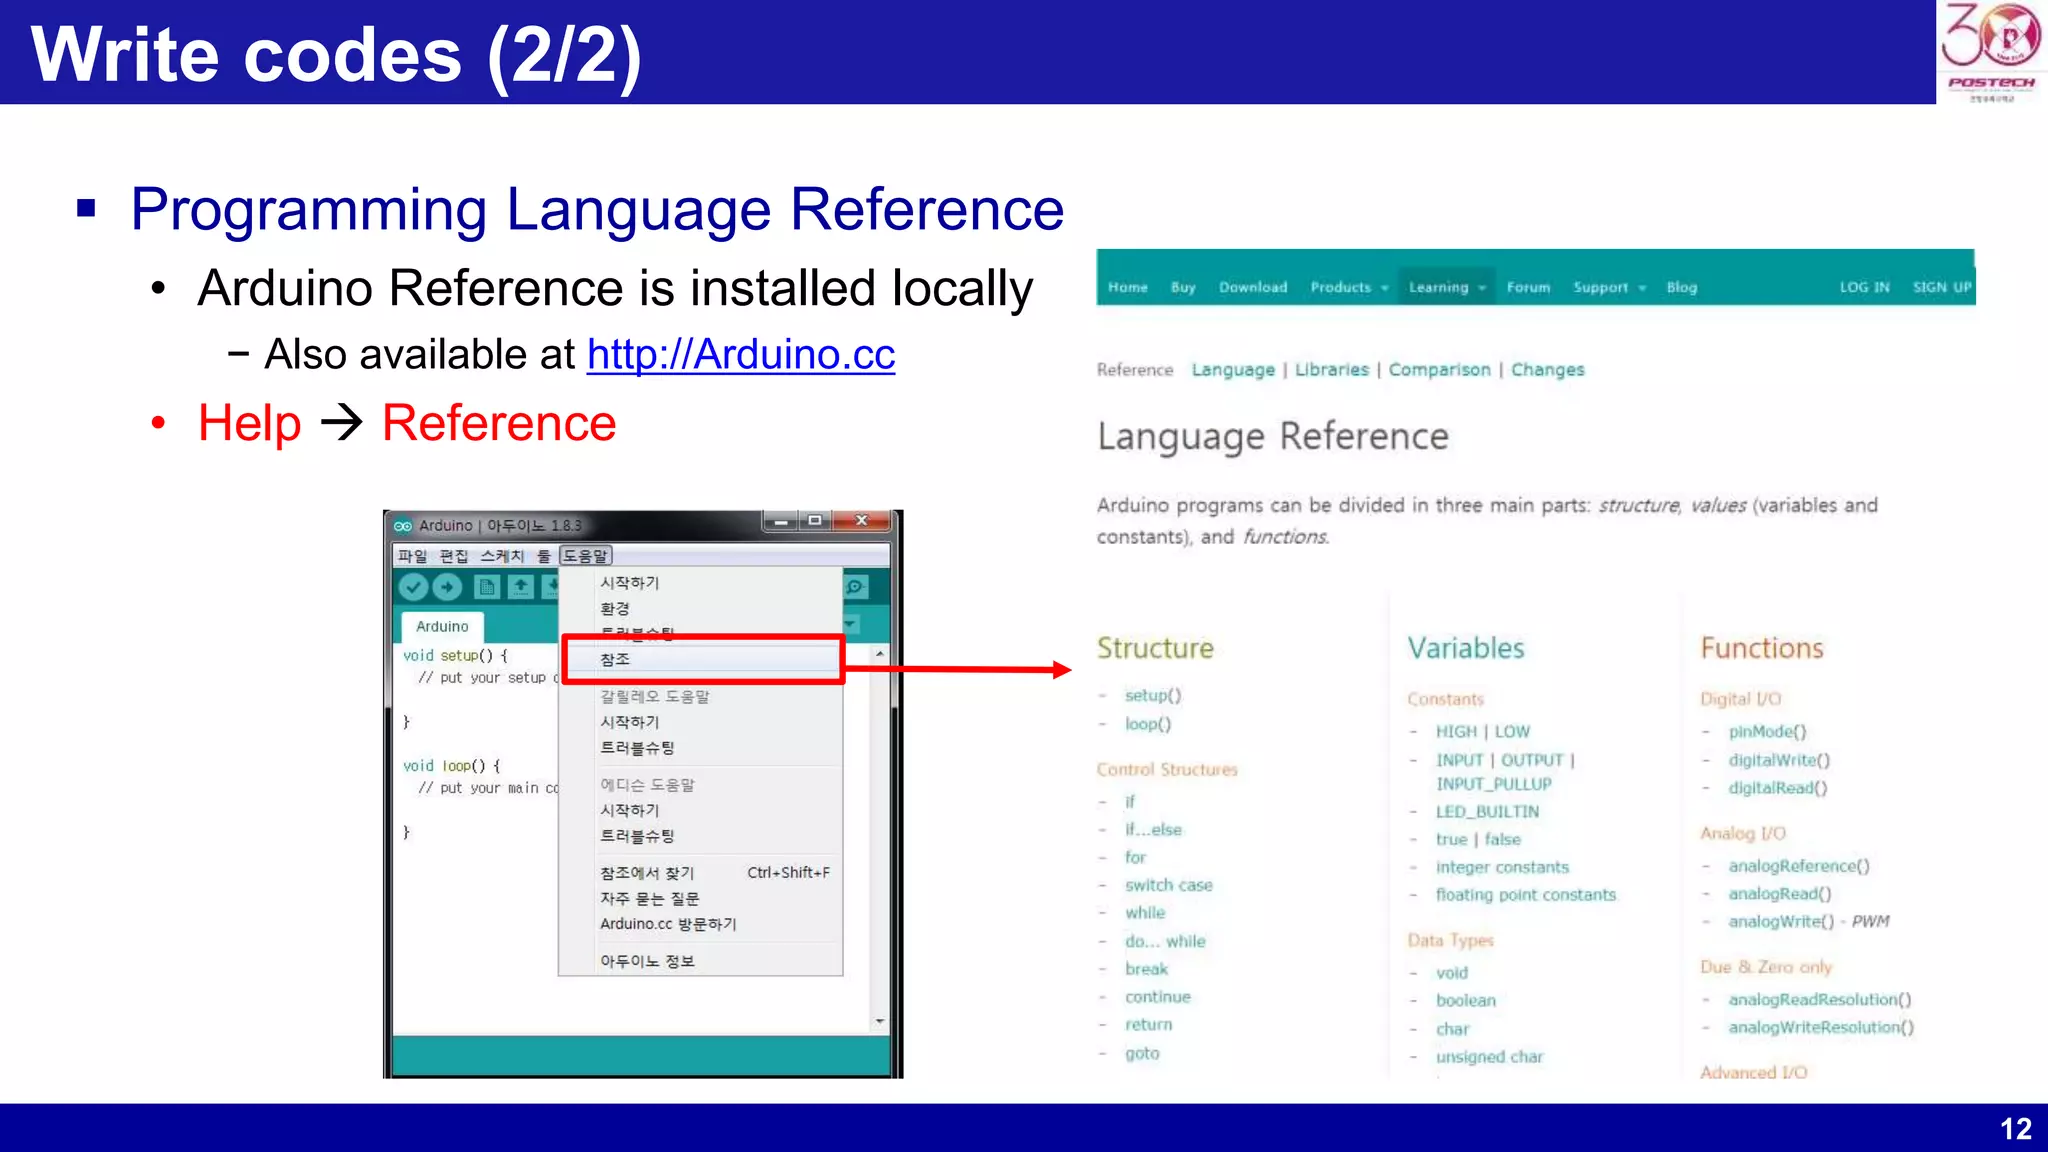
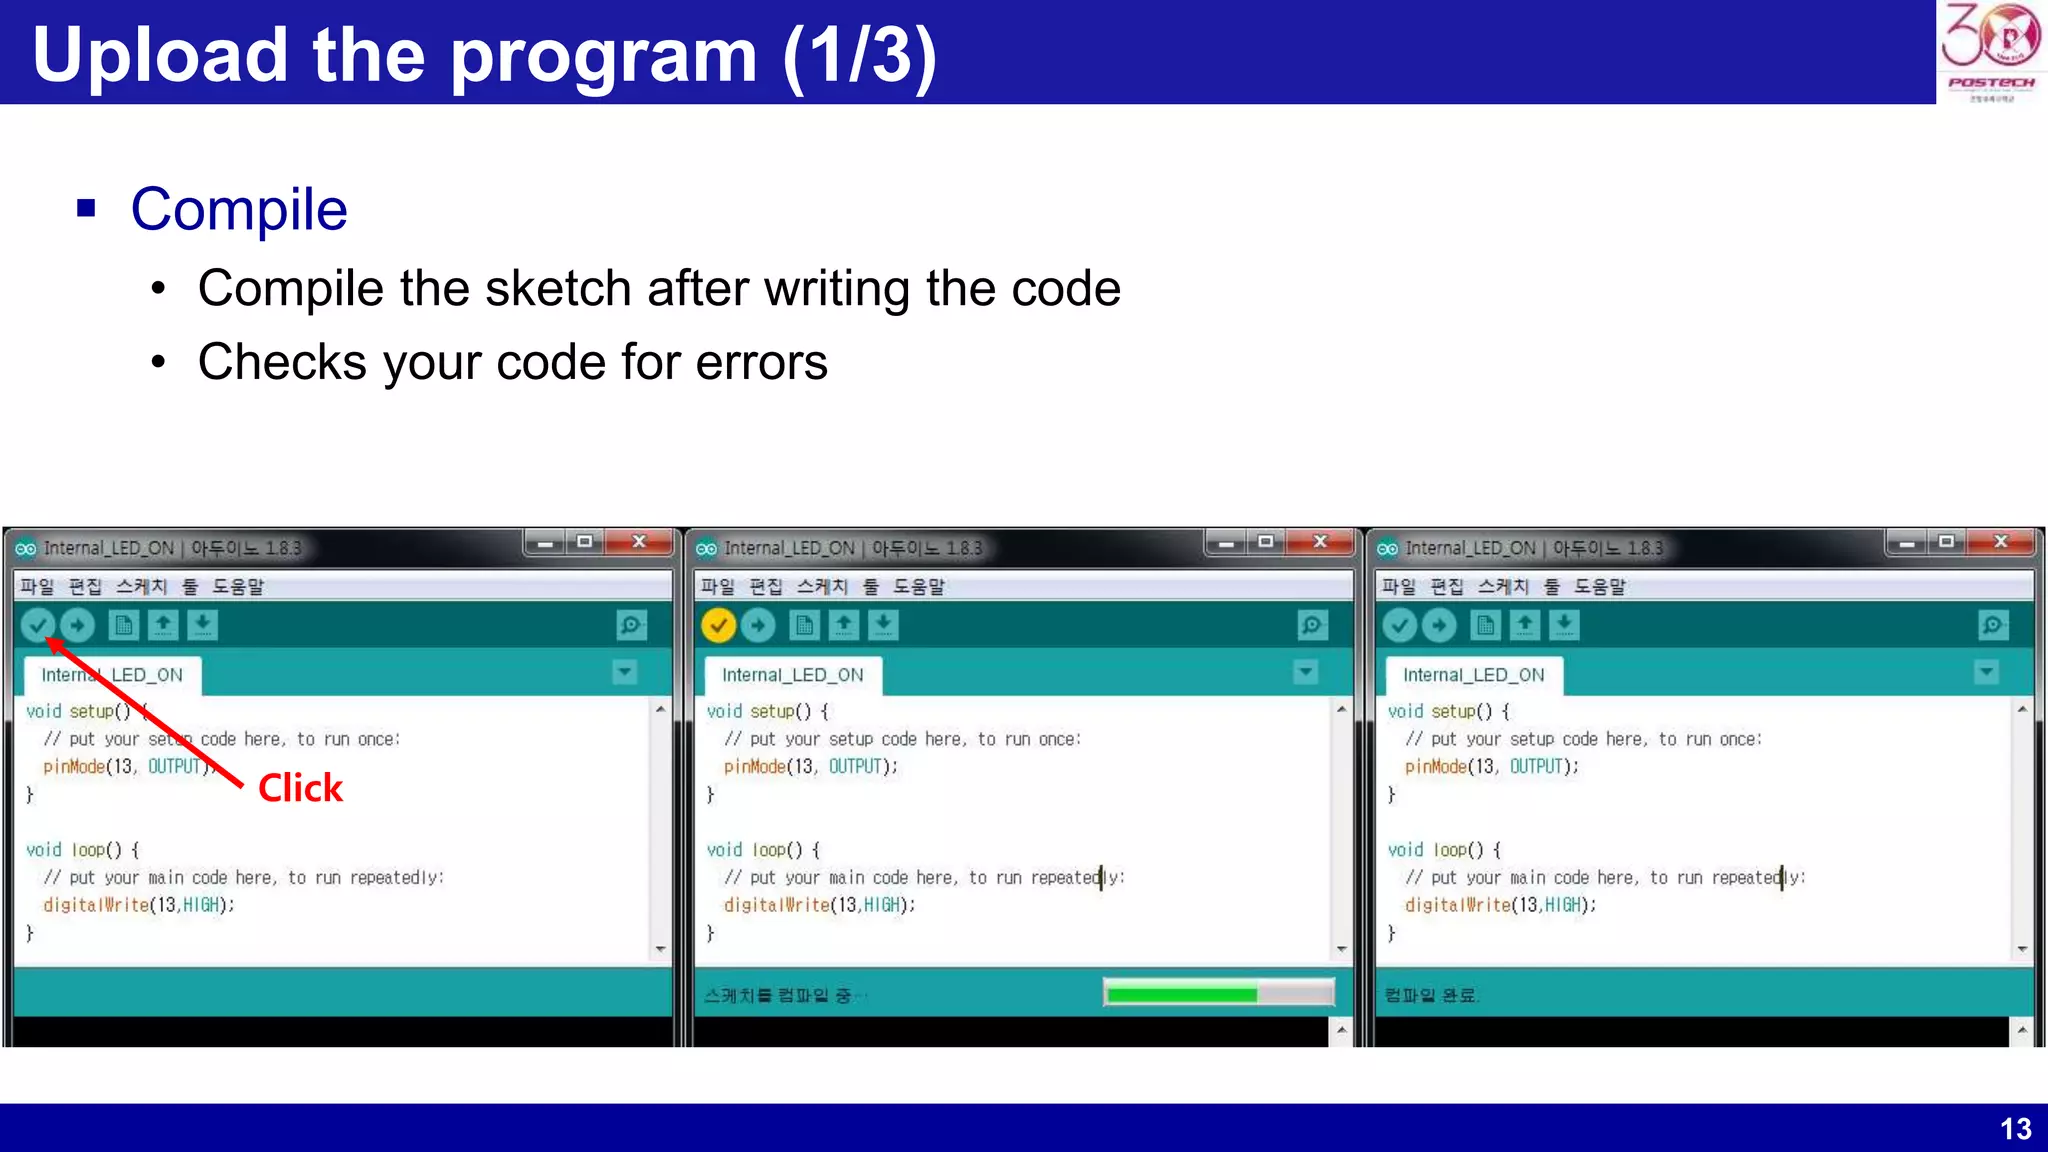
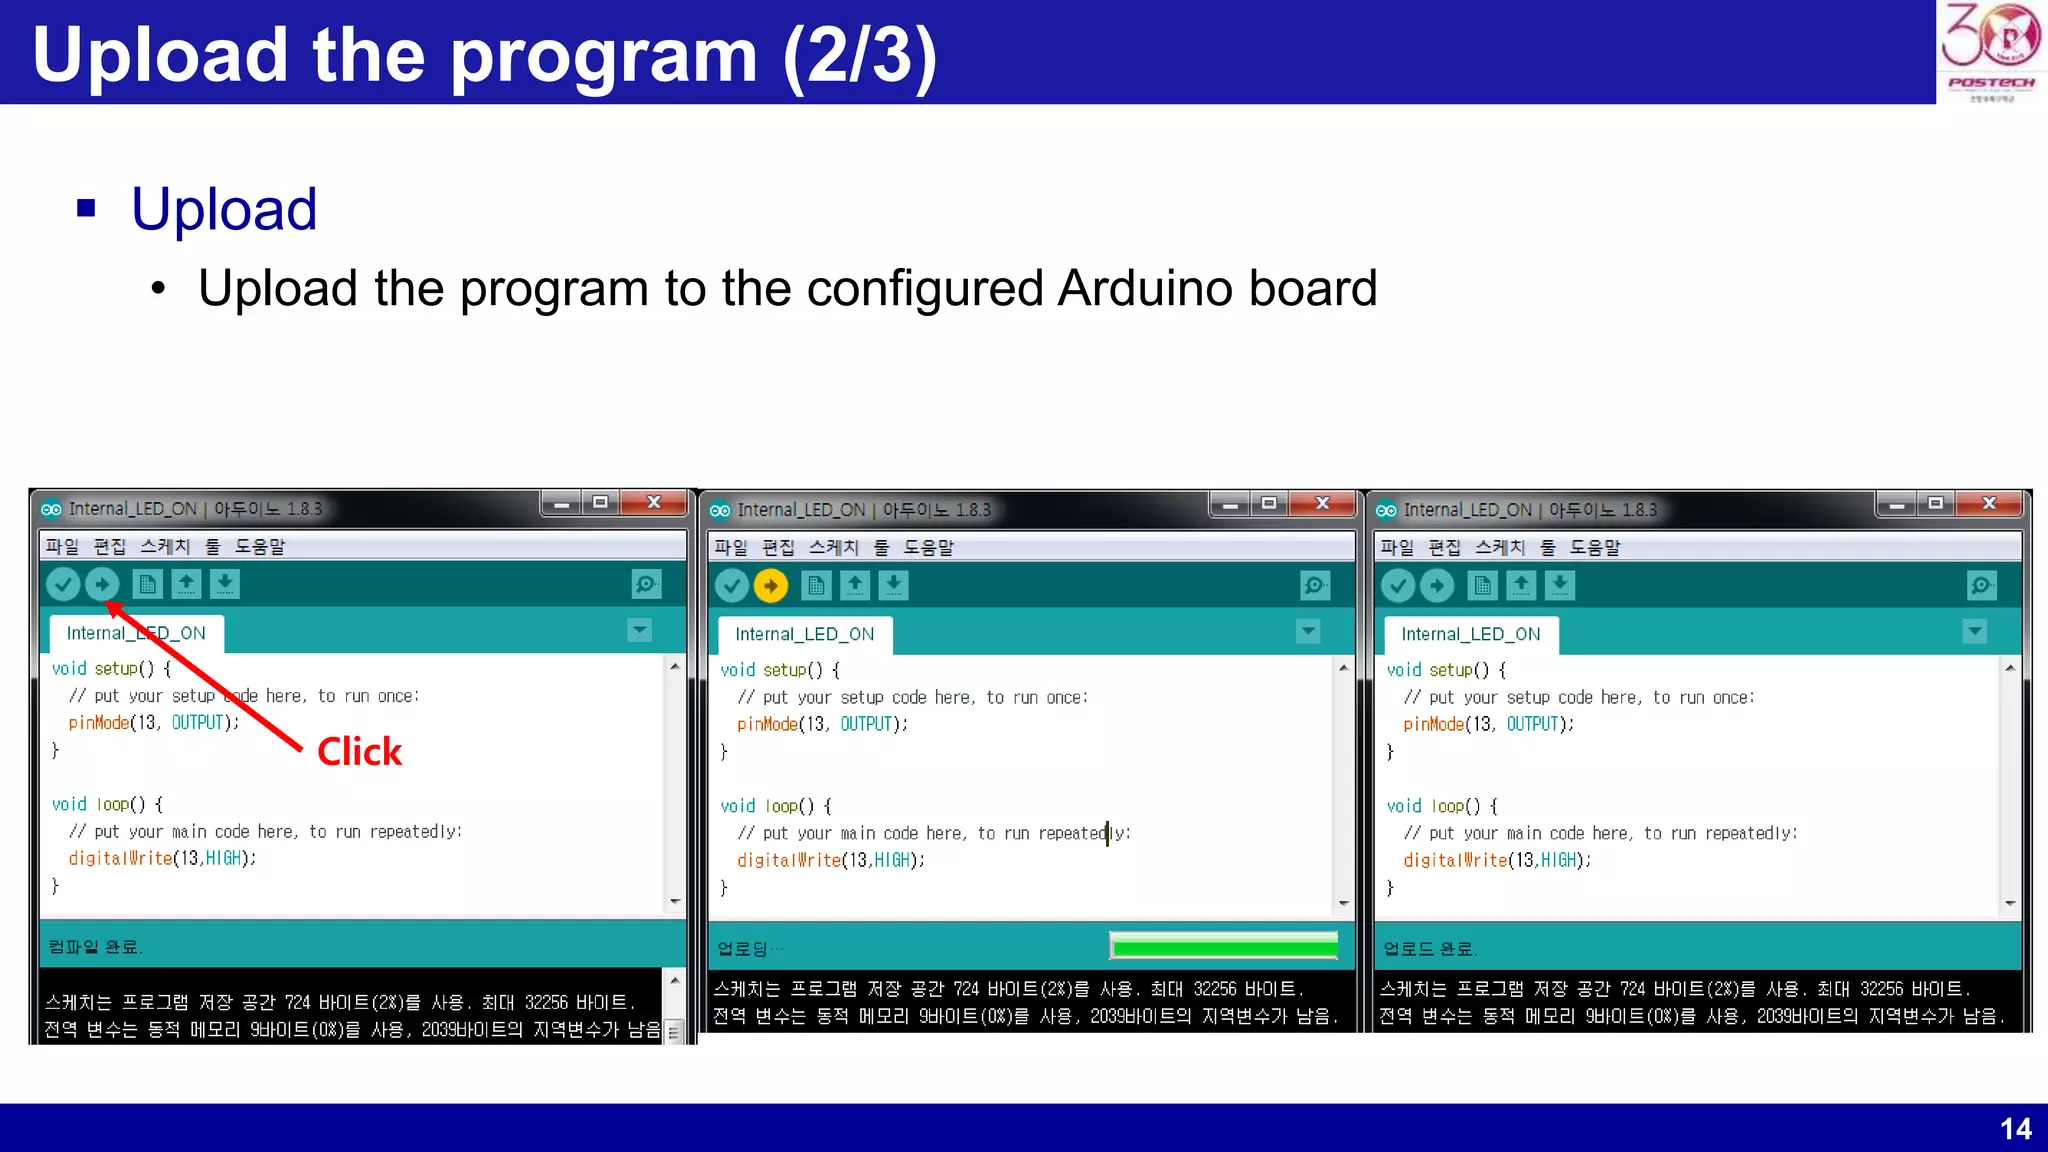
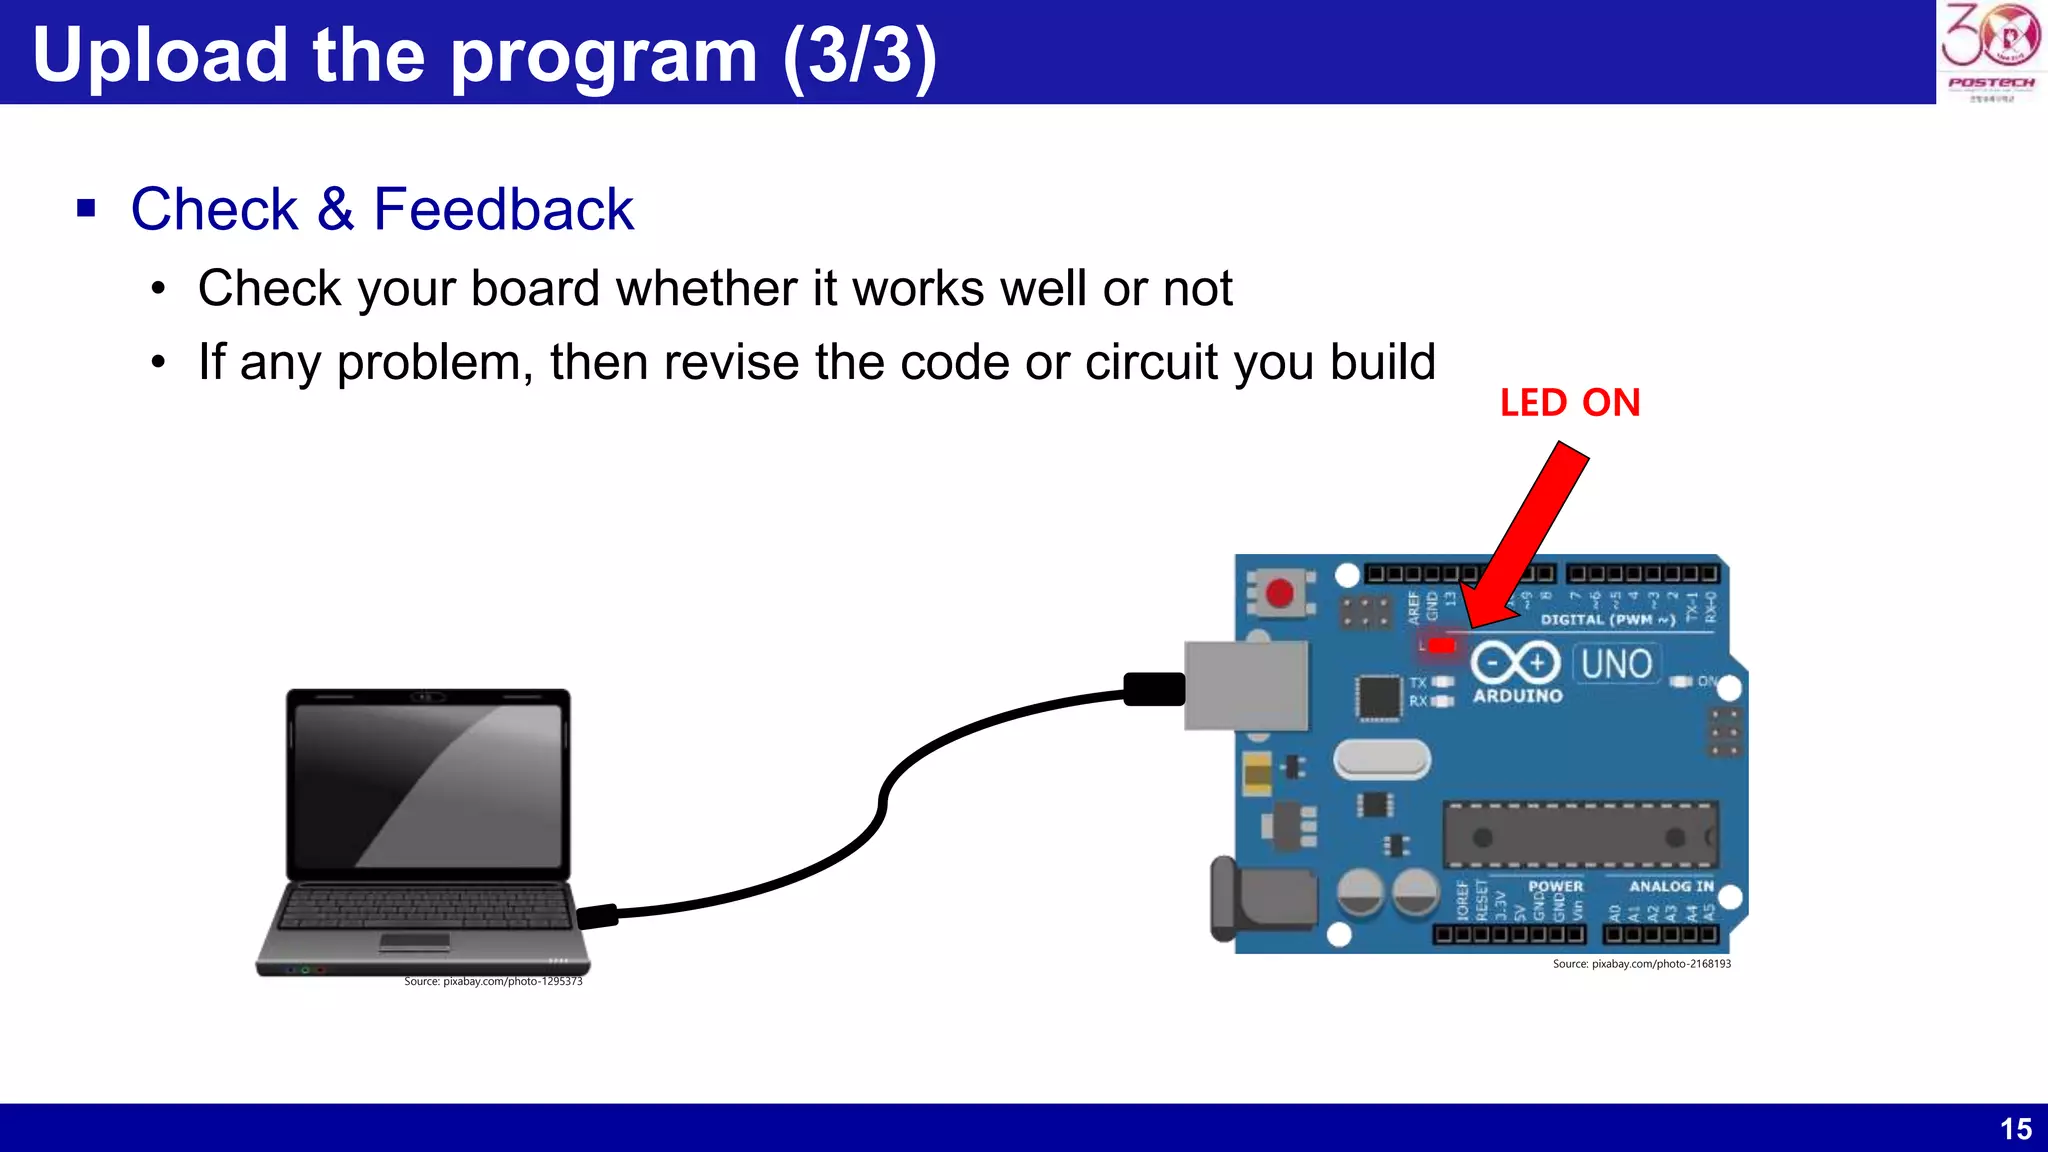
2. 2
What we will need
Options
Before We Start …
PC Arduino UnoUSB Cable
Sensors
Source: commons.wikimedia.org/wiki/File:LDR-gs-2012.jpg
Source: pixabay.com/photo-1295373
Source: pixabay.com/photo-2168193
LEDs
Source: pixabay.com/photo-26354
Jumper Cables
Source: pixabay.com/photo-1991608
Breadboard
http://en.Wikipedia.org
3. 3
1. Download & Install the open-source Arduino software (IDE)
2. Connect the board to the PC
3. Launch the Arduino IDE
4. Select your board & serial port
5. Write and compile the code
6. Upload the program
Step-by-Step
4. 4
Download the Arduino software (IDE)
• https://www.arduino.cc/en/Main/Software
Download the IDE
6. 6
Install the Arduino software (IDE)
Install the IDE (2/2)
Installing The Arduino IDE is completed!
7. 7
Connect the Arduino Uno to your PC via USB cable
• USB cable
− USB B type Arduino Uno
− USB A type PC
Connect the board to the PC
USB Cable
PC Arduino Uno
USB A type
USB B type
Source: pixabay.com/photo-1295373
8. 8
Arduino Software (IDE)
Launch the Arduino IDE (1/3)
Name of Sketch
Verify: Compile Sketch
Upload: Upload the
program to the board
Code Area
Messages / Errors
New Open Save
Serial Monitor
A program written using Arduino
IDE software is called sketch.
9. 9
Select your board
• Tool Board: “Arduino/Genuino Uno” Arduino/Genuino Uno
Launch the Arduino IDE (2/3)
10. 10
Select your serial port
• Check the port in advance
− (Windows) Device manager
• Tool Port
Launch the Arduino IDE (3/3)
11. 11
Every sketch must have two basic functions
• setup( ) { }
− Called when a sketch starts
− Only run once
− Ready to work
• loop( ) { }
− Called after creating a setup() function
− Run repeatedly
− Actively control the board
Write codes (1/2)
12. 12
Programming Language Reference
• Arduino Reference is installed locally
− Also available at http://Arduino.cc
• Help Reference
Write codes (2/2)
13. 13
Compile
• Compile the sketch after writing the code
• Checks your code for errors
Upload the program (1/3)
Click
14. 14
Upload the program (2/3)
Upload
• Upload the program to the configured Arduino board
Click
15. 15
Check & Feedback
• Check your board whether it works well or not
• If any problem, then revise the code or circuit you build
Upload the program (3/3)
LED ON
Source: pixabay.com/photo-1295373
Source: pixabay.com/photo-2168193
16. 16
Arduino board setup
Installing IDE
How to write code, compile, upload and execute
Summary
18. 18
Getting Started with Arduino
• https://www.youtube.com/watch?v=h8UTmDQZ09c
Arduino Tutorial #1 - Getting Started and Connected!
• https://www.youtube.com/watch?v=kLd_JyvKV4Y
You can learn Arduino in 15 minutes
• https://www.youtube.com/watch?v=nL34zDTPkcs
References