An Arduino is an open-source electronics prototyping platform based around flexible, easy-to-use hardware and software. It contains a microchip which can be programmed to sense inputs from sensors or buttons and control outputs like LEDs or motors. It is used to create interactive objects or environments. The Arduino software runs on Windows, Mac, and Linux and is used to write programs, or "sketches", that are then uploaded to the Arduino board. Basic circuits and programming concepts are explained through examples of blinking an LED and controlling it with a potentiometer or switch.
This slide tells about how we operate the electrical instruments using the sound energy, as example given as a notice board operated using the clap sound.
It is a minor project on how a dook knock alarm works.Is shows how one form of energy is transferred to another form of energy which follows the law of conservation of energy
To design and analyze the sound detector circuit.
Objective: - To analyze the sound detection using quad op-amp and getting the output across the led.
The LM324series consists of four independent High-gain, internally frequency-compensated operational amplifiers. Designed specifically to operate from a single power supply over aWide range of voltages
International Journal of Engineering Research and DevelopmentIJERD Editor
Electrical, Electronics and Computer Engineering,
Information Engineering and Technology,
Mechanical, Industrial and Manufacturing Engineering,
Automation and Mechatronics Engineering,
Material and Chemical Engineering,
Civil and Architecture Engineering,
Biotechnology and Bio Engineering,
Environmental Engineering,
Petroleum and Mining Engineering,
Marine and Agriculture engineering,
Aerospace Engineering.
Arduino Workshop Day 1 Slides
Basics of Arduino - Introduction, Basics of Circuits, Signals & Electronics, LED Interfacing, Switch, Buzzer, LCD & Bluetooth Communication.
It is a type of bell . Bell in the sense which can give the deaf a little sense that someone is in the door sight. By using this Door Bell the deaf can have a sense that some is actually looking for the Person(Deaf) who is inside the room....
final Year Projects, Final Year Projects in Chennai, Software Projects, Embedded Projects, Microcontrollers Projects, DSP Projects, VLSI Projects, Matlab Projects, Java Projects, .NET Projects, IEEE Projects, IEEE 2009 Projects, IEEE 2009 Projects, Software, IEEE 2009 Projects, Embedded, Software IEEE 2009 Projects, Embedded IEEE 2009 Projects, Final Year Project Titles, Final Year Project Reports, Final Year Project Review, Robotics Projects, Mechanical Projects, Electrical Projects, Power Electronics Projects, Power System Projects, Model Projects, Java Projects, J2EE Projects, Engineering Projects, Student Projects, Engineering College Projects, MCA Projects, BE Projects, BTech Projects, ME Projects, MTech Projects, Wireless Networks Projects, Network Security Projects, Networking Projects, final year projects, ieee projects, student projects, college projects, ieee projects in chennai, java projects, software ieee projects, embedded ieee projects, "ieee2009projects", "final year projects", "ieee projects", "Engineering Projects", "Final Year Projects in Chennai", "Final year Projects at Chennai", Java Projects, ASP.NET Projects, VB.NET Projects, C# Projects, Visual C++ Projects, Matlab Projects, NS2 Projects, C Projects, Microcontroller Projects, ATMEL Projects, PIC Projects, ARM Projects, DSP Projects, VLSI Projects, FPGA Projects, CPLD Projects, Power Electronics Projects, Electrical Projects, Robotics Projects, Solor Projects, MEMS Projects, J2EE Projects, J2ME Projects, AJAX Projects, Structs Projects, EJB Projects, Real Time Projects, Live Projects, Student Projects, Engineering Projects, MCA Projects, MBA Projects, College Projects, BE Projects, BTech Projects, ME Projects, MTech Projects, M.Sc Projects, Final Year Java Projects, Final Year ASP.NET Projects, Final Year VB.NET Projects, Final Year C# Projects, Final Year Visual C++ Projects, Final Year Matlab Projects, Final Year NS2 Projects, Final Year C Projects, Final Year Microcontroller Projects, Final Year ATMEL Projects, Final Year PIC Projects, Final Year ARM Projects, Final Year DSP Projects, Final Year VLSI Projects, Final Year FPGA Projects, Final Year CPLD Projects, Final Year Power Electronics Projects, Final Year Electrical Projects, Final Year Robotics Projects, Final Year Solor Projects, Final Year MEMS Projects, Final Year J2EE Projects, Final Year J2ME Projects, Final Year AJAX Projects, Final Year Structs Projects, Final Year EJB Projects, Final Year Real Time Projects, Final Year Live Projects, Final Year Student Projects, Final Year Engineering Projects, Final Year MCA Projects, Final Year MBA Projects, Final Year College Projects, Final Year BE Projects, Final Year BTech Projects, Final Year ME Projects, Final Year MTech Projects, Final Year M.Sc Projects, IEEE Java Projects, ASP.NET Projects, VB.NET Projects, C# Projects, Visual C++ Projects, Matlab Projects, NS2 Projects, C Projects, Microcontroller Projects, ATMEL Projects, PIC Projects, ARM Projects, DSP Projects, VLSI Projects, FPGA Projects, CPLD Projects, Power Electronics Projects, Electrical Projects, Robotics Projects, Solor Projects, MEMS Projects, J2EE Projects, J2ME Projects, AJAX Projects, Structs Projects, EJB Projects, Real Time Projects, Live Projects, Student Projects, Engineering Projects, MCA Projects, MBA Projects, College Projects, BE Projects, BTech Projects, ME Projects, MTech Projects, M.Sc Projects, IEEE 2009 Java Projects, IEEE 2009 ASP.NET Projects, IEEE 2009 VB.NET Projects, IEEE 2009 C# Projects, IEEE 2009 Visual C++ Projects, IEEE 2009 Matlab Projects, IEEE 2009 NS2 Projects, IEEE 2009 C Projects, IEEE 2009 Microcontroller Projects, IEEE 2009 ATMEL Projects, IEEE 2009 PIC Projects, IEEE 2009 ARM Projects, IEEE 2009 DSP Projects, IEEE 2009 VLSI Projects, IEEE 2009 FPGA Projects, IEEE 2009 CPLD Projects, IEEE 2009 Power Electronics Projects, IEEE 2009 Electrical Projects, IEEE 2009 Robotics Projects, IEEE 2009 Solor Projects, IEEE 2009 MEMS Projects, IEEE 2009 J2EE P
AUTOMATIC DOORBELL WITH OBJECT DETECTION USING ULTRA SONIC TRANSMITTER AND RE...AKSHAT GANGWAR
We all have a doorbell at our homes. When a visitor comes to our house, he searches for the doorbell switch and then rings it to let us know his presence. If the who came to our house cannot find the doorbell or else if the person is so short that he cannot reach the doorbell, what can be done? How will it be if we use an automatic doorbell which rings as soon as a person arrives at our place? There are no more hassles. The person who comes to our house need not search for the doorbell and press it any more. If we install this automatic doorbell using object detection circuit, the circuit will automatically sense the presence of the person and it rings the doorbell.
This circuit operates using a pair of ultrasonic transmitter and receiver modules which are used to detect the person and then if the person is detected, the doorbell is automatically turned ON when the person is in-front of the door.
The ultrasonic transmitter operates at a frequency of about 40 Kilo-Hertz. That means it continuously transmits the ultrasonic waves of about 40KHz. The power supply should be moderate such that the range of the transmitter is only about one or two meters. If the transmitting power is less than one meter, then there is a chance that the person who is one meter away is not detected. Also, if the range is set to be very large, then it may lead to false triggering, meaning that, the objects far away from our door are considered as the visitors and the alarm rings. This can be a nuisance for us if the alarm rings for every object or person far away. So, to avoid both the problems, the transmitting power is kept to an optimum level.
The ultrasonic receiver module receives the power at the frequency same as that of the transmitter’s so that noise will be eliminated and we get less false triggering. The sensitivity of the receiver can be tuned by using the 500K-ohm variable resistor arranged as a pot in the circuit. By tuning this properly, we can achieve the desired results. The output of our circuit is given to a buzzer circuit which acts as a doorbell in our case. The receiver in this circuit uses IC LM324 which is internally has four op-amps. Out of the four op-amps, we are using only four of them and leaving the other one unused as it is not much required in our case. The three op-amps are used in cascaded arrangement to provide high gain as well as noise free output.
Presentation on Electronic Eye controlled Security SystemSagar Magarde
Electronic eye is also called magic eye. As the automation is emerging technology these days.
Just imagine a door bell that automatically rings when a person visit your home. This also provides security when any person is trying to enter into your home without your permission.
Electronic eye is the electronic device that continuously watches if anyone is visiting your home.
It includes it's symbolic representations, history, types and it's working, applications of Voltmeter.
Can be used for presentations and as a reference too.
Vskills certified it support professional reading materialVskills
Vskills IT Support Professional Sample reading material covers the following concepts.
1. Electronics basics
1.1 Electricity versus Electronics
1.2 Electricity Basics
1.3 Analog electronics
1.4 Digital electronics
Get complete e-book
http://www.vskills.in/certification/information-technology/certified-it-support-professional
2017 Some basic conceptions and misconceptions in electrical engineeringG Karthik Raja
In this presentation, I discuss some basic concepts in electrical engineering that are not well known to students like the concept of Live, Neutral and Earth wiring; Active, Reactive and Apparent power and Foundation of 3-phase system. I have brought in a new perspective to understand these concepts. I also discuss some misconceptions that students face and resolve it the right way.
2017 Some basic conceptions and misconceptions in electrical engineering
Arduino comic-latest
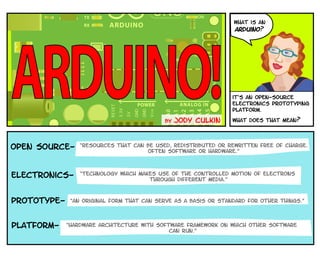
1. what is an
arduino?
it’s an open‐source
electronics prototyping
platform.
by Jody Culkin what does that mean?
open source‐ “resources that can be used, redistributed or rewritten free of charge.
often software or hardware.”
electronics‐ “technology which makes use of the controlled motion of electrons
through different media.”
Prototype‐ “an original Form that can serve as a basis or standard for other things.”
Platform‐ “hardware architecture with software framework on which other software
Can run.”
2. photocell
microchip led
breadboard
An Arduino contains a microchip, which is a very small computer that you can program. You can
attach sensors to it that can measure conditions (like how much light there is in the room). It
can control how other objects react to those conditions (room gets dark, led turns on).
a mouse is a common
input device
ON OFF for a desktop computer,
a monitor is a common
output device.
Microcontrollers use inputs and outputs Like any
computer. Inputs capture information From the user
Or it can respond to something as or the environment while Outputs do something with
simple as the press of a switch. the information that has been captured.
3. force
sensitive DC Motor
momentary switch resisitor
any object we want to turn on and off and
A switch or A sensor could be An input control could be An output. It could be a
into the Arduino. motor or even a computer.
whats the Digital information Analog information
difference between is discrete and is characterized
digital and analog finite. all by its continuous
inputs and information is nature. it can have an
outputs? described in two infinite number
states, 1 or 0, of possible
on or off. values.
inputs and outputs can be digital or analog.
Digital information is binary‐ it is either true a switch is a digital input, a sensor is an
or false. Analog information is continuous, it analog input. the range of an analog sensor
can hold a range of values. is limited by its conversion to digital data.
4. voltage?
current?
resistance?
Ohm’s law? Current (I)
Resistance (R)
Voltage (V) is the amount
is a material's
is a measure of flow
opposition to
of electrical through a
the flow of
potential. conductive
electric
It is measured material.
current.
in volts. It is measured
It is measured
in amperes
in ohms.
Before we plug in the Arduino, or Amps.
we will review a few terms
and principles that have to
do with how electricity (and
therefore electronics) works. Electricity is the flow of energy through a conductive material.
the speed of flow
is determined by voltage
resistance increases or
decreases flow
amount of flow moving through
pipes is current
the water analogy is commonly used to explain these terms. Here’s one model.
5. OHM’s law
current = voltage/resistance
(i = v/r)
or
Resistance = voltage/current
(r = v/i)
or
Voltage = Resistance * current
(v = r*i)
There is a relationship between voltage, for example, Increase
current and resistance, discovered by Georg the resistance, less or increase the
Ohm, a German physicist. flow. potential, more flow.
Lamp
-
Switch DC power source
+
now let’s look at a simple circuit. every This is a schematic of the same circuit (it
circuit is a closed loop that has an energy represents the circuit using symbols for the
source (battery) and a load (lamp). The load electronic components). When the switch is
converts the elecrical energy of the battery closed, current flows from the power
and uses it up. this one has a switch too. source and lights the lamp.
6. Now that we’ve reviewed some
I I basics of how electricity
works, Let’s get back t0
the arduino.
Direct Current Alternating Current
(DC) (AC)
I I
There are two Common types of circuits,
Direct Current and Alternating Current.
In a Dc circuit, the current always flows in
one direction. In AC, the current flows in
opposite directions in regular cycles. We will The arduino will need power to run. we will
only talk about Dc circuits here. need to attach it to a computer to program it.
download here:
http://arduino.cc/en/Main/Software
you’ll have to download and install software
to program the arduino. it is available from
Attaching the arduino to a computer with the URL above Free of charge. the ARduino
a usb cable will supply The 5 volts of power software runs on the Mac os X, Windows and
we need and allow us to start programming. linux Platforms.
7. for instructions on how to install
arduino software on a mac:
http://www.arduino.cc/en/Guide/MacOSX
For Instructions on how to install
on Windows:
http://www.arduino.cc/en/Guide/Windows
For Instructions on how to install
on Linux:
http://www.arduino.cc/playground/Learning/Linux
When you have installed the software,
go to the URLS above for detailed instructions on Connect the arduino. An led marked ON
installing the software on these platforms. should light up on the board.
Next select the serial port.
(Tools > serial port) On a mac it will be
Launch the arduino software. in the tools menu,
something like /dev/tty.usbmodem. On a
select the board you are using (tools > board).
windows machine, it will be com3 or something
for example, Arduino Uno. like that.
8. what’s an
Integrated
Development
environment?
When you downloaded the
Arduino software, you
downloaded an IDE. it combines
a text editor with a compiler The Arduino IDE allows you to write Sketches, or programs
and other features to help and upload them to the Arduino board. open the blink example
programmers develop software. in the file menu. File > Examples > 1.Basics > Blink.
int ledPin = 13;
void setup() {
Upload button
pinMode(ledPin, OUTPUT);
}
void loop() {
Serial.println(analogRead(A0);
To upload the sketch to the arduino board,
}
click the upload button on the strip of
buttons at the top of the window. some
messages will appear in the bottom of the
window, finally Done Uploading. the led at pin 13 on the arduino starts blinking.
9. void setup() {
// initialize the digital pin as an output.
// Pin 13 has LED connected on most Arduino boards:
setup: happens one time when
pinMode(13, OUTPUT);
} program starts to run
void loop() {
digitalWrite(13, HIGH); // set the LED on
delay(1000); // wait for a second
digitalWrite(13, LOW); // set the LED off Loop: repeats over and
delay(1000); // wait for a second
over again
}
a sketch, like a program written in any
language, is a Set of instructions for the
These Are both blocks of code called
computer. If we look closely at the Blink
sketch, we see there are 2 major parts, functions that every sketch will have. They
setup and loop. are blocked out by curly Braces { }.
http://arduino.cc/en/Reference/HomePage void setup() { //DeClares block of code
pinMode(13, OUTPUT); //sets pin 13 to output
} //End block of code
void loop() { //declares block of code
digitalWrite(13, HIGH); //sets pin 13 high
delay(1000); //pause 1 second
digitalWrite(13, LOW); //sets pin 13 low
delay(1000); //pause 1 second
} //End block of code
check out the arduino website for the
arduino reference guide and many other For now, let’s look at this simple script line
resources to learn the language. by line & see what each line does.
10. holes connected
horizontally
holes connected
vertically
This breadboard has 2 rows of holes running
down the left and right side, and 5 rows of
How do we control objects that are not on holes on either side of a middle indentation.
the arduino board? we will connect the arduino the side rows are connected vertically,
to a solderless breadboard. This will allow each Row of 5 holes in the middle are
us to quickly set up and test circuits. connected horizontally.
anode
(connects
to power)
cathode
(connects
to ground)
we will connect power and ground from the
arduino board to the vertically connected When current flows through a led (Light
strips on the left and right with 22 gauge emitting Diode) in the right direction, it
wire. other components can be attached to lights up. we’ll attach an LEd to the
the holes in the middle and to power and breadboard, then to the arduino so we can
ground as needed. control it with code.
11. void setup() {
pinMode(2, OUTPUT);
}
void loop() {
digitalWrite(2, HIGH);
delay(500);
digitalWrite(2, LOW);
delay(500);
}
in setup, we set pin 2 to be an
output. in loop, first we set pin 2
high which lights the led. Delay
the anode is connected to pin 2 on the arduino through pauses 500 milliseconds, or half a
a 220 ohm resistor. The cathode is connected to second. when pin 2 is set low, the
ground. pins 2 through 13 can be configured as digital led goes off, we pause another half
inputs or outputs. click New button to start a sketch. second.
verify button
upload button
click verify on the menu to check your code. if the led blinks on for half a second, then
there aren’t any errors, click upload to put blinks off for half a second, over and over
your program on the arduino. again.
12. Connect one end of a momentary switch to pin 4 on the
Next we will add a switch, a digital Arduino, with a 10k resistor connected to ground
input, so we can turn the LED off attached to the same end. Attach the other end to
and on. power. We will leave the LED attached to the same pin.
void setup() {
pinMode(2, OUTPUT);
pinMode(4, INPUT);
}
void loop() {
if(digitalRead(4)){
digitalWrite(2, HIGH);
}else{
digitalWrite(2, LOW);
}
}
Next we’ll write the code. In setup, we
declare pin 2 an output and pin 4 an input. in
loop, we use an if statement, if we read pin 4
as high, we set the led pin to high, otherwise
The LED lights when the switch is held down.
we set the led pin to low, turning it off.
13. a potentiometer, or pot, is a
variable resistor. the amount
of resistance changes as it
is turned, increasing or
decreasing depending on
which direction it is
turned.
Attach the middle pin on the potentiometer to Analog pin
Now we will set up an analog input. A0. attach one end of the pot to power, the other to
We’ll use a potentiometer. ground.
Serial Monitor
void setup() {
Serial.begin(9600);
}
void loop() {
Serial.println(analogRead(A0));
} click to open
serial window
First we will look at the range of values we
get by turning the pot using the Serial
monitor. in our code, we initialize the serial after you have uploaded the script to the
object in setup, setting a baud rate of 9600. arduino, click the Serial Monitor button in
In loop, We read the value from analog pin a0 order to see the values as you turn the pot.
and print it to the serial object using the A window will open, and you will see values
printLn function, ranging from 0 to 1024 as the pot is turned.
14. 0% Duty Cycle - analogWrite(0)
5V
0V
50% Duty Cycle - analogWrite(127)
5V
0V
100% Duty Cycle - analogWrite(255)
5V
0V
We’ll use pulse width modulation
(PWM). This is a method of simulating
an analog value by manipulating the
voltage, turning it on and off at
Let’s use the changing values we receive from the pot different rates, or duty cycles. you
as a dimmer to control an LED. attach the anode through can use pwm with pins 3, 5, 6, 9, 10,
a resistor to the board at pin 3, Cathode to ground. and 11.
int sensorValue = 0;
void setup() {
pinMode(3,OUTPUT);
}
void loop() {
sensorValue = analogRead(A0);
analogWrite(3, sensorValue/4);
}
First we create a variable to store the value
of the pot. In setup we make pin 3 an output.
In loop, we store the value we have read from
pin a0 in our variable. Then we write the value
to pin 3, our led pin. we have to divide the The brightness of the LED changes, ranging
variable by 4, so we will have a range of values from completely off to very bright as you
from 0 to 255, or a byte. turn the pot.
15. That’s it!
This is a very brief Links
intro. in the next
Panels, there are Software
links and other Software Download
resources. check http://www.arduino.cc/en/Main/Software
them all out, Language Reference
you’ll find lots http://arduino.cc/en/Reference/HomePage
more!
Supplies
Sparkfun Electronics
http://www.sparkfun.com/
Adafruit Industries
http://adafruit.com/
Maker Shed
http://www.makershed.com/
Jameco Electronics
http://www.jameco.com/
Tutorials
all text and drawings by Jody Culkin
Arduino site Tutorials
for more, check out jodyculkin.com
http://www.arduino.cc/en/Tutorial/HomePage
Lady Ada
Special Thanks to Tom Igoe, Marianne petit, Calvin
http://www.ladyada.net/learn/arduino/ Reid, The faculty and staff of the interactive
Instructables telecommunications program at nyu, particularly
http://www.instructables.com/tag/type‐id/ Dan o’sullivan, Danny rozin and Red burns. thanks
to Cindy karasek, chris Stein, sarah teitler, kathy
category‐technology/channel‐arduino/
goncharov & zannah marsh.
books many, many thanks to the Arduino team for bringing
Getting Started with Arduino by Massimo Banzi us this robust and flexible open source platform.
Making Things Talk: Using Sensors, Networks, and
and thanks to the lively, active and ever growing
Arduino to see, hear, and feel your world by arduino community.
Tom Igoe
Physical Computing: Sensing and Controlling Introduction to Arduino by Jody Culkin
the Physical World with Computers by Dan is licensed under a Creative Commons
Attribution‐NonCommercial‐ShareAlike 3.0
O'Sullivan & Tom Igoe Unported License.
Arduino Cookbook by Michael Margolis