This document is a draft chapter from 'Introduction to Computer Science with Java' focused on Java graphics programming, particularly using classes from the java.awt package. It outlines how to create and manipulate two-dimensional graphics, detailing the use of graphics classes, drawing methods, and coordinate systems. The chapter is designed for students in a computer science course and includes programming examples, such as drawing basic shapes and creating a histogram.


![*/
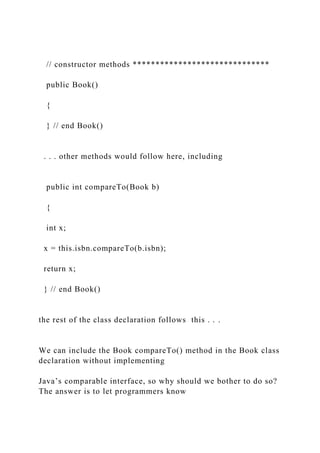
package threerectangles;
import java.awt.*;
import javax.swing.*;
public class ThreeRectangles {
public static void main(String[] args)
{
// create a MyCanvas object
1
The java graphics tutorials are available online at:
http://docs.oracle.com/javase/tutorial/2d/basic2d/index.html
They are
useful, but may be difficult to use for beginning programmers.
http://docs.oracle.com/javase/tutorial/2d/basic2d/index.html
CSCI 111 Chapter 11 Graphics pg. 5
MyCanvas canvas1 = new MyCanvas();](https://image.slidesharecdn.com/anintroductiontocomputersciencewithjava-221014053829-d2f2119a/85/An-Introduction-to-Computer-Science-with-Java-docx-9-320.jpg)


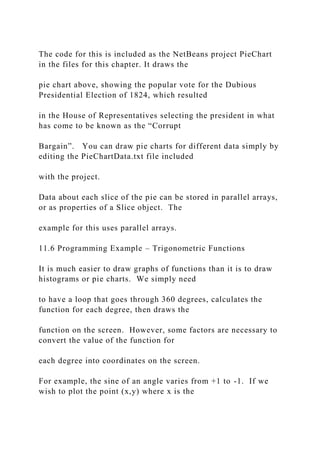
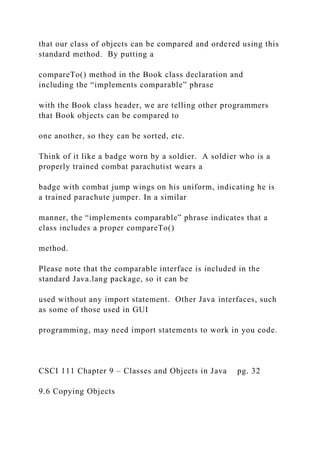
![counterclockwise around the oval for 360 degrees, as shown in
the diagram below.
fillArc(int x, int y, int width, int height, int startAngle, int
arcAngle) draws a filled segment of an oval
defined by the specified arc.
The code below draws the arcs shown, each drawn with
different parameters.
CSCI 111 Chapter 11 Graphics pg. 10
Drawing Polygons
drawPolygon(int[] xPoints, int[] yPoints, int n) draws a polygon
with n vertex points defined by an array
of x coordinates, and an array y coordinates.
fillPolygon(int[] xPoints, int[] yPoints, int nPoints) draws a
filled polygon.
Drawing Text
drawString(String str, int x, int y) draws text specified by given
String, starting with the baseline of the
leftmost character at point (x,y).](https://image.slidesharecdn.com/anintroductiontocomputersciencewithjava-221014053829-d2f2119a/85/An-Introduction-to-Computer-Science-with-Java-docx-18-320.jpg)


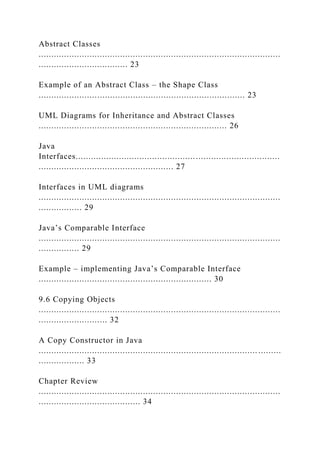
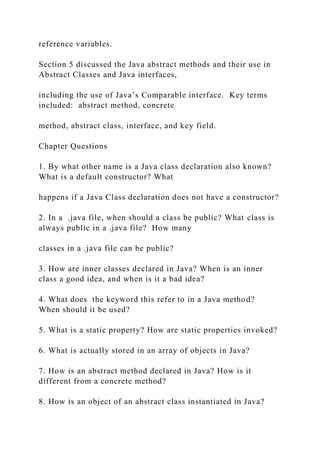
![In addition to drawing the pie chart, we will draw a legend that
has a square with the same color as the
slice, along with the label and value for that color.
The following algorithm shows how to do this:
1. read the data file:
a. first, read the title
b. then in a loop,
c. Load the labels and values for each slice into arrays. We will
put the labels in the array
sliceLabel[]. We will put the values in the array sliceValue[].
Alternatively, this could be
done by letting the user enter the data.
d. As we load the values, we will also calculate the sum of the
values.
2. We will also need a color for each slice. We will call the
array sliceColor[].We can hardcode these
colors into our program. Color[] sliceColor = { Color.RED,
Color.BLUE, Color.GREEN,
Color.MAGENTA, Color. PINK, Color. GRAY, Color. CYAN,
Color. ORANGE} This array of colors can
handle up to 8 slices in the pie chart. Alternatively, we could
define our own Color for any slice,](https://image.slidesharecdn.com/anintroductiontocomputersciencewithjava-221014053829-d2f2119a/85/An-Introduction-to-Computer-Science-with-Java-docx-25-320.jpg)
![by using a Color constructor with RGB values, such as new
Color(128,0, 255).
3. Draw the Title for the chart.
4. Draw the body of the chart. We need to keep track of where
each arc starts and the size of the
arc in degrees. We will initialize the starting angle to be 0
degrees. The total pie chart will be
CSCI 111 Chapter 11 Graphics pg. 15
360 degrees. The size of the arc (in degrees) corresponding to
each value will be
(sliceValue [i] * 360/sum). In a for loop for the number of
slices:
a. Calculate the size of the arc: (size = (a[i] * 360/sum) *
360)
b. Set the color for arc i to be sliceColor[i].
c. Draw the arc: fillArc(x, y, width, height, start, size)
d. Draw the square in the legend for this slice.
e. Add the label and value next to the square.
f. Calculate the value of start for the next slice: start = start +
size.
When the loop is finished, the chart will be done.](https://image.slidesharecdn.com/anintroductiontocomputersciencewithjava-221014053829-d2f2119a/85/An-Introduction-to-Computer-Science-with-Java-docx-26-320.jpg)


![like those found at the beginning of a
Java textbook or a Java language tutorial, we need both properly
defined classes of objects and a public
class with a main() method that allows us to execute our code.
Here is an example of an executable class that uses the book
class to create an instance of a book
object. It is the in the file BookProject.java from a project
named BookProject.
/* BookProject.java
* This file contains the excutable class for a project
* demonstrating the use of a Book object
* last edited November 20, 2019 by C. Herbert
* The file declaring the Book class must be visible to this Main
class.
*/
package BookProject;
public class Main {
public static void main(String[] args) {](https://image.slidesharecdn.com/anintroductiontocomputersciencewithjava-221014053829-d2f2119a/85/An-Introduction-to-Computer-Science-with-Java-docx-52-320.jpg)


![phase 2- create the classes that will define the objects to be
used in the project. Each class will be in its
ow file.
phase 3- create the code in the executable class that will use the
objects in the project.
The rest of this lab will walk you through this process, step by
step.
STEP 1.
Start IntelliJ IDEA, then from the opening menu, select
Create New Project.
A New Project window will open.
STEP 2.
On the new Project screen that appears,
make sure Java is selected to start a new
Java project, then click the [Next] button.
The New Project window will change to
show ask you about a project template.](https://image.slidesharecdn.com/anintroductiontocomputersciencewithjava-221014053829-d2f2119a/85/An-Introduction-to-Computer-Science-with-Java-docx-58-320.jpg)
![CSCI 111 Chapter 9 – Classes and Objects in Java pg. 10
STEP 3.
Click the checkbox to create project from
template, select the Command Line App template,
then click the [Next] button to continue.
The New Project window will change to ask you about
the name and location of your project files.
STEP 4.
The project name will be BookProject.
Fill in the Project name field with "BookProject", make
sure the Base package is also "BookProject", and
make sure the Project location is set to be what you](https://image.slidesharecdn.com/anintroductiontocomputersciencewithjava-221014053829-d2f2119a/85/An-Introduction-to-Computer-Science-with-Java-docx-59-320.jpg)
![want it to be, as you would with any IntelliJ project.
It is usually best to make the package name and the
name of the project to be the same.
This example shows the desktop as the location.
Choosing a location fpr the project is up to you. You
may want to work on the desktop then copy the
project folder to a nother location for long term
storage.
When the data in the three fields is what you want it
to be, then click the [Finish] button to create your
project.
Now you should be able to see the main() method in the Main
class of your Java project.
CSCI 111 Chapter 9 – Classes and Objects in Java pg. 11
STEP 5.
Before going any further, add proper documentation to your
Main.java file, similar to the following:](https://image.slidesharecdn.com/anintroductiontocomputersciencewithjava-221014053829-d2f2119a/85/An-Introduction-to-Computer-Science-with-Java-docx-60-320.jpg)


![the square[] array.
/* Monopoly.java
* CSCI 111 Fall 2019
* last edited November 22, 2019 by C. Herbert
*
* This file contains the executable class Monopoly
* for a simplified version of a Monopoly game.
* It requires access to the BoardSquare class to work properly.
*
* The software creates an array for 40 BoardSquares and loads
data
* into the array from a simple text data file
*
*It also has code to test the program by printing the data from
the array
*
* This is for teaching purposes only.
* Monopoly and the names and images used in Monopoly are
* registered trademarks of Parker Brothers, Hasbro, and others.](https://image.slidesharecdn.com/anintroductiontocomputersciencewithjava-221014053829-d2f2119a/85/An-Introduction-to-Computer-Science-with-Java-docx-83-320.jpg)
![*/
package monopoly;
import java.util.*;
CSCI 111 Chapter 9 – Classes and Objects in Java pg. 21
public class Monopoly {
public static void main(String[] args) throws Exception {
// create an array for the 40 squares on a Monopoly board
BoardSquare[] square = new BoardSquare[40]; // array of
40 monopoly squares
// call the method to load the array
loadArray(square);
// test the code by printing the data for each square
printArray(square);](https://image.slidesharecdn.com/anintroductiontocomputersciencewithjava-221014053829-d2f2119a/85/An-Introduction-to-Computer-Science-with-Java-docx-84-320.jpg)
![} // end main()
//***************************************************
********************
// method to load the BoardSquare array from a data file
public static void loadArray(BoardSquare[] sq) throws
Exception {
// declare temporary variables to hold BoardSquare
properties read from a file
// each variable corresponds by name to a property of a
BoardSquare object
String inName;
String inType;
int inPrice;
int inRent;
String inColor;
// Create a File class object linked to the name of the file
to be read
java.io.File squareFile = new java.io.File("squares.txt");](https://image.slidesharecdn.com/anintroductiontocomputersciencewithjava-221014053829-d2f2119a/85/An-Introduction-to-Computer-Science-with-Java-docx-85-320.jpg)
![// Create a Scanner named infile to read the input stream
from the file
Scanner infile = new Scanner(squareFile);
/* This loop reads data into the array of BoardSquares.
* Each item of data is a separate line in the file.
* There are 40 sets of data for the 40 squares.
*/
for (int i = 0; i < 40; i++) {
// read data from the file into temporary variables
// read Strings directly; parse integers
inName = infile.nextLine();
inType = infile.nextLine();
inPrice = Integer.parseInt(infile.nextLine());
inRent = Integer.parseInt(infile.nextLine());
inColor = infile.nextLine();
// initialze each array element with the BoardSquare
initializing constructor
sq[i] = new BoardSquare(inName, inType, inPrice,
inRent, inColor);](https://image.slidesharecdn.com/anintroductiontocomputersciencewithjava-221014053829-d2f2119a/85/An-Introduction-to-Computer-Science-with-Java-docx-86-320.jpg)
![} // end for
infile.close();
} // endLoadArray
//***************************************************
********************
CSCI 111 Chapter 9 – Classes and Objects in Java pg. 22
// test method to print data from the array of BoarsSquares
public static void printArray(BoardSquare[] sq) throws
Exception {
// print header above each row
System.out.println("Data from the array of Monopoly
board squares.n");
System.out.printf("%-22s%-12s%6s%6s%14s%n", "name",
"type", "price", "rent", "color");](https://image.slidesharecdn.com/anintroductiontocomputersciencewithjava-221014053829-d2f2119a/85/An-Introduction-to-Computer-Science-with-Java-docx-87-320.jpg)
![System.out.println("************************************
****************************");
// print data in formatted columns, one square per row
for (int i = 0; i < 40; i++) {
System.out.printf("%-22s", sq[i].getName());
System.out.printf("%-12s", sq[i].getType());
System.out.printf("%6d", sq[i].getPrice());
System.out.printf("%6d", sq[i].getRent());
System.out.printf("%14s%n", sq[i].getColor());
} // end for
} // end printArray
//***************************************************
********************
} // end class BoardSquare
//***************************************************
************************
Each element in the array square will now be a reference](https://image.slidesharecdn.com/anintroductiontocomputersciencewithjava-221014053829-d2f2119a/85/An-Introduction-to-Computer-Science-with-Java-docx-88-320.jpg)
![variable, holding the memory address where
the corresponding BoardSquare object is actually stored in
memory.
square[0] square [1] square [2] square [3] . . .
4000H 4128H 4224H 4380H . . .
square[0]
name: Go
type: community
rent: 0
price: 0
color: null
square[1]](https://image.slidesharecdn.com/anintroductiontocomputersciencewithjava-221014053829-d2f2119a/85/An-Introduction-to-Computer-Science-with-Java-docx-89-320.jpg)
![name: Mediterranean Ave.
type: property
rent: 2
price: 60
color: Dark Purple
square[2]
name: Community Chest
type: community
rent: 0
price: 0
color: null
square[3]
name: Baltic Ave.
type: property
rent: 4
price: 60
color: Dark Purple](https://image.slidesharecdn.com/anintroductiontocomputersciencewithjava-221014053829-d2f2119a/85/An-Introduction-to-Computer-Science-with-Java-docx-90-320.jpg)


![names to make it more obvious that they
are abstract.
Java Interfaces
Abstract methods can also be used in Java Interfaces. Java
Interfaces are very similar to abstract classes,
but they have two differences:
1. Interfaces can only have abstract methods, not concrete
methods. Interfaces can have
constants, but not properties or concrete methods. (An abstract
class can have concrete
methods as well as abstract methods.)
2. Interfaces are implemented not inherited; they are not used as
super classes. A concrete class
can implement more than one interface.
Interfaces have no constructors, and are not classes that can be
instantiated. They provide a standard
set of method calls for other classes.
A class implements an Interface by using the phrase
”implements [interface name]” immediately after
the name of the class in the class declaration.
Java interfaces are used to provide a common set of method
calls for use within many classes. In](https://image.slidesharecdn.com/anintroductiontocomputersciencewithjava-221014053829-d2f2119a/85/An-Introduction-to-Computer-Science-with-Java-docx-101-320.jpg)


![interface]” immediately after the class name. For example a
class named Timer that implements the
Clock interface might have a class declaration that starts like
this:
Public class Timer implements Clock
{
// body of the Timer class goes here – properties and methods
as usual
}
This tells the world that the Timer class has code implementing
all of the abstract methods in the Clock
interface. Someone who knows the Clock interface would then
know how to invoke and use the similar
methods in Timer. In a similar manner, someone who knows
the Clock interface would also know how
to use the related methods in any system that implements Clock
– household appliances, entertainment
systems, communications equipment, and so on.
In some systems, the interface that specifies the behavior is
called the supplier, and the class that
implements the behavior is called the client.
In the modern world, with so many systems interacting with one](https://image.slidesharecdn.com/anintroductiontocomputersciencewithjava-221014053829-d2f2119a/85/An-Introduction-to-Computer-Science-with-Java-docx-104-320.jpg)

![cannot extend an interface.
• a programmer declares a class will implement an interface by
including “implements [interface
name]” immediately after the class name, such as in “public
class Timer implements Clock { … ”.
CSCI 111 Chapter 9 – Classes and Objects in Java pg. 29
Interfaces in UML diagrams
The implementation of interfaces in UML diagrams is shown by
using an arrow with a dotted line
pointing from a class to any Interfaces it implements. In the
following simplified example, both the
Professor class and the Student class implement the Person
interface:
Java’s Comparable Interface
One commonly used Java interface is the Comparable interface,
whose only method is the CompareTo()
method. The CompareTo() method compares two objects in a
class and returns an integer.
The integer returned by a.compareTo(b) will be:](https://image.slidesharecdn.com/anintroductiontocomputersciencewithjava-221014053829-d2f2119a/85/An-Introduction-to-Computer-Science-with-Java-docx-106-320.jpg)
![• a negative number if a comes before b;
• a zero if a equals b;
• a positive number if a comes after b.
An example of how this is used is the The String class
CompareTo() method, which uses the lexicographic
order (alphabetic order) of the Unicode characters in the String
to compare them. It is most often used
in an If statement, such as in this code from the BubbleSort
demo example in Chapter 6:
if ( a[i+1].compareTo(a[i]) < 0 ) // if the two items are out
of order
{
// swap the two items and set swapped to true
c = a[i];
a[i] = a[i+1];
a[i+1] = c;
swapped = true;
} // end if
The pattern of use for the compareTo() methods in if statement](https://image.slidesharecdn.com/anintroductiontocomputersciencewithjava-221014053829-d2f2119a/85/An-Introduction-to-Computer-Science-with-Java-docx-107-320.jpg)


![i. pick two random numbers between 1 and 6 and add them
together to simulate
the rolling of a real pair of dice.
ii. move the player (change location) to the new square by
adding the player's
location to the value rolled by the dice. (If the value is greater
than 39, then
subtract 40. This accounts for starting again at the start of the
board.)
The code could look like this:
newLocation = p1.getLocation() + roll;
if (newLocation > 39)
newLocation = newLocation - 40;
p1.setLocation(newLocation);
iii. subtract the square's rent from the player's balance,
something like this:
newBalance = p1.getBalance() -
square[newLlocation].getRent();
p1.setBalance(newBalance);
CSCI 111 Chapter 9 – Classes and Objects in Java pg. 36](https://image.slidesharecdn.com/anintroductiontocomputersciencewithjava-221014053829-d2f2119a/85/An-Introduction-to-Computer-Science-with-Java-docx-123-320.jpg)


![C:UserscherbertDesktopNetBeansProjectsCirclePatterns
=
CirclePatterns/build/classes/.netbeans_automatic_build
CirclePatterns/build/classes/.netbeans_update_resources
CirclePatterns/build/classes/circlepatterns/CirclePatterns.classp
ackage circlepatterns;
publicsynchronizedclass CirclePatterns {
public void CirclePatterns();
publicstatic void main(String[]);
}
CirclePatterns/build/classes/circlepatterns/MyCanvas.classpacka
ge circlepatterns;
synchronizedclass MyCanvas extends java.awt.Canvas {
public void MyCanvas();
public void paint(java.awt.Graphics);
}
CirclePatterns/CirclePatterns.iml
CirclePatterns/manifest.mf
Manifest-Version: 1.0
X-COMMENT: Main-Class will be added automatically by build](https://image.slidesharecdn.com/anintroductiontocomputersciencewithjava-221014053829-d2f2119a/85/An-Introduction-to-Computer-Science-with-Java-docx-129-320.jpg)


![CirclePatterns/nbproject/genfiles.properties
build.xml.data.CRC32=45ef90fa
build.xml.script.CRC32=665c12be
[email protected]
# This file is used by a NetBeans-based IDE to track changes in
generated files such as build-impl.xml.
# Do not edit this file. You may delete it but then the IDE will
never regenerate such files for you.
nbproject/build-impl.xml.data.CRC32=45ef90fa
nbproject/build-impl.xml.script.CRC32=ff7a8039
nbproject/[email protected]
CirclePatterns/nbproject/private/private.properties
compile.on.save=true
user.properties.file=C:UserscherbertAppDataRoamingNe
tBeans7.3.1build.properties](https://image.slidesharecdn.com/anintroductiontocomputersciencewithjava-221014053829-d2f2119a/85/An-Introduction-to-Computer-Science-with-Java-docx-167-320.jpg)


![ePatterns.classpackage circlepatterns;
publicsynchronizedclass CirclePatterns {
public void CirclePatterns();
publicstatic void main(String[]);
}
CirclePatterns/out/production/CirclePatterns/circlepatterns/MyC
anvas.classpackage circlepatterns;
synchronizedclass MyCanvas extends java.awt.Canvas {
public void MyCanvas();
public void paint(java.awt.Graphics);
}
CirclePatterns/src/circlepatterns/CirclePatterns.javaCirclePatter
ns/src/circlepatterns/CirclePatterns.java/* CirclePatterns.Java
* Computer Science 111, Fall 2013
* Last edited Nov. 20, 2013 by C. Herbert
*
* This code demonstrates a simple example of some computer a
rt work.
* It draws a pattern of circles on the screen with a time delay b
etween drawings.
*/
package circlepatterns;
import java.awt.*;
import java.util.concurrent.TimeUnit;
import javax.swing.*;
publicclassCirclePatterns
{
publicstaticvoid main(String[] args)
{](https://image.slidesharecdn.com/anintroductiontocomputersciencewithjava-221014053829-d2f2119a/85/An-Introduction-to-Computer-Science-with-Java-docx-173-320.jpg)


![ConcentricCircles/build/classes/.netbeans_automatic_build
ConcentricCircles/build/classes/.netbeans_update_resources
ConcentricCircles/build/classes/concentriccircles/ConcentricCir
cles.classpackage concentriccircles;
publicsynchronizedclass ConcentricCircles {
public void ConcentricCircles();
publicstatic void main(String[]);
}
ConcentricCircles/build/classes/concentriccircles/MyCanvas.cla
sspackage concentriccircles;
synchronizedclass MyCanvas extends java.awt.Canvas {
public void MyCanvas();
public void paint(java.awt.Graphics);
}
ConcentricCircles/ConcentricCircles.iml
ConcentricCircles/manifest.mf
Manifest-Version: 1.0
X-COMMENT: Main-Class will be added automatically by build
ConcentricCircles/nbproject/build-impl.xml](https://image.slidesharecdn.com/anintroductiontocomputersciencewithjava-221014053829-d2f2119a/85/An-Introduction-to-Computer-Science-with-Java-docx-179-320.jpg)


![ConcentricCircles/nbproject/genfiles.properties
build.xml.data.CRC32=48a71fdd
build.xml.script.CRC32=ab357ec2
[email protected]
# This file is used by a NetBeans-based IDE to track changes in
generated files such as build-impl.xml.
# Do not edit this file. You may delete it but then the IDE will
never regenerate such files for you.
nbproject/build-impl.xml.data.CRC32=48a71fdd
nbproject/build-impl.xml.script.CRC32=b94aed7f
nbproject/[email protected]
ConcentricCircles/nbproject/private/private.properties
compile.on.save=true
user.properties.file=C:UserscherbertAppDataRoamingNe
tBeans7.3.1build.properties
ConcentricCircles/nbproject/private/private.xml](https://image.slidesharecdn.com/anintroductiontocomputersciencewithjava-221014053829-d2f2119a/85/An-Introduction-to-Computer-Science-with-Java-docx-217-320.jpg)


![${build.test.classes.dir}
source.encoding=UTF-8
src.dir=src
test.src.dir=test
ConcentricCircles/nbproject/project.xml
org.netbeans.modules.java.j2seproject
ConcentricCircles
ConcentricCircles/out/production/ConcentricCircles/concentricc
ircles/ConcentricCircles.classpackage concentriccircles;
publicsynchronizedclass ConcentricCircles {
public void ConcentricCircles();
publicstatic void main(String[]);
}
ConcentricCircles/out/production/ConcentricCircles/concentricc](https://image.slidesharecdn.com/anintroductiontocomputersciencewithjava-221014053829-d2f2119a/85/An-Introduction-to-Computer-Science-with-Java-docx-222-320.jpg)
![ircles/MyCanvas.classpackage concentriccircles;
synchronizedclass MyCanvas extends java.awt.Canvas {
public void MyCanvas();
public void paint(java.awt.Graphics);
}
ConcentricCircles/src/concentriccircles/ConcentricCircles.javaC
oncentricCircles/src/concentriccircles/ConcentricCircles.java/*
CirclePatterns.Java
* Computer Science 111, Fall 2013
* Last edited Nov. 20. 2013 by C. Herbert
*
* This code demonstrates how to draws a pattern of concentric
circles.
*
* Circle are drawn inside a bounding rectangle that is actually
* a bounding square, with the same width and height.
*
* To draw concentric cicles, , move the x and y coordinates for
each suscessive circle
* up and to the right by a factor of k, and at the same time, incr
ease the size
* of the biounding square by a factor of 2K.
*
*/
package concentriccircles;
import java.awt.*;
import java.util.concurrent.TimeUnit;
import javax.swing.*;
publicclassConcentricCircles
{
publicstaticvoid main(String[] args)](https://image.slidesharecdn.com/anintroductiontocomputersciencewithjava-221014053829-d2f2119a/85/An-Introduction-to-Computer-Science-with-Java-docx-223-320.jpg)


![C:UserscherbertDesktopNetBeansProjectsCosineRose=
CosineRose/build/classes/.netbeans_automatic_build
CosineRose/build/classes/.netbeans_update_resources
CosineRose/build/classes/cosinerose/CosineRose.classpackage
cosinerose;
publicsynchronizedclass CosineRose {
public void CosineRose();
publicstatic void main(String[]);
}
CosineRose/build/classes/cosinerose/CosineRose.rs
CosineRose/build/classes/cosinerose/RoseCanvas.classpackage
cosinerose;
synchronizedclass RoseCanvas extends java.awt.Canvas {
double x1;
double y1;
double x2;
double y2;
double value;
int xAdjust;
int yAdjust;
double factor;
String messageString;
String inputString;
String title;
public void RoseCanvas();](https://image.slidesharecdn.com/anintroductiontocomputersciencewithjava-221014053829-d2f2119a/85/An-Introduction-to-Computer-Science-with-Java-docx-229-320.jpg)
![public void inputFactor();
public void paint(java.awt.Graphics);
}
CosineRose/CosineRose.iml
CosineRose/dist/CosineRose.jar
META-INF/MANIFEST.MF
Manifest-Version: 1.0
Ant-Version: Apache Ant 1.8.4
Created-By: 1.7.0_25-b16 (Oracle Corporation)
Class-Path:
X-COMMENT: Main-Class will be added automatically by build
Main-Class: cosinerose.CosineRose
cosinerose/CosineRose.classpackage cosinerose;
publicsynchronizedclass CosineRose {
public void CosineRose();
publicstatic void main(String[]);
}
cosinerose/RoseCanvas.classpackage cosinerose;
synchronizedclass RoseCanvas extends java.awt.Canvas {](https://image.slidesharecdn.com/anintroductiontocomputersciencewithjava-221014053829-d2f2119a/85/An-Introduction-to-Computer-Science-with-Java-docx-230-320.jpg)


![CosineRose/nbproject/genfiles.properties
build.xml.data.CRC32=246366d1
build.xml.script.CRC32=0c5c294a
[email protected]
# This file is used by a NetBeans-based IDE to track changes in
generated files such as build-impl.xml.
# Do not edit this file. You may delete it but then the IDE will
never regenerate such files for you.
nbproject/build-impl.xml.data.CRC32=246366d1
nbproject/build-impl.xml.script.CRC32=20eeafbd
nbproject/[email protected]
CosineRose/nbproject/private/private.properties
compile.on.save=true
user.properties.file=C:UserscherbertAppDataRoamingNe
tBeans7.3.1build.properties](https://image.slidesharecdn.com/anintroductiontocomputersciencewithjava-221014053829-d2f2119a/85/An-Introduction-to-Computer-Science-with-Java-docx-270-320.jpg)


![publicstatic void main(String[]);
}
CosineRose/out/production/CosineRose/cosinerose/RoseCanvas.
classpackage cosinerose;
synchronizedclass RoseCanvas extends java.awt.Canvas {
double x1;
double y1;
double x2;
double y2;
double value;
int xAdjust;
int yAdjust;
double factor;
String messageString;
String inputString;
String title;
public void RoseCanvas();
public void inputFactor();
public void paint(java.awt.Graphics);
}
CosineRose/src/cosinerose/CosineRose.javaCosineRose/src/cosi
nerose/CosineRose.java
/* CosineRose.Java
* Computer Science 111, Fall 2013
* Last edited Nov. 20, 2013 by C. Herbert
*
* This code demonstrates how to draw a cosine rose in aJFrame
* using Java Graphics class objects.
*
* It lets the user input a factor that will alter the image
*/](https://image.slidesharecdn.com/anintroductiontocomputersciencewithjava-221014053829-d2f2119a/85/An-Introduction-to-Computer-Science-with-Java-docx-276-320.jpg)
![package cosinerose;
import java.awt.*;
import java.util.concurrent.TimeUnit;
import javax.swing.*;
publicclassCosineRose
{
publicstaticvoid main(String[] args)
{
// create a RoseCanvas object
RoseCanvas canvas1 =newRoseCanvas();
// set up a JFrame to hold the canvas
JFrame frame =newJFrame();
frame.setTitle("Cosine Rose");
frame.setSize(500,500);
frame.setLocation(200,200);
frame.setDefaultCloseOperation(JFrame.EXIT_ON_CLOS
E);
// get the factor for cosine rose in camvas1 from the user
canvas1.inputFactor();
// add the canvas to the frame as a content panel
frame.getContentPane().add(canvas1);
frame.setVisible(true);
}// end main()
}// end class
classRoseCanvasextendsCanvas
{
double x1;// x coordinate for point 1](https://image.slidesharecdn.com/anintroductiontocomputersciencewithjava-221014053829-d2f2119a/85/An-Introduction-to-Computer-Science-with-Java-docx-277-320.jpg)


![drawDemo/build/built-jar.properties
#Sat, 20 Jun 2015 15:10:11 -0400
C:UsersChuckDocumentsNetBeansProjectsdrawDemo=
drawDemo/build/classes/.netbeans_automatic_build
drawDemo/build/classes/.netbeans_update_resources
drawDemo/build/classes/drawdemo/DrawDemo.classpackage
drawdemo;
publicsynchronizedclass DrawDemo {
public void DrawDemo();
publicstatic void main(String[]);
}
drawDemo/build/classes/drawdemo/MyCanvas.classpackage
drawdemo;
synchronizedclass MyCanvas extends java.awt.Canvas {
public void MyCanvas();
public void paint(java.awt.Graphics);
}
drawDemo/build/test/classes/drawdemo/DrawDemo.classpackag](https://image.slidesharecdn.com/anintroductiontocomputersciencewithjava-221014053829-d2f2119a/85/An-Introduction-to-Computer-Science-with-Java-docx-283-320.jpg)
![e drawdemo;
publicsynchronizedclass DrawDemo {
public void DrawDemo();
publicstatic void main(String[]);
}
drawDemo/build/test/classes/drawdemo/MyCanvas.classpackage
drawdemo;
synchronizedclass MyCanvas extends java.awt.Canvas {
public void MyCanvas();
public void paint(java.awt.Graphics);
}
drawDemo/drawDemo.iml
drawDemo/logo.jpg
drawDemo/manifest.mf
Manifest-Version: 1.0
X-COMMENT: Main-Class will be added automatically by build
drawDemo/master-application.jnlp
<jnlp spec="1.0+" codebase="${jnlp.codebase}"
href="launch.jnlp">
<information>
<title>${APPLICATION.TITLE}</title>](https://image.slidesharecdn.com/anintroductiontocomputersciencewithjava-221014053829-d2f2119a/85/An-Introduction-to-Computer-Science-with-Java-docx-284-320.jpg)


![drawDemo/nbproject/configs/JWS_generated.properties
$label=Web Start
$target.debug=jws-debug
$target.run=jws-run
compile.on.save.unsupported.javawebstart=true
drawDemo/nbproject/genfiles.properties
build.xml.data.CRC32=2fa960bb
build.xml.script.CRC32=fc53a618
[email protected]
# This file is used by a NetBeans-based IDE to track changes in
generated files such as build-impl.xml.
# Do not edit this file. You may delete it but then the IDE will
never regenerate such files for you.](https://image.slidesharecdn.com/anintroductiontocomputersciencewithjava-221014053829-d2f2119a/85/An-Introduction-to-Computer-Science-with-Java-docx-323-320.jpg)
![nbproject/build-impl.xml.data.CRC32=2fa960bb
nbproject/build-impl.xml.script.CRC32=ba1a5535
nbproject/[email protected]
drawDemo/nbproject/jnlp-impl.xml](https://image.slidesharecdn.com/anintroductiontocomputersciencewithjava-221014053829-d2f2119a/85/An-Introduction-to-Computer-Science-with-Java-docx-324-320.jpg)


![drawDemo/out/production/drawDemo/drawdemo/DrawDemo.cla
sspackage drawdemo;
publicsynchronizedclass DrawDemo {
public void DrawDemo();
publicstatic void main(String[]);
}
drawDemo/out/production/drawDemo/drawdemo/MyCanvas.clas
spackage drawdemo;
synchronizedclass MyCanvas extends java.awt.Canvas {
public void MyCanvas();
public void paint(java.awt.Graphics);
}
drawDemo/preview-application.htmlTest page for launching the
application via JNLP
drawDemo/src/drawdemo/DrawDemo.javadrawDemo/src/drawde
mo/DrawDemo.java/*
* To change this template, choose Tools | Templates
* and open the template in the editor.
*/
package drawdemo;
import java.awt.*;](https://image.slidesharecdn.com/anintroductiontocomputersciencewithjava-221014053829-d2f2119a/85/An-Introduction-to-Computer-Science-with-Java-docx-365-320.jpg)
![import javax.swing.*;
publicclassDrawDemo{
publicstaticvoid main(String[] args){
// create a MyCanvas object
MyCanvas canvas1 =newMyCanvas();
// set up a JFrame tpo hold the canvas
JFrame frame =newJFrame();
frame.setTitle("Using Common Graphics Class Methods");
frame.setSize(512,546);
frame.setLocation(100,100);
frame.setDefaultCloseOperation(JFrame.EXIT_ON_CLOS
E);
// add the canvas to the frame as a content panel
frame.getContentPane().add(canvas1);
frame.setVisible(true);
}// end main()
}// end class ThreeRectangles
classMyCanvasextendsCanvas{
publicMyCanvas(){
}// end MyCanvas() constructor
publicvoid paint(Graphics graphics){
graphics.drawRect(20,20,100,200);
graphics.drawOval(140,20,100,100);
graphics.drawRoundRect(260,20,100,200,20,20);
graphics.drawArc(340,20,100,100,0,90);
graphics.drawLine(20,240,400,280);](https://image.slidesharecdn.com/anintroductiontocomputersciencewithjava-221014053829-d2f2119a/85/An-Introduction-to-Computer-Science-with-Java-docx-366-320.jpg)
![// draw a gray square as a shadow under a red squareoutlined in
black
// draw a gray squareto be used as a shadow, offset down and ri
ght 5 pixels
graphics.setColor(newColor(160,160,160));
graphics.fillRect(25,305,100,100);
// put the red square over the gray shadow
graphics.setColor(Color.red);
graphics.fillRect(20,300,100,100);
// out line the filled red square with a black square
graphics.setColor(Color.black);
graphics.drawRect(20,300,100,100);
graphics.setColor(Color.green);
graphics.fillOval(140,300,100,200);
graphics.setColor(Color.blue);
graphics.fillRoundRect(260,300,100,200,60,60);
graphics.setColor(newColor(128,0,128));
graphics.fillArc(340,340,100,100,0,90);
// draw a parallelogram
int n =4;
int[] x ={20,100,140,60};
int[] y ={420,420,480,480};
graphics.drawPolygon(x, y, n);
// draw some text
graphics.setColor(Color.black);
graphics.setFont(newFont("Times New Roman",Font.BOL
D,12));
graphics.drawString("Draw Text",390,150);](https://image.slidesharecdn.com/anintroductiontocomputersciencewithjava-221014053829-d2f2119a/85/An-Introduction-to-Computer-Science-with-Java-docx-367-320.jpg)
![// add a logo to the canvas
Image logo =newImageIcon("logo.jpg").getImage();
graphics.drawImage(logo,390,440,null);
}// end paint()
}// end class MyCanvas
drawDemo/test/DrawDemo.javadrawDemo/test/DrawDemo.java/
*
* To change this template, choose Tools | Templates
* and open the template in the editor.
*/
package drawdemo;
import java.awt.*;
import javax.swing.*;
publicclassDrawDemo{
publicstaticvoid main(String[] args){
// create a MyCanvas object
MyCanvas canvas1 =newMyCanvas();
// set up a JFrame to hold the canvas
JFrame frame =newJFrame();
frame.setTitle("Using Common Graphics Class Methods");
frame.setSize(512,546);
frame.setLocation(100,100);
frame.setDefaultCloseOperation(JFrame.EXIT_ON_CLOS
E);
// add the canvas to the frame as a content panel
frame.getContentPane().add(canvas1);](https://image.slidesharecdn.com/anintroductiontocomputersciencewithjava-221014053829-d2f2119a/85/An-Introduction-to-Computer-Science-with-Java-docx-368-320.jpg)

![graphics.setColor(Color.blue);
graphics.fillRoundRect(260,300,100,200,60,60);
graphics.setColor(newColor(128,0,128));
graphics.fillArc(340,340,100,100,0,90);
// draw a parallelogram
int n =4;
int[] x ={20,100,140,60};
int[] y ={420,420,480,480};
graphics.drawPolygon(x, y, n);
// draw some text
graphics.setColor(Color.black);
graphics.setFont(newFont("Times New Roman",Font.BOL
D,12));
graphics.drawString("Draw Text",390,150);
// add a logo to the canvas
Image logo =newImageIcon("logo.jpg").getImage();
graphics.drawImage(logo,390,440,null);
}// end paint()
}// end class MyCanvas
GettingCloser/.idea/$PRODUCT_WORKSPACE_FILE$
1.8](https://image.slidesharecdn.com/anintroductiontocomputersciencewithjava-221014053829-d2f2119a/85/An-Introduction-to-Computer-Science-with-Java-docx-370-320.jpg)


![GettingCloser/GettingCloser.iml
GettingCloser/out/production/gettingCloser/gettingCloser/Gettin
gCloser.classpackage gettingCloser;
publicsynchronizedclass GettingCloser {
public void GettingCloser();
publicstatic void main(String[]);
}
GettingCloser/out/production/gettingCloser/gettingCloser/MyCa
nvas.classpackage gettingCloser;
synchronizedclass MyCanvas extends java.awt.Canvas {
public void MyCanvas();
public void paint(java.awt.Graphics);
}
GettingCloser/src/GettingCloser/GettingCloser.javaGettingClos
er/src/GettingCloser/GettingCloser.java/* gettingCloser.Java
* Computer Science 111, Fall 2013
* Last edited Nov. 23, 2019 by C. Herbert
*
* This code demonstrates a simplew example of some computer
art work.
* It draws random ovals on top od each other. Do they appear t
o be getting closer?
*/
package gettingCloser;](https://image.slidesharecdn.com/anintroductiontocomputersciencewithjava-221014053829-d2f2119a/85/An-Introduction-to-Computer-Science-with-Java-docx-373-320.jpg)
![import java.awt.*;
import java.util.concurrent.TimeUnit;
import javax.swing.*;
publicclassGettingCloser{
publicstaticvoid main(String[] args)
{
// create a MyCanvas object
MyCanvas canvas1 =newMyCanvas();
// set up a JFrame to hold the canvas
JFrame frame =newJFrame();
frame.setTitle("Random rectangles");
frame.setSize(500,500);
frame.setLocation(100,100);
frame.setDefaultCloseOperation(JFrame.EXIT_ON_CL
OSE);
// add the canvas to the frame as a content panel
frame.getContentPane().add(canvas1);
frame.setVisible(true);
}// end main()
}// end class
classMyCanvasextendsCanvas
{
publicMyCanvas()
{}// end MyCanvas() constructor
publicvoid paint(Graphics graphics)
{](https://image.slidesharecdn.com/anintroductiontocomputersciencewithjava-221014053829-d2f2119a/85/An-Introduction-to-Computer-Science-with-Java-docx-374-320.jpg)


![Builds, tests, and runs the project Histogram.
Histogram/build/built-jar.properties
#Fri, 22 Nov 2013 09:17:35 -0500
C:UserscherbertDesktopNetBeansProjectsHistogram=
Histogram/build/classes/.netbeans_automatic_build
Histogram/build/classes/.netbeans_update_resources
Histogram/build/classes/histogram/Histogram.classpackage
histogram;
publicsynchronizedclass Histogram {
public void Histogram();
publicstatic void main(String[]);
}
Histogram/build/classes/histogram/Histogram.rs
Histogram/build/classes/histogram/MyCanvas.classpackage
histogram;
synchronizedclass MyCanvas extends java.awt.Canvas {
public void MyCanvas();
public void paint(java.awt.Graphics);](https://image.slidesharecdn.com/anintroductiontocomputersciencewithjava-221014053829-d2f2119a/85/An-Introduction-to-Computer-Science-with-Java-docx-379-320.jpg)


![Histogram/nbproject/genfiles.properties
build.xml.data.CRC32=dc3100a3
build.xml.script.CRC32=a08e0b33
[email protected]
# This file is used by a NetBeans-based IDE to track changes in
generated files such as build-impl.xml.](https://image.slidesharecdn.com/anintroductiontocomputersciencewithjava-221014053829-d2f2119a/85/An-Introduction-to-Computer-Science-with-Java-docx-417-320.jpg)
![# Do not edit this file. You may delete it but then the IDE will
never regenerate such files for you.
nbproject/build-impl.xml.data.CRC32=dc3100a3
nbproject/build-impl.xml.script.CRC32=fee95aa2
nbproject/[email protected]
Histogram/nbproject/private/private.properties
compile.on.save=true
user.properties.file=C:UserscherbertAppDataRoamingNe
tBeans7.3.1build.properties
Histogram/nbproject/private/private.xml
file:/C:/Users/cherbert/Desktop/NetBeansProjects/Histogram/src
/histogram/Histogram.java
Histogram/nbproject/project.properties
annotation.processing.enabled=true
annotation.processing.enabled.in.editor=false
annotation.processing.processor.options=
annotation.processing.processors.list=](https://image.slidesharecdn.com/anintroductiontocomputersciencewithjava-221014053829-d2f2119a/85/An-Introduction-to-Computer-Science-with-Java-docx-418-320.jpg)


![Histogram
Histogram/out/production/Histogram/histogram/Histogram.class
package histogram;
publicsynchronizedclass Histogram {
public void Histogram();
publicstatic void main(String[]);
}
Histogram/out/production/Histogram/histogram/MyCanvas.class
package histogram;
synchronizedclass MyCanvas extends java.awt.Canvas {
public void MyCanvas();
public void paint(java.awt.Graphics);
}
Histogram/src/histogram/Histogram.javaHistogram/src/histogra
m/Histogram.java/* Histogram.Java
* Computer Science 111, Fall 2013
* Last edited Nov. 20, 2013 by C. Herbert
*
* This code demonstrates how to draw a histogram in aJFrame
* using Java Graphics class objects.](https://image.slidesharecdn.com/anintroductiontocomputersciencewithjava-221014053829-d2f2119a/85/An-Introduction-to-Computer-Science-with-Java-docx-423-320.jpg)
![*
* With a little work, it could be transformed into a general-
purpose
* program to read data and labels from a data file then create a
hsitogram
* based on the data.
*
* When analyzing this code, remember, the screen uses inverte
d Cartesian coordinates.
*/
package histogram;
import java.awt.*;
import javax.swing.*;
publicclassHistogram
{
publicstaticvoid main(String[] args)
{
// create a MyCanvas object
MyCanvas canvas1 =newMyCanvas();
// set up a JFrame to hold the canvas
JFrame frame =newJFrame();
frame.setTitle("Enrollment Histogram");
frame.setSize(300,280);
frame.setLocation(100,100);
frame.setDefaultCloseOperation(JFrame.EXIT_ON_CLOS
E);
// add the canvas to the frame as a content panel
frame.getContentPane().add(canvas1);
frame.setVisible(true);](https://image.slidesharecdn.com/anintroductiontocomputersciencewithjava-221014053829-d2f2119a/85/An-Introduction-to-Computer-Science-with-Java-docx-424-320.jpg)
![// add the canvas to the frame as a content panel
frame.getContentPane().add(canvas1);
frame.setVisible(true);
}// end main()
}// end class
classMyCanvasextendsCanvas
{
publicMyCanvas()
{}// end MyCanvas() constructor
publicvoid paint(Graphics graphics)
{
int i;// a loop counter
int x;// x coordinate for drawing
int y;// y coordinate for drawing
/* parallel arrays of data --
This could also be done as an object with
* enrollment and year properties. With more than two pro
perties,
* objects are probably better. The data could be read in fr
om a file.
*/
int[] enrollment ={106,105,142,324};// array of enrollment figu
res
String[] year ={"2010","2011","2012","2013"};// array of years
for labels
// paint the canvas white
graphics.setColor(Color.white);
graphics.fillRect(0,0,300,280);](https://image.slidesharecdn.com/anintroductiontocomputersciencewithjava-221014053829-d2f2119a/85/An-Introduction-to-Computer-Science-with-Java-docx-425-320.jpg)
![// add a logo to the canvas
Image logo =newImageIcon("logo.jpg").getImage();
graphics.drawImage(logo,5,5,null);
// draw chart title
graphics.setColor(Color.black);
graphics.setFont(newFont("Times New Roman",Font.BOL
D,16));
graphics.drawString("Course Enrollment",85,30);
// draw horizintal lines and unit labels
graphics.setFont(newFont("Arial",Font.PLAIN,12));
graphics.setColor(Color.gray);
for(i =0; i <=7; i++){
// lines and labels every 20 units from 200 up
y =200-(20* i);// caculate y coordinate for each line
// draw each line across
graphics.drawLine(50, y,250, y);
// place label for each line; +5 adjustment to align labels and lin
es
graphics.drawString(Integer.toString(i *50),20, y +5);
}// end for
// draw vertical lines on left and right of chart
graphics.drawLine(50,200,50,60);
graphics.drawLine(250,200,250,60);
// draw data bars and place year labels
graphics.setColor(newColor(128,0,0));
for(i =1; i <=4; i++){
x =40+(40* i);// space bars 40 pixels apart
y =(enrollment[i -
1]*140)/350;// caculate height of bar based on data
graphics.fillRect(x,200- y,20, y);// draw bars](https://image.slidesharecdn.com/anintroductiontocomputersciencewithjava-221014053829-d2f2119a/85/An-Introduction-to-Computer-Science-with-Java-docx-426-320.jpg)
![// put year under each bar, 20 pixels below bar, x-
5 to align labels and bars
graphics.drawString(year[i -1], x -5,220);
}// end for
}// end paint()
}// end class MyCanvas
PieChart/.idea/$PRODUCT_WORKSPACE_FILE$
1.8
PieChart/.idea/misc.xml
PieChart/.idea/modules.xml](https://image.slidesharecdn.com/anintroductiontocomputersciencewithjava-221014053829-d2f2119a/85/An-Introduction-to-Computer-Science-with-Java-docx-427-320.jpg)


![PieChart/build/classes/piechart/PieChart.classpackage piechart;
publicsynchronizedclass PieChart {
public void PieChart();
publicstatic void main(String[]) throws Exception;
}
PieChart/build/classes/piechart/PieChartCanvas.classpackage
piechart;
synchronizedclass PieChartCanvas extends java.awt.Canvas {
String title;
int count;
double sum;
String[] sliceLabel;
double[] sliceValue;
java.awt.Color[] sliceColor;
public void PieChartCanvas();
public void ReadChartdata() throws Exception;
public void paint(java.awt.Graphics);
}
PieChart/manifest.mf
Manifest-Version: 1.0
X-COMMENT: Main-Class will be added automatically by build
PieChart/nbproject/build-impl.xml](https://image.slidesharecdn.com/anintroductiontocomputersciencewithjava-221014053829-d2f2119a/85/An-Introduction-to-Computer-Science-with-Java-docx-430-320.jpg)


![PieChart/nbproject/genfiles.properties
build.xml.data.CRC32=1c9e1903
build.xml.script.CRC32=0a1b5f57
[email protected]
# This file is used by a NetBeans-based IDE to track changes in
generated files such as build-impl.xml.
# Do not edit this file. You may delete it but then the IDE will
never regenerate such files for you.
nbproject/build-impl.xml.data.CRC32=1c9e1903
nbproject/build-impl.xml.script.CRC32=3701ff6e
nbproject/[email protected]
PieChart/nbproject/private/private.properties
compile.on.save=true
user.properties.file=C:UserscherbertAppDataRoamingNe
tBeans7.3.1build.properties
PieChart/nbproject/private/private.xml
file:/C:/Users/cherbert/Desktop/NetBeansProjects/PieChart/src/](https://image.slidesharecdn.com/anintroductiontocomputersciencewithjava-221014053829-d2f2119a/85/An-Introduction-to-Computer-Science-with-Java-docx-468-320.jpg)


![${build.test.classes.dir}
source.encoding=UTF-8
src.dir=src
test.src.dir=test
PieChart/nbproject/project.xml
org.netbeans.modules.java.j2seproject
PieChart
PieChart/out/production/PieChart/piechart/PieChart.classpackag
e piechart;
publicsynchronizedclass PieChart {
public void PieChart();
publicstatic void main(String[]) throws Exception;
}
PieChart/out/production/PieChart/piechart/PieChartCanvas.class
package piechart;](https://image.slidesharecdn.com/anintroductiontocomputersciencewithjava-221014053829-d2f2119a/85/An-Introduction-to-Computer-Science-with-Java-docx-473-320.jpg)
![synchronizedclass PieChartCanvas extends java.awt.Canvas {
String title;
int count;
double sum;
String[] sliceLabel;
double[] sliceValue;
java.awt.Color[] sliceColor;
public void PieChartCanvas();
public void ReadChartdata() throws Exception;
public void paint(java.awt.Graphics);
}
PieChart/PieChart.iml
PieChart/PieChartData.txt
Dubious Election of 1824
Andrew Jackson
151271
John Quincy Adams
113122
William Harris Crawford
40856
Henry Clay
47531
Others](https://image.slidesharecdn.com/anintroductiontocomputersciencewithjava-221014053829-d2f2119a/85/An-Introduction-to-Computer-Science-with-Java-docx-474-320.jpg)
![13053
PieChart/src/piechart/PieChart.javaPieChart/src/piechart/PieCha
rt.java/* PieChart.Java
* Computer Science 111, Fall 2013
* Last edited Nov. 20, 2013 by C. Herbert
*
* This code demonstrates how to draw a pie chart in aJFrame
* using Java Graphics class objects.
*
* The chart can handle up to 8 integer values, read in from a da
ta file.
* This code reads a local data file named "PieData.txt"
* The first line inthe file contains the title of the chart.
* Follwing that, there should be a line with a label, followed by
a line with
* the data that matches that label.
*
* The colors of the chart are harcooded into the program.
* When analyzing this code, remember, the screen uses inverte
d Cartesian coordinates.
*/
package piechart;
import java.awt.*;
import java.util.*;
import javax.swing.*;
publicclassPieChart{
publicstaticvoid main(String[] args)throwsException
{
// create a PieChartCanvas object named canvas1
PieChartCanvas canvas1 =newPieChartCanvas();](https://image.slidesharecdn.com/anintroductiontocomputersciencewithjava-221014053829-d2f2119a/85/An-Introduction-to-Computer-Science-with-Java-docx-475-320.jpg)
![// read data into variables for the canvas1 object
canvas1.ReadChartdata();
// set up a JFrame to hold the canvas
JFrame frame =newJFrame();
frame.setTitle("Bedroom Window by Wharton Reed Dickin
son");
frame.setSize(500,400);
frame.setLocation(100,100);
frame.setDefaultCloseOperation(JFrame.EXIT_ON_CLOS
E);
// add the canvas to the frame as a content panel
frame.getContentPane().add(canvas1);
frame.setVisible(true);
}// end main()
}// end PieChart
classPieChartCanvasextendsCanvas
{
String title;// chart title
int count;// number of slices
double sum;// sum of the values in the chart
String[] sliceLabel =newString[10];// array of labels for the cha
rt
double[] sliceValue=newdouble[10];// array of values for the ch
art
// array of colors for each slice
Color[] sliceColor ={Color.RED,Color.BLUE,Color.GREEN,Co
lor.MAGENTA,
Color.ORANGE,Color.GRAY,Color.CYAN,Color.PINK};
publicPieChartCanvas()
{}// end MyCanvas() constructor](https://image.slidesharecdn.com/anintroductiontocomputersciencewithjava-221014053829-d2f2119a/85/An-Introduction-to-Computer-Science-with-Java-docx-476-320.jpg)
![publicvoidReadChartdata()throwsException
{
// Create a Scanner named infile to read the input stream from t
he file
Scanner infile =newScanner(new java.io.File("PieChartData.txt"
));
// read title
title = infile.nextLine();
System.out.println(title);
// initialize count and sum
sum =0.0;
count =0;
// read data for each slice
while(infile.hasNextLine())
{
sliceLabel[count]= infile.nextLine();
sliceValue[count]=Double.parseDouble(infile.nextLine(
));
System.out.println(sliceValue[count]);
// update count and sum
sum = sum + sliceValue[count];
count++;
}// end while (infile.hasNext())
}// end ReadChartdata()
publicvoid paint(Graphics graphics)
{
int i;// a loop counter
int start =0;// the starting angle for each pie chart slice
double size;// the size of the arc for each slice (in degrees)](https://image.slidesharecdn.com/anintroductiontocomputersciencewithjava-221014053829-d2f2119a/85/An-Introduction-to-Computer-Science-with-Java-docx-477-320.jpg)
![int x =10;// x coordinate of the bounding square for the pie's cir
cle
int y =40;// y coordinate of the bounding square for the pie's cir
cle
int side =200;// side of the bounding square for the pie's circle
// draw title
graphics.setFont(newFont("Cambria",Font.BOLD,18));
graphics.drawString(title,130,24);
// set a smaller font for the legend in the following loop
graphics.setFont(newFont("Arial",Font.BOLD,12));
// loop to draw pie chart and legend
for( i =0; i < count; i++)
{
// calculate size of slice
size = sliceValue[i]/sum *360.0;
// set the color for arc
graphics.setColor(sliceColor[i]);
// draw slice
graphics.fillArc(x, y, side, side, start,(int)Math.round(si
ze));
System.out.println(size);
// draw the square in the legend for this slice
graphics.fillRect(240,40+40*i,15,15);
// identify the color with label and value the legend
graphics.setColor(Color.BLACK);
graphics.drawString(sliceLabel[i],265,50+40*i);
graphics.drawString(Integer.toString((int)sliceValue[i])
,425,50+40*i);](https://image.slidesharecdn.com/anintroductiontocomputersciencewithjava-221014053829-d2f2119a/85/An-Introduction-to-Computer-Science-with-Java-docx-478-320.jpg)


![RandomCards/build/classes/.netbeans_automatic_build
RandomCards/build/classes/.netbeans_update_resources
RandomCards/build/classes/randomcards/MyCanvas.classpackag
e randomcards;
synchronizedclass MyCanvas extends java.awt.Canvas {
public void MyCanvas();
public void paint(java.awt.Graphics);
}
RandomCards/build/classes/randomcards/RandomCards.classpac
kage randomcards;
publicsynchronizedclass RandomCards {
public void RandomCards();
publicstatic void main(String[]);
}
RandomCards/cards/1.png
RandomCards/cards/10.png
RandomCards/cards/11.png
RandomCards/cards/12.png
RandomCards/cards/13.png
RandomCards/cards/14.png
RandomCards/cards/15.png
RandomCards/cards/16.png](https://image.slidesharecdn.com/anintroductiontocomputersciencewithjava-221014053829-d2f2119a/85/An-Introduction-to-Computer-Science-with-Java-docx-482-320.jpg)


![RandomCards/nbproject/genfiles.properties
build.xml.data.CRC32=c3ceb0dd
build.xml.script.CRC32=aaf1f873
[email protected]
# This file is used by a NetBeans-based IDE to track changes in
generated files such as build-impl.xml.
# Do not edit this file. You may delete it but then the IDE will
never regenerate such files for you.
nbproject/build-impl.xml.data.CRC32=c3ceb0dd
nbproject/build-impl.xml.script.CRC32=d471aafb
nbproject/[email protected]
RandomCards/nbproject/private/private.properties
compile.on.save=true
user.properties.file=C:UserscherbertAppDataRoamingNe
tBeans7.3.1build.properties](https://image.slidesharecdn.com/anintroductiontocomputersciencewithjava-221014053829-d2f2119a/85/An-Introduction-to-Computer-Science-with-Java-docx-523-320.jpg)


![synchronizedclass MyCanvas extends java.awt.Canvas {
public void MyCanvas();
public void paint(java.awt.Graphics);
}
RandomCards/out/production/RandomCards/randomcards/Rando
mCards.classpackage randomcards;
publicsynchronizedclass RandomCards {
public void RandomCards();
publicstatic void main(String[]);
}
RandomCards/RandomCards.iml
RandomCards/src/randomcards/RandomCards.javaRandomCards
/src/randomcards/RandomCards.java/* RandomCards.Java
* Computer Science 111, Fall 2013
* Last edited Nov. 20, 2013 by C. Herbert
*
* This code demonstrates a simple example of some computer a
rt work.
* It randomly picks a playing cared and displays it 100 times in
random locations.
* The process is repeated 10 times
*
*/
package randomcards;
import java.awt.*;
import java.util.concurrent.TimeUnit;
import javax.swing.*;
publicclassRandomCards{](https://image.slidesharecdn.com/anintroductiontocomputersciencewithjava-221014053829-d2f2119a/85/An-Introduction-to-Computer-Science-with-Java-docx-529-320.jpg)
![publicstaticvoid main(String[] args){
// create a MyCanvas object
MyCanvas canvas1 =newMyCanvas();
// set up a JFrame to hold the canvas
JFrame frame =newJFrame();
frame.setTitle("Random rectangles");
frame.setSize(500,500);
Monopoly/.idea/encodings.xml
Monopoly/.idea/misc.xml
Monopoly/.idea/modules.xml
Monopoly/.idea/workspace.xml](https://image.slidesharecdn.com/anintroductiontocomputersciencewithjava-221014053829-d2f2119a/85/An-Introduction-to-Computer-Science-with-Java-docx-530-320.jpg)


![public void Monopoly();
publicstatic void main(String[]) throws Exception;
publicstatic void loadArray(BoardSquare[]) throws
Exception;
}
Monopoly/build/classes/monopoly/Monopoly.rs
monopoly.Monopoly
monopoly.BoardSquare
Monopoly/manifest.mf
Manifest-Version: 1.0
X-COMMENT: Main-Class will be added automatically by build
Monopoly/Monopoly.iml
Monopoly/Monopoly1.iml
Monopoly/nbproject/build-impl.xml
Must set src.dir
Must set test.src.dir
Must set build.dir
Must set dist.dir
Must set build.classes.dir
Must set dist.javadoc.dir
Must set build.test.classes.dir
Must set build.test.results.dir
Must set build.classes.excludes
Must set dist.jar](https://image.slidesharecdn.com/anintroductiontocomputersciencewithjava-221014053829-d2f2119a/85/An-Introduction-to-Computer-Science-with-Java-docx-533-320.jpg)


![Monopoly/nbproject/genfiles.properties
build.xml.data.CRC32=f3074cd0
build.xml.script.CRC32=57d6b473
[email protected]
# This file is used by a NetBeans-based IDE to track changes in
generated files such as build-impl.xml.
# Do not edit this file. You may delete it but then the IDE will
never regenerate such files for you.
nbproject/build-impl.xml.data.CRC32=f3074cd0
nbproject/build-impl.xml.script.CRC32=f24615cf
nbproject/[email protected]
Monopoly/nbproject/private/private.properties
compile.on.save=true
user.properties.file=C:UsersChuckAppDataRoamingNet
Beans8.0.2build.properties](https://image.slidesharecdn.com/anintroductiontocomputersciencewithjava-221014053829-d2f2119a/85/An-Introduction-to-Computer-Science-with-Java-docx-550-320.jpg)


![private String type;
private int price;
private int rent;
private String color;
public void BoardSquare();
public void BoardSquare(String, String, int, int, String);
public String getName();
public String getType();
public int getPrice();
public int getRent();
public String getColor();
public String toString();
}
Monopoly/out/production/Monopoly/monopoly/Monopoly.classp
ackage monopoly;
publicsynchronizedclass Monopoly {
public void Monopoly();
publicstatic void main(String[]) throws Exception;
publicstatic void loadArray(BoardSquare[]) throws
Exception;
publicstatic void printArray(BoardSquare[]) throws
Exception;
}
Monopoly/out/production/Monopoly1/monopoly/BoardSquare.cl
asspackage monopoly;
publicsynchronizedclass BoardSquare {
private String name;
private String type;
private int price;
private int rent;
private String color;
public void BoardSquare();](https://image.slidesharecdn.com/anintroductiontocomputersciencewithjava-221014053829-d2f2119a/85/An-Introduction-to-Computer-Science-with-Java-docx-556-320.jpg)
![public void BoardSquare(String, String, int, int, String);
public String getName();
public String getType();
public int getPrice();
public int getRent();
public String getColor();
public String toString();
}
Monopoly/out/production/Monopoly1/monopoly/Monopoly.class
package monopoly;
publicsynchronizedclass Monopoly {
public void Monopoly();
publicstatic void main(String[]) throws Exception;
publicstatic void loadArray(BoardSquare[]) throws
Exception;
publicstatic void printArray(BoardSquare[]) throws
Exception;
}
Monopoly/squares.txt
Go
plain
0
0
null
Mediterranean Ave.
property](https://image.slidesharecdn.com/anintroductiontocomputersciencewithjava-221014053829-d2f2119a/85/An-Introduction-to-Computer-Science-with-Java-docx-557-320.jpg)


![}// end class BoardSquare
//***************************************************
************************
Monopoly/src/monopoly/Monopoly.javaMonopoly/src/monopoly
/Monopoly.java/* Monopoly.java
* CSCI 111 Fall 2019
* last edited November 22, 2019 by C. Herbert
*
* This file contains the executable class Monopoly
* for a simplified version of a Monopoly game.
* It requires access to the BoardSquare class to work properly.
*
* The software creates an array for 40 BoardSquares and loads
data
* into the array from a simple text data file
*
*It also has code to test the program by printing the data from t
he array
*
* This is for teaching purposes only.
* Monopoly and the names and images used in Monopoly are
* registered trademarks of Parker Brothers, Hasbro, and others.
*/
package monopoly;
import java.util.*;
publicclassMonopoly{
publicstaticvoid main(String[] args)throwsException{
// create an array for the 40 squares on a Monopoly board
BoardSquare[] square =newBoardSquare[40];// array of 40 mon
opoly squares](https://image.slidesharecdn.com/anintroductiontocomputersciencewithjava-221014053829-d2f2119a/85/An-Introduction-to-Computer-Science-with-Java-docx-571-320.jpg)
![// call the method to load the array
loadArray(square);
// test the code by printing the data for each square
printArray(square);
}// end main()
//***************************************************
********************
// method to load the BoardSquare array from a data file
publicstaticvoid loadArray(BoardSquare[] sq)throwsException{
// declare temporary variables to hold BoardSquare properties re
ad from a file
// each variable corresponds by name to a property of a BoardSq
uare object
String inName;
String inType;
int inPrice;
int inRent;
String inColor;
// Create a File class object linked to the name of the file to be r
ead
java.io.File squareFile =new java.io.File("squares.txt");
// Create a Scanner named infile to read the input stream from t
he file
Scanner infile =newScanner(squareFile);
/* This loop reads data into the array of BoardSquares.
* Each item of data is a separate line in the file.
* There are 40 sets of data for the 40 squares.
*/](https://image.slidesharecdn.com/anintroductiontocomputersciencewithjava-221014053829-d2f2119a/85/An-Introduction-to-Computer-Science-with-Java-docx-572-320.jpg)
![for(int i =0; i <40; i++){
// read data from the file into temporary variables
// read Strings directly; parse integers
inName = infile.nextLine();
inType = infile.nextLine();
inRent =Integer.parseInt(infile.nextLine());
inPrice =Integer.parseInt(infile.nextLine());
inColor = infile.nextLine();
// initialze each array element with the BoardSquare initializing
constructor
sq[i]=newBoardSquare(inName, inType, inPrice, inRent
, inColor);
}// end for
infile.close();
}// endLoadArray
//***************************************************
********************
// test method to print data from the array of BoarsSquares
publicstaticvoid printArray(BoardSquare[] sq)throwsException{
// print header above each row
System.out.println("Data from the array of Monopoly board squ
ares.n");
System.out.printf("%-22s%-
12s%6s%6s%14s%n","name","type","price","rent","color");
System.out.println("************************************
****************************");
// print data in formatted columns, one square per row
for(int i =0; i <40; i++){
System.out.printf("%-22s", sq[i].getName());
System.out.printf("%-12s", sq[i].getType());](https://image.slidesharecdn.com/anintroductiontocomputersciencewithjava-221014053829-d2f2119a/85/An-Introduction-to-Computer-Science-with-Java-docx-573-320.jpg)
![System.out.printf("%6d", sq[i].getPrice());
System.out.printf("%6d", sq[i].getRent());
System.out.printf("%14s%n", sq[i].getColor());
}// end for
}// end printArray
//***************************************************
********************
}// end class BoardSquare
//***************************************************
************************](https://image.slidesharecdn.com/anintroductiontocomputersciencewithjava-221014053829-d2f2119a/85/An-Introduction-to-Computer-Science-with-Java-docx-574-320.jpg)


![Lec 7 28_aug [compatibility mode]](https://cdn.slidesharecdn.com/ss_thumbnails/lec728augcompatibilitymode-130917013811-phpapp02-thumbnail.jpg?width=640&height=640&fit=bounds)


![Lec 10 10_sept [compatibility mode]](https://cdn.slidesharecdn.com/ss_thumbnails/lec1010septcompatibilitymode-130917013808-phpapp01-thumbnail.jpg?width=640&height=640&fit=bounds)
![Lec 11 12_sept [compatibility mode]](https://cdn.slidesharecdn.com/ss_thumbnails/lec1112septcompatibilitymode-130917013822-phpapp02-thumbnail.jpg?width=640&height=640&fit=bounds)


