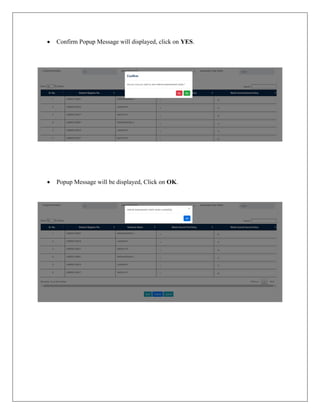
This document provides instructions for using the Unified University and College Management System (UUCMS). It outlines the steps for university administrators, HODs, principals and students to perform functions like mapping programs and departments, designing curriculum, registering courses, approving registrations and more. The steps are presented in a sequential manner and include screenshots of the interface. Key actions include mapping faculty, programs and evaluation systems by the university admin, selecting electives and approving registrations by the principal, and course mapping by HODs.
1. User Manual for Academics Module
Version-2.0
Date: 02-02-2022
Prepared by:
Centre for Smart Governance (CSG)
No. 2A, Hayes Road
Bengaluru – 560025
UNIFIED UNIVERSITY AND COLLEGE MANAGEMENT
SYSTEM (UUCMS)
2. Contents
1. University Admin Login..............................................................................................3
2. Administration .............................................................................................................4
2.1 Map Faculty..................................................................................................................................4
2.2 Department ...................................................................................................................................8
3. Program details ..........................................................................................................16
3.1 Map New Program: ....................................................................................................................16
3.2 Map Teaching Mode & Medium of Instruction .........................................................................20
3.3 Map Evaluation System..............................................................................................................28
4. Schemes and Course Type.........................................................................................35
4.1 Schemes......................................................................................................................................35
4.2 Map Program and Course Type..................................................................................................42
5. Course Regulations ....................................................................................................52
6. Credit Details .............................................................................................................59
6.1 Term/Semester Details ...............................................................................................................59
6.2 Course Type Credit Details ........................................................................................................65
7. Curriculum .................................................................................................................72
8. Academic Guidelines.................................................................................................83
9. Curriculum Selection by College Admin...................................................................86
10. Course registration for normal term by student.......................................................89
11. Approval of course registration by Principal...........................................................92
12. Map HOD to Department.........................................................................................94
13. HOD Login ..............................................................................................................99
13.1 Course Mapping .....................................................................................................................100
13.2 Course Plan.............................................................................................................................103
14. Approval of IA Marks by Principal. ......................................................................112
15. Approval of Attendance by Principal ....................................................................115
3. 1. University Admin Login
Open the portal using url- https://uucms.karnataka.gov.in
Recommended to use Desktop google chrome browser.
Click on Login-Registration
User should select the University radio button, enter the Login Credentials and Captcha code
to Login the Portal.
University admin Login Home page will be displayed.
Steps highlighted are mandatory and should be executed in the sequence provided to
proceed further.
4. 2. Administration
2.1 Map Faculty
In University Login go to Administration, Click on Faculty.
Click on Add New Faculty details.
5. Select new faculty form the dropdowm menu.
Click on Add.
6. Confirm Popup Message will displayed click on YES.
Popup displayed click on OK.
Added Faculty details will be displayed in the grid.
7. Need to delete any of the record Click on Delete in Action Colum.
Confirm Popup Message will displayed click on YES.
Popup displayed click on OK.
16. 3. Program details
Move the Cursor on Academics, Click on Program Details.
3.1 Map New Program:
If Admin wish to Map New Programs, click on Map NEW program button
17. Select Program Level as UG.
Select Program Name, Terms per year, Duration of Program, Max Duration Allowed, Duration
of Term.
Click on Add.
Confirm Popup message will display, Click on YES
18. Pop Up Message will display click on OK
Newly Added Programs will be displayed in Existing programs offered under university grid.
There is NO provision to DELTE the programs and discipline after adding.
19. The recently mapped programs are displayed in existing programs offered under university grid
Modifications can be done by clicking on "Edit" button
“View” button enables the user to list out all disciplines for that particular program.
“Add” button enables the user to map (to their university) the disciplines setup by the state
admin for that program.
20. 3.2 Map Teaching Mode & Medium of Instruction
Click on Map Teaching Mode & Medium of Instruction.
21. User Select the Program Level as UG from Dropdown List
User Select the Program Name from Dropdown List
22. User Select the Discipline from Discipline Drop Down List
23. User Select the Teaching Mode from Drop down List.
24. User Select the Medium of Instructions from Drop Down List
25. Click on ADD.
Confirm Popup message will be displayed Click on YES.
26. Popup Message will be displayed.
Click on OK on Success Message.
User Clicks on Delete to Delete the Record.
27. User Clicks on Yes On Delete POPUP Message
User Clicks on Ok On Delete Success POPUP Message
31. User Select the Evaluation System from Dropdown List
User Click on Add Button
32. User Click on Yes On POPUP Message
User Click on OK On POPUP Message
33. User clicks on delete in action field in table grid to delete Program wise Evaluation
System.
User clicks Yes to delete Program Wise Evaluation System.
34. User Clicks On Ok on Popup Message to delete the Program Wise Evaluation System
35. 4. Schemes and Course Type
4.1 Schemes
In Academics, go to Schemes & Course Types and Select Schemes.
Select Add New Schemes
37. Select Academic Year from the dropdown.
Select Scheme Type from the dropdown.
38. Select Add New Scheme button to save.
A Popup Message Will appear for Conformation before saving the New Scheme.
Click on YES.
39. A Popup Message Will appear for saving the New Scheme.
Edit/ Update The Existing Schemes.
Click on Edit Button on Scheme Details Page.
40. Enter all the Required Data and Click on Update Button to save the data.
Delete The Existing Schemes.
Click on Delete Button on Scheme Details Page to delete Existing data.
41. Popup Message will appear for Conformation before deleting data, Click on OK.
A Popup Message Will appear for Successful Deletion.
42. 4.2 Map Program and Course Type
Select Map Program and Course Type.
To ADD New Course Type
43. Select the Scheme.
Scheme Name Is Dependent on Scheme Code Which auto fills.
44. Select Program Level.
Select Program Name Which is dependent on Program Level.
45. Select Course Type Which is dependent on Program Name.
Select Submit Button to Save.
46. A Popup Message Will appear for Conformation to Save.
To View the Existing Course Type.
Select Scheme Code
47. Scheme Code Will Auto fill which is Dependent on Scheme Name.
Select Program Level.
48. Select Program Name from the Dropdown which is Dependent on Program Level.
Select Course Type from the Dropdown which is Dependent on Program Name.
49. All the Course Types will be displayed.
Select Delete Button to delete any Course Type.
50. A Popup Message Will appear for Conformation before delete.
Click on YES.
A Popup Message Will appear for Successful Deletion.
Any Course Types Which Are left-out can be added individually or Selecting multiple.
51. Popup Message Will appear for Conformation Before Saving.
Click on YES.
52. 5. Course Regulations
Addition/Update of Course regulations by department chairperson
Login of University Admin, you will be displayed the following Home screen
Select the Academics Menu at the top left.
53. Select the ‘Course Regulations’ option from the dropdown.
Click on ‘Add New Course/Paper Details’.
54. Fill all the mandatory fields & Click ‘Add’
Verify the entered details if wrong click ‘Remove’ else Click ‘Next’ button to proceed
further.
Note: Repeat the same procedure for adding more course/paper details.
55. Enter the Credit details & Click ‘Add’
Verify the details added if wrong click ‘Remove’ else Click ‘Next’ button to proceed further
or click ‘Back’ button to go back
Note: Repeat the same procedure for adding more course/paper details
56. Enter the Evaluation Details and Click ‘Add’.
Repeat the same steps, if you are adding evaluation details for multiple components and click
‘Next’
Note: ‘%weightage of component’ for each component type should be 100.
57. Click directly ‘Submit’ button in the Pre-requisite tab
Once you click Submit option a pop-up will be displayed with success message as ‘Data
Saved Successfully’
So, this will complete the procedure for Adding Course/Paper details
58. For viewing the course/paper details added
Select the Scheme that you used for adding course/paper details
Select the Program Level & Offering Department
Then click ‘View course/paper details’ option.
Once you click ‘View course/paper details’ you’ll be displayed the fallowing screen
Where you can view each course details by clicking ‘View’ option and click ‘Delete’ option
to delete the course
59. 6. Credit Details
Select Credit details drop down in Academics.
Credit details page is displayed- Click on Term/Semester details.
6.1 Term/Semester Details
60. Click on Add Program Level Credit Details.
Select Scheme, NEP Level, Term and Credits
61. Click on Add button in Action Colum.
Select Program Level and Program Name.
Click on Add
63. Confirm popup Message is display, Click on YES.
Popup displayed click on OK.
To View Existing Program Level Credit Details.
Select scheme, Program level, Program name in credit details page and click on View.
64. Need to delete any of the records Click on Delete option, popup is displayed.
After Click on Freeze option, Respective Scheme will freeze.
Click on YES.
Note: Please freeze semester/term wise credit details. Curriculum design is not possible without
freezing term/semester wise.
65. 6.2 Course Type Credit Details
In Academics, go to Credit Details Select Course Type Credit Details.
Click on Add Course Type Credit Details.
66. Select Scheme, Course type, term and Credits.
Click on Add in Action Colum.
67. Select Course type, program level and program name and click on Add.
Click on Submit.
68. After click on Submit confirm popup is displayed, Click on YES.
To find Existing course type credit details Select Scheme, Program Level,
Program name and click on view.
69. Click on View in Action Column.
View Program Level Credit Details page is displayed. Enter Term/Semester and
Term/Semester credits.
Note: Term/Semester Credits and Total Credits should be same.
70. Click on Validate Confirm Popup is displayed.
Confirm Message will be displayed, Click on YES.
71. If we want to Edit the View course type Credit details, click on Edit Option.
Click on Delete in action column to delete the credit details and get Confirm Popup will
be displayed.
Confirm Message will be displayed, Click on YES.
72. 7. Curriculum
Addition/Update of Curriculum Details by department chairperson
Login of University Admin, you will be displayed the following Home screen
Select the Academics Menu at the top left
73. Select the ‘Curriculum’ option from the dropdown then click on ‘CBCS’ option
Then click on ‘Add New Course/Paper Details’
74. Enter all the details and Click ‘Add’
Repeat the same steps for adding more courses/papers
75. Then select the Program Level, Program Name and Discipline and click ‘Add’
76. Then click on ‘Submit’ a pop-up message will appear.
77. When we click on Submit then Popup message shows as ‘Data added successfully’ and click
‘OK’
To view the Curriculum details added
Select Scheme, Program level & Program Name
Then Click ‘View Curriculum’
78. Once you click ‘View Curriculum’ it will display the curriculum details added.
Where you can view the Curriculum details for each Discipline by clicking ‘view’ option
in the action column.
79. When we Click on view Curriculum details will be displayed.
Select Term/Semester.
80. When we select term/Semester curriculum details will be displayed.
Validated credits and Credits as per curriculum should be equal then click on validate
option.
Note-Please validate curriculum, Colleges will not be able to see Curriculum without
validation
81. For BSC and BA we need to assigne half credits only (here we assigned 6 credits) not
more than that because this two course has 2 disciplines, For another Half credits click on
Remaining DSC Credits will come from another discipline checkbox.
Note- For BSC and BA we need to assigne half credits only (here we assigned 6 credits) not
more than that because this two course has 2 disciplines, Remaining DSC Credits will come from
another discipline
Confirm Popup Message will be displayed,then click on Yes.
83. 8. Academic Guidelines
In Academics go to Academic Guidelines and select Minimum Attendence Requirment.
Click on Add Minmum Attendance Requirement Details
84. Select Scheme ,Program Level,Program Name and Minimum Attandance.
Click on Add.
Popup Message will be displayed, Click on Ok.
85. Added Minimum Attendance Requirement will display in the grid.
86. 9. Curriculum Selection by College Admin
Below mentioned steps should be completed before proceeding to college curriculum section
Curriculum at university level should be completed
College intake for the selected program should be completed from University
At-least one student should be registered for that course
Once you finish the pre-requisite steps then continue with below steps
Click on ‘Curriculum’ option from Academics menu.
Click on ‘Select Electives’ option
87. Then Select the ‘Term’.
Once you select the Term, you will be displayed with list of courses (Both Mandatory &
Electives)
So, now you can select electives of your choice by selecting checkbox then select the
allocation method and no of seats
Once you finish with the selection click on ‘Save’ button
88. Click on ‘Yes’ in the confirmation pop-up.
Now click on ‘Ok’.
This completes the electives selection by College
89. 10. Course registration for normal term by student
Login as ‘Student’
Click on ‘Course Registration’ from Academics menu.
90. Provide the Preference of your choice (in case of multiple electives), Select the Radio
Button.
Note- Total selected papers credits count should be equal to semester credits count.
Click on Submit.
92. 11. Approval of course registration by Principal
Once Student provides his preference Principal has to approve it
Now, Login as college ‘Principal’
Click on ‘Course Selection Approval’ from Academics menu.
93. Select all the fields and click on ‘Fetch’
Verify the details & Click ‘Approve’ if correct or if not click ‘Reject’
94. 12. Map HOD to Department
NOTE: Employee should be self-registered through the invitation sent by college then only you
will be able to proceed with below mentioned steps.
Login as College Admin
In Administration, Click on ‘Departments’.
95. Click on ‘Add New Department Details’
Select the Department form dropdown menu and click on ‘Submit’
96. Conform Popup Message will be displayed, Click on ‘Yes’.
Click on ‘Ok’
97. Now, Click on ‘Map HOD to Department’
Click on ‘Map Department HOD’
98. Select the ‘Department Name’ and ‘Employee Name’ then click on ‘Add’.
Click on ‘Yes’ in confirmation popup.
99. Click on ‘Ok’
13. HOD Login
Now, that employee has to login to Whom HOD role is mapped.
100. 13.1 Course Mapping
Now click on ‘Course Mapping’ from ‘Academics’ menu.
Click on ‘Map New Courses’
101. Select the Department, Scheme, Program Level and click on ‘View’.
Click on ‘Map’ option in column of courses you want to map.
102. Confirm Popup will be displayed, Click on ‘Yes’.
Click on ‘Ok’
103. Once you click Ok , it will show the list of courses mapped
You can delete the mapped courses by clicking on ‘Delete’ option in action column.
13.2 Course Plan
Click on ‘Course Plan’ submenu from ‘Academics’ menu.
104. Select the Academic year & click on ‘View Courses Mapped to Department’
Click on ‘Internal Assessment Plan’ option in action column.
105. Select the Evaluation Component, Assessment Type & enter the ‘Marks’ and click on
‘Add’
Repeat the same steps for adding multiple Assessment Types (In Case).
Once you finish adding Assessment types, click on ‘Submit’
106. Click on ‘Ok’
Then click on ‘Back’ button.
107. Click on ‘Assessment Marks’ option in action column.
Select Evaluation Component and Assessment Type.
108. Click on Fetch, then Student details will be displayed in the grid.
Enter the Marks Scored by Student, Click on Submit.
109. Confirm Popup Message will displayed, click on YES.
Popup Message will be displayed, Click on OK.
110. Click on ‘Attendance’ option in action column.
Student Details will be displayed in the grid, HOD has to enter the Number of Classes
Conducted and Number of Classes Attended.
Attendance Percentage will be Auto calculated.
111. Click on Submit.
Popup Message will displayed click on OK.
112. 14. Approval of IA Marks by Principal.
After entering IA Marks by HOD, Principal has to approve the IA Marks of Student.
Principal has to Login using his Login Credential.
In Academics Select Approve Internal Assessment.
113. Select Academic Year, Department and Term.
Select Course Code, Course Name Will be Auto fetched
Click on View Marks.
114. Student Record will be displayed in the grid. Click on Approve (Submit to Exam
Department).
Confrim Popup Message will be displayed,Click on YES.
115. 15. Approval of Attendance by Principal
After entering Attendance by HOD, Principal has to approve the Attendance of Student.
Principal has to Login using his Login Credential.
In Academics, Select Approve Attendance.
116. Select Academic Year,Department,Term.
Select Course Code,Course Paper Name will be Autofetched.
Click on View Attendance.
117. Student Attendence details will be displayed in the grid.
Click on Approve (Submit to Exam Department).
118. Confirm Popup Message will be displayed Click on YES
Submitted Successfully Popup will be displayed. Click on OK.