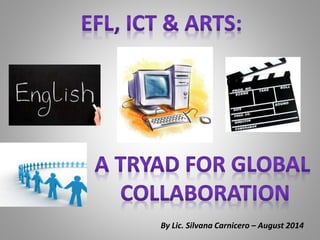
EFL, ICT & Arts: A tryad for global collaboration
•Download as PPTX, PDF•
1 like•445 views

This presentation was shown at Share 2014, a congress for English teachers in Buenos Aires. It shows how to take part in the project Adobe Youth Voices as a way of raising students' awareness of social issues which are relevant to all youth around the world.

Recommended
More Related Content
What's hot
What's hot (20)
Viewers also liked
Viewers also liked (7)
Similar to EFL, ICT & Arts: A tryad for global collaboration
Similar to EFL, ICT & Arts: A tryad for global collaboration (20)
More from Silvana Carnicero
More from Silvana Carnicero (20)
Recently uploaded
Recently uploaded (20)
EFL, ICT & Arts: A tryad for global collaboration
- 1. By Lic. Silvana Carnicero – August 2014
- 3. Project Description Objectives • Make students reflect on social problems they are interested in • Allow students to do their own research on the topics chosen • Make students create messages to raise awareness of the social problems they have chosen •Allow students to become content producers for other youth in different parts of the world E N G L I S H I C T A R T S
- 5. Bullying at school Addictions Dangers in the streets Environmental damage Animals’ rights Teenage pregnancy
- 6. The project in steps Visual input Brainstorming Slogan Research Storyboard Production Peer feedback Sharing
- 7. A video on bullying…
- 9. Methodology Constructivism Connectivism Problem-solving Collective intelligence
- 10. ICT Use Search engines: to look for information relevant to the topics Online translators: to look up words they did not know in English Interactive graphic organizers: to organize the information found Power Point presentations: to present to their classmates the causes and consequences of the problems chosen and the possible solutions
- 11. Facebook: to have an online collaborative working space to negotiate content and organization for the video productions Moviemaker and Adobe Premiere: to create and edit the videos produced on the topics of their choice Youtube: to make their productions public for an international audience Blog: to publish the final product and share them in the web accompanied by explanations of the production process
- 12. ACTIVITIES Technology allowed students to build knowledge based on their own reality
- 13. Learning beyond the classroom walls • Virtual classroom in: •Closed group in:
- 14. Local and virtual collaboration As a result of face to face and online collaboration, students created summaries and graphic organizers that were the starting point for their final products
- 15. Evidencias del Aprendizaje Students shared their productions globally in the collaborative site that gave birth to them: Adobe Youth Voices Online Community Street Dangers Let´s care for our world Born for freedom Say no to addictions Productions
- 16. An anecdote of success Two students at our school were nvited to take part in Adobe Youth Summit for the work done in Adobe Youth Voices Project. There, they exchanged creative ideas with their global peers who were also part of the project and made a joint production with students from India and USA. Collaborative final product
- 17. EFL ICT ARTS Meaningful foreign language learning
- 18. Lic. Silvana Carnicero silvanacar01@yahoo.com.ar
Editor's Notes
- Para incrustar o añadir recursos o los materiales e información del proyecto siga los siguientes pasos: Debe tener los recursos o documentos fácilmente accesibles. En el menú Insertar/Insert, seleccione Objeto/Object. Seleccione Crear desde archivo/Create from File y haga clic en Examinar/Change Icon ... .... Busque el archivo que desea incluir y haga clic en Aceptar/OK. Seleccione Mostrar como icono/Display as icon y haga clic en Cambiar icono/Change Icon ... y añada o escriba un título adecuado. Haga clic en Aceptar/OK para agregar el título y haga clic en Aceptar/OK para incrustar o añadir el archivo. Utilice el botón de Acción/Action en la función o menú Insertar/Insert para activar el objeto. Utilice hipervínculos o enlaces a sitios web, para mostrar su audio y video. No debe incrustar o añadir vídeo o de audio, utilice enlaces a otros sitios de alojamiento de vídeo o a los sitios Web de su escuela. Abra el documento de Word haciendo doble clic en los iconos. Al hacer clic en Guardar/Save en Word guardará los cambios. Por favor, asegúrese de que tiene la plena autorización para utilizar las imágenes y vídeo, ya que este proyecto será de dominio público.
- Para incrustar o añadir recursos o los materiales e información del proyecto siga los siguientes pasos: Debe tener los recursos o documentos fácilmente accesibles. En el menú Insertar/Insert, seleccione Objeto/Object. Seleccione Crear desde archivo/Create from File y haga clic en Examinar/Change Icon ... .... Busque el archivo que desea incluir y haga clic en Aceptar/OK. Seleccione Mostrar como icono/Display as icon y haga clic en Cambiar icono/Change Icon ... y añada o escriba un título adecuado. Haga clic en Aceptar/OK para agregar el título y haga clic en Aceptar/OK para incrustar o añadir el archivo. Utilice el botón de Acción/Action en la función o menú Insertar/Insert para activar el objeto. Utilice hipervínculos o enlaces a sitios web, para mostrar su audio y video. No debe incrustar o añadir vídeo o de audio, utilice enlaces a otros sitios de alojamiento de vídeo o a los sitios Web de su escuela. Abra el documento de Word haciendo doble clic en los iconos. Al hacer clic en Guardar/Save en Word guardará los cambios. Por favor, asegúrese de que tiene la plena autorización para utilizar las imágenes y vídeo, ya que este proyecto será de dominio público.
- Para incrustar o añadir recursos o los materiales e información del proyecto siga los siguientes pasos: Debe tener los recursos o documentos fácilmente accesibles. En el menú Insertar/Insert, seleccione Objeto/Object. Seleccione Crear desde archivo/Create from File y haga clic en Examinar/Change Icon ... .... Busque el archivo que desea incluir y haga clic en Aceptar/OK. Seleccione Mostrar como icono/Display as icon y haga clic en Cambiar icono/Change Icon ... y añada o escriba un título adecuado. Haga clic en Aceptar/OK para agregar el título y haga clic en Aceptar/OK para incrustar o añadir el archivo. Utilice el botón de Acción/Action en la función o menú Insertar/Insert para activar el objeto. Utilice hipervínculos o enlaces a sitios web, para mostrar su audio y video. No debe incrustar o añadir vídeo o de audio, utilice enlaces a otros sitios de alojamiento de vídeo o a los sitios Web de su escuela. Abra el documento de Word haciendo doble clic en los iconos. Al hacer clic en Guardar/Save en Word guardará los cambios. Por favor, asegúrese de que tiene la plena autorización para utilizar las imágenes y vídeo, ya que este proyecto será de dominio público.