More Related Content
Similar to 2.3.8 lab---navigate-the-ios-by-using-tera-term-for-console-connectivity (1) (20)
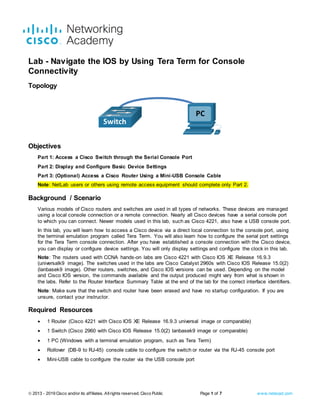
2.3.8 lab---navigate-the-ios-by-using-tera-term-for-console-connectivity (1)
- 1. © 2013 - 2019 Cisco and/or its affiliates. All rights reserved. Cisco Public Page 1 of 3 www.netacad.com
Packet Tracer - Implement Basic Connectivity
Addressing Table
Device Interface IP Address Subnet Mask
S1 VLAN 1 192.168.1.253 255.255.255.0
S2 VLAN 1 192.168.1.254 255.255.255.0
PC1 NIC 192.168.1.1 255.255.255.0
PC2 NIC 192.168.1.2 255.255.255.0
Objectives
Part 1: Perform a Basic Configuration on S1 and S2
Part 2: Configure the PCs
Part 3: Configure the Switch Management Interface
Background
In this activity, you will first create a basic switch configuration. Then, you will implement basic connectivity by
configuring IP addressing on switches and PCs. When the IP addressing configuration is complete, you will
use various show commands to verify the configuration and use the ping command to verify basic
connectivity between devices.
Instructions
Part 1: Perform a Basic Configuration on S1 and S2
Complete the following steps on S1 and S2.
Step 1: Configure S1 with a hostname.
a. Click S1 and then click the CLI tab.
b. Enter the correct command to configure the hostname as S1.
Step 2: Configure the console and encrypted privileged EXEC mode passwords.
a. Use cisco for the console password.
b. Use class for the privileged EXEC mode password.
Step 3: Verify the password configurations for S1.
Question:
How can you verify that both passwords were configured correctly?
Type your answers here.
- 2. Packet Tracer - Implement Basic Connectivity
© 2013 - 2019 Cisco and/or its affiliates. All rights reserved. Cisco Public Page 2 of 3 www.netacad.com
Step 4: Configure an MOTD banner.
Use an appropriate banner text to warn unauthorized access. The following text is an example:
Authorized access only. Violators will be prosecuted to the full extent of the law.
Step 5: Save the configuration file to NVRAM.
Question:
Which command do you issue to accomplish this step?
Type your answers here.
Step 6: Repeat Steps 1 to 5 for S2.
Part 2: Configure the PCs
Configure PC1 and PC2 with IP addresses.
Step 1: Configure both PCs with IP addresses.
a. Click PC1 and then click the Desktop tab.
b. Click IP Configuration. In the Addressing Table above, you can see that the IP address for PC1 is
192.168.1.1 and the subnet mask is 255.255.255.0. Enter this information for PC1 in the IP Configuration
window.
c. Repeat steps 1a and 1b for PC2.
Step 2: Test connectivity to switches.
a. Click PC1. Close the IP Configuration window if it is still open. In the Desktop tab, click Command
Prompt.
b. Type the ping command and the IP address for S1 and press Enter.
Packet Tracer PC Command Line 1.0
PC> ping 192.168.1.253
Question:
Were you successful? Explain.
Type your answers here.
Part 3: Configure the Switch Management Interface
Configure S1 and S2 with an IP address.
Step 1: Configure S1 with an IP address.
Switches can be used as plug-and-play devices. This means that they do not need to be configured for them
to work. Switches forward information from one port to another based on MAC addresses.
Question:
If this is the case, why would we configure it with an IP address?
Type your answers here.
Use the following commands to configure S1 with an IP address.
S1# configure terminal
Enter configuration commands, one per line. End with CNTL/Z.
- 3. Packet Tracer - Implement Basic Connectivity
© 2013 - 2019 Cisco and/or its affiliates. All rights reserved. Cisco Public Page 3 of 3 www.netacad.com
S1(config)# interface vlan 1
S1(config-if)# ip address 192.168.1.253 255.255.255.0
S1(config-if)# no shutdown
%LINEPROTO-5-UPDOWN: Line protocol on Interface Vlan1, changed state to up
S1(config-if)#
S1(config-if)# exit
S1#
Question:
Why do you enter the no shutdown command?
Type your answers here.
Step 2: Configure S2 with an IP address.
Use the information in the Addressing Table to configure S2 with an IP address.
Step 3: Verify the IP address configuration on S1 and S2.
Use the show ip interface brief command to display the IP address and status of all the switch ports and
interfaces. You can also use the show running-config command.
Step 4: Save configurations for S1 and S2 to NVRAM.
Question:
Which command is used to save the configuration file in RAM to NVRAM?
Type your answers here.
Step 5: Verify network connectivity.
Network connectivity can be verified using the ping command. It is very important that connectivity exists
throughout the network. Corrective action must be taken if there is a failure. Ping S1 and S2 from PC1 and
PC2.
a. Click PC1 and then click the Desktop tab.
b. Click Command Prompt.
c. Ping the IP address for PC2.
d. Ping the IP address for S1.
e. Ping the IP address for S2.
Note: You can also use the ping command on the switch CLI and on PC2.
All pings should be successful. If your first ping result is 80%, try again. It should now be 100%. You will learn
why a ping may sometimes fail the first time later in your studies. If you are unable to ping any of the devices,
recheck your configuration for errors.
End of Document