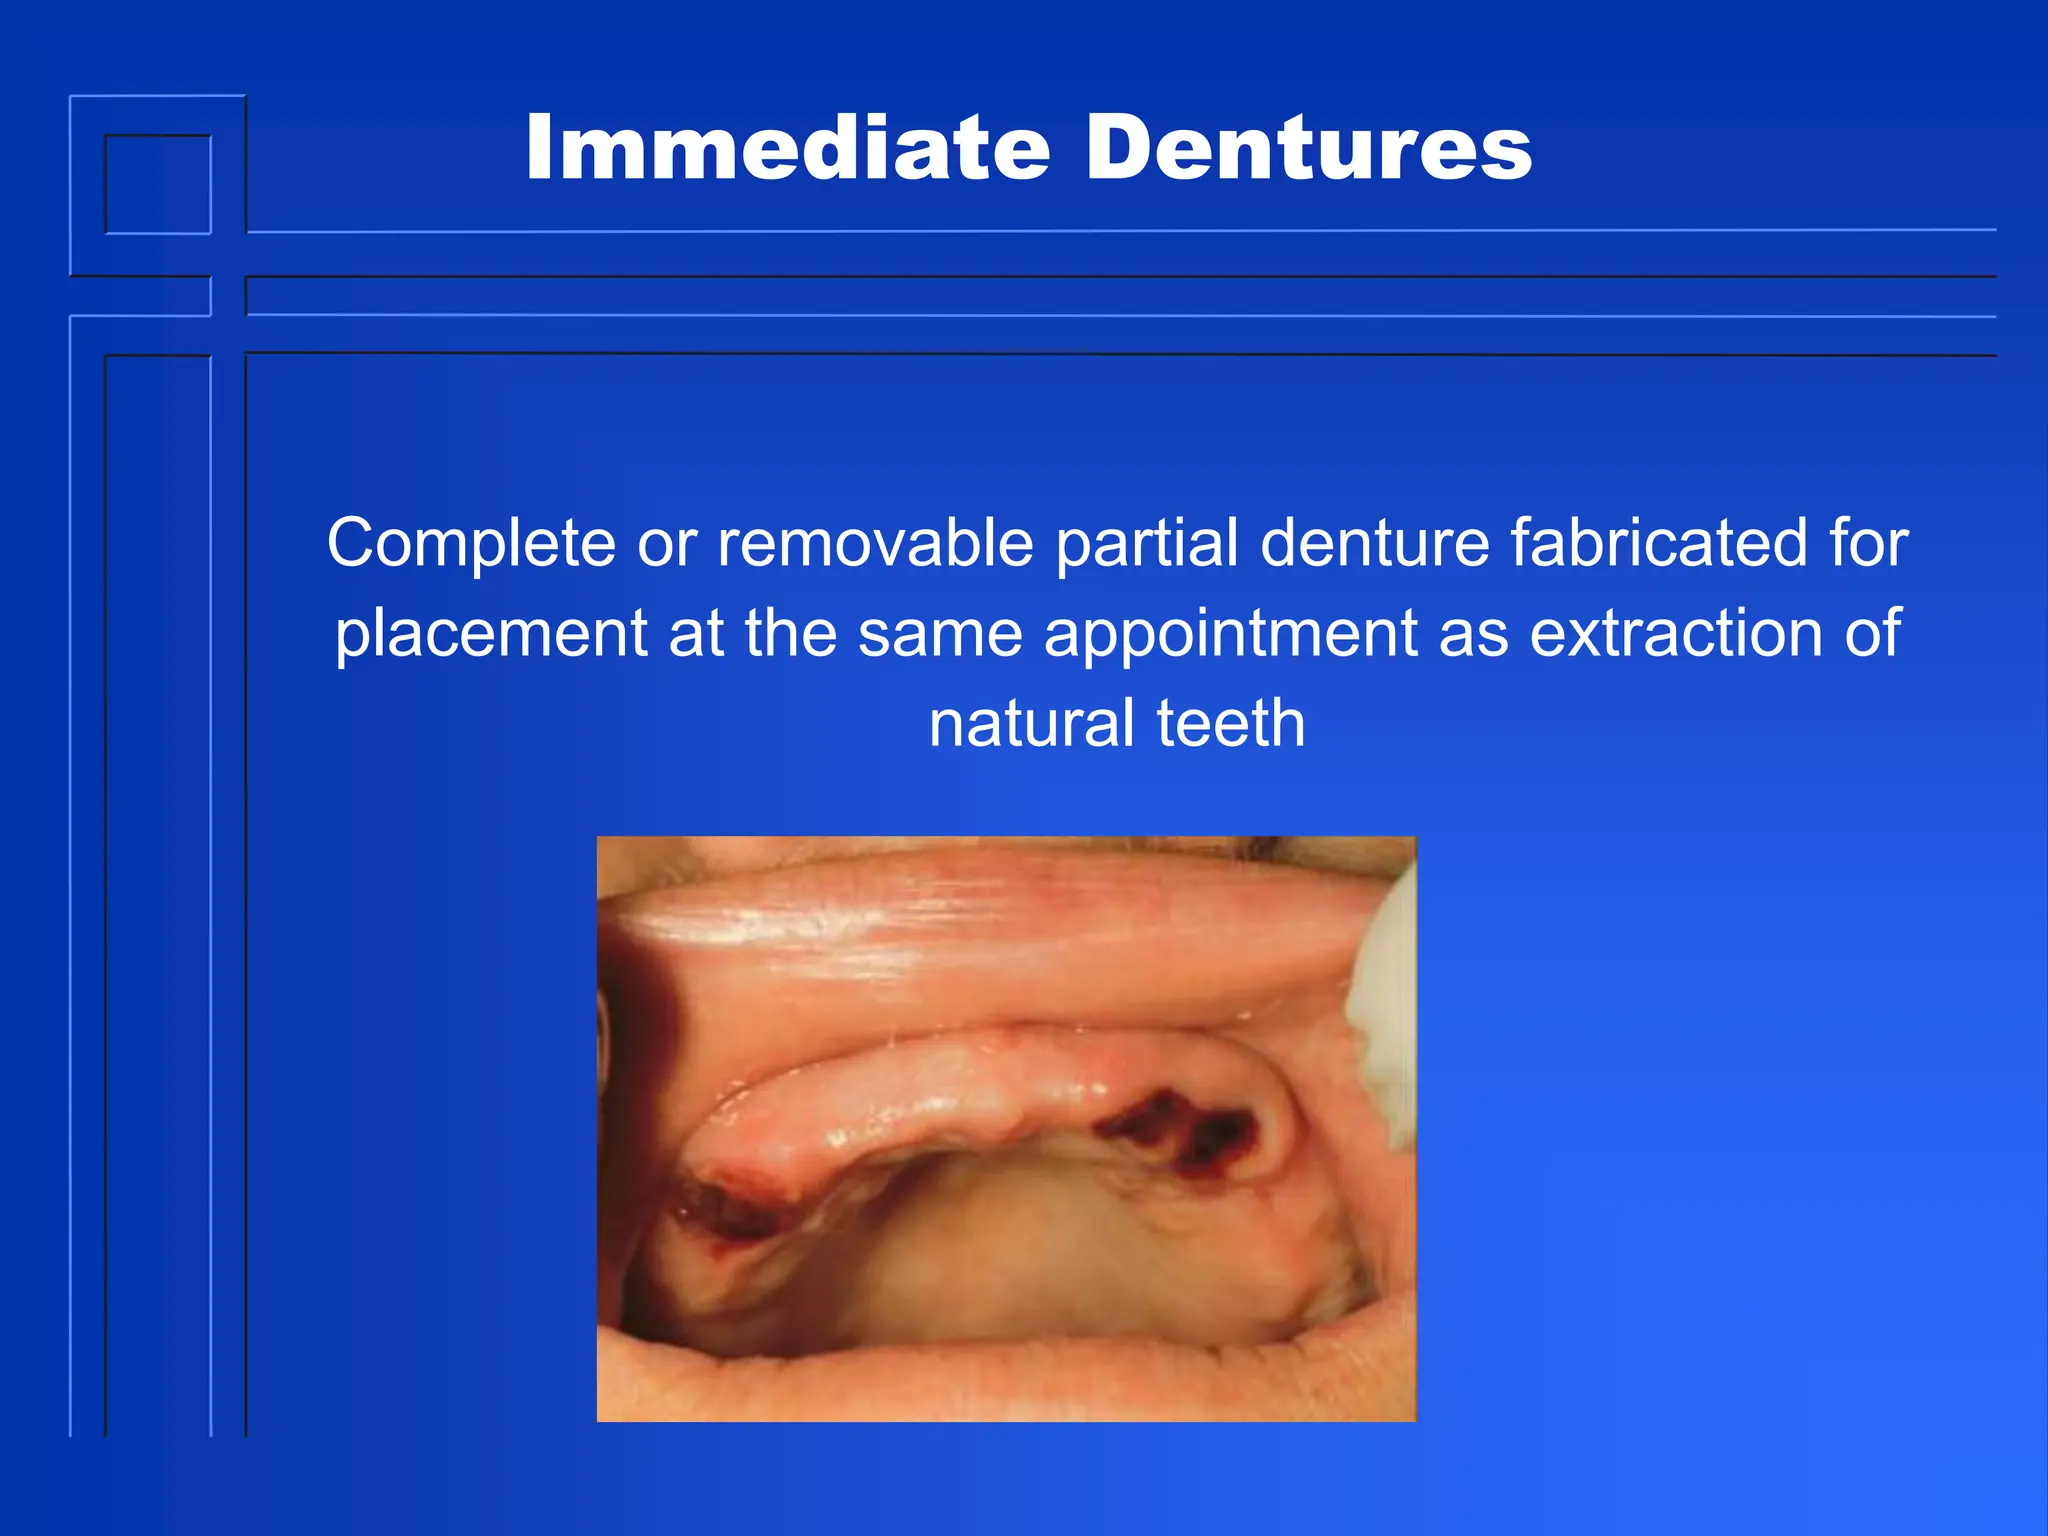
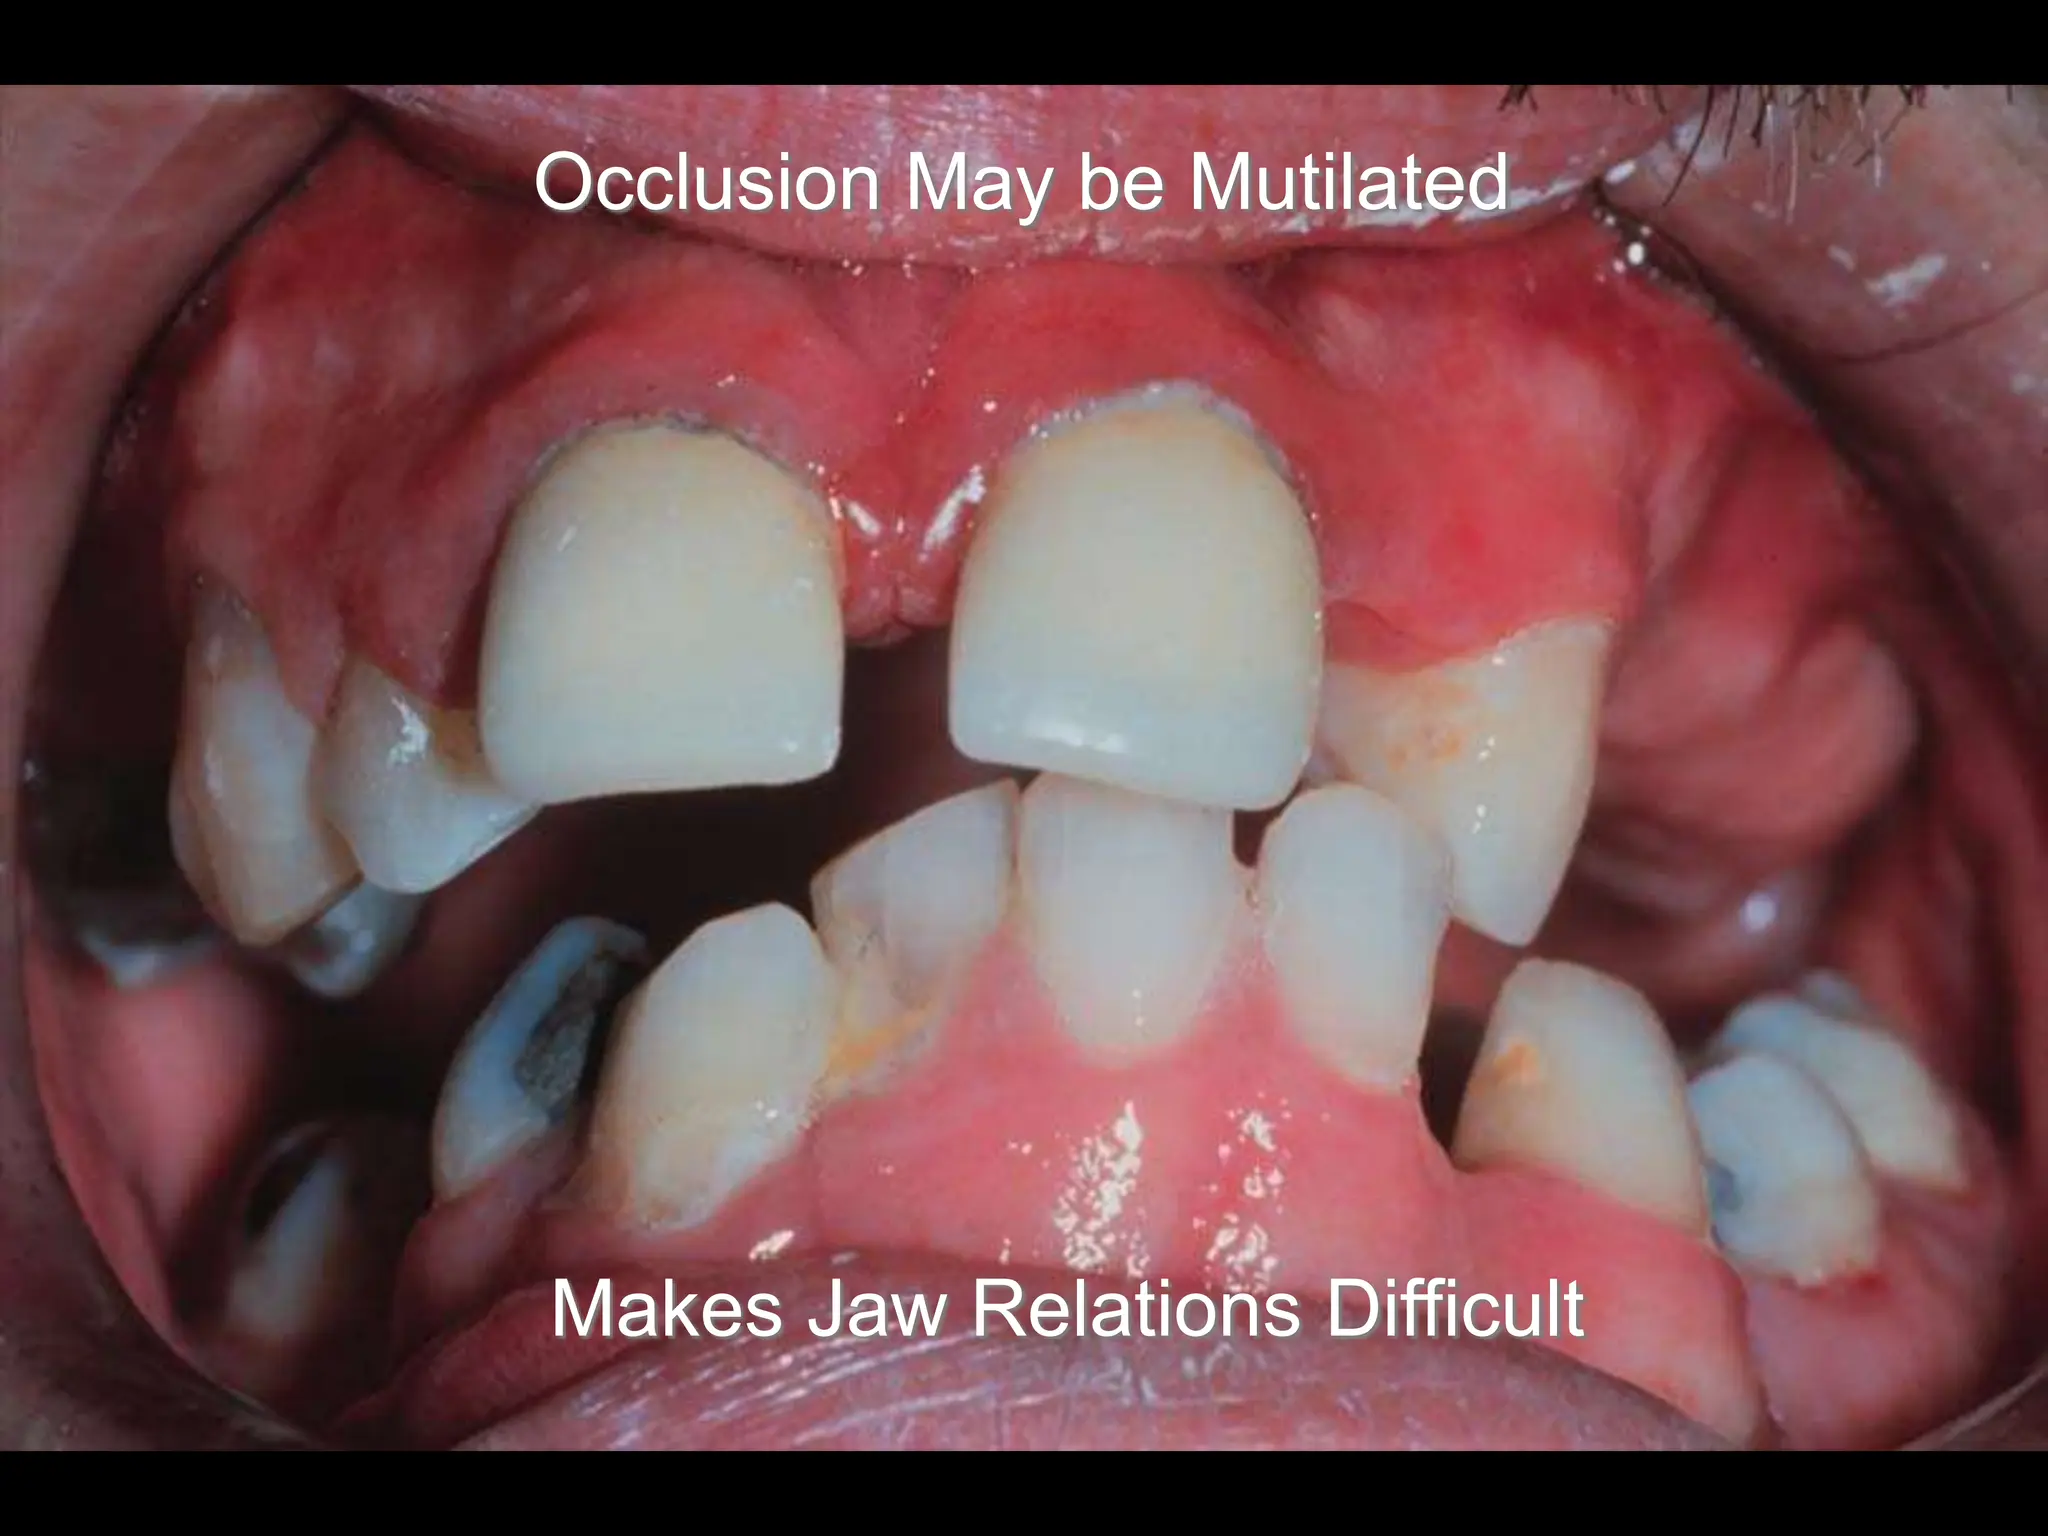
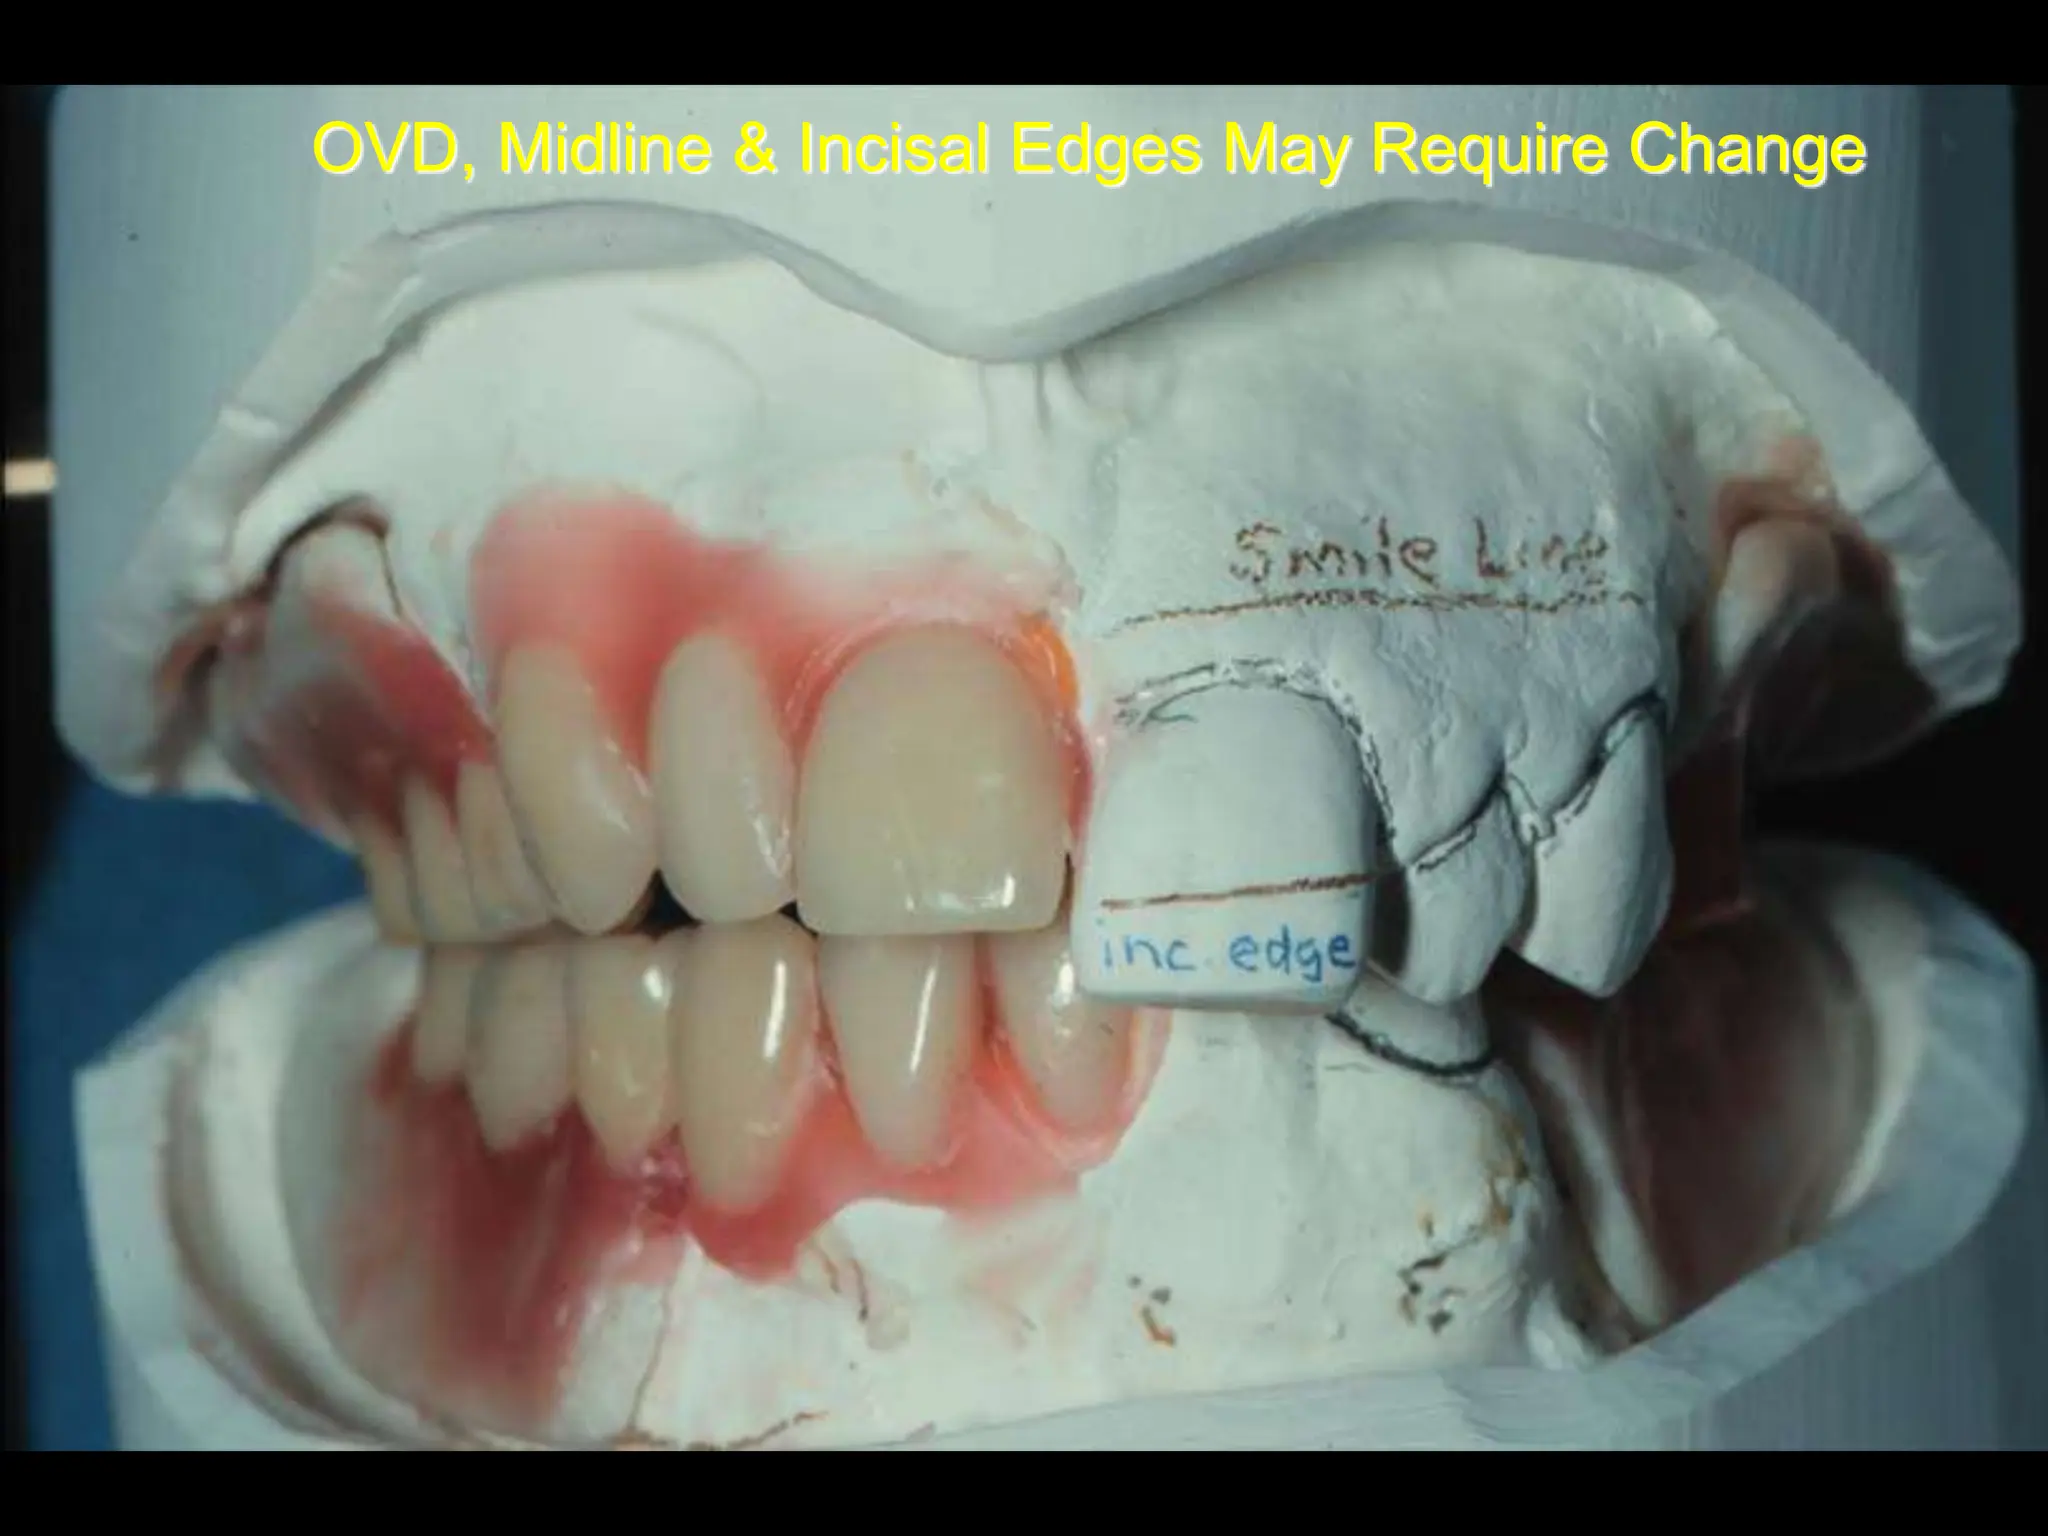
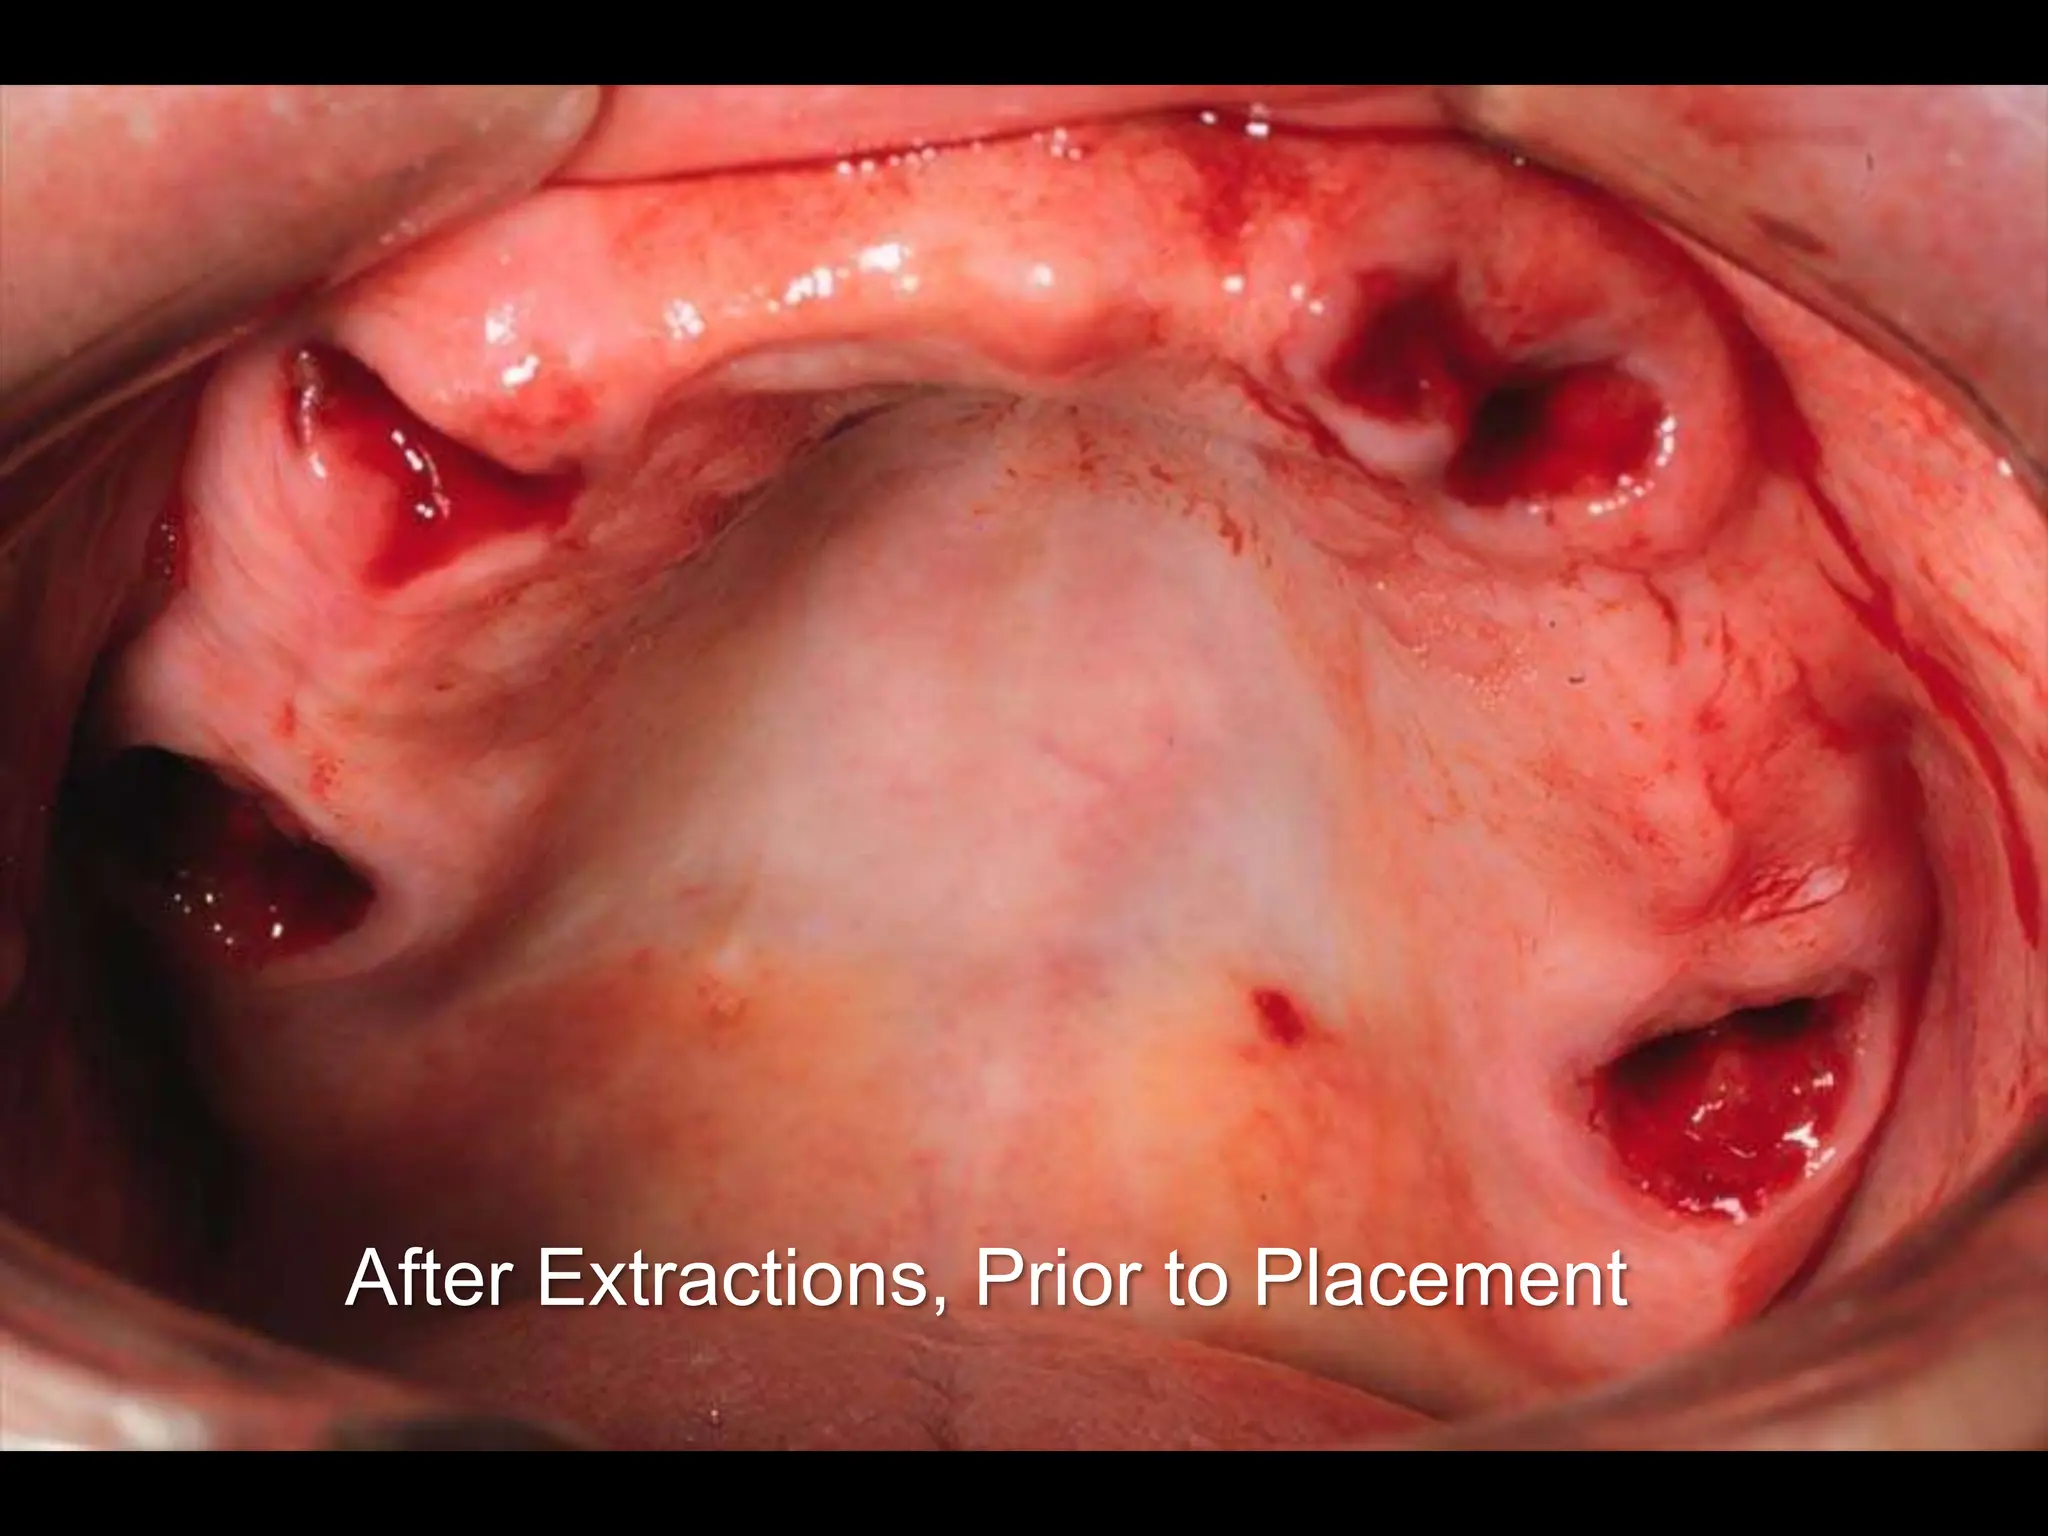
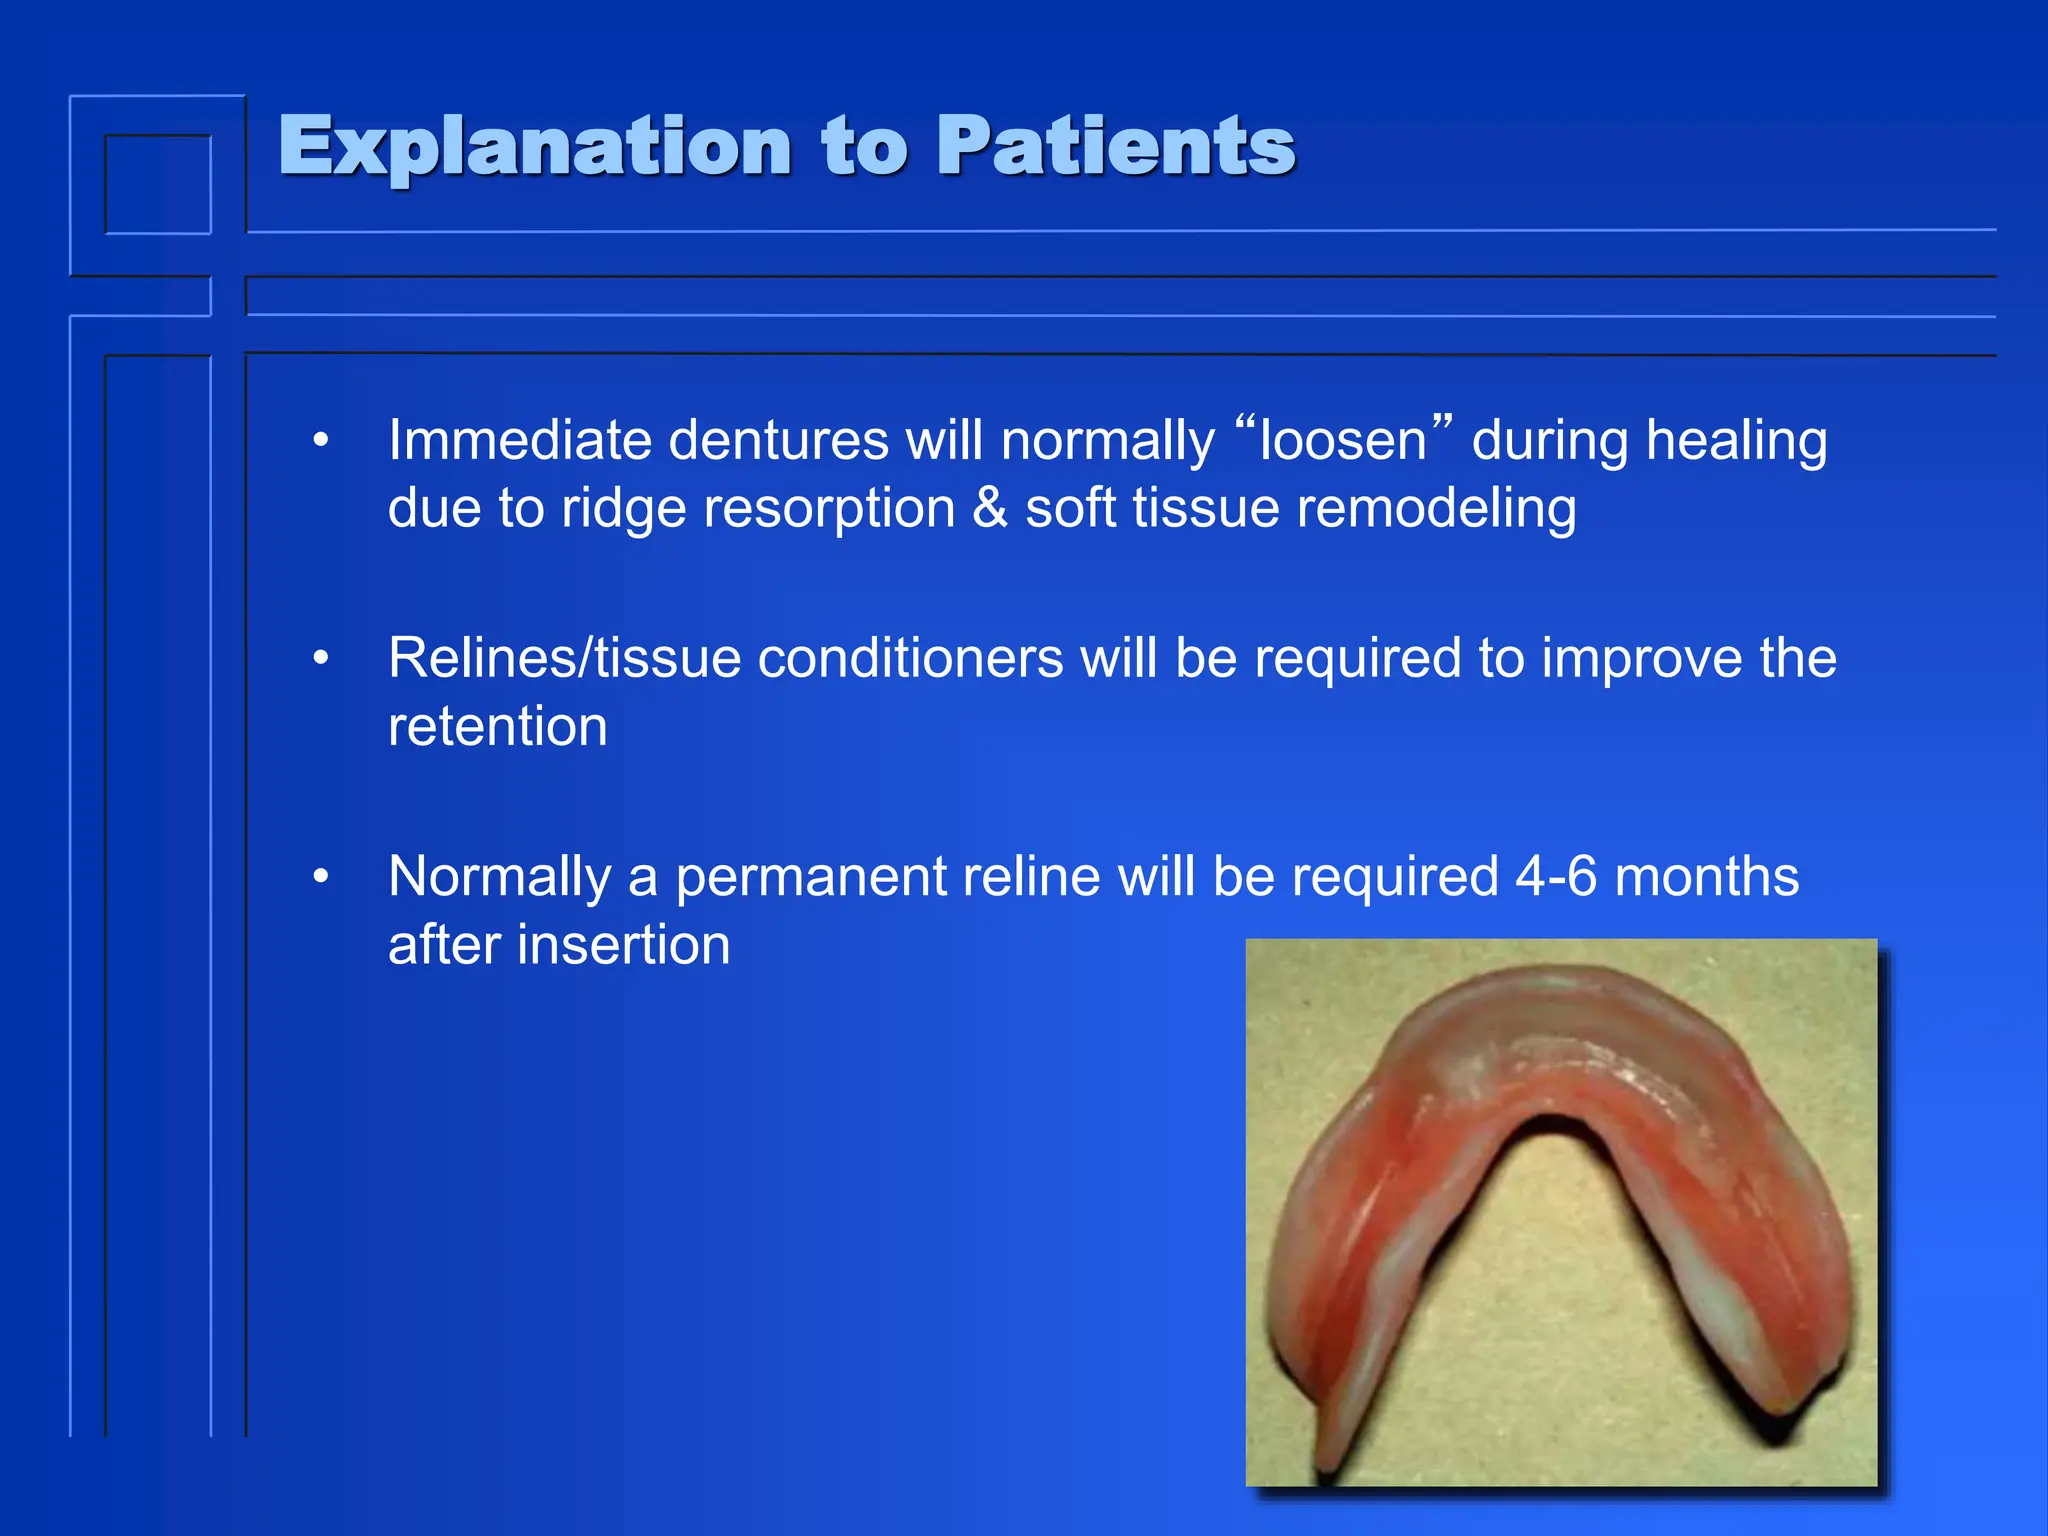
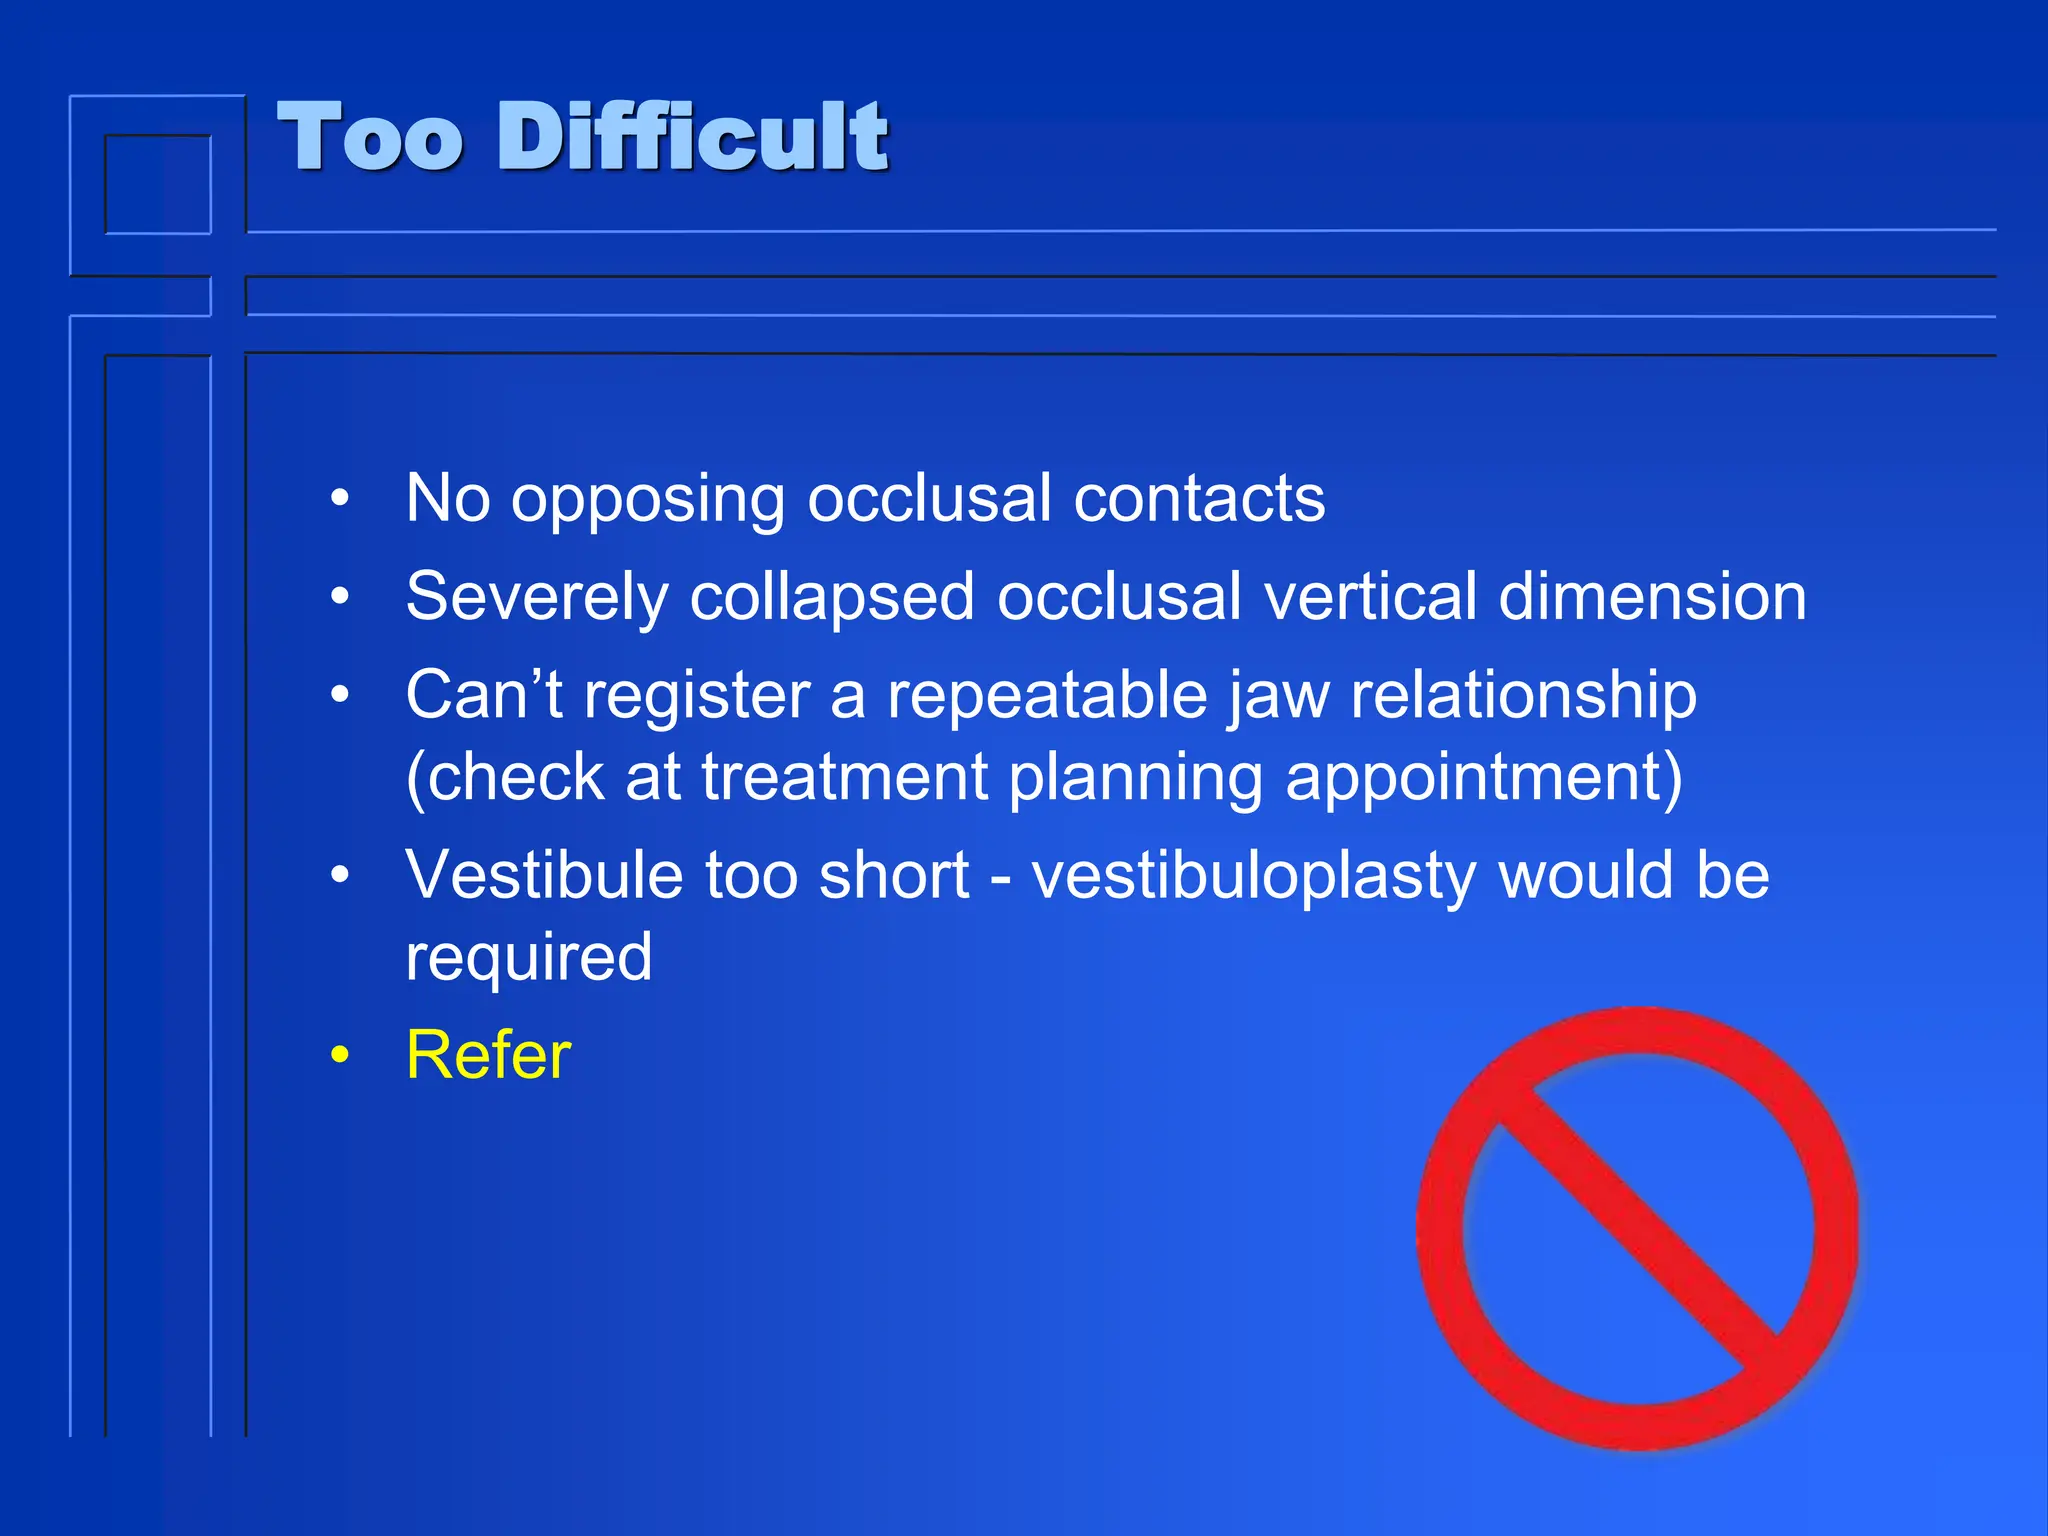
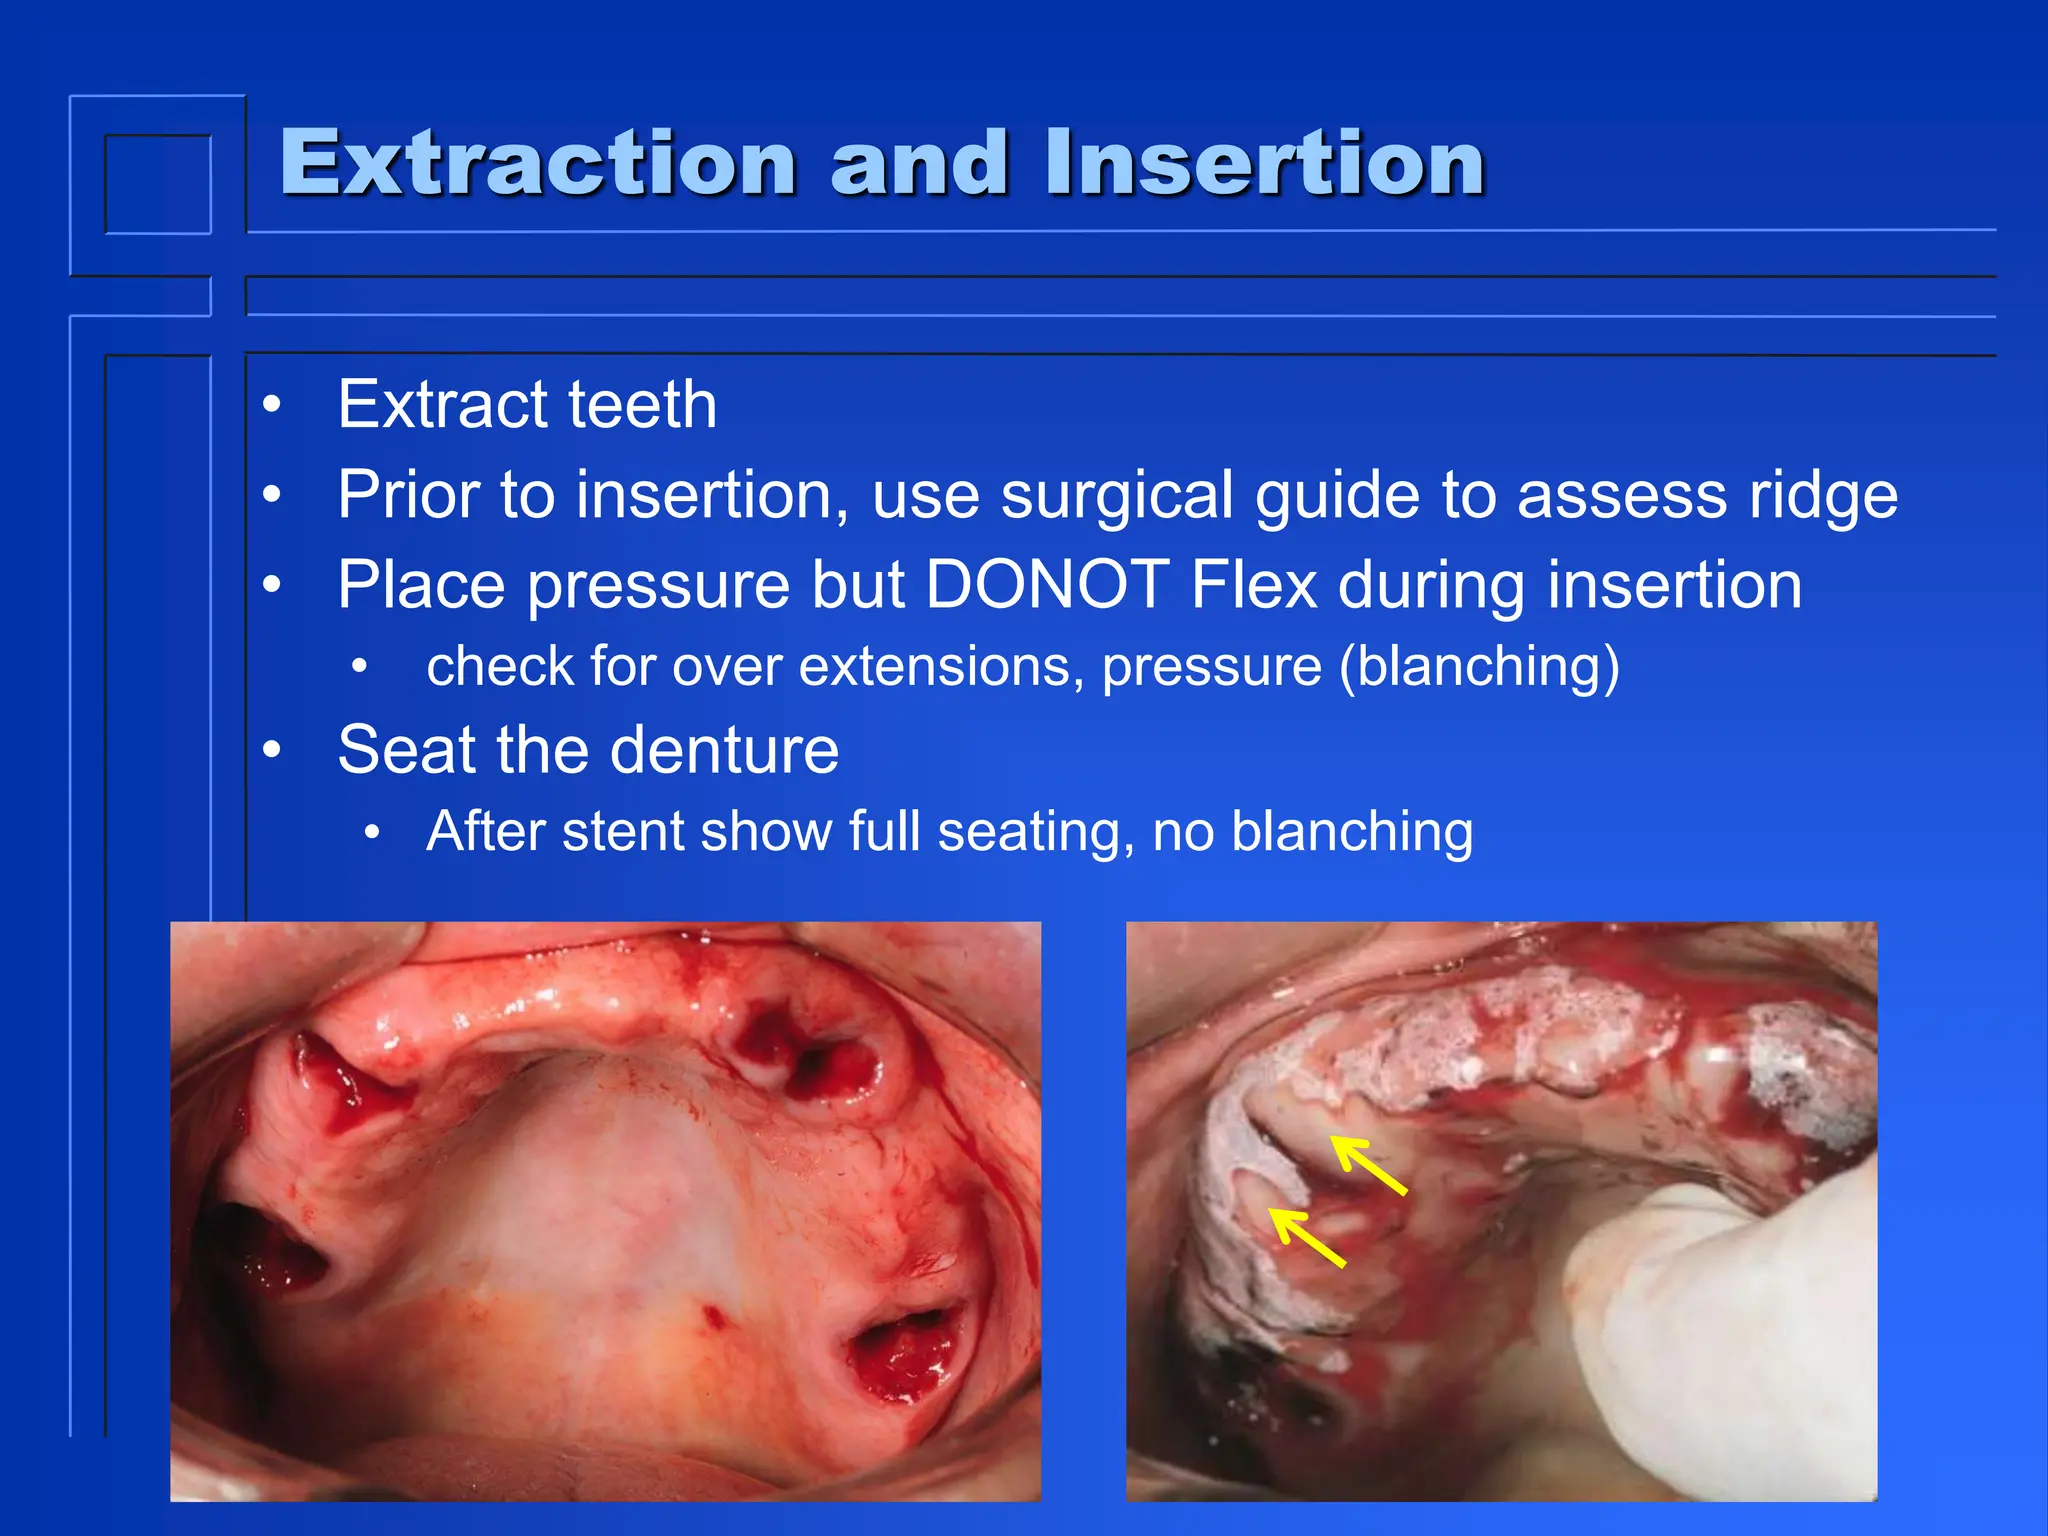
Complete or removable partial denture fabricated for
placement at the same appointment as extraction of
natural teeth
Immediate Dentures
Makes Jaw Relations Difficult
Occlusion May be Mutilated
OVD, Midline & Incisal Edges May Require Change
After Extractions, Prior to Placement
Final Result
Immediate Complete Denture
• Conventional immediate denture
• intended to be relined to serve long-term
• Interim immediate denture (IID) (transitional):
• after healing a second new complete denture is fabricated
as a long-term prosthesis
(Zarb, G. Prosthodontic Treatment for Edentulous Patients, 12th Edition. Elsevier, 2003. 9.1)
Advantages
• Maintenance of
• Appearance
• Circum oral support
• Muscle tone
• Occlusal vertical dimension
• Jaw relationships
• Facial height
• Tongue will not spread out as result of tooth loss
Zarb, G. Prosthodontic Treatment for Edentulous Patients, 12th Edition. Elsevier, 2003. 9.2.1
Advantages
• Less postoperative pain & bleeding
• extraction sites protected
• Pressure from denture base
• Easier to duplicate natural tooth shape &
position (if desired)
• Easier Adaptation
• Speech, mastication rarely compromised
• Nutrition can be maintained
Zarb, G. Prosthodontic Treatment for Edentulous Patients, 12th Edition. Elsevier, 2003. 9.2.1
Disadvantages
• More challenging to set teeth
– Less space for teeth as ridge resorption hasn’t occurred
• Alveolar ridge undercuts around remaining teeth may make
impressions more difficult
• Unstable or inadequate occlusion can make recording
centric position difficult
Unstable Occlusion
Explanation to Patients
• Fit is usually not as good as traditional
dentures (estimate ridge form)
• Extractions and sore spots from
immediate denture can result in more
discomfort after initial insertion
Zarb, G. Prosthodontic Treatment for Edentulous Patients, 12th Edition. Elsevier, 2013. 9.4.3.1
Explanation to Patients
• Takes time to adapt to chewing and speaking
• Appearance may be unpredictable if anterior try-in
not possible
(Zarb, G. Prosthodontic Treatment for Edentulous Patients, 12th Edition. Elsevier, 2013. 9.4.3.1)
No Anterior Try-in
Explanation to Patients
• Should be worn for first 24 hours without removal
• If removed, reinsertion can be difficult if
significant swelling occurs
• Patient should return to dental office for initial
removal at 24-hours
Explanation to Patients
• Immediate dentures will normally “loosen” during healing
due to ridge resorption & soft tissue remodeling
• Relines/tissue conditioners will be required to improve the
retention
• Normally a permanent reline will be required 4-6 months
after insertion
Explanation to Patients
• In some cases a remake may be required
• Significant change in jaw position
• Significant esthetic problem
• May be cheaper/better to remake
• Patient is responsible for fees for relines
• Explain prior to beginning
• Include reline fee in estimate for immediate denture
Too Difficult
• No opposing occlusal contacts
• Severely collapsed occlusal vertical dimension
• Can’t register a repeatable jaw relationship
(check at treatment planning appointment)
• Vestibule too short - vestibuloplasty would be
required
• Refer
Technique
• Examination/Diagnosis/Treatment Plan
• Informed consent
• Alternatives
• Pros/cons
• Prognosis
• Timing
• Costs
Examination/Diagnosis/Treatment Plan
• Beware of tissue undercuts
• Especially anterior maxilla & tuberosities
• Make notes to reduce at time of extractions
• Compress socket
• Bony reduction if necessary
• If not reduced, denture may not seat
• 2 piece tray for impression
Examination/Diagnosis/Treatment Plan
• Determine if OVD requires change at diagnosis
appointment
• Use physiologic rest, interocclusal space
measurements
Examination/Diagnosis/Treatment Plan
• To improve esthetics & ensure adequate stability:
• Decide whether you will need to imitate or change
tooth arrangement prior to beginning
• Helps avoid unexpected surprises
Technique
• Oral hygiene procedures
• Reduce inflammation to speed healing
• Reduced discomfort after extractions
• Less soft tissue changes – better fit
Technique
• Preliminary extractions - posterior teeth
• Keep one set of opposing teeth on each side of arch if
OVD and centric are to be preserved
• Wait 4 weeks for healing
• If very few teeth remain
• Consider extracting all at once
• Skip preliminary extraction step
• Less morbidity
Extract All Teeth Single Appointment
Technique After Preliminary Extractions
• Preliminary impressions - alginate
• Final impressions – 1 or 2 step
• Jaw relation records
• Tooth set-up and try-in
• Final extractions and insertion
• Post insertion care
Examination/Diagnosis/Treatment Plan
• Reconfirm decision to imitate or change tooth
arrangement
• Determine midlines, occlusal plane, vertical
overlap, length of maxillary incisors
• Mark on cast for laboratory to use for setup
Preliminary impressions
• Stock trays
• Dentate or partially-edentulous
• Irreversible Hydrocolloid
• Mark vibrating line & hamular notches
prior to impression
• Can’t reseat intraorally
Final Impressions
• Use 2 piece custom tray if significant
undercuts
• If no large tissue undercuts use one
piece custom tray
Mark Posterior Border Prior to Impression
• Vibrating line & hamular notches
• Not able to reseat intraorally
• tooth & tissue undercuts, embrasures
• If don’t have correct posterior border, denture
will not be retentive
2 Piece Impression
Stock Tray
Custom Tray – Ensure
Alginate Not Too Thin
1 Piece Impression
• Block out minor undercuts
• Ensure tray flange not too
far from vestibule
• After border molding,
should not lock into place
Jaw relation records
• Record base & occlusion rim
used if unstable cast/contacts
(wobbles, rocks)
• Make facebow record with
dentate bitefork
• Use for centric & protrusion
• If stable contacts, record base
not needed
Jaw Relation Records
• Determine OVD
• Use physiologic rest, interocclusal space
measurements
• Do NOT incorporate an overbite in occlusion rims
• if anterior teeth are missing, use rims only to
determine OVD, not incisal display
• Once mounted, determine overbite, incisal display
required
Use occlusion rims for OVD, Jaw Relations Records
Use PVS Bite Registration Material, NOT Wax
Dentate Bitefork wth Wax/PVS
Centric Record
Tooth Set-up and Try-in
Anterior Try-in Only Possible if Anterior Teeth Missing
Extraction and Insertion
• Have lab complete set up & modify cast
as directed
• use probing depths & radiographs to
guide cast modification
Do not create large socket convexities – grind teeth
Final Setup Usually will not allow for Full Wax Try-in
Extraction and Insertion
• Always request a surgical stent (guide)
• Prescribe fabrication of stent when sent for processing
• Allows for identifying areas of impingement (blanching)
Extraction and Insertion
• Extract teeth
• Prior to insertion, use surgical guide to assess ridge
• Place pressure but DONOT Flex during insertion
• check for over extensions, pressure (blanching)
• Seat the denture
• After stent show full seating, no blanching
Extraction and Insertion
THE DENTURE MUST BE FULLY SEATED
• Otherwise occlusion will be unacceptable
• Once fully seated, adjust occlusion as needed
• Provide post insertion instructions
• Verbal
• Written – patient brochure
Timeline for Insertion
0 -15 min
- Inform surgeon & Dr patient is receiving
an immediate denture
- review med history
- provide local anaesthesia
15 - 60 min
- extractions
1 - 2 hour
- insert and adjust
- instructions
Instructions to Patient
• Do not remove until 24 hour appointment
• If it comes loose/out replace immediately
• Soft/liquid diet for 24 hours
• Avoid vigorous rinsing
• Take analgesic as prescribed
• Expect red saliva
24 Hour Appointment
• Remove and clean denture
• Relieve sore spots
• Do not use PIP – use indelible stick
• Gross occlusal adjustment
1 Week Recall Appointment
• Relieve sore spots
• Use PIP
• Refine occlusion – possible remount
Continuing Care
• Tissue conditioner to improve retention as
needed
• Remove any socket convexities to avoid healing
defects
• Reline or remake in 4 to 6 months
• Postpone as long as patient can tolerate to
ensure most of initial resorption complete
Remove denture base convexities to avoid healing defects
X
X X

21. Immediate Denture and complete dentures.ppt

  • 1.
    Complete or removablepartial denture fabricated for placement at the same appointment as extraction of natural teeth Immediate Dentures
  • 2.
    Makes Jaw RelationsDifficult Occlusion May be Mutilated
  • 3.
    OVD, Midline &Incisal Edges May Require Change
  • 4.
  • 5.
  • 6.
    Immediate Complete Denture •Conventional immediate denture • intended to be relined to serve long-term • Interim immediate denture (IID) (transitional): • after healing a second new complete denture is fabricated as a long-term prosthesis (Zarb, G. Prosthodontic Treatment for Edentulous Patients, 12th Edition. Elsevier, 2003. 9.1)
  • 7.
    Advantages • Maintenance of •Appearance • Circum oral support • Muscle tone • Occlusal vertical dimension • Jaw relationships • Facial height • Tongue will not spread out as result of tooth loss Zarb, G. Prosthodontic Treatment for Edentulous Patients, 12th Edition. Elsevier, 2003. 9.2.1
  • 8.
    Advantages • Less postoperativepain & bleeding • extraction sites protected • Pressure from denture base • Easier to duplicate natural tooth shape & position (if desired) • Easier Adaptation • Speech, mastication rarely compromised • Nutrition can be maintained Zarb, G. Prosthodontic Treatment for Edentulous Patients, 12th Edition. Elsevier, 2003. 9.2.1
  • 9.
    Disadvantages • More challengingto set teeth – Less space for teeth as ridge resorption hasn’t occurred • Alveolar ridge undercuts around remaining teeth may make impressions more difficult • Unstable or inadequate occlusion can make recording centric position difficult Unstable Occlusion
  • 10.
    Explanation to Patients •Fit is usually not as good as traditional dentures (estimate ridge form) • Extractions and sore spots from immediate denture can result in more discomfort after initial insertion Zarb, G. Prosthodontic Treatment for Edentulous Patients, 12th Edition. Elsevier, 2013. 9.4.3.1
  • 11.
    Explanation to Patients •Takes time to adapt to chewing and speaking • Appearance may be unpredictable if anterior try-in not possible (Zarb, G. Prosthodontic Treatment for Edentulous Patients, 12th Edition. Elsevier, 2013. 9.4.3.1) No Anterior Try-in
  • 12.
    Explanation to Patients •Should be worn for first 24 hours without removal • If removed, reinsertion can be difficult if significant swelling occurs • Patient should return to dental office for initial removal at 24-hours
  • 13.
    Explanation to Patients •Immediate dentures will normally “loosen” during healing due to ridge resorption & soft tissue remodeling • Relines/tissue conditioners will be required to improve the retention • Normally a permanent reline will be required 4-6 months after insertion
  • 14.
    Explanation to Patients •In some cases a remake may be required • Significant change in jaw position • Significant esthetic problem • May be cheaper/better to remake • Patient is responsible for fees for relines • Explain prior to beginning • Include reline fee in estimate for immediate denture
  • 15.
    Too Difficult • Noopposing occlusal contacts • Severely collapsed occlusal vertical dimension • Can’t register a repeatable jaw relationship (check at treatment planning appointment) • Vestibule too short - vestibuloplasty would be required • Refer
  • 16.
    Technique • Examination/Diagnosis/Treatment Plan •Informed consent • Alternatives • Pros/cons • Prognosis • Timing • Costs
  • 17.
    Examination/Diagnosis/Treatment Plan • Bewareof tissue undercuts • Especially anterior maxilla & tuberosities • Make notes to reduce at time of extractions • Compress socket • Bony reduction if necessary • If not reduced, denture may not seat • 2 piece tray for impression
  • 18.
    Examination/Diagnosis/Treatment Plan • Determineif OVD requires change at diagnosis appointment • Use physiologic rest, interocclusal space measurements
  • 19.
    Examination/Diagnosis/Treatment Plan • Toimprove esthetics & ensure adequate stability: • Decide whether you will need to imitate or change tooth arrangement prior to beginning • Helps avoid unexpected surprises
  • 20.
    Technique • Oral hygieneprocedures • Reduce inflammation to speed healing • Reduced discomfort after extractions • Less soft tissue changes – better fit
  • 21.
    Technique • Preliminary extractions- posterior teeth • Keep one set of opposing teeth on each side of arch if OVD and centric are to be preserved • Wait 4 weeks for healing • If very few teeth remain • Consider extracting all at once • Skip preliminary extraction step • Less morbidity Extract All Teeth Single Appointment
  • 22.
    Technique After PreliminaryExtractions • Preliminary impressions - alginate • Final impressions – 1 or 2 step • Jaw relation records • Tooth set-up and try-in • Final extractions and insertion • Post insertion care
  • 23.
    Examination/Diagnosis/Treatment Plan • Reconfirmdecision to imitate or change tooth arrangement • Determine midlines, occlusal plane, vertical overlap, length of maxillary incisors • Mark on cast for laboratory to use for setup
  • 24.
    Preliminary impressions • Stocktrays • Dentate or partially-edentulous • Irreversible Hydrocolloid • Mark vibrating line & hamular notches prior to impression • Can’t reseat intraorally
  • 25.
    Final Impressions • Use2 piece custom tray if significant undercuts • If no large tissue undercuts use one piece custom tray
  • 26.
    Mark Posterior BorderPrior to Impression • Vibrating line & hamular notches • Not able to reseat intraorally • tooth & tissue undercuts, embrasures • If don’t have correct posterior border, denture will not be retentive
  • 27.
    2 Piece Impression StockTray Custom Tray – Ensure Alginate Not Too Thin
  • 28.
    1 Piece Impression •Block out minor undercuts • Ensure tray flange not too far from vestibule • After border molding, should not lock into place
  • 29.
    Jaw relation records •Record base & occlusion rim used if unstable cast/contacts (wobbles, rocks) • Make facebow record with dentate bitefork • Use for centric & protrusion • If stable contacts, record base not needed
  • 30.
    Jaw Relation Records •Determine OVD • Use physiologic rest, interocclusal space measurements • Do NOT incorporate an overbite in occlusion rims • if anterior teeth are missing, use rims only to determine OVD, not incisal display • Once mounted, determine overbite, incisal display required
  • 31.
    Use occlusion rimsfor OVD, Jaw Relations Records
  • 32.
    Use PVS BiteRegistration Material, NOT Wax Dentate Bitefork wth Wax/PVS Centric Record
  • 33.
    Tooth Set-up andTry-in Anterior Try-in Only Possible if Anterior Teeth Missing
  • 34.
    Extraction and Insertion •Have lab complete set up & modify cast as directed • use probing depths & radiographs to guide cast modification
  • 35.
    Do not createlarge socket convexities – grind teeth
  • 36.
    Final Setup Usuallywill not allow for Full Wax Try-in
  • 37.
    Extraction and Insertion •Always request a surgical stent (guide) • Prescribe fabrication of stent when sent for processing • Allows for identifying areas of impingement (blanching)
  • 38.
    Extraction and Insertion •Extract teeth • Prior to insertion, use surgical guide to assess ridge • Place pressure but DONOT Flex during insertion • check for over extensions, pressure (blanching) • Seat the denture • After stent show full seating, no blanching
  • 39.
    Extraction and Insertion THEDENTURE MUST BE FULLY SEATED • Otherwise occlusion will be unacceptable • Once fully seated, adjust occlusion as needed • Provide post insertion instructions • Verbal • Written – patient brochure
  • 41.
    Timeline for Insertion 0-15 min - Inform surgeon & Dr patient is receiving an immediate denture - review med history - provide local anaesthesia 15 - 60 min - extractions 1 - 2 hour - insert and adjust - instructions
  • 42.
    Instructions to Patient •Do not remove until 24 hour appointment • If it comes loose/out replace immediately • Soft/liquid diet for 24 hours • Avoid vigorous rinsing • Take analgesic as prescribed • Expect red saliva
  • 43.
    24 Hour Appointment •Remove and clean denture • Relieve sore spots • Do not use PIP – use indelible stick • Gross occlusal adjustment
  • 45.
    1 Week RecallAppointment • Relieve sore spots • Use PIP • Refine occlusion – possible remount
  • 46.
    Continuing Care • Tissueconditioner to improve retention as needed • Remove any socket convexities to avoid healing defects • Reline or remake in 4 to 6 months • Postpone as long as patient can tolerate to ensure most of initial resorption complete
  • 47.
    Remove denture baseconvexities to avoid healing defects X X X