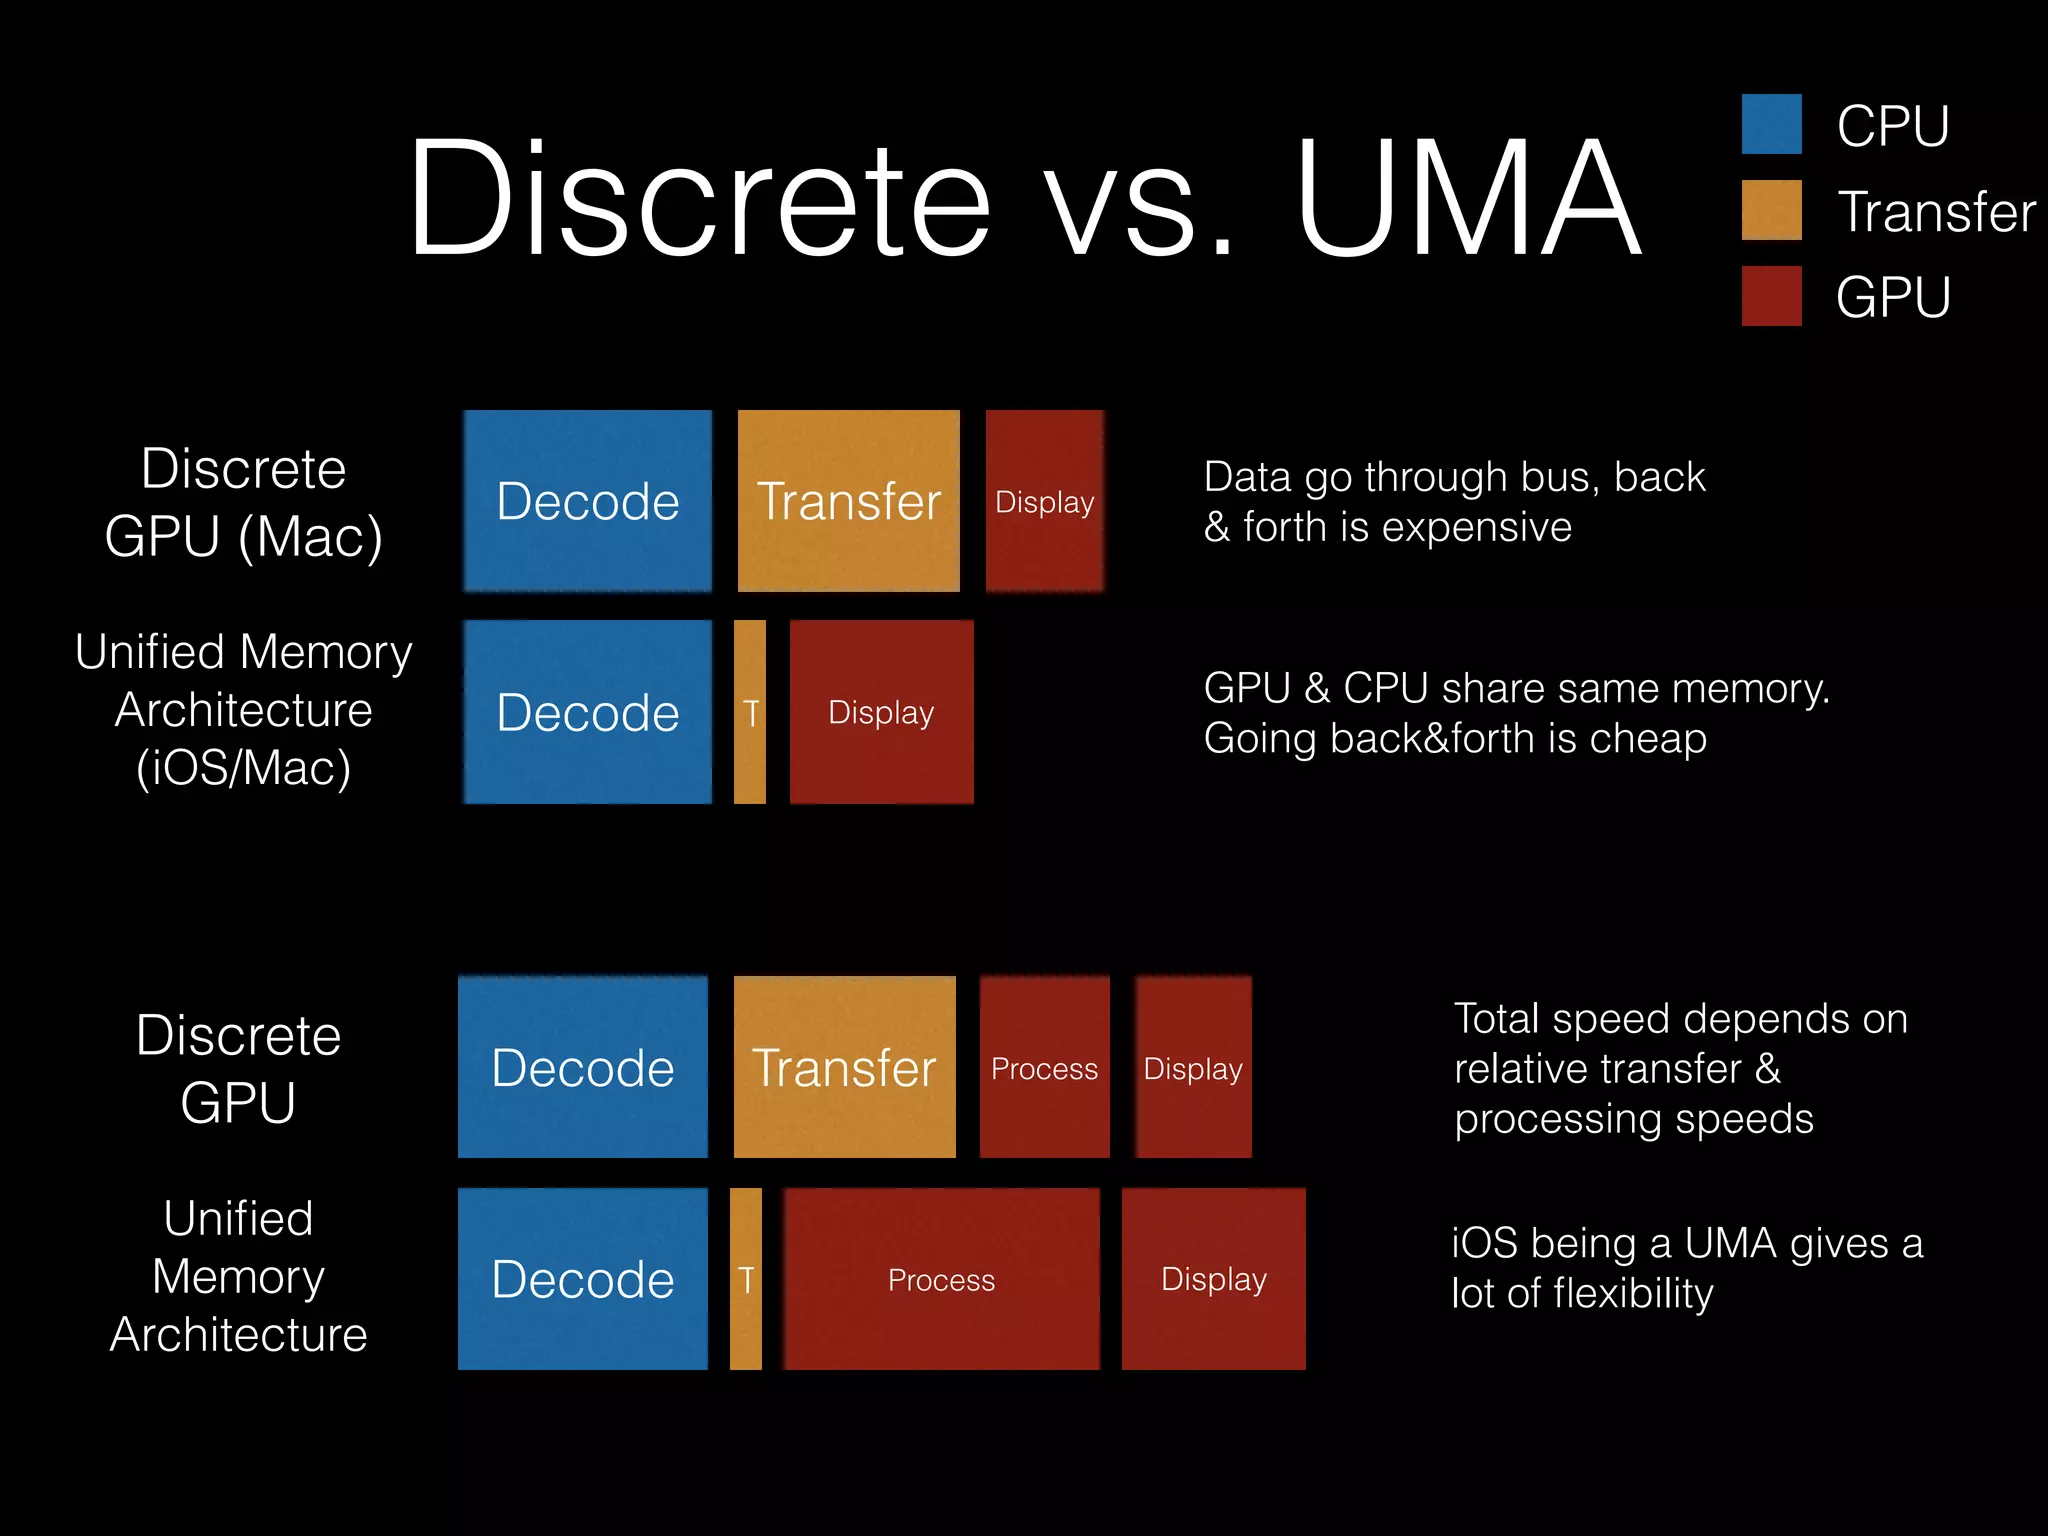
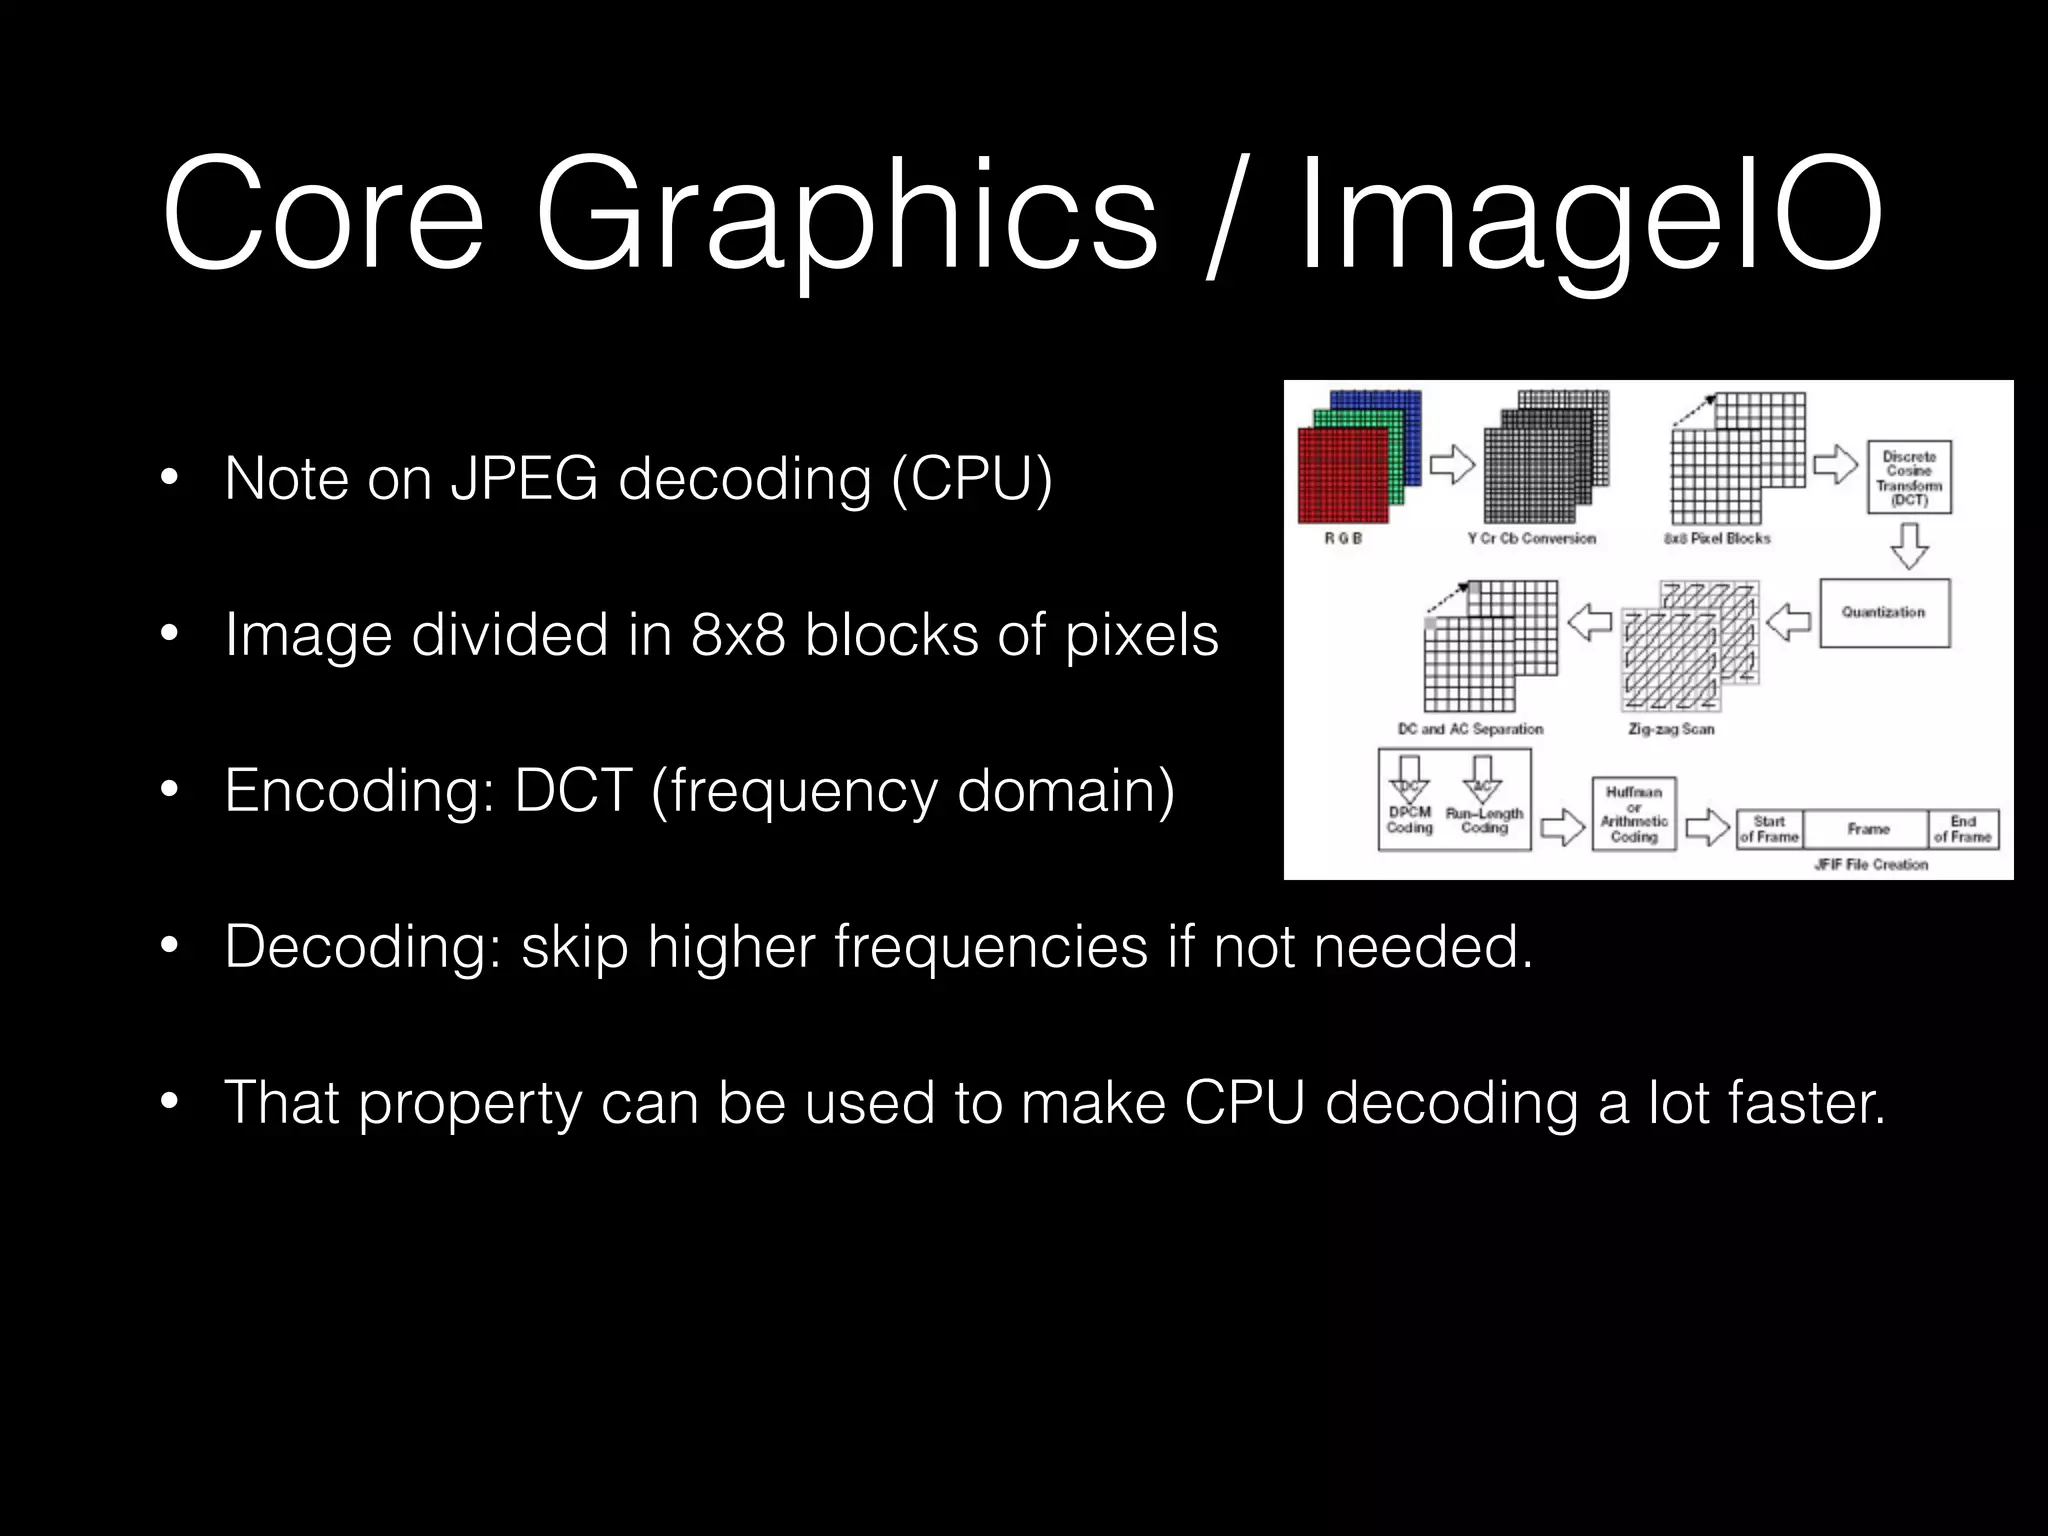
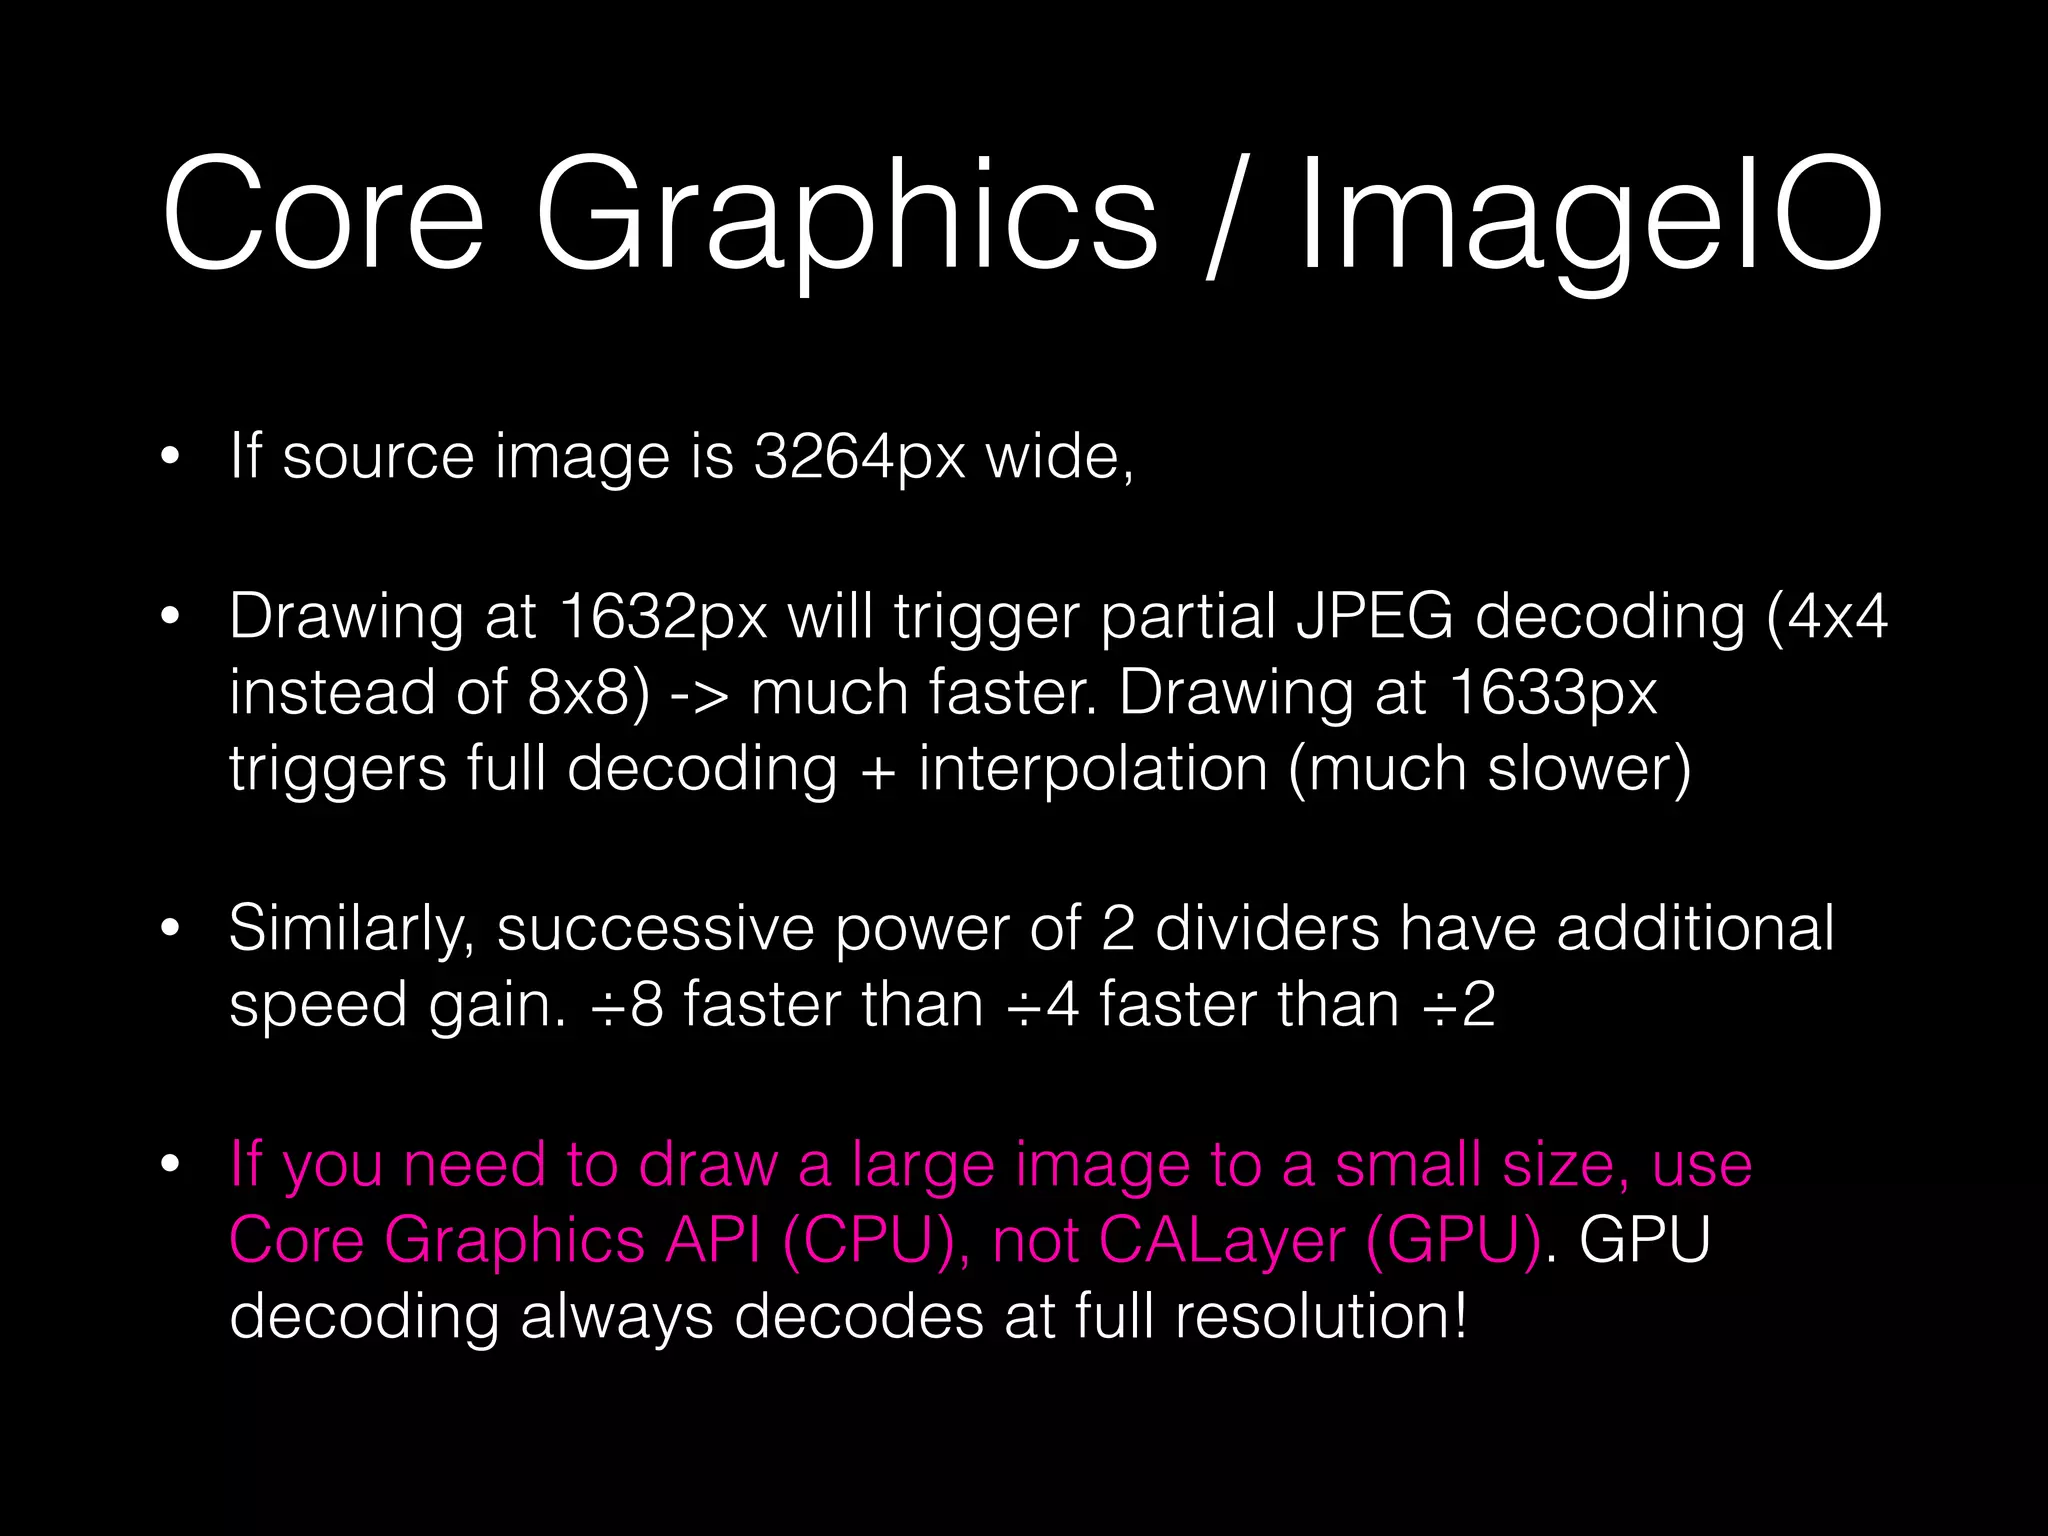
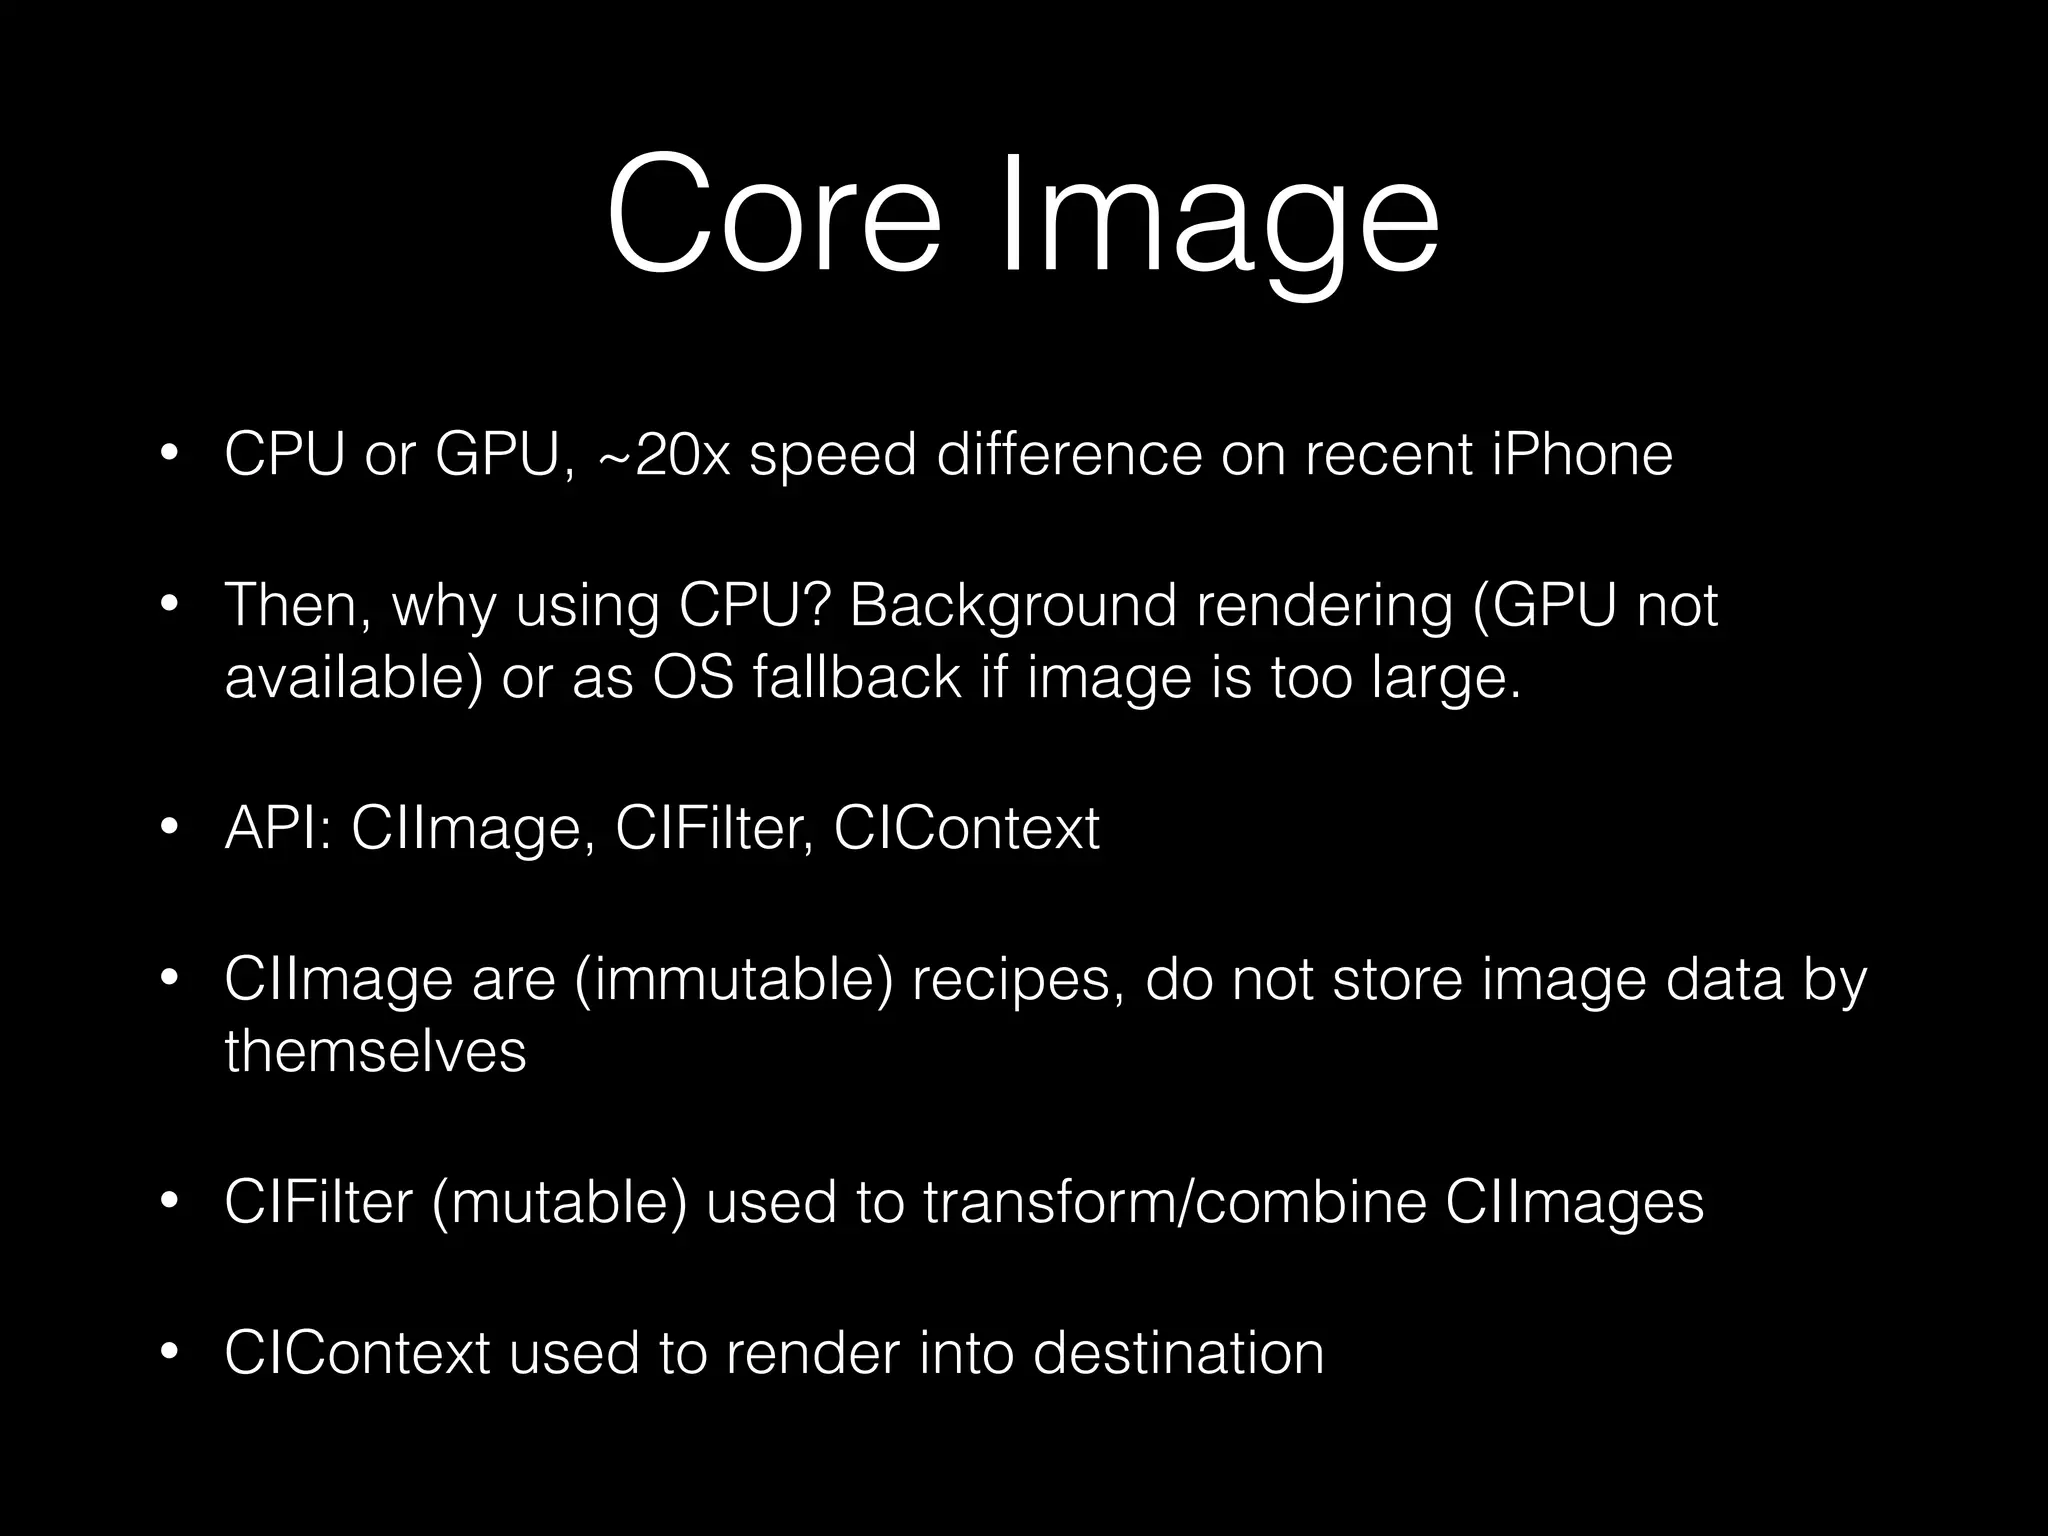
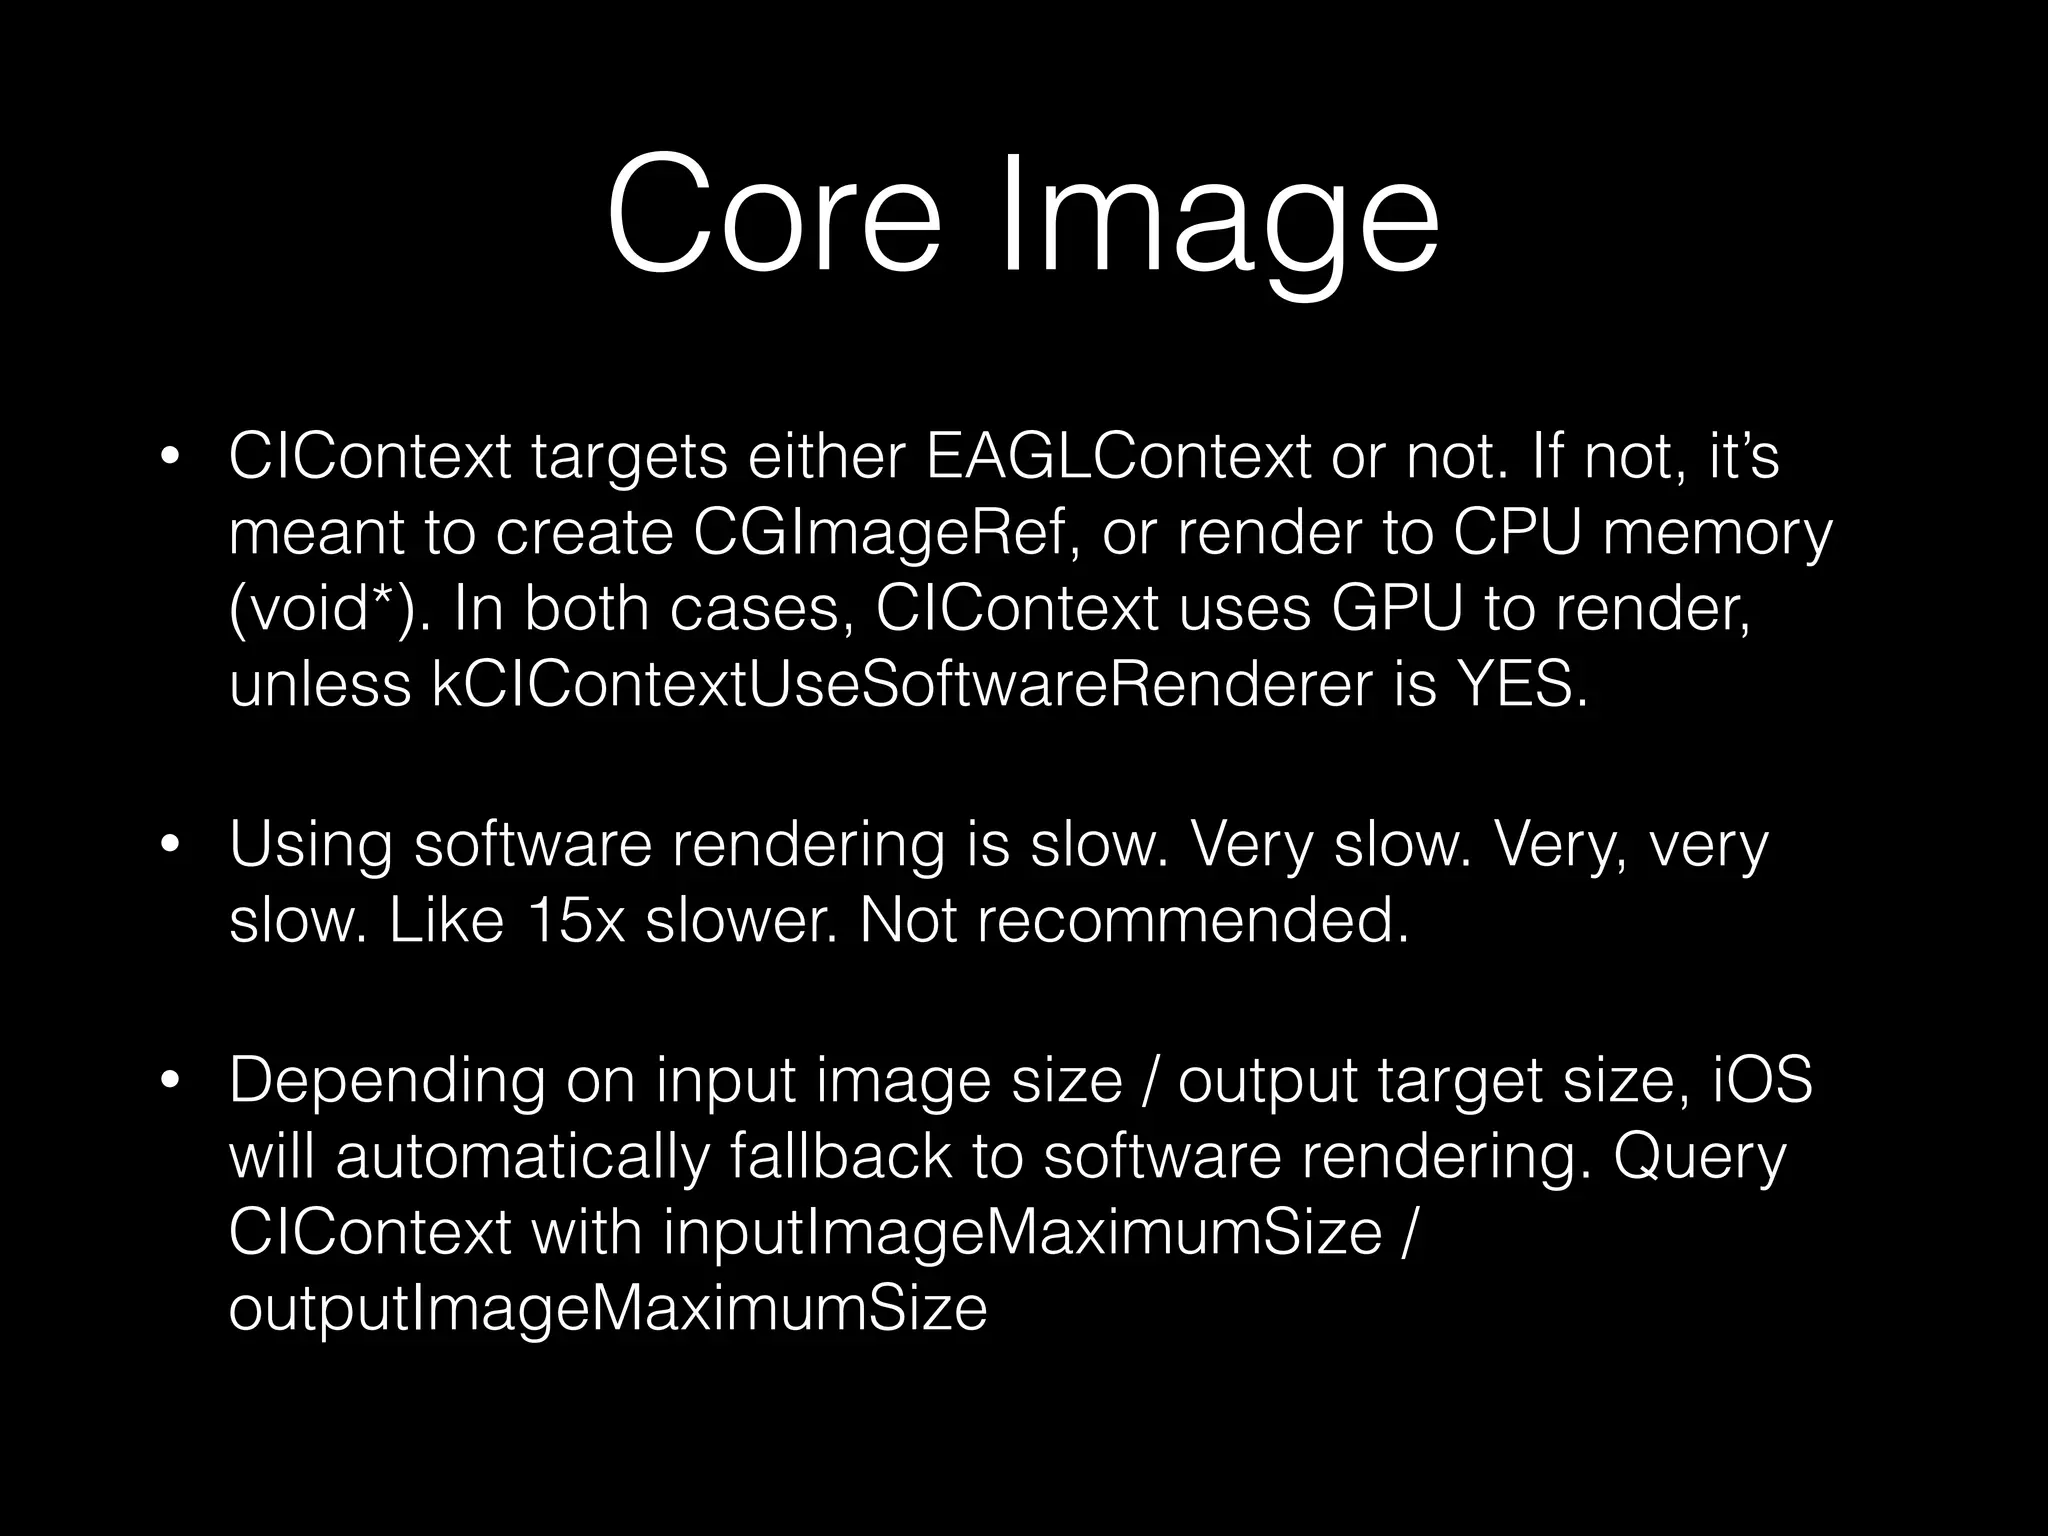
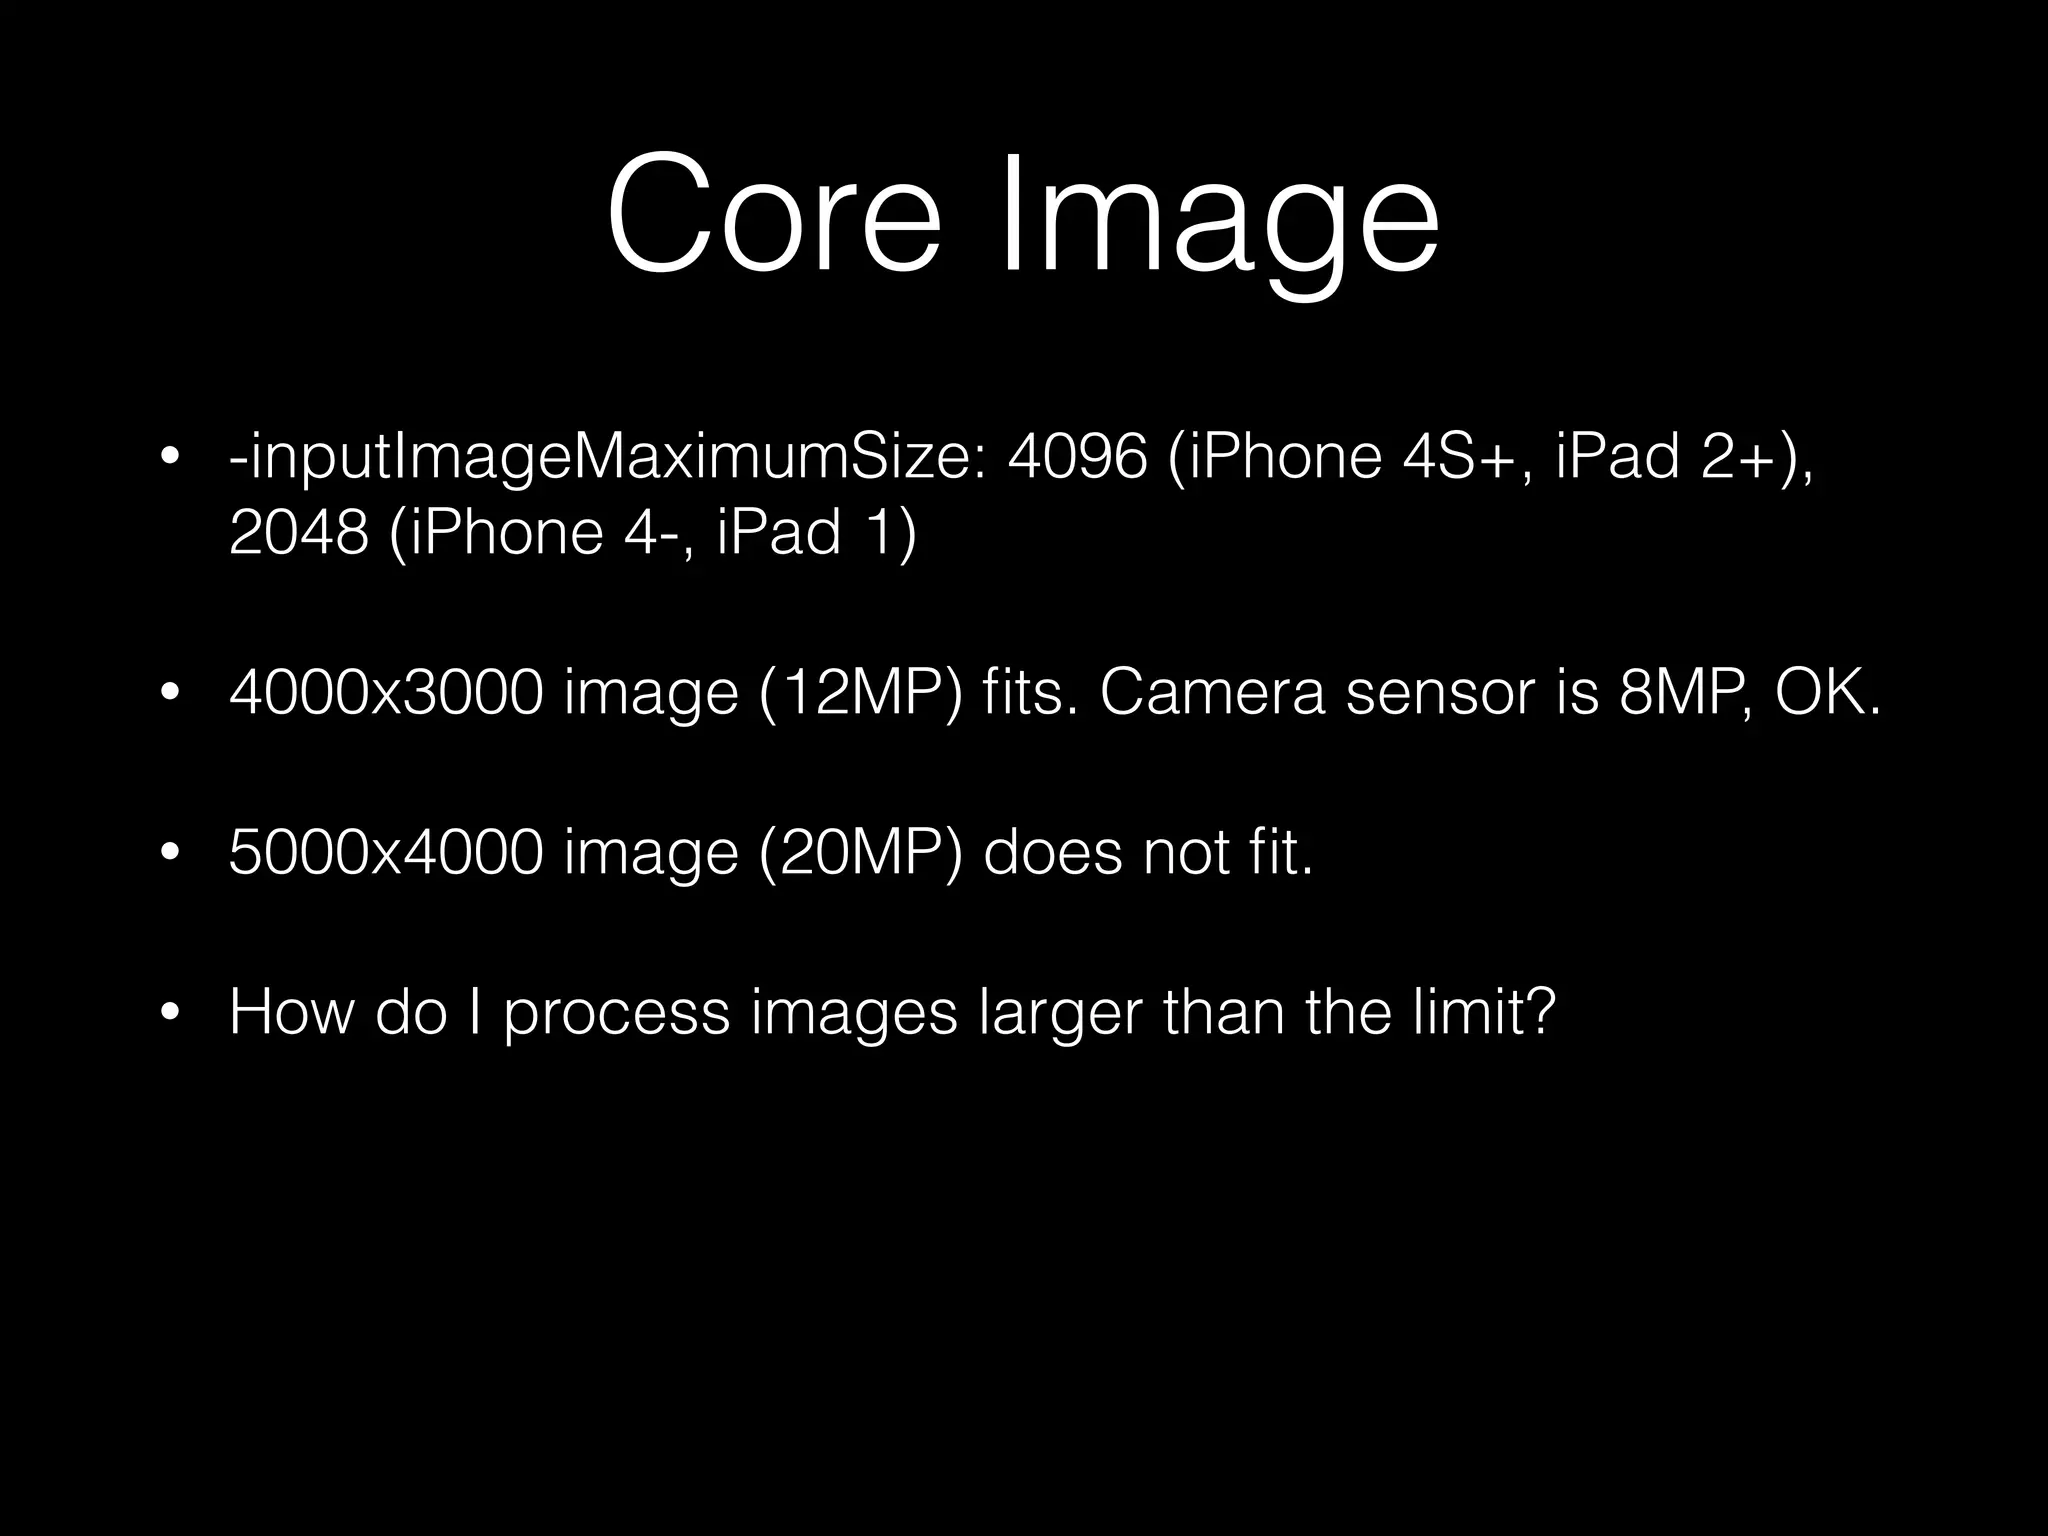
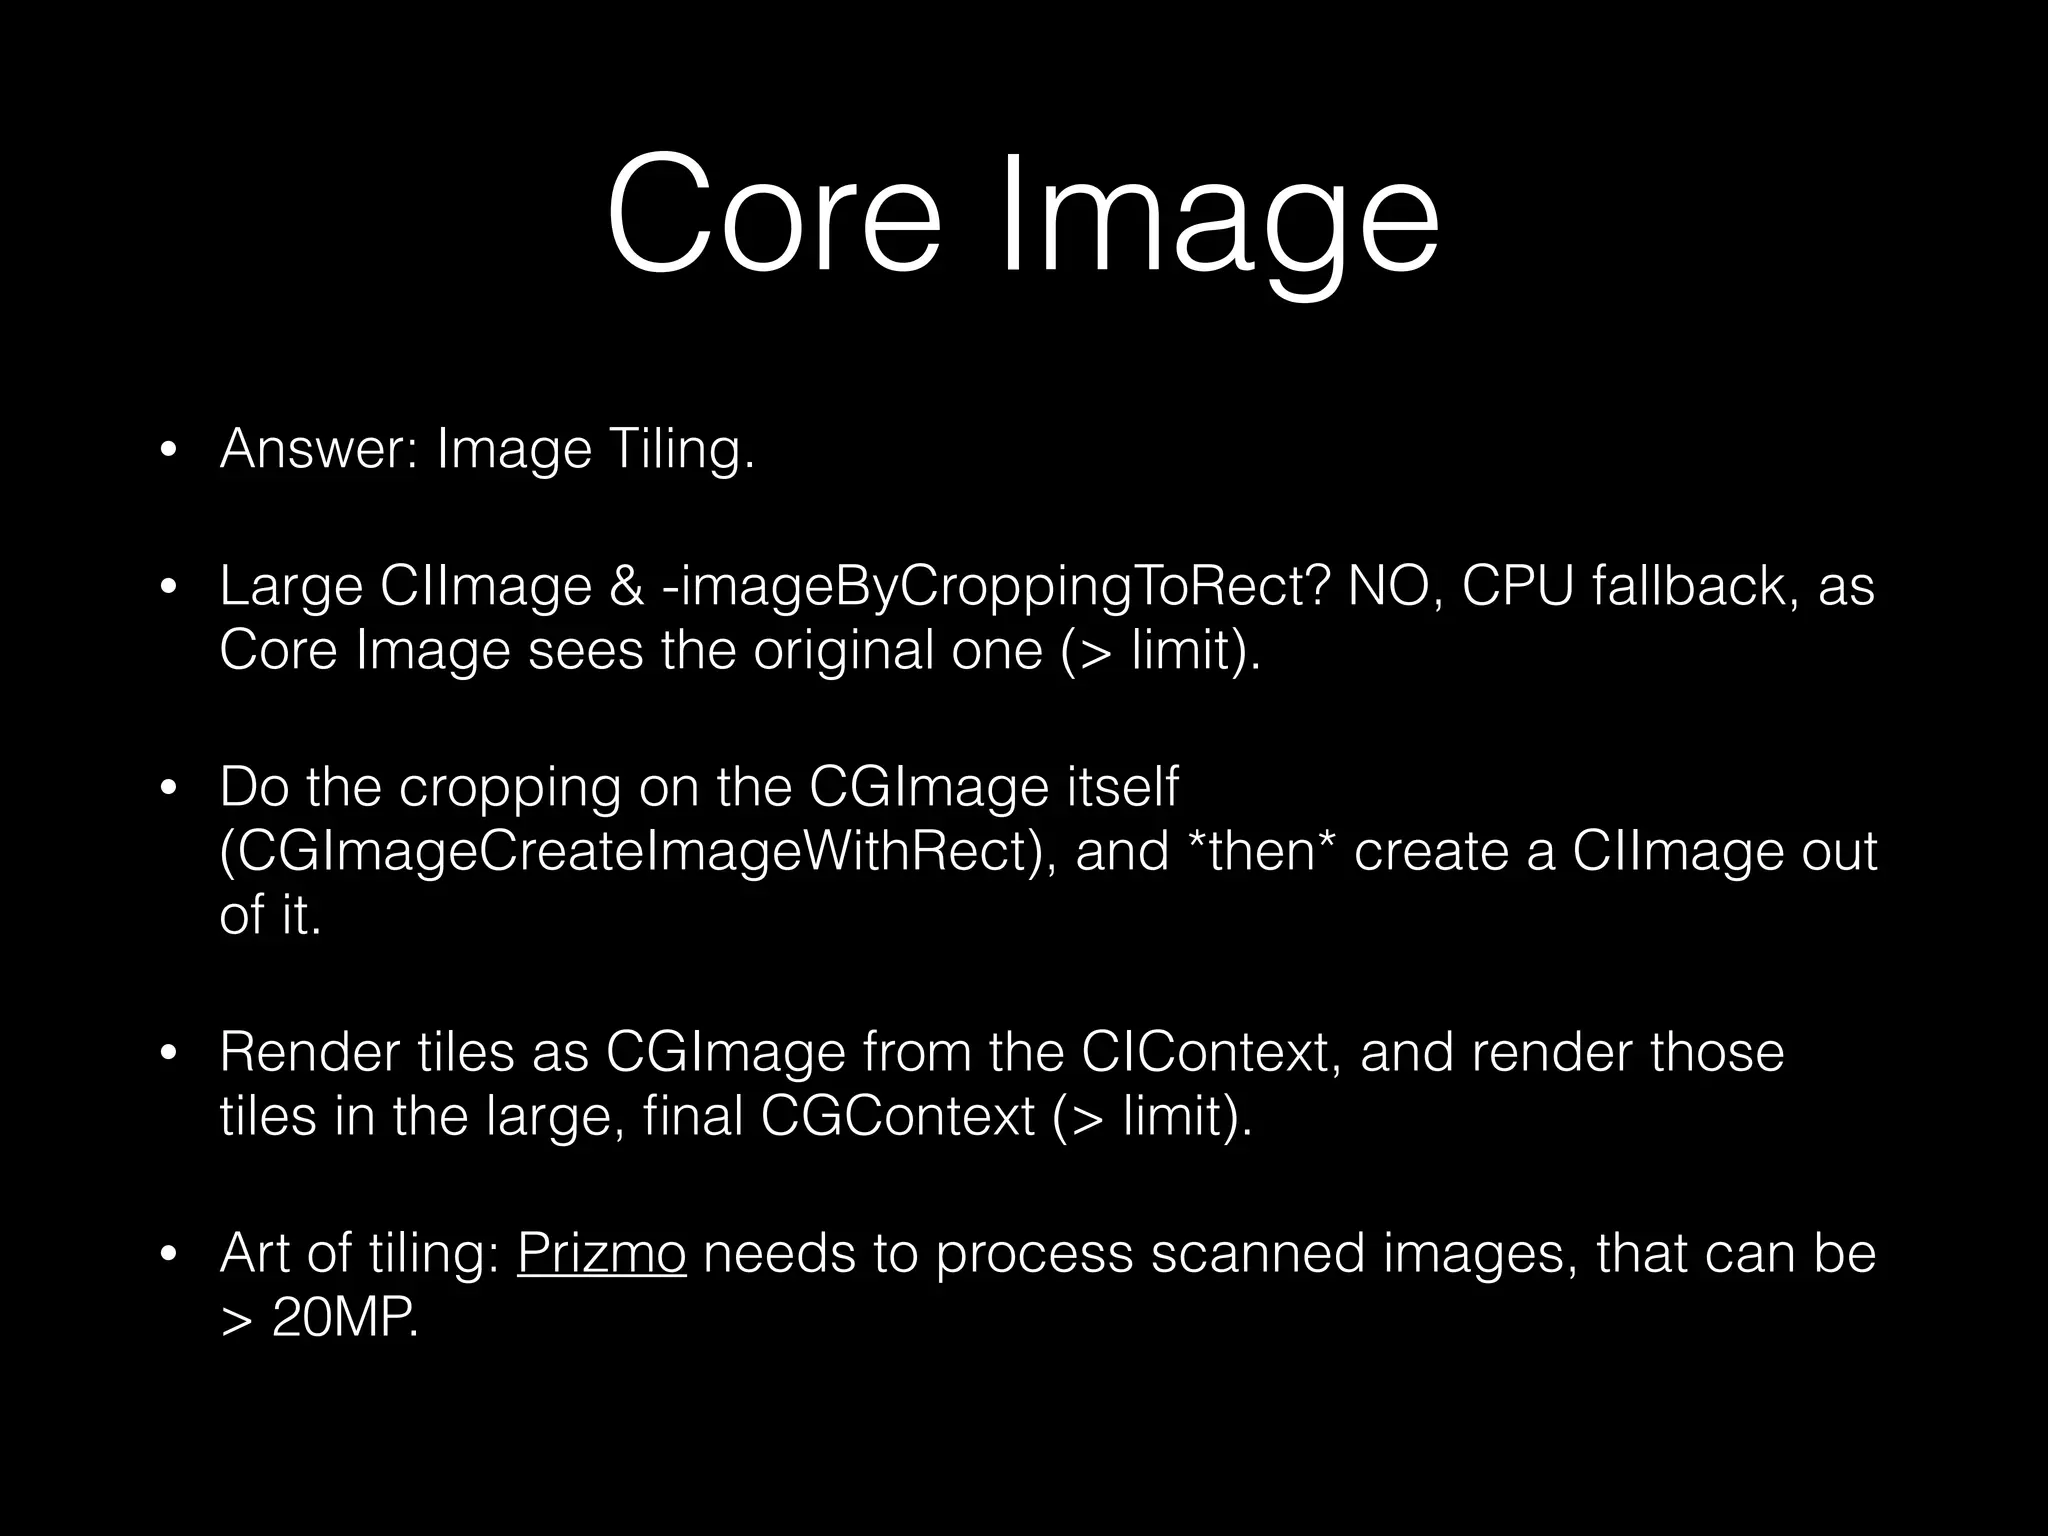
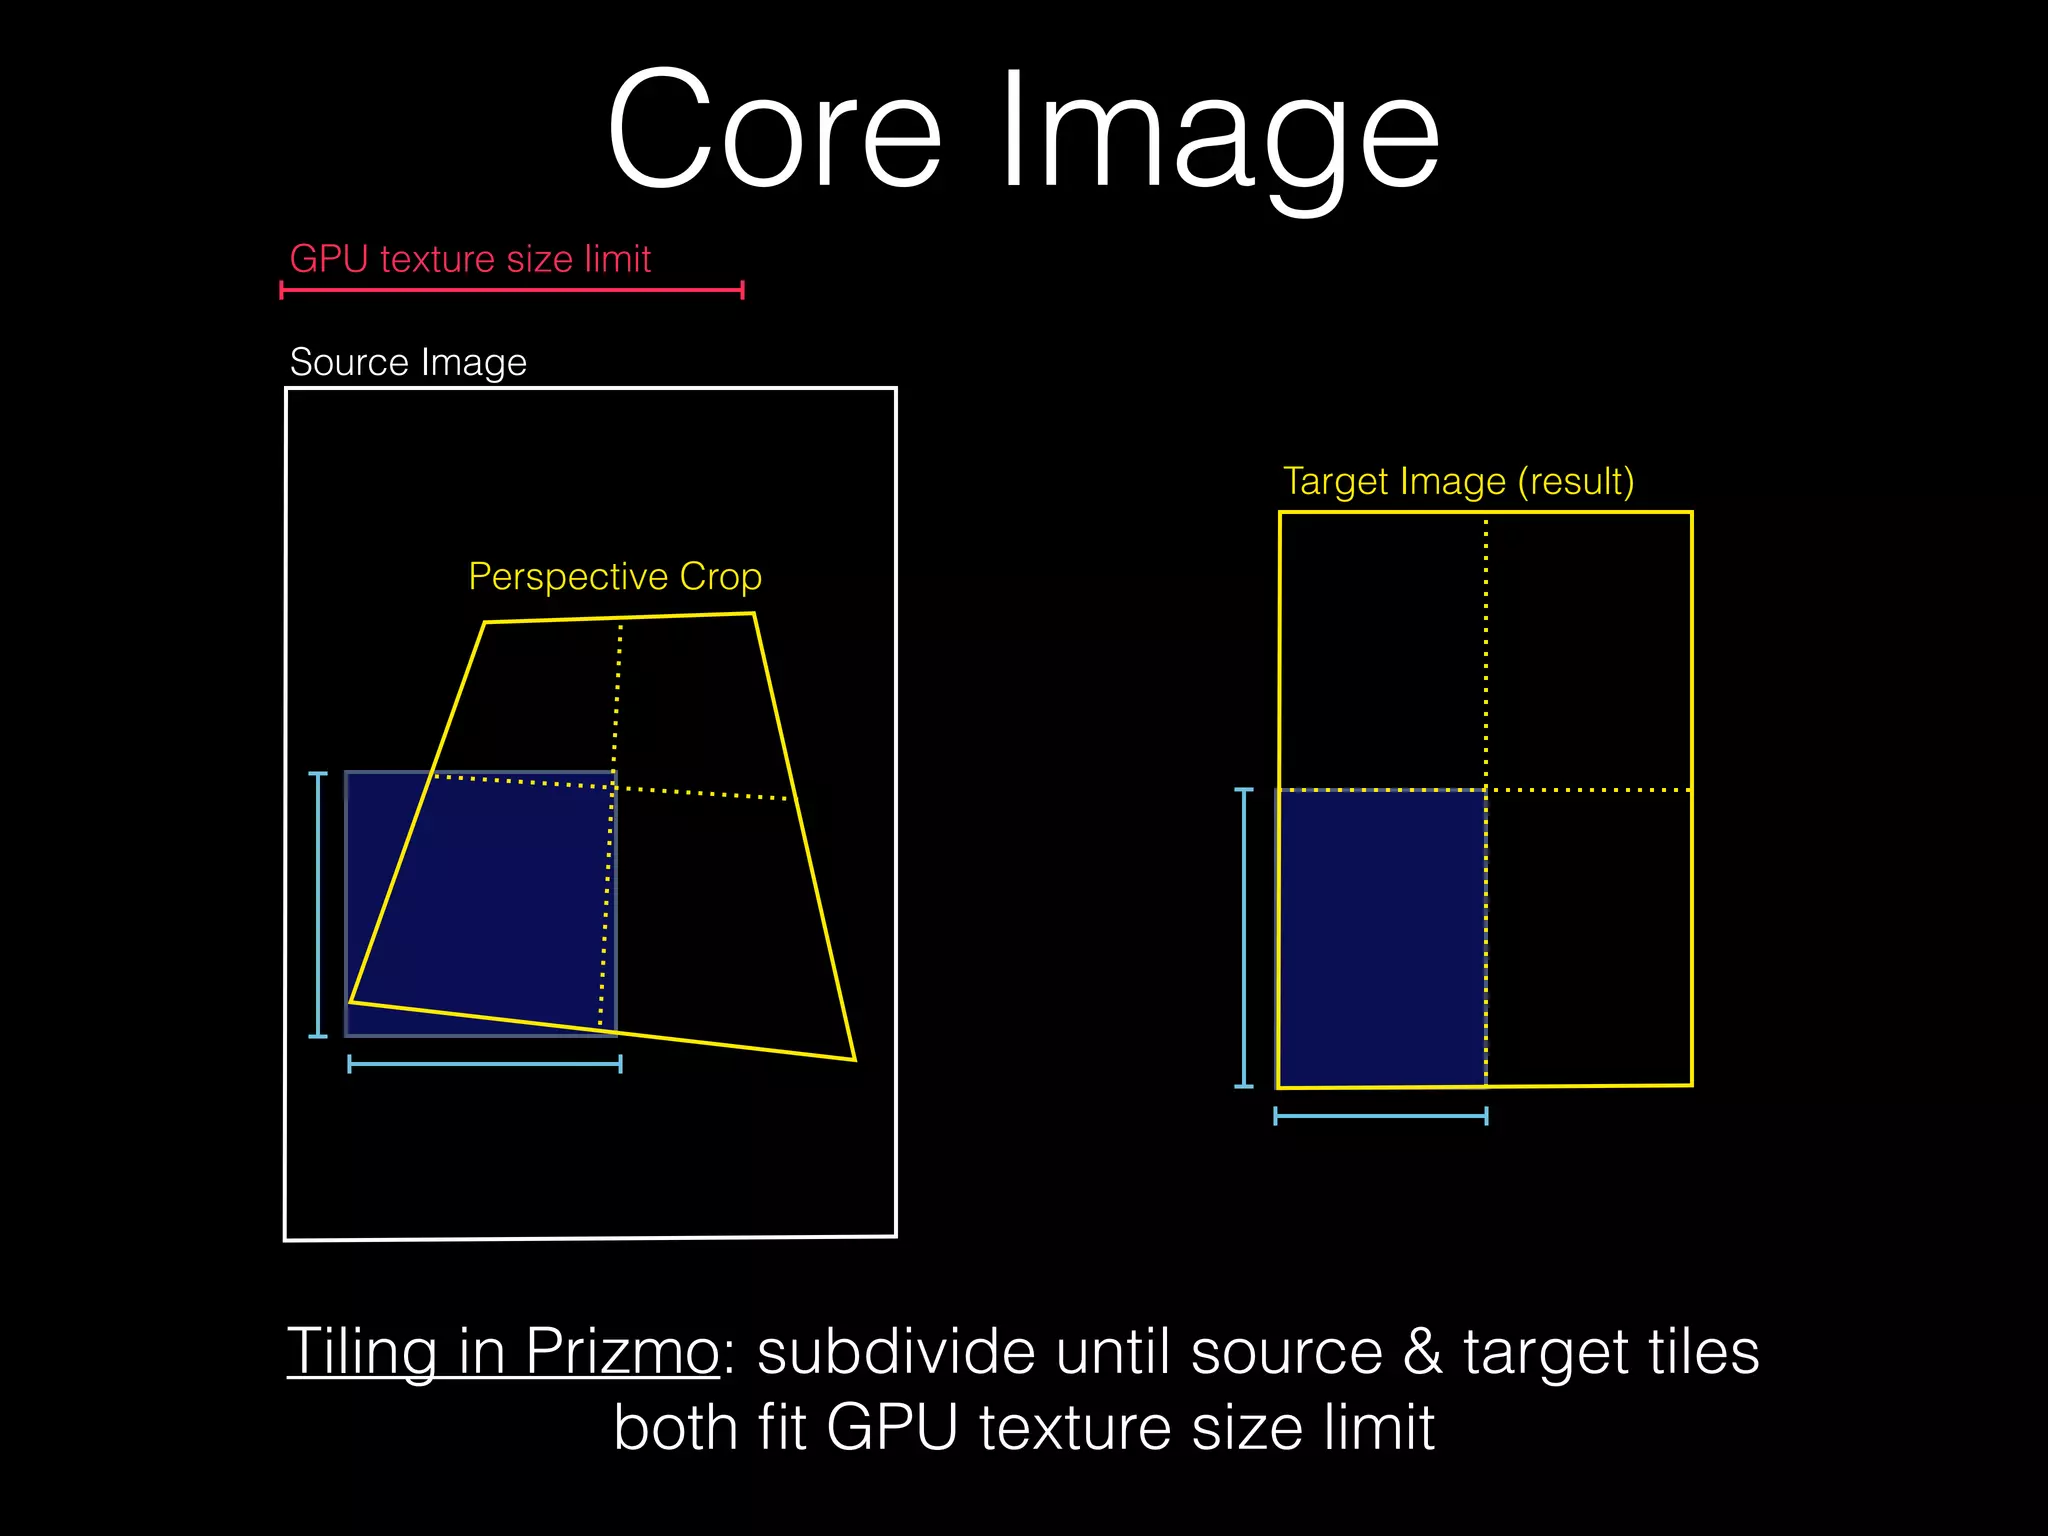
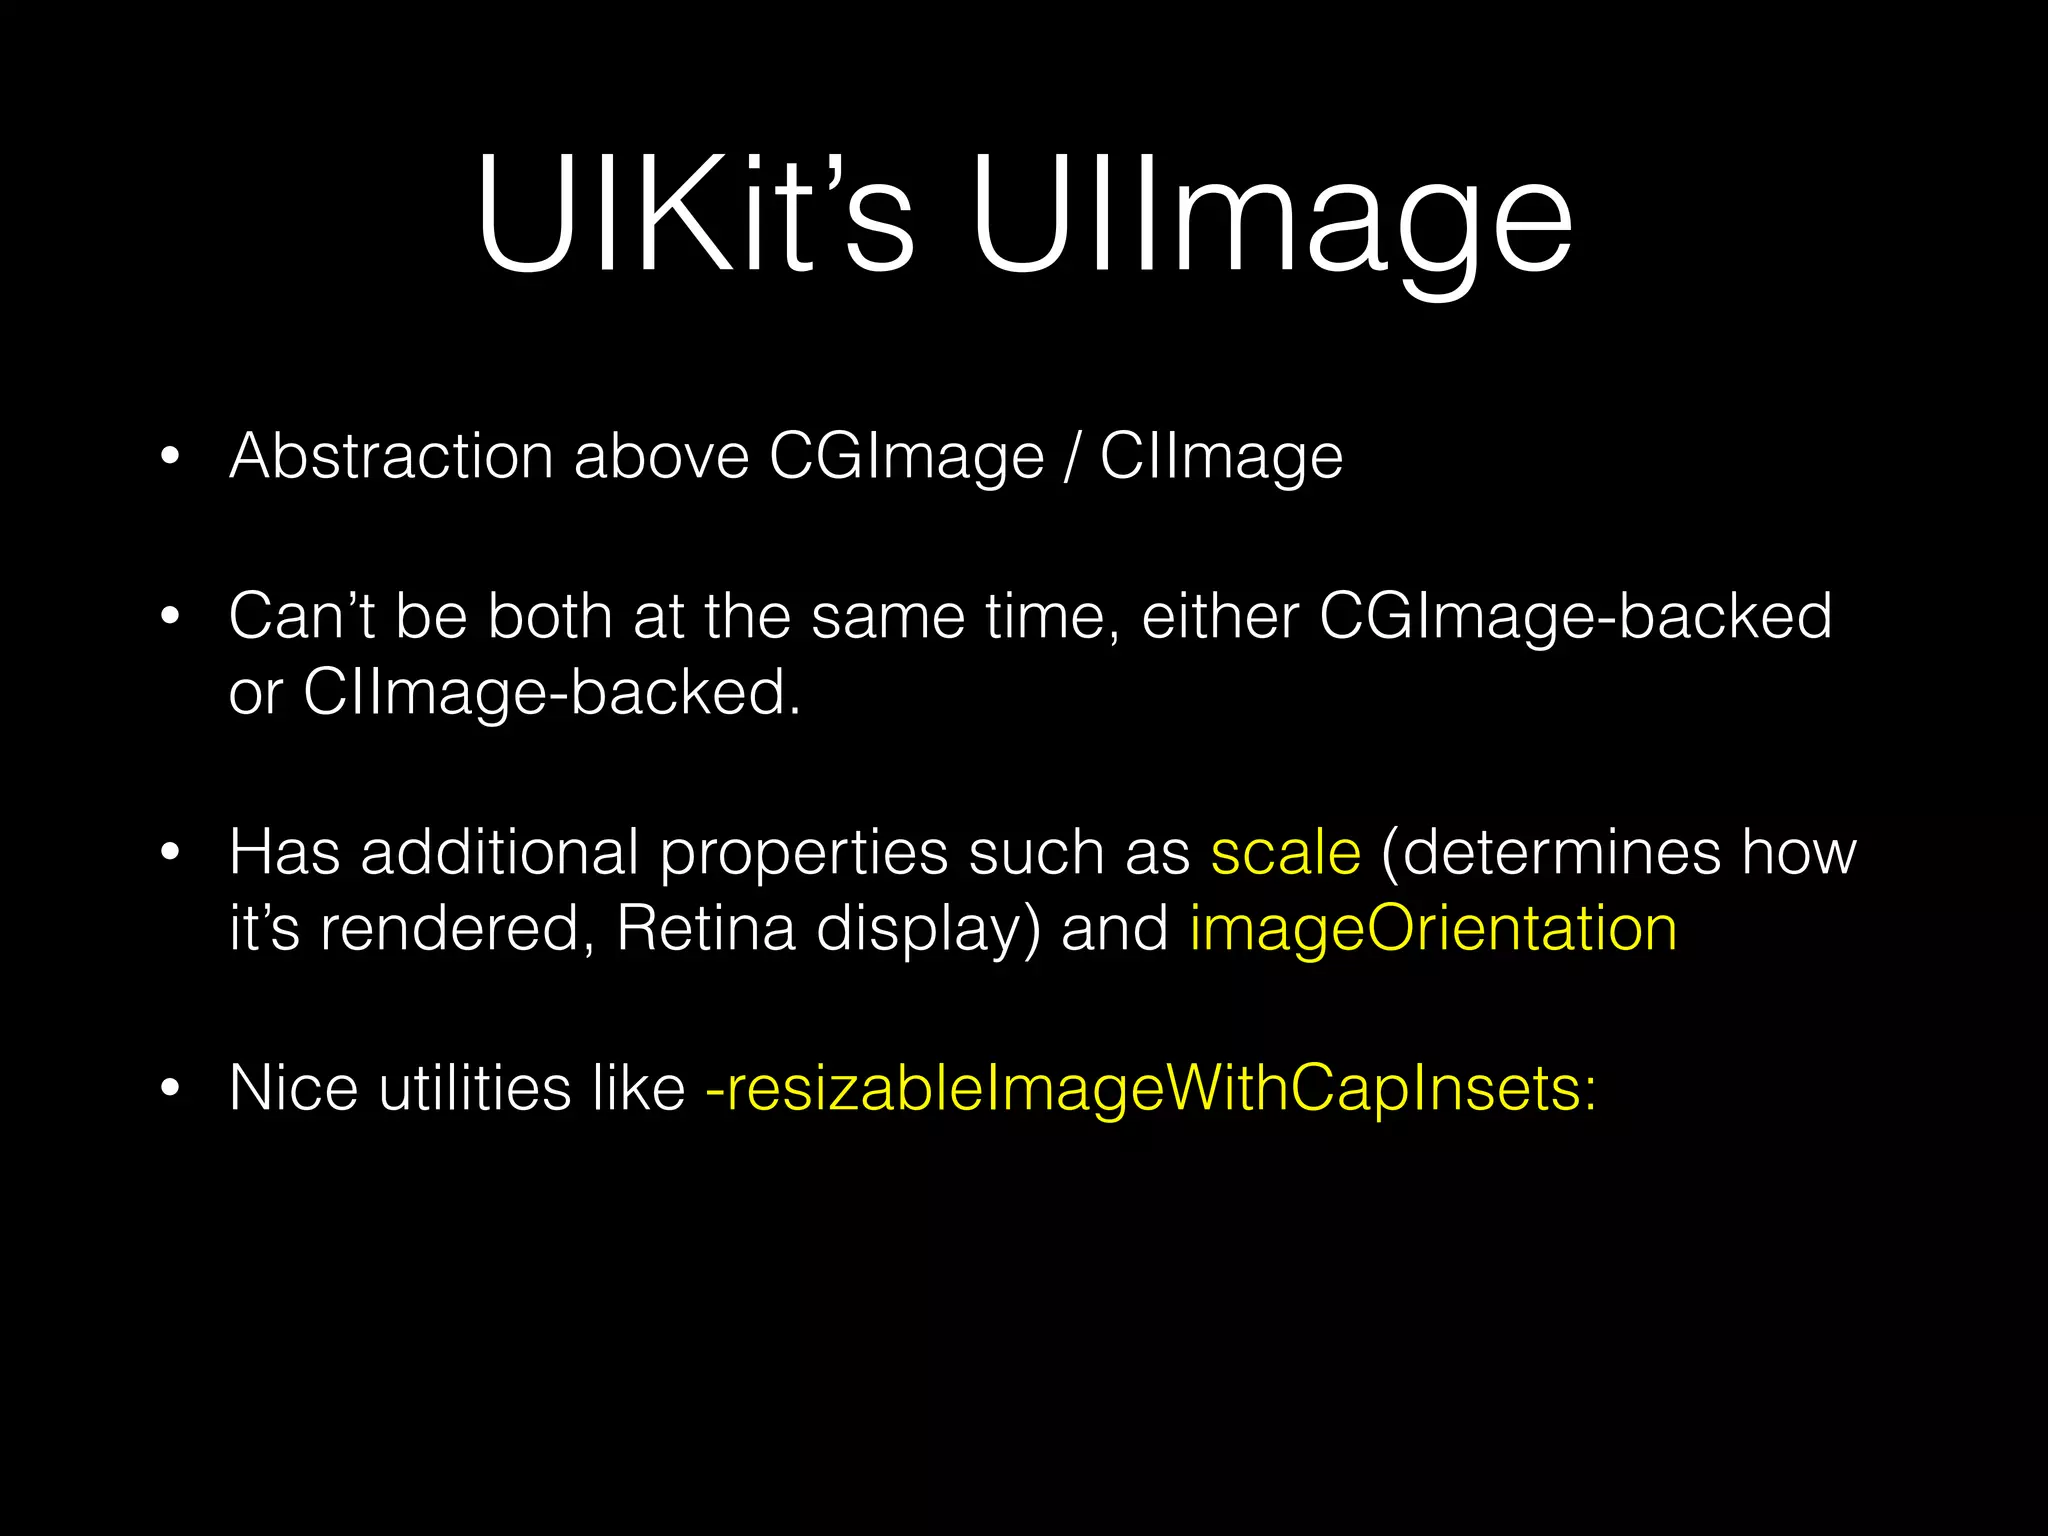
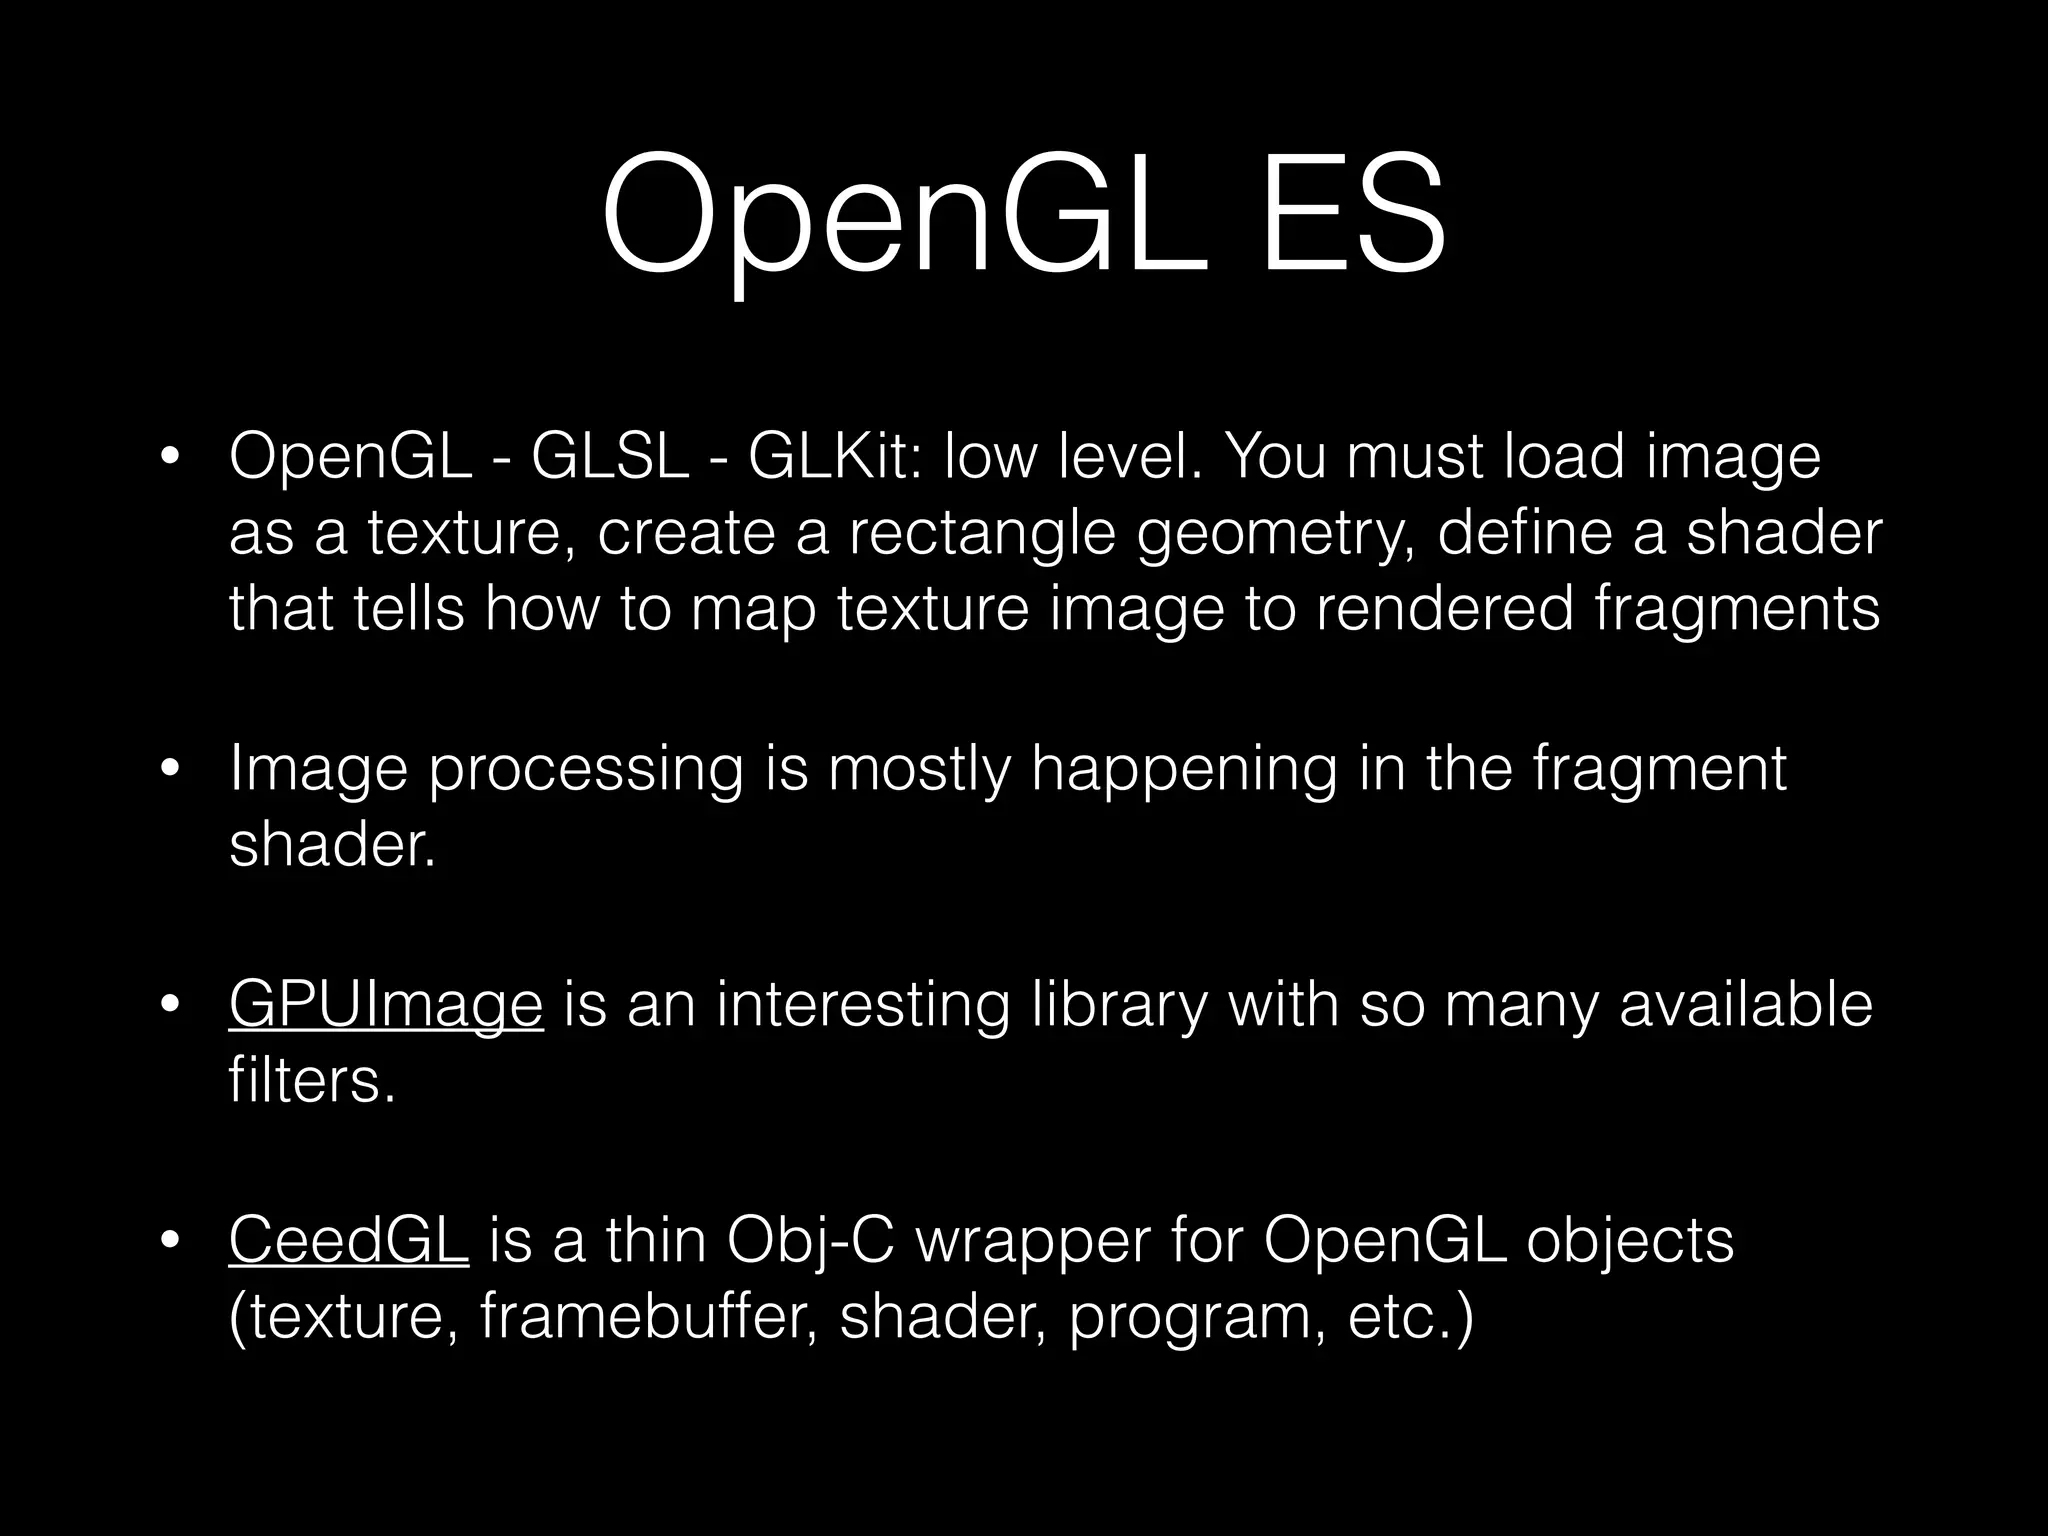
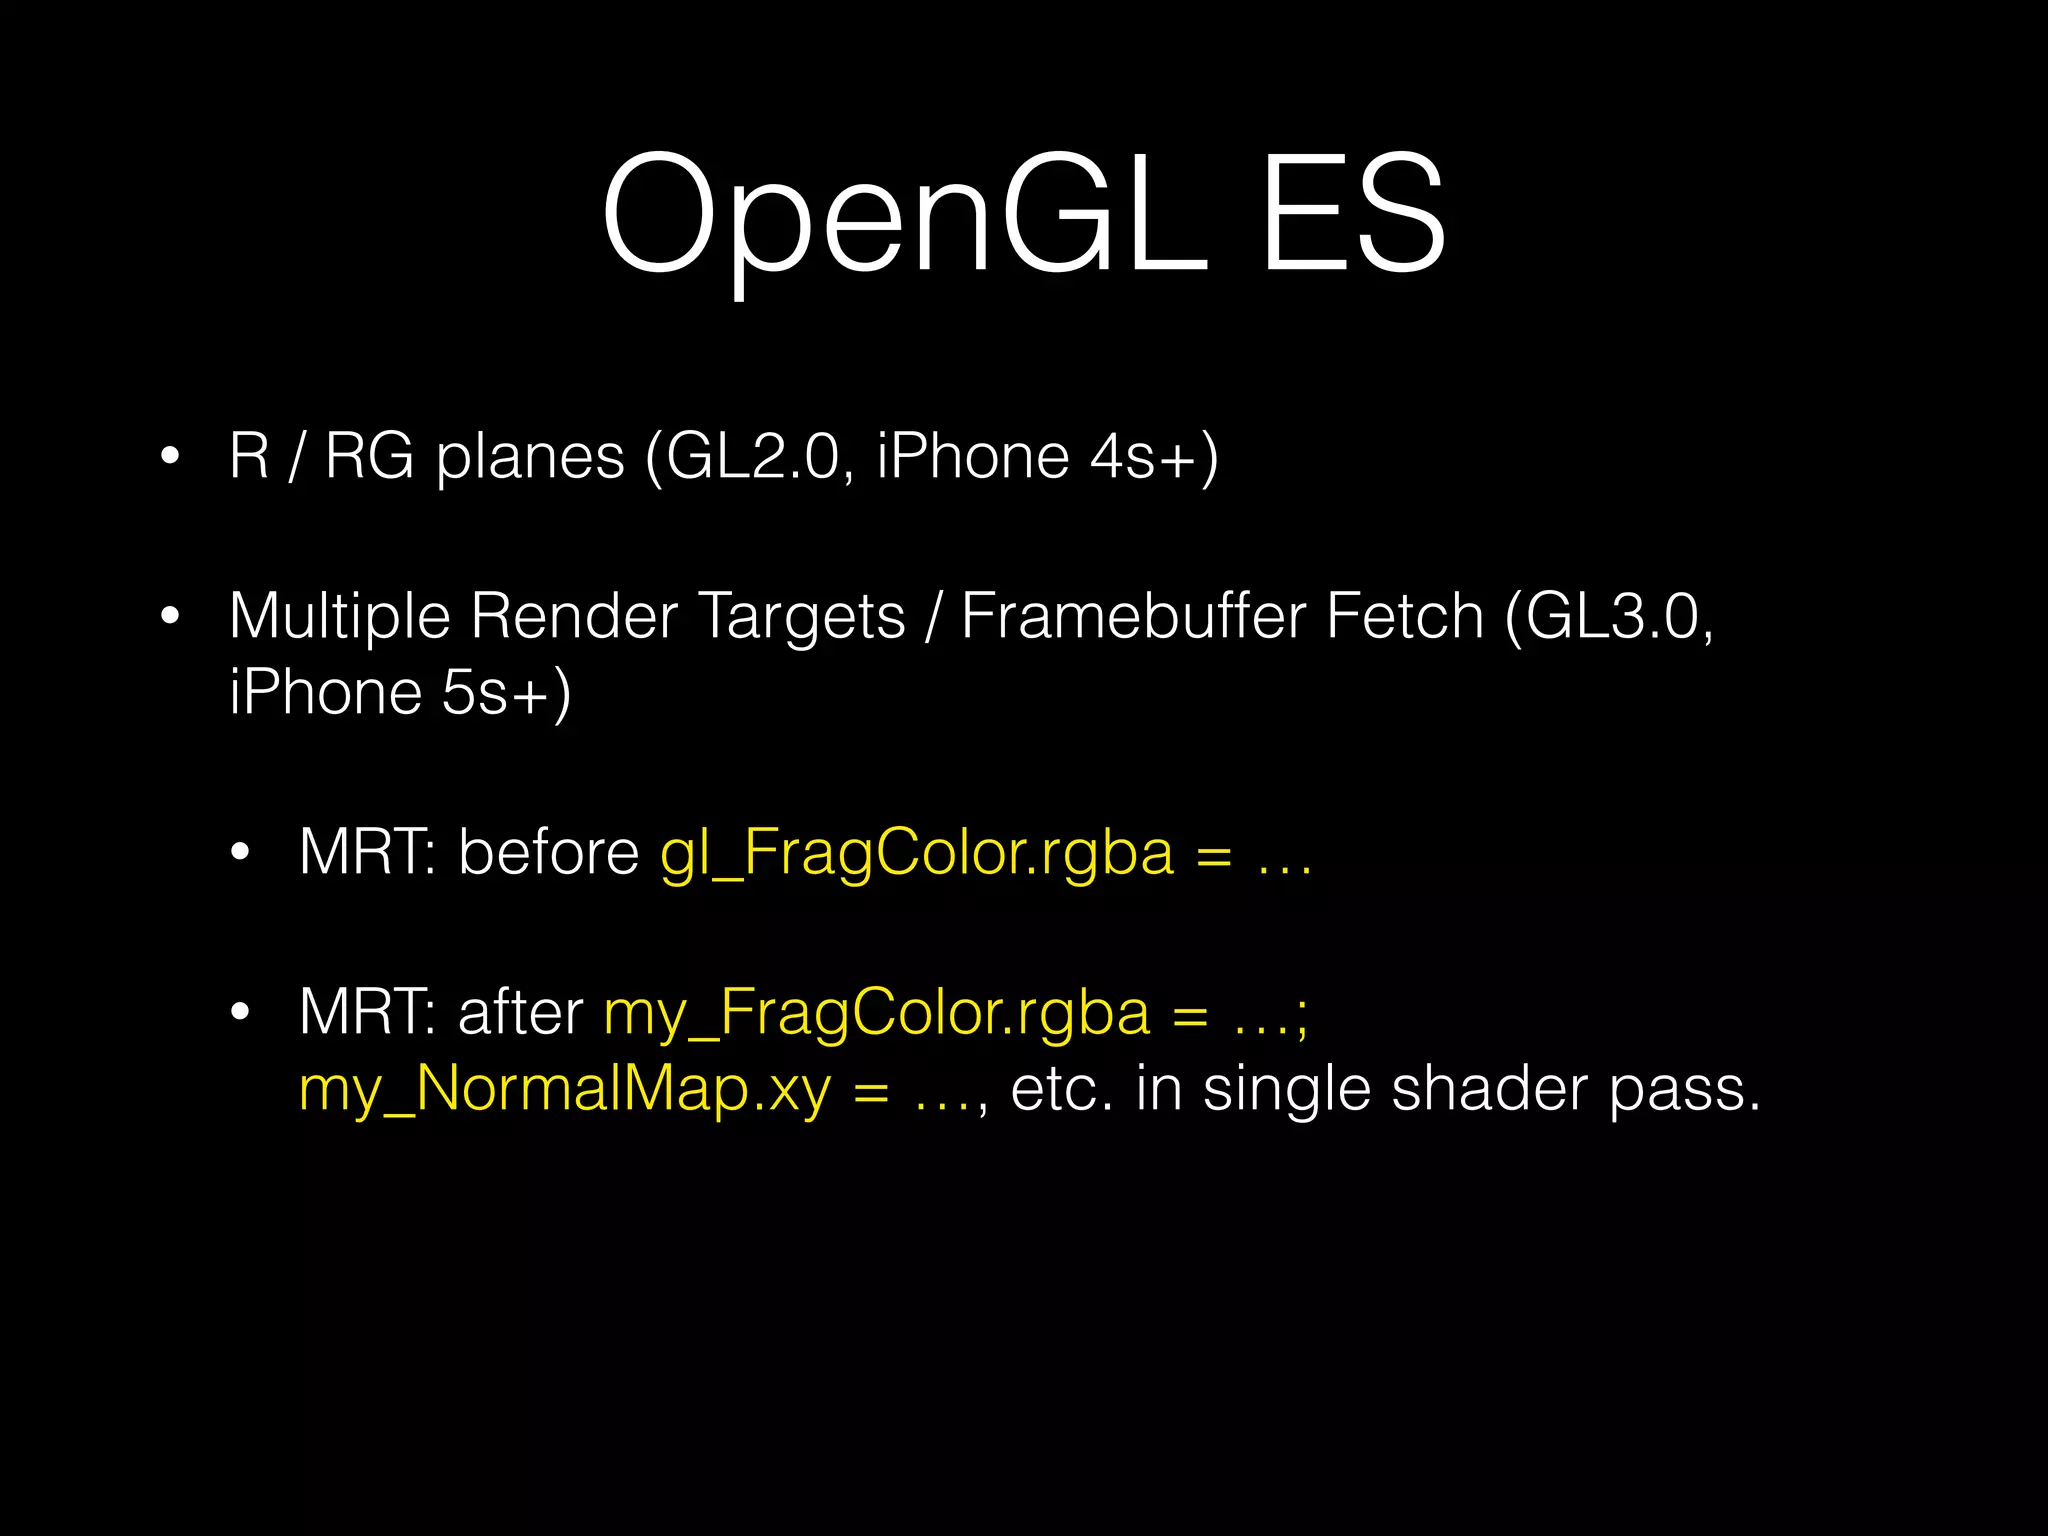
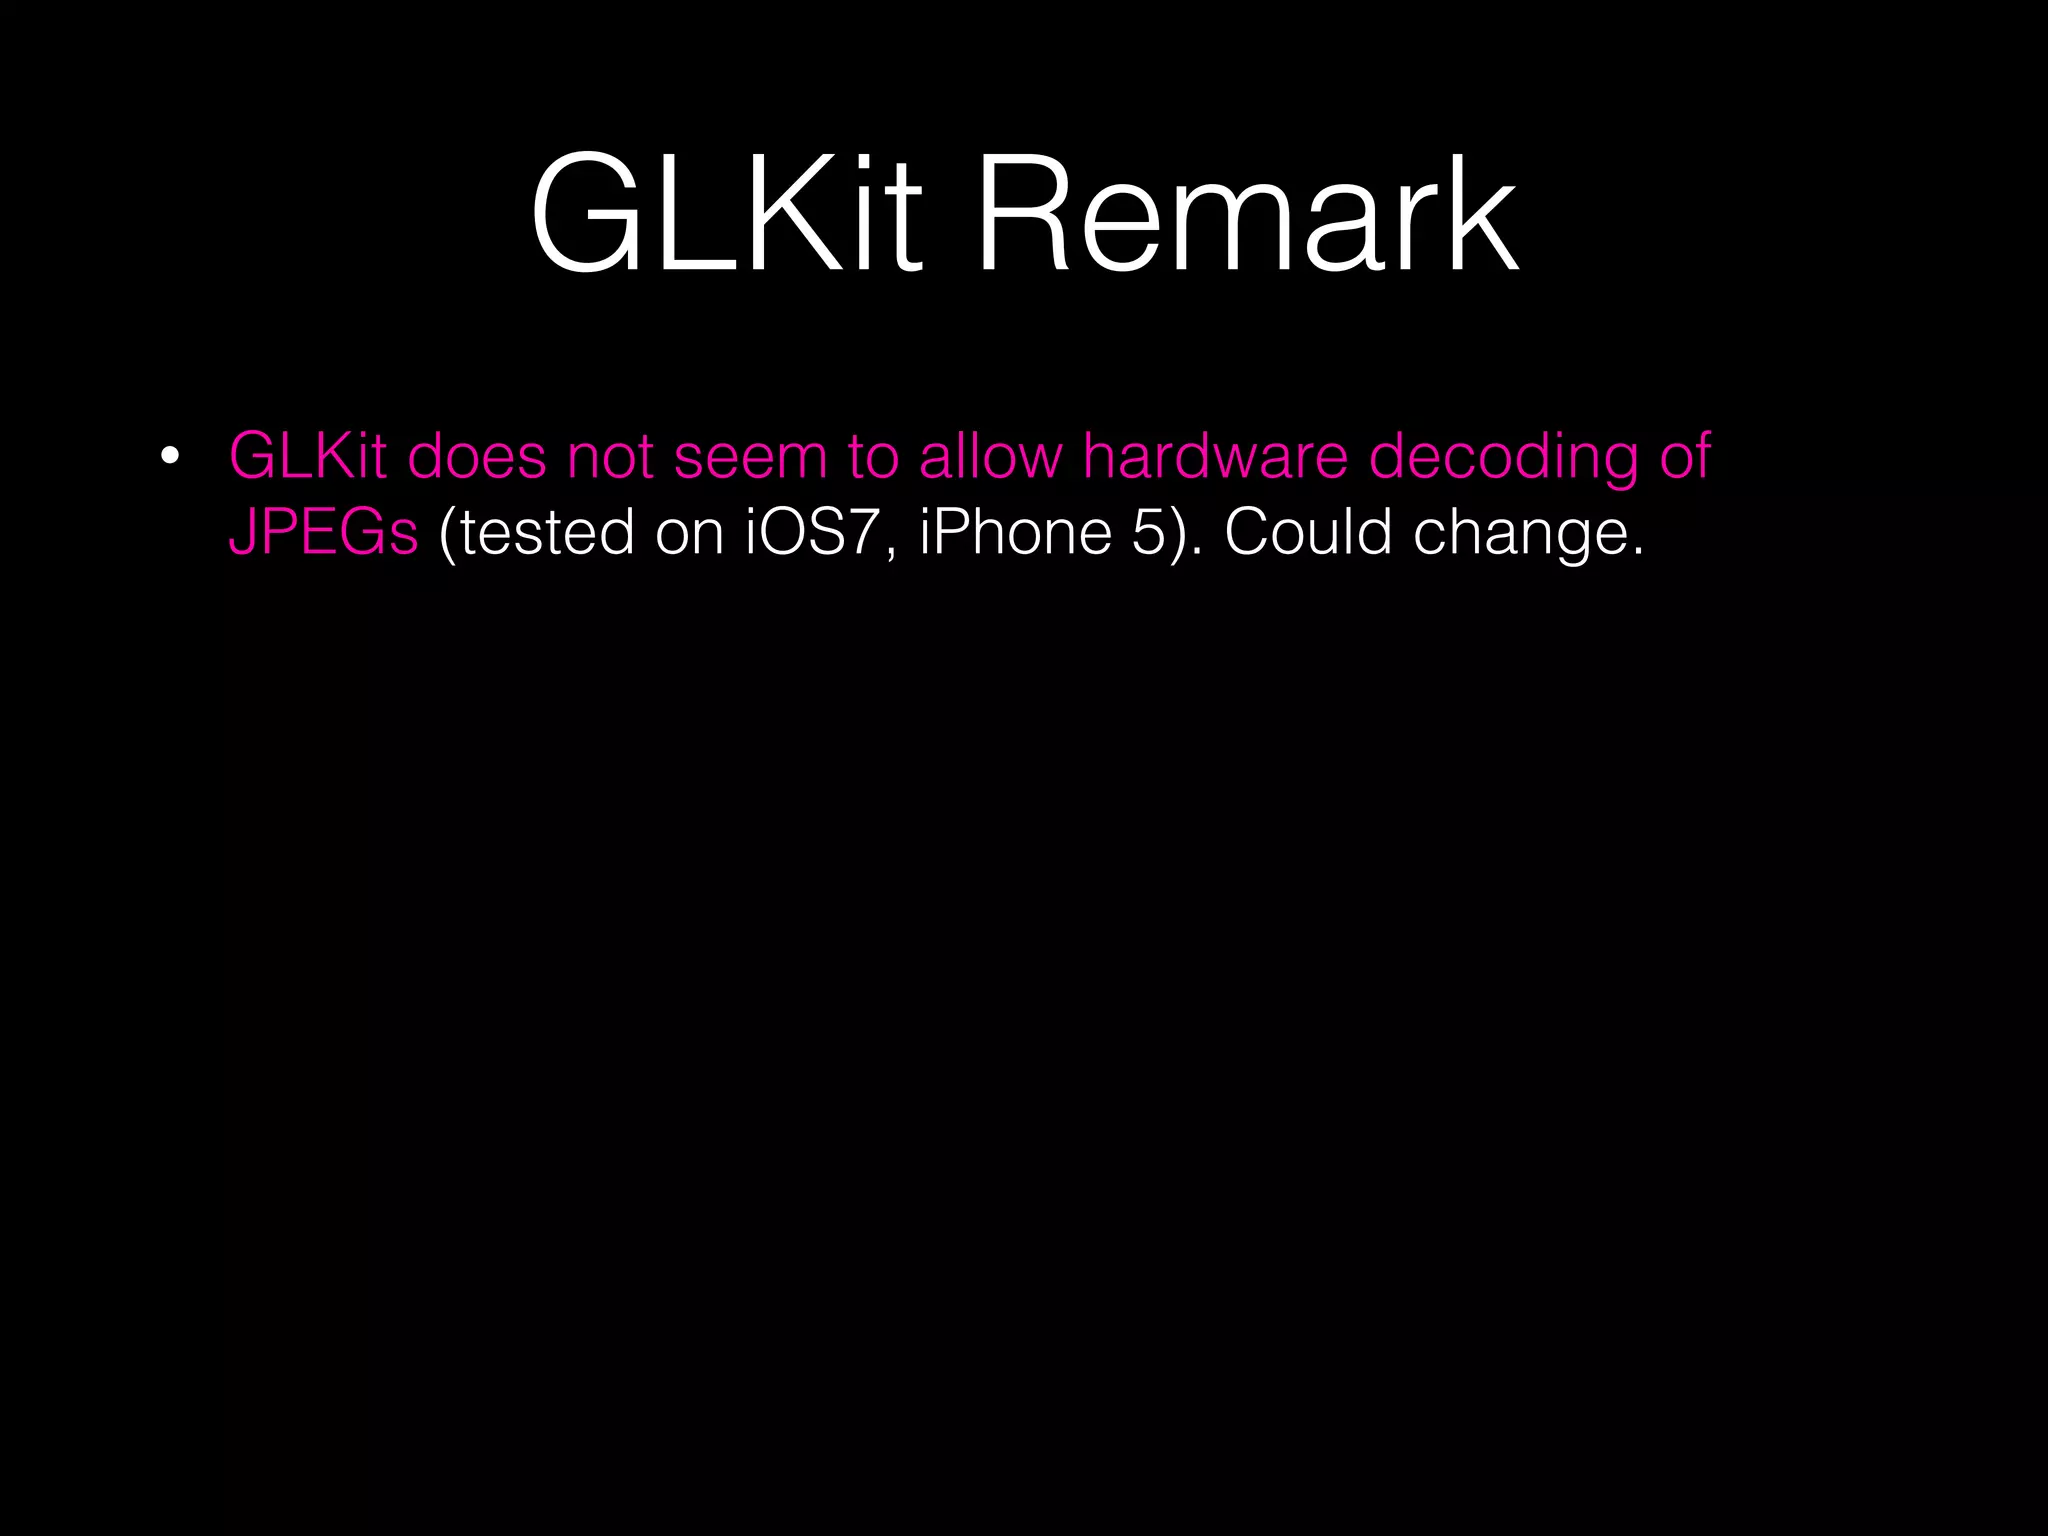
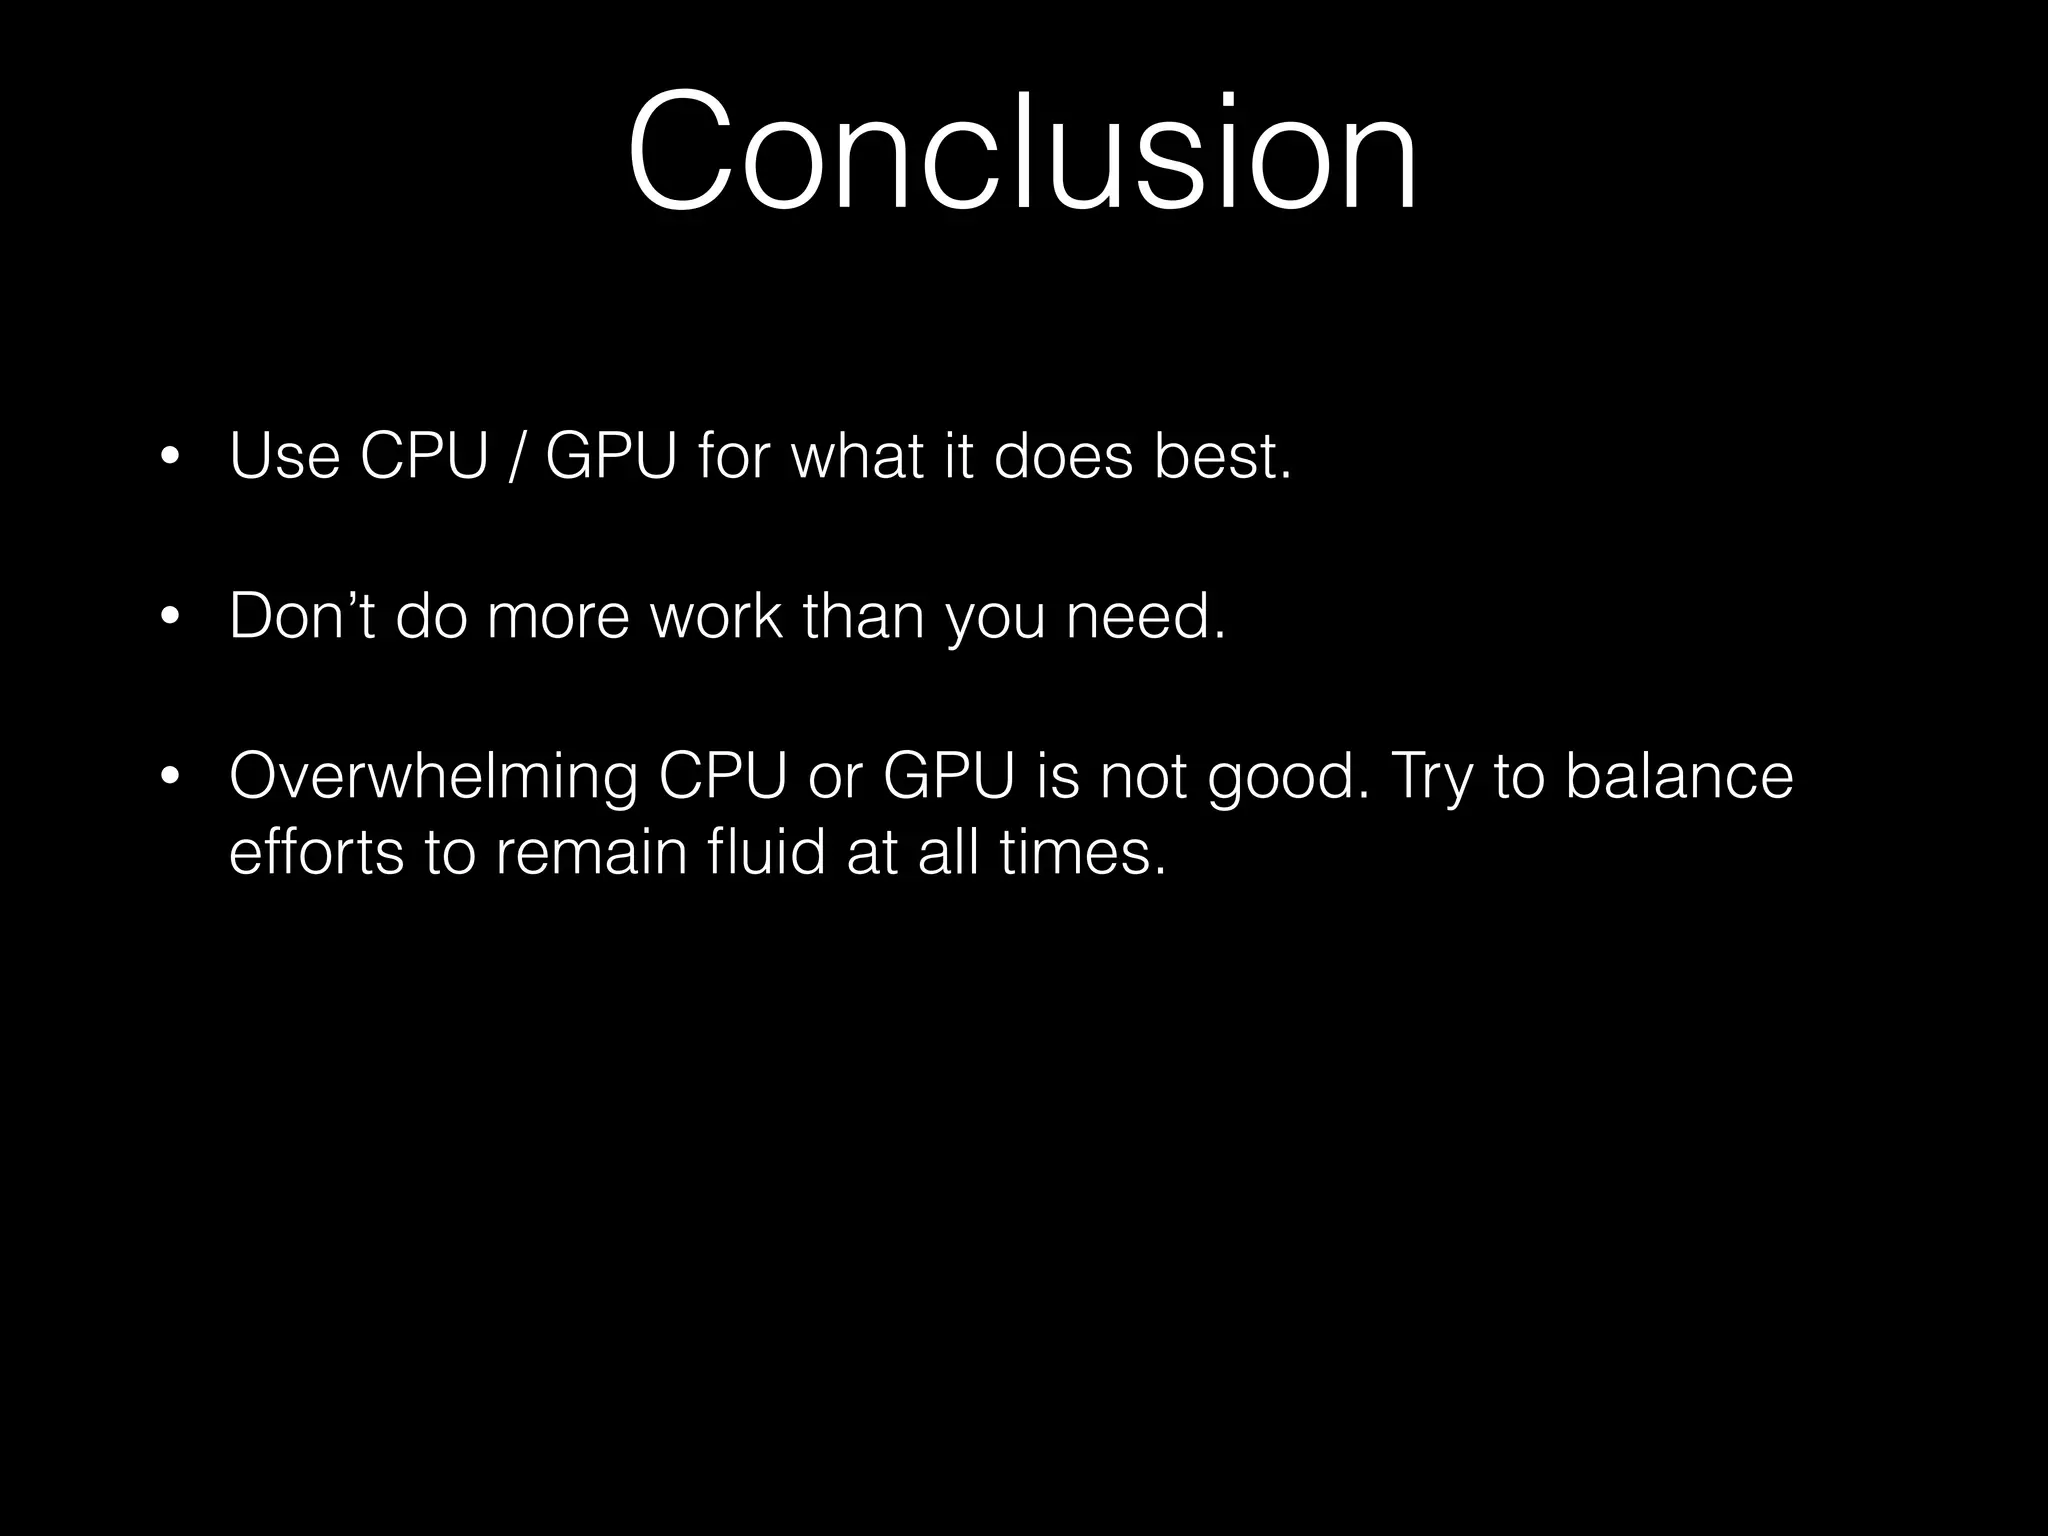
The document discusses advanced imaging techniques on iOS, emphasizing the importance of understanding CPU and GPU capabilities, execution speed, and memory consumption for optimizing app performance. It outlines various APIs available for image processing and provides guidelines on selecting the appropriate image formats for different use cases, highlighting key differences between PNG and JPEG. Additionally, it covers best practices for efficient image rendering and processing, including CPU and GPU utilization strategies, and suggests techniques for handling large images effectively.
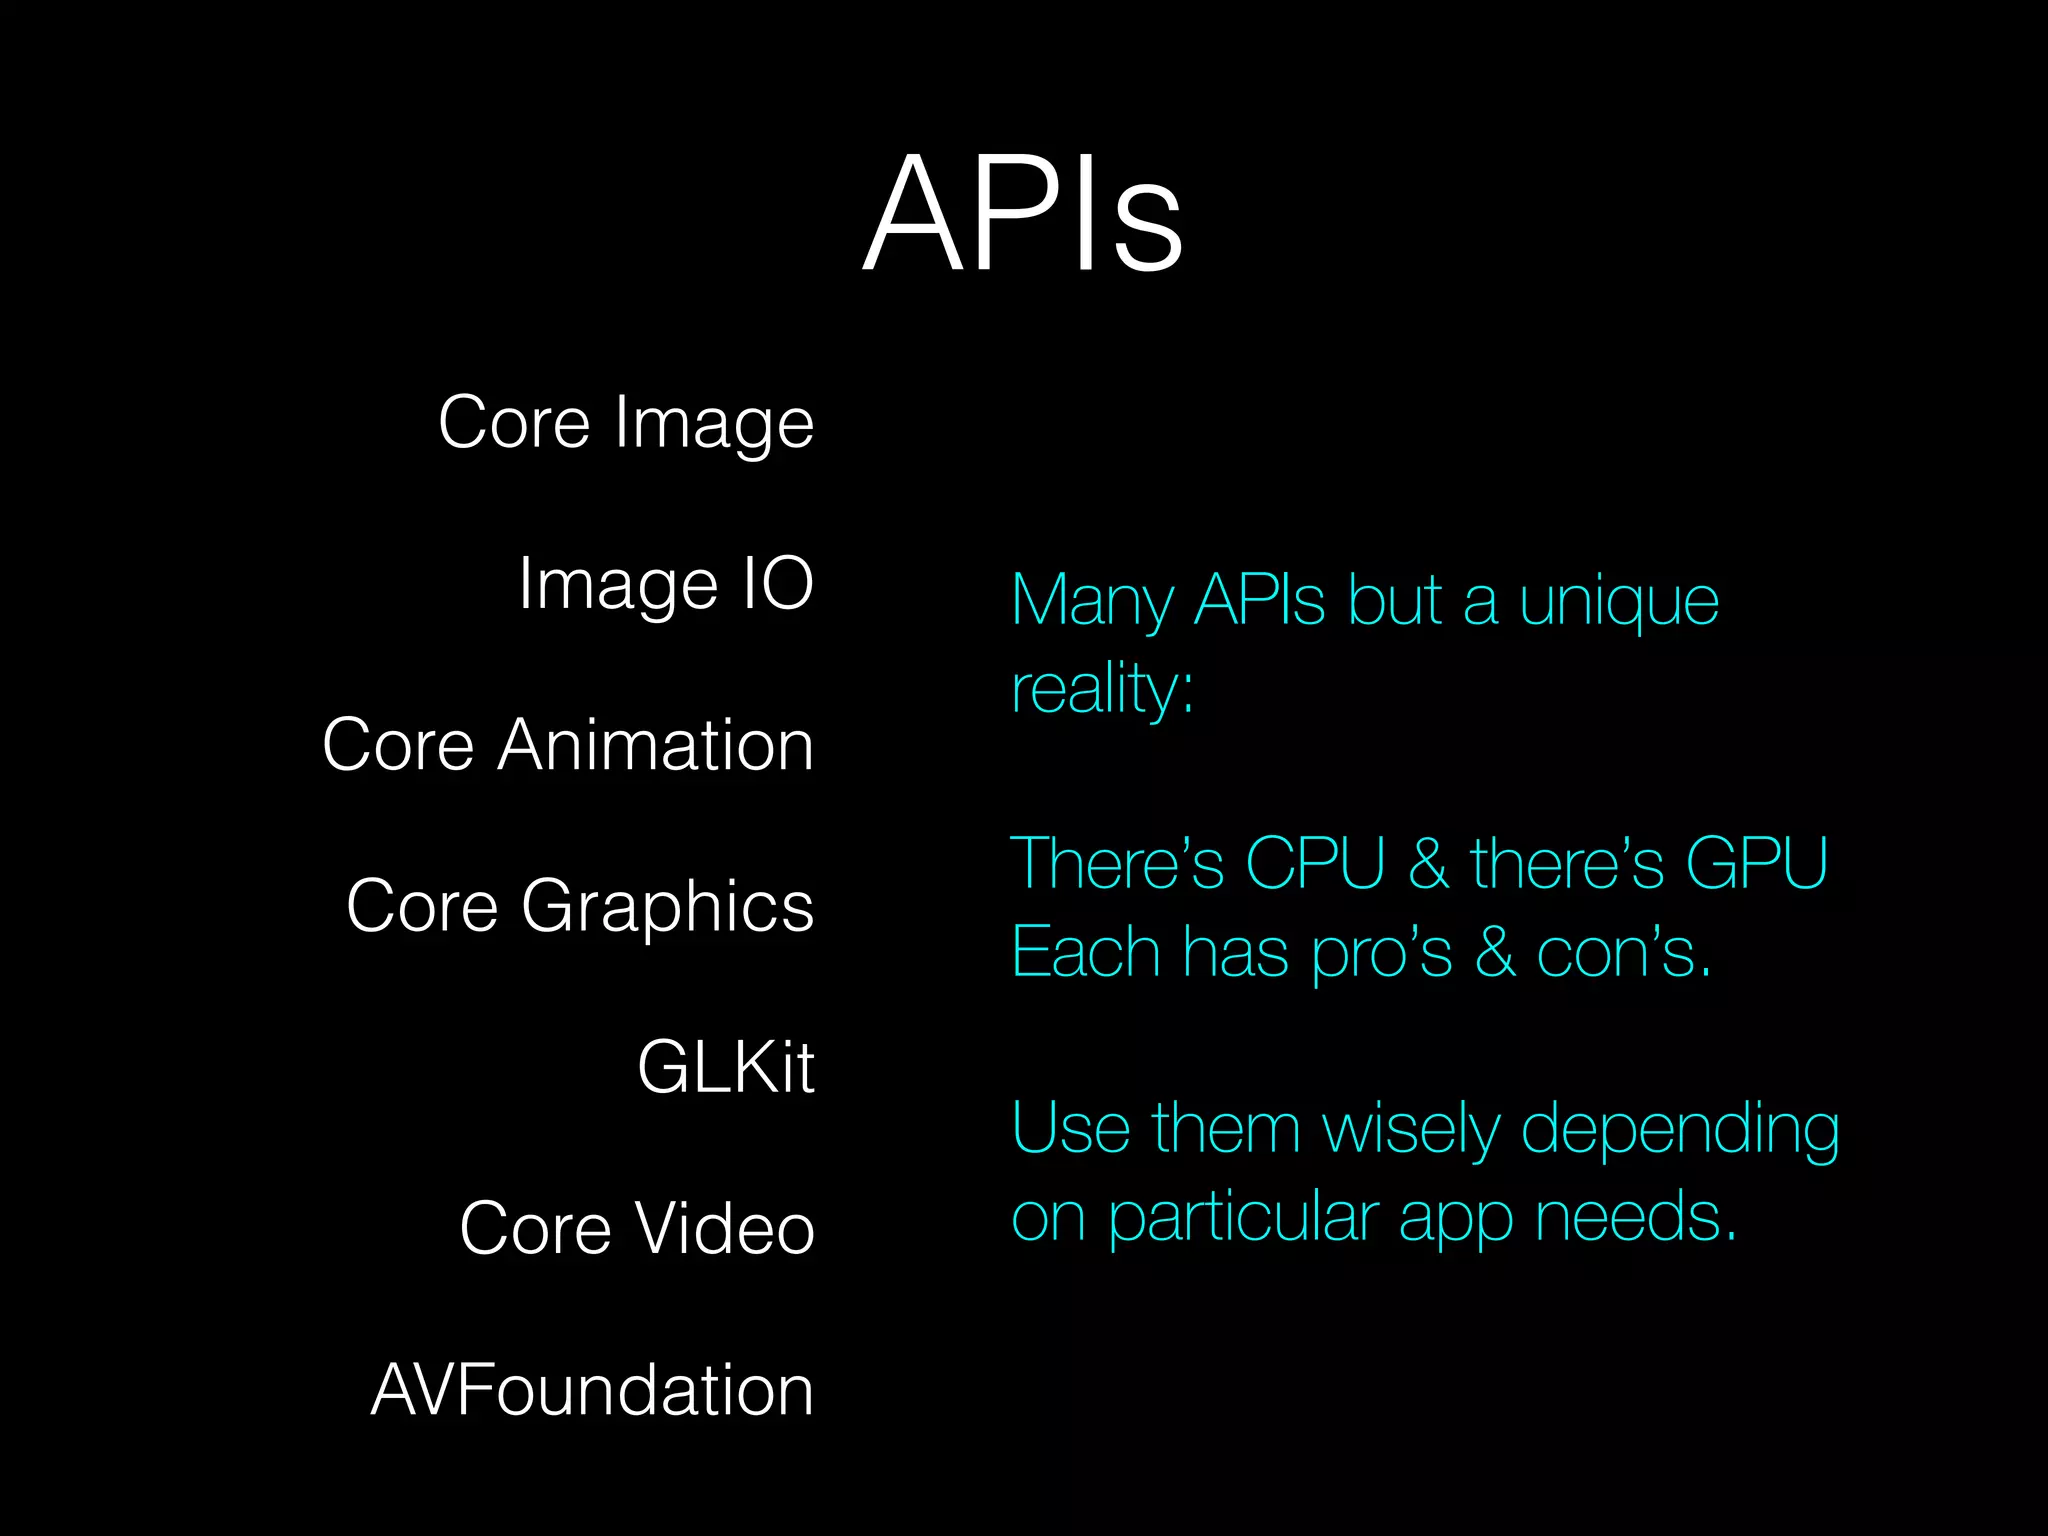
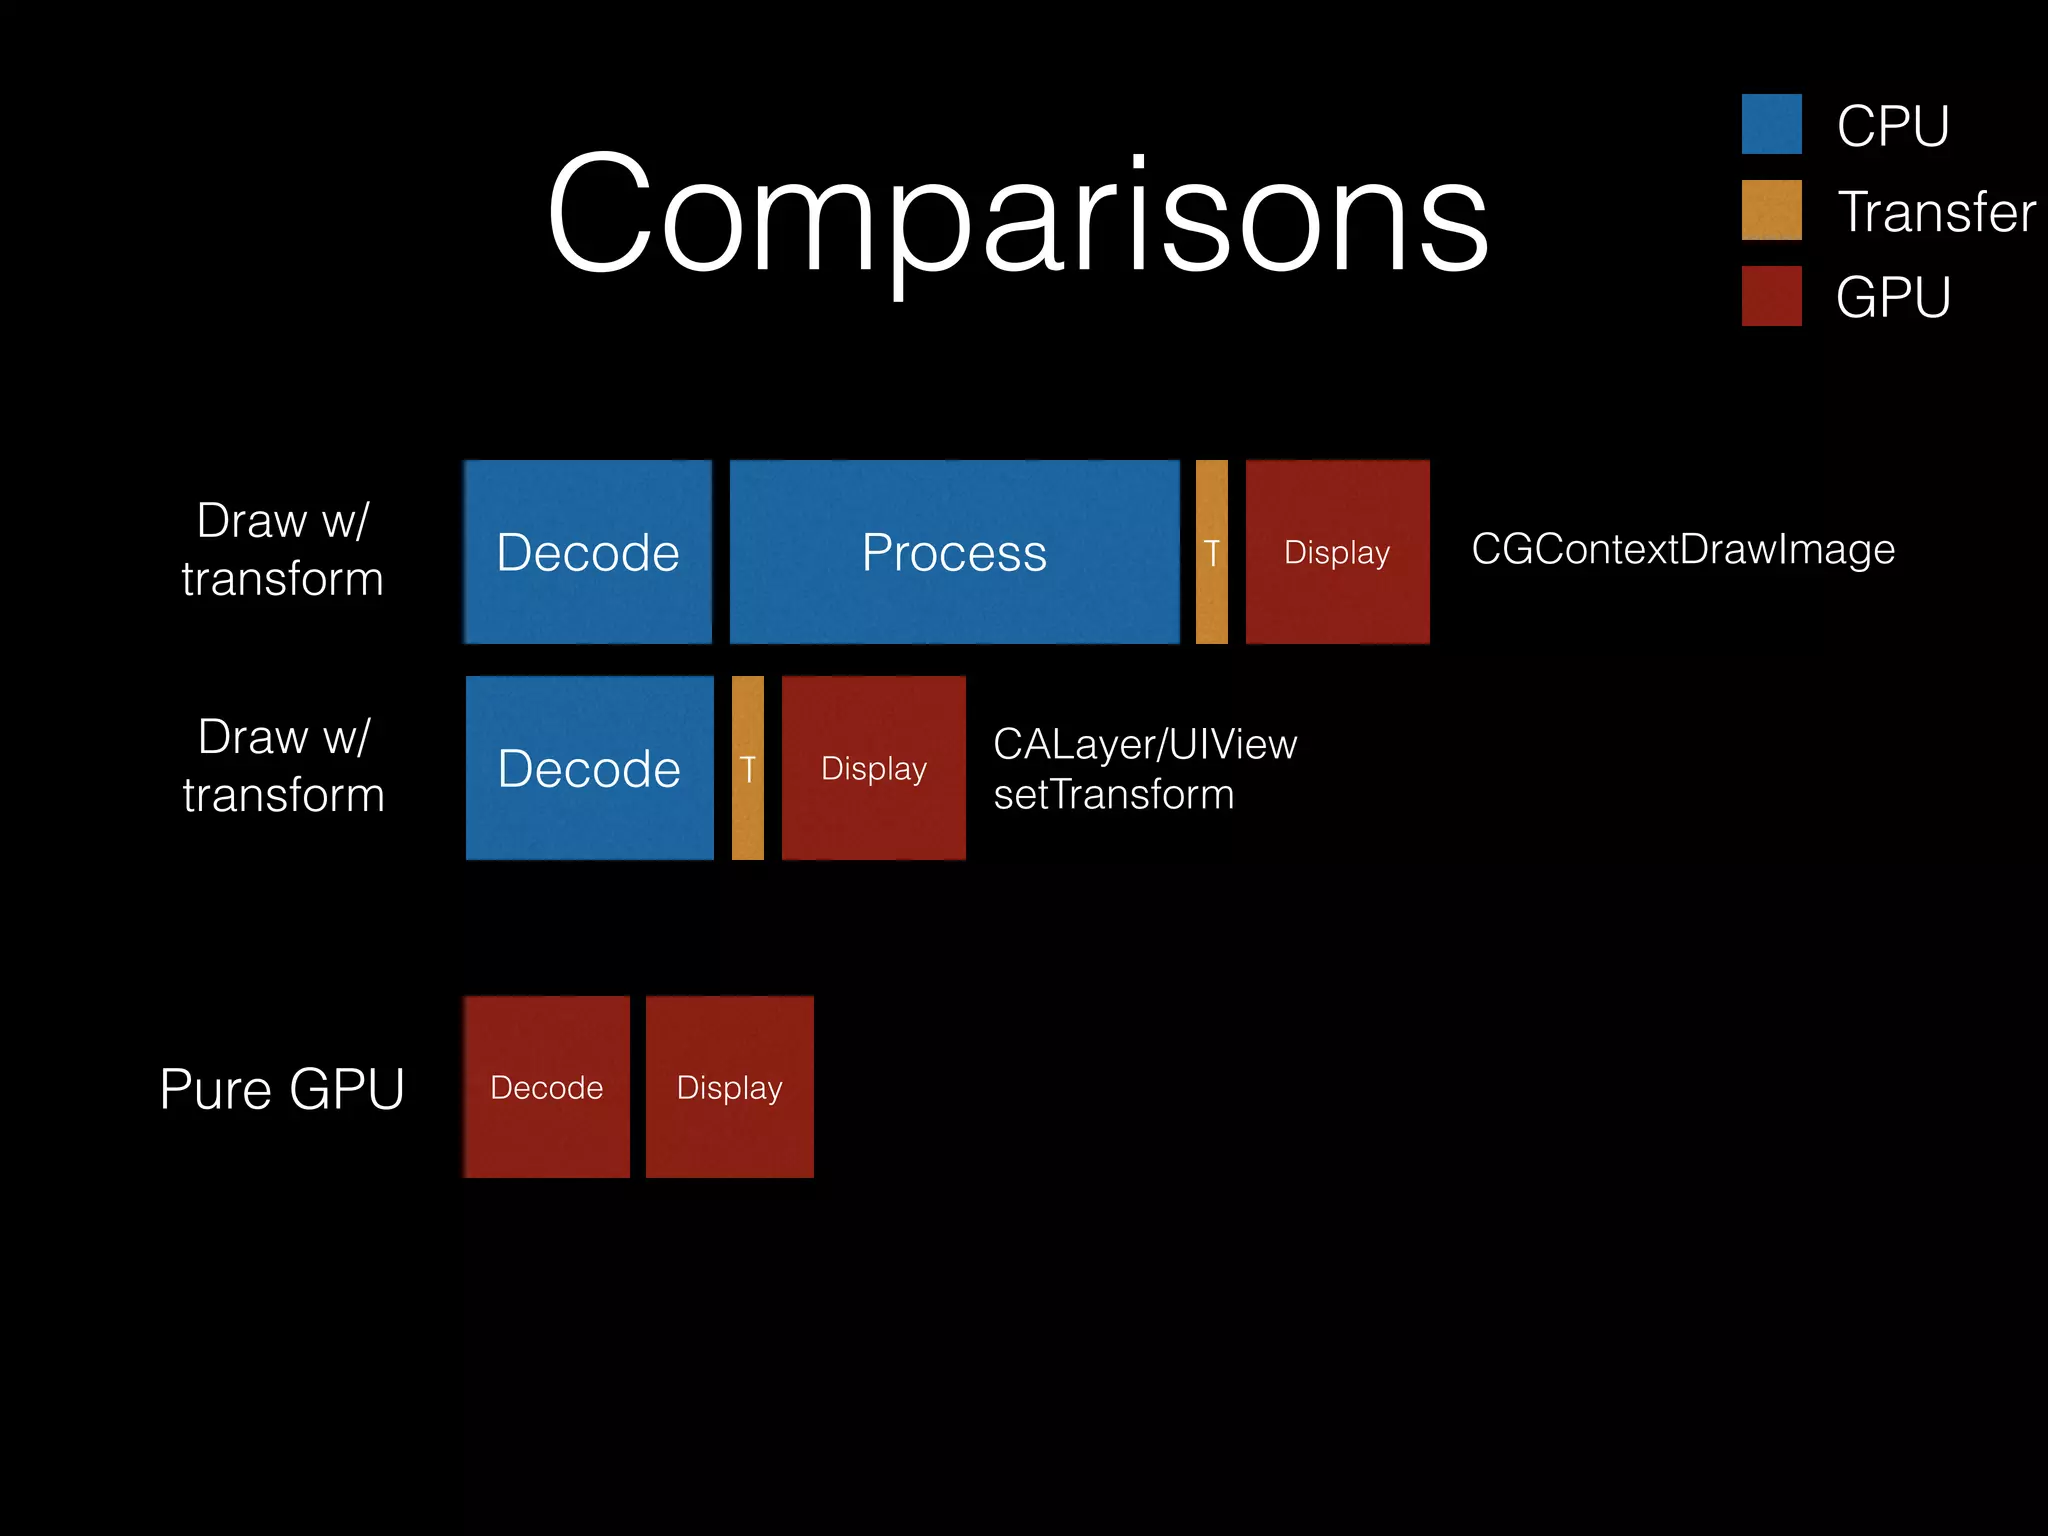
![Core Animation
•
Very efficient, GPU-accelerated 2D/3D transform of image-based
content. Foundation for UIKit’s UIView.
•
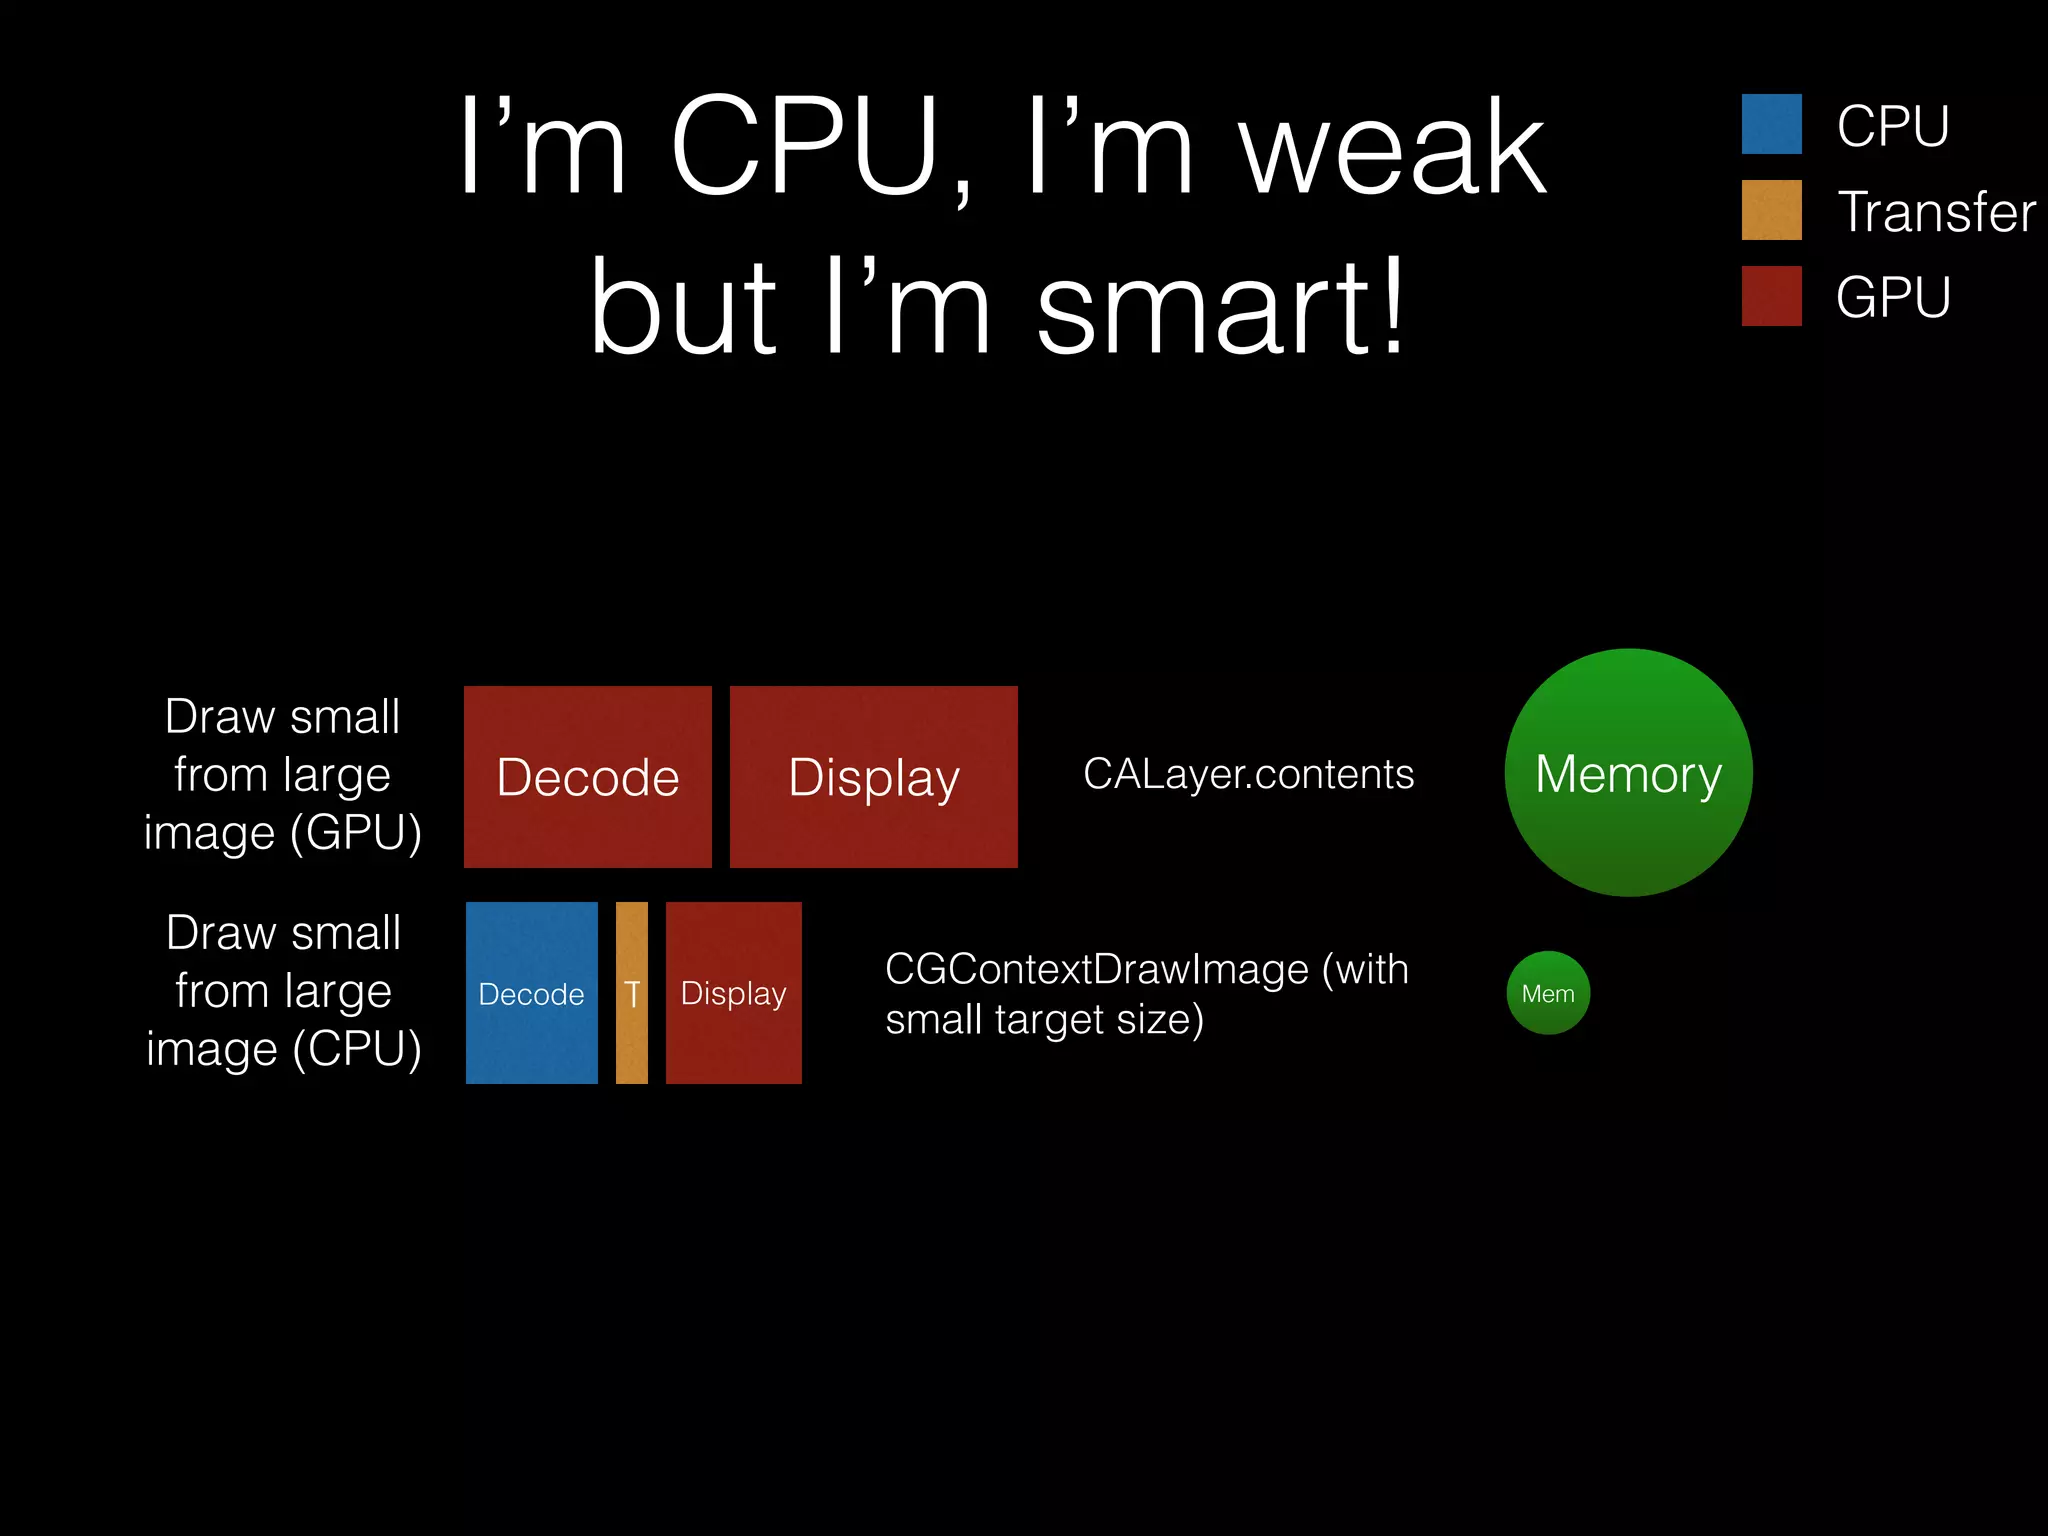
CALayer/UIView needs some visuals. How? -drawLayer: or setContents:
•
-[CALayer drawLayer:] (or -[UIView drawRect:]) uses Core
Graphics (CPU) to generate an image (slow), and that image is
then made into a GPU-backed texture that can move around
(fast).
•
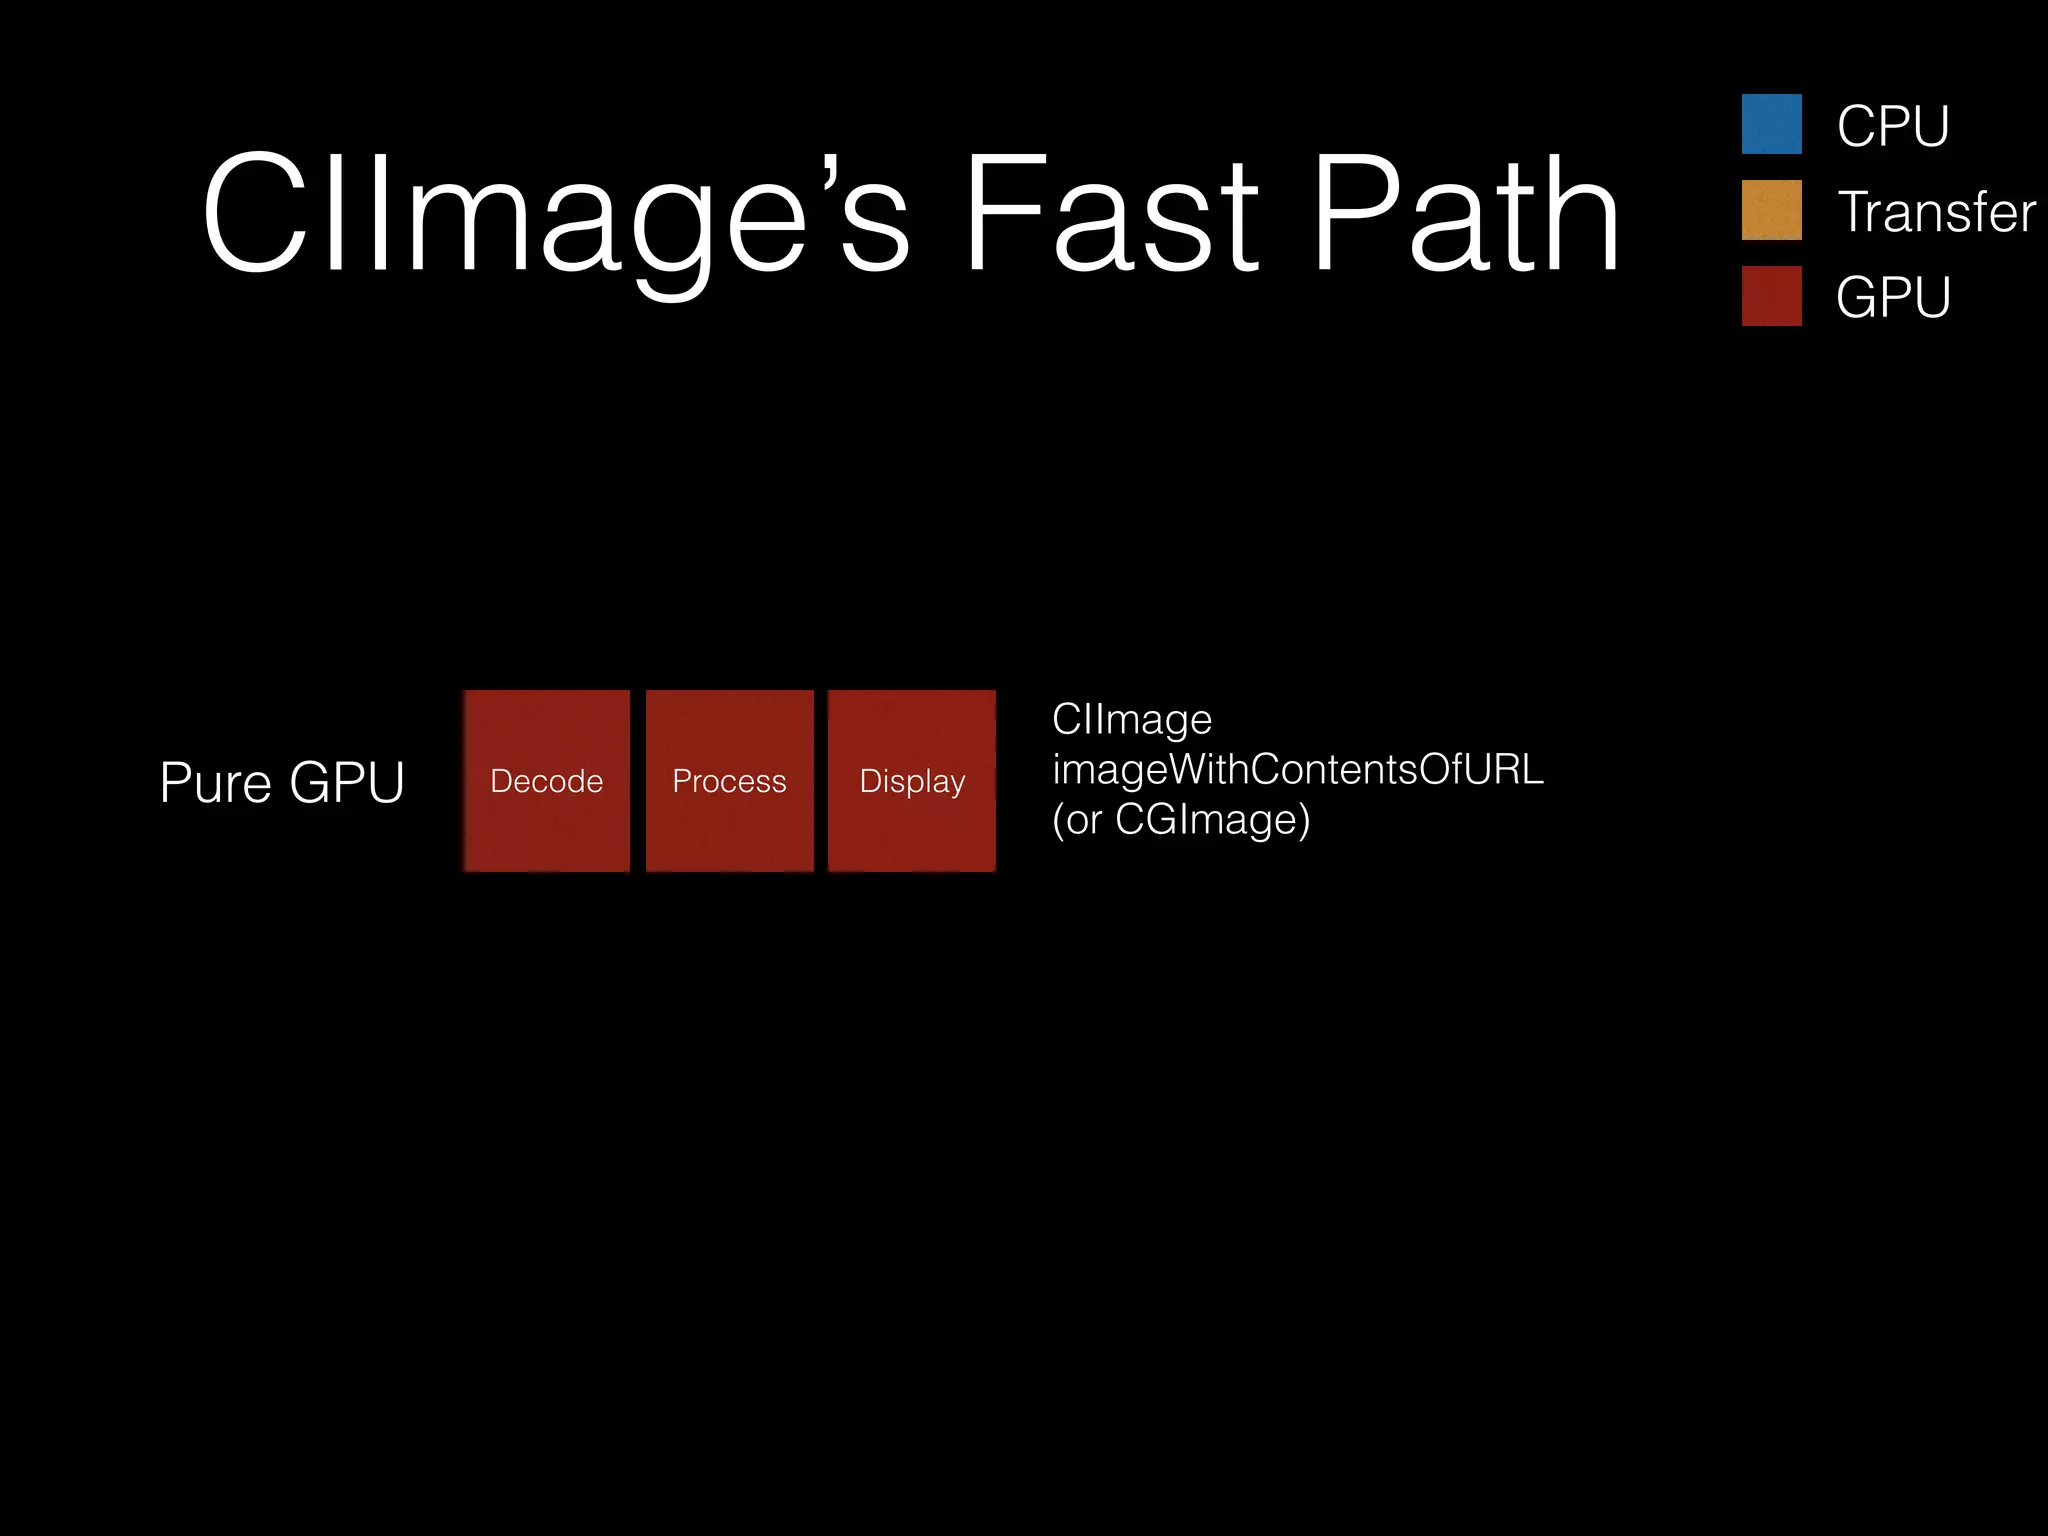
If not drawing, but instead setting contents -[CALayer
setContents:] (or -[UIImageView setImage:]), you get the fast
path, that is, GPU image decoding.](https://image.slidesharecdn.com/2014cocoaheadsadvimaging-140204022434-phpapp01/75/Advanced-Imaging-on-iOS-12-2048.jpg)
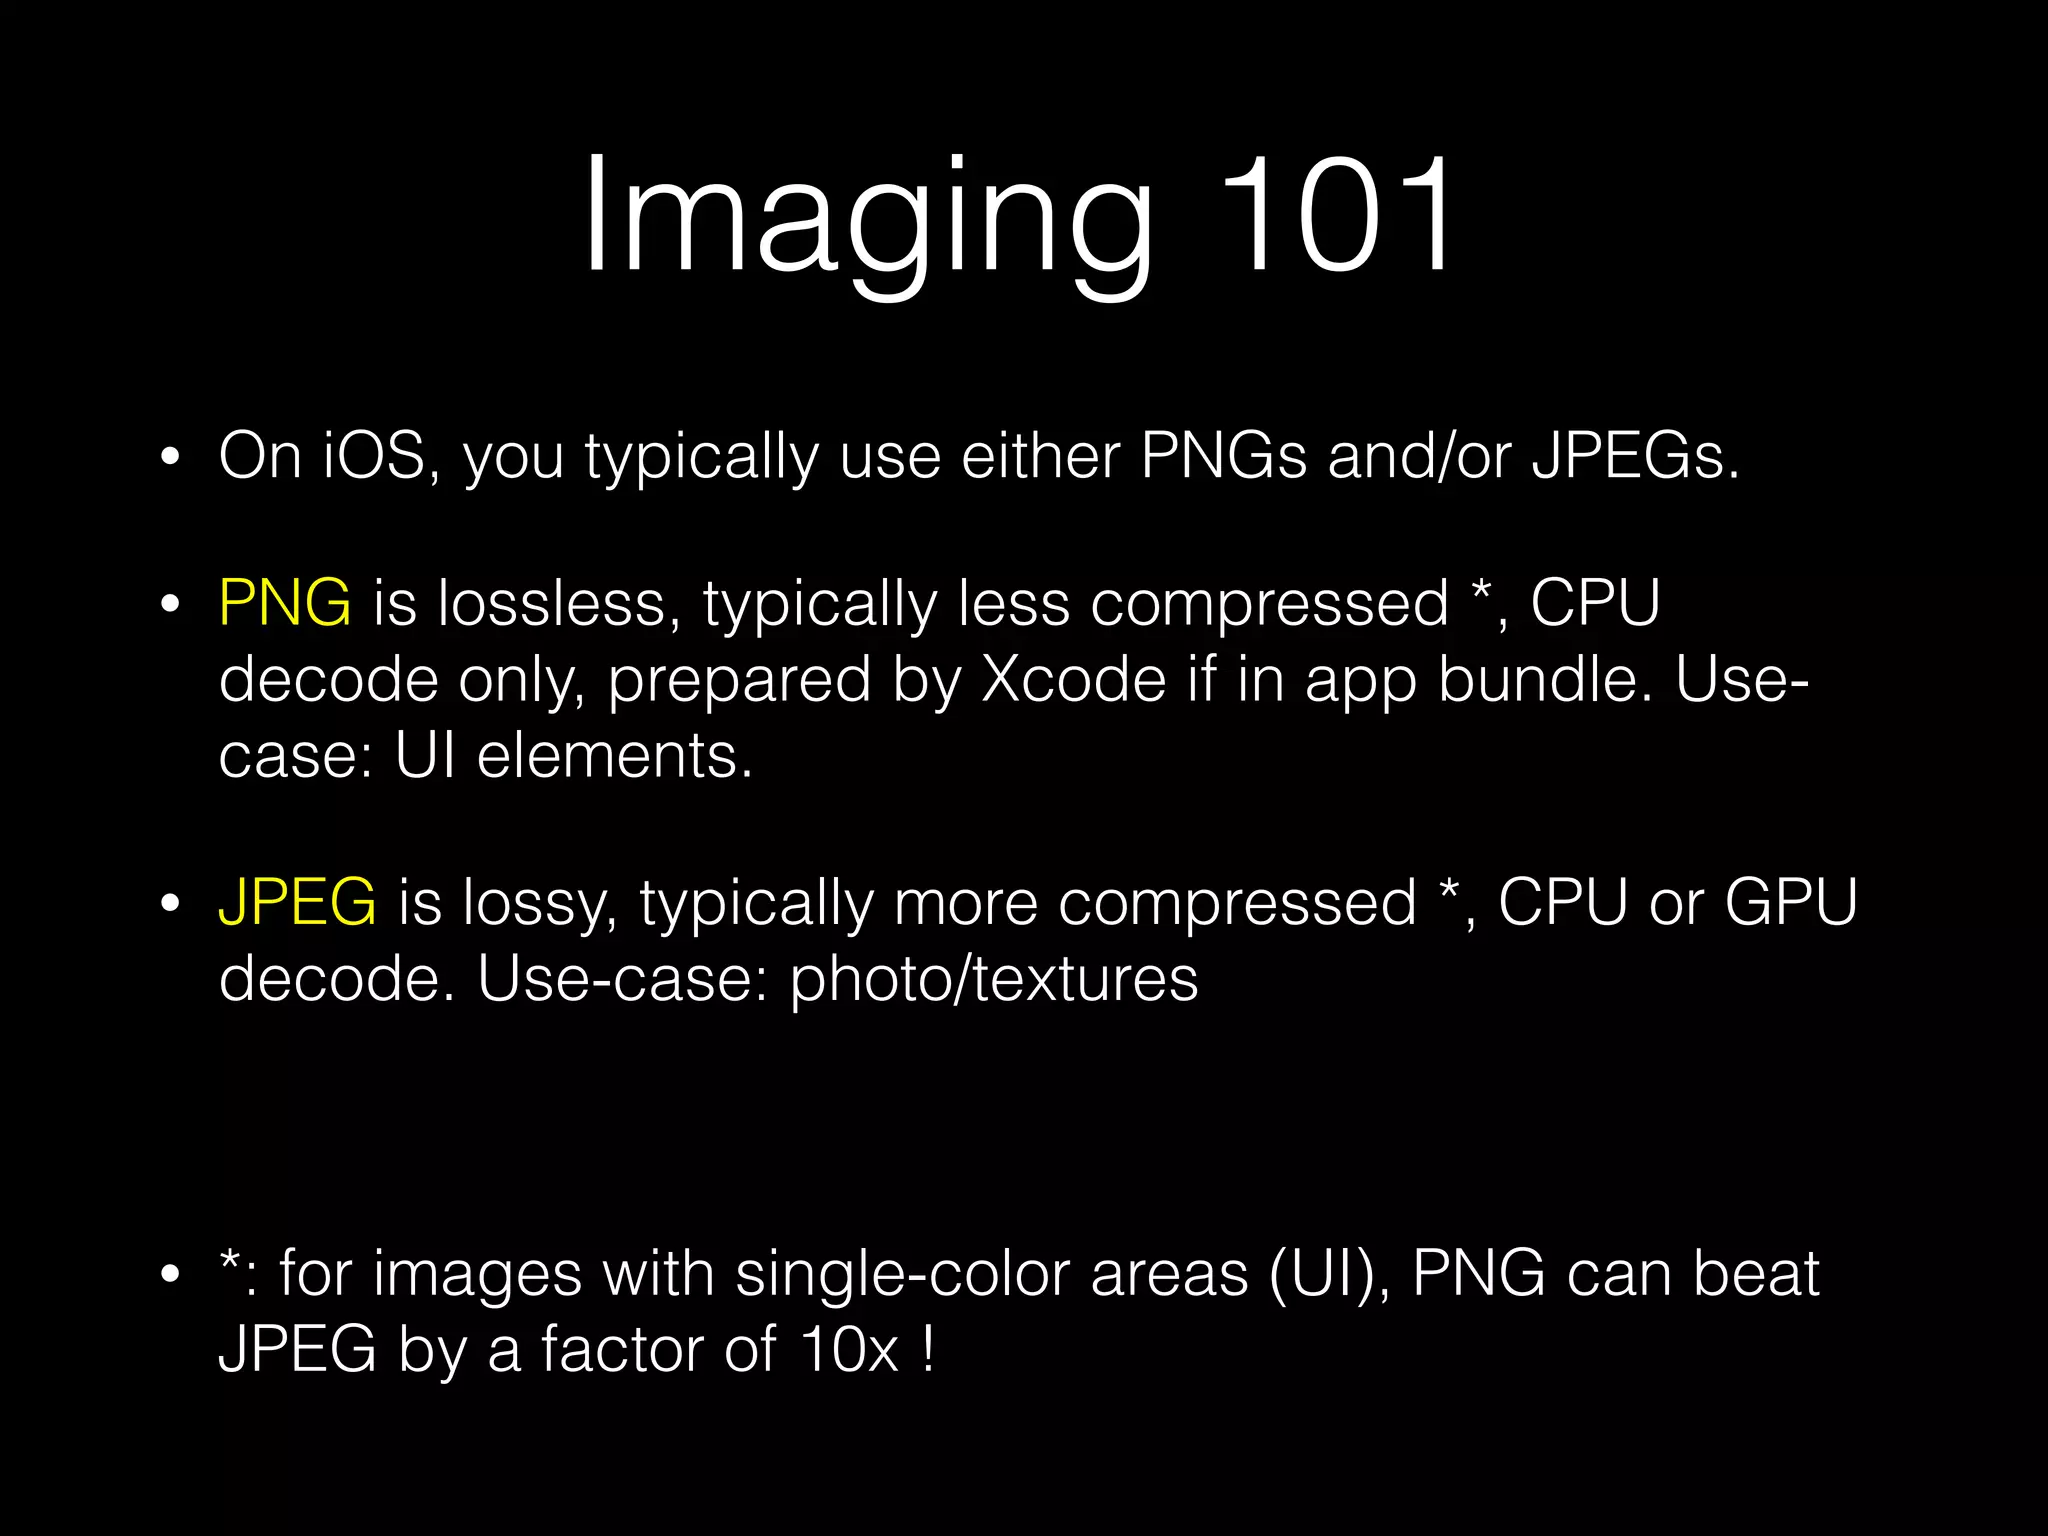
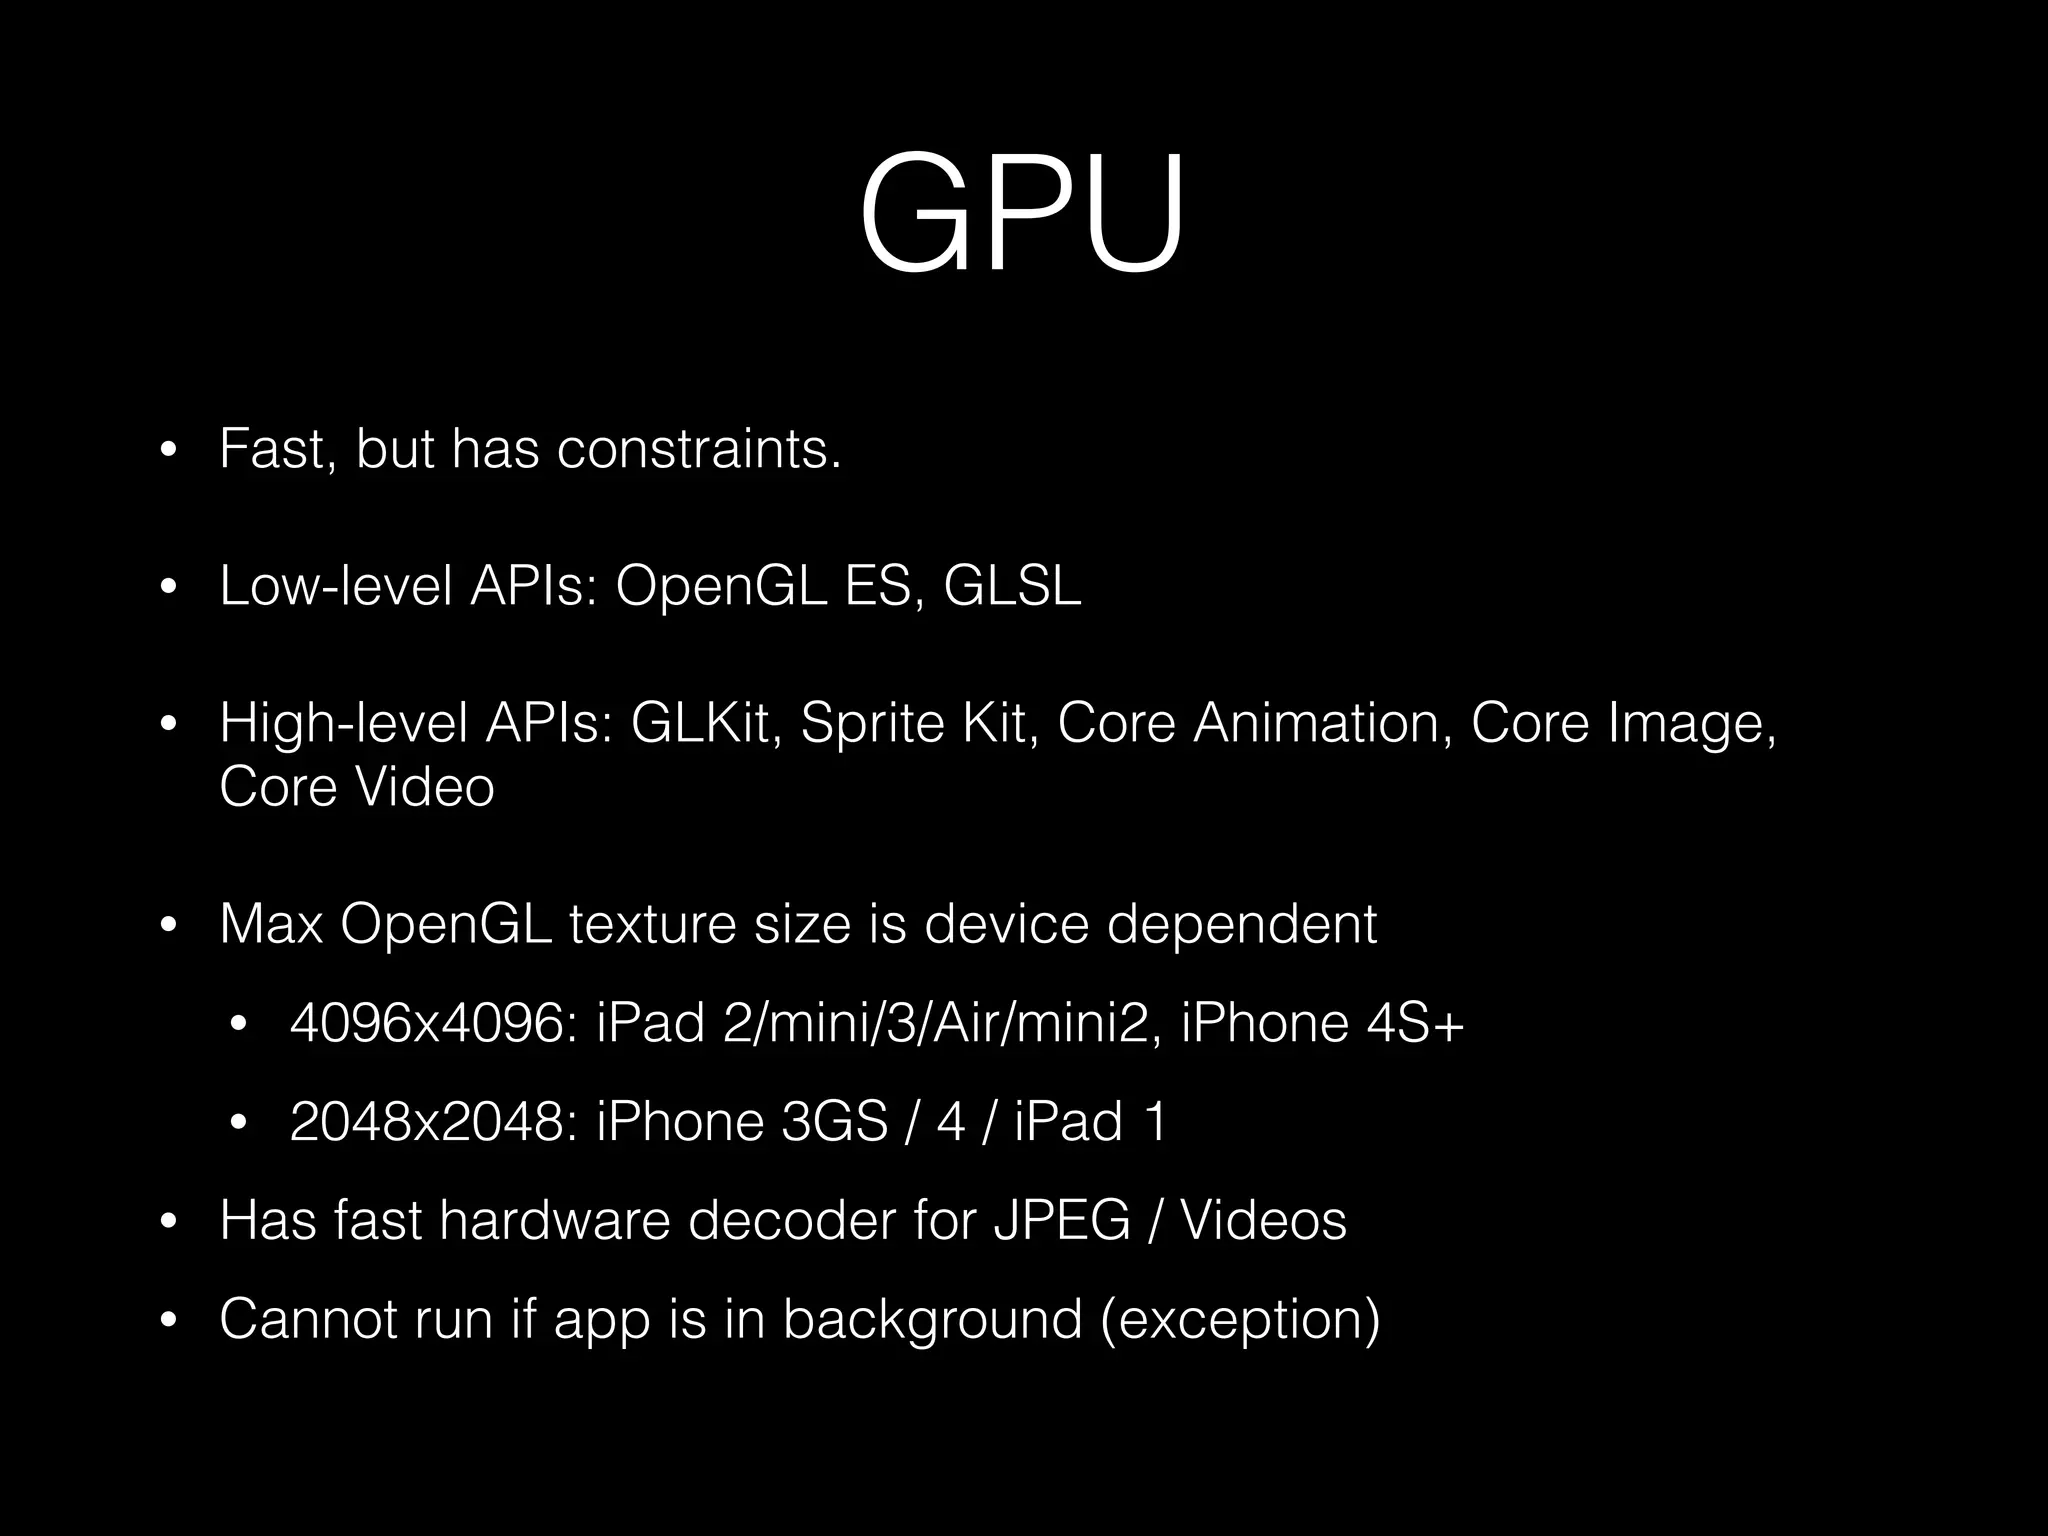
![Fast Path
CPU
Pure GPU
Decode
Decode
Display
T
Display
CPU
Transfer
GPU
-[CALayer drawRect:] (or UIView) +
CGContextDrawImage (or UIImage
draw)
CALayer.contents (or
UIImageView.image)](https://image.slidesharecdn.com/2014cocoaheadsadvimaging-140204022434-phpapp01/75/Advanced-Imaging-on-iOS-13-2048.jpg)


![UIImageView vs Metal [日本語版] #tryswiftconf](https://cdn.slidesharecdn.com/ss_thumbnails/tryswift20180302japanese-180304220322-thumbnail.jpg?width=640&height=640&fit=bounds)