This document provides an introduction to MongoDB and Python. It discusses how to install and run MongoDB, set up a Python environment connected to MongoDB, perform basic read and write operations on MongoDB collections from Python. It also covers common patterns for modeling data in MongoDB like embedding documents and indexing, and integrating MongoDB with popular Python web frameworks.

![MongoDB and Python
by Niall O’Higgins
Copyright © 2011 Niall O’Higgins. All rights reserved.
Printed in the United States of America.
Published by O’Reilly Media, Inc., 1005 Gravenstein Highway North, Sebastopol, CA 95472.
O’Reilly books may be purchased for educational, business, or sales promotional use. Online editions
are also available for most titles (http://my.safaribooksonline.com). For more information, contact our
corporate/institutional sales department: (800) 998-9938 or corporate@oreilly.com.
Editors: Mike Loukides and Shawn Wallace
Production Editor: Jasmine Perez
Proofreader: O’Reilly Production Services
Cover Designer: Karen Montgomery
Interior Designer: David Futato
Illustrator: Robert Romano
Nutshell Handbook, the Nutshell Handbook logo, and the O’Reilly logo are registered trademarks of
O’Reilly Media, Inc. MongoDB and Python, the image of a dwarf mongoose, and related trade dress are
trademarks of O’Reilly Media, Inc.
Many of the designations used by manufacturers and sellers to distinguish their products are claimed as
trademarks. Where those designations appear in this book, and O’Reilly Media, Inc. was aware of a
trademark claim, the designations have been printed in caps or initial caps.
While every precaution has been taken in the preparation of this book, the publisher and author assume
no responsibility for errors or omissions, or for damages resulting from the use of the information con-
tained herein.
ISBN: 978-1-449-31037-0
[LSI]
1315837615](https://image.slidesharecdn.com/1428393873-mhkx3ln-210915090520/85/1428393873-mhkx3-ln-4-320.jpg)


![sys.exit(1)
if __name__ == "__main__":
main()
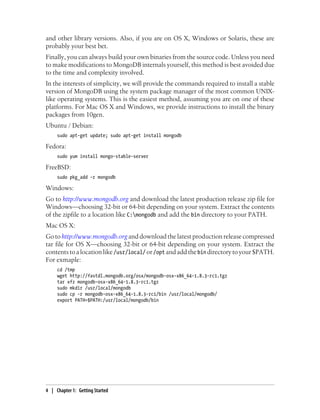
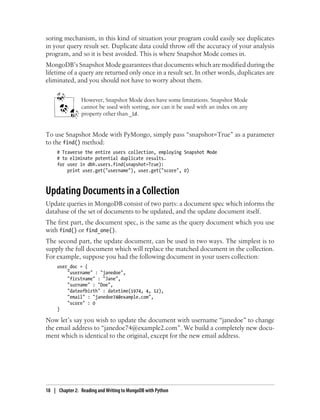
As you can see, a ConnectionFailure exception can be thrown by Connection instan-
tiation. It is usually a good idea to handle this exception and output something infor-
mative to your users.
Getting a Database Handle
Connection objects themselves are not all that frequently used when working with
MongoDB in Python. Typically you create one once, and then forget about it. This is
because most of the real interaction happens with Database and Collection objects.
Connection objects are just a way to get a handle on your first Databse object. In fact,
even if you lose reference to the Connection object, you can always get it back because
Database objects have a reference to the Connection object.
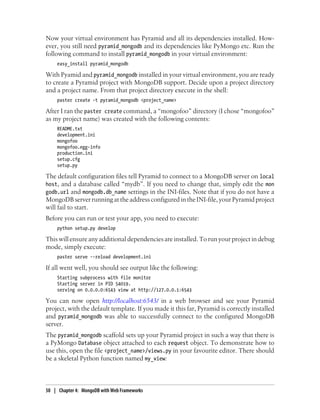
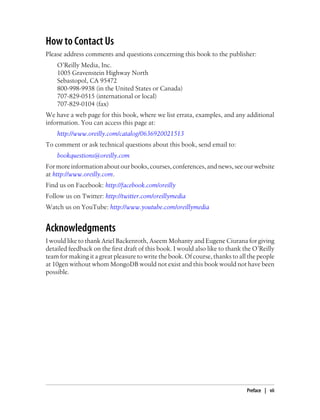
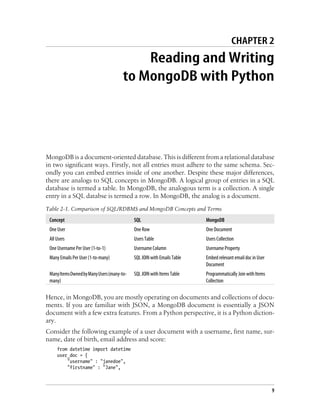
Getting a Database object is easy once you have a Connection instance. You simply
need to know the name of the database, and the username and password to access it if
you are using authorization on it.
""" An example of how to get a Python handle to a MongoDB database """
import sys
from pymongo import Connection
from pymongo.errors import ConnectionFailure
def main():
""" Connect to MongoDB """
try:
c = Connection(host="localhost", port=27017)
except ConnectionFailure, e:
sys.stderr.write("Could not connect to MongoDB: %s" % e)
sys.exit(1)
# Get a Database handle to a database named "mydb"
dbh = c["mydb"]
# Demonstrate the db.connection property to retrieve a reference to the
# Connection object should it go out of scope. In most cases, keeping a
# reference to the Database object for the lifetime of your program should
# be sufficient.
assert dbh.connection == c
print "Successfully set up a database handle"
if __name__ == "__main__":
main()
Getting a Database Handle | 11](https://image.slidesharecdn.com/1428393873-mhkx3ln-210915090520/85/1428393873-mhkx3-ln-21-320.jpg)
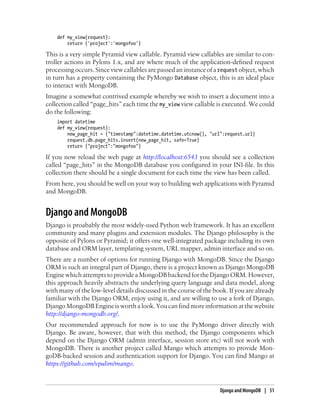
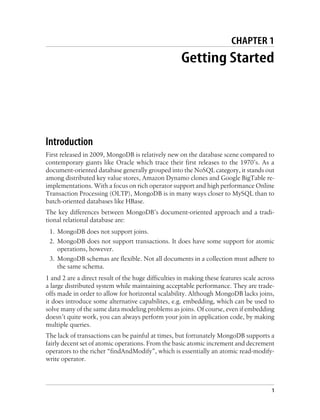
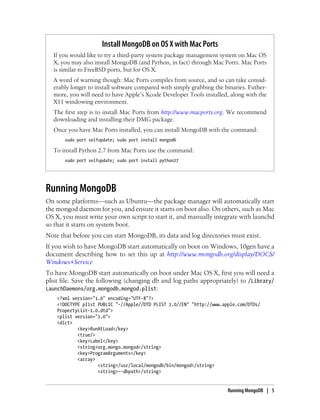
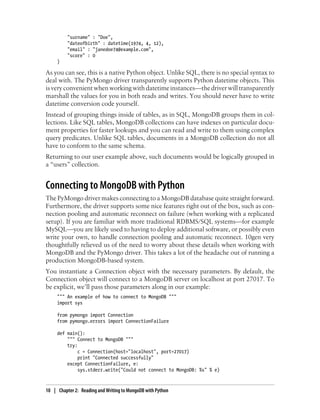
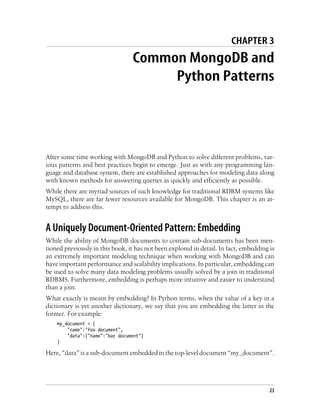
![Inserting a Document into a Collection
Once you have a handle to your database, you can begin inserting data. Let us imagine
we have a collection called “users”, containing all the users of our game. Each user has
a username, a first name, surname, date of birth, email address and a score. We want
to add a new user:
""" An example of how to insert a document """
import sys
from datetime import datetime
from pymongo import Connection
from pymongo.errors import ConnectionFailure
def main():
try:
c = Connection(host="localhost", port=27017)
except ConnectionFailure, e:
sys.stderr.write("Could not connect to MongoDB: %s" % e)
sys.exit(1)
dbh = c["mydb"]
assert dbh.connection == c
user_doc = {
"username" : "janedoe",
"firstname" : "Jane",
"surname" : "Doe",
"dateofbirth" : datetime(1974, 4, 12),
"email" : "janedoe74@example.com",
"score" : 0
}
dbh.users.insert(user_doc, safe=True)
print "Successfully inserted document: %s" % user_doc
if __name__ == "__main__":
main()
Note that we don’t have to tell MongoDB to create our collection “users” before we
insert to it. Collections are created lazily in MongoDB, whenever you access them. This
has the advantage of being very lightweight, but can occasionally cause problems due
to typos. These can be hard to track down unless you have good test coverage. For
example, imagine you accidentally typed:
# dbh.usrs is a typo, we mean dbh.users! Unlike an RDBMS, MongoDB won't
# protect you from this class of mistake.
dbh.usrs.insert(user_doc)
The code would execute correctly and no errors would be thrown. You might be left
scratching your head wondering why your user document isn’t there. We recommend
being extra vigilant to double check your spelling when addressing collections. Good
test coverage can also help find bugs of this sort.
12 | Chapter 2: Reading and Writing to MongoDB with Python](https://image.slidesharecdn.com/1428393873-mhkx3ln-210915090520/85/1428393873-mhkx3-ln-22-320.jpg)

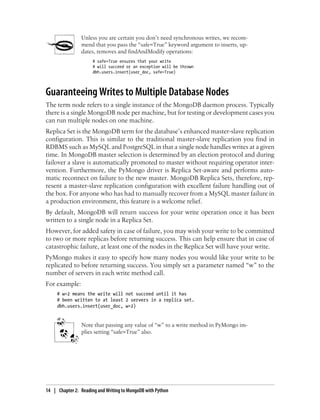
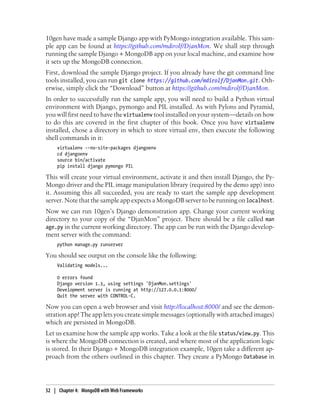
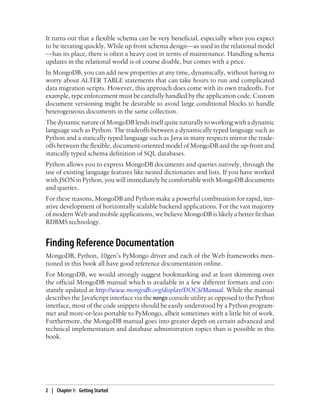
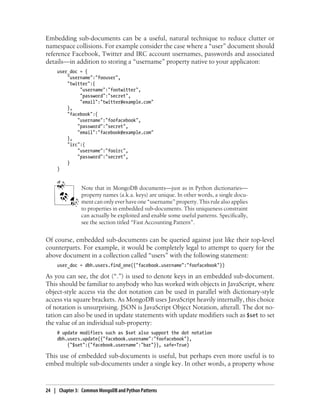
![as you iterate, so if you have a huge number of results they are not all stored in memory
at once.
# Assuming we already have a database handle in scope named dbh
# find all documents with the firstname "jane".
# Then iterate through them and print out the email address.
users = dbh.users.find({"firstname":"jane"})
for user in users:
print user.get("email")
Notice in the above example that we use the Python dict class’ get method. If we were
certain that every single result document contained the “email” property, we could
have used dictionary access instead.
for user in users:
print user["email"]
If you only wish to retrieve a subset of the properties from each document in a collection
during a read, you can pass those as a dictionary via an additional parameter. For
example, suppose that you only wish to retrieve the email address for each user with
firstname “jane”:
# Only retrieve the "email" field from each matching document.
users = dbh.users.find({"firstname":"jane"}, {"email":1})
for user in users:
print user.get("email")
If you are retrieving a large result set, requesting only the properties you need can reduce
network and decoding overhead, potentially increasing performance.
Sometimes you are not so interested in the query results themselves, but are looking to
find the size of the result set for a given query. A common example is an analytics
situationwhereyouwantacountofhowmanydocumentsareinyourusers’collections.
MonogDB supports efficient server-side counting of result sets with thecount() method
on Cursor objects:
# Find out how many documents are in users collection, efficiently
userscount = dbh.users.find().count()
print "There are %d documents in users collection" % userscount
MongoDB can also perform result sorting for you on the server-side. Especially if you
are sorting results on a property which has an index, it can sort these far more efficiently
than your client program can. PyMongo Cursor objects have a sort() method which
takes a Python 2-tuple comprising the property to sort on, and the direction. The Py-
Mongo sort() method is analogous to the SQL ORDER BY statement. Direction can
either be pymongo.ASCENDING or pymongo.DESCENDING. For example:
# Return all user with firstname "jane" sorted
# in descending order by birthdate (ie youngest first)
users = dbh.users.find(
{"firstname":"jane"}).sort(("dateofbirth", pymongo.DESCENDING))
for user in users:
print user.get("email")
16 | Chapter 2: Reading and Writing to MongoDB with Python](https://image.slidesharecdn.com/1428393873-mhkx3ln-210915090520/85/1428393873-mhkx3-ln-26-320.jpg)
![In addition to the sort() method on the PyMongo Cursor object, you may also pass
sort instructions to the find() and find_one() methods on the PyMongo Collection
object. Using this facility, the above example may be rewritten as:
# Return all user with firstname "jane" sorted
# in descending order by birthdate (ie youngest first)
users = dbh.users.find({"firstname":"jane"},
sort=[("dateofbirth", pymongo.DESCENDING)])
for user in users:
print user.get("email")
Another situation you may encounter—especially when you have large result sets—is
that you wish to only fetch a limited number of results. This is frequently combined
with server-side sorting of results. For example, imagine you are generating a high score
table which displays only the top ten scores. PyMongo Cursor objects have a limit()
method which enables this. The limit() method is analogous to the SQL LIMIT state-
ment.
# Return at most 10 users sorted by score in descending order
# This may be used as a "top 10 users highscore table"
users = dbh.users.find().sort(("score", pymongo.DESCENDING)).limit(10)
for user in users:
print user.get("username"), user.get("score", 0)
If you know in advance that you only need a limited number of results from a query,
using limit() can yield a performance benefit. This is because it may greatly reduce the
size of the results data which must be sent by MongoDB. Note that a limit of 0 is
equivalent to no limit.
Additionally, MongoDB can support skipping to a specific offset in a result set through
the Cursor.skip() method provided by PyMongo. When used with limit() this enables
result pagination which is frequently used by clients when allowing end-users to browse
very large result sets. skip() is analogous to the SQL OFFSET statement. For example,
imagine a Web application which displays 20 users per page, sorted alphabetically by
surname , and needs to fetch the data to build the second page of results for a user. The
query used by the Web application might look like this:
# Return at most 20 users sorted by name,
# skipping the first 20 results in the set
users = dbh.users.find().sort(
("surname", pymongo.ASCENDING)).limit(20).skip(20)
Finally, when traversing very large result sets, where the underlying documents may be
modified by other programs at the same time, you may wish to use MongoDB’s Snap-
shot Mode. Imagine a busy site with hundreds of thousands of users. You are devel-
oping an analytics program to count users and build various statistics about usage
patterns and so on. However, this analytics program is intended to run against the live,
production database. Since this is such a busy site, real users are frequently performing
actions on the site which may result in modifications to their corresponding user docu-
ments—while your analytics program is running. Due to quirks in MongoDB’s cur-
Reading, Counting, and Sorting Documents in a Collection | 17](https://image.slidesharecdn.com/1428393873-mhkx3ln-210915090520/85/1428393873-mhkx3-ln-27-320.jpg)
![# first query to get a copy of the current document
import copy
old_user_doc = dbh.users.find_one({"username":"janedoe"})
new_user_doc = copy.deepcopy(old_user_doc)
# modify the copy to change the email address
new_user_doc["email"] = "janedoe74@example2.com"
# run the update query
# replace the matched document with the contents of new_user_doc
dbh.users.update({"username":"janedoe"}, new_user_doc, safe=True)
Building the whole replacement document can be cumbersome, and worse, can intro-
duce race conditions. Imagine you want to increment the score property of the “jane-
doe” user. In order to achieve this with the replacement approach, you would have to
first fetch the document, modify it with the incremented score, then write it back to
the database. With that approach, you could easily lose other score changes if some-
thing else were to update the score in between you reading and writing it.
In order to solve this problem, the update document supports an additional set of
MongoDB operators called “update modifiers”. These update modifiers include oper-
ators such as atomic increment/decrement, atomic list push/pop and so on. It is very
helpful to be aware of which update modifiers are available and what they can do when
designing your application. Many of these will be described in their own recipes
throughout this book.
To illustrate usage of “update modifiers”, let’s return to our original example of chang-
ing only the email address of the document with username “janedoe”. We can use the
$set update modifier in our update document to avoid having to query before updating.
$set changes the value of an individual property or a group of properties to whatever
you specify.
# run the update query, using the $set update modifier.
# we do not need to know the current contents of the document
# with this approach, and so avoid an initial query and
# potential race condition.
dbh.users.update({"username":"janedoe"},
{"$set":{"email":"janedoe74@example2.com"}}, safe=True)
You can also set multiple properties at once using the $set update modifier:
# update the email address and the score at the same time
# using $set in a single write.
dbh.users.update({"username":"janedoe"},
{"$set":{"email":"janedoe74@example2.com", "score":1}}, safe=True)
At the time of writing, the PyMongo driver, even if you specify a docu-
ment spec to the update method which matches multiple documents in
a collection, only applies the update to the first document matched.
Updating Documents in a Collection | 19](https://image.slidesharecdn.com/1428393873-mhkx3ln-210915090520/85/1428393873-mhkx3-ln-29-320.jpg)

![Finally, if you wish to delete all documents in a collection, you can pass None as a
parameter to remove():
# Delete all documents in user collection
dbh.users.remove(None, safe=True)
Clearing a collection with remove() differs from dropping the collection via drop_col
lection() in that the indexes will remain intact.
MongoDB Query Operators
As mentioned previously, MongoDB has quite a rich set of query operators and pred-
icates. In Table 2-2 we provide a table with the meaning of each one, along with a
sample usage and the SQL equivalent where applicable.
Table 2-2. MongoDB query operators
Operator Meaning Example SQL Equivalent
$gt Greater Than “score”:{"$gt”:0} >
$lt Less Than “score”:{"$lt”:0} <
$gte Greater Than or Equal “score”:{"$gte”:0} >=
$lte Less Than or Equal “score”:{"$lte”:0} ⇐
$all Array Must Contain All “skills”:{"$all”:["mongodb”,"python"]} N/A
$exists Property Must Exist “email”:{"$exists”:True} N/A
$mod Modulo X Equals Y “seconds”:{"$mod”:[60,0]} MOD()
$ne Not Equals “seconds”:{"$ne”:60} !=
$in In “skills”:{"$in”:["c”,"c++"]} IN
$nin Not In “skills”:{"$nin”:["php”,"ruby”,"perl"]} NOT IN
$nor Nor “$nor”:[{"language”:"english"},{"coun-
try”:"usa"}]
N/A
$or Or “$or”:[{"language”:"english"},{"coun-
try”:"usa"}]
OR
$size Array Must Be Of Size “skills”:{"$size”:3} N/A
If you do not fully understand the meaning or purpose of some of these operators
immediately do not worry. We shall discuss the practical use of some of the more
advanced operators in detail in Chapter 3.
MongoDB Query Operators | 21](https://image.slidesharecdn.com/1428393873-mhkx3ln-210915090520/85/1428393873-mhkx3-ln-31-320.jpg)
![MongoDB Update Modifiers
As mentioned in the section “Updating Documents in a Collection”, MongoDB comes
with a set of operators for performing atomic modifications on documents.
Table 2-3. MongoDB update modifiers
Modifier Meaning Example
$inc Atomic Increment “$inc”:{"score”:1}
$set Set Property Value “$set”:{"username”:"niall"}
$unset Unset (delete) Property “$unset”:{"username”:1}
$push Atomic Array Append (atom) “$push”:{"emails”:"foo@example.com"}
$pushAll Atomic Array Append (list) “$pushall”:{"emails”:["foo@example.com”,"foo2@ex-
ample.com"]}
$addToSet Atomic Append-If-Not-Present “$addToSet”:{"emails”:"foo@example.com"}
$pop Atomic Array Tail Remove “$pop”:{"emails”:1}
$pull Atomic Conditional Array Item
Removal
“$pull”:{"emails”:"foo@example.com"}
$pullAll Atomic Array Multi Item Re-
moval
“$pullAll”:{"emails”:["foo@example.com”, “foo2@ex-
ample.com"]}
$rename Atomic Property Rename “$rename”:{"emails”:"old_emails"}
As with the MongoDB query operators listed earlier in this chapter, this table is mostly
for your reference. These operators will be introduced in greater detail in Chapter 3.
22 | Chapter 2: Reading and Writing to MongoDB with Python](https://image.slidesharecdn.com/1428393873-mhkx3ln-210915090520/85/1428393873-mhkx3-ln-32-320.jpg)
![value is a list or array of sub-documents. In MongoDB, this is a legal and very useful
construct. This is a very natural way to model one-to-many relationships, or parent-
child relationships. Consider the example of a “user” document which can reference
multiple email addresses for that user. In the relational model, this would typically be
achieved with two tables—one for users, and one for the email addresses associated
with each user. A join query could then be used to retrieve a user along which each of
its email addresses.
In MongoDB, a natural approach to model a one-to-many relationship would be to
simply have a property “emails” on the user document, the value of which is an array
containing sub-documents, each representing an associated email account. For exam-
ple:
# A user document demonstrating one-to-many relationships using embedding
# Here we map multiple email addresses (along with whether or not the email
# is the user's primary email address) to a single user.
user_doc = {
"username":"foouser",
"emails":[
{
"email":"foouser1@example.com",
"primary":True
},
{
"email":"foouser2@example2.com",
"primary":False
},
{
"email":"foouser3@example3.com",
"primary":False
}
]
}
Not only does this work, but MongoDB has some specific features to help working
with this type of embedded structure. Just as you can query for documents by the value
of sub-documents directly embedded in the top-level document, documents can also
be located by the value of sub-documents embedded in arrays. To do this, simply use
the same dot (“.”) notation, as described earlier in this section. MongoDB transparently
searches through arrays for sub-documents.
Returning to our earlier example of a single user with multiple email addresses, consider
the following code:
# A user document demonstrating one-to-many relationships using embedding
user_doc = {
"username":"foouser",
"emails":[
{
"email":"foouser1@example.com",
"primary":True
},
A Uniquely Document-Oriented Pattern: Embedding | 25](https://image.slidesharecdn.com/1428393873-mhkx3ln-210915090520/85/1428393873-mhkx3-ln-35-320.jpg)
![{
"email":"foouser2@example2.com",
"primary":False
},
{
"email":"foouser3@example3.com",
"primary":False
}
]
}
# Insert the user document
dbh.users.insert(user_doc, safe=True)
# Retrieve the just-inserted document via one of its many email addresses
user_doc_result = dbh.users.find_one({"emails.email":"foouser1@example.com"})
# Assert that the original user document and the query result are the same
assert user_doc == user_doc_result
In addition to MongoDB understanding lists of sub-documents to enable querying for
embedded values via the dot notation, there are also useful update modifiers. $pull,
$push and their variants are the most helpful, enabling atomic append and removal of
sub-documents to and from embedded lists. Consider the case where a user no longer
wishes a particular email address to be linked to his or her account. The naive way to
remove that email address from their user document would be to first query for their
user document, modify it in your application code so it no longer contains the removed
email address, and then send an update query to the database. Not only is this cum-
bersome, it also introduces a race condition, as the underlying user document may have
been modified by another process in between your read and write:
# Naive method to remove an email address from a user document
# Cumbersome and has a race condition
user_doc = {
"username":"foouser",
"emails":[
{
"email":"foouser1@example.com",
"primary":True
},
{
"email":"foouser2@example2.com",
"primary":False
},
{
"email":"foouser3@example3.com",
"primary":False
}
]
}
# Insert the user document
dbh.users.insert(user_doc, safe=True)
# Retrieve the just-inserted document via username
user_doc_result = dbh.users.find_one({"username":"foouser"})
# Remove the "foouser2@example2.com" email address sub-document from the embedded list
del user_doc_result["emails"][1]
26 | Chapter 3: Common MongoDB and Python Patterns](https://image.slidesharecdn.com/1428393873-mhkx3ln-210915090520/85/1428393873-mhkx3-ln-36-320.jpg)
![# Now write the new emails property to the database
# May cause data to be lost due to the race between read and write
dbh.users.update({"username":"foouser"},{"$set":{"emails":user_doc_result}},
safe=True)
The three most common operations on sub-documents embedded in a list property
are: Deletion, insertion and modification. Each of these can be performed atomically
with the provided update modifiers. First let’s demonstrate the use of $pull to remove
the sub-document matching “foouser2@example2.com” in a simple and race-free way:
# Atomically remove an email address from a user document race-free using the
# $pull update modifier
user_doc = {
"username":"foouser",
"emails":[
{
"email":"foouser1@example.com",
"primary":True
},
{
"email":"foouser2@example2.com",
"primary":False
},
{
"email":"foouser3@example3.com",
"primary":False
}
]
}
# Insert the user document
dbh.users.insert(user_doc, safe=True)
# Use $pull to atomically remove the "foouser2@example2.com" email sub-document
dbh.users.update({"username":"foouser"},
{"$pull":{"emails":{"email":"foouser2@example2.com"}}}, safe=True)
In this example, $pull is used to match an embedded document with
"email":"foouser2@example2.com" in the “emails” field. $pull will remove the entire
document from the array in an atomic fashion, meaning there is no opportunity for a
race condition. You can also use query modifiers with $pull, for example to remove all
sub-documents with a “primary” value that is not equal to True, you could write the
following:
# Use $pull to atomically remove all email sub-documents with primary not equal to True
dbh.users.update({"username":"foouser"},
{"$pull":{"emails":{"primary":{"$ne":True}}}, safe=True)
The full range of query modifiers (see table in Chapter 2) are available for use, including
$gt, $lt and so on. Additionally, $pull can be used with arrays containing atoms (num-
bers, strings, dates, ObjectIDs etc). In other words, $pull doesn’t work only with em-
bedded documents—if you store a list of primitive types in an array, you can remove
elements atomically with $pull too.
A Uniquely Document-Oriented Pattern: Embedding | 27](https://image.slidesharecdn.com/1428393873-mhkx3ln-210915090520/85/1428393873-mhkx3-ln-37-320.jpg)
![The $push update modifier is used to atomically append an element to an array. At the
time of writing, $push can only support adding items to the end of the array—there is
no update modifier to add an element to the beginning of an array, or to insert it at an
arbitrary index. $push is simple to use, because, unlike $pull, it does not take any field
match or conditional arguments.
For example, to atomically add a new email address to our user document, we could
use the following query:
# Use $push to atomically append a new email sub-document to the user document
new_email = {"email":"fooemail4@exmaple4.com", "primary":False}
dbh.users.update({"username":"foouser"},
{"$push":{"emails":new_email}}, safe=True)
The final case is updating an existing sub-document in-place. This can be achieved
using what is called the “positional” operator. The positional operator is represented
by the dollar sign (“$”). Basically, it is replaced by the server with the index of the item
matched by the document spec. For example, suppose we wish to make our user docu-
ment’s “foouser2@example2.com” email address primary. We could issue the follow-
ing update query to modify it in-place:
# Demonstrate usage of the positional operator ($) to modify
# matched sub-documents in-place.
user_doc = {
"username":"foouser",
"emails":[
{
"email":"foouser1@example.com",
"primary":True
},
{
"email":"foouser2@example2.com",
"primary":False
},
{
"email":"foouser3@example3.com",
"primary":False
}
]
}
# Insert the user document
dbh.users.insert(user_doc, safe=True)
# Now make the "foouser2@example2.com" email address primrary
dbh.users.update({"emails.email":"foouser2@example2.com"},
{"$set":{"emails.$.primary":True}}, safe=True)
# Now make the "foouser1@example.com" email address not primary
dbh.users.update({"emails.email":"foouser1@example.com"},
{"$set":{"emails.$.primary":False}}, safe=True)
Note that the $ operator cannot be used with upserts (see section on
upserts later in this chapter) additionally it only works with the first
matched element.
28 | Chapter 3: Common MongoDB and Python Patterns](https://image.slidesharecdn.com/1428393873-mhkx3ln-210915090520/85/1428393873-mhkx3-ln-38-320.jpg)
!["primary":False
},
{
"email":"foouser3@example3.com",
"primary":False
}
]
}
dbh.users.insert(user_doc)
# If we place an index on property "emails.email",
# e.g. dbh.users.create_index("emails.email")
# this find_one query can use a btree index
user = dbh.users.find_one({"emails.email":"foouser2@example2.com"})
Btree indexes in MongoDB are also important when performing server-side sorting of
results. Without an index on the property you are sorting by, MongoDB will run out
of memory when trying to sort anything greater than a relatively small results set (ap-
prox. 4Mb at time of writing). If you expect that you will be sorting result sets larger
than 4Mb, you should specify an index on the sort key. It is easy to underestimate this
and find exceptions are being raised on queries against larger, real-world data which
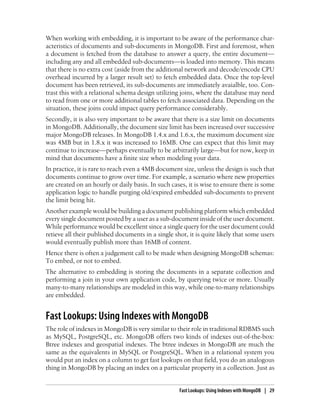
were not anticipated during development.
To create an index with the PyMongo driver, use the Collection.create_index()
method. This method can create single-key indexes or compound indexes. For a single-
key index, only the key needs to be provided. A compound index is slightly more com-
plicated—a list of 2-tuples (key, direction) must be supplied.
For example to create an index on the username property of a collection called users,
you could write the following:
# Create index on username property
dbh.users.create_index("username")
To create a compound index, for example on the first_name and last_name, with an
ascending direction, you could specify:
# Create a compound index on first_name and last_name properties
# with ascending index direction
dbh.users.create_index([("first_name", pymongo.ASCENDING), ("last_name",
pymongo.ASCENDING)])
Indexes in MongoDB each have names. By default, MongoDB will generate a name,
but you may wish to give a custom name—particularly for compound indexes where
the generated names are not especially readable by humans. To give a custom name
during creation, supply the name=<str> parameter to the create_index() method:
# Create a compound index called "name_idx" on first_name and last_name properties
# with ascending index direction
dbh.users.create_index([
("first_name", pymongo.ASCENDING),
("last_name", pymongo.ASCENDING)
],
name="name_idx")
Fast Lookups: Using Indexes with MongoDB | 31](https://image.slidesharecdn.com/1428393873-mhkx3ln-210915090520/85/1428393873-mhkx3-ln-41-320.jpg)
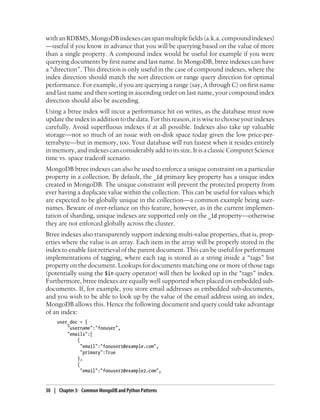
![If, on the other hand, you did not give your index a custom name, you can delete by
passing the original index specifier. For example:
# Create a compound index on first_name and last_name properties
# with ascending index direction
dbh.users.create_index([("first_name", pymongo.ASCENDING), ("last_name",
pymongo.ASCENDING)])
# Delete this index
dbh.users.drop_index([("first_name", pymongo.ASCENDING), ("last_name",
pymongo.ASCENDING)])
All indexes in a collection can be dropped in a single statement using the Collec
tion.drop_indexes() method.
If you wish to programatically inspect the indexes on your collections from Python,
you can use the Collection.index_information() method. This returns a dictionary in
which each key is the name of an index. The value associated with each key is an
additional dictionary. These second-level dictionaries always contain a special key
called key, which is an entry containing the original index specifier—including index
direction. This original index specifier was the data passed to the create_index()
method when the index was first created. The second-level dictionaries may also con-
tain additional options such as unique constraints and so on.
Location-based Apps with MongoDB: GeoSpatial Indexing
As mentioned in the previous section on indexes, MongoDB has support for two kinds
of index: Btree and geospatial. Btree indexes have been covered quite thoroughly in the
preceeding section, however we have not yet described GeoSpatial indexes.
First of all, let us discuss why geospatial indexing might be useful at all. Many apps
today are being built with the requirement of location-awareness. Typically this trans-
lates into features where points of interest (POI) near a particular user location may be
rapidly retrieved from a database. For example, a location-aware mobile app might
wish to quickly fetch a list of nearby coffeeshops, based upon the current GPS co-
ordinates. The complicating issue, fundamentally, is that the world is both quite large
and quite full of interesting points—and so to try to answer such a query by iterating
through the entire list of all POIs in the world to find ones which are nearby would take
an unacceptably long time. Hence the need for some sort of GeoSpatial indexing, to
speed up these searches.
Fortunately for anybody tasked with building location-aware applications, MongoDB
is one of the rare few databases with out-of-the-box support for geospatial indexing.
MongoDB uses geohashing, a public domain algorithm developed by Gustavo Nie-
meyer, which translates geographic proximity into lexical proximity. Hence, a database
supporting range queries (such as MongoDB) can be efficiently used to query for points
near and within bounds.
Location-based Apps with MongoDB: GeoSpatial Indexing | 33](https://image.slidesharecdn.com/1428393873-mhkx3ln-210915090520/85/1428393873-mhkx3-ln-43-320.jpg)
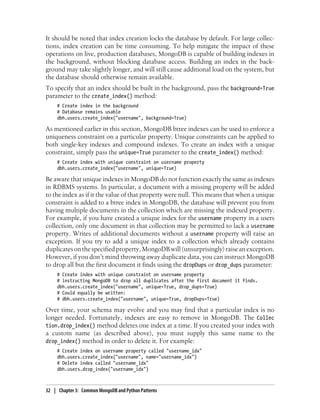
![It should be noted that at present, MongoDB’s geospatial indexing support is limited
purely to point-based querying. The supplied operators can only be used for finding
individual points—not routes or sub-shapes.
MongoDB provides the $near and $within operators which constitute the primary
means for performing geospatial queries in the system. Using $near, you can efficiently
sort documents in a collection by their proximity to a given point. The $within operator
allows you to specify a bounds for the query. Supported boundary definitions include
$box for a rectangular shape, $circle for a circle. In MongoDB 1.9 and up, the $poly
gon operator allows for convex and concave polygon boundaries.
Before you can use the geospatial queries, you must have a geospatial index. In Mon-
goDB versions up to and including 1.8.x, geospatial indexes are limited to a single index
per collection. This means that each document can have only one location property
queried efficiently by MongoDB. This can have some important implications for
schema design which is why it is good to know from the outset.
Geospatial indexes by default limit acceptable values for the location
property on documents to those within GPS. That is, co-ordinates must
be in the range -180 .. +180. If you have co-ordinates outside of this
range, MongoDB will raise an exception when you attempt to create the
geospatial index on the colleciton. If you wish to index values outside
of the range of regular GPS, you can specify this at index creation time.
The location property on your documents must be either an array or sub-document
where the first two items are the x and y co-ordinates to be indexed. The order of the
co-ordinates (whether x,y or y,x) does not matter so long as it is consistent on all docu-
ments. For example, your document could look like any of the following:
# location property is an array with x,y ordering
user_doc = {
"username":"foouser",
"user_location":[x,y]
}
# location property is an array with y,x ordering
user_doc = {
"username":"foouser",
"user_location":[y,x]
}
import bson
# location property is a sub-document with y,x ordering
loc = bson.SON()
loc["y"] = y
loc["x"] = x
user_doc = {
"username":"foouser",
"user_location":loc
}
34 | Chapter 3: Common MongoDB and Python Patterns](https://image.slidesharecdn.com/1428393873-mhkx3ln-210915090520/85/1428393873-mhkx3-ln-44-320.jpg)
![import bson
# location property is a sub-document with x,y ordering
loc = bson.SON()
loc["x"] = x
loc["y"] = y
user_doc = {
"username":"foouser",
"user_location":loc
}
Note that in Python the default dictionary type (dict class), order is not
preserved. When using location in a sub-document from Python, use a
bson.SON object instead. bson.SON comes with the PyMongo driver, and
is used in exactly the same way as Python’s dict class.
Once the documents in your collection have their location properties correctly formed,
we can create the geospatial index. As with btree indexes, geospatial indexes in Mon-
goDB are created with PyMongo’s Collection.create_index() method. Due to the one-
geospatial-index-per-collection limitation in MongoDB versions up to and including
1.8.x, if you are planning to query by other properties in addition to the location prop-
erty, you can make your geospatial index a compound index. For exmaple, if you know
that you will be searching your collection by both “username” and “user_location”
properties, you could create a compound geo index across both fields. This can help
to work around the single geospatial index limitation in many cases.
Returning to our example of documents in a collection called “users” with the location
property being “user_location”, we would create a geospatial index with the following
statement:
# Create geospatial index on "user_location" property.
dbh.users.create_index([("user_location", pymongo.GEO2D)])
To create a compound geospatial index which would let us query efficiently on location
and username, we could issue this statement:
# Create geospatial index on "user_location" property.
dbh.users.create_index([("user_location", pymongo.GEO2D), ("username",
pymongo.ASCENDING)])
Now that we have geospatial indexes available, we can try out some efficient location-
based queries. The $near operator is pretty easy to understand, so we shall start there.
As has already been explained, $near will sort query results by proximity to specified
point. By default, $near will try to find the closest 100 results.
An important performance consideration which is not mentioned clearly in the official
MongoDB documentation is that when using $near, you will almost always want to
specify a maximum distance on the query. Without a clamp on the maximum distance,
in order to return the specified number of results (default 100) MongoDB has to search
through the entire database. This takes a lot of time. In most cases, a max distance of
Location-based Apps with MongoDB: GeoSpatial Indexing | 35](https://image.slidesharecdn.com/1428393873-mhkx3ln-210915090520/85/1428393873-mhkx3-ln-45-320.jpg)
![around 5 degrees should be sufficient. Since we are using decimal degrees (a.k.a GPS)
co-ordinates, the units of max distance is degrees. 1 degree is roughly 69 miles. If you
onlycareaboutarelativelysmallsetofresults(forexample,thenearest10coffeeshops),
limiting the query to 10 results should also aid performance.
Let’s start with an example of finding the nearest 10 users to the point 40, 40 limiting
to a max distance of 5 degrees:
# Find the 10 users nearest to the point 40, 40 with max distance 5 degrees
nearest_users = dbh.users.find(
{"user_location":
{"$near" : [40, 40],
"$maxDistance":5}}).limit(10)
# Print the users
for user in nearest_users:
# assume user_location property is array x,y
print "User %s is at location %s,%s" %(user["username"], user["user_location"][0],
user["user_location"[1])
Next let us try using the $within geospatial operator to find points within a certain
boundary. This can be useful when searching for POI’s in a specific county/city or even
well-defined neighbourhood within a city. In the real world, these boundaries are fuzzy
and changing constantly, however there are good enough databases available for them
to be useful.
To specify a rectangle to search within, you simply provide the lower-left and top-right
co-ordinates as elements in an array. For example:
box = [[50.73083, -83.99756], [50.741404, -83.988135]]
We could query for points within this bound by using the following geospatial query:
box = [[50.73083, -83.99756], [50.741404, -83.988135]]
users_in_boundary = dbh.users.find({"user_location":{"$within": {"$box":box}}})
To specify a citcle to search within, you just supply the center point and the radius. As
with $maxDistance mentioned previously, the units of the radius are degrees. Here is
how we could make a geospatial lookup for 10 users within a radius of 5 degress cen-
tered at the point 40, 40:
users_in_circle = dbh.users.find({"user_location":{"$within":{"$center":[40, 40,
5]}}}).limit(10)
Notice that with the circle boundary using $center, we pass an array, the first two values
of which are the co-ordinates of the center and the third parameter is the radius (in
degrees).
All the queries we’ve mentioned so far which make use of a geospatial index actually
are not entirely accurate. This is because they use a flat earth model where each arc
degreeoflatitudeandlongitudetranslatestothesamedistanceeverywhereontheearth.
In reality, the earth is a sphere and so these values differ depending upon where you
are. Fortunately, MongoDB in 1.8.x and up implements a spherical model of the earth
for geospatial queries.
36 | Chapter 3: Common MongoDB and Python Patterns](https://image.slidesharecdn.com/1428393873-mhkx3ln-210915090520/85/1428393873-mhkx3-ln-46-320.jpg)
![The new spherical model can be used by employing the $nearSphere and $circle
Sphere variants on the $near and $circle operators. MongoDB’s spherical model has a
few extra caveats. First and foremost, you must use (longitude, latitude) ordering of
your co-ordinates. While there are many other application and formats which use the
(latitude, longitude) ordering, you should be careful to re-order to use with MongoDB’s
spherical model. Secondly, unlike the $near and $center operators we just described,
the units for distances with $nearSphere and $centerSphere are always expressed in
radians. This includes when using $maxDistance with $nearSphere or $centerSphere.
Luckily, it is not difficult to convert from a more humanly-understandable unit such
as kilometers to radians. To translate from kilometers to radians, simply divide the
kilometer value by the radius of the earth which is approximately 6371 km (or 3959
miles). To demonstrate, let’s try our earlier example of finding the 10 users nearest to
the point 40,40 with a max distance of 5 km—but this time using the spherical model:
# Find the 10 users nearest to the point 40, 40 with max distance 5 degrees
# Uses the spherical model provided by MongoDB 1.8.x and up
earth_radius_km = 6371.0
max_distance_km = 5.0
max_distance_radians = max_distance_km / earth_radius_km
nearest_users = dbh.users.find(
{"user_location":
{"$nearSphere" : [40, 40],
"$maxDistance":max_distance_radians}}).limit(10)
# Print the users
for user in nearest_users:
# assume user_location property is array x,y
print "User %s is at location %s,%s" %(user["username"], user["user_location"][0],
user["user_location"[1])
Code Defensively to Avoid KeyErrors and Other Bugs
One of the tradeoffs of a document-oriented database versus a relational database is
that the database does not enforce schema for you. For this reason, when working with
MongoDB you must be vigilant in your handling of database results. Do not blindly
assume that results will always have the properties you expect.
Check for their presence before accessing them. Although Python will generally raise
a KeyError and stop execution, depending on your application this still may result in
loss of data integrity. Consider the case of updating every document in a collection one-
by-one—a single unforeseen KeyError could leave the database in an inconsistent state,
with some documents having been updated and others not.
For example,
all_user_emails = []
for username in ("jill", "sam", "cathy"):
user_doc = dbh.users.find_one({"username":username})
# KeyError will be raised if any of these does not exist
dbh.emails.insert({"email":user_doc["email"]})
Code Defensively to Avoid KeyErrors and Other Bugs | 37](https://image.slidesharecdn.com/1428393873-mhkx3ln-210915090520/85/1428393873-mhkx3-ln-47-320.jpg)
![Sometimes you will want to have a default fallback to avoid KeyErrors should a docu-
ment be returned which is missing a property required by your program. The Python
dict class’ get method easily lets you specify a default value for a property should it be
missing.
Often it makes sense to use this defensively. For example, imagine we have a collection
of user documents. Some users have a “score” property set to a number, while others
do not. It would be safe to have a default fallback of zero (0) in the case that no score
property is present. We can take a missing score to mean a zero score. The dict class’s
get method lets us do this easily:
total_score = 0
for username in ("jill", "sam", "cathy"):
user_doc = dbh.users.find_one({"username":username})
total_score += user_doc.get("score", 0)
This approach can also work well when looping over embedded lists. For example, to
defensively handle the case where a document representing a particular product does
not yet have a list of suppliers embedded (perhaps because it is not yet on the market,
or is no longer being produced) you might write code like this:
# Email each supplier of this product.
# Default value is the empty list so no special casing
# is needed if the suppliers property is not present.
for supplier in product_doc.get("suppliers", []):
email_supplier(supplier)
MongoDB also makes no guarantees about the type of a property’s value on a given
document.
In most RDBMS implementations (the notable exception I’m aware of being SQLite)
the database will quite rigorously enforce column types. If you try to insert a string into
an integer column, the database will reject the write.
MongoDB, on the other hand, will only in exceptional circumstances reject such writes.
If you set the value of a property on one document to be a string and on another docu-
ment in the same collection set the value of that property to a number, it will very
happily store that.
# Perfectly legal insert - MongoDB will not complain
dbh.users.insert({"username":"janedoe"})
# Also perfectly legal - MongoDB will not complain
dbh.users.insert({"username":l337})
When you couple this with Python’s willingness to let you forgo explicitly typing your
variables, you can soon run into trouble. Perhaps the most common scenario is when
writing inputs from Web applications to the database. Most WSGI-based Python
frameworks will send you all HTTP POST and GET parameter values as strings—
regardless of whether or not they are in fact strings.
Thus it is easy to insert or update a numeric property with a value that is a string. The
best way, of course, to avoid errors of this nature is to prevent the wrong type of data
38 | Chapter 3: Common MongoDB and Python Patterns](https://image.slidesharecdn.com/1428393873-mhkx3ln-210915090520/85/1428393873-mhkx3-ln-48-320.jpg)
![For example, imagine a billing system. Each user document has an “account_balance”
property. There may be writes which alter the account balance—let’s say an account
top-up event which adds money to the account, and a purchase action which takes
money from the account. Consider the following implementation:
# User X adds $20 to his/her account, so we atomically increment
# account_balance
dbh.users.update({"username":username}, {"$inc":{"account_balance":20}}, safe=True)
# Fetch the updated account balance to display to user
new_account_balance = dbh.users.find_one({"username":username},
{"account_balance":1})["account_balance"]
This will work fine assuming no other writes to the account balance occur between the
write and read operations. There is an obvious race condition. If a purchase action were
to take place between the balance update and the balance read, the user may be dis-
pleased to be presented with a post-payment balance of less than what they expected!
# User X adds $20 to his/her account, so we atomically increment
# account_balance
dbh.users.update({"username":username}, {"$inc":{"account_balance":20}}, safe=True)
# In the meantime, in another thread or process, there is a payment operation,
# which decrements the account balance:
dbh.users.update({"username":username}, {"$dec":{"account_balance":5}}, safe=True)
# Fetch the updated account balance to display to user
new_account_balance = dbh.users.find_one({"username":username},
{"account_balance":1})["account_balance"]
What you want in this kind of situation is a way to update the account balance and
return the new value in a single, atomic operation. MongoDB’s findAndModify com-
mand allows you to do just this. PyMongo provides a wrapper around findAndModify
in the Collection.find_and_modify() method. Using this method, we can rewrite the
code to a single, atomic operation:
# User X adds $20 to his/her account, so we atomically increment
# account_balance and return the resulting document
ret = dbh.users.find_and_modify({"username":username},
{"$inc":{"account_balance":20}}, safe=True, new=True)
new_account_balance = ret["account_balance"]
Fast Accounting Pattern
Many of the applications people are building today are realtime with very large data
sets.Thatistosay,usersexpectchangestheymaketobereflectedwithintheapplication
instantly. For example if a user wins a new high score in a multiplayer game, they expect
the high score table in the game to be updated immediately. However, it may not be a
single high score table which must be updated. Perhaps you are also ranking by high
score this week, or this month, or even this year. Furthermore, as the application de-
veloper you may wish to keep a detailed log of each change—including when it occured,
Fast Accounting Pattern | 41](https://image.slidesharecdn.com/1428393873-mhkx3ln-210915090520/85/1428393873-mhkx3-ln-51-320.jpg)
![what the client IP address was, the software version of the client, etc.—per user for
analytics purposes.
This pattern isn’t limited to high scores. Similar high performance accounting require-
ments exist for in-app social activity feeds, billing systems which charge per byte, and
so on. Not only do these counts need to be fast to read from the database, they needs
to be quick to write. Additionally, with potentially millions of users, the data set can
grow very large, very quickly.
You might be tempted to keep only a detailed log, with one document per change.
Totals for the various time periods can then be calculated by an aggregate query across
the collection. This may work well initially, with only hundreds or thousands of docu-
ments to be aggregated to compute the result. However when the number of these
documents grows into the millions or even billions—which they may easily do in a
successful application—this approach will quickly become intractable.
Of course, as with many problems in Computer Science, the solution is ultimately a
form of caching. MongoDB and its document-oriented data model gives us a nice idiom
for this kind of period-based accounting, however. Given that we are counting on a
per-user basis, we can utilize embedded sub-documents containing property names
derived from time period. Consider for example a high score table supporting resolu-
tions of week, month and total (across all time).
For the weekly resolution score counts, we can name the properties after the current
week number. To disambiguate over multiple years, we can include the four-digit year
in the key:
# Store weekly scores in sub-document
user_doc = {
"scores_weekly":{
"2011-01":10,
"2011-02":3,
"2011-06":20
}
}
To fetch the score for this week, we simply execute the following simple dictionary
lookup:
# Fetch the score for the current week
import datetime
now = datetime.datetime.utcnow()
current_year = now.year
current_week = now.isocalendar()[1]
# Default missing keys to a score of zero
user_doc["scores_weekly"].get("%d-%d" %(current_year, current_week), 0)
Such a lookup is incredibly fast. There is no aggregation to perform whatsoever. With
this pattern, we can also write very quickly and safely. Because we are counting, we can
take advantage of MongoDB’s atomic increment and decrement update modifiers,
$inc and $dec. Atomic update operators are great because they ensure the underlying
42 | Chapter 3: Common MongoDB and Python Patterns](https://image.slidesharecdn.com/1428393873-mhkx3ln-210915090520/85/1428393873-mhkx3-ln-52-320.jpg)
![data is in a consistent state and help to avoid nasty race conditions. Especially when
dealing with billing, accurate counts are very important.
Imagine we wish to increment the user’s score for this week by 24. We can do so with
the following query:
# Update the score for the current week
import datetime
username = "foouser"
now = datetime.datetime.utcnow()
current_year = now.year
current_week = now.isocalendar()[1]
# Use atomic update modifier to increment by 24
dbh.users.update({"username":username},
{"$inc":{"scores_weekly.%s-%s" %(current_year, current_week):24}},
safe=True)
If the application needs to track multiple time-periods, these can be represented as
additional sub-documents:
# Store daily, weekly, monthly and total scores in user document
user_doc = {
"scores_weekly":{
"2011-01":10,
"2011-02":3,
"2011-06":20
},
"scores_daily":{
"2011-35":2,
"2011-59":7,
"2011-83":15
},
"scores_monthly":{
"2011-09":30,
"2011-10":43,
"2011-11":24
},
"score_total":123
}
Of course, in your writes, you should increment the counts for each time period:
# Update the score for the current week
import datetime
username = "foouser"
now = datetime.datetime.utcnow()
current_year = now.year
current_month = new.month
current_week = now.isocalendar()[1]
current_day = now.timetuple().tm_yday
# Use atomic update modifier to increment by 24
dbh.users.update({"username":username},
{"$inc":{
"scores_weekly.%s-%s" %(current_year, current_week):24,
"scores_daily.%s-%s" %(current_year, current_day):24,
"scores_monthly.%s-%s" %(current_year, current_month):24,
Fast Accounting Pattern | 43](https://image.slidesharecdn.com/1428393873-mhkx3ln-210915090520/85/1428393873-mhkx3-ln-53-320.jpg)
![description='',
author='',
author_email='',
url='',
install_requires=[
"Pylons>=1.0", "pymongo",
],
setup_requires=["PasteScript>=1.6.3"],
packages=find_packages(exclude=['ez_setup']),
include_package_data=True,
test_suite='nose.collector',
package_data={'pylonsfoo': ['i18n/*/LC_MESSAGES/*.mo']},
#message_extractors={'pylonsfoo': [
# ('**.py', 'python', None),
# ('templates/**.mako', 'mako', {'input_encoding': 'utf-8'}),
# ('public/**', 'ignore', None)]},
zip_safe=False,
paster_plugins=['PasteScript', 'Pylons'],
entry_points="""
[paste.app_factory]
main = pylonsfoo.config.middleware:make_app
[paste.app_install]
main = pylons.util:PylonsInstaller
""",
)
Now you need to fetch the PyMongo driver into your virtual environment. It is easy to
do this by executing:
python setup.py develop
Your Pylons app is now ready to be configured with a MongoDB connection. First, we
shall create a config file for development
cp development.ini.sample development.ini
Next open the file development.ini in your favourite editor. Underneath the section
[app:main] add the following two variables, changing the URI and database names to
whatever works for your set up:
mongodb.url = mongodb://localhost
mongodb.db_name = mydb
You can now try starting your project with the following command:
paster serve --reload development.ini
You should see the following output:
Starting subprocess with file monitor
Starting server in PID 82946.
serving on http://127.0.0.1:5000
If you open the URL http://localhost:5000/ in a web browser, you should see the default
Pylons page. This means that you have correctly set up your project. However, we do
not yet have a way to talk to MongoDB.
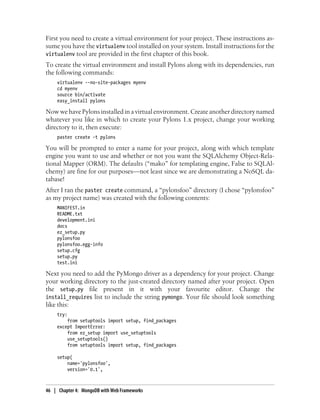
Pylons 1.x and MongoDB | 47](https://image.slidesharecdn.com/1428393873-mhkx3ln-210915090520/85/1428393873-mhkx3-ln-57-320.jpg)
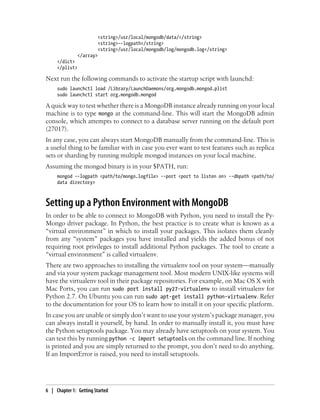
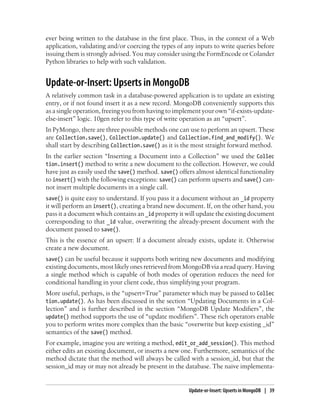
![Now that the configuration is in place, we can tell Pylons how to connect to MongoDB
and where to make the PyMongo connection available to our application. Pylons pro-
vides a convenient place for this in <project_name>/lib/app_globals.py. Edit this file
and change the contents to the following:
from beaker.cache import CacheManager
from beaker.util import parse_cache_config_options
from pymongo import Connection
from pylons import config
class Globals(object):
"""Globals acts as a container for objects available throughout the
life of the application
"""
def __init__(self, config):
"""One instance of Globals is created during application
initialization and is available during requests via the
'app_globals' variable
"""
mongodb_conn = Connection(config['mongodb.url'])
self.mongodb = mongodb_conn[config['mongodb.db_name']]
self.cache = CacheManager(**parse_cache_config_options(config))
Once this has been set up, a PyMongo Database instance will be available to your Pylons
controller actions through the globals object. To demonstrate, we will create a new
controller named “mongodb” with the following command:
paster controller mongodb
You should see a file named mongodb.py in the <project_name>/controllers directory.
For demonstration purposes, we shall modify it to increment a counter document in
MongoDB every time the controller action is run.
Open this file with your editor. Modify it to look like the following (remembering to
change the from pylonsfoo import line into whatever you named your project):
import logging
from pylons import app_globals as g, request, response, session, tmpl_context as c, url
from pylons.controllers.util import abort, redirect
from pylonsfoo.lib.base import BaseController, render
log = logging.getLogger(__name__)
class MongodbController(BaseController):
def index(self):
new_doc = g.mongodb.counters.find_and_modify({"counter_name":"test_counter"},
{"$inc":{"counter_value":1}}, new=True, upsert=True , safe=True)
return "MongoDB Counter Value: %s" % new_doc["counter_value"]
48 | Chapter 4: MongoDB with Web Frameworks](https://image.slidesharecdn.com/1428393873-mhkx3ln-210915090520/85/1428393873-mhkx3-ln-58-320.jpg)