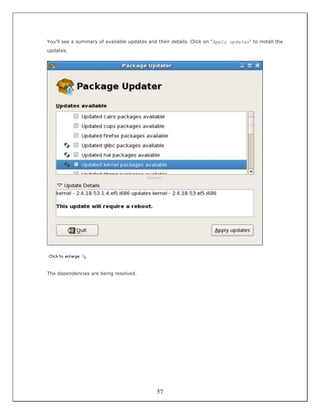
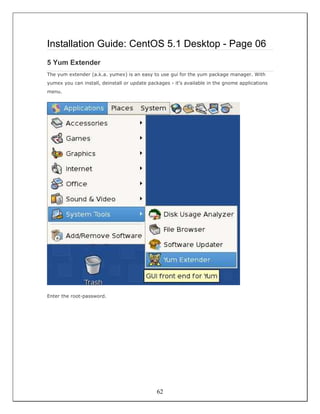
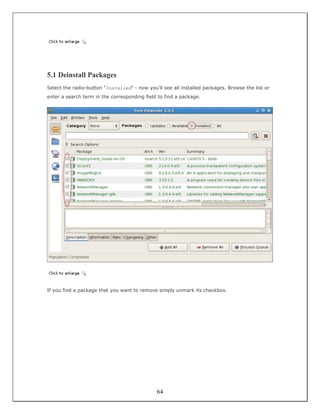
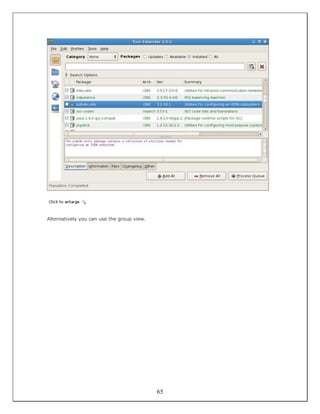
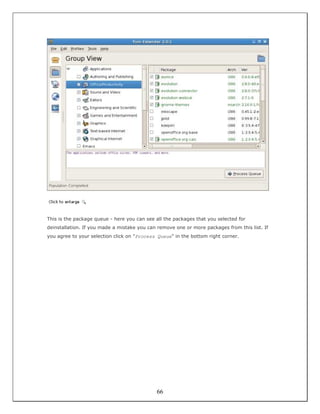
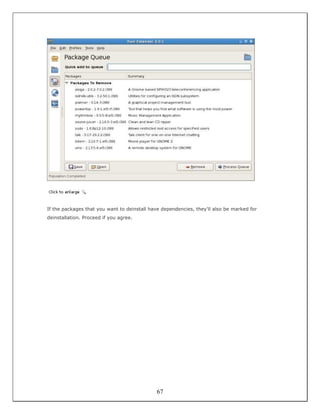
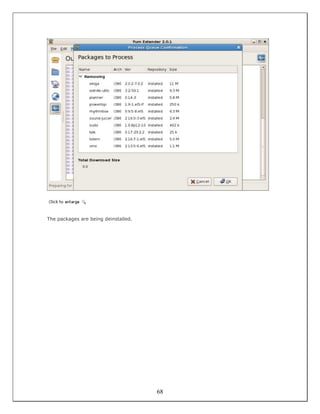
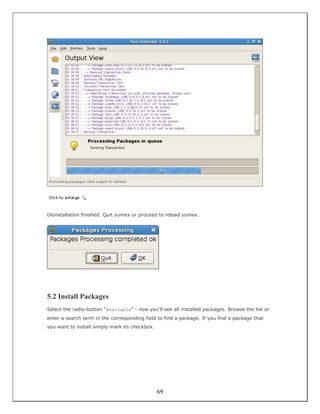
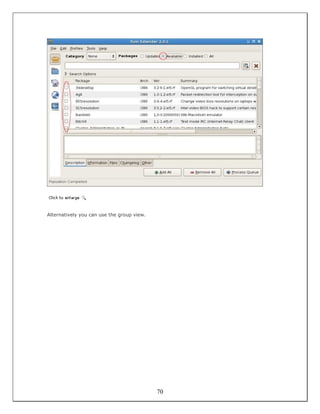
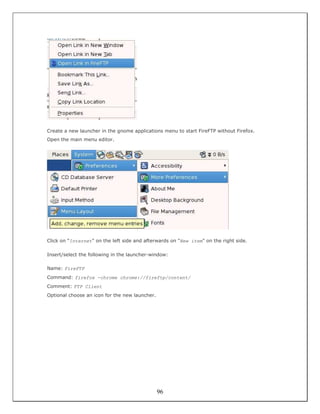
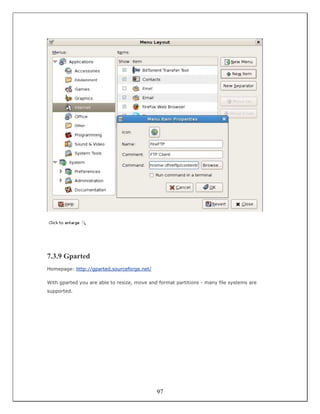
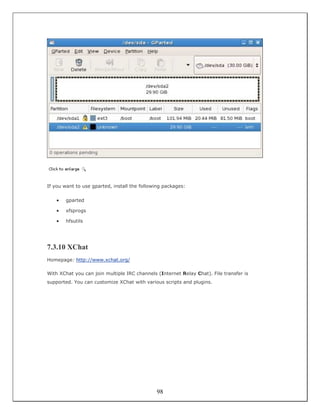
This document provides instructions for installing CentOS 5.1 on a desktop system, including downloading the installation media, running the installation wizard, configuring basic system settings like networking and time, installing software updates, and adding additional software packages. It recommends installing common multimedia, graphics, office, and internet applications, and provides instructions for using the yum package manager to remove unwanted default software and install other packages.
![Installation Guide: CentOS 5.1 Desktop
Version 1.0
Author: Oliver Meyer <o [dot] meyer [at] projektfarm [dot] de>
Last edited 12/12/2007
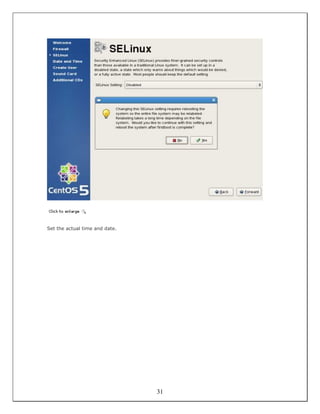
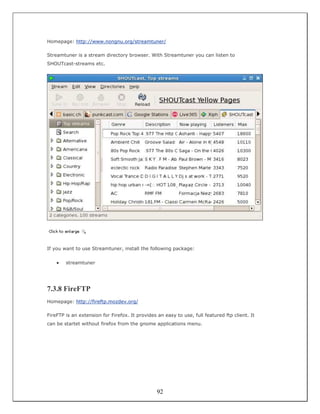
This document describes how to set up a CentOS 5.1 desktop. The result is a fast, secure and
extendable system that provides all you need for daily work and entertainment.
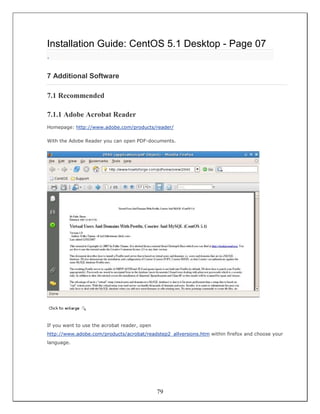
This howto is a practical guide without any warranty - it doesn't cover the theoretical backgrounds.
There are many ways to set up such a system - this is the way I chose.
1 Install Media
The install media(s) are available at http://isoredirect.centos.org/centos/5/isos/i386/. I used the
DVD-image for this howto.
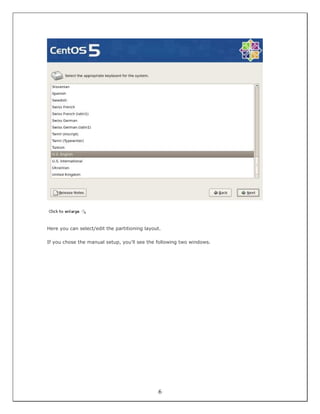
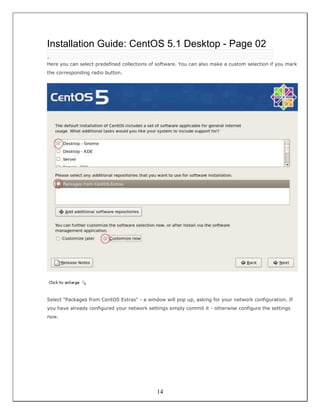
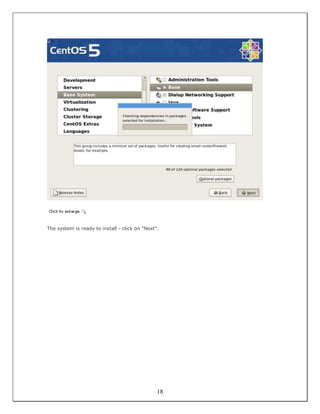
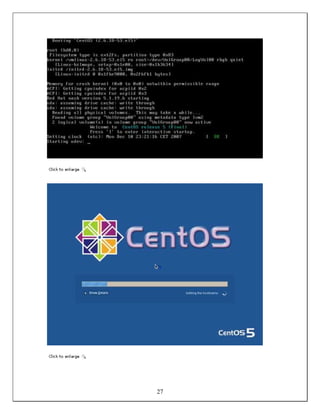
2 Installation
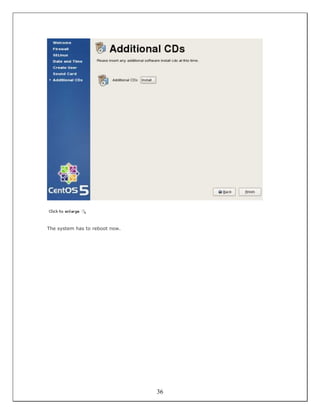
Hit "Enter" to start the installation.
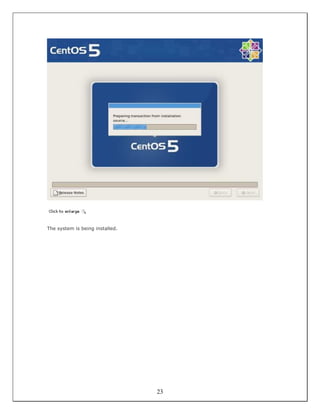
2](https://image.slidesharecdn.com/14038356-installation-guide-of-centos-5-121219095354-phpapp02/85/14038356-installation-guide-of-centos-5-2-320.jpg)
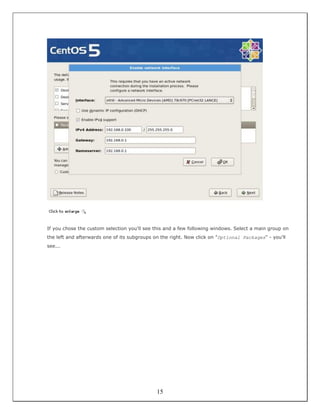


![After that we add priorities to the default repositories.
vi /etc/yum.repos.d/CentOS-Base.repo
Add a priority to each repository-entry - the content should look like this:
# CentOS-Base.repo
#
# This file uses a new mirrorlist system developed by
Lance Davis for CentOS.
# The mirror system uses the connecting IP address of
the client and the
# update status of each mirror to pick mirrors that
are updated to and
# geographically close to the client. You should use
this for CentOS updates
# unless you are manually picking other mirrors.
#
# If the mirrorlist= does not work for you, as a fall
back you can try the
# remarked out baseurl= line instead.
#
#
[base]
name=CentOS-$releasever - Base
mirrorlist=http://mirrorlist.centos.org/?release=$rel
easever&arch=$basearch&repo=os
#baseurl=http://mirror.centos.org/centos/$releasever/
os/$basearch/
gpgcheck=1
42](https://image.slidesharecdn.com/14038356-installation-guide-of-centos-5-121219095354-phpapp02/85/14038356-installation-guide-of-centos-5-42-320.jpg)
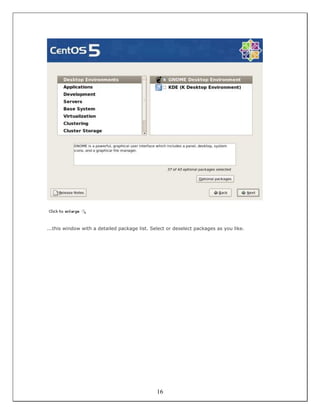
![gpgkey=http://mirror.centos.org/centos/RPM-GPG-KEY-
CentOS-5
priority=1
#released updates
[updates]
name=CentOS-$releasever - Updates
mirrorlist=http://mirrorlist.centos.org/?release=$rel
easever&arch=$basearch&repo=updates
#baseurl=http://mirror.centos.org/centos/$releasever/
updates/$basearch/
gpgcheck=1
gpgkey=http://mirror.centos.org/centos/RPM-GPG-KEY-
CentOS-5
priority=1
#packages used/produced in the build but not released
[addons]
name=CentOS-$releasever - Addons
mirrorlist=http://mirrorlist.centos.org/?release=$rel
easever&arch=$basearch&repo=addons
#baseurl=http://mirror.centos.org/centos/$releasever/
addons/$basearch/
gpgcheck=1
gpgkey=http://mirror.centos.org/centos/RPM-GPG-KEY-
CentOS-5
priority=1
#additional packages that may be useful
[extras]
name=CentOS-$releasever - Extras
43](https://image.slidesharecdn.com/14038356-installation-guide-of-centos-5-121219095354-phpapp02/85/14038356-installation-guide-of-centos-5-43-320.jpg)
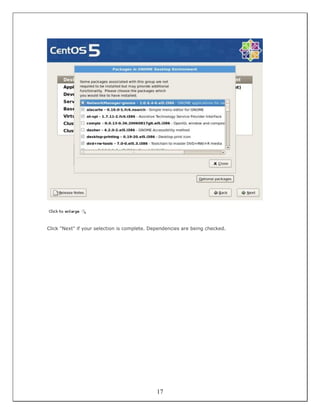
![mirrorlist=http://mirrorlist.centos.org/?release=$rel
easever&arch=$basearch&repo=extras
#baseurl=http://mirror.centos.org/centos/$releasever/
extras/$basearch/
gpgcheck=1
gpgkey=http://mirror.centos.org/centos/RPM-GPG-KEY-
CentOS-5
priority=1
#additional packages that extend functionality of
existing packages
[centosplus]
name=CentOS-$releasever - Plus
mirrorlist=http://mirrorlist.centos.org/?release=$rel
easever&arch=$basearch&repo=centosplus
#baseurl=http://mirror.centos.org/centos/$releasever/
centosplus/$basearch/
gpgcheck=1
enabled=0
gpgkey=http://mirror.centos.org/centos/RPM-GPG-KEY-
CentOS-5
priority=2
4.2 RPMforge
The RPMforge-repository provides many packages like multimedia applications and drivers.
4.2.1 Installation
44](https://image.slidesharecdn.com/14038356-installation-guide-of-centos-5-121219095354-phpapp02/85/14038356-installation-guide-of-centos-5-44-320.jpg)
![Install the repository:
rpm -ivh http://apt.sw.be/redhat/el5/en/i386/RPMS.dag/rpmforge-release-0.3.6-
1.el5.rf.i386.rpm
4.2.2 Priority
Now let's set a low priority (high number > 10) for this repository.
vi /etc/yum.repos.d/rpmforge.repo
Change the content that it looks like this:
# Name: RPMforge RPM Repository for Red Hat
Enterprise 5 - dag
# URL: http://rpmforge.net/
[rpmforge]
name = Red Hat Enterprise $releasever - RPMforge.net
- dag
#baseurl =
http://apt.sw.be/redhat/el5/en/$basearch/dag
mirrorlist = http://apt.sw.be/redhat/el5/en/mirrors-
rpmforge
#mirrorlist = file:///etc/yum.repos.d/mirrors-
rpmforge
enabled = 1
protect = 0
gpgkey = file:///etc/pki/rpm-gpg/RPM-GPG-KEY-
rpmforge-dag
gpgcheck = 1
priority=11
45](https://image.slidesharecdn.com/14038356-installation-guide-of-centos-5-121219095354-phpapp02/85/14038356-installation-guide-of-centos-5-45-320.jpg)


![Aix5[1].3+hacmp+oracle9 i+weblogic8.1安装实施报告](https://cdn.slidesharecdn.com/ss_thumbnails/aix51-3hacmporacle9iweblogic8-1-110524233723-phpapp01-thumbnail.jpg?width=640&height=640&fit=bounds)


