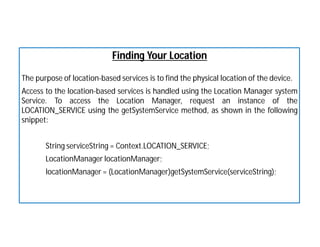
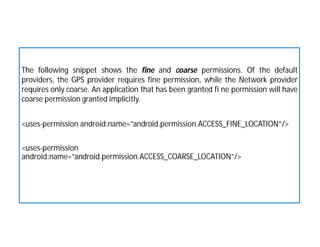
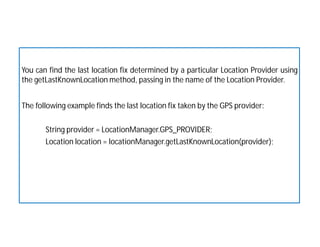
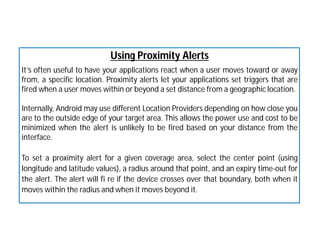
This document discusses mobile application development using location-based services in Android. It covers:
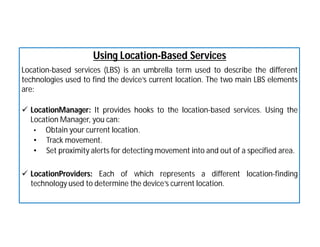
- Using the LocationManager to obtain a device's location, track movement, and set proximity alerts.
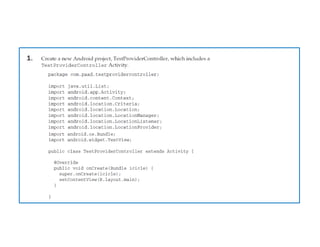
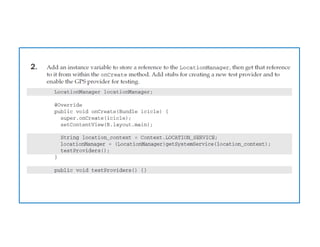
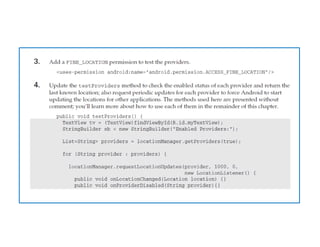
- Setting up emulators with test location providers to simulate location for testing.
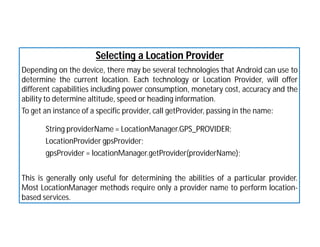
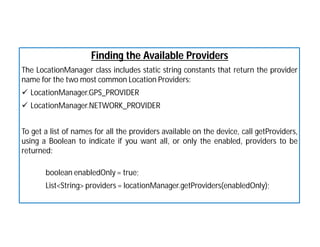
- Selecting location providers, finding available providers, and getting the last known location.
- Using proximity alerts to trigger when a user enters or exits an area.
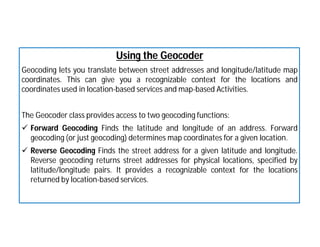
- Translating between addresses and coordinates using the Geocoder for geocoding and reverse geocoding.
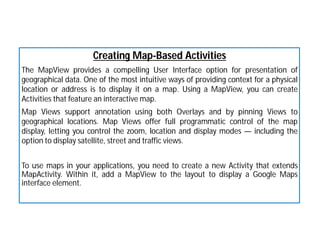
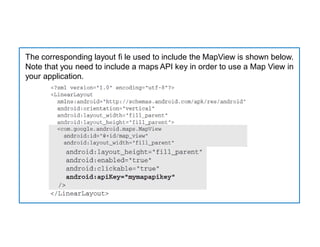
- Creating map-based activities using MapViews to display locations on interactive maps.


![[Android] Maps, Geocoding and Location-Based Services](https://cdn.slidesharecdn.com/ss_thumbnails/trainingandroidlesson8-130304083435-phpapp01-thumbnail.jpg?width=640&height=640&fit=bounds)