
Recommended
More Related Content
What's hot
What's hot (20)
Similar to INLAY CAVITY PREPARATION seminaar.pptx
Similar to INLAY CAVITY PREPARATION seminaar.pptx (20)
Recently uploaded
Recently uploaded (20)
INLAY CAVITY PREPARATION seminaar.pptx
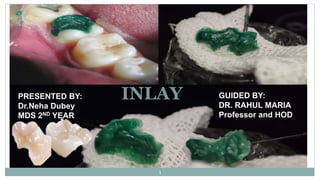
- 1. INLAY PRESENTED BY: Dr.Neha Dubey MDS 2ND YEAR 1 GUIDED BY: DR. RAHUL MARIA Professor and HOD
- 2. CONTENTS Introduction Definitions Indications Contraindications Advantages Disadvantages Material for cast restorations • General shape • Location of margins • Bevels • Flare •Internal anatomy • Variations in proximal margin design •Impression technique 1- Direct technique 2- Indirect technique •Sprue •Reservoir Charbeneau page no 351-359 2
- 3. INTRODUCTION For restoration of extensively damaged teeth with vital pulp so as to restore remaining tooth structure, cast gold inlays or onlays are a good option. Cast gold restoration has a long history of success as they are strong, inert and reproduce precise details. Summit 4th edition Charbeneau page no 351-359 3
- 4. The cast metal restorations are versatile and the procedure requires meticulous care in preparation and laboratory procedures. Dr. Phil Brook in 1897, was the first to introduce Inlay in dentistry who gave the concept of forming an investment around a wax pattern, eliminating the wax and filling the created mold with a gold alloy. In 1907 Taggart changed the practice of restorative dentistry by introducing his technique of cast gold dental restorations. Charbeneau page no 351-359 4
- 5. DEFINITIONS GPT 9- A fixed intracoronal restoration; a dental restoration made outside of a tooth to correspond to the form of the prepared cavity, which is then luted into the tooth. Summit 4th ed -Inlays are entirely intracoronal restorations, most commonly with occlusal and proximal extensions . Mosby’s Dental Dictionary- A restoration of metal, fired porcelain, or plastic made to fit a tapered cavity preparation & fastened to or luted into it with a cementing medium Sturdevant’s 4th ed- An inlay may cap none, or may cap all but one cusp. Charbeneau page no 351-359 5
- 6. William HO McGhee - An inlay may be defined as a restoration which has been constructed out of mouth from gold, porcelain, or other material & then cemented into the prepared cavity of a tooth. Shillingburg - Inlays may be used as single-tooth restorations for proximo- occlusal or gingival lesions with minimal to moderate extensions. Sturdevant 7th ed- Class II inlay involves the occlusal and proximal surfaces of a posterior tooth and may cap one or more, but not all of the cusps. Charbeneau page no 351-359 6
- 7. FACTORS AFFECTING THE DESIGN OF THE CAVITY Length of clinical crown. Anatomic contours of the occlusal, proximal, buccal and lingual surface. The position of tooth in arch. The occlusal and proximal relations. Unusual esthetic conditions, if any. The condition of soft tissues around the tooth. The extend and location of carious lesion. Charbeneau page no 351-359 7 Pulp chamber
- 8. Charbeneau page no 351-359 8 Box preparation and flat floor. Parallelism: internal walls must be almost parallel Dovetails : occlusal dovetails aid in retention Surface area- frictional retention Masticatory loads directed to seat the restoration.
- 9. INDICATIONS Charbeneau page no 351-359 9
- 10. A cavity’s width does not exceed one-third the intercuspal distance. Strong, self-resistant cusps remain. Patients with low caries index. Marzouk MA, Simonton AL, Gross RD. Operative Dentistry- Modern Theory & Practice, 1st Edition. Page no -323 10
- 11. Restorative procedure – does not change the occlusion or occluding surfaces. For restorations of large abraded surfaces. Tooth – not to be used as an abutment for fixed or removable prosthesis. 11 Marzouk MA, Simonton AL, Gross RD. Operative Dentistry- Modern Theory & Practice, 1st Edition. Page no -323
- 12. Restoration for endodontically treated teeth.. Retainers for fixed prosthesis. Correction of occlusion 12 Marzouk MA, Simonton AL, Gross RD. Operative Dentistry- Modern Theory & Practice, 1st Edition. Page no -323
- 13. Low incidence of plaque accumulation Cracked teeth (vertically, horizontally or diagonally). Partially subgingival restorations Marzouk MA, Simonton AL, Gross RD. Operative Dentistry- Modern Theory & Practice, 1st Edition.page no 323 13
- 14. CONTRAINDICATIONS High Caries Rate Young Patients Studevant’s Art and science of operative dentistry – 7th edition page no 309 14
- 15. Esthetics Small Restorations Studevant’s Art and science of operative dentistry – 7th edition page no 309 15
- 16. Developing and deciduous teeth Occlusal disharmony Dissimilar metals Marzouk MA, Simonton AL, Gross RD. Operative Dentistry- Modern Theory & Practice, 1st Edition. 16
- 17. ADVANTAGES Control of Contours and Contacts Strength Biocompatibility Low Wear Studevant’s Art and science of operative dentistry – 7th edition 17
- 18. Can be finished and polished outside the oral cavity Not affected by tarnish and corrosion process. Imparts resistance to tooth Marzouk MA, Simonton AL, Gross RD. Operative Dentistry- Modern Theory & Practice, 1st Edition. Charbeneau page no 351-359 18
- 19. Number of Appointments and Higher Chair Time Temporary Restorations Cost Technique Sensitivity Splitting Forces DISADVANTAGES Studevant’s Art and science of operative dentistry – 7th edition19
- 20. MATERIAL FOR CAST RESTORATION ADA Specification - Requires a minimum total gold plus-platinum- metals content of 75 weight percent (wt%). Acc to Sturdevant (1) Traditional high-gold alloys, (2) Low-gold alloys, (3) Palladium–silver alloys, and (4) Base metal alloy Studevant’s Art and science of operative dentistry – 7th edition Charbeneau page no 351-359 20
- 21. Acc. to Marzouk 1) Class I – Gold and Platinum based alloys 2) Class II- low gold alloys <50% 3) Class III- non Gold, Palladium based alloys 4) Class IV- Nickel-Chromium based alloys 5) Class V – Castable and moldable ceramics Marzouk MA, Simonton AL, Gross RD. Operative Dentistry- Modern Theory & Practice, 1st Edition. Charbeneau page no 351-359 21
- 22. 22
- 23. Preparation path Apico-occlusal taper of a preparation Circumferential tie Basic designs of cast metal restoration Flares Bevels Charbeneau page no 351-359 23
- 24. Preparation path Preparation should have single insertion path opposite to the occlusal load and parallel to the long axis of tooth. This helps in retention of the restoration. Charbeneau page no 351-359 24
- 25. Apico-occlusal taper of a preparation To have unhindered removal and placement of the wax pattern and seating of the final casting, intracoronal and extracoronal tooth preparation should have some taper. Ideally, an intracoronal tooth preparation should have slight diverging walls from gingival to occlusal surface. This is the concept of taper. Charbeneau page no 351-359 25
- 26. The optimal taper lie in the range of 2° to 5° per wall. A 2° to 5° of taper provides optimal retention for inlay. MAXIMUM- 10° Charbeneau page no 351-359 26
- 27. Degree of taper 3 – 12o (Ward, 1926) 6o (Shillingburg et al, 1974) 10 – 14o (Tylman, Malone 1978) 3 - 5o (Dykema et al 1986) Ideal convergence angle - 2 – 10o Clinically acceptable convergence angle - 10 – 20o (Goodacre et al 2001) Charbeneau page no 351-359 27
- 28. Giving more than required taper in preparation walls results in reduced retention of inlay. Charbeneau page no 351-359 28
- 29. Uneven taper of preparation walls will result in failure of inlay. Charbeneau page no 351-359 29
- 30. When to increase or decrease the taper? Charbeneau page no 351-359 30
- 31. Charbeneau page no 351-359 31
- 32. Circumferential Tie Circumferential tie refers to the design of cavosurface margin of an inlay tooth preparation. For the success of restoration, the margins of restoration should be designed so as to achieve its maximum adaptation to tooth structure. Charbeneau page no 351-359 32
- 33. What is the weakest portion of an inlay and how can we modify it? Charbeneau page no 351-359 33
- 34. Cavosurface margins of an inlay preparation can be of two types: 1. Bevels 2. Flares. Charbeneau page no 351-359 34
- 35. Bevels Bevels are the “ flexible extensions” of a cavity preparation, allowing the inclusion of surface defects, supplementary grooves, or other areas on the tooth surface. - MARZOUK Charbeneau page no 351-359 35
- 36. Charbeneau page no 351-359 36
- 37. 37
- 38. Functions of bevels • Weak enamel is removed • Beveling produce obtuse angled tooth margins (140 – 150 degrees) and acute angled metal margins (35°-45°). • Increases retention, resistance, aesthetics and color matching for composite resin restoration. Charbeneau page no 351-359 38
- 39. • Improves junctional relationship between the restorative material and tooth. • Bevels are the flexible extensions, i.e. they allow inclusion of faults, wear facets, etc. without overextending the preparation margins. Because of beveling, the gingival margin has a lap sliding fit which provides better fit at this region Charbeneau page no 351-359 39
- 40. Figure showing an equal bevel of 40 degree given on both the wall Mesial bevel directed correctly to result in 40 degree marginal metal. Unbeveled mesial margin is incorrect because it results both in weak enamel margin and unburnished marginal metal. Studevant’s Art and science of operative dentistry – 7th edition Charbeneau page no 351-359 40
- 41. Failing to bevel gingival margin resulting in undermined rods and difficulty in burnishing. Butt joint (90) with metal margin. Sliding lap joint with metal margin. Properly directed gingival bevel resulting in 30 degree marginal metal. Charbeneau page no 351-359 41
- 42. FLARES Flares are concave or flat peripheral portions of the facial or lingual proximal walls. They are of two types: PRIMARY SECONDARY Charbeneau page no 351-359 42
- 43. PRIMARY FLARE • It is the conventional & basic part of circumferential tie Facially & lingually. • Similar to long bevel, 45° to the inner dentinal wall proper Charbeneau page no 351-359 43
- 44. Functions & Indications • Bring the facial & lingual margins to cleansable – finishable areas. • Indicated for any facial or lingual proximal wall of cavity preparation. Charbeneau page no 351-359 44
- 45. • It is a flat plane superimposed peripherally to the primary flare. • It may have different angulations, involvement and extent depending upon requirement. • Secondary flare is not given in the areas where esthetics is more important. SECONDARY FLARE Charbeneau page no 351-359 45
- 46. Indications of secondary flares: • When broad contact area is present. • To include the faults present on facial and lingual walls beyond primary flare. • To include the undercuts present at cervical aspect of facial and lingual walls in ovoid teeth. • When caries is widely extended in buccolingual direction. Charbeneau page no 351-359 46
- 47. Advantages • Secondary flare ensures cavo-surface margins to extend into embrasures (self-cleansing area). • Permits easy burnishing and finishing of the restoration. • Produces more obtuse angled and stronger cavo- surface margin. Charbeneau page no 351-359 47
- 48. Reverse Secondary Flare These are extension of secondary flare. Reverse secondary flare upon secondary flare Reverse secondary flare upon primary flare Charbeneau page no 351-359 48
- 49. Indications • To include facial or lingual defects beyond the axial angle of tooth. • To eradicate severe peripheral marginal undercuts which have not been removed by maximum angulations & extent of secondary flare. • Needed to add to the retention capability of restoration proximally. Charbeneau page no 351-359 49
- 50. • Fulfill objective of secondary flare in extremely wide cavities or contact areas. • For encompassing an axial angle for reinforcing and supporting reasons. Charbeneau page no 351-359 50
- 51. TOOTH PREPARATION FOR CLASS II CAST METAL INLAY Charbeneau page no 351-359 51
- 52. A, Proposed outline form for disto-occlusal preparation. B, Dimensions and configuration of No. 271, No. 169L, and No. 8862 instruments. C, Conventional 4-degree divergence from line of draw (line xy). Charbeneau page no 351-359 52
- 53. • The cutting instruments used to develop the vertical walls are oriented to a single "draw" path, usually the long axis of the tooth crown, so that the completed preparation will have draft (no undercuts). • The gingival-to-occlusal divergence of these preparation walls may range from 2 to 5 degrees per wall from the line of draw. • If the vertical walls are unusually short, a maximum of 2 degrees occlusal divergence is desirable to increase retention potential. • As the occlusogingival height increases, the occlusal divergence should increase because lengthy preparations with minimal divergence (more parallel) may present difficulties during pattern withdrawal, trial seating and withdrawal of the casting, and cementing. Charbeneau page no 351-359 53
- 54. A and B, Bur after punch cut to a depth of 1.5 mm. C, For maxillary posterior teeth, the long axis of the bur should parallel the long axis of the tooth crown (line yz). D, For molar and second premolar teeth of mandibular dentition, the long axis of the bur should tilt slightly lingually to parallel the long axis of the tooth crown (line wx). Occlusal Step • With the No. 271 carbide bur held parallel to the long axis of the tooth crown, enter the fossa/pit closest to the involved marginal ridge, using a punch cut to a depth of 1.5 mm to establish the depth of the pulpal wall. • In initial preparation do not exceed this specified depth, regardless of whether the bur end is in dentin, caries, old restorative material, or air. Charbeneau page no 351-359 54
- 55. • A general rule is to maintain the long axis of the bur parallel to the long axis of the tooth crown at all times. • For mandibular molars and second premolars whose crowns tilt slightly lingually, this rule dictates that the bur should tilt slightly (5 to 10 degrees) lingually to conserve the strength of the lingual cusps. Charbeneau page no 351-359 55
- 56. E and F, Extending the mesial wall, taking care to conserve dentin that supports marginal ridge (s). G, The marginal bevel can provide additional extension. H, Improper extension that has weakened the marginal ridge. Charbeneau page no 351-359 56
- 57. •Maintaining the 1.5-mm initial depth and the same bur orientation, extend the preparation outline mesially along the central groove/fissure to include the mesial fossa/pit. • The facial and lingual extension in the mesial pit region should provide the desired dovetail retention form, which resists distal displacement of the inlay. • Continuing at the initial depth, extend the occlusal step distally into the distal marginal ridge sufficiently to expose the junction of the proximal enamel and the dentin. Charbeneau page no 351-359 57
- 58. • While extending distally, progressively widen the preparation to the desired faciolingual width in anticipation for the proximal box preparation. • The increased faciolingual width enables the facial and lingual walls of the box to project (visually) perpendicularly to the proximal surface at positions that will clear the adjacent tooth by 0.2 to 0.5 mm. Charbeneau page no 351-359 58
- 59. Proximal Box • Continuing with the No. 271 carbide bur, isolate the distal enamel by cutting a proximal ditch. • The Mesio-distal width of the ditch should be 0.8 mm (the tip diameter of the bur) and prepared approximately two thirds (0.5 mm) at the expense of dentin and one third (0.3 mm) at the expense of enamel. Charbeneau page no 351-359 59
- 60. A, After exposing the junction (j) of proximal enamel and dentin. B, Sectional drawing of A. C, Cutting the proximal ditch. D, Sectional drawing of C. • While penetrating gingivally, extend the proximal ditch facially and lingually beyond the caries to the desired position of the facioaxial and linguoaxial line angles. • Ideal extension gingivally will eliminate caries on the gingival floor and provide 0.5-mm clearance of the unbeveled gingival margin with the adjacent tooth. Charbeneau page no 351-359 60
- 61. E, Proximal view of D. F, Occlusal view of the proximal ditch with proposed ideal clearance with the adjacent tooth. Charbeneau page no 351-359 61
- 62. • Guard against overcutting the facial, lingual, and gingival walls, which would not conserve tooth structure and could result in: (1) overextension of the margins in the completed preparation, (2) a weakened tooth, and (3) possible injury of the soft tissue. Charbeneau page no 351-359 62
- 63. • The axial wall should follow the contour of the tooth faciolingually. • Any carious dentin on the axial wall should not be removed at this stage of preparation. • Then with the No. 271 carbide bur, make two cuts, one at the facial limit of the proximal ditch and the other at the lingual limit, extending from the ditch perpendicularly toward the enamel surface (in the direction of the enamel rods). Charbeneau page no 351-359 63
- 64. • Extend these cuts until the bur is nearly through the marginal ridge enamel (the side of the bur may emerge slightly through the surface at the level of the gingival floor). • At this time, however, the remaining wall of enamel often breaks away during cutting, especially when high speeds are employed. If the isolated wall of enamel is still present, it can be fractured out with a spoon excavator. Charbeneau page no 351-359 64
- 65. H, Proximal ditch extended distally. x, penetration of enamel by side of bur at its gingival end. I, Breaking away isolated enamel. Charbeneau page no 351-359 65
- 66. • Planing the distofacial, distolingual, and gingival walls by hand instruments to remove all undermined enamel may be indicated. • When proximal caries is minimal, ideal facial and lingual extension at this step in the preparation results in margins that clear the adjacent tooth by 0.2 to 0.5 mm. • Shallow (0.3 mm deep) retention grooves may be cut in the facioaxial and linguoaxial line-angles with the No. 169L carbide bur. These grooves are indicated especially when the prepared tooth is short. Charbeneau page no 351-359 66
- 67. A–D, Using modified palm-and-thumb grasp (A) to plane distofacial and distolingual walls (B and D) and to scrape gingival wall (C). E, Before cutting retention grooves. F, Cutting retention grooves. Charbeneau page no 351-359 67
- 68. Moderately deep caries. A–C, Extending the proximal ditch gingivally (B) to a sound floor free from caries (C). D, Remaining caries on the axial wall. E, Section of C in plane yy Charbeneau page no 351-359 68
- 69. • Light-cured glass-ionomer cement may be mixed and applied with a suitable applicator to these shallow (or moderately deep) excavated regions to the depth and form of the ideally prepared surface. • If removal of soft, infected dentin leads directly to a pulpal exposure (carious pulpal exposure), then root canal treatment should be accomplished before completing the cast metal restoration. • If the pulp is inadvertently exposed as a result of operator error or misjudgment (mechanical pulpal exposure), then it must be decided whether to proceed with root canal treatment or attempt a direct pulp capping. Charbeneau page no 351-359 69
- 70. F, Removing the remaining infected dentin. c, inserted retraction cord. G, Section of F. H, Inserting glass ionomer base with periodontal probe. I, Completed base. Charbeneau page no 351-359 70
- 71. Remaining old restorative material on the internal walls should be removed if any of the following conditions are present: (1) the old material is judged to be thin and or non-retentive, (2) there is radiographic evidence of caries under the old material. (3) the pulp was symptomatic preoperatively. Or (4) the periphery of the remaining restorative material is not intact, Charbeneau page no 351-359 71
- 72. D–F, Diamond instrument preparing lingual secondary flare. Large arrow in F indicates the direction of the translation. Preparation of Bevels and Flares Charbeneau page no 351-359 72
- 73. Properly directed gingival bevel resulting in 30-degree marginal metal. Failure to bevel the gingival margin results in a weak margin formed by undermined rods (note the easily displaced wedge of enamel) and 110-degree marginal metal, an angular design unsuitable for burnishing. Lap, sliding fit of prescribed bevel metal decreases the 50-µm error of seating to 20 µm. A 50-µm error of seating produces an equal cement line of 50 µm along the unbeveled gingival margin. Charbeneau page no 351-359 73
- 74. Occlusal marginal metal is approximately 40 degrees in cross-section, making the enamel angle 140 degrees. Charbeneau page no 351-359 74
- 75. • Using the flame-shaped diamond instrument, rotating at high speed, prepare the lingual secondary flare. • Approach from the lingual embrasure, moving the instrument Mesio- facially. • Bevel the gingival margin by moving the instrument facially along the gingival margin. Charbeneau page no 351-359 75
- 76. D–F, Diamond instrument preparing lingual secondary flare. Large arrow in F indicates the direction of the translation. Charbeneau page no 351-359 76
- 77. PRIMARY Retention features Primary Retention forms: Box preparation and flat floor. Parallelism: internal walls must be almost parallel Dovetails : occlusal dovetails aid in retention Surface area- frictional retention Masticatory loads directed to seat the restoration. Charbeneau page no 351-359 77
- 78. SECONDARY RETENTION FEATURES Additional Retention and Resistance forms include: Charbeneau page no 351-359 78
- 79. Retention Grooves • Located completely in dentin. • Can be located at the mesial & distal wall/the gingival floor of the facial or lingual portion of a cavity preparation. Charbeneau page no 351-359 79
- 80. • Prevent the lateral displacement the of restoration. • Grooves are prepared using a tapered fissure bur (168 or 699). • They should not exceed 2mm in depth and should be at the expense of the side of walls or axial surfaces of the preparation. Charbeneau page no 351-359 80
- 81. INTERNAL BOX Internal boxes are indicated in shallow cavities and short teeth preparations when occlusal dovetail cant be prepared because of cavity involvement of occlusal surface. Charbeneau page no 351-359 81
- 82. • Are prepared using a 168 or 699 bur to a dimension compatible with the size of the restoration. • Should have a minimum size of 2mm in three dimensions. • Has high locking power- it is advisable to place internal boxes at the very peripheries of the cavity preparation. • If placed in the middle- uneven immobilization of the casting with ends less resistant than the middle part. Charbeneau page no 351-359 82
- 83. Slots • Slot is preferred over preparing a box in the distal surface because (1) the former is more conserving of the tooth structure and of the strength of the tooth crown, and (2) the linear extent of marginal outline is less. • Slot should have a 2 to 3 mm depth Charbeneau page no 351-359 83
- 84. • Use a No. 169L carbide bur with its long axis parallel to the line of draw (this must be reasonably close to a line parallel with the long axis of the tooth). • The slot is cut in dentin so that it would pass midway between the pulp and the DEJ if it were to be extended gingivally. • The position and direction of the slot thus avert (1) the exposure of the pulp, (2) the removal of the dentin supporting the distal enamel, and (3) the perforation of the distal surface of the tooth at the gingival termination of the slot. Charbeneau page no 351-359 84
- 85. The slot should have the following approximate dimensions: (1) the width (diameter) of the bur mesiodistally; (2) 2 mm faciolingually; and (3) a depth of 2 mm gingival of the normally positioned pulpal wall. Charbeneau page no 351-359 85
- 86. Collar preparation •A facial or lingual “collar” or both may be prepared increase the retention and resistance when preparing a weakened tooth for a mesioocclusodistal onlay to cap all cusps. •They help in retention of shortened teeth. Charbeneau page no 351-359 86
- 87. Collar preparations are of two types: • Cuspal Collar: involves the facial & lingual surfaces of one cusp only in multi-cusped tooth. • Tooth Collar: involves entire facial and lingual surface of the tooth. Charbeneau page no 351-359 87
- 88. • Skirts are thin extensions of the facial or lingual proximal margins of the cast metal onlay that extend from the primary flare to a termination just past the transitional line angle of the tooth. • They are a conservative method of improving the retention and resistance forms of the preparation. • Usually, are prepared entirely in enamel. Skirt preparation Charbeneau page no 351-359 88
- 89. Modifications of Inlay cavity preparation SLICE PREPARATION MODIFIED FLARE BOX PREPARATION AUXILLARY SLICE Charbeneau page no 351-359 89
- 90. • The box design is principally used with the proximo-occlusal preparation for the direct method of wax pattern formation. • A cervical bevel is required in the proximo – occlusal cavity for ease of wax manipulation in mouth. • The bevel is placed most often with hand instruments, thus forming lap joint for the bulk of wax suitable for direct carving. Box Preparation Charbeneau page no 351-359 90
- 91. Slice preparation A slice refers to the placement of extracoronal taper using a disk of adequate diameter to contact nearly the entire proximal surface. Charbeneau page no 351-359 91
- 92. • Involves conservative disking of the proximal surface to establish the buccal & lingual extent of the finish lines. • Teeth with proximal contours of the square tooth form - extends to the cervical floor. • Assures a sound enamel margin & also yields a casting margin that is adapted & finished with relative ease Charbeneau page no 351-359 92
- 93. • Wraps partially around the proximal line angles, thus providing additional tooth support. • Minimal bulk of tissue is lost, yet resistance form is greatly enhanced, reducing the possibility of tooth fracture. Auxiliary Slice Auxiliary slice around the lingual proximal line angle of a tooth, for example, will aid in preventing a buccal displacement of the casting. Charbeneau page no 351-359 93
- 94. Modified flare Preparation Hybrid between the box & slice preparations. Charbeneau page no 351-359 94
- 95. • Buccal & lingual proximal walls are initially formed with minimal extension, then disked in a plane that only slightly reduces the proximal wall dimension. • Extensive disking will reduce the retesion of these walls. • The obtuseness of the cavosurface angle is enhanced. Charbeneau page no 351-359 95
- 96. IMPRESSION TECHNIQUES Impression technique Direct technique Open method- with matrix band Closed method- without matrix Indirect technique Anusavice, Shen, Rawls. Phillips’ Science of Dental Materials, 11th Edition Types 1. Type I – medium wax – direct technique 2. Type II – soft wax – indirect technique Charbeneau page no 351-359 96
- 97. PKT instruments No. 1 and no. 2 are wax addition instruments No. 3 is a burnisher for refining occlusal anatomy Nos. 4 and 5 are wax carvers. Charbeneau page no 351-359 97
- 98. Tissue compatible lubricant is placed in the internal surface of the prepared tooth and adjacent tooth Piece of wax is placed is flamed to achieve hanging drop and band is immediately place on tooth and pushed 2- 3mm cervically Whenever subsequent layers of wax are added the previous layer which was applied should be remelted or folds would form on fitting surface Adequate bulk should be provided at proximal and axial surface in order to prevent distortion while removal Principles and practice of operative dentistry – Gearld T. Charbeneau – 3rd edition Anusavice, Shen, Rawls. Phillips’ Science of Dental Materials, 11th Edition Charbeneau page no 351-359 98
- 99. The pattern is again seated in the cavity. A heated instrument is held lightly against the copper staple, thus facilitating its removal Pattern is then carved. Prepared tooth & opposing tooth is isolated and dried with cotton rolls. With camel hair brush, talcum powder is dusted on the occlusal surface of the wax and the patient is instructed to close the teeth lightly Cuspal contact with the wax pattern is indicated by a shiny burnished spot on the pattern. The spots of hyperocclusion are carved away using warm carvers Textbook of operative dentistry –Vimal K Sikiri - 4nd edition 267 Principles and practice of operative dentistry – Gearld T. Charbeneau – 3rd edition Charbeneau page no 351-359 99
- 100. ADVANTAGE • Proper margin seal in gingival area • Good isolation • Make a proper contour in proximal surface DISADVANTAGE • Great skill & patience is required • Greater tendency for wax pattern to get distorted. • Indirect vision is required. • Discrepancies at the gingival margin is difficult to detect • If the casting fails patient has to be recalled Charbeneau page no 351-359 100
- 101. Indirect patterns: • The wax should be allowed to cool thoroughly before the pattern is removed from the die. • A constant light grip is maintained on the pattern by the thumb and forefinger of one hand while pressure is applied against them with the thumb and forefinger of the other hand, which also holds the die Disadvantages • The model may not be the exact replica of the tooth. • Time consuming procedure. Charbeneau page no 351-359 101
- 102. Charbeneau page no 351-359 102
- 103. Types of Sprue • According to material used: • Wax sprue former (for large restorations E.g.. RPD frameworks) • Plastic/Resin sprue former (smaller restorations) • Metal sprue ( smaller restorations E.g.. Crown) • According to process: • Prefabricated • Custom made • According to shape: • Solid • Hollow (Round) • According to the diameter of teeth: • For molars: 2.5mm (10-gauge) • For anteriors and pre-molars: 2.0mm (12-gauge) 10 3 Charbeneau page no 351-359 103
- 104. Materials Used In Sprue 10 4 • Special wax supplied as rope form (rolls) of different diameters (gauges) for selection. • Hollow stainless steel wires of different diameters and lengths. • These are to be coated with thin layer of inlay wax by dipping in molten wax. • This is done for easy removal of sprue former after setting of investment. Anusavice (phillips) 11th edition page no 321 Charbeneau page no 351-359 104
- 105. Length & Diameter of The Sprue 10 5 • The length of the sprue former should be adjusted so that the pattern is approximately 6 mm from the open end of the ring. • The sprue former should be atleast 1.7mm in diameter unless the pattern is extremely small. • Sprue formers upto 2.5mm in diameter is used for very large patterns and bulky full crowns. Anusavice (phillips) 11th edition page no 321 Charbeneau page no 351-359 105
- 106. Anusavice (phillips) 11th edition page no 321 Charbeneau page no 351-359 106
- 107. Spruing Principles AndTechnique • The first step in the production of refractory mould is termed as spruing the pattern, whereby the wax pattern is attached to conical base by extension of wax, plastic, or metal. • This connector is known as sprue former, which should be properly selected in respect to size and configuration. 10 7 Charbeneau page no 351-359 107
- 108. Location Of Sprue • Sprue is attached to the bulkiest, non-critical part of the pattern. • Away from the margins and occlusal contacts. • Normally it is attached to largest non-functional cusp used. Wrong 10 8 Correct Anusavice (phillips) 11th edition page no 321 Charbeneau page no 351-359 108
- 109. Sprue Former Direction • It is attached at 45 degrees to the walls of the mould, which decreases the turbulence of molten alloy. 10 9 Charbeneau page no 351-359 109
- 110. Charbeneau page no 351-359 RESERVOIR Reservoir is a small amount of additional wax which is added to the sprue former near the junction of wax pattern It prevents localized shrinkage porosity as the alloy in this part solidifies last after the solidification of metal in mold Philip's 11th edition page no:320 110
- 111. • If bulky pontics are placed at the heat center of the mould without a reservoir, porosity is very likely to occur in the pontic itself, resulting in a weak bridge. • Where a dental casting contains both thick and thin elements, porosity can be minimized by the addition of chill vents. • Chill vents accelerate the cooling of the pontic relative to the parts of the casting external to the dental unit itself. Addition of chill vents to bulky dental units may speed solidification and minimize porosity in the thick pontic or connector areas. Venting 11 1
- 112. Charbeneau page no 351-359 112 Thin film of cleaner on pattern reduces surface tension of wax better “wetting” of wax pattern by the investment. Some of the commercially available debubblizing agents can be used. The wax pattern should not stand for more than 20-30 min before being invested. So, it is best to invest the wax pattern as soon as possible
- 113. 113
- 114. REFERENCES Strudevants 4th edition Philip's 11th edition Marzouk Charbeneau 3rd edition G.H. Mount Mc Ghee 1st edition. Shillingburg Vimak sikri, textbook of endodontics Charbeneau page no 351-359 114
- 115. 115
Editor's Notes
- Non – gold platinum based alloys – class 3 • Composed mainly of palladium and silver. • They are either palladium – silver alloys or silver – palladium alloys. • Palladium is most influential in dictating the properties. • Also has indium, copper, tin, zinc constituting not more than 10%. • Indium acts as a scavenger while melting, and increases resistance to tarnish and corrosion. Non – gold platinum based alloys – class 3 • Composed mainly of palladium and silver. • They are either palladium – silver alloys or silver – palladium alloys. • Palladium is most influential in dictating the properties. • Also has indium, copper, tin, zinc constituting not more than 10%. • Indium acts as a scavenger while melting, and increases resistance to tarnish and corrosion.
- Nickel – chromium based alloys – class 4 • These metals are referred to as non-noble or non-precious alloys because of their low cost. • The chromium content in these alloys should not exceed 30%. • The chromium imparts the passivating effect on base metals making them corrosion resistant. • Beryllium and molybdenum have been added to improve upon properties of the base metals. • Beryllium – control castability and oxidation • Molybdenum – decreases co-efficient of thermal expansion.
- Castable moldable ceramics – class 5 • Composed of aluminium tri oxide( at least 50%) and magnesium oxide ( at least 15%) • Ratio of Al2O3 : MgO is 7:1 • To this 0.5% of stearate or wax is added to improve the moldability. • When heated above the glass transition temperature ( 30-150°) the mass becomes moldable and deformable.
- FUNCTIONS Helps in retention of restoration. Decreases it’s micromovement during function
- Greater the wall length, more taper will be necessary and vice versa Taper should not exceed 10% Greater the surface involvement and the more detailed the internal anatomy greater frictional component between preparation and material thus taper should be increase to reduce friction The need for retention Retention - approach exact parallelism i.e. less taper. Favorable – taper equally at expense of 2 opposing walls. Tapering can be done in expense of one wall - opposing side is absolutely parallel to insertion path. One side having more taper than other - Contraindicated If cariogenic and anatomical condition dictate 2 different tapers for opposing walls, its preferable to create 2 planes for each involved walls or axial surfaces,i.e. inner plane parallel to each other and plane having diff. tapers.
- In an inlay the weakest portion is at the junction of the inlay- cement- tooth. Every effort should be made to design and prepare these marginal peripheries to create most favorable relationship with restoration casting and luting cement.
- Angled (140 – 150degrees) marginal tooth structures which is bulkiest and strongest configuration of marginal tooth anatomy. 30-40 degree marginal metal, thus can be easily burnished
- Gingival bevels bring the gingival margins as cleansable or protected areas. Gingival bevel should be 0.5 to 1mm wide.
- Contraindicated in class IV & V cast materials.
- (i.e., there is some breach in the junction of the material \with the adjacent tooth structure that may indicate caries under the material).