Learn Mise en Place Essentials
•
0 likes•78 views

Culinary Innovation Training and Development Center

Recommended
More Related Content
What's hot
What's hot (20)
Similar to Learn Mise en Place Essentials
Similar to Learn Mise en Place Essentials (20)
More from Montaser Masoud
More from Montaser Masoud (20)
Recently uploaded
Recently uploaded (20)
Learn Mise en Place Essentials
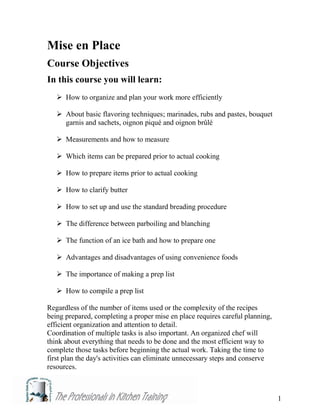
- 1. 1 Mise en Place Course Objectives In this course you will learn: How to organize and plan your work more efficiently About basic flavoring techniques; marinades, rubs and pastes, bouquet garnis and sachets, oignon piqué and oignon brûlé Measurements and how to measure Which items can be prepared prior to actual cooking How to prepare items prior to actual cooking How to clarify butter How to set up and use the standard breading procedure The difference between parboiling and blanching The function of an ice bath and how to prepare one Advantages and disadvantages of using convenience foods The importance of making a prep list How to compile a prep list Regardless of the number of items used or the complexity of the recipes being prepared, completing a proper mise en place requires careful planning, efficient organization and attention to detail. Coordination of multiple tasks is also important. An organized chef will think about everything that needs to be done and the most efficient way to complete those tasks before beginning the actual work. Taking the time to first plan the day's activities can eliminate unnecessary steps and conserve resources.
- 2. 2 Introduction Mise en Place The French term mise en place (meez ahn plahs) literally means "to put in place" or "everything in its place". But in the culinary context, it means much more. Escoffier defined the phrase as "those elementary preparations that are constantly resorted to during the various steps of most culinary preparations: “He meant, essentially, gathering and prepping the ingredients to be cooked as well as assembling the tools and equipment necessary to cook them”. The concept of mise en place is simple: A chef should have at hand everything he or she needs to prepare and serve food in an organized and efficient manner. Proper mise en place can consist of just a few items – for example, those needed to prepare a small quantity of chicken soup. Or it can be quite extensive – for example, when setting up the hot line for a busy restaurant with a large menu. A proper mise en place requires the chef to consider: Work patterns Ingredient lists Tools and equipment needed Mise en place will differ from one restaurant to another. A banquet chef’s mise en place could include organizing large quantities of meats, vegetables, salad ingredients, breads, condiments and pastries for several dinners, all with different menus. Regardless of the specific menu, banquet mise en place may also include gathering hot boxes, plates, chafing dishes, tongs, spoons and ladles, and setting up the dish-up line. The mise en place for the broiler station at a steakhouse could include properly storing raw steaks and chops that will be cooked to order, as well as gathering the salt, pepper, prepared sauces and accompaniments that are used during cooking or served with the finished items. The broiler cook could also be responsible for gathering plates, building a charcoal fire for the grill, and stocking his or her work area with hand tools, towels and sanitizing solution.
- 3. 3 In the restaurant situation, unlike in banquet work, the cook's mise en place is probably identical night after night. A waiter's mise en place could include brewing tea, cutting lemon wedges and refilling salt and pepper shakers - preparations that will make work go more smoothly during actual service. Regardless of the number of items used or the complexity of the recipes being prepared, completing a proper mise en place requires careful planning, efficient organization and attention to detail. Coordination of multiple tasks is also important. An organized chef will think about everything that needs to be done and the most efficient way to complete those tasks before beginning the actual work. Taking the time to first plan the day's activities can eliminate unnecessary steps and conserve resources. Proper mise en place also requires a good sense of timing. Knowing how long before service to begin a task, or how far in advance of service some preparations can be made, allows a chef to better plan for the efficient execution of his or her duties. In this type of planning, it is also important to consider food safety issues, such as those relating to time and temperature controls. Selecting Tools and Equipment An important step in creating the proper mise en place is to identify and gather all of the tools and equipment that will be needed to prepare a recipe properly or to work a station efficiently. A few general rules to bear in mind: All tools, equipment and work surfaces must be clean and sanitized. Knives should be honed and sharpened. Measuring devices should be checked periodically for accuracy. Ovens and cooking surfaces should be preheated, as necessary. Mixing bowls, saucepans and storage containers should be the correct size for the task at hand. Serving plates, cookware, utensils, hand tools and other necessary smallwares should be gathered and stored nearby. Foods should be gathered and stored conveniently at the proper temperatures. Expiration dates on foods should be checked periodically for validity. Sanitizing solution, hand towels, disposable gloves and trash cans should be conveniently located.
- 4. 4 Measuring Ingredients In order to reproduce foods consistently and for the same cost day after day, it is important that the ingredients be measured accurately each time. Ingredients may be measured by weight, volume or count. Weight refers to the mass or heaviness of an item and is measured using a scale. Volume refers to the space occupied by a substance and is measured with graduated measuring cups and spoons. Count refers to the number of individual items. It is important to remember that foods do not weigh their volume. In other words, although 1 cup contains 240 fluid gram, 1 cup of flour, honey, cinnamon, and so on does not weigh 240 grams, but 340 gram. For the purpose of proper food costing it is advisable to standardize your measurement systems throughout your operation from recipe writing, purchasing to preparation and food costing. Courses composed by the Egyptian Chefs Association are all adapted to the metric weight units (kg) of liquids and solids for consistency. Also to ensure your measurements are exact measures it is better to use digital scales. For little amounts of dry ingredients you would need to use 1 gram digital scales. Preparing Ingredients Some ingredients that are used frequently throughout the kitchen are often prepared in large quantities so that they are ready when needed for a specific recipe. For example, dry bread crumbs can be made and stored whenever a supply of bread is available. Large quantities of butter can be clarified on a back burner while other operations proceed on the line. These chores may be simple, but they are time-consuming. An entry-level cook may be assigned responsibility for this type of mise en place. Never feel that such chores are menial; consider, instead, how frustrating it would be for the chef to run out of a simple item just when it is needed during service.
- 5. 5 Clarifying Butter Unsalted whole butter is approximately 80% fat, 16% water and 4% milk solids. Although whole butter can be used for cooking or sauce making, sometimes a more stable and consistent product will be achieved by using butter that has had the water and milk solids removed by a process called clarification. Procedure for Clarifying Butter 1. Slowly warm the butter in a saucepan over low heat without boiling or agitation. As the butter melts, the milk solids rise to the top as a foam and the water sinks to the bottom. 2. When the butter is completely melted, skim the milk solids from the top. 3. When all the milk solids have been removed, ladle the butterfat into a clean saucepan, being careful to leave the water in the bottom of the pan. 4. The clarified butter is now ready to use. 450 grams of whole butter will yield approximately 300 grams of clarified butter- a yield of 75%. Clarified butter will keep for extended periods in either the freezer or refrigerator. Terminology Ghee Ghee is a form of clarified butter in which the milk solids remain with the fat and are allowed to brown; originating in India and now used worldwide as an ingredient and cooking medium, it has a long shelf life, a high smoke point and a nutty, caramel-like flavor. Skimming milk solids from the surface of melted butter. Lading the butterfat into a clean pan.
- 6. 6 Toasting Nuts and Spices Nuts are often toasted lightly before being used in baked goods, breadings, salads and sauces. Whole spices are sometimes toasted before being ground for a sauce or used as a garnish. Toasting not only browns the food, it brings out its flavor and makes it crispier and crunchier. When toasting nuts or spices in the oven or on the stove top, watch them closely as they can develop scorched flavors and burn easily. Toasting sesame seeds in a dry sauté pan on the stove top. Making Bread Crumbs Almost any bread can be used to make crumbs; the choice depends on how the crumbs will be used. Fresh bread crumbs are made from fresh bread that is slightly dried out, approximately two to four days old. If the bread is too fresh, the crumbs will be gummy and stick together; if the bread is too stale, the crumbs will taste stale as well. Dry bread crumbs are made from bread that has been lightly toasted in a warm oven. Do not make crumbs from stale or molding bread, as these undesirable flavors will be apparent when the crumbs are used. To make crumbs, the bread is cubed or torn into pieces and ground in a food processor. Dried bread can be processed to a finer consistency than fresh bread. After processing, the crumbs should be passed through a tamis and stored in a tightly closed plastic container in a cool, dry place. For additional flavors, dried herbs and spices can be mixed into the crumbs.
- 7. 7 1. Grind chunks of bread in a food processor. 2. Pass the crumbs through a tamis or sieve so that they will be the same size.
- 8. 8 Flavoring Foods Foods are often flavored with herbs or spices, marinades or rubs before they are actually cooked. This may require the chef to prepare various flavoring or seasoning mixtures and wait for a period of time between steps in a recipe. Bouquet Garni and Sachet A bouquet garni and sachet are used to introduce flavorings, seasonings and aromatics into stocks, sauces, soups and stews. Bouquet Garni A bouquet garni is a selection of herbs (usually fresh) and vegetables tied into a bundle with twine. A standard bouquet garni consists of parsley stems, celery, thyme, leeks and carrots. Bouquet Garni Sachet A sachet (also known as a sachet d'épices) is made by tying seasonings together in cheesecloth. A standard sachet consists of peppercorns, bay leaves, parsley stems, thyme, cloves and, optionally, garlic. The exact quantity of these ingredients is determined by the amount of liquid the sachet is meant to flavor. Sachet
- 9. 9 Bouquets garni and sachets are used to add flavors in such a way that they can be easily removed from a dish when their flavors have been extracted. A similar flavoring technique, although less commonly used, is an oignon piqué (also known as an onion piquet). To prepare an oignon piqué, peel the onion and trim off the root end. Attach one or two dried bay leaves to the onion using whole cloves as pins. The oignon piqué is then simmered in milk or stock to extract flavors. Oignon Piqué An oignon brûlé (also known as onion brûlé) French for "burnt onion," is used to flavor and color stocks, sauces and soups such as consommé. To prepare an onion brûlé, peel the onion, trim off the root end and cut it in half. Place the onion halves cut sides down in a dry skillet over medium-high heat. Cook until the onion halves char and darken. The oignon brûlé is then simmered in stocks or soups to give them a clear caramel color. Oignon brûlé
- 10. 10 Marinades Marinating is the process of soaking meat or poultry in a seasoned liquid to flavor and tenderize it. Marinades can be a simple blend (herbs, seasonings and oil) or a complicated cooked recipe (red wine, fruit and other ingredients). Mild marinades should be used on more delicate meats, such as veal. Game and beef require strongly flavored marinades. In wine-based marinades, white wine is usually used for white meats and poultry, and red wine is used for red meats. Not only does the wine add a distinctive flavor, but the acids in it break down connective tissues and help tenderize the meat. Poultry, veal and pork generally require less time to marinate than game, beef and lamb. Smaller pieces of meat take less time than larger pieces. When marinating, be sure to cover the meat or poultry completely then keep it refrigerated. The quantity of marinade needed will vary depending on the size and form of the product; 1 kg of boneless chicken breasts will require less marinade to cover than 1 kg of whole Cornish game hens. Stir or turn foods frequently so that the marinade can penetrate evenly. Some chefs prefer to marinate food in heavy-duty plastic food storage bags. These are useful for smaller quantities and allow for easy disposal of leftover marinades with less risk of cross-contamination. Label the bags properly and be sure to seal them tightly to prevent leaks. Marinating chicken breasts
- 11. 11 Rubs and Pastes Additional flavors can be added to meat, fish and poultry by rubbing them with a mixture of fresh or dried herbs and spices ground together with a mortar and pestle or in a spice grinder. The flavoring blend, called a rub, can be used dried, or it can be mixed with a little oil, lemon juice, prepared mustard or ground fresh garlic or ginger to make a paste (also known as a wet rub). Rubs and pastes add flavor and, often, a bit of crispy crust. They do not, however, generally act as a tenderizer. They are most often used on foods that will be cooked with dry heat, especially by grilling, broiling, baking or roasting. To apply a rub or paste, apply the mixture over the entire surface of the food to be flavored. Use enough pressure to make sure that the rub or paste adheres. (Pastes tend to adhere better than rubs.) The thicker the covering or the longer it remains on the food before cooking, the more pronounced the flavor. If the rubbed food is to be left for some time so that the flavors can be absorbed, it should be covered, refrigerated and turned from time to time. It is best to wear disposable gloves when applying a rub or paste. Some spices can irritate or stain the skin, and cross-contamination can occur from handling raw meats. Applying a dry rub to beef
- 12. 12 Steeping Steeping is the process of soaking dry ingredients in a liquid (usually hot) in order to either soften a food or infuse its flavor into the liquid. Spices, coffee beans and nuts are often steeped in hot milk to extract their flavors. The milk is then used to flavor other foods during cooking. For example, coffee beans can be steeped in hot milk and then strained out, with the coffee-flavored milk being used to make a custard sauce. Steeping is also used for rehydrating dried fruits and vegetables such as raisins and mushrooms. Typically, the softened fruits or vegetables will be used in a recipe and the liquid discarded. Additional flavors can be achieved by using wine, spirits, stock or other flavored liquids as the rehydrating medium. Note that in both situations, the steeping mixture is generally covered and removed from the heat to avoid evaporation or reduction of the liquid. Terminology Infuse is to flavor a liquid by steeping it with ingredients such as tea, coffee, herbs or spices. Steeping a vanilla bean and cinnamon sticks in warm milk to extract their flavors. Steeping raisins in hot water to rehydrate.
- 13. 13 Preparing to Cook Some techniques are done very close to or almost as a part of the final preparation of a dish. Breading and Battering Foods Breading A breaded item is any food that is coated with bread crumbs, cracker meal, cornmeal or other dry meal to protect it during cooking. Breaded foods can be seasoned before the breading is applied, or seasonings may be added to the flour, bread crumbs or meal before the main item is coated. Breaded foods are generally cooked by deep-frying or pan-frying. The breading makes a solid coating that seals during cooking and prevents the fat from coming in direct contact with the food, which would make it greasy. Standard Breading Procedure For breading meats, poultry, fish, shellfish or vegetables, a three-step process is typically used. Called the standard breading procedure, it gives foods a relatively thick, crisp coating. 1. Pat the food dry and dredge it in seasoned flour. The flour adds seasoning to the food, helps seal it, and allows the egg wash to adhere. 2. Dip the floured food in an egg wash. The egg wash should contain whole eggs whisked together with approximately 15 grams milk or water per egg. The egg wash will cause the crumbs or meal to completely coat the item and form a tight seal when the food is cooked. 3. Coat the food with bread crumbs, cracker crumbs or other dry meal. Shake off excess crumbs and place the breaded item in a pan. As additional breaded items are added to the pan, align them in a single layer; do not stack them or the breadings will get soggy and the foods will stick together. 4. To ensure that breading adheres after cooking, refrigerate breaded foods for at least 30 minutes before frying.
- 14. 14 Setup for the standard breading procedure. The following procedure helps bread foods more efficiently: 1. Assemble the mise en place as shown in picture. 2. With your left hand, place the food to be breaded in the flour and coat it evenly. With the same hand, remove the floured item, shake off the excess flour and place it in the egg wash. 3. With your right hand, remove the item from the egg wash and place it in the bread crumbs or meal. 4. With your left hand, cover the item with crumbs or meal and press lightly to make sure the item is completely and evenly coated. Shake off the excess crumbs or meal and place the breaded food in the empty pan for finished product. The key is to use one hand for the liquid ingredients and the other hand for the dry ingredients. This prevents your fingers from becoming coated with layer after layer of breading.
- 15. 15 Battering Batters, like breading, coat the food being cooked, keeping it moist and preventing it from becoming excessively greasy. Batters consist of a liquid such as water, milk or beer, combined with a starch such as flour or cornstarch. Many batters also contain a leavening agent such as baking powder or whipped egg whites. Two common batters are beer batter, which uses the beer for leavening as well as for flavor and tempura batter, which is used in Tempura Vegetables with Dipping Sauce. Items coated with a batter are cooked immediately, usually by deep-frying or pan-frying. Procedure For Battering Foods 1. Prepare the batter. 2. Pat the food dry and dredge in flour if desired. 3. Dip the item in the batter and place it directly in the hot fat. Setup for the standard battering procedure. Safety Alert Batters and breading are potentially hazardous foods when eggs or milk are used in their preparation. Make small batches of batter, then discard after each use. Store fresh batter at or below 5°C. Discard crumbs, flour and eggs for breading after each use. To prevent cross-contamination when coating different foods such as vegetables and poultry, use separate batter or breading for each product.
- 16. 16 Recipe Frying Batter Ingredients Yield: 800 g 250 g Flour 250 g Non-alcoholic beer 40 g Peanut oil 100 g Egg whites 10 g Salt Method 1. Combine flour and non-alcoholic beer and stir to a smooth batter. Strain batter to remove all lumps. 2. Cover top of batter with peanut oil to prevent drying out. 3. Let batter rest for 1 hour in a warm place. 4. Whip egg whites with salt into stiff peaks and fold carefully into the batter. Use at once Note: The batter can be made ahead of time. However, as soon as the egg white are blended in, the batter should be used. Recipe Tempura Batter Ingredients Yield: 1 Kg 2 Eggs 500 g Sparkling water (cold) 300 g Flour Method 1. Beat the eggs and add the cold sparkling water. 2. Add the flour to the egg-and-water mixture and mix until the flour is incorporated. There should be still small lumps in the batter. Overmixing develops gluten, which is undesirable.
- 17. 17 Parboiling, Blanching and Making an Ice Bath Some foods, especially vegetables, are blanched or parboiled before being used in a recipe. To do so, they are immersed in a large quantity of a boiling or simmering liquid - oil, stock or water - and partially cooked. This parcooking assists preparation (for example, it loosens peels from vegetables), removes undesirable flavors, softens firm foods, sets colors and shortens final cooking times. The only difference between blanching and parboiling is cooking time. Blanching is done quickly, usually only a few seconds. Parboiling lasts longer, usually several minutes. Foods that are blanched or parboiled in water (rather than fat) are often shocked or refreshed in ice water to halt the cooking process. Terminology Blanching is very briefly and partially cooking a food in boiling water or hot fat; used to assist preparation (for example, to loosen peels from vegetables), as part of a combination cooking method or to remove undesirable flavors. Parboiling is partially cooking a food in boiling or simmering liquid; similar to blanching but the cooking time is longer. Parcooking is partially cooking a food by any cooking method. Shocking is also called refreshing; the technique of quickly chilling blanched or parcooked foods in ice water; prevents further cooking and sets colors. 1 2 1. Blanch or parboil the food as desired in boiling water. 2. Remove the food from the cooking liquid and submerge it in ice water to refresh.
- 18. 18 Making an Ice Bath Because of the risk of food-borne illness, it is important to cool hot foods quickly to a temperature below (5˚C) before storing them in the refrigerator. An ice bath is an easy, efficient way to do so. An ice bath is also necessary for shocking or refreshing blanched or parcooked vegetables and for stopping the cooking of delicate mixtures such as custards. An ice bath is simply a container of ice cubes and cold water. The combination of ice and water will chill foods more rapidly than a container of only ice. The food being chilled will also cool faster if it is in a metal container, rather than one made of plastic or glass. Chilling vanilla custard sauce in an ice bath. Convenience Products Convenience products have now replaced many of the chores that were typically part of a cook's routine mise en place. For example, stock and sauce bases eliminate the time and labor necessary to make these products from scratch. Fresh onions and garlic can be purchased peeled, chopped and ready to use. Bread crumbs are available in bulk, and ready-to-use clarified butter is sold in refrigerated tubs. All this convenience comes at a price, of course. A chef must carefully consider whether the savings in employee time, along with the quality and consistency of available products, justify the higher cost of some of the convenience products now on the market. Conclusion As with most endeavors, consistently good cooking requires careful planning, preparation and organization. With these skills, a chef should be able to create a proper mise en place for almost any occasion.
- 19. 19 Term to Know Mise en place Expiration dates Mass Volume Weight Bouquet garni Sachet d’epices Clarified butter Ghee Marinate Dry rub Wet rub Infuse Rehydrating Breading foods Batter Battering foods Ice bath Refreshing / Shocking Convenience foods Prep list
- 20. 20 The Prep List Imagine trying to cross a stream by stepping on many different rocks. If you look at only one rock at a time, you will never have a clear picture of where you need to step next to safely get to the other side. You may completely miss the next step and find that now you have to backtrack and waste time or not get across at all. A prep list is the blueprint for how food production is going to be achieved during the work day. It gives the cook an overview of what needs to be done, how long it may take, the order in which assignments should be completed, and how each cook may interact with others in the kitchen. A prep list is not just rewriting recipes. It is reading through recipes and composing a written map of how to accomplish the tasks necessary to prepare the recipe. The first step in organizing your work is to read and understand the recipes you will be using. Reading the recipe alerts you to other components such as sauces or stocks that must be prepared in advance. You may find that you need to change the proportions of the recipe to meet production needs. Next, it is important to break down each dish by the steps necessary to complete the mise en place and prep. This will assist you in gathering ingredients for all of your prep at one time instead of getting an item multiple times on each occasion that it is called for in the recipe. Once each item is identified and quantified, the next step is to schedule your tasks through prioritization. Decide what needs to be done first and at what time or on what day the task should be started and completed. Follow the detailed task list you started with and this will assist you in determining the priority of your work. Do not leave anything to chance by trying to keep track of things in your head. The prep list is not only for your benefit. It can be used if another cook is assigned to help you or is needed to take over your work assignments. A clearly written prep list will allow the prep work to be completed efficiently and effectively. CHEF DAVID ROSENTHAL is Department Chair of the Contra Costa College Culinary Program.