1. How did you use media
technologies in the construction and research,
planning and evaluation
stages?
2. Technologies
When constructing my A2 music video coursework I used many technologies within my
construction, research, planning and evaluation.
All my work that I have done within all the tasks
are being blogged. I have found this the hardest
task as it was the first thing that we set up as we
started the year. At first I found it hard to handle
and work out how to use but after a while you
get used to it. The blog has proved to be a great
way to display multimedia skill, an easy place
to access work from anywhere and visually
more interesting than showcases from projects
before. The advances and changes to the layout of blogger also causes many problems as it
took a while for me to adjust to the new format,
however once I was an accomplished user of
the new layout, I believe that it was highly beneficial, time effective and efficient.
Due to the fact of expanding my work in A2
when using blogger you need to use different
ways to publish your work. I started using YouTube to publish videos onto to my blog to make
a change from using slideshare/issu, which is
a programme you would use to publish word
or PowerPoint documents. Not only did I use
YouTube to upload production logs or planning/
evaluation tasks I used it to upload drafts of music video and my final draft. I would often have
to export my video using a different compressor
in order to reduce file size so that I would not
have to be waiting around for large amounts
of time whilst the video uploaded, it still took
a bit of time but even though I had to wait for
the file to upload it
didn’t stop me from
carrying on with my
work.
Other online forms
include the essential
‘Prezi’ presentationmaker, you would
use this programme
to create a document with interactions to make it
more interesting
and keep people
attracted to my blog and make sure that they don’t get
bored or lose concentration. I used prezi’s in a number
of different research tasks, such as influence in music
styles, music genre and what is a digipak.
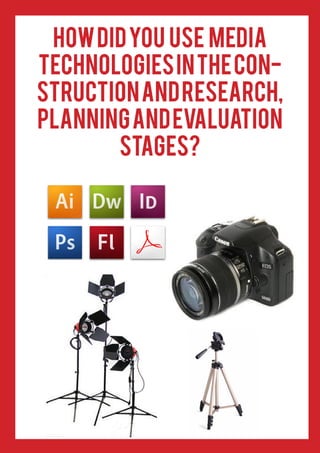
When shooting photos for my ancillary tasks I used a
Cannon 550D. This camera was equipped with a cinematic shutter speed with a 1.8 aperture lens. This
meant I could take photographs in shallow focus for a
more creative and artistic look. When editing these images I would place them into Adobe Photoshop cs6.
Once placing my images in adobe Photoshop I would
use the crop tool to make images the size I wanted for
my digipak or magazine advert and the Magic Wand
Tool is what assisted me in cutting out particular parts
of an image in a professional manner. The Brush Tool
also came in handy when making my magazine advert
look more interesting, as it meant I could scroll through
a selection of shapes and images and print them onto
the background of my advert. I used the effects that
we had in our media resources area to get a sepia look
to make my photos fit in with my genre. Once I had
edited all of my photos I then created my actual digipak on a program called Adobe InDesign, I previously
used this in AS, this meant that I had experience using
the program and just needed to refresh my memory on
how it works. I find that Adobe InDesign is a lot easier
to use then Photoshop as you don’t have to everything on a different layer, not using layers is easier as
previously when using Photoshop I forget to add new
layers, so when I want to go and change something
I cannot as I have something else on the same layer.
When creating my digipak I sued a variety of tools.
When adding my image I would place it and re-size to
the sixe that it needed
to be for me to work
around it. With my
image I would have it
‘at the back’ meaning
that when I added text
it would go in front of
the image instead of
behind. A few times
when I added text
it would go behind
the image, when this
happened I would
have to left click on
the image, go to ar-
range then send
back. Another tool
that I used within
Adobe InDesign is
the transparency
tool for my image
that goes behind
the actual CD. This
tool is found on the
tool bar at the top
of the program,
you can choose how transparent you want the
image to be.
When filming my actual music video I used the
same camera as I did to take the pictures with,
which is a Cannon 550D, so that my footage was
steady I always filmed with a tripod so that the
camera didn’t shake or move. This would give
me a more professional look to my footage.
When shooting in Green screen I used florescent strip Lights. This allowed me to brighten
up my actress so that the focus was on her. Not
only did it help me brighten up my actresses it
helped me to be able to use adobe premiere to
cut my actress out of the green screen. When
cutting out my actresses I used the keying tool.
The keying tool allowed me to select the green
and ‘delete’ the background so that I could add
my own effect. Also when using the strip lights
, it took away shadows from behind my actress,
this helped a lot when I was using the ultra key
tool in Adobe premiere to cut my footage as
it made I could do it all in one simple set with
adjusting the levels of contrast and brightness.
I had to learn this new skill of being able to use
Adobe premiere but once I got the hang of it
you understand what all the tools to and how it
works, it takes time and you get stressed but it’s
simple once you know how it works.
Once I had uploaded all of my footage into
Adobe premiere CS6 I used the razor tool so
that I was able to cut my clips at the right place
so that it linked up with my lyrics and the lip
syncing was perfect. This tool became very useful as it was used at all times, this was the main
tool that was being used during the time of
creating my music
video. To help me
figure out when
I need to cut my
footage I could
listen to the beat
of the music and
click ‘m’ when the
beat was changing. This would
leave a red mark at the top if the timeline, it allowed
me to know where the beat changed and how often I
needed to change my clip so I wouldn’t have the same
clip running for too long of a time. Another tool that I
used when creating my music video in Adobe Premiere
was the black and white tool, if I wanted a certain part of
my music video in black all I would have to do is search
for the tool the drag it on top of my certain clip and it
would change to black and white, I could then adjust the
contrast and brightness.
Not only did I used the lights when filming my green
screen, I used lights when filming my outside footage.
While filming outside I used different lights to when I
was filming my greens screen this time I used Red head
lights, these lights are brighter and more effective for
outside filming as they are more likely to be able to light
up a wider space where as the florescent strip lights
can’t. With Red head lights you have to position them in
the correct place for you to be able to still see you actor.
With filming outside I had to place the Red head light far
away when filming because when the light was closer
you couldn’t see any of the people in the view of the
camera.
Media technologies were also important in the evaluation stage of my coursework, I used Microsoft word to
draft all of my questions before I chose how I was going
to present them as I wanted to make them interesting
and pleasing for people to watch. A great way of presenting your work in an interesting way is to create a video
on Adobe premiere. This way I will be able to record my
voice and all images and clips within a clip to make sure
that whoever is watching my evaluations will stay interested.