How to concatenate two (or more) subvolumes, measured with XCT, using ImageJ
•
0 likes•219 views

Guide for volume concatenation after X-Ray Computed Tomography reconstruction. This is one of multiple ways to make a concatenation for a volume at IMDEA Materials Institute (Getafe, Spain, 2018). ImageJ software is used.

Recommended
Recommended
More Related Content
What's hot
What's hot (18)
Similar to How to concatenate two (or more) subvolumes, measured with XCT, using ImageJ
Similar to How to concatenate two (or more) subvolumes, measured with XCT, using ImageJ (20)
More from Javier García Molleja
More from Javier García Molleja (20)
Recently uploaded
Recently uploaded (20)
How to concatenate two (or more) subvolumes, measured with XCT, using ImageJ
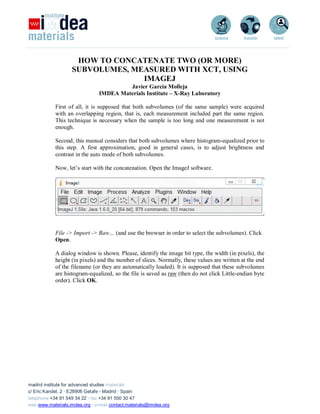
- 1. madrid institute for advanced studies materials c/ Eric Kandel, 2 · E28906 Getafe - Madrid · Spain telephone +34 91 549 34 22 · fax +34 91 550 30 47 web www.materials.imdea.org · e-mail contact.materials@imdea.org HOW TO CONCATENATE TWO (OR MORE) SUBVOLUMES, MEASURED WITH XCT, USING IMAGEJ Javier García Molleja IMDEA Materials Institute – X-Ray Laboratory First of all, it is supposed that both subvolumes (of the same sample) were acquired with an overlapping region, that is, each measurement included part the same region. This technique is necessary when the sample is too long and one measurement is not enough. Second, this manual considers that both subvolumes where histogram-equalized prior to this step. A first approximation, good in general cases, is to adjust brightness and contrast in the auto mode of both subvolumes. Now, let’s start with the concatenation. Open the ImageJ software. File -> Import -> Raw… (and use the browser in order to select the subvolumes). Click Open. A dialog window is shown. Please, identify the image bit type, the width (in pixels), the height (in pixels) and the number of slices. Normally, these values are written at the end of the filename (or they are automatically loaded). It is supposed that these subvolumes are histogram-equalized, so the file is saved as raw (then do not click Little-endian byte order). Click OK.
- 2. 2 The volume is loaded in the TOP-BOTTOM view. Now, it is time to identify which subvolume represents the top part of the sample and which one represents the bottom part of the sample. TOP REGION BOTTOM REGION Following step is to locate a slice, without artifacts, repeated in both subvolumes. If the overlapped region is in the middle of the sample, the identical slice must be at the end of the top subvolume and at the beginning of the bottom subvolume. Please, write the number of slice in both cases.
- 3. 3 Of course, the overlapped region will contain many slices. The choice of two identical slices depends on you (or if one volume is better than the other and you want to minimize the bad one…) TOP SLICE #1942 BOTTOM SLICE #189 Image -> Duplicate… these identical slices. Please, give them different names in order to know which is which and do not check Duplicate stack option. Image -> Stacks -> Tools -> Concatenate… (All open windows: uncheck, Image1: Top Slice #1942, Image2: Bottom Slice #189, Image3: None, Title: Concatenated Stacks or other of your choice, Keep original images: check, Open as 4D image: uncheck) and you will make a little stack composed by two slices. In this moment, you can select one of these slices as reference, i.e., the one that won’t move. In this case, randomly, top slice will be the reference. Important! For concatenation both subvolumes MUST have the same dimensions in horizontal and in vertical directions. Plugins -> StackReg (Transformation: Translation) is the plugin that will be used in order to move one subvolume with regard the other one, so the position of the top slice will coincide with the position of the bottom slice. Select the Translation option and click OK. This option will move in vertical and in horizontal the second slice in order to exactly match the position. For this operation it is necessary a good starting subvolume without operations. Why this condition? Because the plugin will move the slice in the X-axis and in the Y-axis. So, the number of translated pixels will be replaced by zeroes. If you have pixels with a gray level 0 in the borders, you will miss the whole operation. With Magnifying Glass tool make a zoom in the borders and move from the first slice to the second. You will see a column (or row) of zeroes. With Rectagular tool you can
- 4. 4 measure the amount of pixels. A rule of thumb about the translation: the origin of coordinates in ImageJ is the upper left corner of the first slice. Thus: a) If the slice is moved downwards (positive) the zeroes will be at top. b) If the slice is moved upwards (negative) the zeroes will be at bottom. c) If the slice is moved rightwards (positive) the zeroes will be at the left. d) If the slice is moved leftwards (negative) the zeroes will be at the right. In the present case, the slice of reference has no zeroes and the other one moved 6 pixels upwards and 19 pixels leftwards. Now, go to the stack that is not the reference. Image -> Transform -> Translate… (X offset (pixels): -19, Y offset (pixels): -6, Interpolation: None). Click OK and the subvolume will be moved to the right position. Click Yes in order to apply this operation for the whole volume.
- 5. 5 Now, it is time to concatenate the two subvolumes. It is worth mentioning that both subvolumes will be merged into a new volume and all slices must be unique. For this reason, it is necessary to duplicate all non coincident slices. Furthermore, it is possible to avoid shadows or any inconvenient slices during this step. For example, if the top subvolume has sample at the slice number 300, it could be interesting a duplication starting from the slice number 275. Storage saving is always a must! Image -> Duplicate… (Title: the most convenient, Duplicate Stack: checked, Range: 1- 1942 for top subvolume and 190-2120 for the bottom subvolume). In this case all slices will be different (note that Bottom Slice #189 is absent) and not useful slices are removed. Image -> Stacks -> Tools -> Concatenate… (All open windows: uncheck, Image1: Top Duplicated Subvolume, Image2: Bottom Duplicated Subvolume, Image3: None, Title: Concatenated Stacks or other of your choice, Keep original images: check, Open as 4D image: uncheck). Whith this operation subvolumes are concatenated and the complete sample is obtained in one stack. Image -> Type -> 8-bit if you want to minimize the file size.
- 6. 6 Now, if you want, you can use the Rectangle tool in order to make a ROI avoiding all zero grays obtained after the translation. Image -> Crop in order to make a new volume with only the ROI previously selected.
- 7. 7 File -> Save As -> Raw Data… and that’s all! Do not forget about give it a good filename with bit type, dimensions and operations involved. IN718_19052_10_z_Ctt_8b_crop_1210x1210x3873.raw