Arduino bt mobile robot r2.0
•Download as PPTX, PDF•
0 likes•453 views

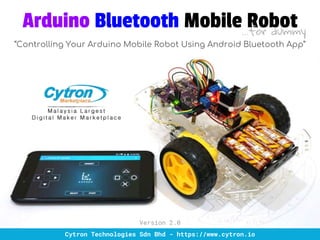
The document describes how to build an Arduino Bluetooth mobile robot and control it using an Android app. It includes sections on assembling the robot parts, controlling the DC motors, setting robot movements, using serial communication with the Bluetooth module, and connecting an Android app. The robot uses an Arduino Uno, motor driver, Bluetooth module, batteries and a 2WD chassis. Functions are created to define movements like forward, reverse, and turning. Serial communication with the Bluetooth module uses AT commands.

Recommended
More Related Content
What's hot
What's hot (20)
Similar to Arduino bt mobile robot r2.0
Similar to Arduino bt mobile robot r2.0 (20)
More from Fajar Baskoro
More from Fajar Baskoro (20)
Recently uploaded
Recently uploaded (20)
Arduino bt mobile robot r2.0
- 1. Arduino Bluetooth Mobile Robot “Controlling Your Arduino Mobile Robot Using Android Bluetooth App” Cytron Technologies Sdn Bhd - https://www.cytron.io Version 2.0 ...for dummy
- 2. Arduino Bluetooth Mobile Robot Module Content Arduino Bluetooth Mobile Robot by Cytron Technologies - https://www.cytron.io No TOPIC DURATION 1. Mobile Robot Introduction 10 minutes 2. Getting Started with Maker UNO 30 minutes 3. Assemble the Mobile Robot 1 hour 4. Control the DC Motor 10 minutes 5. Set the Robot Movement 20 minutes 6. Serial Communication 20 minutes 7. Bluetooth HC-05 AT Command 10 minutes 8. Arduino BT Joystick Android App 20 minutes 9. Arduino Bluetooth Mobile Robot Let’s Play! 30 minutes
- 3. Mobile Robot Introduction What is Mobile Robot? Robots that can move around in a physical environment. Mobile robots are generally controlled by software and use sensors and other gear to identify their surroundings. In general, we can divide mobile robot into ● Autonomous ○ Robot moves automatically based on the sensors and other gear. ● Manual ○ Robot moves depend on the command received from the instructor. Basic thing to develop mobile robot 1. Robot chassis. 2. Motor, motor driver and wheels. 3. Controller. 4. Battery. Arduino Bluetooth Mobile Robot by Cytron Technologies - https://www.cytron.io
- 4. Mobile Robot Introduction List of mobile robot parts for this workshop Arduino Bluetooth Mobile Robot by Cytron Technologies - https://www.cytron.io Quantity Description 1 set 2WD Smart Robot Car Chassis 1 Maker UNO (Arduino Uno compatible) 1 L298N Dual H Bridge Motor/Stepper Driver 1 set Male to Female Jumper Wire 1 set Male to Male Jumper Wire 4 PCB Stand 1 sets 4 x AA Battery 1 Bluetooth Serial Transceiver HC-05
- 5. Getting Started with Maker UNO What is Maker UNO? Maker UNO is an Arduino Uno compatible board which is specially designed for those who interested in learning electronic and programming for the first time. Arduino Bluetooth Mobile Robot by Cytron Technologies - https://www.cytron.io What is ? Arduino is an open-source electronics prototyping platform based on flexible, easy-to-use hardware and software. It’s intended for artists, designers, hobbyists, and anyone interested in creating interactive objects or environments.
- 6. Getting Started with Maker UNO Arduino Bluetooth Mobile Robot by Cytron Technologies - https://www.cytron.io On-board Piezo Buzzer Piezo buzzer is connected to pin 8 through slide switch. On-board Programmable Push Button This button is connected to pin 2 without a pull up. Reset Button Press to restart program. Mini Slide Switch Switch to connect/disconnect piezo buzzer to pin 8. USB Micro B Connector Main supply, program and debug purpose. On-board Series of LEDs All digital pins is equipped with LED. This LED can be controlled or act as signal indicator. USB to UART IC Equipped with CH340G for USB to UART conversion. Main Microcontroller Same as uC inside Arduino Uno - ATmega328P. Analog Input Pin This pin can be used for reading analog voltage. Arduino ISP Pin This pin can be used for SPI and bootloader programming. Serial Pin Hardware Serial (UART) is labeled with RX and TX pin. Power Pin USB 5V, regulated 3.3V 500mA and GND.
- 7. Getting Started with Maker UNO Arduino IDE Arduino IDE is an open source software and it is free. Maker UNO can be programmed using Arduino IDE. To get the latest version, you can download at https://www.arduino.cc/en/Main/Software Note: For Windows, we recommended to choose Windows Installer. Arduino Bluetooth Mobile Robot by Cytron Technologies - https://www.cytron.io
- 8. Getting Started with Maker UNO Arduino Bluetooth Mobile Robot by Cytron Technologies - https://www.cytron.io Menu Bar Button Bar Serial Monitor Sketch Name Status Bar IDE Output Code Area Board Name and Port
- 9. Getting Started with Maker UNO Arduino Bluetooth Mobile Robot by Cytron Technologies - https://www.cytron.io Verify Compiles and approves your code. It will detect errors in syntax (e.g. missing semi colon or parentheses). Upload Compiles and send your code to the Maker UNO. When you click it, you should see the lights (labelled RX & TX) on your board blink rapidly. New Sketch This button opens up a new code window tab. Open This button will let you open an existing sketch. Save This saves the currently active sketch. Serial Monitor Open Serial Monitor.
- 10. Getting Started with Maker UNO Maker UNO Driver In order to make your Maker UNO board can be detected by PC/laptop, you need to install CH340G driver. Download the driver from the following link. ● Windows - https://cdn.cytron.io/makeruno/CH341SER.EXE ● Mac - http://www.wch.cn/download/CH341SER_MAC_ZIP.html ● Linux - Normally is readily installed Arduino Bluetooth Mobile Robot by Cytron Technologies - https://www.cytron.io
- 11. Assemble the Mobile Robot Arduino Bluetooth Mobile Robot by Cytron Technologies - https://www.cytron.io
- 12. Assemble the Mobile Robot Arduino Bluetooth Mobile Robot by Cytron Technologies - https://www.cytron.io Wiring and connection
- 13. Wiring and connection Assemble the Mobile Robot Arduino Bluetooth Mobile Robot by Cytron Technologies - https://www.cytron.io Maker UNO Pin Connection Maker UNO Pin Connection 0 NC 10 Motor Driver IN3 1 NC 11 Motor Driver IN4 2 Internal Push Button 12 NC 3 Bluetooth Transmit 13 NC 4 Bluetooth Receive A0 NC 5 Motor Driver ENA A1 NC 6 Motor Driver ENB A2 NC 7 Motor Driver IN1 A3 NC 8 Internal Buzzer A4 NC 9 Motor Driver IN2 A5 NC
- 14. Control the DC Motor What is DC Motor? Any of a class of rotary electrical machines that converts direct current electrical energy into mechanical energy. There have 2 types if DC motor: 1. Brush 2. Brushless How brush DC motor works? Arduino Bluetooth Mobile Robot by Cytron Technologies - https://www.cytron.io
- 15. Control the DC Motor Arduino Bluetooth Mobile Robot by Cytron Technologies - https://www.cytron.io #define BUTTON 2 #define L298N_ENA 5 #define L298N_ENB 6 #define L298N_IN1 7 #define L298N_IN2 9 #define L298N_IN3 10 #define L298N_IN4 11 void setup() { pinMode(BUTTON, INPUT_PULLUP); pinMode(L298N_ENA, OUTPUT); pinMode(L298N_ENB, OUTPUT); pinMode(L298N_IN1, OUTPUT); pinMode(L298N_IN2, OUTPUT); pinMode(L298N_IN3, OUTPUT); pinMode(L298N_IN4, OUTPUT); } Define pin 2 as internal push button. Define pin 5 as motor driver ENA. Define pin 6 as motor driver ENB. Define pin 7 as motor driver IN1. Define pin 9 as motor driver IN2. Define pin 10 as motor driver IN3. Define pin 11 as motor driver IN4. Set push button as input with internal pull up. Set motor driver ENA as output. Set motor driver ENB as output. Set motor driver IN1 as output. Set motor driver IN2 as output. Set motor driver IN3 as output. Set motor driver IN4 as output. Moving DC Motor: Write and Upload this code to your Maker UNO.
- 16. Control the DC Motor Arduino Bluetooth Mobile Robot by Cytron Technologies - https://www.cytron.io void loop() { if (digitalRead(BUTTON) == LOW) { digitalWrite(L298N_ENA, HIGH); digitalWrite(L298N_IN1, HIGH); digitalWrite(L298N_IN2, LOW); digitalWrite(L298N_ENB, HIGH); digitalWrite(L298N_IN3, HIGH); digitalWrite(L298N_IN4, LOW); } else { digitalWrite(L298N_ENA, LOW); digitalWrite(L298N_IN1, LOW); digitalWrite(L298N_IN2, LOW); digitalWrite(L298N_ENB, LOW); digitalWrite(L298N_IN3, LOW); digitalWrite(L298N_IN4, LOW); } } If button is pressed, move the motor. Enable channel A Set the direction for motor 1 Enable channel B Set the direction for motor 2 If not pressed, both motors will stop Disable channel A Disable channel B Moving DC Motor: Write and Upload this code to your Maker UNO.
- 17. Control the DC Motor Result: When the push button is pressed, both motors will move to certain direction. So how to change the motor direction? This table shows the relationship between driver signal at channel A and motor 1 direction. Same applies to channel B and motor 2. Arduino Bluetooth Mobile Robot by Cytron Technologies - https://www.cytron.io Motor 1 ENA IN1 IN2 Stop LOW Don’t care Don’t care Clockwise HIGH LOW HIGH Counter Clockwise HIGH HIGH LOW Brake HIGH HIGH HIGH HIGH LOW LOW
- 18. Control the DC Motor Arduino Bluetooth Mobile Robot by Cytron Technologies - https://www.cytron.io if (digitalRead(BUTTON) == LOW) { analogWrite(L298N_ENA, 200); digitalWrite(L298N_IN1, HIGH); digitalWrite(L298N_IN2, LOW); analogWrite(L298N_ENB, 200); digitalWrite(L298N_IN3, HIGH); digitalWrite(L298N_IN4, LOW); } If button is pressed, move the motor. Set voltage at pin ENA to ~4V (200/255 x 5V) Set the direction for motor 1 Set voltage at pin ENB to ~4V (200/255 x 5V) Set the direction for motor 2 Controlling Motor Speed: You can control the motor speed by applying different voltage at enable pin by using analogWrite() function. For example:
- 19. Set the Robot Movement Basic Mobile Robot Movement You already know how to control the motor. By combining the movement of both motors, you can set the robot movement! Below is the basic movement of the robot: 1. Stop/Brake 2. Forward 3. Reverse 4. Turn Left 5. Turn Right Note: Everyone will have a different set of program to produce the same movement. This is because we don’t have the same connection especially on motor terminal. So find yours! Arduino Bluetooth Mobile Robot by Cytron Technologies - https://www.cytron.io How to move? Which direction I need to rotate so my body will move forward? ???
- 20. Set the Robot Movement Arduino Bluetooth Mobile Robot by Cytron Technologies - https://www.cytron.io Robot Movement: FORWARD
- 21. Set the Robot Movement Arduino Bluetooth Mobile Robot by Cytron Technologies - https://www.cytron.io Robot Movement: REVERSE
- 22. Set the Robot Movement Arduino Bluetooth Mobile Robot by Cytron Technologies - https://www.cytron.io Robot Movement: TURN RIGHT
- 23. Set the Robot Movement Arduino Bluetooth Mobile Robot by Cytron Technologies - https://www.cytron.io Robot Movement: TURN LEFT
- 24. Set the Robot Movement Arduino Bluetooth Mobile Robot by Cytron Technologies - https://www.cytron.io void robotForward(int robotSpeed) { analogWrite(L298N_ENA, robotSpeed); digitalWrite(L298N_IN1, LOW); digitalWrite(L298N_IN2, HIGH); analogWrite(L298N_ENB, robotSpeed); digitalWrite(L298N_IN3, HIGH); digitalWrite(L298N_IN4, LOW); } void robotReverse(int robotSpeed) { analogWrite(L298N_ENA, robotSpeed); digitalWrite(L298N_IN1, HIGH); digitalWrite(L298N_IN2, LOW); analogWrite(L298N_ENB, robotSpeed); digitalWrite(L298N_IN3, LOW); digitalWrite(L298N_IN4, HIGH); } Function for robot move forward, speed = 0 - 255 Enable channel A (Right motor) Set the direction for motor 1 to move forward Enable channel B (Left motor) Set the direction for motor 2 to move forward Function for robot go reverse, speed = 0 - 255 Enable channel A (Right motor) Set the direction for motor 1 to reverse Enable channel B (Left motor) Set the direction for motor 2 to reverse Create function: Once you have finalize your robot movement, create function for each movement - forward, reverse, turn right, turn left and stop.
- 25. Set the Robot Movement Arduino Bluetooth Mobile Robot by Cytron Technologies - https://www.cytron.io void robotTurnRight(int robotSpeed) { analogWrite(L298N_ENA, robotSpeed); digitalWrite(L298N_IN1, HIGH); digitalWrite(L298N_IN2, LOW); analogWrite(L298N_ENB, robotSpeed); digitalWrite(L298N_IN3, HIGH); digitalWrite(L298N_IN4, LOW); } void robotTurnLeft(int robotSpeed) { analogWrite(L298N_ENA, robotSpeed); digitalWrite(L298N_IN1, LOW); digitalWrite(L298N_IN2, HIGH); analogWrite(L298N_ENB, robotSpeed); digitalWrite(L298N_IN3, LOW); digitalWrite(L298N_IN4, HIGH); } Function for robot turn right, speed = 0 - 255 Enable channel A (Right motor) Set the direction for motor 1 to go reverse Enable channel B (Left motor) Set the direction for motor 2 to move forward Function for robot turn left, speed = 0 - 255 Enable channel A (Right motor) Set the direction for motor 1 to move forward Enable channel B (Left motor) Set the direction for motor 2 to reverse Create function: Once you have finalize your robot movement, create function for each movement - forward, reverse, turn right, turn left and stop.
- 26. Set the Robot Movement Arduino Bluetooth Mobile Robot by Cytron Technologies - https://www.cytron.io void robotStop() { digitalWrite(L298N_ENA, LOW); digitalWrite(L298N_IN1, LOW); digitalWrite(L298N_IN2, LOW); digitalWrite(L298N_ENB, LOW); digitalWrite(L298N_IN3, LOW); digitalWrite(L298N_IN4, LOW); } void robotBrake() { digitalWrite(L298N_ENA, HIGH); digitalWrite(L298N_IN1, HIGH); digitalWrite(L298N_IN2, HIGH); digitalWrite(L298N_ENB, HIGH); digitalWrite(L298N_IN3, HIGH); digitalWrite(L298N_IN4, HIGH); } Function for robot stop Enable channel A (Right motor) Motor 1 stop Enable channel B (Left motor) Motor 2 stop Function for robot brake Enable channel A (Right motor) Motor 1 brake Enable channel B (Left motor) Motor 2 brake Create function: Once you have finalize your robot movement, create function for each movement - forward, reverse, turn right, turn left and stop.
- 27. Serial Communication What is Serial Communication? It is a most popular communication protocol (also known as UART) used to communicate between the Arduino board and a computer or other devices. ● Bluetooth: HC-05, HC-06. ● GSM: SIM900A, SIM800L. ● WiFi module: ESP8266. ● RFid reader: 125kHz, MiFare. ● GPS, RF module, and more... Hardware Serial It communicates on digital pins 0 (RX) and 1 (TX) as well as with the computer via USB. Thus, if you use these functions, you cannot also use pins 0 and 1 for digital input or output. Note: Please disconnect pin 0 and 1 during uploading sketch. Arduino Bluetooth Mobile Robot by Cytron Technologies - https://www.cytron.io
- 28. Serial Communication Software Serial Due to limited number of hardware serial (only at pin 0 and 1) in Arduino Uno, SoftwareSerial library has been developed to allow serial communication on other digital pins of the Arduino Uno board. However, there still have limitation on SoftwareSerial library for Arduino Uno: ● If using multiple software serial ports, only one can receive data at a time. ● Current maximum RX speed is 57600 bps. ● RX doesn't work on pin 13. Arduino Bluetooth Mobile Robot by Cytron Technologies - https://www.cytron.io
- 29. Bluetooth HC-05 AT Command What is AT Command? AT commands are instructions used to control a modem. AT is the abbreviation of ATtention. Every command line starts with "AT" or "at", as a prefix that informs the modem about the start of a command line. Bluetooth HC-05 AT Command Arduino Bluetooth Mobile Robot by Cytron Technologies - https://www.cytron.io AT Command Description AT Check the connection. AT+VERSION Check bluetooth version. For example, it returned VERSION:3.0-20170609 AT+NAME=.... Set bluetooth name. For example AT+NAME=Maker UNO AT+PSWD="...." Set bluetooth pin number. For example AT+PSWD=”8888” AT+ORGL Restore factory setting
- 30. Bluetooth HC-05 AT Command Arduino Bluetooth Mobile Robot by Cytron Technologies - https://www.cytron.io #include <SoftwareSerial.h> SoftwareSerial HC05Serial(3, 4); void setup() { Serial.begin(9600); HC05Serial.begin(38400); } void loop() { if (Serial.available()) { HC05Serial.write(Serial.read()); } if (HC05Serial.available()) { Serial.write(HC05Serial.read()); } } Include SoftwareSerial function Set pin 3 as RX and 4 as TX Initialize Serial with 9600bps Initialize bluetooth serial with 38400bps If AT command received from Serial Monitor Send AT command to bluetooth If response received from bluetooth Display on Serial Monitor Upload this sketch to Maker UNO.
- 31. Bluetooth HC-05 AT Command Now set your own name and pin number at your bluetooth module. For example: Arduino Bluetooth Mobile Robot by Cytron Technologies - https://www.cytron.io Send Received AT OK AT+VERSION VERSION:3.0-20170609 OK AT+NAME=Maker UNO OK AT+PSWD=”8888” OK
- 32. Bluetooth HC-05 AT Command Arduino Bluetooth Mobile Robot by Cytron Technologies - https://www.cytron.io To enter AT command mode in HC-05 bluetooth module, please follow these steps: 1. Turn off the bluetooth module. 2. Press and hold button on the bluetooth module. 3. Turn on the bluetooth module. 4. Release the button. Open Serial Monitor and set to 9600 baud and Both NL & CR. Next, configure bluetooth with AT command.
- 33. Arduino BT Joystick Android App Arduino Bluetooth Mobile Robot by Cytron Technologies - https://www.cytron.io #include <SoftwareSerial.h> SoftwareSerial HC05Serial(3, 4); void setup() { Serial.begin(9600); HC05Serial.begin(9600); } void loop() { if (Serial.available()) { HC05Serial.write(Serial.read()); } if (HC05Serial.available()) { Serial.write(HC05Serial.read()); } } Include SoftwareSerial function Set pin 3 as RX and 4 as TX Initialize Serial with 9600bps Initialize bluetooth serial with 9600bps If AT command received from Serial Monitor Send AT command to bluetooth If response received from bluetooth Display on Serial Monitor Upload this sketch to Maker UNO. Then, we can see the status of the button on the Arduino BT Joystick app at the Serial Monitor when the bluetooth is connected.
- 34. Arduino BT Joystick Android App In this workshop, we will use Arduino BT Joystick Free. Why? Because it is free, easy to use and have a nice layout. So let’s install and open it. Arduino Bluetooth Mobile Robot by Cytron Technologies - https://www.cytron.io
- 35. Arduino BT Joystick Android App FYI, Arduino BT Joystick Free is no longer available in Play Store. But don’t worry, we have prepared the APK file. You can download here (click using your phone) from Google Drive. Arduino Bluetooth Mobile Robot by Cytron Technologies - https://www.cytron.io
- 36. Arduino BT Joystick Android App Finish download, click on the installer (APK) file. By default your phone setting is not allowed any installation except from Play Store. Unless you’re sure the sources, you can allow the installation on your phone setting. Arduino Bluetooth Mobile Robot by Cytron Technologies - https://www.cytron.io
- 37. Arduino BT Joystick Android App Proceed with the installation. Once complete, the app icon will appear on your phone - home screen. To open it, just tap on the icon as usual. Arduino Bluetooth Mobile Robot by Cytron Technologies - https://www.cytron.io
- 38. Arduino BT Joystick Android App Now we need to configure a bit on this app. 1. Click on the Menu and choose Settings. 1. Click Define the send delay. Arduino Bluetooth Mobile Robot by Cytron Technologies - https://www.cytron.io
- 39. Arduino BT Joystick Android App 3. Update value in Define the send delay (ms) from 20 to 200. Click OK and Save. 3. It will return to the main screen. Now click CONNECT. Arduino Bluetooth Mobile Robot by Cytron Technologies - https://www.cytron.io
- 40. Arduino BT Joystick Android App 5. Choose your bluetooth name. Make sure your bluetooth name is unique. Else, other participant will connect to your bluetooth. :) 5. Put your bluetooth pin number and click OK. Arduino Bluetooth Mobile Robot by Cytron Technologies - https://www.cytron.io
- 41. Arduino BT Joystick Android App 7. If the connection successful, the CONNECT button will update to DISCONNECT. If you click on the DISCONNECT button, it will disconnect the bluetooth connection. 7. Then, if you notice, there have a set of data display on Serial Monitor (during bluetooth is connected). This is the status of the button on the Arduino BT Joystick app. Arduino Bluetooth Mobile Robot by Cytron Technologies - https://www.cytron.io
- 42. Arduino BT Joystick Android App Every 200ms (set in Define the send delay), this app will send a set of data as shown in the picture above. If no key have been pressed, it sends #b=0#. Arduino Bluetooth Mobile Robot by Cytron Technologies - https://www.cytron.io
- 43. Arduino BT Joystick Android App Arduino Bluetooth Mobile Robot by Cytron Technologies - https://www.cytron.io #include <SoftwareSerial.h> SoftwareSerial HC05Serial(3, 4); char inChar; String inString; void setup() { Serial.begin(9600); HC05Serial.begin(9600); } Include SoftwareSerial function Set pin 3 as RX and 4 as TX Global char variable for inChar Global string variable called inString Initialize Serial with 9600bps Initialize bluetooth serial with 9600bps After knowing the data set, now we need to grab the data and do comparison in the program, so that we can make specific action for specific key.
- 44. Arduino BT Joystick Android App Arduino Bluetooth Mobile Robot by Cytron Technologies - https://www.cytron.io void loop() { if (HC05Serial.available()) { delay(100); inString = ""; while (HC05Serial.available()) { inChar = HC05Serial.read(); inString = inString + inChar; } if (inString == "#b=0#") { Serial.println("None"); } else if (inString == "#b=1#") { Serial.println("Up"); } } } If bluetooth received the data from the app Wait for 100ms so that all the data is received Clear inString variable While the data set is available Read and store to inChar variable Combined characters to form a single string Do comparison, if inString = "#b=0#" Print on Serial Monitor “None” Do comparison, if inString = "#b=1#" Print on Serial Monitor “Up”
- 45. Arduino Bluetooth Mobile Robot Arduino Bluetooth Mobile Robot by Cytron Technologies - https://www.cytron.io This is the final stage to create Arduino Bluetooth Mobile Robot. Make sure the previous chapters is working. 1. Set the robot movement together with functions. 2. Configure bluetooth using AT command (name, pin #). 3. Read data set from the app. 4. Compare and do specific action. 5. Now, combine no 1 and 4.
- 46. Arduino BT Joystick Android App Arduino Bluetooth Mobile Robot by Cytron Technologies - https://www.cytron.io #define RX 3 #define TX 4 #include <SoftwareSerial.h> SoftwareSerial HC05Serial(RX, TX); #define BUTTON 2 #define L298N_ENA 5 #define L298N_ENB 6 #define L298N_IN1 7 #define L298N_IN2 9 #define L298N_IN3 10 #define L298N_IN4 11 char inChar; String inString; Define pin 3 as received pin = HC05 TX. Define pin 4 as transmit pin = HC05 RX. Include SoftwareSerial function Set pin 3 as RX and 4 as TX Define pin 2 as internal push button. Define pin 5 as motor driver ENA. Define pin 6 as motor driver ENB. Define pin 7 as motor driver IN1. Define pin 9 as motor driver IN2. Define pin 10 as motor driver IN3. Define pin 11 as motor driver IN4. Global char variable for inChar Global string variable called inString
- 47. Arduino BT Joystick Android App Arduino Bluetooth Mobile Robot by Cytron Technologies - https://www.cytron.io void setup() { Serial.begin(9600); HC05Serial.begin(9600); pinMode(BUTTON, INPUT_PULLUP); pinMode(L298N_ENA, OUTPUT); pinMode(L298N_ENB, OUTPUT); pinMode(L298N_IN1, OUTPUT); pinMode(L298N_IN2, OUTPUT); pinMode(L298N_IN3, OUTPUT); pinMode(L298N_IN4, OUTPUT); } Initialize Serial with 9600bps Initialize bluetooth serial with 9600bps Set push button as input with internal pull up. Set motor driver ENA as output. Set motor driver ENB as output. Set motor driver IN1 as output. Set motor driver IN2 as output. Set motor driver IN3 as output. Set motor driver IN4 as output.
- 48. BT JoysArduino tick Android App Arduino Bluetooth Mobile Robot by Cytron Technologies - https://www.cytron.io void loop() { if (HC05Serial.available()) { delay(100); inString = ""; while (HC05Serial.available()) { inChar = HC05Serial.read(); inString = inString + inChar; } if (inString == "#b=0#") { robotStop(); } else if (inString == "#b=1#") { robotForward(200); } else if (inString == "#b=2#") { robotReverse(200); } else if (inString == "#b=3#") { robotTurnLeft(150); } else if (inString == "#b=4#") { robotTurnRight(150); } } } If bluetooth received the data from the app Wait for 100ms so that all the data is received Clear inString variable While the data set is available Read and store to inChar variable Combined characters to form a single string If inString = "#b=0#" Robot stop If inString = "#b=1#" Robot move forward with PWM 200 If inString = "#b=2#" Robot go reverse with PWM 200 If inString = "#b=3#" Robot turn left with PWM 150 If inString = "#b=4#" Robot turn right with PWM 150
- 49. Arduino BT Joystick Android App Arduino Bluetooth Mobile Robot by Cytron Technologies - https://www.cytron.io void robotForward(int robotSpeed) { analogWrite(L298N_ENA, robotSpeed); digitalWrite(L298N_IN1, LOW); digitalWrite(L298N_IN2, HIGH); analogWrite(L298N_ENB, robotSpeed); digitalWrite(L298N_IN3, HIGH); digitalWrite(L298N_IN4, LOW); } void robotReverse(int robotSpeed) { analogWrite(L298N_ENA, robotSpeed); digitalWrite(L298N_IN1, HIGH); digitalWrite(L298N_IN2, LOW); analogWrite(L298N_ENB, robotSpeed); digitalWrite(L298N_IN3, LOW); digitalWrite(L298N_IN4, HIGH); } Function for robot move forward, speed = 0 - 255 Enable channel A (Right motor) Set the direction for motor 1 to move forward Enable channel B (Left motor) Set the direction for motor 2 to move forward Function for robot go reverse, speed = 0 - 255 Enable channel A (Right motor) Set the direction for motor 1 to reverse Enable channel B (Left motor) Set the direction for motor 2 to reverse
- 50. Arduino BT Joystick Android App Arduino Bluetooth Mobile Robot by Cytron Technologies - https://www.cytron.io void robotTurnRight(int robotSpeed) { analogWrite(L298N_ENA, robotSpeed); digitalWrite(L298N_IN1, HIGH); digitalWrite(L298N_IN2, LOW); analogWrite(L298N_ENB, robotSpeed); digitalWrite(L298N_IN3, HIGH); digitalWrite(L298N_IN4, LOW); } void robotTurnLeft(int robotSpeed) { analogWrite(L298N_ENA, robotSpeed); digitalWrite(L298N_IN1, LOW); digitalWrite(L298N_IN2, HIGH); analogWrite(L298N_ENB, robotSpeed); digitalWrite(L298N_IN3, LOW); digitalWrite(L298N_IN4, HIGH); } Function for robot turn right, speed = 0 - 255 Enable channel A (Right motor) Set the direction for motor 1 to go reverse Enable channel B (Left motor) Set the direction for motor 2 to move forward Function for robot turn left, speed = 0 - 255 Enable channel A (Right motor) Set the direction for motor 1 to move forward Enable channel B (Left motor) Set the direction for motor 2 to reverse
- 51. Arduino BT Joystick Android App Arduino Bluetooth Mobile Robot by Cytron Technologies - https://www.cytron.io void robotStop() { digitalWrite(L298N_ENA, LOW); digitalWrite(L298N_IN1, LOW); digitalWrite(L298N_IN2, LOW); digitalWrite(L298N_ENB, LOW); digitalWrite(L298N_IN3, LOW); digitalWrite(L298N_IN4, LOW); } void robotBrake() { digitalWrite(L298N_ENA, HIGH); digitalWrite(L298N_IN1, HIGH); digitalWrite(L298N_IN2, HIGH); digitalWrite(L298N_ENB, HIGH); digitalWrite(L298N_IN3, HIGH); digitalWrite(L298N_IN4, HIGH); } Function for robot stop Enable channel A (Right motor) Motor 1 stop Enable channel B (Left motor) Motor 2 stop Function for robot brake Enable channel A (Right motor) Motor 1 brake Enable channel B (Left motor) Motor 2 brake
- 52. End of Workshop Arduino Bluetooth Mobile Robot by Cytron Technologies - https://www.cytron.io Thank you and Let’s Play! Q & A Session