Downloaded 146 times


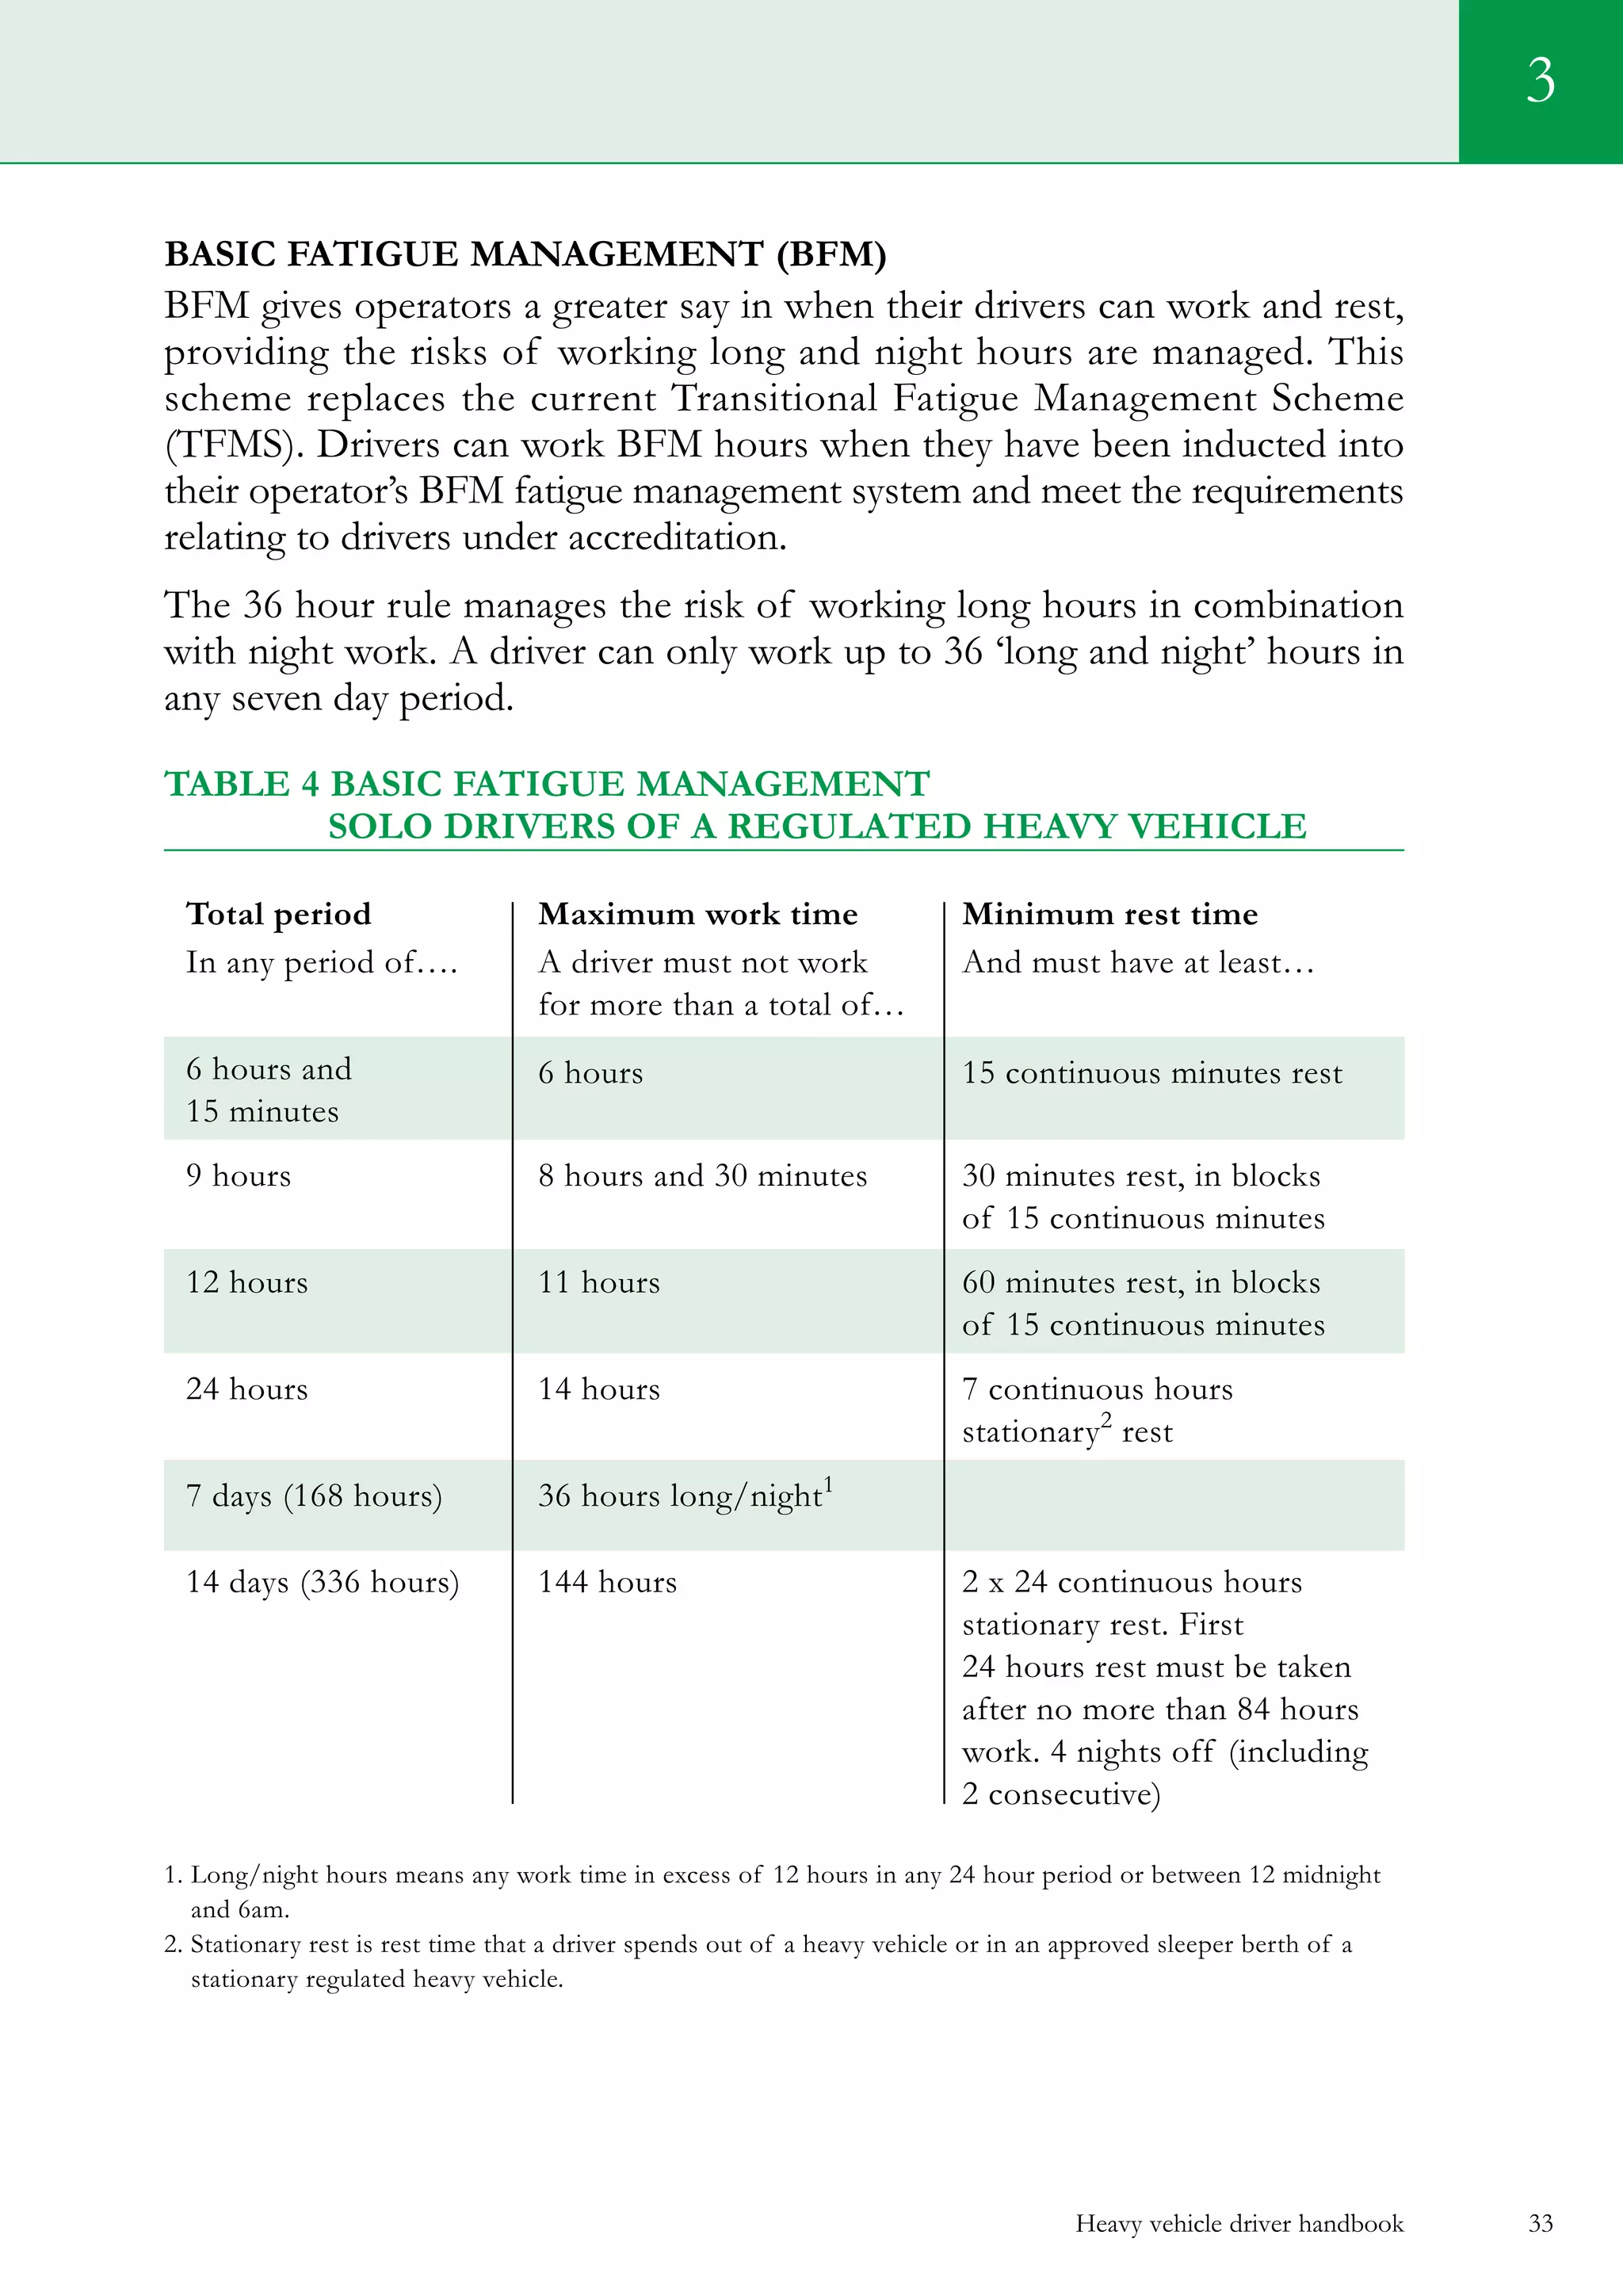

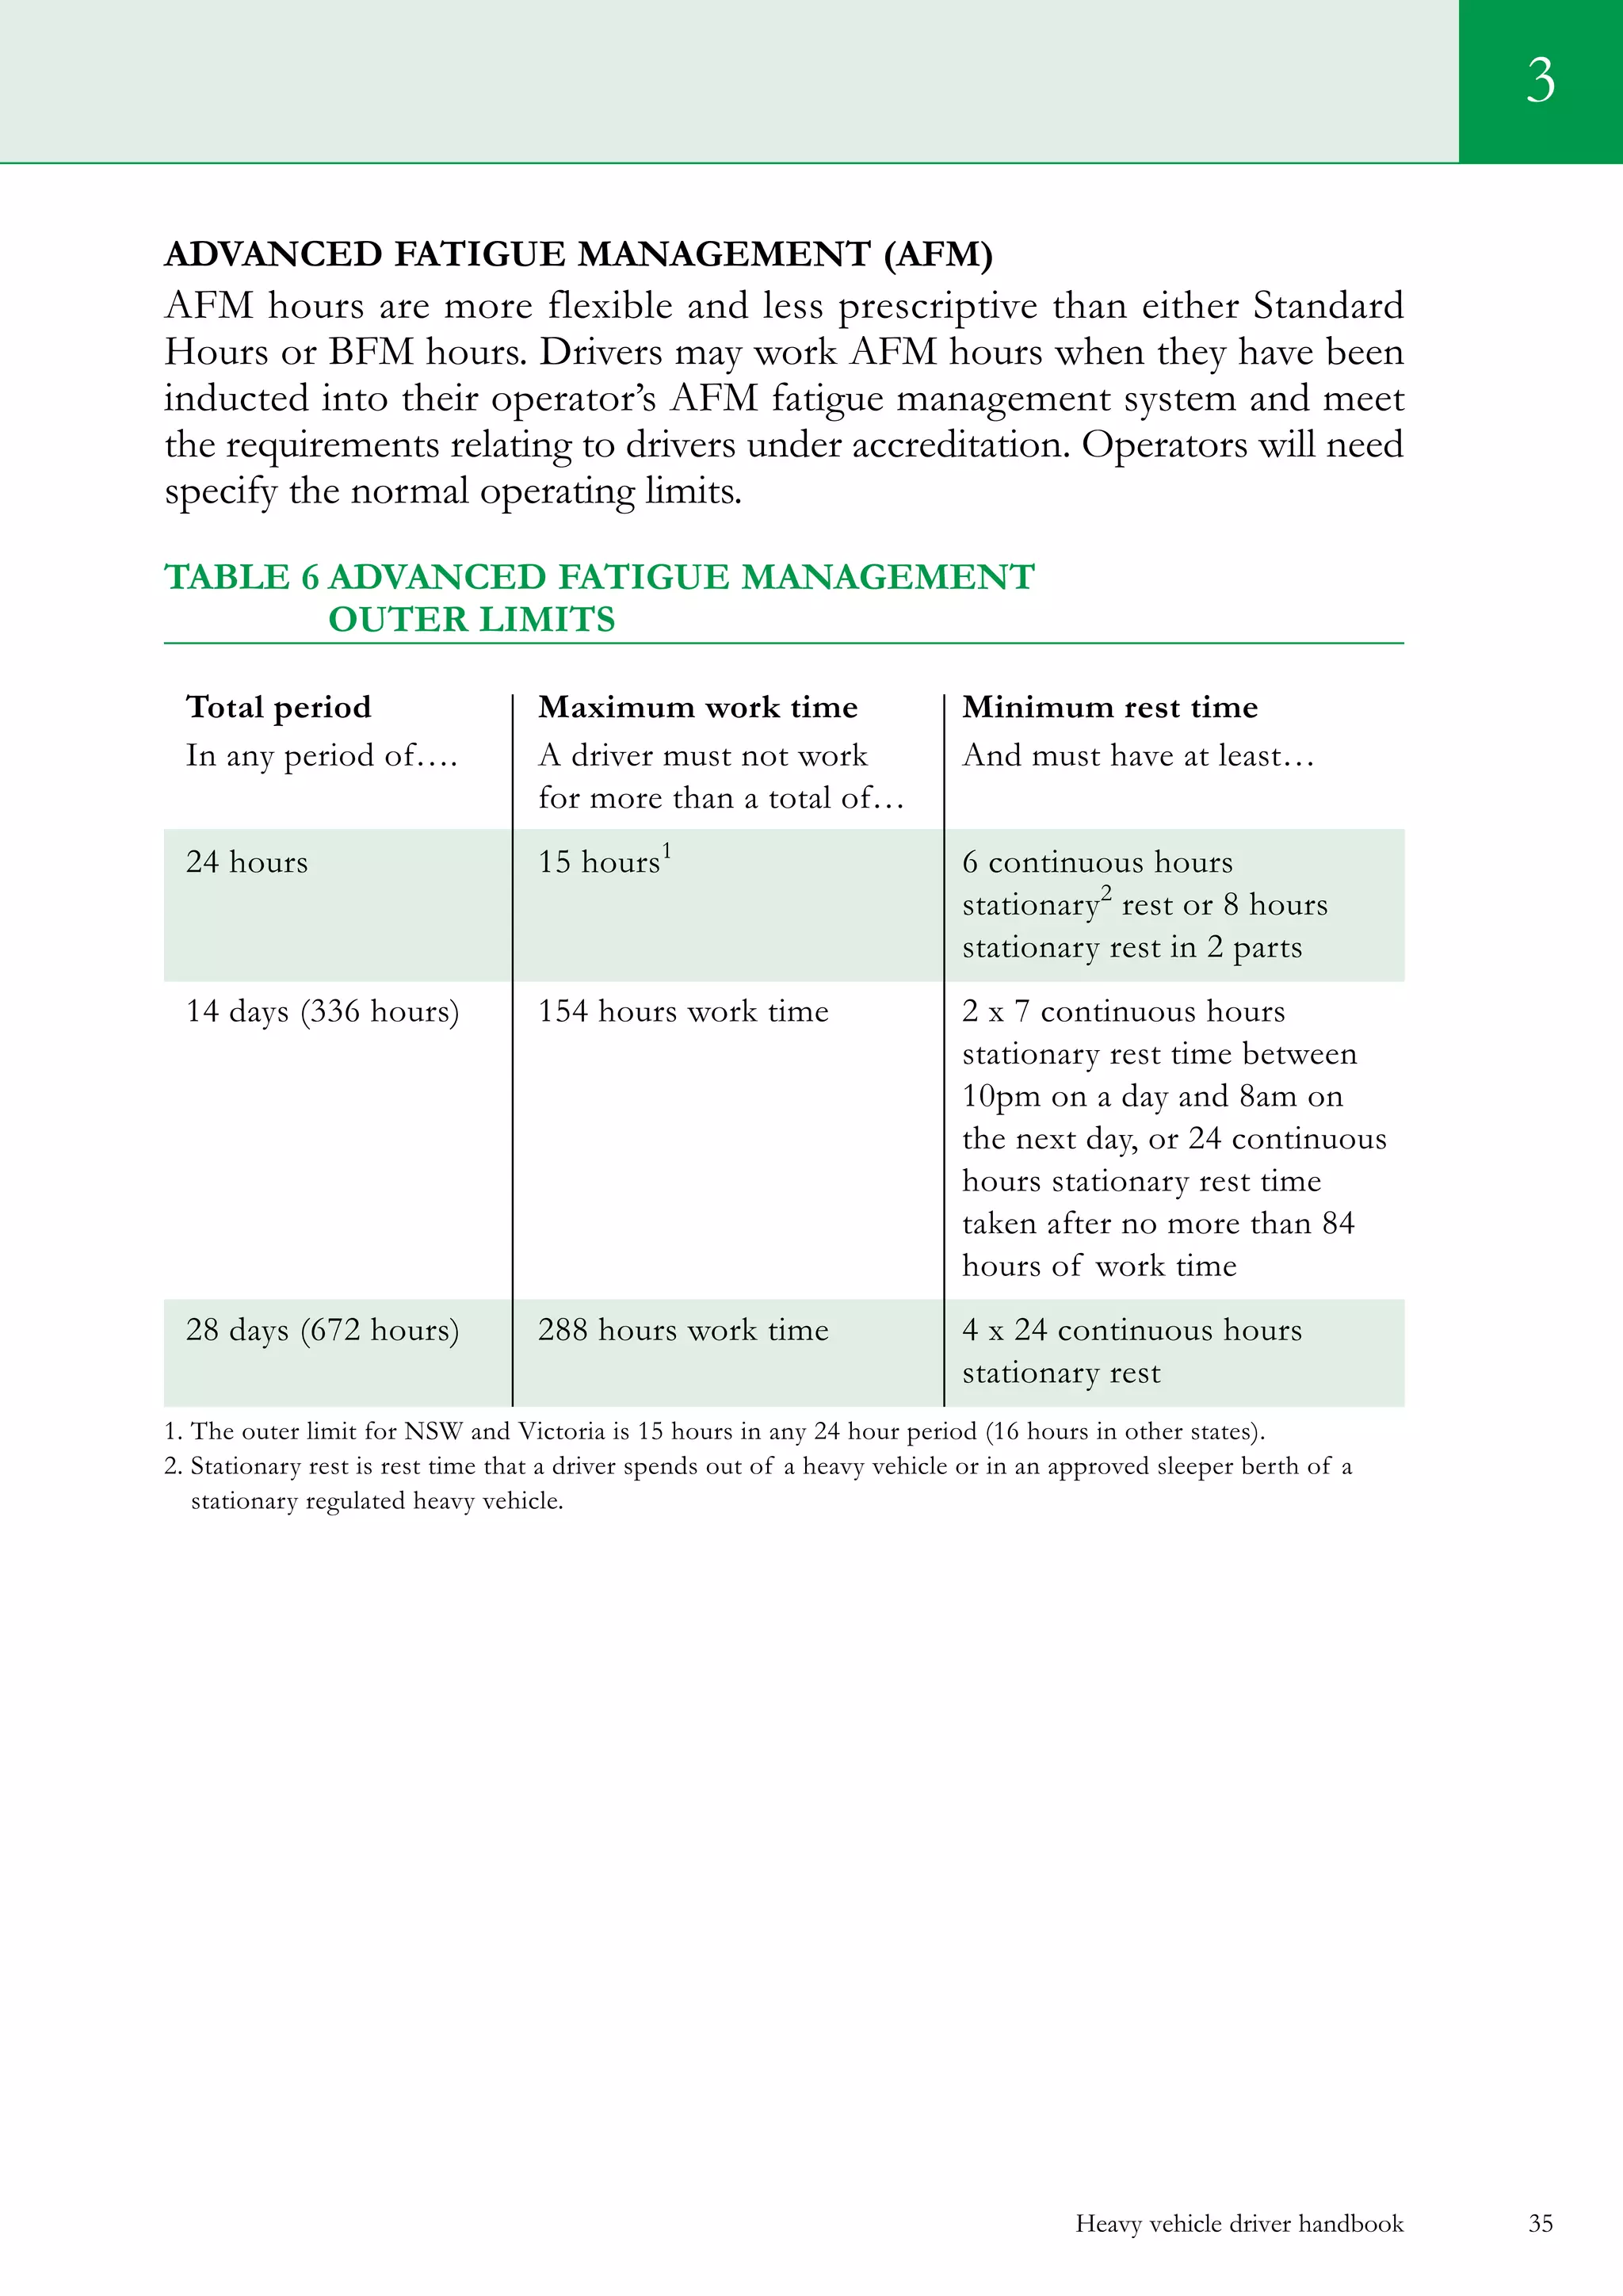


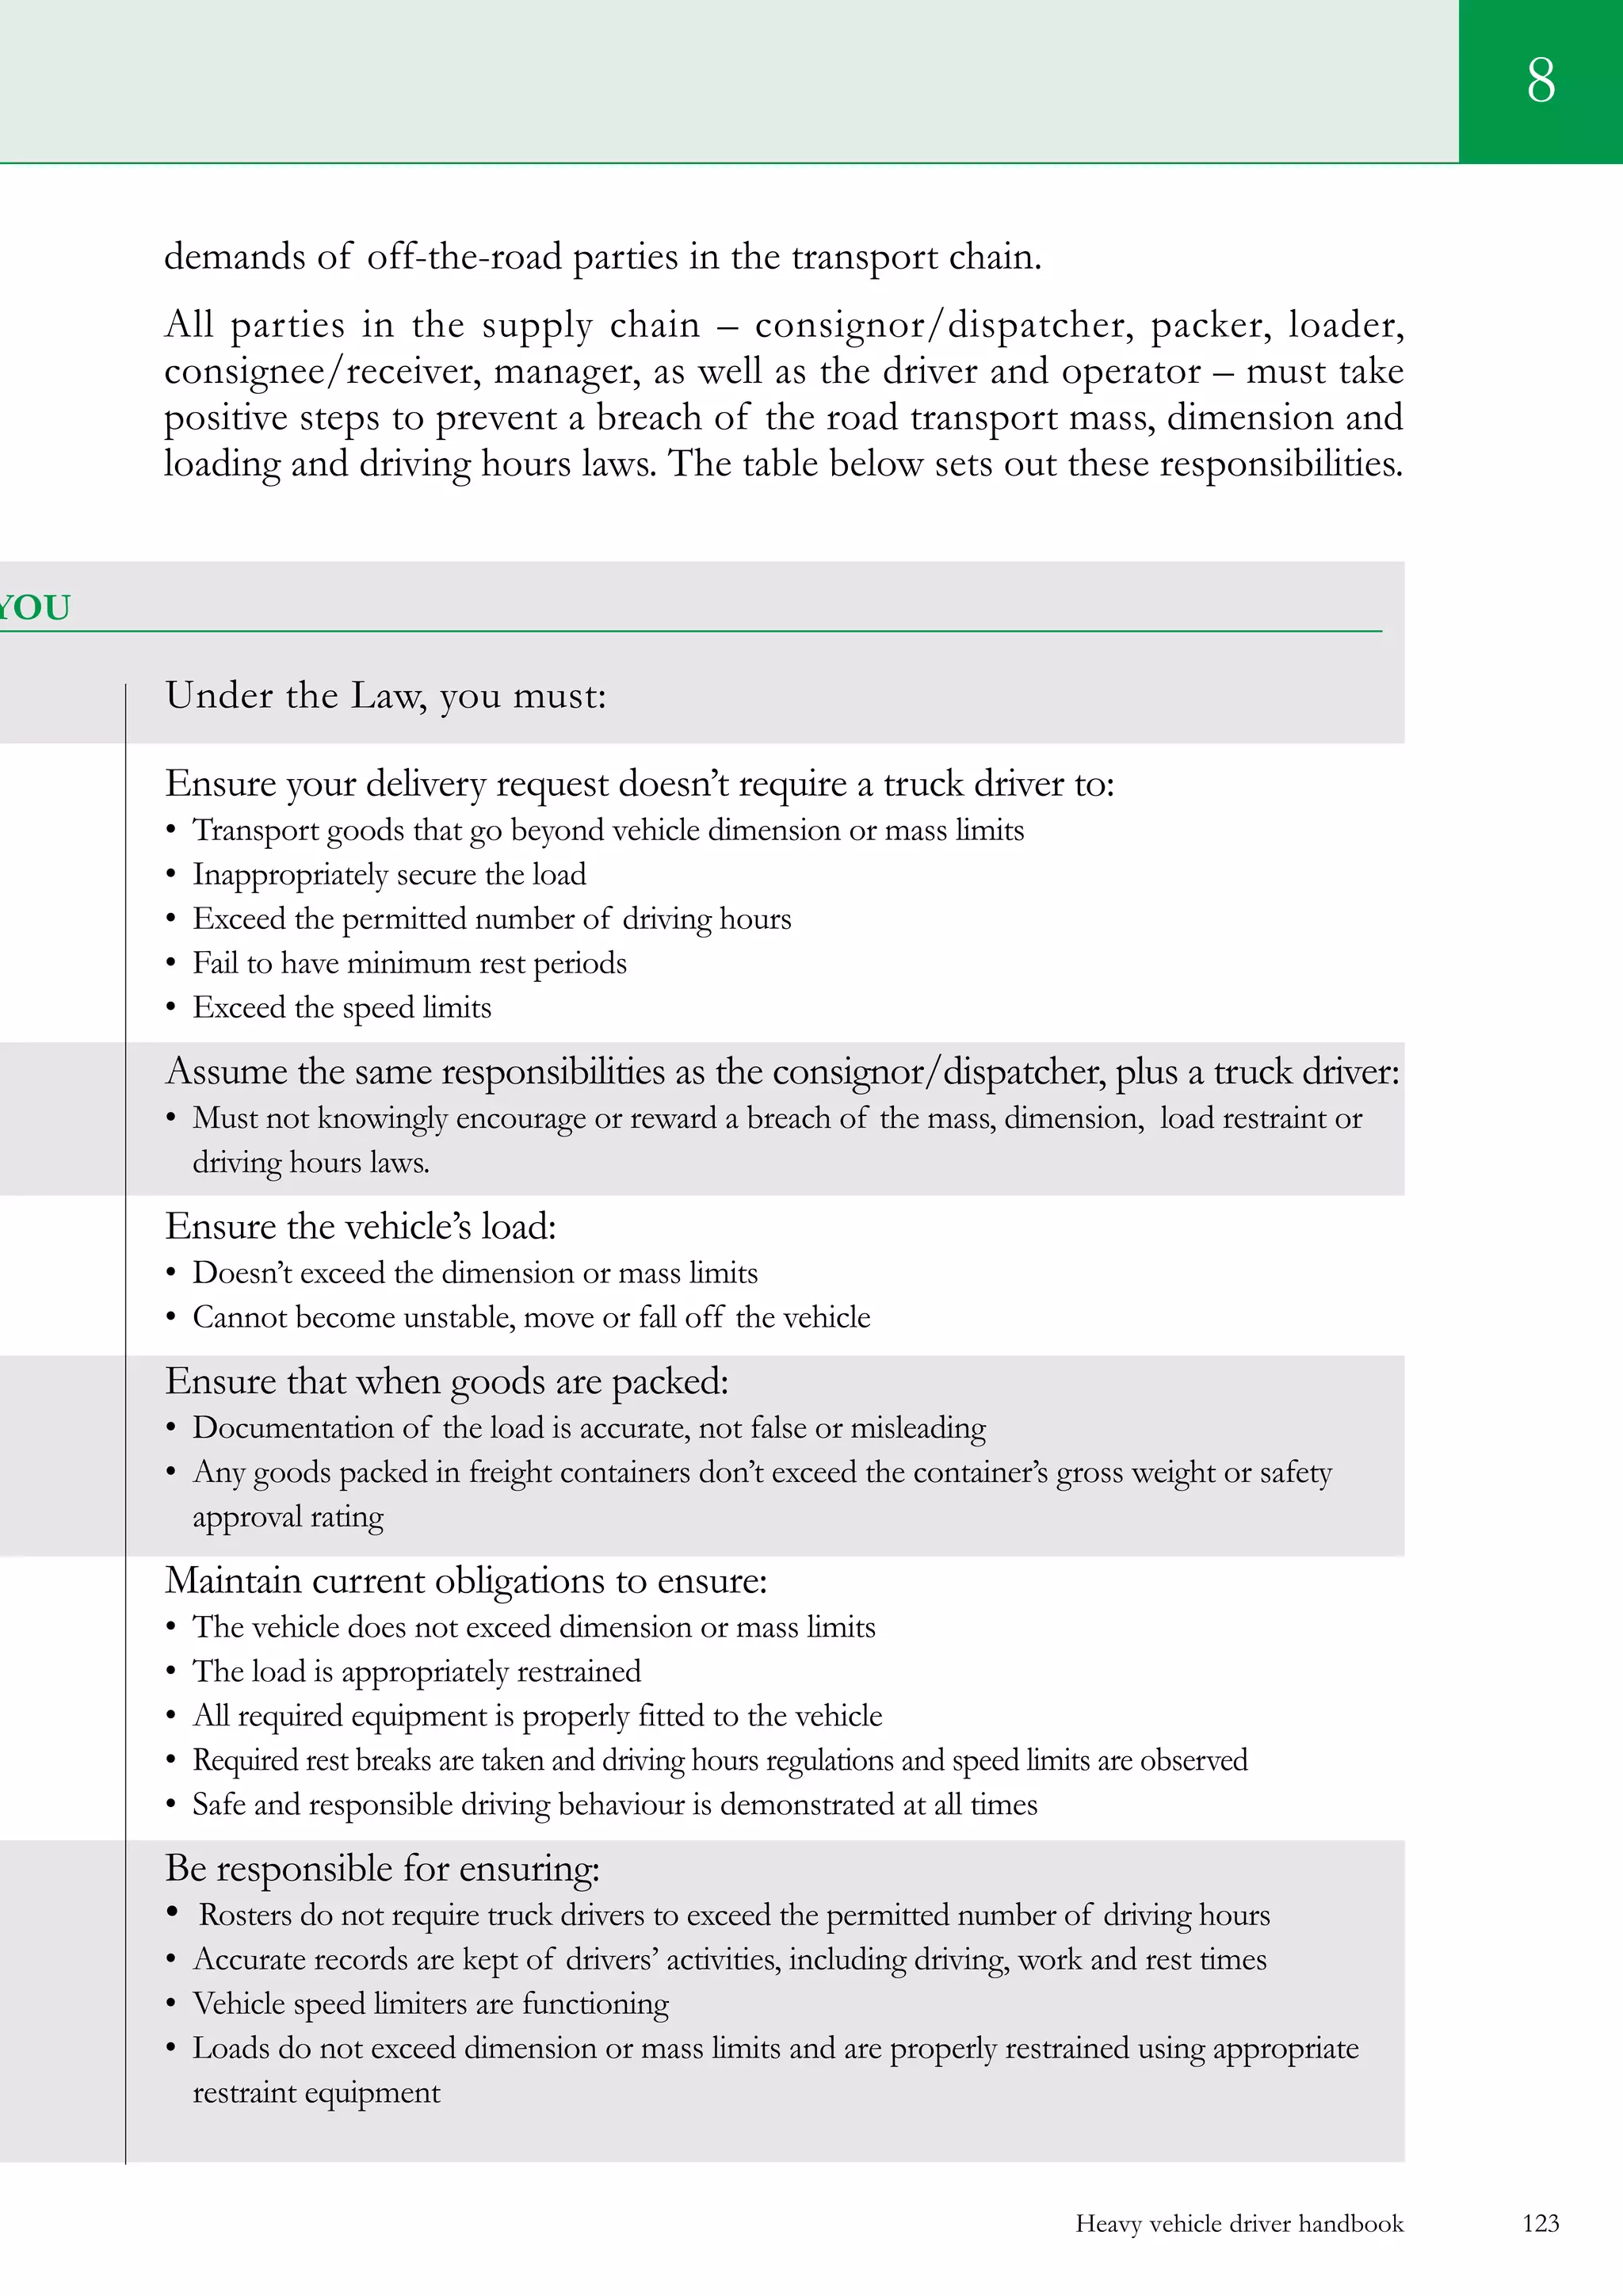


This document is a handbook that provides guidance for heavy vehicle drivers on obtaining licenses, managing driver health and fatigue, safe driving techniques, and road rules specific to heavy vehicles. It discusses getting the appropriate license class, medical requirements, learning to drive, and competency assessments. It also covers fatigue management, work and rest options, alcohol and drug policies, and record keeping requirements. The handbook provides an overview of basic driving skills like vehicle control, hill driving, and braking. It outlines heavy vehicle-specific road rules regarding speed limits, intersections, overtaking, parking, and restricted areas. The intended purpose is to help heavy vehicle drivers understand the regulations and skills needed for safe professional operation.


