Downloaded 753 times
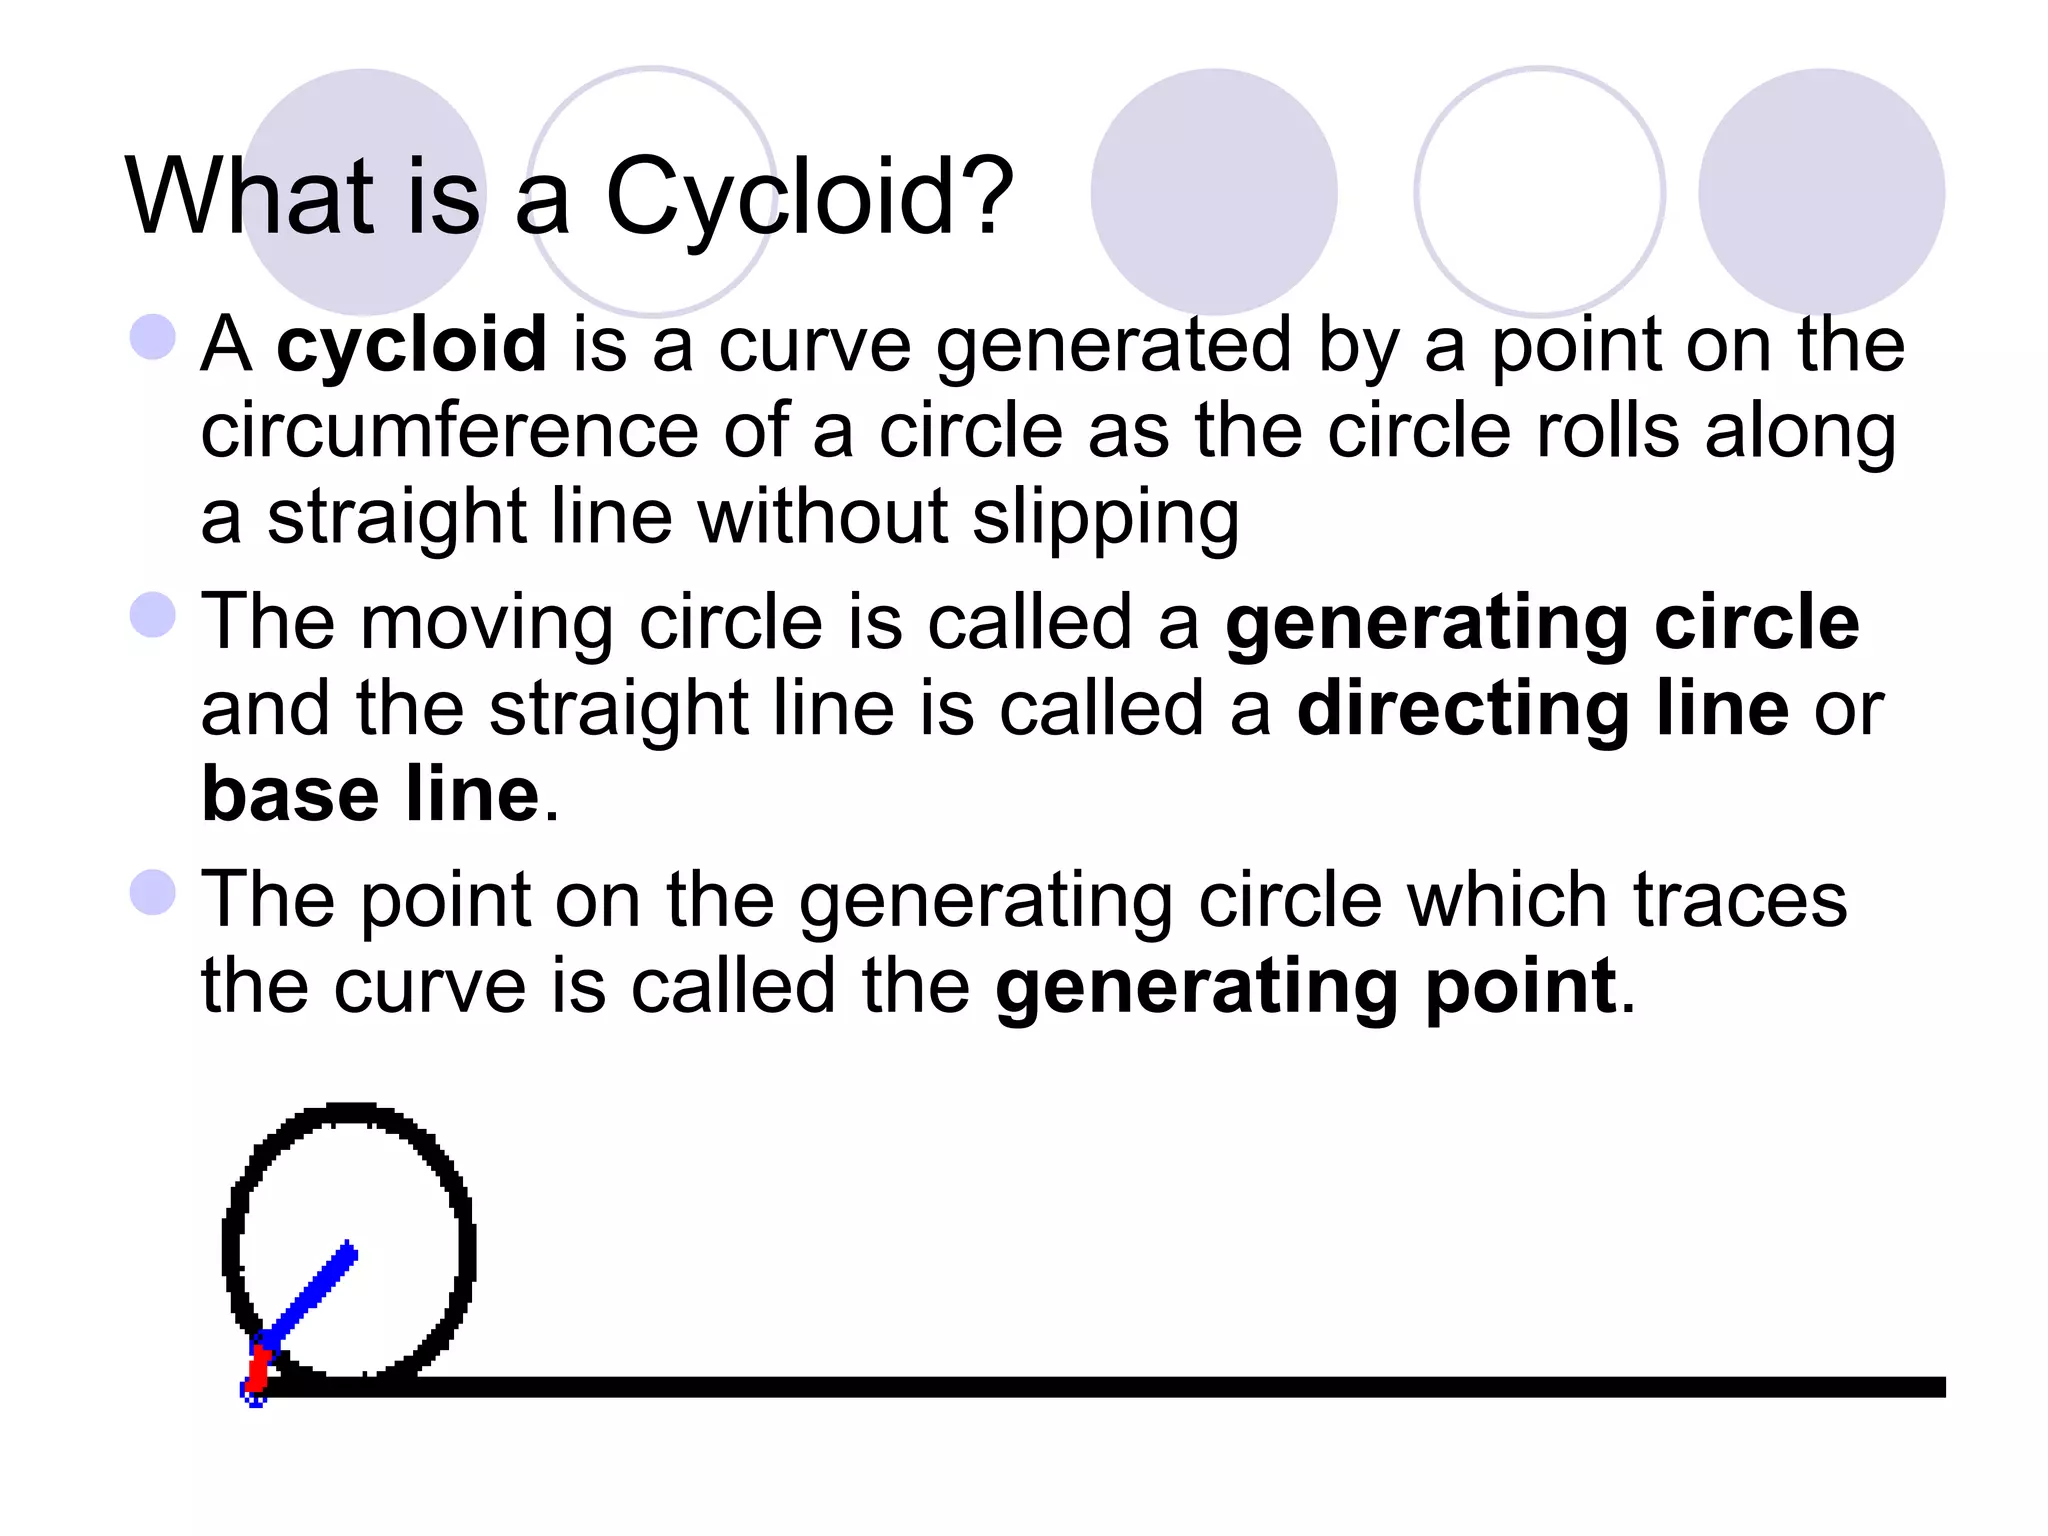

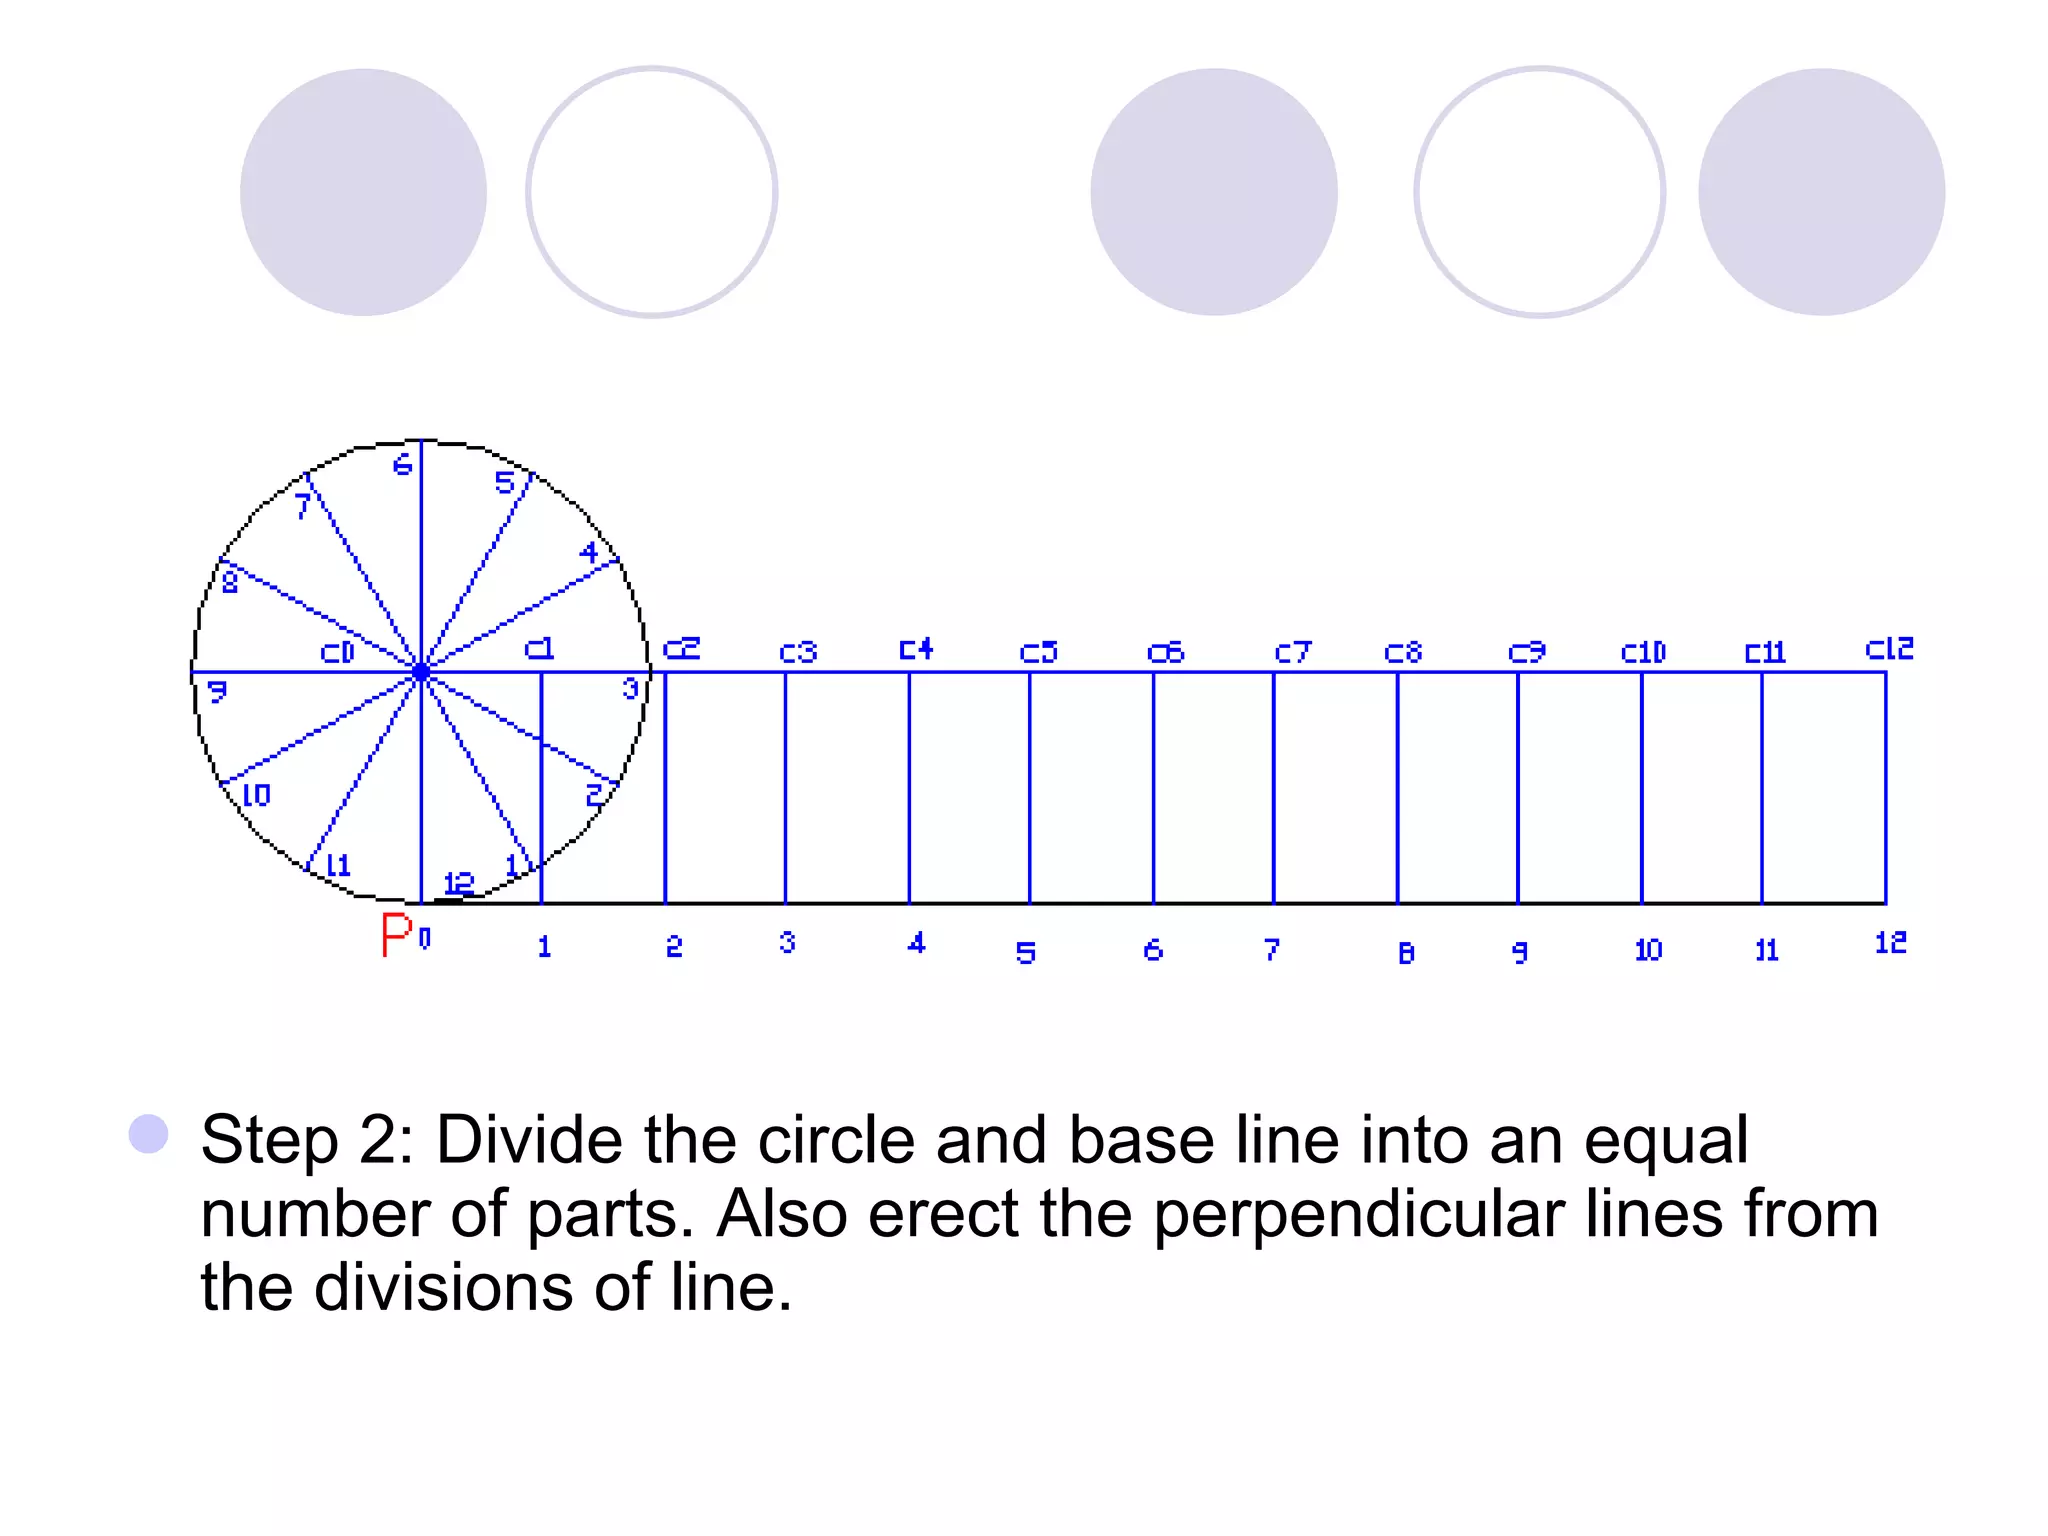
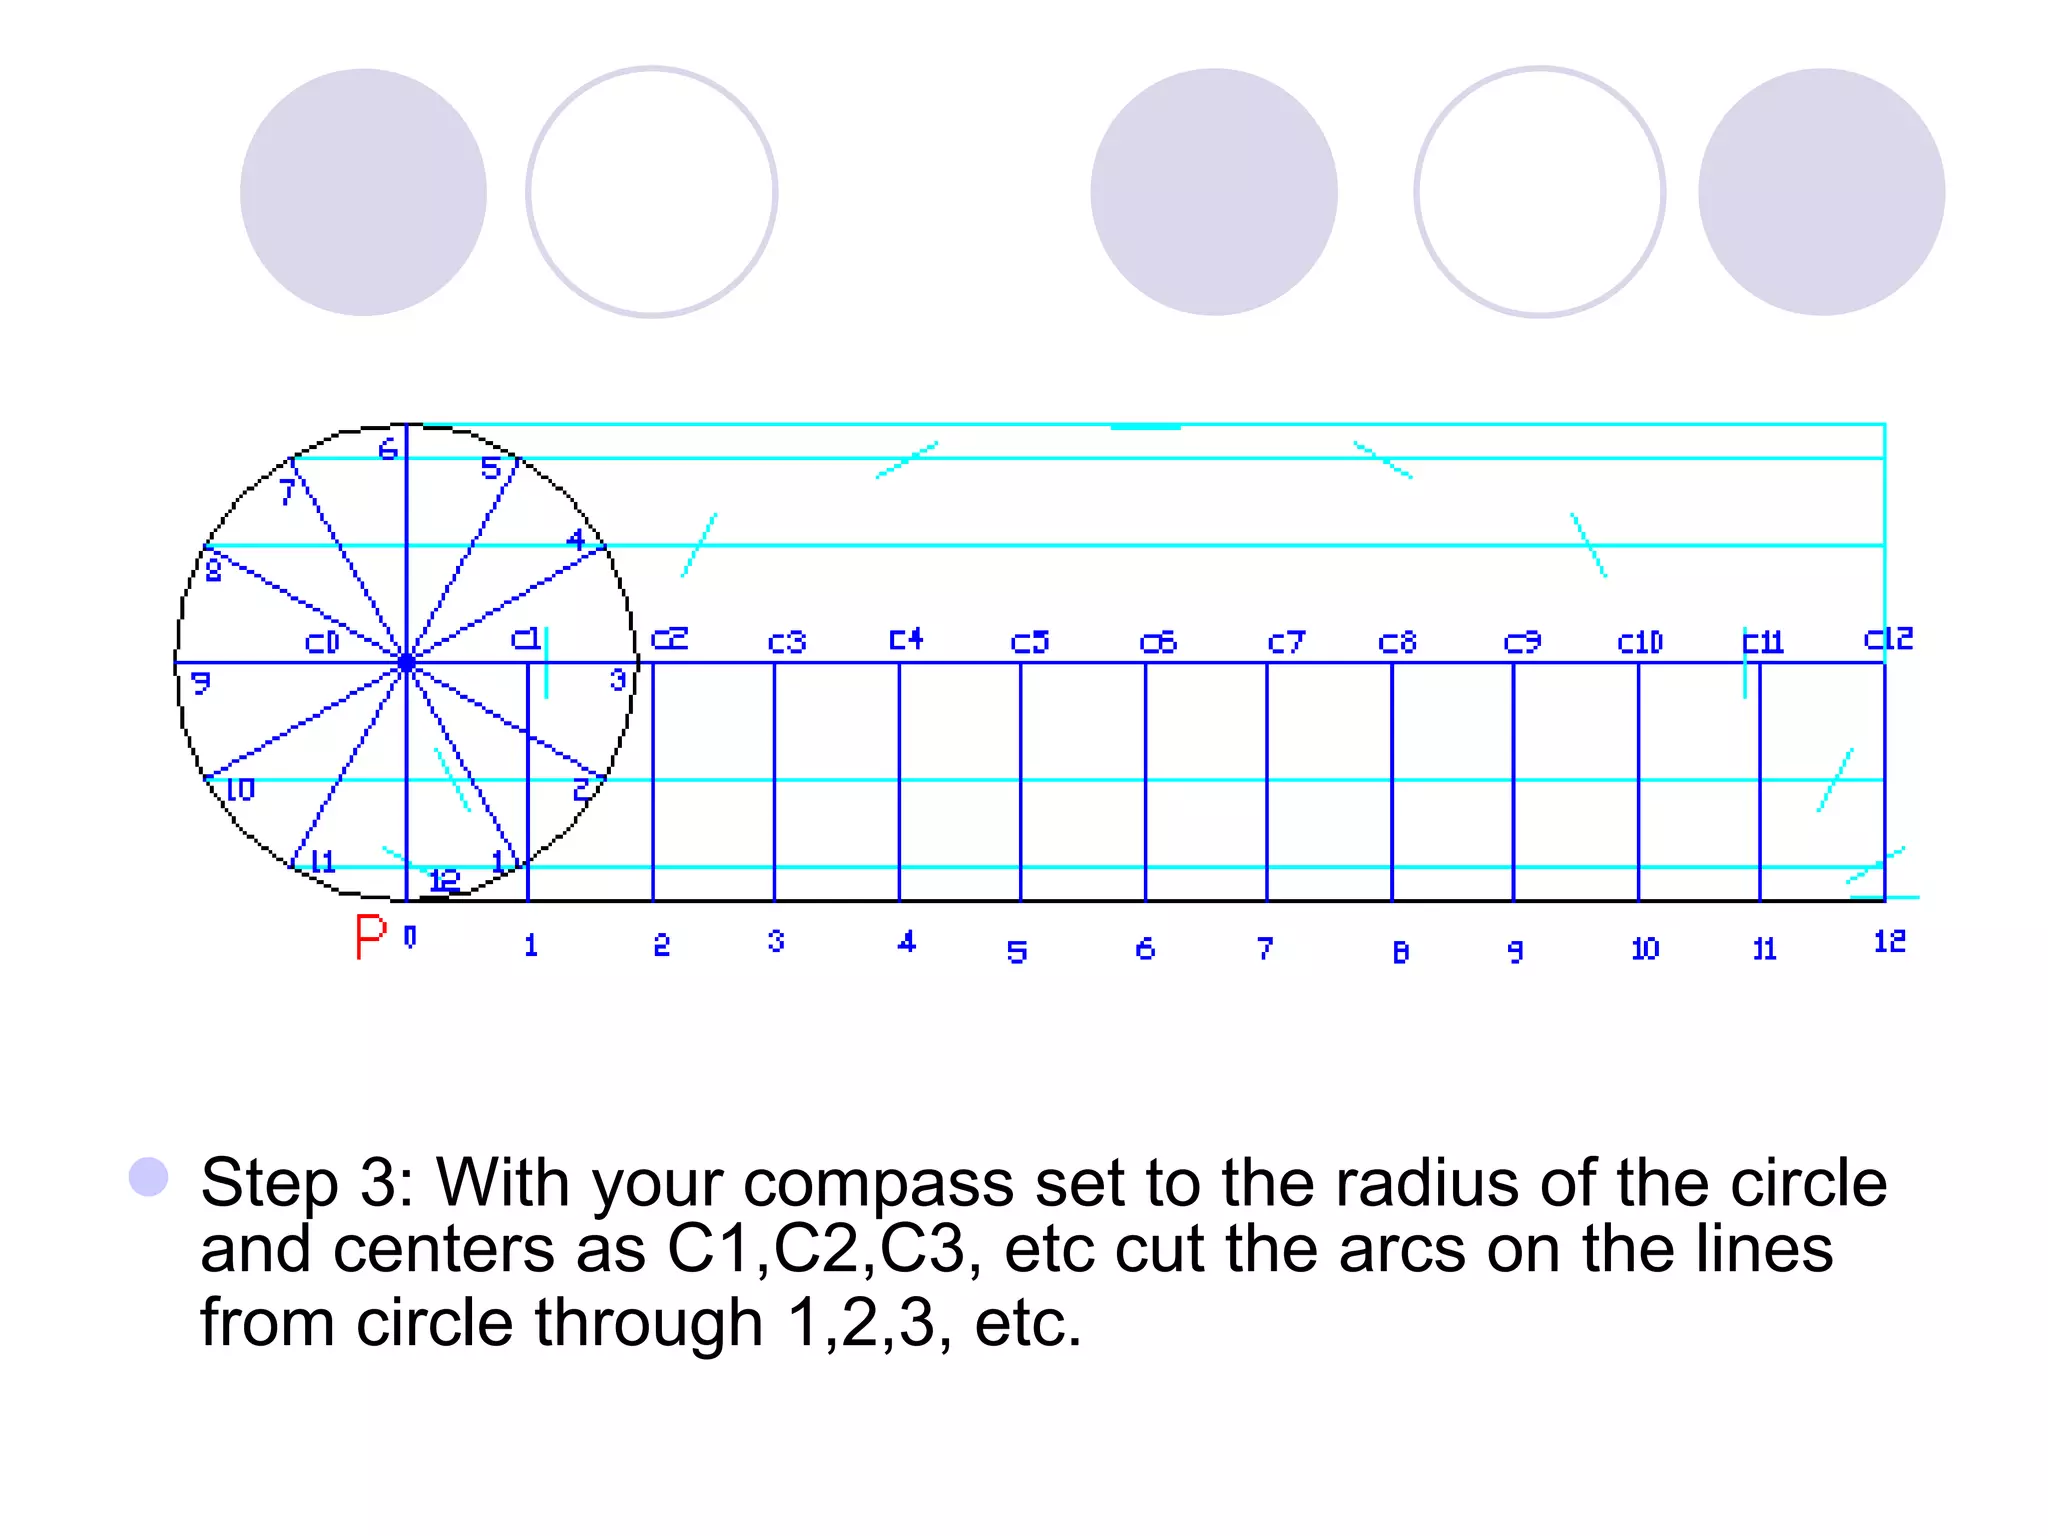
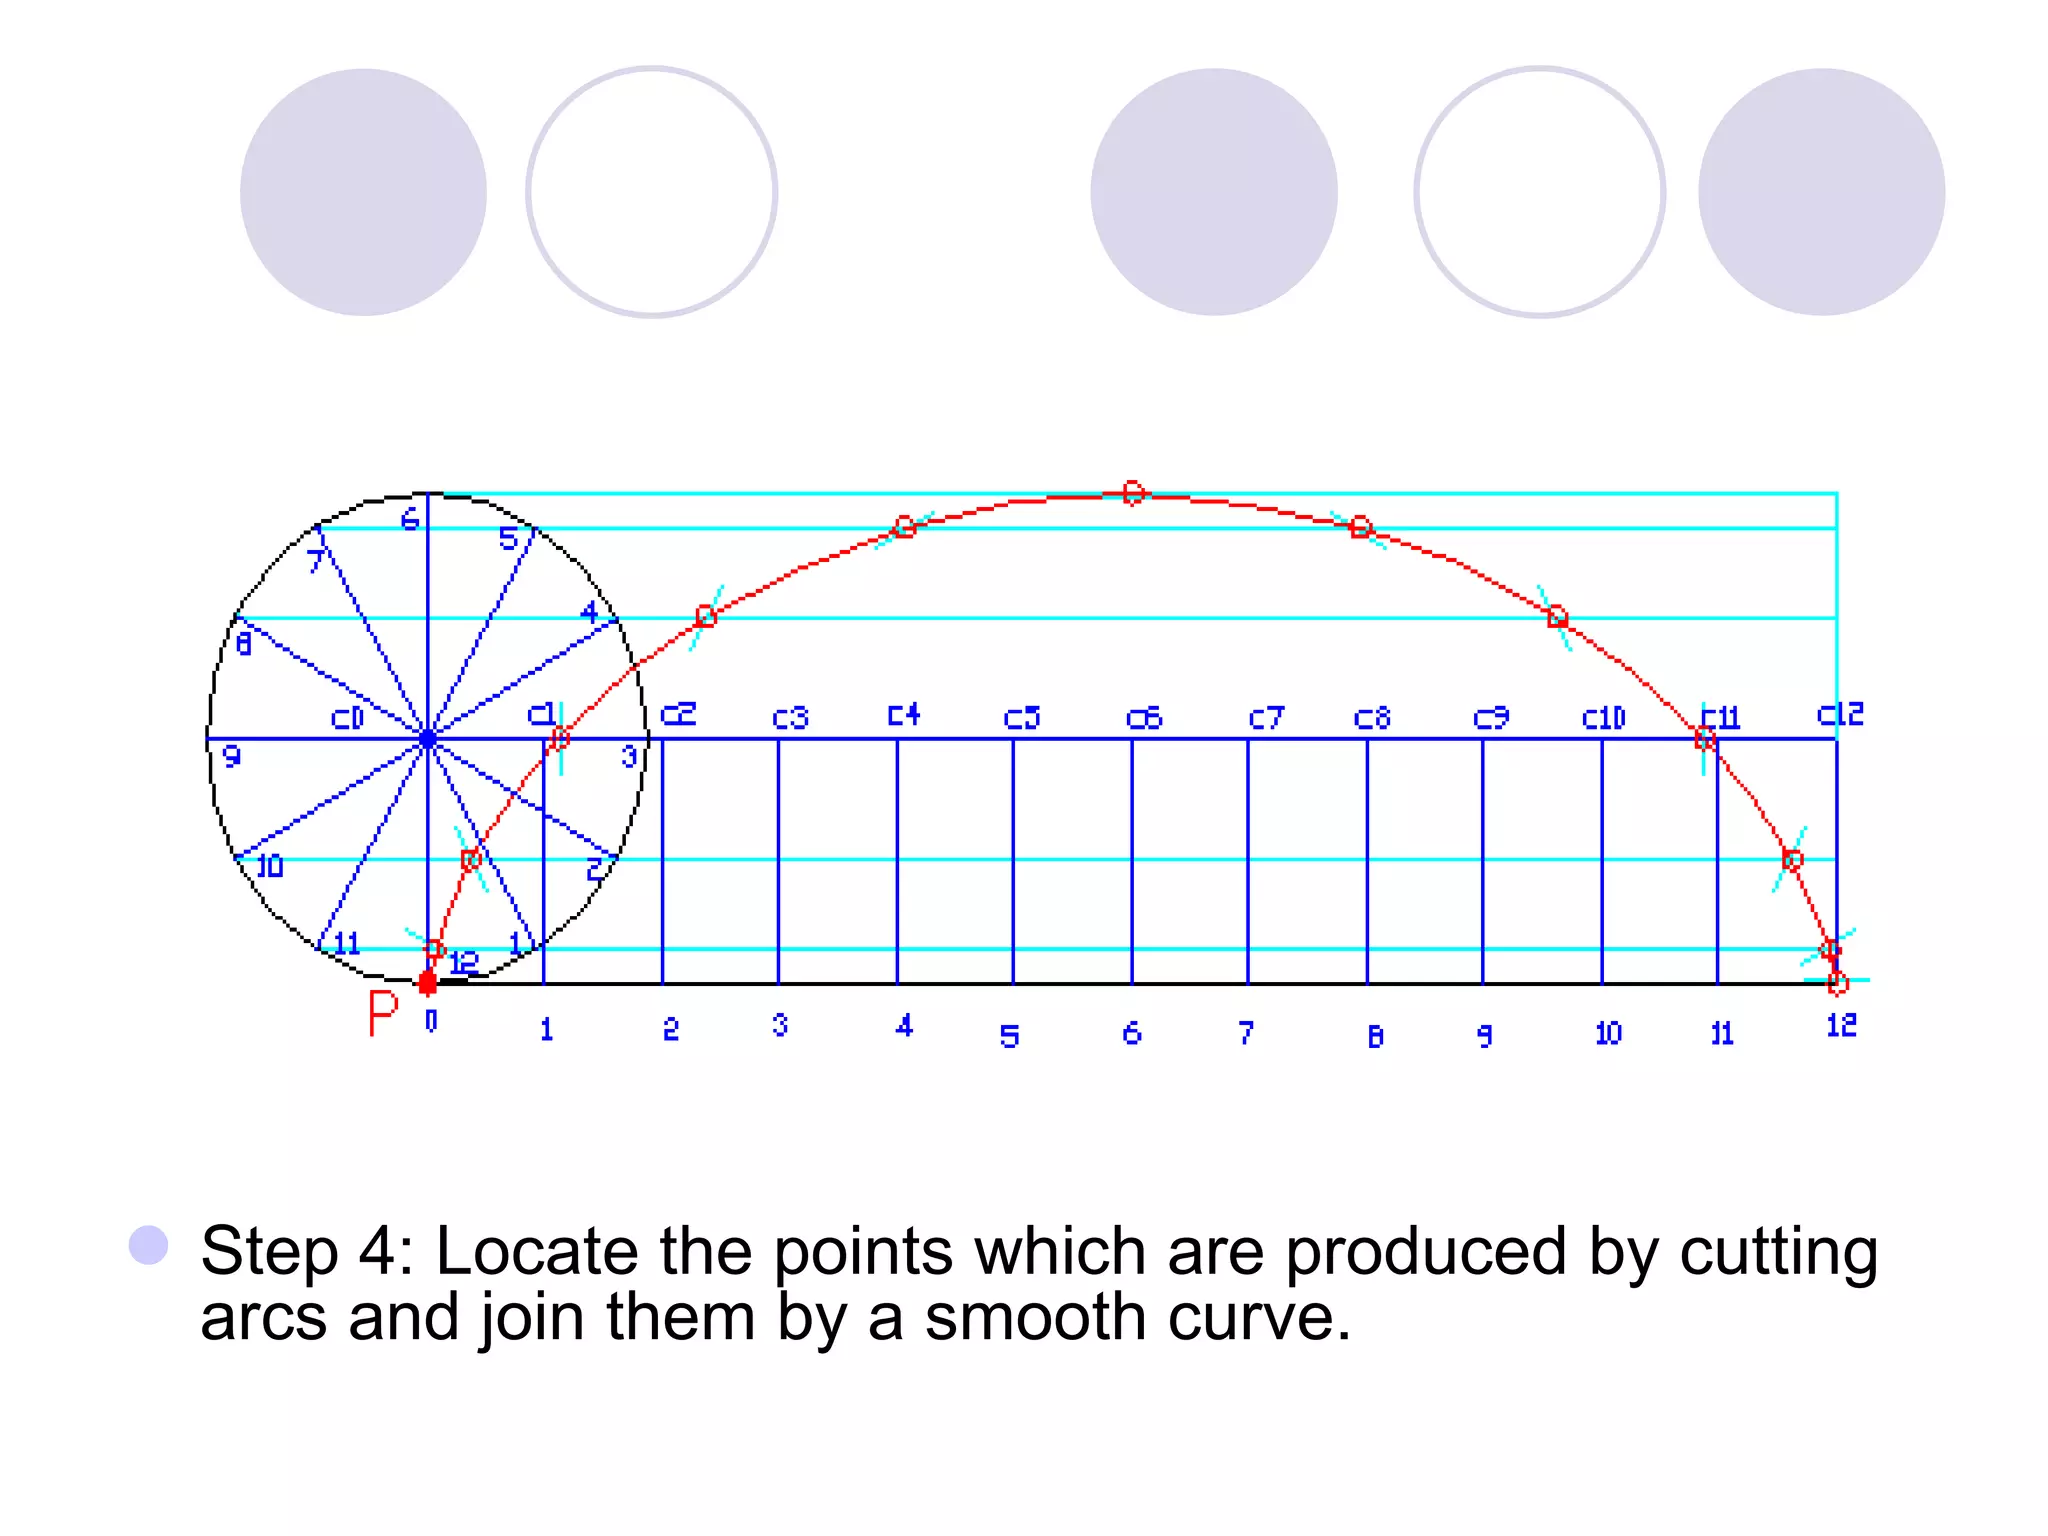
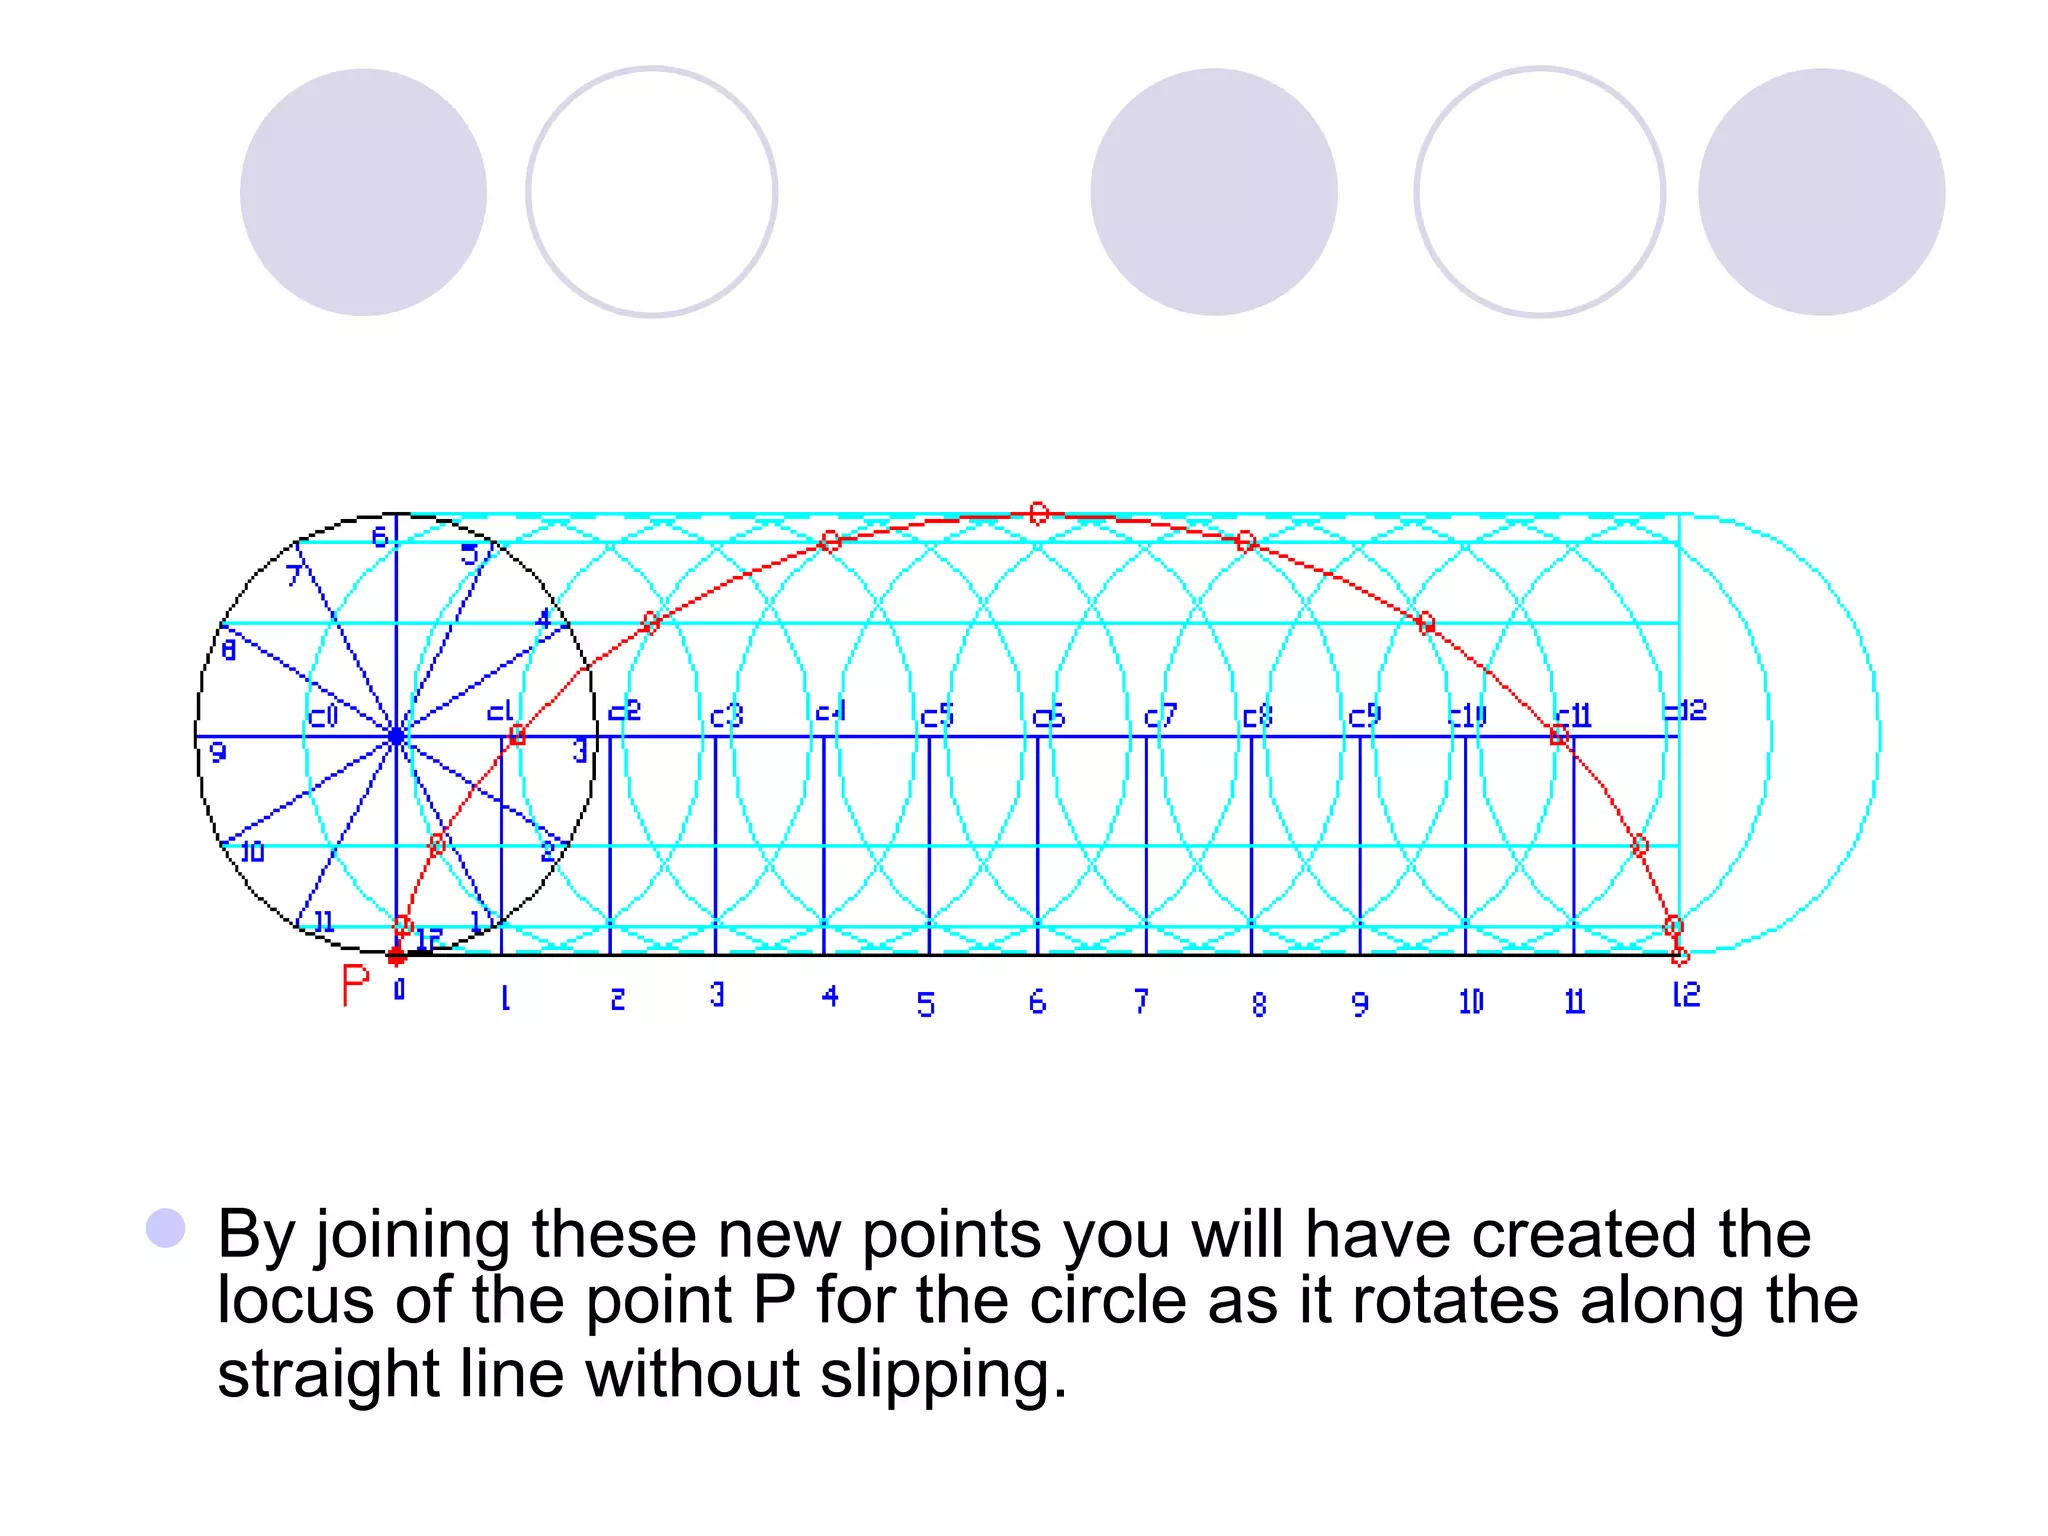
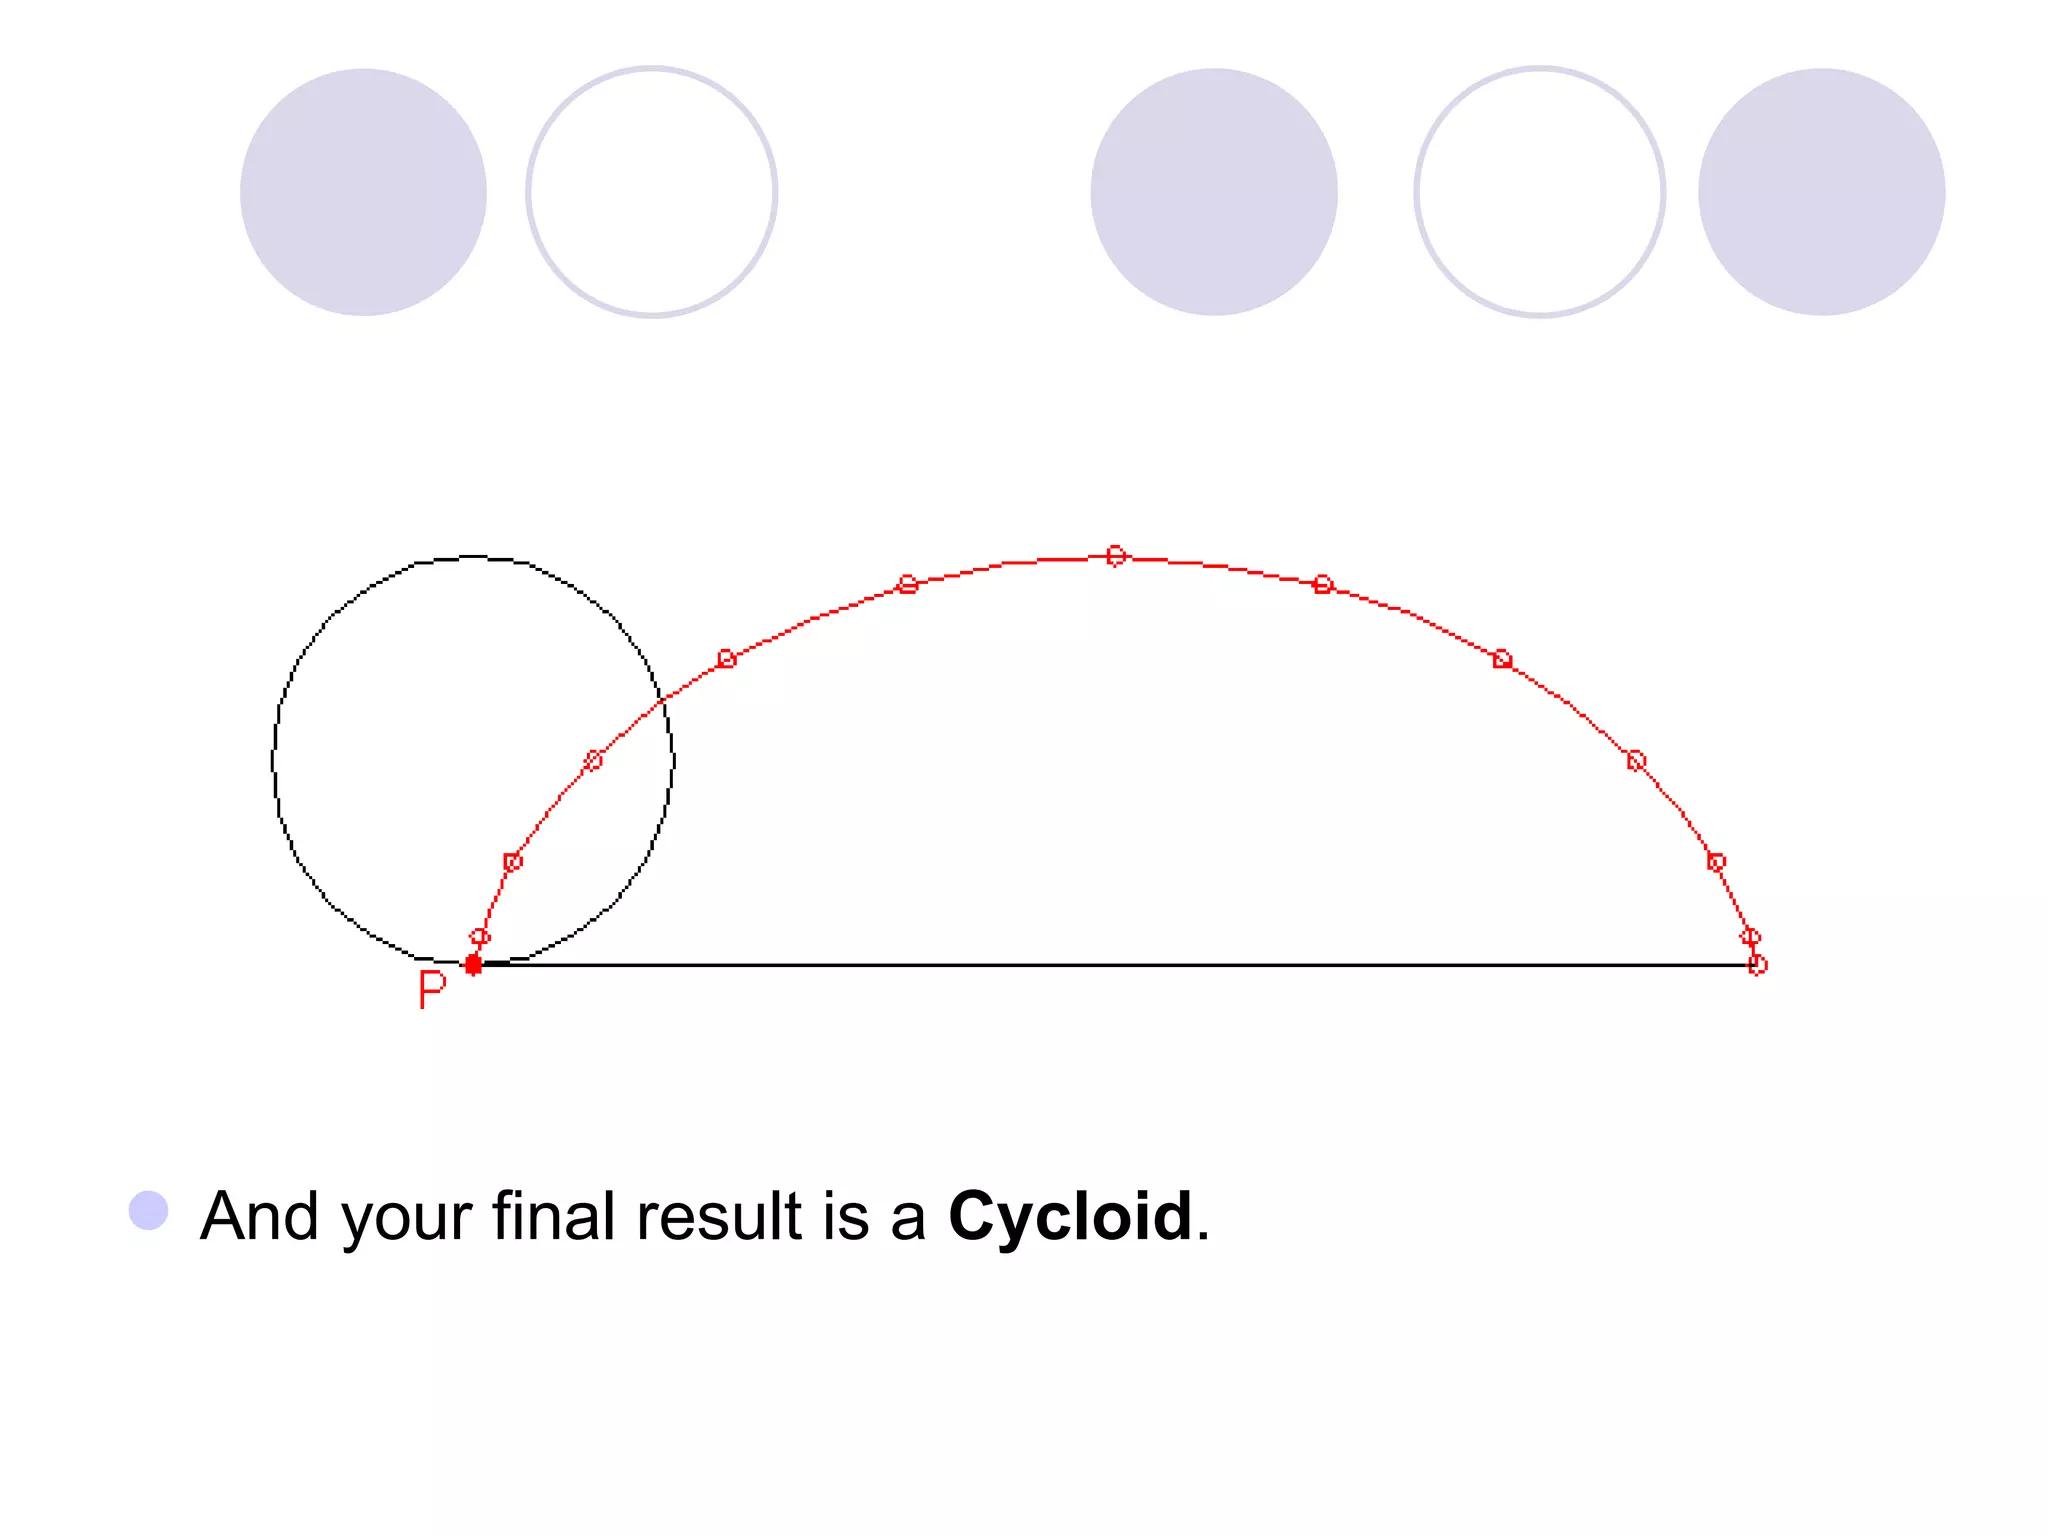
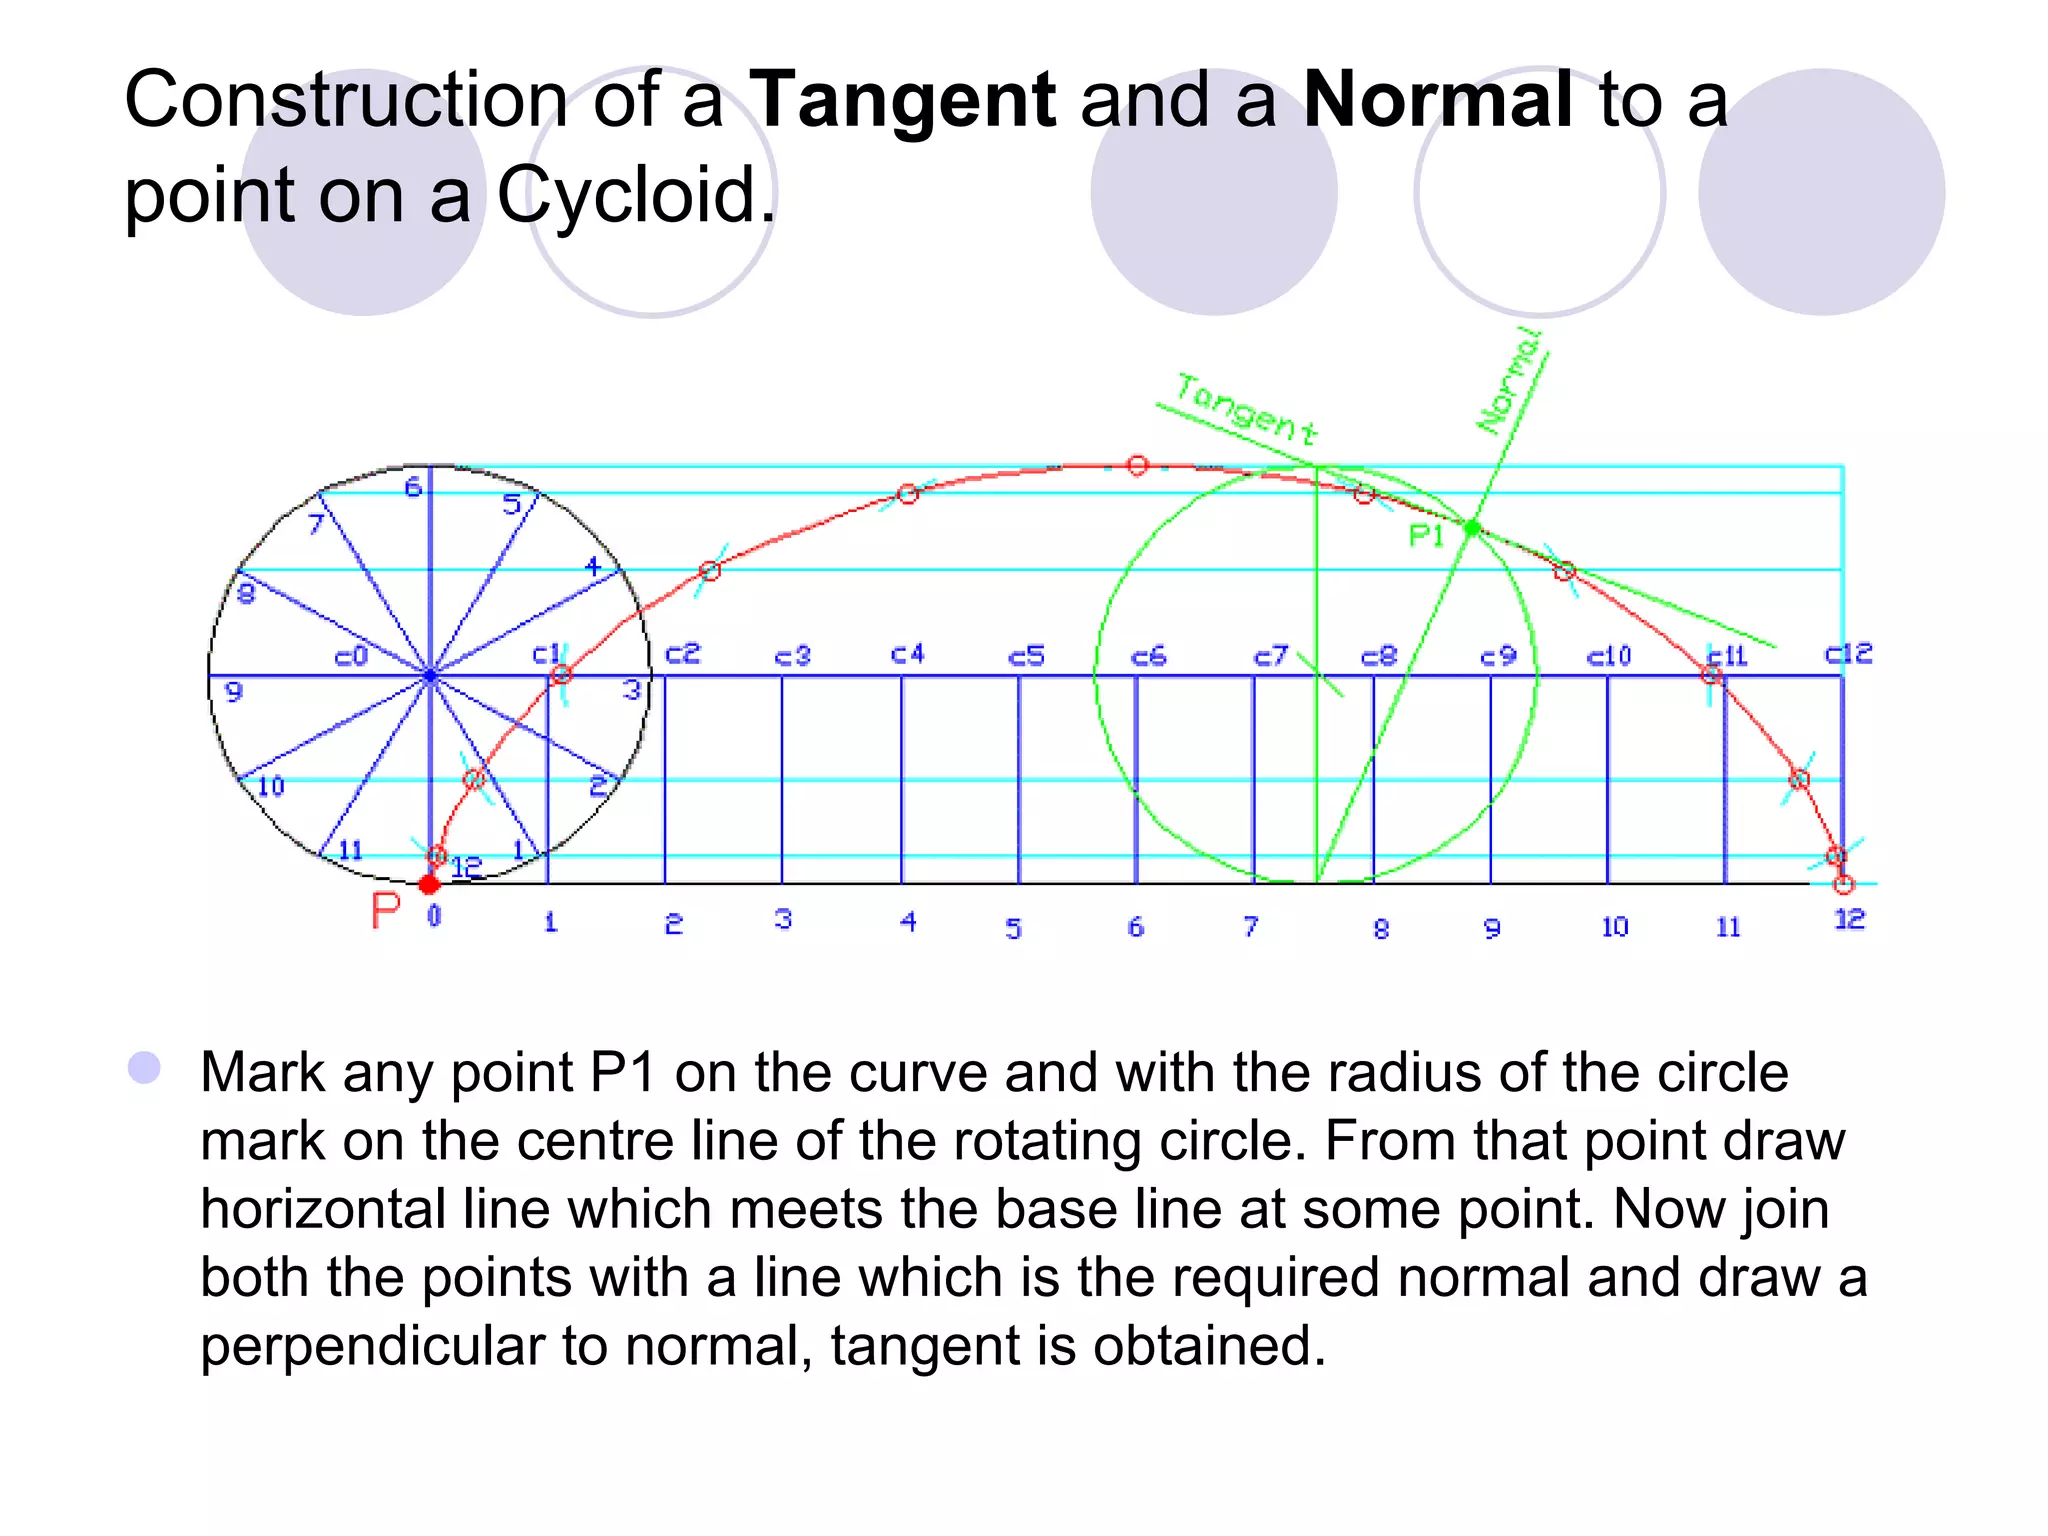


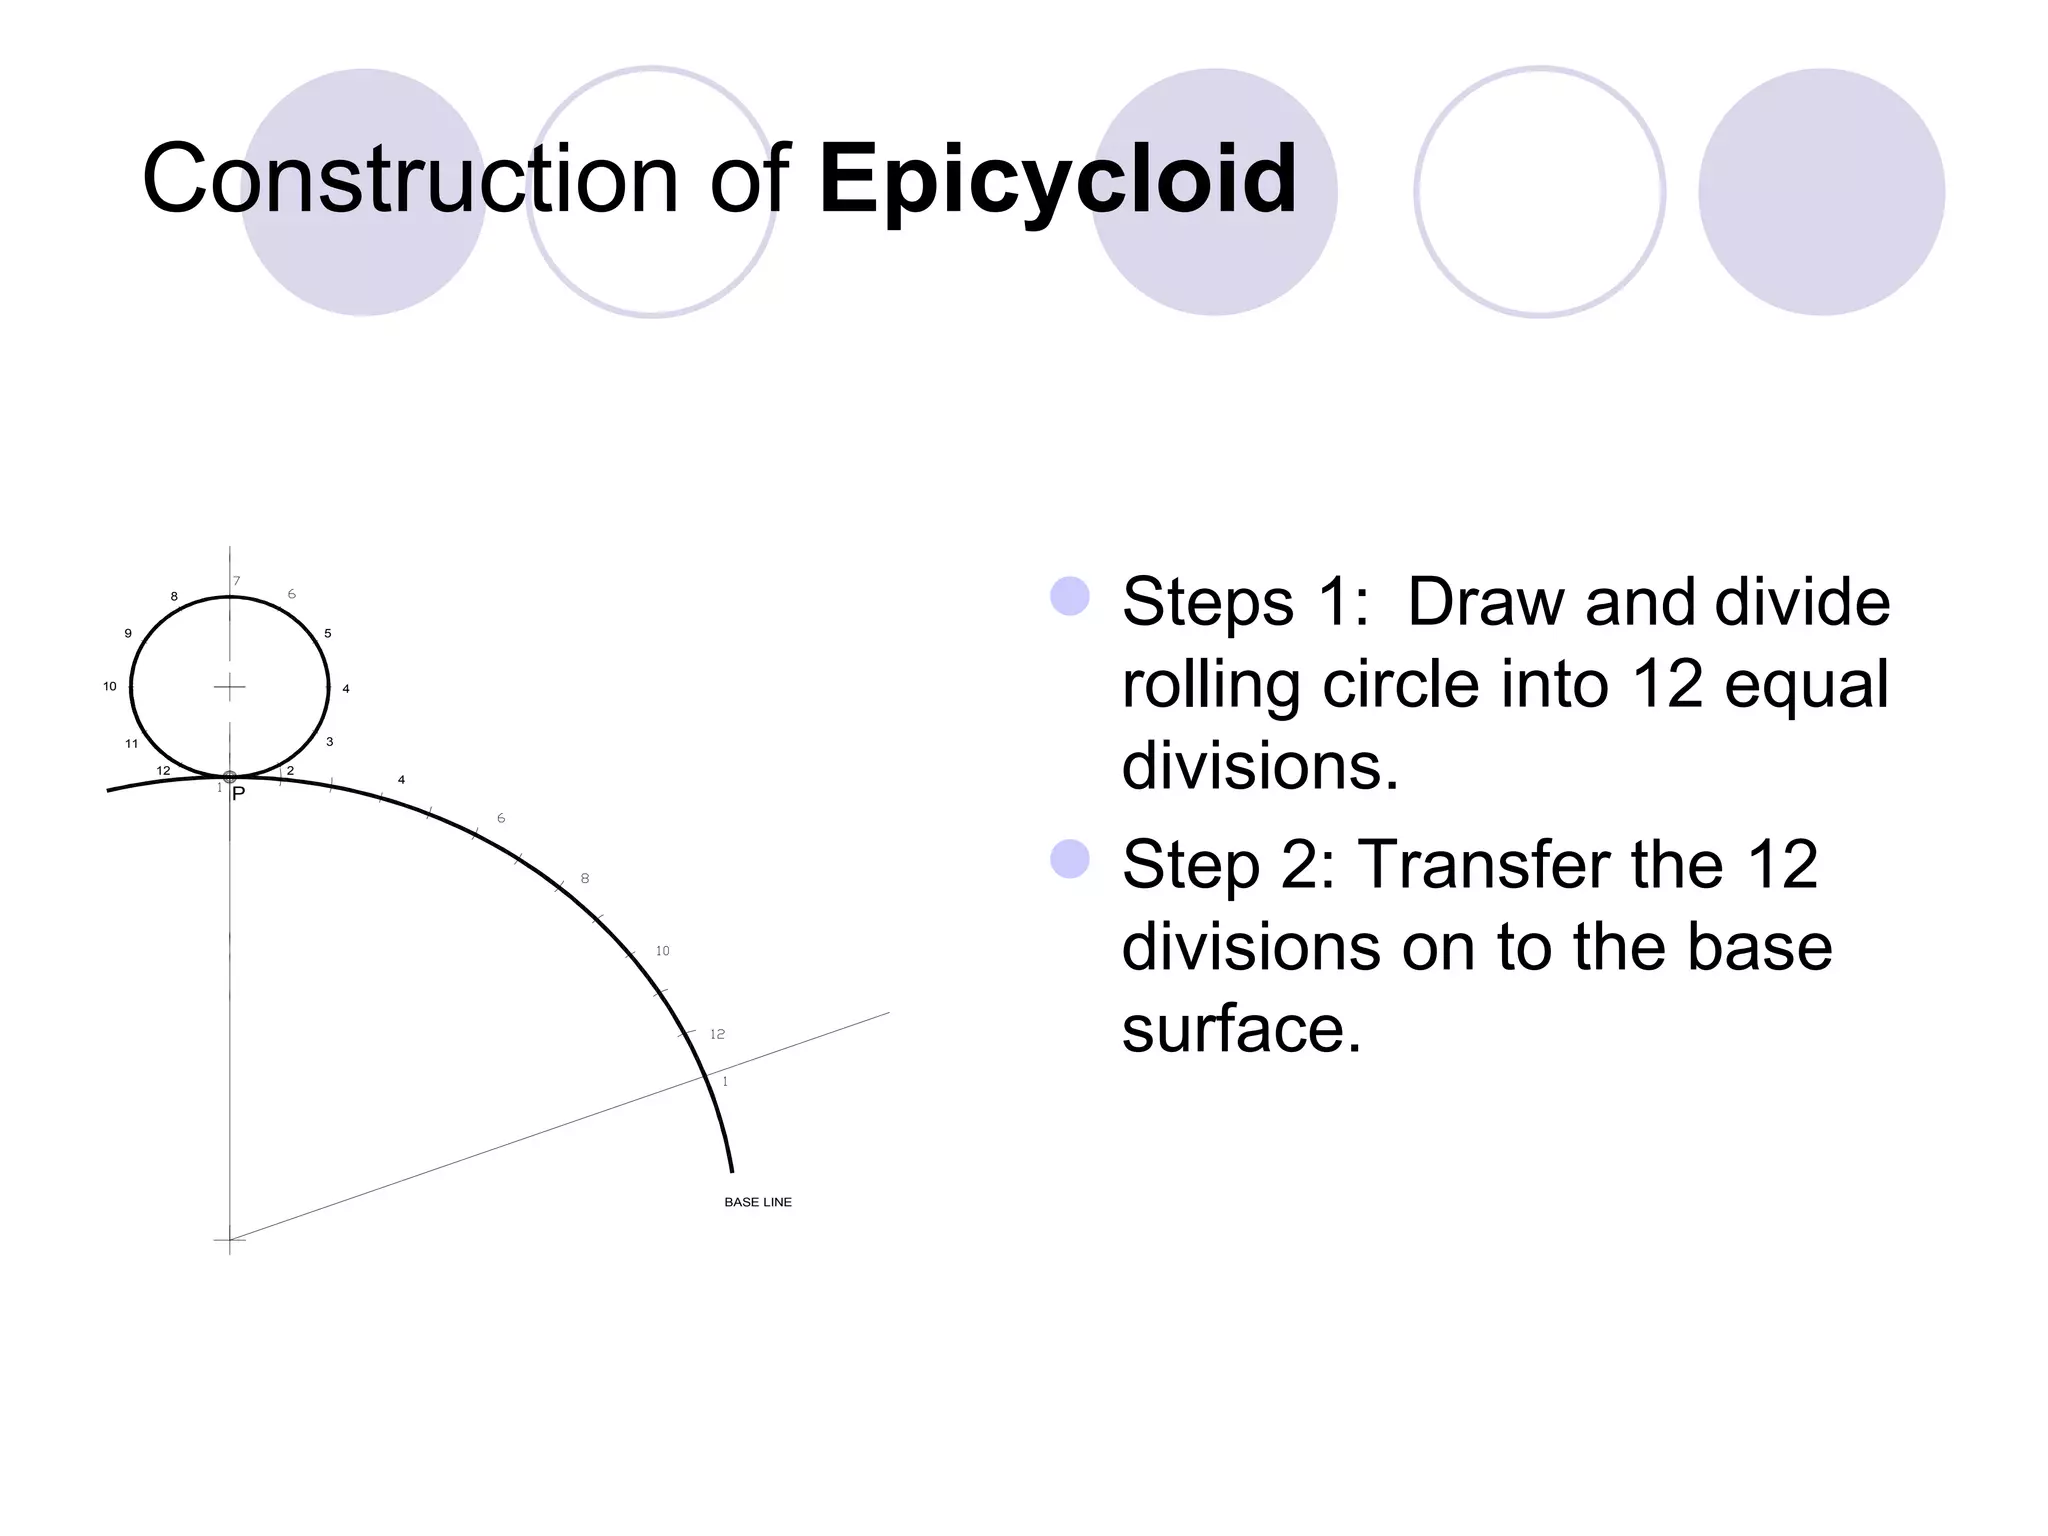

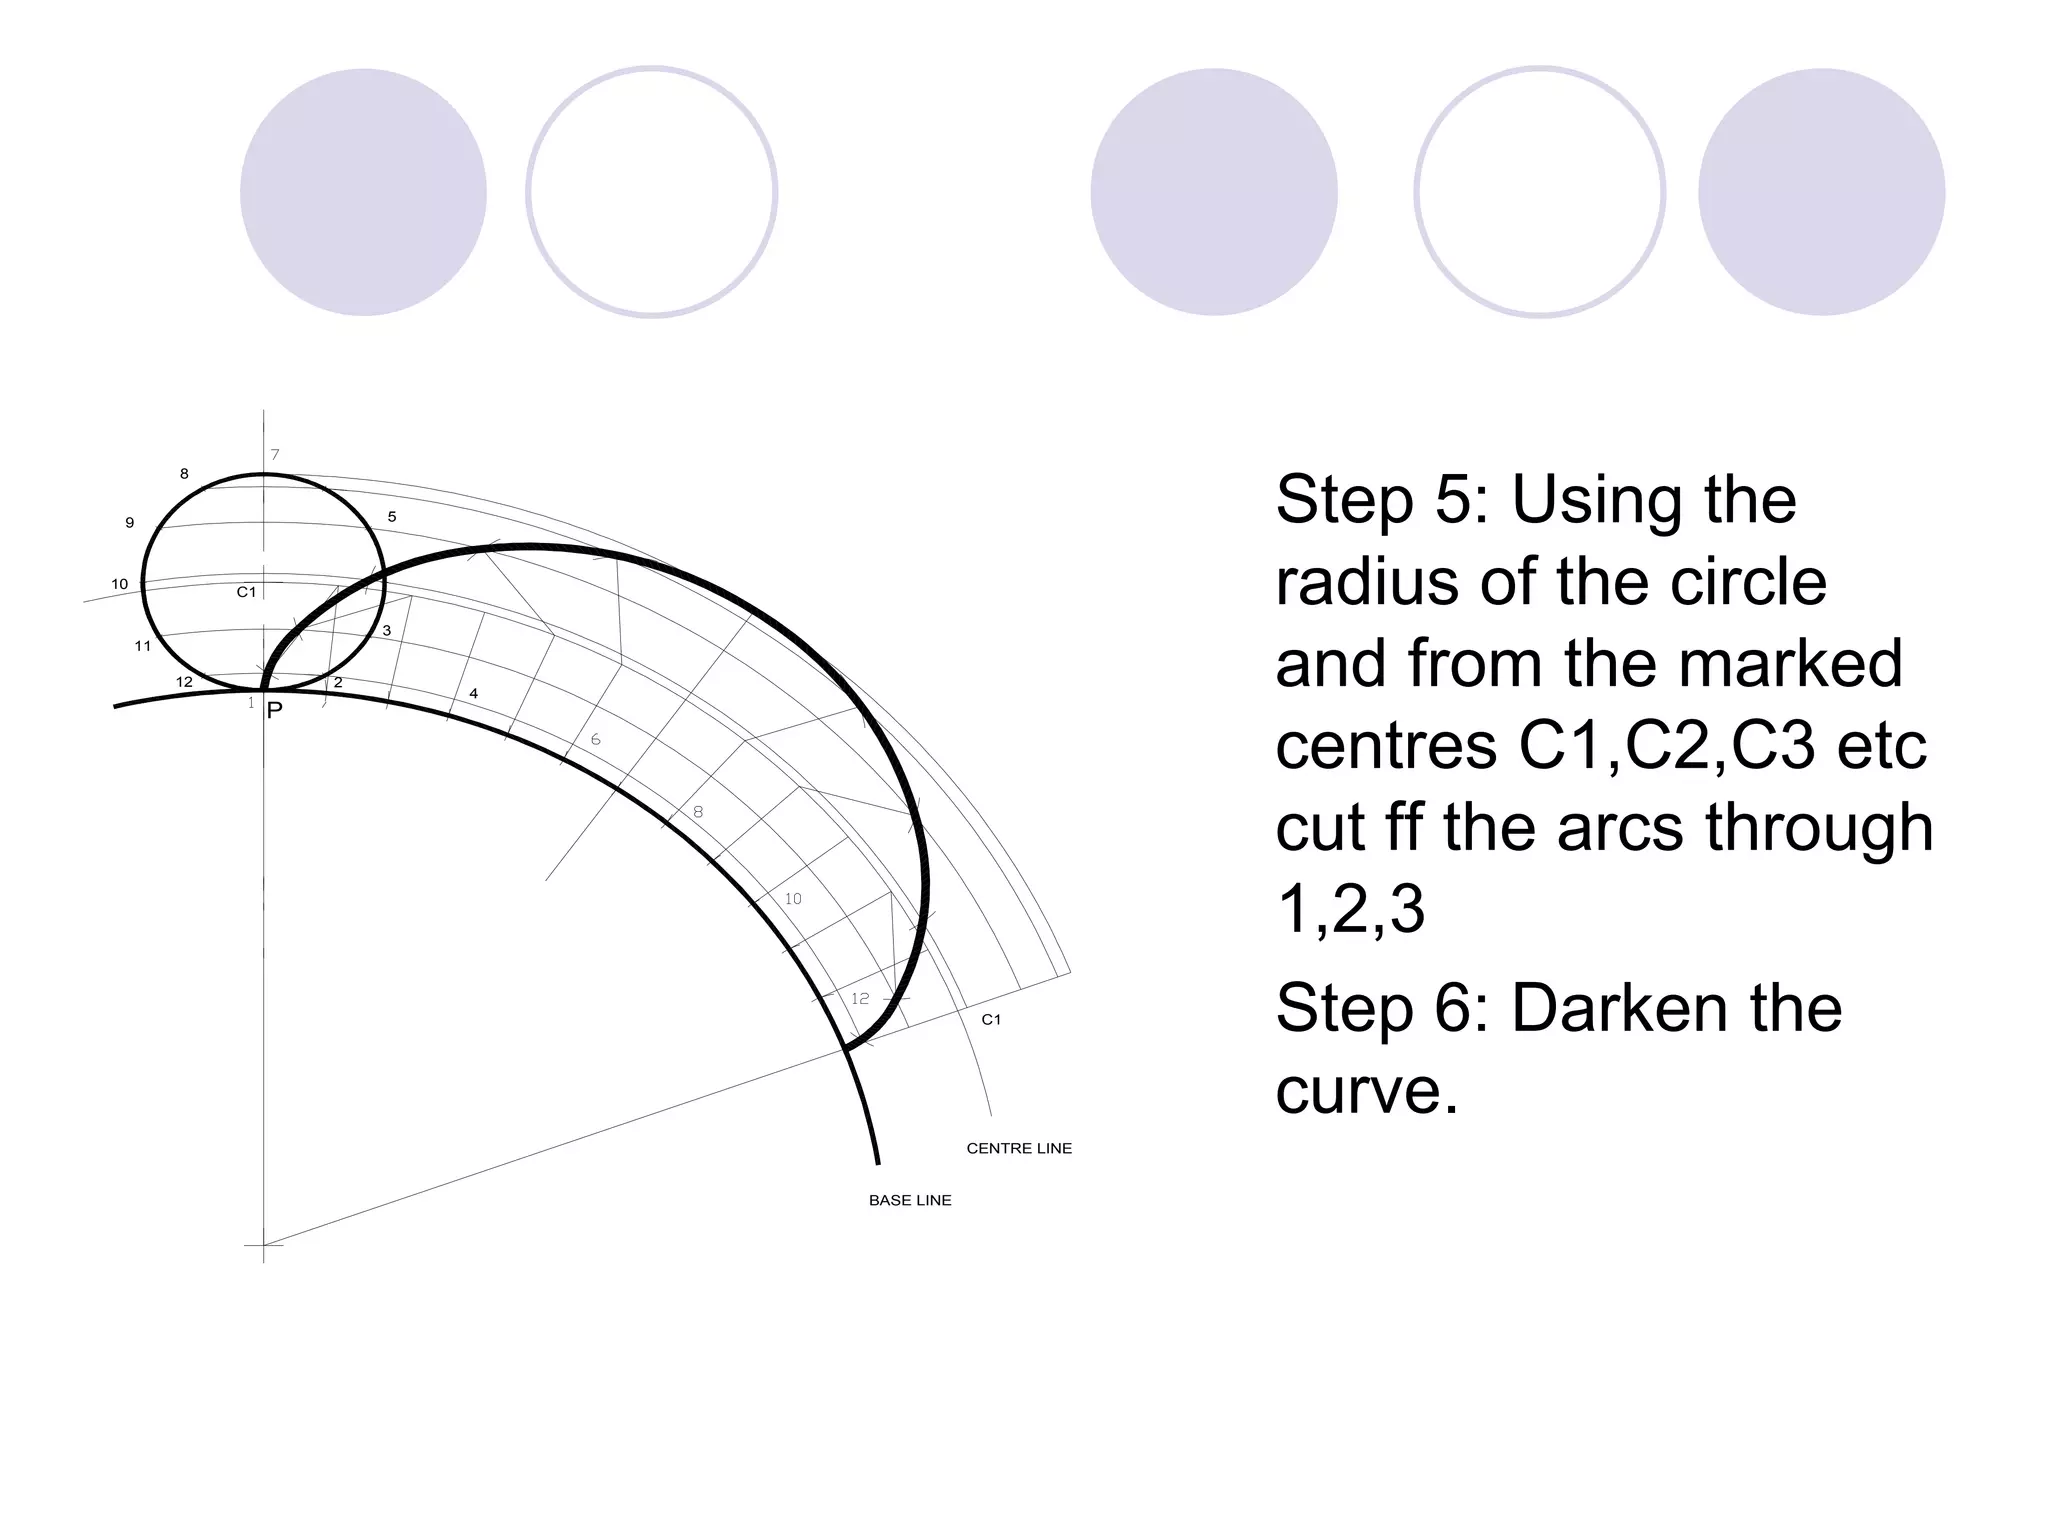
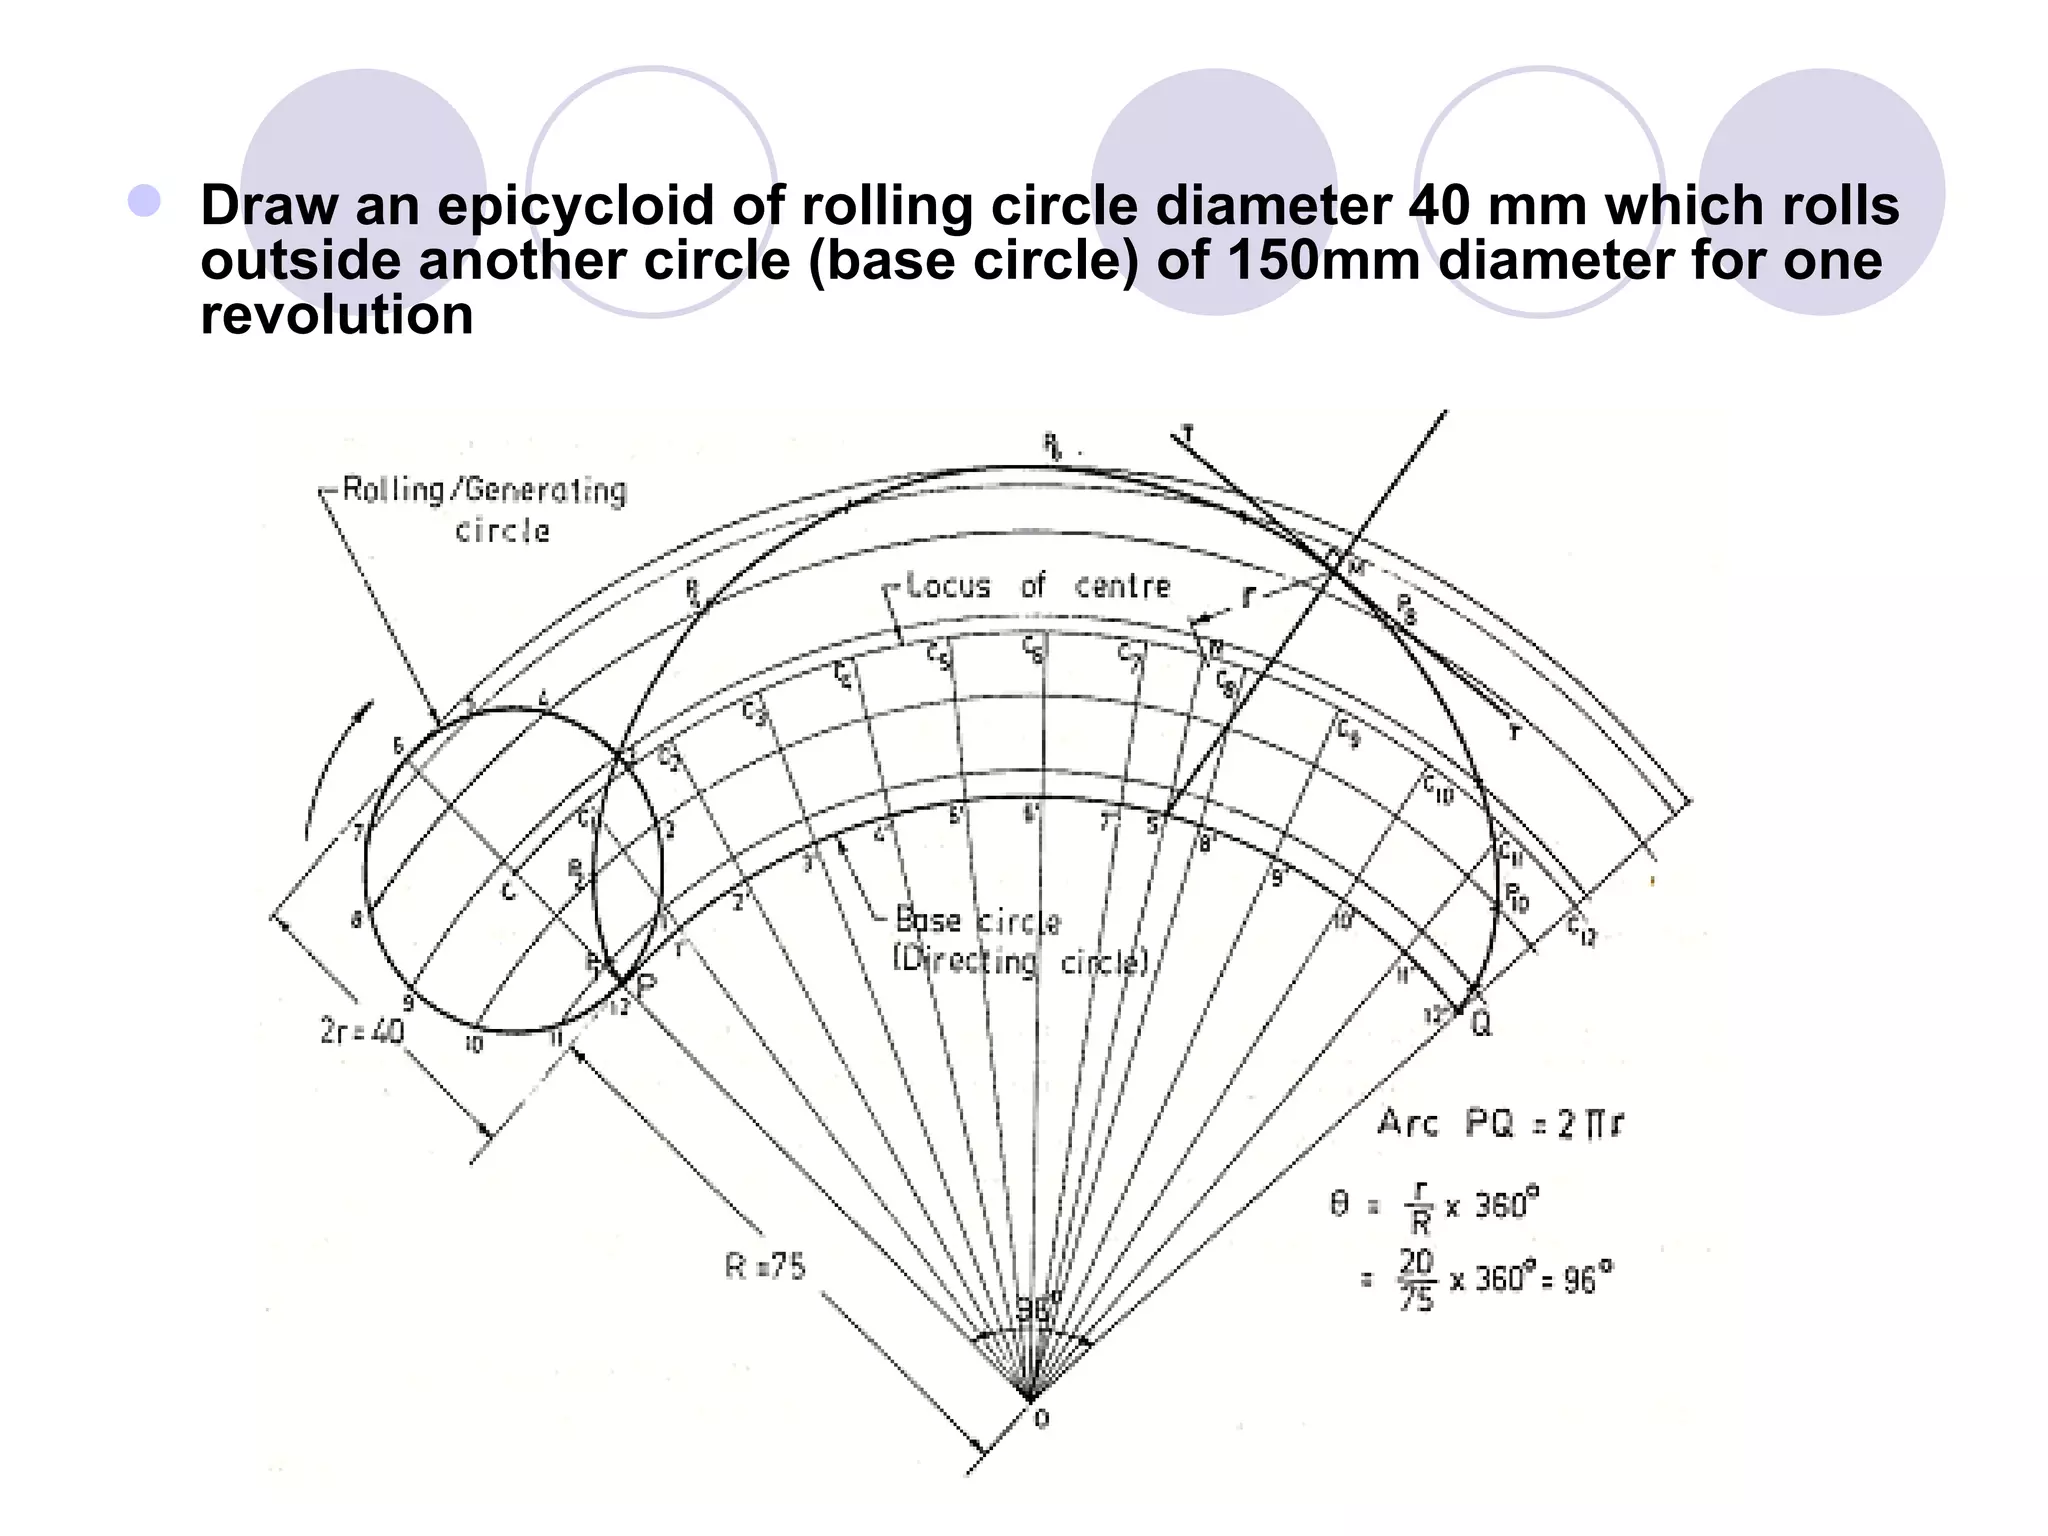


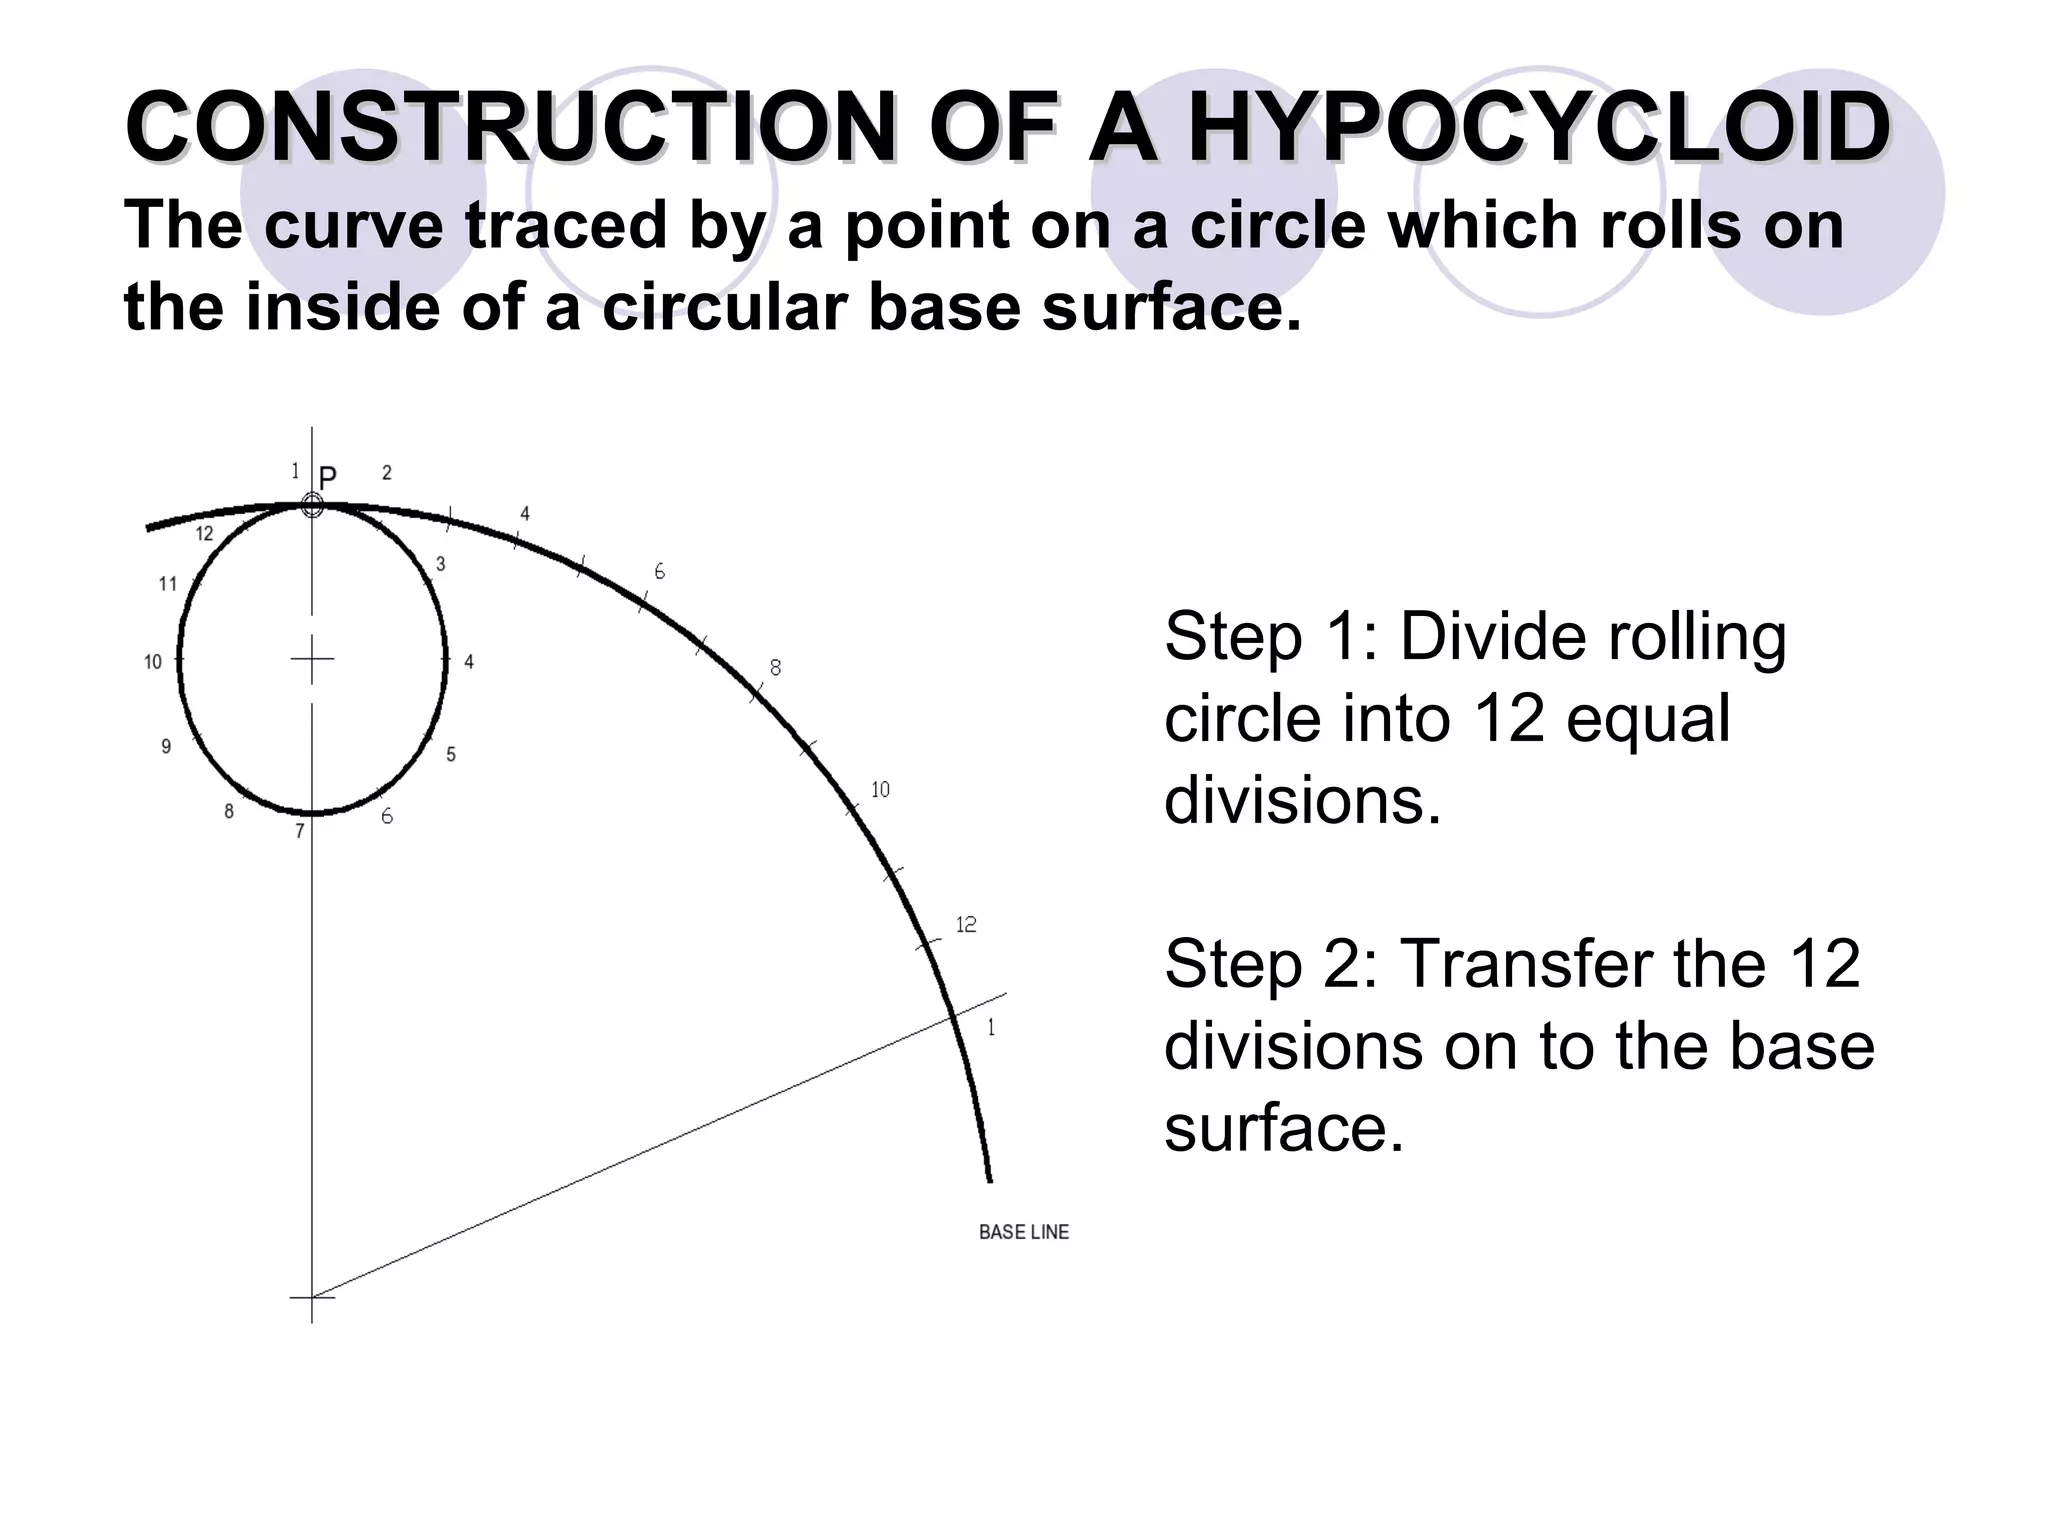
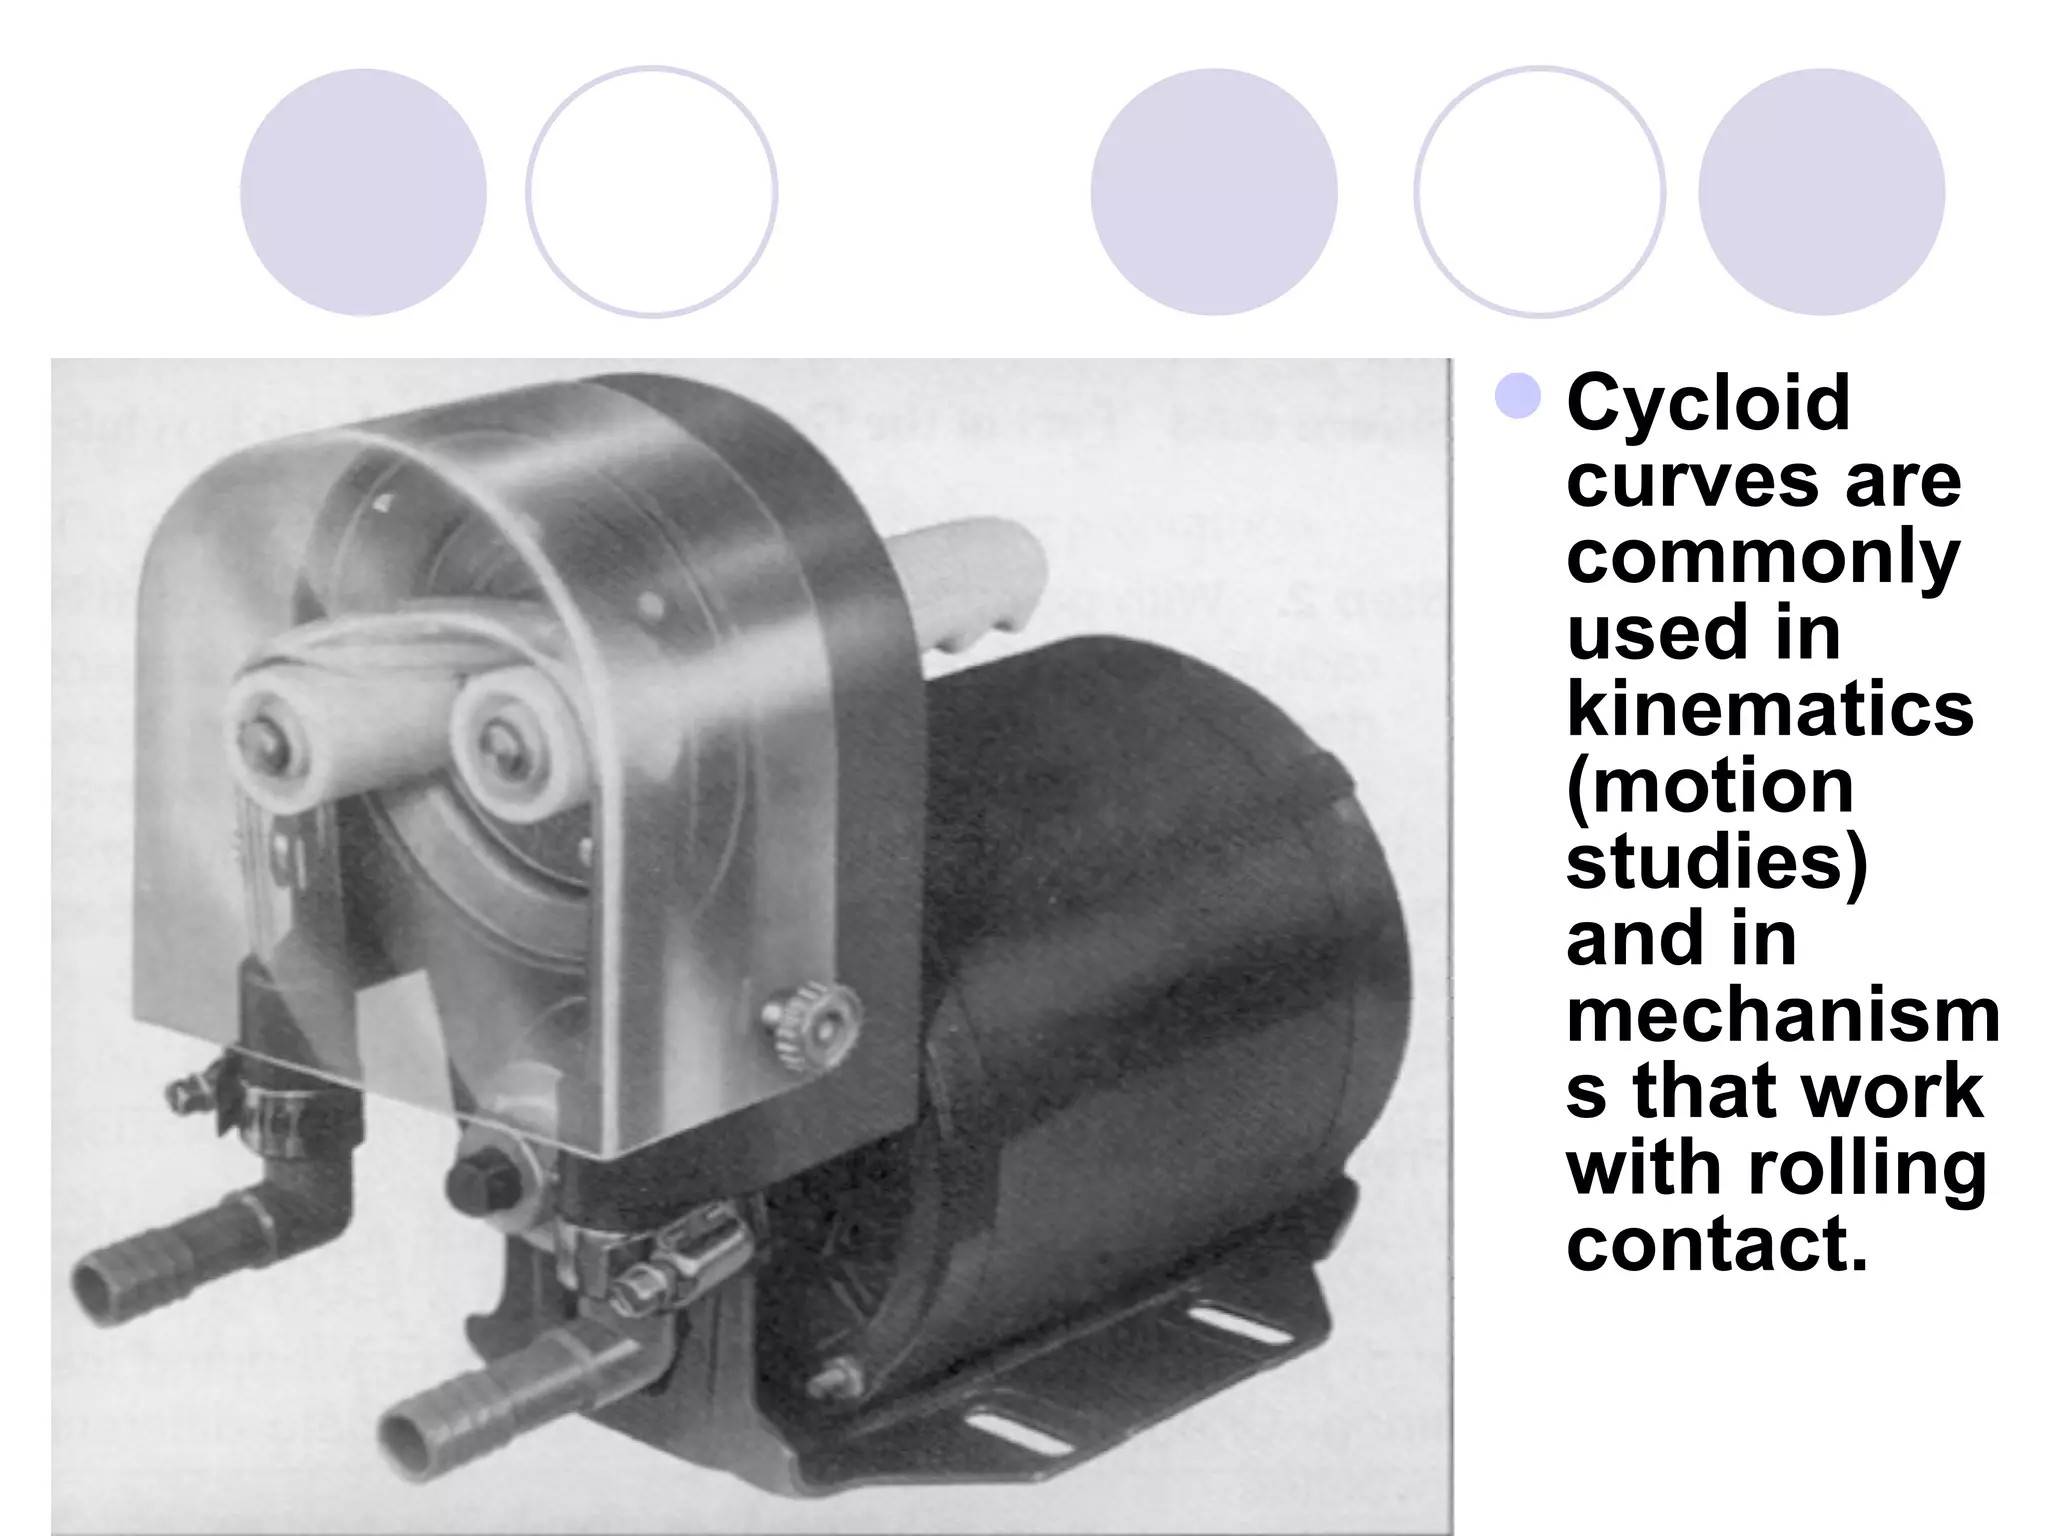

A cycloid is a curve traced by a point on the circumference of a rolling circle. It is generated when a circle rolls along a straight line without slipping. An epicycloid is formed when the generating circle rolls along the outside of another directing circle, while a hypotrochoid is formed when it rolls on the inside. These curves are constructed by marking positions of the generating circle as it rolls and joining the traced points. Cycloids find applications in gear designs, conveyors, and the study of rolling motions in mechanisms.