SlideShare a Scribd company logo
1 of 24
SMS COMPUTERS MS – OFFICE
MS-OFFICE
Introduction :
MS–Office means Microsoft Office. Now a day MS-Office is the most
sophisticated software package. MS-Office is used to create a documents, letters &
envelops, inserting pictures and images, graphs, calculations, presentation slides and
creating database tables, queries, forms, reports and etc.
MS-Office is divided into mainly four parts. They are
1. MS – WORD
2. MS – EXCEL
3. MS – POWERPOINT
4. MS – ACCESS
MS – WORD
Introduction :
MS – Word is used to create a documents and letters, inserting pictures and word
art, tables and graphs. MS-Word File Extension is ".doc"
How to start MS – Word :
42
Click “Start” button.
Select Programs.
Select MS – Office option.
Click MS – Word option.
Finally then displays a MS – Word application window.
SMS COMPUTERS MS – OFFICE
Then opens a MS – Word window. The whole document is called application
window, we are using white area is called document window.
Title Bar :
Title Bar displays title of the document and three control buttons on the right side
of the title bar.
Control Buttons :
There are three types of control buttons. They are
1. Minimize Button :
This button is used to minimize the document on the task bar.
2. Maximize Button :
This button is used to maximizes the document on the screen
3. Close Button :
This button is used to closes the whole application.
Status bar :
Status bar displays the current settings of the document window, like current page
number, section, total pages and using current page, using paper ruler scales and using
line number, column number and displays overwriting etc.
Scroll Bars :
Scroll Bars are used to scroll the document up and down, left and right sides.
They are two types of scroll bars available in the
Ms – Word application.
1. Horizontal Scroll Bar.
2. Vertical Scroll Bar.
43
(Horizontal Scroll Bar)
(Vertical Scroll Bar)
SMS COMPUTERS MS – OFFICE
Menu Bar :
Menu Bar displays different types of menus. They are
File Menu Edit Menu View Menu Insert Menu
Format Menu Tools Menu Table Menu Window Menu
Help Menu. (Each menu displays menu options.)
File Menu : (Alt + F)
NEW :
This option is used to opens a new document or new template. Template means
already designed particular format document.
Keyboard Shortcut : Ctrl + N
OPEN :
This option is used to opens an existing or old document.
Keyboard Shortcut: Ctrl+ O, Ctrl + F12
CLOSE :
This option is used to closes the document window.
Keyboard shortcut : Ctrl + F4 (Function Key)
SAVE :
This option is used to saves the current file.
Keyboard Shortcut : Ctrl + S
Save As :
This option is used to saves the file with a different or new name.
Keyboard Shortcut : F12 (Function key)
44
How To opens document
 Click File Menu.
 Select and Click Open option.
 Then displays a open window.
 Select existing or old file.
 Finally click open button.
 Then opens a existing file.
How To saves document
• Click File Menu.
• Select and Click Save option.
• Then displays a Save window.
• Type a name.
• Finally click save button.
• Then file saves.
SMS COMPUTERS MS – OFFICE
Save As Web Page :
This option is used to saves the file with Internet Explorer format or Web page
format.
File Search :
This option is used to searches the particular word in the ms-word application
files.
Web Page Preview :
This option is used to preview the file with internet explorer format with another
application window.
Page Setup :
This option is used to sets the page like page margins, page rulers, page sizes,
paper orientation and etc.
Print Preview :
This option is used to displays or sees the required page print format preview.
Keyboard Shortcut : Ctrl + F2 (Function Key) or Ctrl + Alt + i
Print :
This option is used to prints the document on the paper.
Keyboard Shortcut : Ctrl + P
Properties :
This option is used to see the file content properties like no .of pages, no of words,
no of lines, no of characters, no of character with spaces, no of paragraphs, author name,
and document creation, modification, printing and last saved the options is displayed.
45
How to sets the Page Setup
 Click File Menu.
 Select and Click Page Setup option.
 Then displays a Page Setup window.
 Then sets page margins, page sizes, and page
orientation and etc.
 Finally click OK button.
 Then file sets the required formats.
How to use Print :
1. Click on File Menu.
2. Select and click Print Option.
3. Then displays a print dialogue box.
4. Sets the printer options like choose printer
type, no of copies, page range etc.
5. Then finally click OK button.
SMS COMPUTERS MS – OFFICE
Exit :
This option is used to exit or closes the complete ms-word application window.
Keyboard Shortcut : Alt + F4 (Function key)
Edit Menu : (Alt + E)
UNDO :
This option is used to perform the last action of the document.
Keyboard Shortcut : Ctrl + Z
REDO :
This option is used to repeat the last action of the document.
Keyboard Shortcut : Ctrl + Y
CUT :
This option is used to cuts the required are particular text or figure.
Keyboard Shortcut : Ctrl + X
How to use this option :
 Select the text of the document.
 Select Edit menu, Select and click cut option.
 Then cuts the required text or figure.
COPY :
This option is used to copy the required are particular text or figure.
Keyboard Shortcut : Ctrl + C
How to use this option :
 Select the text of the document.
 Select Edit menu, Select and click copy option.
 Then copy the required text or figure.
PASTE :
This option is used to paste the cut or copy text or figure.
Keyboard Shortcut : Ctrl + V
How to use this option :
 Select the text of the document.
 Select Edit menu, Select and click cut or copy options.
 Then cut or copy the required text or figure.
 Select Edit menu, select and click paste option.
46
SMS COMPUTERS MS – OFFICE
 Then fixes the cut or copying text or figure.
PASTE SPECIAL :
This option is used to paste to the link of the copy text or figure.
You have any modification in the master file, then automatically changes contents
of the duplicate file.
How to use this option :
 Select the contents of the file.
 Select Edit menu, Select and click copy option.
 Then copy the required text or figure.
 Then goes another file or same file.
 Select Edit menu, select and click paste special option.
 Then fixes the copying text or figure to link the selecting file.
 Then you have any modifications of the master file, automatically changes
another file.
PASTE AS HYPERLINK:
This option is used to paste the hyperlink with selecting or copying text or
figure.
How to use this option :
 Select the text of the document.
 Select Edit menu, Select and click copy option.
 Then copy the required text or figure.
 Select Edit menu, select and click Paste Hyperlink option.
 Then fixes the copying text or figure with a link format.
 Then click ctrl + mouse button click, then goes to copying text.
CLEAR :
This option is used to clears or deletes the selected text. This option is used
to types.
1. Deleting all formats with selected text.
2. Deleting all selected text with completely.
Keyboard Shortcut : Delete key.
How to use this option :
 Select required or particular text or figure.
 Select Edit menu, select and click clear option.
 Then deletes, removes or erases the selected text or figure.
SELECT ALL :
This option is used to selects the total contents of the document or file.
47
SMS COMPUTERS MS – OFFICE
Keyboard Shortcut : Ctrl + A.
FIND :
This option is used to finds or search the word, character or text of the file or
document.
Keyboard Shortcut : Ctrl + F.
REPLACE :
This option is used to replaces the word, character or text of the file or
document.
Keyboard Shortcut : Ctrl + H.
GO TO :
This option is used to goes the required or particular page.
Keyboard Shortcut : Ctrl + G.
View Menu :
NORMAL :
Switches to normal view, which is the default document view for most
word-processing tasks, such as typing, editing, and formatting.
48
How to use this option :
1. Select Edit menu, select and click Find
option.
2. Then displays a find dialog box.
3. Type the finding or searching text.
4. Then click find next button.
5. Then displays the searching text.
How to use this option :
1. Select Edit menu, select and click replace
option.
2. Then displays a replace dialog box.
3. Type the replacing text.
4. Then click replace or replace all button.
5. Then replace the old text with a new text.
How to use this option :
1. Select Edit menu, select and click Go To option.
2. Then displays a Go To dialog box.
3. Type the Go To Page Number.
4. Then click Go To button.
5. Then goes the selected page.
SMS COMPUTERS MS – OFFICE
WEB LAYOUT :
Switches the active document to Web layout view, which is an editing view
that displays your document as it will appear in a Web browser.
PRINT LAYOUT :
Switches the active document to print layout view, which is an editing view
that displays your document as it will print. Print layout view uses more system
memory, so scrolling may be slower, especially if your document contains many
pictures or complex formatting.
OUTLINE VIEW :
Switches to outline view, in which you can examine and work with the
structure of your file in classic outline form. Work in outline view when you need
to organize and develop the content of your file.
TOOLBARS :
Displays or hides toolbars. To display a toolbar, select the check box next to
the toolbar name. To hide a toolbar, clear the check box.
RULER :
Displays or hides the horizontal ruler, which you can use to position objects,
change paragraph indents, page margins, and other spacing settings.
DOCUMENT MAP :
Turns on or off the Document Map, a vertical pane along the left edge of the
document window that outlines the document structure. Use the Document Map to
quickly browse a long or online document and to keep track of your location in it.
HEADER AND FOOTER :
Adds or changes the text that appears at the top and bottom of every page or slide.
FOOTNOTES :
Displays footnotes and endnotes so that you can view and edit them.
COMMENTS :
In Word, displays all comments ¾ made by all reviewers ¾ in the comment
pane. In Microsoft Excel, turns display of comments on the worksheet on or off.
49
SMS COMPUTERS MS – OFFICE
FULL SCREEN :
Hides most screen elements so that you can view more of your document.
To switch back to your previous view, click or press ESC.
ZOOM :
Controls how large or small the current file appears on the screen.
Inert Menu :
BREAK :
Inserts a page break, column break, or section break at the insertion point.
PAGE NUMBERS :
Inserts page numbers that automatically update when you add or delete pages.
DATE AND TIME :
Adds the date and time to an individual slide using the format you choose. If
you want to add the date and time to every slide, use the Header and Footer
command (View menu).
50
How to use Break option :
 Click Insert menu, select and click Break
option.
 Then displays a Break dialog box.
 Choose the required or particular option
and click OK button.
 Then inserts the required output.
How to use Page Numbers :
 Select Insert Menu.
 Select and click Page Numbers
option.
 Then displays a Page Numbers
dialog box.
 Sets the required format of
Page Numbers, and click OK
button.
SMS COMPUTERS MS – OFFICE
SYMBOL :
Inserts symbols and special characters from the fonts that are installed on
your computer.
FIELD :
Inserts a field at the insertion point. Use fields to insert a variety of
information automatically and to keep the information up-to-date.
COMMENT :
Inserts a comment at the insertion point.
AUTOTEXT :
Creates or inserts an AutoText entry.
CAPTION :
Inserts captions for tables, figures, equations, and other items.
CROSS-REFERENCE :
Inserts a cross-reference to an item in a document.
INDEX AND TABLES :
Creates indexes, tables of contents, tables of figures, tables of authorities,
and other similar tables.
PICTURE :
51
How to use Date and Time :
1. Select Insert Menu.
2. Select and click Date and Time option.
3. Then displays a date and time dialog box.
4. choose the particular format of date or time
settings.
5. Finally click OK button.
6. Then Date and Time format will appear on the
document.
How to use Symbol :
 Select Insert menu.
 Select and click Symbol option.
 Then displays a symbol dialog box.
 Then select a required symbol.
 Click Insert button, next click Close
button.
 Finally Inserts the selecting symbols
on the document.
SMS COMPUTERS MS – OFFICE
CLIP ART :
Opens the Clip Gallery where you can select the clip art image you want to
insert in your file or update your clip art collection. In PowerPoint, this command
is available only in slide and notes views.
PICTURE FROM FILE :
Inserts an existing picture in the active file at the insertion point.
AUTOSHAPES :
Displays the AutoShape categories you can insert. Click an AutoShape
category, click the AutoShape you want, and then click or drag in the active
window where you want to insert the AutoShape. To draw an AutoShape that
retains its default height-to-width ratio, hold down SHIFT while you drag.
WORDART :
Creates text effects by inserting a Microsoft Office drawing object.
FROM SCANNER OR CAMERA :
Loads an image by using a scanner or digital camera and then inserts the
resulting picture at the insertion point.
CHART :
Creates a chart by inserting a Microsoft Graph object.
FILE :
Inserts all or part of the file you select, into the active file at the insertion
point.
OBJECT :
Inserts an object ¾ such as a drawing, WordArt text effect, or an equation ¾
at the insertion point.
BOOKMARK :
Creates bookmarks, which you can use to mark selected text, graphics,
tables, or other items.
HYPERLINK :
Inserts a hyperlink or edits the selected hyperlink. Keyboard Shortcut : Ctrl + K
52
How to use Hyperlink :
 Select the text in document.
 Select Insert menu.
 Select and click Hyperlink option.
 Hyperlink dialog box will appear.
 Select the link file.
 Finally click OK button.
 Then sets the hyperlink to the selecting text.
 Click Ctrl +Mouse, then opens a linked file.
SMS COMPUTERS MS – OFFICE
Format Menu :
FONT :
Changes the font and character spacing formats of the selected text.
Keyboard Shortcut : Ctrl + D
PARAGRAPH :
Changes paragraph indents, text alignment, line spacing, pagination, and
other paragraph formats in the selected paragraph.
BULLETS AND NUMBERING :
Adds bullets or numbers to selected paragraphs and modifies the bullets and
numbering format.
53
How to use Font option :
 Select Format menu.
 Select and click Font option.
 Then displays a Font dialog box.
 Then select a required format of the font.
 Click OK button.
 Finally sets the required or selecting font
formats.
How to use Paragraph option :
 Select the text in document.
 Select Format menu.
 Select and click Paragraph option.
 Then Displays a Paragraph dialog box will appear.
 Sets the required or particular formats like alignment, line
spacing, indentation and line or page breaks etc.
 Finally click OK button.
 Then sets the required or particular settings of the text.

SMS COMPUTERS MS – OFFICE
BORDERS AND SHADING :
Adds borders and shading to selected text, paragraphs, pages, table cells, or
pictures.
COLUMNS :
Changes the number of columns in a document or a section of a document.
TABS :
Sets the position and alignment of tab stops and determines the type of
leader character for each tab stop.
54
How to use Bullets and Numbering option :
 Select the text in document.
 Select Format menu.
 Select and click Bullets and Numbering option.
 Then Displays a Bullets and Numbering dialog box .
 Sets the required or particular formats like Bulleted,
Numbered, Outlined Numbered, Line styles etc.
 Finally click OK button.
 Then sets the required or particular settings of the text.
How to use Borders and Shading option :
 Select the text in document.
 Select Format menu.
 Select and click Borders and Shading option.
 Then Displays a Borders and Shading dialog box .
 Sets the required or particular formats like Borders,
Page borders or Shading etc.
 Finally click OK button.
 Then sets the required or particular settings of the text.
How to use Columns option :
 Select required text on the document.
 Select Format Menu.
 Select and click Columns option.
 Then displays a Columns dialog box.
 Sets the how many columns divided option into the
column dialog box.
 Finally click OK button. Then sets the required formats.
SMS COMPUTERS MS – OFFICE
DROP CAP :
Formats a letter, word, or selected text with a large initial ¾ or "dropped" ¾
capital letter. A "drop cap" is traditionally the first letter in a paragraph, and it can
appear either in the left margin or dropped from the base line of the first line in the
paragraph.
TEXT DIRECTION :
Rotates selected text in table cells so you can read it from bottom to top or
from top to bottom.
55
How to use Tabs option :
 Select Format menu.
 Select and click Tabs option.
 Then displays Tabs dialog box.
 Sets Tab stop position, Alignment
and Leader options.

 Click Set button.
 Finally click OK button.
 Then sets the required or sets the
formats on the document.
How to use Drop Cap option :
• Select the text on the document file.
• Click format menu and click Drop Cap
option.
• Then opens a Drop Cap dialog box.
• Sets the position of Drop Cap.
• Click OK button.
• Then sets the selected Drop Cap format on
the document.
How to use Text Direction option :
• Create a table, type column and rows names.
• Select the text on the table column or row.
• Click format menu and click Text Direction
option.
• Then opens a Text Direction dialog box.
• Sets the position of Text Direction.
• Click OK button.
• Then sets the selected Text Direction format on
the document.
SMS COMPUTERS MS – OFFICE
CHANGE CASE :
Changes the capitalization of selected text.
BACKGROUND :
This option is used to sets the background color you want, or removes the
background color, or sets different styles of background colors and designs.
WEB THEME :
Applies a new or different theme, or removes a theme in a Web page,
document, e-mail message, or data access page. A theme is a set of unified design
elements and color schemes for background images, bullets, fonts, horizontal lines,
and other document elements.
FRAMES :
TABLE OF CONTENTS IN FRAME :
56
How to use Change Case option :
• Select the text on the document.
• Click format menu and click Change Case
option.
• Then opens a Change Case dialog box.
• Sets the position of Case type on the dialog box.
• Click OK button.
• Then sets the selected Change Case format on
the document.
How to use Background option :
Select the text or object on the document.
Click format menu and click Background option.
Then opens a Color Palette dialog box.
Sets the color or design of text or object on the document.
Then sets the color format on the document.
How to use Theme option :
 Select format menu.
 Select and click Theme option.
 Then displays a Theme dialog box.
 Select the required format of the theme.
 Finally click OK button on the dialog box.
 Then sets the required format on the
document.
SMS COMPUTERS MS – OFFICE
Creates a table of contents using the headings of your document and places
it in the left frame of a frames page. When you click a hyperlink in the left frame,
the document for the followed hyperlink appears in the right frame.
FRAMES PAGE :
Creates a new frames page.
AUTOFORMAT :
Analyzes the content of the active file and then automatically formats the
file. If you want to change the automatic formatting options before auto formatting
begins, use the AutoFormat command (Format menu) instead of clicking .
STYLE :
Defines or applies to the selection a combination of formats, called a style.
OBJECT :
Formats the line, color, fill and pattern, size, position, and other properties of
the selected object.
Tools Menu :
SPELLING AND GRAMMAR :
Checks the active document for possible spelling, grammar, and writing
style errors, and displays suggestions for correcting them. To set spelling and
grammar checking options, click Options on the Tools menu, and then click the
Spelling and Grammar tab.
LANGUAGE :
Set Language :
Designates the language of selected text in a file that contains more than one
language. The spelling checker automatically uses the dictionary for the designated
language.
Language Thesaurus :
Replaces a word or phrase in the document with a synonym, antonym, or
related word.
Word Count :
57
SMS COMPUTERS MS – OFFICE
Counts the number of pages, words, characters, paragraphs, and lines in the
active document. Punctuation marks and special symbols are also included in the
word count.
AutoSummarize :
Automatically summarizes the key points in the active document. You can
use the AutoSummarize command to create an executive summary or an abstract.
AutoCorrect :
Sets the options used to correct text automatically as you type, or to store
and reuse text and other items you use frequently.
TRACK CHANGES :
Highlight Changes :
Highlights changes to cell contents in a shared workbook, including moved
and pasted contents and inserted and deleted rows and columns.
Accept or Reject Changes :
Finds and selects each tracked change in a document so that you can review,
accept, or reject the change.
Track Changes Compare Documents :
Compares an open, edited document with the original document, and marks
any differences in the edited document.
Merge Documents :
Merges the tracked changes from the specified document to the active
document.
Protect Document, Unprotect Document :
Prevents changes to all or part of an online form or document except as
specified. You can also assign a password so that other users can annotate a
document, mark revisions, or fill in parts of an online form. When a document is
protected, this command changes to Unprotect Document.
58
How to Protect or Unprotect Document :
• Open the required or particular document file.
• Select and click Tools Option.
• Then displays a menu options list box.
• Select and click “Protect Document” option.
• Then displays a protect password dialog box will appear.
• Type the name. once again type rename as the same format.
• Finally click OK button.
• Then protects the selecting or required document.
• Close the document file. Once again open the document.
• Then type any matter, the matter will types red color.
• Once again click unprotect option on the format menu.
• Type protect name on the text box. Click ok button. Then unprotect the
SMS COMPUTERS MS – OFFICE
ONLINE COLLABORATION :
Meet Now :
Starts an impromptu online meeting by sending an invitation to participants.
The participants you invite to the meeting must be running Microsoft NetMeeting
on their computers.
Web Discussions :
Displays the Discussions toolbar, where you can insert a new discussion
about the file or perform other discussion tasks.
Mail Merge :
Produces form letters, mailing labels, envelopes, catalogs, and other types of
merged documents.
How to use Mail Merge :
1. Click on Tools menu. Select and click
Mail Merge option.
2. Then displays a Mail Merge Helper dialog
box.
3. Click Create button, displays sub options
list, and click from letters option.
4. Then displays a Microsoft Word dialog box.
5. Click Active Window button.
59
SMS COMPUTERS MS – OFFICE
6. Next Click “Get Data” button on the dialog box.
7. Then displays a sub options list.
8. Select and click create data source option.
9. Then displays a save as dialog box.
10. Type name and click save button.
11. Click edit data source button.
12. Then displays a data form.
13. Type the the details of the data.
14. Tnd finally click OK button.
15. Then displays a mail merge tool bar.
16. Select and click or inserts the fields.
17. Then sets the fields on the document.
18. Finally click the "ABC" button on the tool bar.
19. Then appears the mail merge
format.
Envelopes and Labels :
Creates an envelope or a single mailing label, or inserts the same name
and address on an entire sheet of mailing labels.
Letter Wizard :
Runs the Letter Wizard, which helps you quickly create letters.
60
How to use Envelopes and Labels :
• Select and click format menu.
• Click envelopes and labels option.
• Then displays a envelopes and labels dialog box.
• Select the “Envelopes” or “Labels” on the dialog
box.
• Type the address on the delivery address and return
address on the enveloeps.
• Type the address on the Labels.
• Finally click Print or Add to Document.
• Then sets the required formats of the document.
SMS COMPUTERS MS – OFFICE
Macros :
Opens the Macros dialog box, where you can run, edit, or delete a macro.
Use Record New Macro to record a series of actions as a macro, or click Visual
Basic Editor to write a macro.
Macro Record New Macro/Stop Recording :
Records a new macro, or stops recording after you start recording a macro.
Templates and Add-Ins :
Attaches a different template to the active document, loads add-in programs,
or updates a document's styles. Also loads additional templates as global templates
so you can use their macros, AutoText entries, and custom command settings.
Customize :
Customizes toolbar buttons, menu commands, and shortcut key assignments.
Options :
Modifies settings for Microsoft Office programs such as screen appearance,
printing, editing, spelling, and other options.
Table Menu :
Draw Table :
Inserts a table where you drag in the document. After you drag to insert the
table, drag inside the table to add cells, columns, or rows. You can create cells of
different heights or a varying number of columns per row. In Microsoft Word, you
can even create a nested table. For more information, type the keywords creating
tables in the Office Assistant.
Insert Table :
Inserts a table in the document with the number of columns and rows you specify.
Delete :
Delete Table :
Deletes the selected table from the document.
Delete Columns :
Deletes from the table the selected columns or the column that contains the
insertion point.
61
SMS COMPUTERS MS – OFFICE
Delete Rows :
Deletes from the table the selected rows or the row that contains the
insertion point.
Delete Cells :
Deletes from the table the selected cells or the cell that contains the insertion
point.
Select :
Select Table :
Selects the table that contains the insertion point.
Select Columns :
Selects the columns that contain the insertion point.
Select Rows :
Selects the rows that contain the insertion point.
Select Cells :
Selects the cells that contain the insertion point.
Merge Cells :
In Microsoft Word and Microsoft PowerPoint, combines the contents of
selected adjacent cells into a single cell.
In Microsoft Excel, combines two or more selected cells into a single cell.
The cell reference for a merged cell is the upper-left cell in the original selection.
Merging multiple cells into one cell will keep the contents of the upper-left cell
only.
Split Cells / Unmerge Cells :
In Microsoft Word and Microsoft PowerPoint, splits the selected cells into the
number of rows and columns you enter.
In Microsoft Excel, separates a merged cell into the cells that were originally
combined.
Split Table :
Divides a table into two separate tables and inserts a paragraph mark above
the row that contains the insertion point.
62
SMS COMPUTERS MS – OFFICE
Table AutoFormat :
In Microsoft Word, automatically applies formats, including predefined
borders and shading, to a table. Automatically resizes a table to fit the contents of
the table cells.
In Microsoft Excel, applies a built-in combination of formats to a cell range
or a PivotTable report. If a single cell is selected, Microsoft Excel automatically
selects the range surrounded by blank cells and applies the autoformat to that
range. If the selection is part of a PivotTable report, the entire table, except for the
page fields, is selected and formatted. This command is not available if the sheet is
protected.
Auto Fit :
AutoFit to Contents :
Automatically adjusts the width of columns in the table, based on the
amount of text you type.
AutoFit to Window :
Automatically resizes the table so that it fits within the window of a Web
browser. When the window size of the Web browser changes, the table size
automatically adjusts to fit within the window.
Fixed Column Width :
Makes each column a fixed width in the table, using the current widths of
the columns.
Distribute Rows Evenly :
Changes the selected rows or cells to equal row height.
Distribute Columns Evenly :
Changes the selected columns or cells to equal column width.
Heading Rows Repeat :
Designates the selected rows to be a table heading that is repeated on
subsequent pages if the table spans more than one page. This command is available
only if the selected rows include the top row of a table.
Convert :
Text to Table :
Converts the selected text to a table.
63
SMS COMPUTERS MS – OFFICE
Table to Text :
Converts a selected table or selected table rows to text, separating the
contents of the cells in each row with the separator character you specify.
Sort :
Arranges the information in selected rows or lists alphabetically,
numerically, or by date.
Formula :
Performs mathematical calculations on numbers.
Gridlines :
In a table, the Gridlines command (Table menu) displays or hides dotted
gridlines to help you see which cell you're working in. Table gridlines don't print;
if you want to add printable gridlines to your table, use the Borders and Shading
command (Format menu).
If you are working in an East Asian language, the Gridlines command (View
menu) displays or hides the document grid.
Table Properties :
Sets various options to the table such as the table size, alignment, and text
wrapping; the row height, row page breaking, and row header options; the column
width; and the cell size, alignment, and other cell options.
Window Menu :
New Window :
Opens a new window with the same contents as the active window so you
can view different parts of a file at the same time.
Arrange :
Displays all open files in separate windows on the screen. The Arrange
command makes it easier to drag between files.
Split :
Splits the active window into panes, or removes the split from the active window.
Help Menu :
Office Assistant :
The Office Assistant provides Help topics and tips to help you accomplish
your tasks.
64
SMS COMPUTERS MS – OFFICE
Show or hide the Office Assistant :
Displays or removes the Office Assistant from view.
Office on the Web :
Connects to the Microsoft Office Web site where you can get up-to-date
information and help on Office programs.
WordPerfect Help :
Helps you learn the Word equivalents for WordPerfect for DOS commands
and key combinations. You can also display Help for WordPerfect Users by
double-clicking WPH on the status bar.
Detect and Repair :
Automatically finds and fixes errors in this program.
About Microsoft Program :
Displays the version number of this Microsoft program; copyright, legal, and
licensing notices; the user and organization name; the software serial number; and
information about your computer and your operating system.

S. MADHU MOHAN
M.A., PGDSE & DHE.,
SMS COMPUTER EDUCATION,
H.No: 16-38F/1A,
College Road,
NANDIKOTKUR POST,
Phone No : 9032900170
94402 89220
65

More Related Content

What's hot (20)

Introduction to MS WORD
Introduction to MS WORDIntroduction to MS WORD
Introduction to MS WORD
 
Word Lecture 1
Word Lecture 1Word Lecture 1
Word Lecture 1
 
intro of ms word 2007
intro of ms word 2007intro of ms word 2007
intro of ms word 2007
 
Microsoft word basics
Microsoft word basicsMicrosoft word basics
Microsoft word basics
 
Word Tutorial 2007
Word Tutorial 2007Word Tutorial 2007
Word Tutorial 2007
 
M odul 3 ms word
M odul 3 ms wordM odul 3 ms word
M odul 3 ms word
 
Ms word
Ms wordMs word
Ms word
 
Lecture1 for MS Word2007
Lecture1 for MS Word2007Lecture1 for MS Word2007
Lecture1 for MS Word2007
 
MS Word Introduction and Tools.
MS Word Introduction and Tools.MS Word Introduction and Tools.
MS Word Introduction and Tools.
 
Ms powerpoint 2007 presentation by sarmad baloch
Ms powerpoint 2007 presentation by sarmad balochMs powerpoint 2007 presentation by sarmad baloch
Ms powerpoint 2007 presentation by sarmad baloch
 
Word 2007
Word 2007Word 2007
Word 2007
 
Word 2003
Word 2003Word 2003
Word 2003
 
Soft skills (ICT) part2
Soft skills (ICT) part2Soft skills (ICT) part2
Soft skills (ICT) part2
 
MS Office Word 2007
MS Office Word 2007MS Office Word 2007
MS Office Word 2007
 
Ms word 2007 pptx
Ms word 2007 pptxMs word 2007 pptx
Ms word 2007 pptx
 
Microsoft word
Microsoft wordMicrosoft word
Microsoft word
 
MS Word Window Elements
MS Word Window ElementsMS Word Window Elements
MS Word Window Elements
 
Microsoft word tutorials COMPLETE by Gulshan K Maheshwari(QAU)
Microsoft word tutorials COMPLETE by Gulshan  K Maheshwari(QAU)Microsoft word tutorials COMPLETE by Gulshan  K Maheshwari(QAU)
Microsoft word tutorials COMPLETE by Gulshan K Maheshwari(QAU)
 
Ms word 2010 by sachin sharma
Ms word 2010 by sachin sharmaMs word 2010 by sachin sharma
Ms word 2010 by sachin sharma
 
MS Word Intermediate Training
MS Word Intermediate TrainingMS Word Intermediate Training
MS Word Intermediate Training
 

Similar to 006 ms office (word)

ICT Skills CBSE XI AI Resources for students
ICT Skills CBSE XI AI Resources for studentsICT Skills CBSE XI AI Resources for students
ICT Skills CBSE XI AI Resources for studentsricha527021
 
Microsoft word 2007 part 1
Microsoft word 2007 part 1Microsoft word 2007 part 1
Microsoft word 2007 part 1kenjaneredz
 
INFORMATION TECHNOLOGY (ICT Skills ).pptx
INFORMATION TECHNOLOGY (ICT Skills ).pptxINFORMATION TECHNOLOGY (ICT Skills ).pptx
INFORMATION TECHNOLOGY (ICT Skills ).pptxArshveerSinghDhillon
 
Microsoft Office Specialization.pptx
Microsoft Office Specialization.pptxMicrosoft Office Specialization.pptx
Microsoft Office Specialization.pptxDarylCornelos
 
Introduction to word processing
Introduction to word processingIntroduction to word processing
Introduction to word processingIddrisu Issah
 
Microsoft word
Microsoft wordMicrosoft word
Microsoft wordAmit Singh
 
MS powerpoint 2007 complete
MS powerpoint 2007 completeMS powerpoint 2007 complete
MS powerpoint 2007 completeLovenish Arora
 
Information Technology
Information Technology Information Technology
Information Technology JassyGill2
 
1.0 Introduction to Information Technology
1.0 Introduction to Information Technology1.0 Introduction to Information Technology
1.0 Introduction to Information TechnologyAIMIZAWANIZAINAL1
 
Introduction to ms word
Introduction to ms wordIntroduction to ms word
Introduction to ms wordigwennabuike
 
Ms office 2003
Ms office 2003Ms office 2003
Ms office 2003Hepsijeba
 
Microsoft Office slides
Microsoft Office slidesMicrosoft Office slides
Microsoft Office slidesSohaib Latif
 

Similar to 006 ms office (word) (20)

Unit4
Unit4Unit4
Unit4
 
ICT Skills CBSE XI AI Resources for students
ICT Skills CBSE XI AI Resources for studentsICT Skills CBSE XI AI Resources for students
ICT Skills CBSE XI AI Resources for students
 
Microsoft word 2007 part 1
Microsoft word 2007 part 1Microsoft word 2007 part 1
Microsoft word 2007 part 1
 
Ms word
Ms wordMs word
Ms word
 
INFORMATION TECHNOLOGY (ICT Skills ).pptx
INFORMATION TECHNOLOGY (ICT Skills ).pptxINFORMATION TECHNOLOGY (ICT Skills ).pptx
INFORMATION TECHNOLOGY (ICT Skills ).pptx
 
Microsoft Office Specialization.pptx
Microsoft Office Specialization.pptxMicrosoft Office Specialization.pptx
Microsoft Office Specialization.pptx
 
Introduction to word processing
Introduction to word processingIntroduction to word processing
Introduction to word processing
 
Ms word module 1
Ms word module 1Ms word module 1
Ms word module 1
 
Microsoft word
Microsoft wordMicrosoft word
Microsoft word
 
Word Processor
Word ProcessorWord Processor
Word Processor
 
Word 2016
Word 2016Word 2016
Word 2016
 
MS powerpoint 2007 complete
MS powerpoint 2007 completeMS powerpoint 2007 complete
MS powerpoint 2007 complete
 
Information Technology
Information Technology Information Technology
Information Technology
 
1.0 Introduction to Information Technology
1.0 Introduction to Information Technology1.0 Introduction to Information Technology
1.0 Introduction to Information Technology
 
Introduction to ms word
Introduction to ms wordIntroduction to ms word
Introduction to ms word
 
Presentation
PresentationPresentation
Presentation
 
Ms office 2003
Ms office 2003Ms office 2003
Ms office 2003
 
lecture 1
 lecture 1 lecture 1
lecture 1
 
03.ms word
03.ms word03.ms word
03.ms word
 
Microsoft Office slides
Microsoft Office slidesMicrosoft Office slides
Microsoft Office slides
 

Recently uploaded

Interactive Powerpoint_How to Master effective communication
Interactive Powerpoint_How to Master effective communicationInteractive Powerpoint_How to Master effective communication
Interactive Powerpoint_How to Master effective communicationnomboosow
 
Painted Grey Ware.pptx, PGW Culture of India
Painted Grey Ware.pptx, PGW Culture of IndiaPainted Grey Ware.pptx, PGW Culture of India
Painted Grey Ware.pptx, PGW Culture of IndiaVirag Sontakke
 
ECONOMIC CONTEXT - PAPER 1 Q3: NEWSPAPERS.pptx
ECONOMIC CONTEXT - PAPER 1 Q3: NEWSPAPERS.pptxECONOMIC CONTEXT - PAPER 1 Q3: NEWSPAPERS.pptx
ECONOMIC CONTEXT - PAPER 1 Q3: NEWSPAPERS.pptxiammrhaywood
 
Presiding Officer Training module 2024 lok sabha elections
Presiding Officer Training module 2024 lok sabha electionsPresiding Officer Training module 2024 lok sabha elections
Presiding Officer Training module 2024 lok sabha electionsanshu789521
 
How to Make a Pirate ship Primary Education.pptx
How to Make a Pirate ship Primary Education.pptxHow to Make a Pirate ship Primary Education.pptx
How to Make a Pirate ship Primary Education.pptxmanuelaromero2013
 
Employee wellbeing at the workplace.pptx
Employee wellbeing at the workplace.pptxEmployee wellbeing at the workplace.pptx
Employee wellbeing at the workplace.pptxNirmalaLoungPoorunde1
 
Crayon Activity Handout For the Crayon A
Crayon Activity Handout For the Crayon ACrayon Activity Handout For the Crayon A
Crayon Activity Handout For the Crayon AUnboundStockton
 
Final demo Grade 9 for demo Plan dessert.pptx
Final demo Grade 9 for demo Plan dessert.pptxFinal demo Grade 9 for demo Plan dessert.pptx
Final demo Grade 9 for demo Plan dessert.pptxAvyJaneVismanos
 
How to Configure Email Server in Odoo 17
How to Configure Email Server in Odoo 17How to Configure Email Server in Odoo 17
How to Configure Email Server in Odoo 17Celine George
 
Types of Journalistic Writing Grade 8.pptx
Types of Journalistic Writing Grade 8.pptxTypes of Journalistic Writing Grade 8.pptx
Types of Journalistic Writing Grade 8.pptxEyham Joco
 
POINT- BIOCHEMISTRY SEM 2 ENZYMES UNIT 5.pptx
POINT- BIOCHEMISTRY SEM 2 ENZYMES UNIT 5.pptxPOINT- BIOCHEMISTRY SEM 2 ENZYMES UNIT 5.pptx
POINT- BIOCHEMISTRY SEM 2 ENZYMES UNIT 5.pptxSayali Powar
 
Framing an Appropriate Research Question 6b9b26d93da94caf993c038d9efcdedb.pdf
Framing an Appropriate Research Question 6b9b26d93da94caf993c038d9efcdedb.pdfFraming an Appropriate Research Question 6b9b26d93da94caf993c038d9efcdedb.pdf
Framing an Appropriate Research Question 6b9b26d93da94caf993c038d9efcdedb.pdfUjwalaBharambe
 
Computed Fields and api Depends in the Odoo 17
Computed Fields and api Depends in the Odoo 17Computed Fields and api Depends in the Odoo 17
Computed Fields and api Depends in the Odoo 17Celine George
 
Capitol Tech U Doctoral Presentation - April 2024.pptx
Capitol Tech U Doctoral Presentation - April 2024.pptxCapitol Tech U Doctoral Presentation - April 2024.pptx
Capitol Tech U Doctoral Presentation - April 2024.pptxCapitolTechU
 
KSHARA STURA .pptx---KSHARA KARMA THERAPY (CAUSTIC THERAPY)————IMP.OF KSHARA ...
KSHARA STURA .pptx---KSHARA KARMA THERAPY (CAUSTIC THERAPY)————IMP.OF KSHARA ...KSHARA STURA .pptx---KSHARA KARMA THERAPY (CAUSTIC THERAPY)————IMP.OF KSHARA ...
KSHARA STURA .pptx---KSHARA KARMA THERAPY (CAUSTIC THERAPY)————IMP.OF KSHARA ...M56BOOKSTORE PRODUCT/SERVICE
 
Alper Gobel In Media Res Media Component
Alper Gobel In Media Res Media ComponentAlper Gobel In Media Res Media Component
Alper Gobel In Media Res Media ComponentInMediaRes1
 
internship ppt on smartinternz platform as salesforce developer
internship ppt on smartinternz platform as salesforce developerinternship ppt on smartinternz platform as salesforce developer
internship ppt on smartinternz platform as salesforce developerunnathinaik
 
CELL CYCLE Division Science 8 quarter IV.pptx
CELL CYCLE Division Science 8 quarter IV.pptxCELL CYCLE Division Science 8 quarter IV.pptx
CELL CYCLE Division Science 8 quarter IV.pptxJiesonDelaCerna
 
Enzyme, Pharmaceutical Aids, Miscellaneous Last Part of Chapter no 5th.pdf
Enzyme, Pharmaceutical Aids, Miscellaneous Last Part of Chapter no 5th.pdfEnzyme, Pharmaceutical Aids, Miscellaneous Last Part of Chapter no 5th.pdf
Enzyme, Pharmaceutical Aids, Miscellaneous Last Part of Chapter no 5th.pdfSumit Tiwari
 

Recently uploaded (20)

Interactive Powerpoint_How to Master effective communication
Interactive Powerpoint_How to Master effective communicationInteractive Powerpoint_How to Master effective communication
Interactive Powerpoint_How to Master effective communication
 
Painted Grey Ware.pptx, PGW Culture of India
Painted Grey Ware.pptx, PGW Culture of IndiaPainted Grey Ware.pptx, PGW Culture of India
Painted Grey Ware.pptx, PGW Culture of India
 
ECONOMIC CONTEXT - PAPER 1 Q3: NEWSPAPERS.pptx
ECONOMIC CONTEXT - PAPER 1 Q3: NEWSPAPERS.pptxECONOMIC CONTEXT - PAPER 1 Q3: NEWSPAPERS.pptx
ECONOMIC CONTEXT - PAPER 1 Q3: NEWSPAPERS.pptx
 
Presiding Officer Training module 2024 lok sabha elections
Presiding Officer Training module 2024 lok sabha electionsPresiding Officer Training module 2024 lok sabha elections
Presiding Officer Training module 2024 lok sabha elections
 
How to Make a Pirate ship Primary Education.pptx
How to Make a Pirate ship Primary Education.pptxHow to Make a Pirate ship Primary Education.pptx
How to Make a Pirate ship Primary Education.pptx
 
Employee wellbeing at the workplace.pptx
Employee wellbeing at the workplace.pptxEmployee wellbeing at the workplace.pptx
Employee wellbeing at the workplace.pptx
 
Crayon Activity Handout For the Crayon A
Crayon Activity Handout For the Crayon ACrayon Activity Handout For the Crayon A
Crayon Activity Handout For the Crayon A
 
Final demo Grade 9 for demo Plan dessert.pptx
Final demo Grade 9 for demo Plan dessert.pptxFinal demo Grade 9 for demo Plan dessert.pptx
Final demo Grade 9 for demo Plan dessert.pptx
 
How to Configure Email Server in Odoo 17
How to Configure Email Server in Odoo 17How to Configure Email Server in Odoo 17
How to Configure Email Server in Odoo 17
 
Types of Journalistic Writing Grade 8.pptx
Types of Journalistic Writing Grade 8.pptxTypes of Journalistic Writing Grade 8.pptx
Types of Journalistic Writing Grade 8.pptx
 
POINT- BIOCHEMISTRY SEM 2 ENZYMES UNIT 5.pptx
POINT- BIOCHEMISTRY SEM 2 ENZYMES UNIT 5.pptxPOINT- BIOCHEMISTRY SEM 2 ENZYMES UNIT 5.pptx
POINT- BIOCHEMISTRY SEM 2 ENZYMES UNIT 5.pptx
 
Framing an Appropriate Research Question 6b9b26d93da94caf993c038d9efcdedb.pdf
Framing an Appropriate Research Question 6b9b26d93da94caf993c038d9efcdedb.pdfFraming an Appropriate Research Question 6b9b26d93da94caf993c038d9efcdedb.pdf
Framing an Appropriate Research Question 6b9b26d93da94caf993c038d9efcdedb.pdf
 
Computed Fields and api Depends in the Odoo 17
Computed Fields and api Depends in the Odoo 17Computed Fields and api Depends in the Odoo 17
Computed Fields and api Depends in the Odoo 17
 
Capitol Tech U Doctoral Presentation - April 2024.pptx
Capitol Tech U Doctoral Presentation - April 2024.pptxCapitol Tech U Doctoral Presentation - April 2024.pptx
Capitol Tech U Doctoral Presentation - April 2024.pptx
 
KSHARA STURA .pptx---KSHARA KARMA THERAPY (CAUSTIC THERAPY)————IMP.OF KSHARA ...
KSHARA STURA .pptx---KSHARA KARMA THERAPY (CAUSTIC THERAPY)————IMP.OF KSHARA ...KSHARA STURA .pptx---KSHARA KARMA THERAPY (CAUSTIC THERAPY)————IMP.OF KSHARA ...
KSHARA STURA .pptx---KSHARA KARMA THERAPY (CAUSTIC THERAPY)————IMP.OF KSHARA ...
 
TataKelola dan KamSiber Kecerdasan Buatan v022.pdf
TataKelola dan KamSiber Kecerdasan Buatan v022.pdfTataKelola dan KamSiber Kecerdasan Buatan v022.pdf
TataKelola dan KamSiber Kecerdasan Buatan v022.pdf
 
Alper Gobel In Media Res Media Component
Alper Gobel In Media Res Media ComponentAlper Gobel In Media Res Media Component
Alper Gobel In Media Res Media Component
 
internship ppt on smartinternz platform as salesforce developer
internship ppt on smartinternz platform as salesforce developerinternship ppt on smartinternz platform as salesforce developer
internship ppt on smartinternz platform as salesforce developer
 
CELL CYCLE Division Science 8 quarter IV.pptx
CELL CYCLE Division Science 8 quarter IV.pptxCELL CYCLE Division Science 8 quarter IV.pptx
CELL CYCLE Division Science 8 quarter IV.pptx
 
Enzyme, Pharmaceutical Aids, Miscellaneous Last Part of Chapter no 5th.pdf
Enzyme, Pharmaceutical Aids, Miscellaneous Last Part of Chapter no 5th.pdfEnzyme, Pharmaceutical Aids, Miscellaneous Last Part of Chapter no 5th.pdf
Enzyme, Pharmaceutical Aids, Miscellaneous Last Part of Chapter no 5th.pdf
 

006 ms office (word)

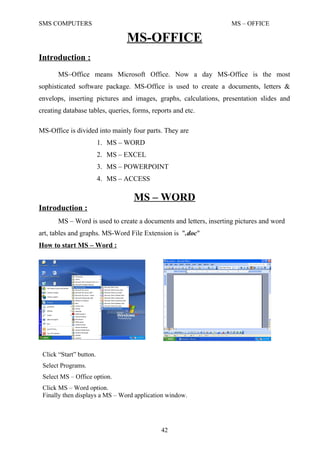
  • 1. SMS COMPUTERS MS – OFFICE MS-OFFICE Introduction : MS–Office means Microsoft Office. Now a day MS-Office is the most sophisticated software package. MS-Office is used to create a documents, letters & envelops, inserting pictures and images, graphs, calculations, presentation slides and creating database tables, queries, forms, reports and etc. MS-Office is divided into mainly four parts. They are 1. MS – WORD 2. MS – EXCEL 3. MS – POWERPOINT 4. MS – ACCESS MS – WORD Introduction : MS – Word is used to create a documents and letters, inserting pictures and word art, tables and graphs. MS-Word File Extension is ".doc" How to start MS – Word : 42 Click “Start” button. Select Programs. Select MS – Office option. Click MS – Word option. Finally then displays a MS – Word application window.
  • 2. SMS COMPUTERS MS – OFFICE Then opens a MS – Word window. The whole document is called application window, we are using white area is called document window. Title Bar : Title Bar displays title of the document and three control buttons on the right side of the title bar. Control Buttons : There are three types of control buttons. They are 1. Minimize Button : This button is used to minimize the document on the task bar. 2. Maximize Button : This button is used to maximizes the document on the screen 3. Close Button : This button is used to closes the whole application. Status bar : Status bar displays the current settings of the document window, like current page number, section, total pages and using current page, using paper ruler scales and using line number, column number and displays overwriting etc. Scroll Bars : Scroll Bars are used to scroll the document up and down, left and right sides. They are two types of scroll bars available in the Ms – Word application. 1. Horizontal Scroll Bar. 2. Vertical Scroll Bar. 43 (Horizontal Scroll Bar) (Vertical Scroll Bar)
  • 3. SMS COMPUTERS MS – OFFICE Menu Bar : Menu Bar displays different types of menus. They are File Menu Edit Menu View Menu Insert Menu Format Menu Tools Menu Table Menu Window Menu Help Menu. (Each menu displays menu options.) File Menu : (Alt + F) NEW : This option is used to opens a new document or new template. Template means already designed particular format document. Keyboard Shortcut : Ctrl + N OPEN : This option is used to opens an existing or old document. Keyboard Shortcut: Ctrl+ O, Ctrl + F12 CLOSE : This option is used to closes the document window. Keyboard shortcut : Ctrl + F4 (Function Key) SAVE : This option is used to saves the current file. Keyboard Shortcut : Ctrl + S Save As : This option is used to saves the file with a different or new name. Keyboard Shortcut : F12 (Function key) 44 How To opens document  Click File Menu.  Select and Click Open option.  Then displays a open window.  Select existing or old file.  Finally click open button.  Then opens a existing file. How To saves document • Click File Menu. • Select and Click Save option. • Then displays a Save window. • Type a name. • Finally click save button. • Then file saves.
  • 4. SMS COMPUTERS MS – OFFICE Save As Web Page : This option is used to saves the file with Internet Explorer format or Web page format. File Search : This option is used to searches the particular word in the ms-word application files. Web Page Preview : This option is used to preview the file with internet explorer format with another application window. Page Setup : This option is used to sets the page like page margins, page rulers, page sizes, paper orientation and etc. Print Preview : This option is used to displays or sees the required page print format preview. Keyboard Shortcut : Ctrl + F2 (Function Key) or Ctrl + Alt + i Print : This option is used to prints the document on the paper. Keyboard Shortcut : Ctrl + P Properties : This option is used to see the file content properties like no .of pages, no of words, no of lines, no of characters, no of character with spaces, no of paragraphs, author name, and document creation, modification, printing and last saved the options is displayed. 45 How to sets the Page Setup  Click File Menu.  Select and Click Page Setup option.  Then displays a Page Setup window.  Then sets page margins, page sizes, and page orientation and etc.  Finally click OK button.  Then file sets the required formats. How to use Print : 1. Click on File Menu. 2. Select and click Print Option. 3. Then displays a print dialogue box. 4. Sets the printer options like choose printer type, no of copies, page range etc. 5. Then finally click OK button.
  • 5. SMS COMPUTERS MS – OFFICE Exit : This option is used to exit or closes the complete ms-word application window. Keyboard Shortcut : Alt + F4 (Function key) Edit Menu : (Alt + E) UNDO : This option is used to perform the last action of the document. Keyboard Shortcut : Ctrl + Z REDO : This option is used to repeat the last action of the document. Keyboard Shortcut : Ctrl + Y CUT : This option is used to cuts the required are particular text or figure. Keyboard Shortcut : Ctrl + X How to use this option :  Select the text of the document.  Select Edit menu, Select and click cut option.  Then cuts the required text or figure. COPY : This option is used to copy the required are particular text or figure. Keyboard Shortcut : Ctrl + C How to use this option :  Select the text of the document.  Select Edit menu, Select and click copy option.  Then copy the required text or figure. PASTE : This option is used to paste the cut or copy text or figure. Keyboard Shortcut : Ctrl + V How to use this option :  Select the text of the document.  Select Edit menu, Select and click cut or copy options.  Then cut or copy the required text or figure.  Select Edit menu, select and click paste option. 46
  • 6. SMS COMPUTERS MS – OFFICE  Then fixes the cut or copying text or figure. PASTE SPECIAL : This option is used to paste to the link of the copy text or figure. You have any modification in the master file, then automatically changes contents of the duplicate file. How to use this option :  Select the contents of the file.  Select Edit menu, Select and click copy option.  Then copy the required text or figure.  Then goes another file or same file.  Select Edit menu, select and click paste special option.  Then fixes the copying text or figure to link the selecting file.  Then you have any modifications of the master file, automatically changes another file. PASTE AS HYPERLINK: This option is used to paste the hyperlink with selecting or copying text or figure. How to use this option :  Select the text of the document.  Select Edit menu, Select and click copy option.  Then copy the required text or figure.  Select Edit menu, select and click Paste Hyperlink option.  Then fixes the copying text or figure with a link format.  Then click ctrl + mouse button click, then goes to copying text. CLEAR : This option is used to clears or deletes the selected text. This option is used to types. 1. Deleting all formats with selected text. 2. Deleting all selected text with completely. Keyboard Shortcut : Delete key. How to use this option :  Select required or particular text or figure.  Select Edit menu, select and click clear option.  Then deletes, removes or erases the selected text or figure. SELECT ALL : This option is used to selects the total contents of the document or file. 47
  • 7. SMS COMPUTERS MS – OFFICE Keyboard Shortcut : Ctrl + A. FIND : This option is used to finds or search the word, character or text of the file or document. Keyboard Shortcut : Ctrl + F. REPLACE : This option is used to replaces the word, character or text of the file or document. Keyboard Shortcut : Ctrl + H. GO TO : This option is used to goes the required or particular page. Keyboard Shortcut : Ctrl + G. View Menu : NORMAL : Switches to normal view, which is the default document view for most word-processing tasks, such as typing, editing, and formatting. 48 How to use this option : 1. Select Edit menu, select and click Find option. 2. Then displays a find dialog box. 3. Type the finding or searching text. 4. Then click find next button. 5. Then displays the searching text. How to use this option : 1. Select Edit menu, select and click replace option. 2. Then displays a replace dialog box. 3. Type the replacing text. 4. Then click replace or replace all button. 5. Then replace the old text with a new text. How to use this option : 1. Select Edit menu, select and click Go To option. 2. Then displays a Go To dialog box. 3. Type the Go To Page Number. 4. Then click Go To button. 5. Then goes the selected page.
  • 8. SMS COMPUTERS MS – OFFICE WEB LAYOUT : Switches the active document to Web layout view, which is an editing view that displays your document as it will appear in a Web browser. PRINT LAYOUT : Switches the active document to print layout view, which is an editing view that displays your document as it will print. Print layout view uses more system memory, so scrolling may be slower, especially if your document contains many pictures or complex formatting. OUTLINE VIEW : Switches to outline view, in which you can examine and work with the structure of your file in classic outline form. Work in outline view when you need to organize and develop the content of your file. TOOLBARS : Displays or hides toolbars. To display a toolbar, select the check box next to the toolbar name. To hide a toolbar, clear the check box. RULER : Displays or hides the horizontal ruler, which you can use to position objects, change paragraph indents, page margins, and other spacing settings. DOCUMENT MAP : Turns on or off the Document Map, a vertical pane along the left edge of the document window that outlines the document structure. Use the Document Map to quickly browse a long or online document and to keep track of your location in it. HEADER AND FOOTER : Adds or changes the text that appears at the top and bottom of every page or slide. FOOTNOTES : Displays footnotes and endnotes so that you can view and edit them. COMMENTS : In Word, displays all comments ¾ made by all reviewers ¾ in the comment pane. In Microsoft Excel, turns display of comments on the worksheet on or off. 49
  • 9. SMS COMPUTERS MS – OFFICE FULL SCREEN : Hides most screen elements so that you can view more of your document. To switch back to your previous view, click or press ESC. ZOOM : Controls how large or small the current file appears on the screen. Inert Menu : BREAK : Inserts a page break, column break, or section break at the insertion point. PAGE NUMBERS : Inserts page numbers that automatically update when you add or delete pages. DATE AND TIME : Adds the date and time to an individual slide using the format you choose. If you want to add the date and time to every slide, use the Header and Footer command (View menu). 50 How to use Break option :  Click Insert menu, select and click Break option.  Then displays a Break dialog box.  Choose the required or particular option and click OK button.  Then inserts the required output. How to use Page Numbers :  Select Insert Menu.  Select and click Page Numbers option.  Then displays a Page Numbers dialog box.  Sets the required format of Page Numbers, and click OK button.
  • 10. SMS COMPUTERS MS – OFFICE SYMBOL : Inserts symbols and special characters from the fonts that are installed on your computer. FIELD : Inserts a field at the insertion point. Use fields to insert a variety of information automatically and to keep the information up-to-date. COMMENT : Inserts a comment at the insertion point. AUTOTEXT : Creates or inserts an AutoText entry. CAPTION : Inserts captions for tables, figures, equations, and other items. CROSS-REFERENCE : Inserts a cross-reference to an item in a document. INDEX AND TABLES : Creates indexes, tables of contents, tables of figures, tables of authorities, and other similar tables. PICTURE : 51 How to use Date and Time : 1. Select Insert Menu. 2. Select and click Date and Time option. 3. Then displays a date and time dialog box. 4. choose the particular format of date or time settings. 5. Finally click OK button. 6. Then Date and Time format will appear on the document. How to use Symbol :  Select Insert menu.  Select and click Symbol option.  Then displays a symbol dialog box.  Then select a required symbol.  Click Insert button, next click Close button.  Finally Inserts the selecting symbols on the document.
  • 11. SMS COMPUTERS MS – OFFICE CLIP ART : Opens the Clip Gallery where you can select the clip art image you want to insert in your file or update your clip art collection. In PowerPoint, this command is available only in slide and notes views. PICTURE FROM FILE : Inserts an existing picture in the active file at the insertion point. AUTOSHAPES : Displays the AutoShape categories you can insert. Click an AutoShape category, click the AutoShape you want, and then click or drag in the active window where you want to insert the AutoShape. To draw an AutoShape that retains its default height-to-width ratio, hold down SHIFT while you drag. WORDART : Creates text effects by inserting a Microsoft Office drawing object. FROM SCANNER OR CAMERA : Loads an image by using a scanner or digital camera and then inserts the resulting picture at the insertion point. CHART : Creates a chart by inserting a Microsoft Graph object. FILE : Inserts all or part of the file you select, into the active file at the insertion point. OBJECT : Inserts an object ¾ such as a drawing, WordArt text effect, or an equation ¾ at the insertion point. BOOKMARK : Creates bookmarks, which you can use to mark selected text, graphics, tables, or other items. HYPERLINK : Inserts a hyperlink or edits the selected hyperlink. Keyboard Shortcut : Ctrl + K 52 How to use Hyperlink :  Select the text in document.  Select Insert menu.  Select and click Hyperlink option.  Hyperlink dialog box will appear.  Select the link file.  Finally click OK button.  Then sets the hyperlink to the selecting text.  Click Ctrl +Mouse, then opens a linked file.
  • 12. SMS COMPUTERS MS – OFFICE Format Menu : FONT : Changes the font and character spacing formats of the selected text. Keyboard Shortcut : Ctrl + D PARAGRAPH : Changes paragraph indents, text alignment, line spacing, pagination, and other paragraph formats in the selected paragraph. BULLETS AND NUMBERING : Adds bullets or numbers to selected paragraphs and modifies the bullets and numbering format. 53 How to use Font option :  Select Format menu.  Select and click Font option.  Then displays a Font dialog box.  Then select a required format of the font.  Click OK button.  Finally sets the required or selecting font formats. How to use Paragraph option :  Select the text in document.  Select Format menu.  Select and click Paragraph option.  Then Displays a Paragraph dialog box will appear.  Sets the required or particular formats like alignment, line spacing, indentation and line or page breaks etc.  Finally click OK button.  Then sets the required or particular settings of the text. 
  • 13. SMS COMPUTERS MS – OFFICE BORDERS AND SHADING : Adds borders and shading to selected text, paragraphs, pages, table cells, or pictures. COLUMNS : Changes the number of columns in a document or a section of a document. TABS : Sets the position and alignment of tab stops and determines the type of leader character for each tab stop. 54 How to use Bullets and Numbering option :  Select the text in document.  Select Format menu.  Select and click Bullets and Numbering option.  Then Displays a Bullets and Numbering dialog box .  Sets the required or particular formats like Bulleted, Numbered, Outlined Numbered, Line styles etc.  Finally click OK button.  Then sets the required or particular settings of the text. How to use Borders and Shading option :  Select the text in document.  Select Format menu.  Select and click Borders and Shading option.  Then Displays a Borders and Shading dialog box .  Sets the required or particular formats like Borders, Page borders or Shading etc.  Finally click OK button.  Then sets the required or particular settings of the text. How to use Columns option :  Select required text on the document.  Select Format Menu.  Select and click Columns option.  Then displays a Columns dialog box.  Sets the how many columns divided option into the column dialog box.  Finally click OK button. Then sets the required formats.
  • 14. SMS COMPUTERS MS – OFFICE DROP CAP : Formats a letter, word, or selected text with a large initial ¾ or "dropped" ¾ capital letter. A "drop cap" is traditionally the first letter in a paragraph, and it can appear either in the left margin or dropped from the base line of the first line in the paragraph. TEXT DIRECTION : Rotates selected text in table cells so you can read it from bottom to top or from top to bottom. 55 How to use Tabs option :  Select Format menu.  Select and click Tabs option.  Then displays Tabs dialog box.  Sets Tab stop position, Alignment and Leader options.   Click Set button.  Finally click OK button.  Then sets the required or sets the formats on the document. How to use Drop Cap option : • Select the text on the document file. • Click format menu and click Drop Cap option. • Then opens a Drop Cap dialog box. • Sets the position of Drop Cap. • Click OK button. • Then sets the selected Drop Cap format on the document. How to use Text Direction option : • Create a table, type column and rows names. • Select the text on the table column or row. • Click format menu and click Text Direction option. • Then opens a Text Direction dialog box. • Sets the position of Text Direction. • Click OK button. • Then sets the selected Text Direction format on the document.
  • 15. SMS COMPUTERS MS – OFFICE CHANGE CASE : Changes the capitalization of selected text. BACKGROUND : This option is used to sets the background color you want, or removes the background color, or sets different styles of background colors and designs. WEB THEME : Applies a new or different theme, or removes a theme in a Web page, document, e-mail message, or data access page. A theme is a set of unified design elements and color schemes for background images, bullets, fonts, horizontal lines, and other document elements. FRAMES : TABLE OF CONTENTS IN FRAME : 56 How to use Change Case option : • Select the text on the document. • Click format menu and click Change Case option. • Then opens a Change Case dialog box. • Sets the position of Case type on the dialog box. • Click OK button. • Then sets the selected Change Case format on the document. How to use Background option : Select the text or object on the document. Click format menu and click Background option. Then opens a Color Palette dialog box. Sets the color or design of text or object on the document. Then sets the color format on the document. How to use Theme option :  Select format menu.  Select and click Theme option.  Then displays a Theme dialog box.  Select the required format of the theme.  Finally click OK button on the dialog box.  Then sets the required format on the document.
  • 16. SMS COMPUTERS MS – OFFICE Creates a table of contents using the headings of your document and places it in the left frame of a frames page. When you click a hyperlink in the left frame, the document for the followed hyperlink appears in the right frame. FRAMES PAGE : Creates a new frames page. AUTOFORMAT : Analyzes the content of the active file and then automatically formats the file. If you want to change the automatic formatting options before auto formatting begins, use the AutoFormat command (Format menu) instead of clicking . STYLE : Defines or applies to the selection a combination of formats, called a style. OBJECT : Formats the line, color, fill and pattern, size, position, and other properties of the selected object. Tools Menu : SPELLING AND GRAMMAR : Checks the active document for possible spelling, grammar, and writing style errors, and displays suggestions for correcting them. To set spelling and grammar checking options, click Options on the Tools menu, and then click the Spelling and Grammar tab. LANGUAGE : Set Language : Designates the language of selected text in a file that contains more than one language. The spelling checker automatically uses the dictionary for the designated language. Language Thesaurus : Replaces a word or phrase in the document with a synonym, antonym, or related word. Word Count : 57
  • 17. SMS COMPUTERS MS – OFFICE Counts the number of pages, words, characters, paragraphs, and lines in the active document. Punctuation marks and special symbols are also included in the word count. AutoSummarize : Automatically summarizes the key points in the active document. You can use the AutoSummarize command to create an executive summary or an abstract. AutoCorrect : Sets the options used to correct text automatically as you type, or to store and reuse text and other items you use frequently. TRACK CHANGES : Highlight Changes : Highlights changes to cell contents in a shared workbook, including moved and pasted contents and inserted and deleted rows and columns. Accept or Reject Changes : Finds and selects each tracked change in a document so that you can review, accept, or reject the change. Track Changes Compare Documents : Compares an open, edited document with the original document, and marks any differences in the edited document. Merge Documents : Merges the tracked changes from the specified document to the active document. Protect Document, Unprotect Document : Prevents changes to all or part of an online form or document except as specified. You can also assign a password so that other users can annotate a document, mark revisions, or fill in parts of an online form. When a document is protected, this command changes to Unprotect Document. 58 How to Protect or Unprotect Document : • Open the required or particular document file. • Select and click Tools Option. • Then displays a menu options list box. • Select and click “Protect Document” option. • Then displays a protect password dialog box will appear. • Type the name. once again type rename as the same format. • Finally click OK button. • Then protects the selecting or required document. • Close the document file. Once again open the document. • Then type any matter, the matter will types red color. • Once again click unprotect option on the format menu. • Type protect name on the text box. Click ok button. Then unprotect the
  • 18. SMS COMPUTERS MS – OFFICE ONLINE COLLABORATION : Meet Now : Starts an impromptu online meeting by sending an invitation to participants. The participants you invite to the meeting must be running Microsoft NetMeeting on their computers. Web Discussions : Displays the Discussions toolbar, where you can insert a new discussion about the file or perform other discussion tasks. Mail Merge : Produces form letters, mailing labels, envelopes, catalogs, and other types of merged documents. How to use Mail Merge : 1. Click on Tools menu. Select and click Mail Merge option. 2. Then displays a Mail Merge Helper dialog box. 3. Click Create button, displays sub options list, and click from letters option. 4. Then displays a Microsoft Word dialog box. 5. Click Active Window button. 59
  • 19. SMS COMPUTERS MS – OFFICE 6. Next Click “Get Data” button on the dialog box. 7. Then displays a sub options list. 8. Select and click create data source option. 9. Then displays a save as dialog box. 10. Type name and click save button. 11. Click edit data source button. 12. Then displays a data form. 13. Type the the details of the data. 14. Tnd finally click OK button. 15. Then displays a mail merge tool bar. 16. Select and click or inserts the fields. 17. Then sets the fields on the document. 18. Finally click the "ABC" button on the tool bar. 19. Then appears the mail merge format. Envelopes and Labels : Creates an envelope or a single mailing label, or inserts the same name and address on an entire sheet of mailing labels. Letter Wizard : Runs the Letter Wizard, which helps you quickly create letters. 60 How to use Envelopes and Labels : • Select and click format menu. • Click envelopes and labels option. • Then displays a envelopes and labels dialog box. • Select the “Envelopes” or “Labels” on the dialog box. • Type the address on the delivery address and return address on the enveloeps. • Type the address on the Labels. • Finally click Print or Add to Document. • Then sets the required formats of the document.
  • 20. SMS COMPUTERS MS – OFFICE Macros : Opens the Macros dialog box, where you can run, edit, or delete a macro. Use Record New Macro to record a series of actions as a macro, or click Visual Basic Editor to write a macro. Macro Record New Macro/Stop Recording : Records a new macro, or stops recording after you start recording a macro. Templates and Add-Ins : Attaches a different template to the active document, loads add-in programs, or updates a document's styles. Also loads additional templates as global templates so you can use their macros, AutoText entries, and custom command settings. Customize : Customizes toolbar buttons, menu commands, and shortcut key assignments. Options : Modifies settings for Microsoft Office programs such as screen appearance, printing, editing, spelling, and other options. Table Menu : Draw Table : Inserts a table where you drag in the document. After you drag to insert the table, drag inside the table to add cells, columns, or rows. You can create cells of different heights or a varying number of columns per row. In Microsoft Word, you can even create a nested table. For more information, type the keywords creating tables in the Office Assistant. Insert Table : Inserts a table in the document with the number of columns and rows you specify. Delete : Delete Table : Deletes the selected table from the document. Delete Columns : Deletes from the table the selected columns or the column that contains the insertion point. 61
  • 21. SMS COMPUTERS MS – OFFICE Delete Rows : Deletes from the table the selected rows or the row that contains the insertion point. Delete Cells : Deletes from the table the selected cells or the cell that contains the insertion point. Select : Select Table : Selects the table that contains the insertion point. Select Columns : Selects the columns that contain the insertion point. Select Rows : Selects the rows that contain the insertion point. Select Cells : Selects the cells that contain the insertion point. Merge Cells : In Microsoft Word and Microsoft PowerPoint, combines the contents of selected adjacent cells into a single cell. In Microsoft Excel, combines two or more selected cells into a single cell. The cell reference for a merged cell is the upper-left cell in the original selection. Merging multiple cells into one cell will keep the contents of the upper-left cell only. Split Cells / Unmerge Cells : In Microsoft Word and Microsoft PowerPoint, splits the selected cells into the number of rows and columns you enter. In Microsoft Excel, separates a merged cell into the cells that were originally combined. Split Table : Divides a table into two separate tables and inserts a paragraph mark above the row that contains the insertion point. 62
  • 22. SMS COMPUTERS MS – OFFICE Table AutoFormat : In Microsoft Word, automatically applies formats, including predefined borders and shading, to a table. Automatically resizes a table to fit the contents of the table cells. In Microsoft Excel, applies a built-in combination of formats to a cell range or a PivotTable report. If a single cell is selected, Microsoft Excel automatically selects the range surrounded by blank cells and applies the autoformat to that range. If the selection is part of a PivotTable report, the entire table, except for the page fields, is selected and formatted. This command is not available if the sheet is protected. Auto Fit : AutoFit to Contents : Automatically adjusts the width of columns in the table, based on the amount of text you type. AutoFit to Window : Automatically resizes the table so that it fits within the window of a Web browser. When the window size of the Web browser changes, the table size automatically adjusts to fit within the window. Fixed Column Width : Makes each column a fixed width in the table, using the current widths of the columns. Distribute Rows Evenly : Changes the selected rows or cells to equal row height. Distribute Columns Evenly : Changes the selected columns or cells to equal column width. Heading Rows Repeat : Designates the selected rows to be a table heading that is repeated on subsequent pages if the table spans more than one page. This command is available only if the selected rows include the top row of a table. Convert : Text to Table : Converts the selected text to a table. 63
  • 23. SMS COMPUTERS MS – OFFICE Table to Text : Converts a selected table or selected table rows to text, separating the contents of the cells in each row with the separator character you specify. Sort : Arranges the information in selected rows or lists alphabetically, numerically, or by date. Formula : Performs mathematical calculations on numbers. Gridlines : In a table, the Gridlines command (Table menu) displays or hides dotted gridlines to help you see which cell you're working in. Table gridlines don't print; if you want to add printable gridlines to your table, use the Borders and Shading command (Format menu). If you are working in an East Asian language, the Gridlines command (View menu) displays or hides the document grid. Table Properties : Sets various options to the table such as the table size, alignment, and text wrapping; the row height, row page breaking, and row header options; the column width; and the cell size, alignment, and other cell options. Window Menu : New Window : Opens a new window with the same contents as the active window so you can view different parts of a file at the same time. Arrange : Displays all open files in separate windows on the screen. The Arrange command makes it easier to drag between files. Split : Splits the active window into panes, or removes the split from the active window. Help Menu : Office Assistant : The Office Assistant provides Help topics and tips to help you accomplish your tasks. 64
  • 24. SMS COMPUTERS MS – OFFICE Show or hide the Office Assistant : Displays or removes the Office Assistant from view. Office on the Web : Connects to the Microsoft Office Web site where you can get up-to-date information and help on Office programs. WordPerfect Help : Helps you learn the Word equivalents for WordPerfect for DOS commands and key combinations. You can also display Help for WordPerfect Users by double-clicking WPH on the status bar. Detect and Repair : Automatically finds and fixes errors in this program. About Microsoft Program : Displays the version number of this Microsoft program; copyright, legal, and licensing notices; the user and organization name; the software serial number; and information about your computer and your operating system.  S. MADHU MOHAN M.A., PGDSE & DHE., SMS COMPUTER EDUCATION, H.No: 16-38F/1A, College Road, NANDIKOTKUR POST, Phone No : 9032900170 94402 89220 65