Download to read offline


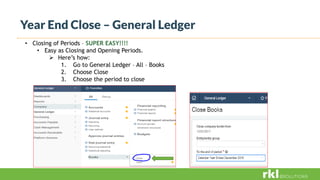
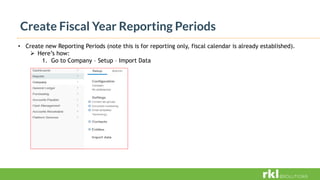
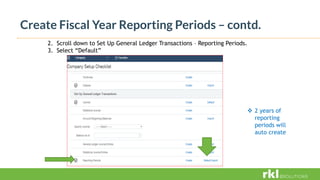


The document outlines year-end planning and preparation processes for Sage Intacct, including steps on closing sub-ledgers, creating fiscal year reporting periods, and preparing 1099 forms. It highlights key benefits such as no longer needing to back up data or worry about disaster recovery and provides best practices for managing financial periods and reconciling accounts. Additionally, it details the process of 1099 vendor setup and printing, along with FAQs related to tax form management and electronic filing requirements.


