Methods of micropropagation in date palm and guava
•Download as PPTX, PDF•
0 likes•508 views

Case study of micro propagation of date palm and guava.

Recommended
More Related Content
What's hot
What's hot (20)
Similar to Methods of micropropagation in date palm and guava
Similar to Methods of micropropagation in date palm and guava (20)
Recently uploaded
Recently uploaded (20)
Methods of micropropagation in date palm and guava
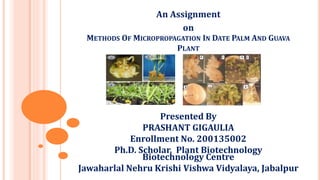
- 1. METHODS OF MICROPROPAGATION IN DATE PALM AND GUAVA PLANT An Assignment on Presented By PRASHANT GIGAULIA Enrollment No. 200135002 Ph.D. Scholar. Plant Biotechnology Biotechnology Centre Jawaharlal Nehru Krishi Vishwa Vidyalaya, Jabalpur
- 2. CASE STUDIES:- Micropropagation of Date Palm (Phoenix dactylifera L.) var. Maktoom through Direct Organogenesis Hussam S.M. Khierallah, College of Agriculture / University of Diyala, Iraq. Saleh M. Bader, Board for Agriculture Researches, Ministry ofAgriculture Baghdad, Iraq Somatic Embryogenesis for Efficient Micropropagation of Guava ( Psidium guajava L.) Nasim Akhtar, Protocols for Micropropagation of Selected Economically-Important Horticultural Plants, Methods in Molecular Biology, vol. 994,
- 3. MICROPROPAGATION OF DATE PALM (PHOENIX DACTYLIFERA L.) VAR. MAKTOOM THROUGH DIRECT ORGANOGENESIS Introduction:- Date palm (Phoenix dactylifera L.) is a dioecious tree and its cultivation has extended to Iraq and most Arab countries. It also occupies special significance for its distinguished economic, nutritional, esthetic, historic and social values. It is propagated traditionally by seeds or offshoots.
- 4. NECESSITY OF MICROPROPAGATION:- Heterozygosity the plantlets produced from seeds are not identical, are lesser in quality than the mother plant, and are approximately 50 % male. Therefore, propagation by offshoots is better, but the numbers produced from the tree are limited, especially from superior and rare cultivars, so it cannot satisfy the need to establishing new groves.
- 5. PLANT TISSUE CULTURE:- The use of plant tissue culture to supplement propagation by offshoots is necessary. Since the first attempts at date palm propagation by tissue culture (Shroeder, 1970; Reuveni, 1972), two methods of propagation have appeared: the first was direct organogenesis and the second was somatic embryogenesis through embryogenic callus produced from explants. The second method is the most commonly used in commercial plant tissue culture labs, it involves the possibility of undesirable genetic variability in the derived plants which is not apparent until the fruiting stage. The first method enables the production of plants that are genetically identical and true-to-type with the mother plant, therefore second method represents an effective means of large scale vegetative propagation of date palm.
- 6. MATERIALS AND METHODS Explants Preparation and Sterilization Young offshoots of Maktoom cultivar (2–3 years old) were chosen and detached from the mother palm. Offshoots were dissected acropetaly until the shoot tips appeared. Shoot tips of 3 cm (apical meristem with soft inner leaves) were excised with immature fiber 2 cm in diameter and then applied in antioxidant solution consisting of 150 mg/L cirtic +100 mg/L ascorbic acid (Tisserat, 1991). Explants were sterilized in commercial bleach (sodium hypochlorite) 20 % containing eight drops of tweed – 20 as emulsifier for 20 minutes, and rinsed three times with sterile distilled water. Then they were transferred to petridishes and all leaf primordia were removed except two pairs surrounding the apical meristem.
- 7. Initiation Stage The medium used in the initiation stage (Table 1) was composed of MS (Murashise and Skoog, 1962). The pH of the medium was adjusted to 5.7 with 0.1 N NaOH or HCl, before the addition of agar. Media were dispensed into culture jars with 25 ml in each, then covered with polypropylene caps. All vials with media were well autoclaved at 121°C and 1.04 kg/cm² for 15 minutes. Apical meristems were cultured into the jars aseptically in a laminar air flow cabinet and cultures were incubated in the dark to reduce phenolic secretions from the explant for one month (Fig. 1).
- 8. The apical meristems were then removed and divided longitudinally into four equal segments and cultured on media of the same composition supplemented with benzyl adenine (BA), kinetin, isopentenyl adenine (2ip), naphthaleneacetic acid (NAA) and naphthoxyacetic acid (NOA) (Table 1). The activated charcoal was changed by 2 g/L of polyvenypyroledone (PVP). All cultures were incubated in a culture room under low light intensity of 1000 lux for 16 hours daily at 27 + 1°C for four weeks. They were subculture four times at four week intervals until the buds had initiated, at which time data was recorded. There were ten replicates of each treatment.
- 9. Multiplication Stage The formed buds were divided into small clumps, each one containing not less than three buds, and cultured on medium of the same composition except for the hormones. Depending on the initiation stage, kinetin was removed and 2ip was added in various concentrations (1.0, 2.0, 4.0, 6.0, mg/L) plus 1.0 mg/L of NAA and NOA. There were ten replicates for each treatment. Cultures were incubated under the same conditions as above. Subculture was carried out every four weeks, and data recorded after eight weeks. The physical status of the medium was evaluated when buds were transferred to liquid medium containing the best combination of plant growth regulators achieved from the multiplication stage. Stationary medium and rotating medium on an orbital shaker (40 rpm) were examined. Results were recorded after eight weeks and compared with those on solid medium.
- 10. Elongation Stage In order to increase the shoot length, shoots were transferred to elongation medium with the same composition except the addition of GA3 in various concentrations (0.1, 0.3, 0.5, and 1.0 mg/L) in the presence of 1 mg/L NAA with ten replicates for each treatment. Data were recorded after eight weeks, while the subculture was done every four weeks. Rooting Stage Resultant shoots were transferred to test tubes (one shoot / test tube) containing 25 cm³ of rooting medium consisting of MS salts. The auxin NAA was added separately in different concentrations (0.1, 0.3, 0.5, and 1.0 mg/L). There were ten replicates for each treatment, and cultures were incubated in a culture room at 27 + 1 ° C and 1000 lux light intensity for 16 hours daily. Rooting percentage, average number of roots and root length were recorded after two months of culture.
- 11. Acclimatization Stage There were two stages of acclimatization. Firstly, the rooted shoots were taken out of the test tube and the root system was washed with tap water to remove the medium. Every washed plantlet was transferred to a new test tube containing 20 cm³ of MS salts and was incubated for two weeks at 27 + 1°C with 3000 lux light intensity for 16 hour days.. Subsequently,all plastic covers were removed for one week in the culture room. Secondly, the plantlets were washed with distilled water and treated with fungicide for 10 minutes, then transplanted into peat moss and perlite alone or into a mixture (1 : 1, 1 : 2 and 2 : 1). Plants were placed in pots with a 10 cm diameter, that were filled with a peat/perlite mixture and placed in a greenhouse or under plastic tunnels. Pots were irrigated with 1/2 strength MS salts and plastic covers were removed gradually for eight weeks. The survival of acclimatized plants was then recorded.
- 12. RESULTS :- Initiation Stage It was clear that the type and concentration of cytokinin affected the response percentage as well as the formation of buds (Table 2). No response was noticed among explants cultured on media free from cytokinin (medium 2, Table 1) or those supplemented with 0.1 mg/L kinetin (medium 3, Table 1). The medium containing 2 mg/L 2ip plus 1 mg/L BA gave a better result in terms of growth response percentage (80%) and average bud formation (6.2 bud), (Fig. 2). These results indicated the superiority of BA over other cytokinins (kinetin and 2ip) for the initiation and development of buds (Fig. 3).
- 14. Multiplication Stage The multiplication of buds was slightly more enhanced by the addition of 2ip(isopently adenine) than BA. (Table 3). The highest number of the buds was 8.6 when 4.0 mg/L 2ip was combined with 2 mg/L BA and 1 mg/L NAA. This number was significantly higher than all other treatments (Fig. 4). This result shows the optimum combination of plant growth regulators for high multiplication rates. For the effect of physical status of the medium, results indicated that the agitated liquid medium significantly increased the number of buds (Table 4).
- 16. Elongation Stage GA3 had a positive effect on the elongation of shoots produced in the multiplication stage (Table 5). Shoot length increased with the increasing GA3 concentration in the medium. The concentration of 0.5 mg/L was considered a better treatment with an average shoot length of 5.3 cm which was significantly different from other treatments.
- 17. Rooting Stage Results of rooting are shown in Table 6. They indicated that the addition of NAA leads to an increase in rooting, with the concentration 0.5 mg/L resulting in the best rooting percentage and average root length (5.4cm), which were significantly different from other treatments. No reduction in root length was observed with the increasing of auxin concentration.
- 18. Acclimatization Stage Acclimatization of plantlets derived from tissue culture confirmed the efficiency of the method used, where the transformation of rooted shoots to the MS salts solution and increasing light intensity enhanced the plantlets for photosynthesis and then changing from heterotrophic to autotrophic status. The gradual lifting of plastic covers both in the culture room and the greenhouse assisted in formation of the cuticle layer (Fig. 6) and regulation of stomatal action. In spite of the significant differences in the percentage of acclimatization successes, the mixture containing 2 peatmoss: 1 perlite was the best and gave 80% survival of acclimitaized plants (Table 7, Fig. 7).
- 20. Somatic Embryogenesis for Efficient Micropropagation of Guava ( Psidium guajava L.) INTRODUCTION:- Common guava ( Psidium guajava L.; Family Myrtaceae) is diploid (2 n = 22), but exist as triploid (2 n = 3 x = 33) in some natural and artificial forms with seedless fruits. Guava flowers are self- and natural cross pollinated for the 30–35%, produce three crops in 1 year, and in a mild tropical climate the tree can flower and fruit throughout the year. Seedless triploid guava and other cultivars have been conventionally propagated through budding inarching, or approach grafting to maintain its clonal populations. Guava is a rich source of proteins, carbohydrates, fats, vitamins, minerals, fragrance, and flavors.
- 21. TISSUE CULTURE ASPECT:- Guava has been successfully micro propagated through the nodal explants and regenerated adventitious shoots from leaves of already micro propagated in vitro-grown plantlets. clonal propagation of guava from seedling and grafted plants has been accomplished. the rapid multiplication of guava seedlings through in vitro shoot tip culture has been over 95% without any problem of phenolic or necrosis of the explants.
- 22. METHODS:- Preparation of Stock Solutions of Growth Regulators 1. Weigh 5 or 10 mg 2,4-dichlorophenoxy acetic acid (2,4-D) powder, transfer in a clean dried small test tube, and dissolve in 0.1–0.2 mL 80% ethanol. 2. Maintain the final volume with double distilled water to get the final concentration of 1 or 2 mg mL −1 stock solution. Preparation of Culture Medium 1. To prepare 1 L MS basal medium, measure 50 mL add one by one to 900 mL double distilled water and raise the final volume to 1 L. 2. Transfer the medium to 1 L beaker and check the initial pH. It should be around 4.2 ± 0.05 after mixing all the four stock solutions. 3. Raise pH of the medium to 6.2 ± 0.05 with the addition of 1 M NaOH.
- 23. 4. Leave the medium under continuous stirring over a magnetic stirrer for 1–2 h. 5. After about 1 h the pH of the medium stabilizes at 5.8 ± 0.05, if not can be adjusted with 0.1 M HCl. 6. For induction and development media, weigh 50 g sucrose and dissolve in 1,000 mL (5% w/v) medium; for germination and plantlets growth media dissolve 30 g sucrose in 1,000 mL (3% w/v) medium. 7. To prepare semisolid medium weigh 8–10 g agar (0.8–1.0% w/v) and add to the above 1 L medium. 8. Melt agar by gentle heating over a hot plate with continuous stirring. 9. Use melted agar to modify the culture medium according to the need and stages of somatic embryogenesis.
- 24. Media Types and Modifications Induction Medium 1. Prepare full strength semisolid MS medium supplemented with 5% (w/v) sucrose and 1.0 mg L −1 2,4-D for the induction of somatic embryogenesis. 2. Dispense 8–10 mL induction medium amended with 2,4-D to each culture tube. 3. Plug the culture tubes with muslin cloth wrapped cotton plugs and autoclave. 4. Modify culture media with 0.1, 0.5, 1.5, and 2.0 mg L −1 2,4-D when using zygotic embryo explants of various cultivars from different agro climatic zones.
- 25. Development and Maturation Medium 1. Prepare full strength agar-solidified MS basal medium supplemented with 5% (w/v) sucrose without any plant growth regulator (PGR). 2. Dispense 10–12 mL of medium into culture tubes and plug the tubes with muslin cloth wrapped cotton plugs; sterilize by autoclaving. 3. Use the development medium, free of PGR, for subculture of explants following 8 days of inductive treatment with 2,4-D.
- 26. Germination Medium 1. Prepare half strength agar-solidified MS basal medium supplemented with 3% (w/v) sucrose without PGR for the germination of somatic embryo and encapsulated. 2. Dispense 12–15 mL of the medium in each culture tube, plug the tubes with muslin cloth wrapped cotton plugs and autoclave. 3. For germination of encapsulated seeds, autoclave medium in conical flasks and pour 20–25 mL medium into sterile Petri dishes. Growth Medium 1. Prepare full strength MS liquid suspension medium for the initial growth of plantlet prior to the soil transfer and hardening. 2. Supplement this medium with 3% (w/v) sucrose devoid of PGR. 3. Dispense 25–30 mL full strength MS liquid suspension medium to each 150 or 250 mL conical flasks for plantlet growth. 4. Plug the culture vessels
- 27. Stock Solution of Mercuric Chloride 1. Weigh 50 mg HgCl2 and dissolve in 100 mL double distilled water in 250 mL conical flask to get 0.05% concentration. o Sterilization 1. Sterilize different media, HgCl2 solution, double distilled water, and all other instruments by autoclaving at 121°C for 15 min at 1.1 kg cm −2 pressure. Plant and Explants Selection of Cultivars and Plants 1. Select a 10–15 year old tree of an elite high-yielding guava variety from the field. 2. Collect fruits from the selected guava tree and use them to excise zygotic embryo explants. 3. Observe the development of flower buds systematically in each growing season with regard to their appearance, growth periods, and maturity.
- 28. 4. The full grown or the half-open flower buds (about 14–18 days from their appearance), are tagged and bagged to ensure close/open pollination; time of explant collection is regarded as the day zero of anthesis and fertilization. Collection of Fruits and Preparation of Explant Material 1. Collect guava fruits ranging from 2.5 to 4.0 cm diameter after 10 weeks of anthesis. 2. Wash the fruits thoroughly under running tap water for about 10–15 min. 3. Remove the hard green exo and greenish white mesocarp with the help of a sharp knife or scalpel and divide the central pulp with seeds into 4–6 vertical lobes. 4. Wash the central pulp lobes under running tap water for 15–20 min.
- 29. 5. Disinfect the central pulp with seeds by treating with a mild antiseptic (e.g., 2% Cetavlon (v/v); ICI Ltd., India) with 2–4 drops of Tween-X (Hi-media, India) in 50 mL tap water for 15 min in 150 or 250 mL conical flasks. 6. Wash the material under running tap water for further 10–15 min to remove the traces of surfactants. 7. Rinse in 80% (v/v) ethanol for 30–60 s followed by treating the pulp lobes with an autoclaved 0.05% HgCl2 solution (w/v) for about 15–17 min by rigorous shaking in a sterilized 250 mL conical flask. 8. Rinse the pulp lobes 4–5 times with sterile double distilled water to remove traces of sterilant. Dissection of Zygotic Embryo Explants 1. Put one of the pulp lobes along with seeds in a 96 mm diameter sterilized Petri dish, containing 15–20 mL sterile double distilled water.
- 30. 2. Pick up guava seeds from the sterilized pulp lobes using forceps and scalpel; place on a microscopic slide for dissection. 3. Hold the seed with a forceps in left hand over a microscopic slide and remove a small piece of longer arm with the help of a fine and pointed scalpel. 4. Turn the seed in opposite orientation and similarly remove a small piece of shorter arm, preferably by making a horizontal cut. 5. Insert a blunt needle either through the longer or the shorter arm side, so that embryo comes out at the other end. 6. Inoculate the zygotic embryo (Fig.1a) on induction medium, modified with 2,4-D, in a test-tubes. 7. Incubate the culture for 8 days for induction of somatic embryogenesis. 8. Transfer zygotic embryos from induction to development medium after 8 days of inductive treatment. 9. Zygotic embryos from cultivars of different agro climatic zones are tested with 0.1, 0.5, 1.0, 1.5, and 2.0 mg L −1 2,4-D containing medium for optimization of somatic embryogenesis.
- 31. Somatic Embryogenesis and Regeneration of Plantlets The process of somatic embryogenesis for micro propagation of guava is described in various different stages, viz., induction of somatic embryogenesis, development and maturation of somatic embryos, germination of somatic embryos, growth of plantlets, and acclimatization of plantlets to ex vitro condition. Stages in Somatic Embryogenesis and Plantlets Regeneration A. Induction of Somatic Embryogenesis 1. Isolate zygotic embryo explants by dissecting seeds from 10-week post-anthesis fruits; embyos are curved, translucent watery white, mostly with 3–5 mm long embryonic axis, and 3–5 times longer hypocotyl than the cotyledons (Fig. 1a ). 2. Zygotic embryo explants are cultured for 8 days on full strength agar- solidified MS basal medium supplemented with 5% sucrose and 1.0 mg L −1 2,4-D for the induction of somatic embryogenesis (Fig. 1b ).
- 32. B. Development and Maturation of Somatic Embryos 1. Development and maturation of somatic embryos is done on the development medium having full strength agar solidified MS basal medium containing 5% sucrose but free of PGR (Fig. 1c–f ). C. Germination of Somatic Embryos 1. Subculture the entire bunch of somatic embryos along with the zygotic embryo explants after 10 weeks of culture initiation to a fresh embryo germination medium consisting of half strength agar-solidified MS basal salts and supplemented with 3% (w/v) sucrose. 2. Somatic embryos sub cultured on germination medium will turn light green to green irrespective of the developmental stages, indicating germination within 2–3 days of transfer. 3. Most of the somatic embryos show the emergence of root, shoot, and leaves within the first week of subculture.
- 33. 4. Germinating somatic embryos continue to grow into plantlets during the second week of subculture. 5. At the end of second week, most of the plantlets develop well grown roots (0.5–2.0 cm), shoots (0.5–5.0 cm), and leaves (medium size) (Fig. 1i , j). 6. There is no significant growth of plantlets. D. Growth of the Plantlets 1. Subculture the plantlets regenerated from somatic embryos after 2 weeks on full strength MS liquid growth Medium containing 3% (w/v) sucrose. 2. Maintain cultures for an extended growth period of 2 weeks in culture room. 3. All the plantlets grow well in growth medium and attain full height of culture vessel within 2 weeks of subculture (Fig. 1k ).
- 34. E. Acclimatization of Regenerated Plantlets to Ex Vitro Conditions 1. In vitro-grown plantlets are taken from the growth medium to plant transfer area. 2. Wash plantlets gently under slow running tap water for about 15–30 min to remove nutrient salts and sucrose. 3. Plantlets from liquid growth medium initially require a more porous potting mixture, i.e., 5:1:2 (w/w/w) of sand: soil: compost. 4. Transfer plantlets either singly or in a group of two in each pot without any damage to the roots. 5. Keep the plantlets covered with transparent polyethylene cover for the first 2–4 days and maintain high humidity. 6. Grow the plantlets for 1–2 weeks in a growth room fitted with humidifier and large exhaust fans, temperature, and photoperiod control system.
- 35. 7. Transfer the plants to a potting mix with a ratio 1:2:3 (w/w/w) of sand: soil: and compost in medium size polyethylene bags or earthen pots after 2 weeks of growth. 8. Keep the plantlets in a shady place of the glasshouse equipped with fogging (or humidifier) and large exhaust fans (or dehumidifier), temperature and photoperiod control system. 9. Maintain slightly higher relative humidity during initial phase of hardening process. 10. Water the potted plants regularly and mulch the upper layer of potting mix occasionally. 11. The somatic plants are ready for the field transfer following 4–6 weeks of acclimatization. 12. Monitor the growth performance of plants under the field condition. 13. Maintain a record of the developmental history and performance of plants for quality assurance.
- 38. THANK YOU