
Recommended
More Related Content
What's hot
What's hot (20)
Similar to Inter-Phase Teaching and Learning
Similar to Inter-Phase Teaching and Learning (20)
More from PiLNAfrica
More from PiLNAfrica (20)
Recently uploaded
Recently uploaded (20)
Inter-Phase Teaching and Learning
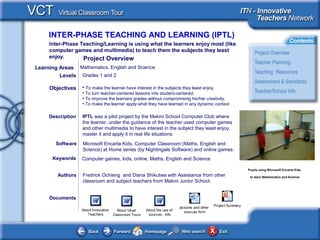
- 1. INTER-PHASE TEACHING AND LEARNING (IPTL) <This picture should illustrate the subject of your Classroom Learning Resource> Project Overview Documents Authors Fredrick Ochieng and Diana Shikutwa with Assistance from other classroom and subject teachers from Makini Junior School. • To make the learner have interest in the subjects they least enjoy. • To turn teacher-centered lessons into student-centered. • To improve the learners grades without compromising his/her creativity. • To make the learner apply what they have learned in any dynamic context Objectives Microsoft Encarta Kids, Computer Classroom (Maths, English and Science) at Home series (by Nightingale Software) and online games. Software Description IPTL was a pilot project by the Makini School Computer Club where the learner, under the guidance of the teacher used computer games and other multimedia to have interest in the subject they least enjoy, master it and apply it in real life situations. Learning Areas Mathematics, English and Science Levels Grades 1 and 2 Computer games, kids, online, Maths, English and ScienceKeywords Inter-Phase Teaching/Learning is using what the learners enjoy most (like computer games and multimedia) to teach them the subjects they least enjoy. Pupils using Microsoft Encarta Kids to learn Mathematics and Science About Innovative Teachers About Vitual Classroom Tours About the use of sources , info pictures and other sources form Project Summary
- 2. INTER-PHASE TEACHING AND LEARNING (IPTL) <This picture should illustrate the subject of your Classroom Learning Resource> Teacher Planning and Management Documents Click the documents below to help you understand the context of this exemplary learning project: Background & Planning: Gives a clear picture of the origin and objectives of the learning project, including the manner in which the project was planned and managed. Classroom Images: Images of the classroom to give you a better feeling for how the project was implemented. Project Background and Planning Classroom Images Group representatives challenging each other
- 3. INTER-PHASE TEACHING AND LEARNING (IPTL) <This picture should illustrate the subject of your Classroom Learning Resource> Teaching Resources Microsoft Office Training Resources Documents • Microsoft Encarta Kids • Maths, English and Science (at home) series by Nightingle Software. • Bailey, Millie, Sammy and Trudy by Edmark Corporation. •http://www.sciencekids.co.nz/gamesactivities.html • http://www.ixl.com/math/practice/grade-1-counting- review-0-to-10 • www.epals.com •http://kids.nationalgeographic.com/kids/ •http://www.globalclassroom.org Having fun learning Science with Microsoft Encarta Kids
- 4. INTER-PHASE TEACHING AND LEARNING (IPTL) <This picture should illustrate the subject of your Classroom Learning Resource> Assessment and Standards Mapping the Standards Authentic Assessment Assessment Rubrics: The project assessment was based on the achievement of the objectives and goals set out for the learner/teacher and how that affected the teaching/leaning process. Mapping the Standards: The following questions were to be answered in the affirmative to prove that the project was a success. Documents • Did the learner have more interest in the subjects they least enjoyed before? • Were the lessons turned from teacher-centered into student- centered? •Did the learner’s grades improve without compromising his/her creativity? • Can the learner now apply what they have learned in any dynamic context? •YES – in this context the project was a great success. PROJECT FINDINGS AND CONCLUSION Learning does not stop outside the classroom
- 5. INTER-PHASE TEACHING AND LEARNING (IPTL) <This picture should illustrate the subject of your Classroom Learning Resource> Teacher and School Information SCHOOL INFORMATION Makini Computer Club members celebrate the success of the project
- 6. INTER-PHASE TEACHING AND LEARNING (IPTL) <This picture should illustrate the subject of your Classroom Learning Resource> Teacher and School Information SCHOOL INFORMATION Makini Computer Club members celebrate the success of the project
Editor's Notes
- This Virtual Classroom Tour template has been provided so you can develop your own Virtual Classroom Tours. Use the template to record a special learning project that you have found particularly successful in your classroom. Then share the project with other teachers in your school, district or beyond. Here’s how: Follow the prompts on each slide and in the embedded Word documents, in this PowerPoint document, to insert your project information. When you have finished inputting all of the project information that is requested, delete the prompts. Select each one and press the Delete key. Note: To enter the title of your Virtual Classroom Tour you must select View, Master, Slide Master, and enter it on the slide master. Then click Close Slide Master. This will cause the title to appear on each of the slides. From the File menu choose Save As… and save the document as a PowerPoint Show. (Use the File type: drop-down list to choose PowerPoint Show). You can then distribute the Virtual Classroom Tour.
- Open the Word documents at the bottom of each slide by double clicking the icons. Follow the prompts [in the yellow boxes] for inserting information about your learning project.
- On this slide, embed the student handouts and the resources created for this project. Some examples are a student project overview, Internet and other resources, directions for art projects, or instructions to students for peer editing of projects. To embed the resources, follow these steps: Have the resource document available. From the Insert menu choose Object. Select Create from File… and click Browse…. Find the file you want to include and click OK. Select Display as icon and click Change Icon… and add a suitable caption. Click OK to add the caption and click OK to embed the file. Position the document icon at the bottom of the slide. You can go to View, Grid and Guides, and click Display Grid on Screen for a grid on which to line up your icons.
- Add any assessment materials you developed for the project to this slide. Have the resource document available. From the Insert menu choose Object. Select Create from File… and click Browse…. Find the file you want to include and click OK. Select Display as icon and click Change Icon… and add a suitable caption. Click OK to add the caption and click OK to embed the file. Position the document icon at the bottom of the slide. You can go to View, Grid and Guides, and click Display Grid on Screen for a grid on which to line up your icons. To include the Standards targeted through your learning project, open the Mapping the Standards document and then add your own standards at the bottom of the document. Links are included to help you search for local curriculum and technology standards.
- Use these resources for assistance in working with and learning more about Microsoft Office applications.