Right Money Management App For Your Financial Goals
Adaptersdb-03-file2storedprocedure
1. Oracle SOA Suite 11g - Sample
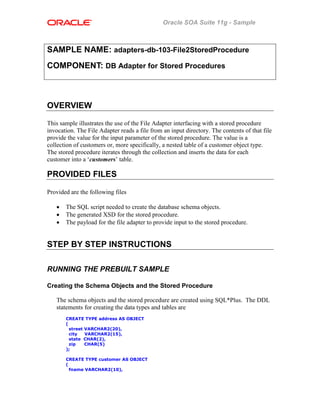
SAMPLE NAME: adapters-db-103-File2StoredProcedure
COMPONENT: DB Adapter for Stored Procedures
OVERVIEW
This sample illustrates the use of the File Adapter interfacing with a stored procedure
invocation. The File Adapter reads a file from an input directory. The contents of that file
provide the value for the input parameter of the stored procedure. The value is a
collection of customers or, more specifically, a nested table of a customer object type.
The stored procedure iterates through the collection and inserts the data for each
customer into a ‘customers’ table.
PROVIDED FILES
Provided are the following files
• The SQL script needed to create the database schema objects.
• The generated XSD for the stored procedure.
• The payload for the file adapter to provide input to the stored procedure.
STEP BY STEP INSTRUCTIONS
RUNNING THE PREBUILT SAMPLE
Creating the Schema Objects and the Stored Procedure
The schema objects and the stored procedure are created using SQL*Plus. The DDL
statements for creating the data types and tables are
CREATE TYPE address AS OBJECT
(
street VARCHAR2(20),
city VARCHAR2(15),
state CHAR(2),
zip CHAR(5)
);
CREATE TYPE customer AS OBJECT
(
fname VARCHAR2(10),
2. Oracle SOA Suite 11g - Sample
lname VARCHAR2(10),
loc address,
email VARCHAR2(25),
phone VARCHAR2(15)
);
CREATE TYPE collection AS TABLE OF customer;
CREATE TABLE customers
(
name VARCHAR2(25),
loc VARCHAR2(45),
email VARCHAR2(25),
phone VARCHAR2(15)
);
The stored procedure is created using this statement
CREATE PROCEDURE add_customers(c IN collection) AS
BEGIN
FOR i IN c.FIRST .. c.LAST LOOP
INSERT INTO customers VALUES (
c(i).lname || ', ' || c(i).fname,
c(i).loc.street || ', ' || c(i).loc.city || ', ' || c(i).loc.state || ' ' || c(i).loc.zip,
c(i).email,
c(i).phone
);
END LOOP;
END;
Connect to the database as SCOTT/TIGER and execute the contents of customers.sql
using SQL*Plus.
RUNNING THE SAMPLE
Deploying the BPEL Process
1. Create a new connection instance in the weblogic-ra.xml file.
<connection-instance>
<jndi-name>eis/DB/oracle</jndi-name>
<connection-properties>
<properties>
<property>
<name>xADataSourceName</name>
<value>jdbc/OracleDataSource</value>
</property>
<property>
<name>dataSourceName</name>
<value></value>
</property>
</properties>
</connection-properties>
</connection-instance>
2. Create a new data source for the JNDI name specified via the <jndi-name>
element of the connection instance (i.e. eis/DB/oracle).
a. Connect to the WebLogic Server Administration Console.
b. Click the “Data Sources” link under the JDBC list item in the Services
section.
3. Oracle SOA Suite 11g - Sample
c. Enter “OracleDataSource” as the name and use the xADataSourceName as
the JNDI Name.
d. Select the Oracle Database Type and Oracle’s Driver (Thin XA) for
instance connections; Versions 9.0.1,9.20,10,11.
e. Enter the Connection Properties and click “Test Configuration”.
f. Deploy the data source to the “AdminServer” target.
3. In JDeveloper, right-click the project name and choose “Deploy” then “Deploy to
Application Server”. Accept the default deployment configuration. Check the
“Overwrite any existing composites with the same revision ID” checkbox if an
archive with the same revision ID has already been deployed.
4. Select an existing Application Server or create a connection to a new one. Choose
to deploy the archive to the soa_server1.
5. To verify that the application has been deployed successfully, click the
“Deployment” tab at the bottom of JDeveloper. This will show you the
deployment log.
6. Login to Enterprise Manager. The “File2SP [1.0]” archive will be listed in the
Deployments area.
Figure 1: Successfully Deployed Archive
TESTING THE BPEL PROCESS
Copy customers.xml to the directory for incoming files of the File Adapter service to
initiate the BPEL process.
VERIFYING EXECUTION
Login as SCOTT/TIGER using SQL*Plus and query the customers table.
SQL> select * from customers;
NAME LOC
------------------------- ---------------------------------------
------
EMAIL PHONE
------------------------- ---------------
Doe, John 123 Main Street, Anytown, CA 12345
john.smith@gmail.com 567-123-9876
Doe, Jane 987 Sunset Blvd, Sometown, CA 34567
JaneDoe@yahoo.com 567-123-9876
Click on the “File2SP [1.0]” link in Enterprise Manager. Click the “Instances” tab.
Click the Instance ID associated with the most recent execution. Look at the Trace.
4. Oracle SOA Suite 11g - Sample
Figure 2: Trace Results from the Test Instance
Click the BPELProcess link to look at the instance data. Expand the <payload> of the
Invoke activity to see the input from the file passed to the stored procedure.
Figure 3: Input Parameter Value for the Stored Procedure
BUILDING THE SAMPLE
CONFIGURING THE OUTBOUND ADAPTER SERVICE
5. Oracle SOA Suite 11g - Sample
1. Launch JDeveloper.
2. Create a new SOA Application called “File2SPApp”. Create a project called
“File2SP” with SOA Project Technologies selected. Select “Composite with
BPEL”.
3. Create a BPEL process called “BPELProcess” and select “Define Service Later”
from the list of Templates.
4. From the BPEL Services area drag and drop a Database Adapter service to the
right swim lane. Provide “AddCustomers” as the Service Name.
5. Choose an existing service connection or create a new one. The connection must
be to SCOTT/TIGER where the schema objects were created.
Figure 4: Establishing a Service Connection
6. Select “Call a Stored Procedure or Function” then browse for and select the
ADD_CUSTOMERS stored procedure.
Figure 5: Choosing a Stored Procedure
7. Click through the remaining pages of the wizard until you reach the Finish page.
Click “Finish” to end the wizard.
6. Oracle SOA Suite 11g - Sample
CONFIGURING THE INBOUND ADAPTER SERVICE
1. From the BPEL Services area drag and drop a File Adapter service to the left
swim lane. Provide “ReadFile” as the Service Name and select “Define from
operation and schema (specified later).”
2. Select “Read File” as the Operation Type. Specify a physical directory path for
incoming files. Specify a name pattern for incoming files to read and provide a
polling frequency.
3. On the Messages page click the search icon to look up a URL. Select
“InputParameters” from the SCOTT_ADD_CUSTOMERS.xsd project schema
file. Click “Finish on the Finish page.
CONFIGURING AN END TO END BPEL PROCESS
1. Under BPEL Activities drag a Receive activity and drop it where it says “Drop
Activity Here” in the process diagram.
2. Right-click the Receive activity and choose Edit. Name the activity “Receive” and
select ReadFile as the partner link. Auto-create the variable. Check the box
marked “Create Instance.”
Figure 6: Configuring the Receive Activity
3. Drag an Invoke activity and drop it after the Receive activity. Right click on the
Invoke and choose “Edit”. Name the activity “Invoke”. Use the Flashlight to find
and choose the “AddCustomers” Partner Link. Auto-create the Input variable.
7. Oracle SOA Suite 11g - Sample
Figure 7: Configuring the Invoke Activity
4. Provide a value for the stored procedure’s input variable by dragging an Assign
activity into the diagram, positioning it between the Receive and Invoke activities.
Right click the assign and choose “Edit”. Choose “Copy Operation” from the
dropdown (the green “+”) in the “Copy Operation” tab to copy the value read
from the file to the input parameter of the stored procedure.
Figure 8: Coping the Input Read from the File to the Input Parameter
Use the “General” tab to provide a name for the Assign (e.g. “Input”).
5. This completes the modeling of the BPEL Process. The diagramming between
the receiveInput and replyOutput activities should look similar to the following
8. Oracle SOA Suite 11g - Sample
Figure 9: The Complete BPEL Process
6. Click the “composite.xml” tab and choose the “Design” view. The composite
should resemble
Figure 10: Complete Composite Structure Diagram