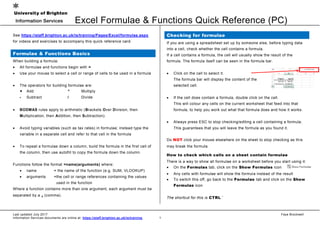
1. Excel Formulae & Functions Quick Reference (PC)
Last updated July 2017 Faye Brockwell
Information Services documents are online at: https://staff.brighton.ac.uk/is/training 1
See https://staff.brighton.ac.uk/is/training/Pages/Excel/formulae.aspx
for videos and exercises to accompany this quick reference card.
Formulae & Functions Basics
When building a formula:
All formulae and functions begin with =
Use your mouse to select a cell or range of cells to be used in a formula
The operators for building formulae are:
+ Add * Multiply
- Subtract / Divide
BODMAS rules apply to arithmetic (Brackets Over Division, then
Multiplication, then Addition, then Subtraction).
Avoid typing variables (such as tax rates) in formulae; instead type the
variable in a separate cell and refer to that cell in the formula
To repeat a formulae down a column, build the formula in the first cell of
the column, then use autofill to copy the formula down the column.
Functions follow the format =name(arguments) where:
name = the name of the function (e.g. SUM, VLOOKUP)
arguments =the cell or range references containing the values
used in the function
Where a function contains more than one argument, each argument must be
separated by a , (comma).
Checking for formulae
If you are using a spreadsheet set up by someone else, before typing data
into a cell, check whether the cell contains a formula.
If a cell contains a formula, the cell will usually show the result of the
formula. The formula itself can be seen in the formula bar.
Click on the cell to select it.
The formula bar will display the content of the
selected cell.
If the cell does contain a formula, double click on the cell.
This will colour any cells on the current worksheet that feed into that
formula, to help you work out what that formula does and how it works.
Always press ESC to stop checking/editing a cell containing a formula.
This guarantees that you will leave the formula as you found it.
Do NOT click your mouse elsewhere on the sheet to stop checking as this
may break the formula.
How to check which cells on a sheet contain formulae
There is a way to show all formulae on a worksheet before you start using it:
On the Formulas tab, click on the Show Formulas icon
Any cells with formulae will show the formula instead of the result
To switch this off, go back to the Formulas tab and click on the Show
Formulas icon
The shortcut for this is CTRL `
2. Last updated July 2017 Faye Brockwell
Information Services documents are online at: https://staff.brighton.ac.uk/is/training
How to check what a formula is doing
Use this technique to check that your formulae are doing what you think:
Click on the cell containing the formula.
Click once on the formula in the formula bar.
The cells used in the formula will be colour coded within the sheet,
making it easy to spot mistakes.
Building a formula to add
1. Click in the cell where the result of the formula will appear
2. Type =
3. Click on the first cell containing
data to be included in the sum
4. Type +
5. Click on the next cell containing
data to be included in the sum
6. Repeat steps 4 and 5 as required.
7. Press ENTER on the keyboard.
Autosum to add row or column totals
This only works where the total is to appear at the end
of the column or row of data. This technique will not
work across worksheets.
Select the range of cells to add up
On the Home tab, click on the Autosum icon
The total will be put in the cell at the end of the selected cells.
Building a formula to subtract
1. Click in the cell where the result of the formula will appear
2. Type =
3. Click on the first cell containing data to be included in the calculation
4. Type –
5. Click on the next cell containing data to be included in the calculation
6. Press ENTER on the keyboard.
Building a formula to multiply or divide
1. Click in the cell where the result of the formula will appear
2. Type =
3. Click on the first cell containing data to be included in the calculation
4. Type * to multiply or / to divide
5. Click on the next cell containing data to be included in the calculation
6. Press ENTER on the keyboard.
3. Last updated September 2017 Faye Brockwell
Information Services documents are online at: https://staff.brighton.ac.uk/is/training 3
Useful keyboard Shortcuts
Using your keyboard to navigate saves time when building formulae.
CTRL + Arrow keys Jump to the beginning, end, top or bottom of a set of
data.
CTRL + SHIFT +
Down arrow
Select an entire column
CTRL + SHIFT +
Down arrow
Select an entire row
CTRL+A Select all data (one cell in data set must be selected)
CTRL + SHIFT + * Selects an entire data table
Use insert function (formula builder) to make
formulae easier
Start to type your formula until the first bracket e.g. =VLOOKUP(
On the formula bar, click on the function button
The pop-up window splits the formula into its arguments
To select cells to add them to the formula click on the icon to jump
back to the worksheet. To return to the formula builder after selecting
cells click on the icon again.
Autofill to copy formula to other cells
Select the cell(s) you want to copy. The fill
handle will appear at the bottom right of the
selection
Point at the fill handle until it becomes a cross.
Click and drag to copy the data OR Double-click to autofill all rows
Click on to change the type of fill (series, copy, formula only etc.)
Always double-click on some of the newly populated cells to check that
the copied formula is still doing what you expect.
If your copied formula is not behaving as it should, it is likely that your
original formula references a single cell that should be used in all of the
formula. In this case, you will need to make the cell reference absolute. See
Absolute references for common variables for more information.
Relative cell references
When you use the autofill technique to copy a formula down a column or
across a row, Excel will automatically update the cell references in the
formula, relative to where the copied formula sits.
Cell reference Copied down the column… Copied across the row…
A2 …becomes A3 …becomes B2
A3 …becomes A4 …becomes B3
A4 …becomes A5 …becomes B4
4. Last updated July 2017 Faye Brockwell
Information Services documents are online at: https://staff.brighton.ac.uk/is/training
Absolute references for common variables
Avoid typing variables (such as tax rates) in formulae; instead type the
variable in a separate cell and refer to that cell in the formula.
The advantage of this is that, should the variable change, you only need
update one cell and all formulae referencing that cell will updated
automatically.
The disadvantage is that if you copy a formula that references that variable
cell, your formula will not work properly unless you make the reference to
the variable cell absolute (instead of relative)
There are 2 ways to make a formula absolute (which you choose is up to
you):
Naming the variable cell
Using $ signs to indicate that a cell reference is absolute
Name cells or ranges for easier to read formulas
This technique has the advantage that formulae become easier to read.
The disadvantage is not many people understand the technique.
Select the cell or range you want to name
Click in the Name box (left of the formula bar)
Type the name and press ENTER
To use, simply type the name wherever you would use a
cell or range reference in a formula. e.g. =SUM(Wages)
$$ signs to make a cell reference absolute
The alternative to naming a cell is to use dollar signs within the cell
reference to make the cell reference for the variable value absolute.A quick
way to do this:
Click on the cell containing the formula
Click once on the cell reference in the formula bar
Press F4 to add 2 dollar signs to your cell reference. Eg D2 will become
$D$2.
You can type the dollar signs in manually.
Mixed cell references
When copying formulae to other cells, sometimes you only want to
anchor the column letter or row number of a cell reference within the
original formula. This is achieved by changing the position of the dollar
signs mentioned above. A quick way to do this:
Click on the cell containing the formula
Click once on the cell reference in the formula bar
Press F4 until the cell reference meets your requirements (see below)
Relative v absolute v mixed cell references
This table shows how the different $ sign positions affect the cell
references in a formula when copied:
Original cell
reference...
...when copied
becomes
Effect
D2 E4
Both the column and the row coordinates change
as the formula is copied
$D2 $D4
The column coordinate is fixed, but the row
coordinate changes
D$2
E$2
The column coordinate changes, but the row
coordinate is fixed.
$D$2
$D$2 Both the column and row coordinates remain fixed
5. Last updated July 2017 Faye Brockwell
Information Services documents are online at: https://staff.brighton.ac.uk/is/training 5
Function Used for Format Example Tips
SUM
Add values in a
range of cells
=SUM(range of cells to add) =SUM(A1:A10)
AVERAGE
Average the values in
a range of cells
=AVERAGE(range of cells to average) =AVERAGE(A1:A10)
MAX
Find the highest
value in a range of
cells
=MAX(range of cells) =MAX(A1:A10)
MIN
Find the lowest value
in a range of cells
=MIN(range of cells) =MIN(A1:A10)
IF
Display different
information
depending on the
outcome of a
condition test
=IF(condition test, what to display if
outcome is true, what to display if
outcome is false)
=IF(A1>20, “Great!”,”Oops!”) or
=IF(A1>20, A1*E1,A1)
AND
Test that more than
one condition is true.
Test result is TRUE
only if all conditions
are met.
=AND(condition test 1, condition test 2, ...) =AND(A1>20,B1=”Gold”)
TRUE and FALSE are the
only possible answers.
To change the content of
a cell as the result of an
AND function, use the
AND function as the
condition test in an IF
statement
OR
Test that more than
one condition is true.
Test result is TRUE if
any of the conditions
are met.
=OR(condition test 1, condition test 2, ...) =OR(A1>20,B1=”Gold”)
COUNT Count numerical cells =COUNT(range of cells to count) =COUNT(A1:A10)
COUNT does not count
cells containing text, use
COUNTA for this
COUNTA Count cells =COUNTA(range of cells to count) =COUNTA(A1:A10)
COUNTBLANK Count empty cells
=COUNTBLANK(range of cells to
count)
=COUNTBLANK(A1:A10)
COUNTIF
Count cells that meet
a certain condition
=COUNTIF(range of cells to count,critera
to satisfy)
=COUNTIF(A1:A10,”>20”)
Counts all cells containing a value greater than
20
COUNTIFS
Count cells only if
multiple conditions
are met
=COUNTIFS( range of cells for criteria
check 1, criteria 1 to satisfy, range of cells
for criteria check 2, criteria 2 to satisfy,...)
=COUNTIFS(A1:A10,”Gold”,B1:B10,”>20”)
Counts number of rows where column A contains
the word Gold AND column B is greater than 20
Can use pivot table instead.
6. Last updated July 2017 Faye Brockwell
Information Services documents are online at: https://staff.brighton.ac.uk/is/training
Function Used for Format Example Tips
SUMIF
Add values in a
range only if cells
meet a certain
condition
=SUMIF(range of cells for criteria check;
criteria to satisfy, range of cells to add)
=SUMIF(A1:A10,”Gold”,C1:C10)
Adds all cells in column C if column A contains
the word Gold
You only need the second
range if the range to add
is different to the range to
be searched.
SUMIFS
Add values in a
range only if cells
meet multiple
conditions
=SUMIFS(range of cells to add, range of
cells for criteria check 1, criteria 1 to
satisfy, range of cells for criteria check 2,
criteria 2 to satisfy,...)
=SUMIFS(C1:C10,A1:A10,”Gold”,B1:B10,”>20”)
Adds all cells in column C if column A contains
the word Gold AND column B is greater than 20
Can use pivot table instead
VLOOKUP
Where several spreadsheets use the same data, it is useful to have one sheet holding that data and then allow the other sheet s to reference that information
using the VLOOKUP function. This allows you to maintain data centrally. Any updates will automatica lly update the other sheets.
The format of the VLOOKUP function is:
=VLOOKUP(lookup value, table range holding the master data, number of the column containing the answer to your question, FALSE)
For example, in the diagram above cell D2 would contain:
=VLOOKUP(C2,Main_data_sheet A2:D4, 3,FALSE)
to search the table on the right, for the relevant fee for course code UB200.
FALSE tells excel to only find an answer if an exact match is found for the
lookup value.
If no match is found (e.g. course code UB150), Excel will display #N/A.
When using VLOOKUP for numerical data, you can omit FALSE from the
function to find the closest match (next lowest value):
=VLOOKUP(lookup value, table range holding the master data, number of
the column containing the answer to your question)
For VLOOKUP to work, the data table must be sorted in ascending order on
the lookup column (e.g. the course code column A in the example above)
Main data sheet
7. Last updated July 2017 Faye Brockwell
Information Services documents are online at: https://staff.brighton.ac.uk/is/training 7
Flash Fill (Excel 2013 & 2016 only)
This tool is amazing for working with text in databases. In earlier versions,
you needed to know several text functions to achieve the same results.
Type the desired result in the first cell of the series and press ENTER
Start typing the desired result in the second cell in the series.
Excel should suggest content for that and all other cells in the column.
Press ENTER to fill the column.
Some examples:
To merge first name and last name in one column
Type the full name in the first cell of a new column
Start typing the full name in the second cell of the
new column
Press ENTER when Excel suggests the full name for
every cell in the column
To extract the initials from 2 columns
Type the initials in the first cell of a new column
Start typing the initials in the second cell of the new
column
Press ENTER when Excel suggests the initials for
every cell in the column
TOP TIP: if the technique above does not work:
Type the desired result in the first cell of the series and press ENTER.
Type the desired result in the second cell in the series and press
ENTER.
Select both cells.
Use the Autofill technique to copy the cells down column.
Click on the icon and choose Flash Fill.
To split the contents of a column into 2 columns
For example, you can separate a column of full names into first and last
name columns.
Insert a new column to the right of the column you want to split
Select the column that you want to split
On the Data tab click on the text to columns icon
In the pop-up window, check that Delimited is selected and click on
Next
In the Delimiters section, indicate what separates the first bit of text from
the second.
o E.g. if a space separates first and last name, click on Space
o The example shows how to indicate that 2 pieces of
information are separated by a hyphen
o Click on Next and then on Finish
8. Last updated July 2017 Faye Brockwell
Information Services documents are online at: https://staff.brighton.ac.uk/is/training
Colour all cells containing a formula (Excel 2013
only)
This may help you keep track of where
you have added formulae to a sheet.
Click on to select the entire
worksheet.
On the Home tab, click on Conditional Formatting and
choose New Rule.
In the list, click to choose Use a
formula to determine which cells
to format
In the formula box type
=ISFORMULA(A1)
Click on the Format button.
Choose the format you require. e.g. to
colour all cells containing a formula:
o Click on the Fill tab
o Click on a colour for the cell
o Click OK.
Click OK.
All cells containing a formula will be
coloured.
Recommended PivotTables (Excel 2013 and 2016)
Excel Pivot Tables summarise data without the need to build complex
formulae. From Excel 2013 on, the Recommended PivotTables tool will
suggest simple Pivot Tables to summarise your data without the need to
know the details of how to build a PivotTable.
Click anywhere within the table of data.
Click on the INSERT tab.
Click on the Recommended PivotTables icon.
Click on the suggested PivotTables on
the left of the pop-up window to see the
table in more detail.
To create a PivotTable, click on the
PivotTable you require and click OK.
The PivotTable will be created on its
own worksheet.
Creating a chart from a Pivot Table
Once you’ve created a simple Pivot Table using the steps above, creating a
chart to go with it is easy:
Click on the Pivot Table to select it.
On the Pivot Table Tools ANALYZE tab, click on the PivotChart
icon
Choose a chart type
Click OK.