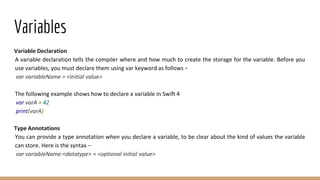
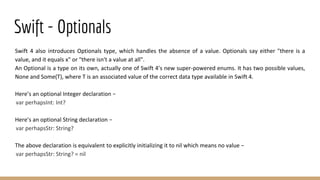
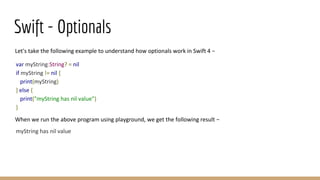
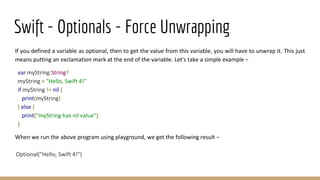
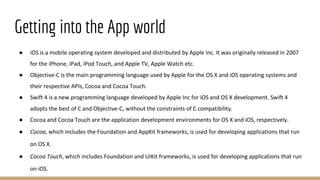
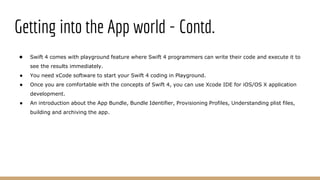
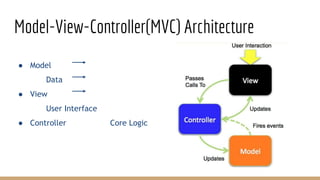
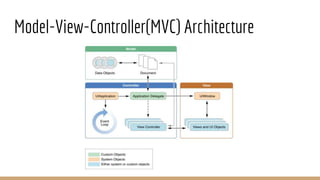
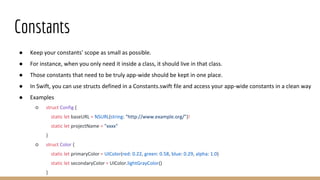
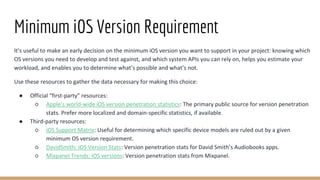
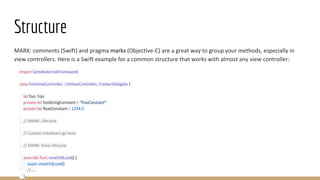
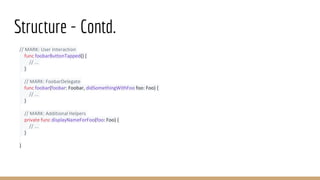
The document provides an overview of iOS training for day 1, which includes introductions to iOS, Objective-C and Swift programming languages, Xcode IDE, Cocoa and Cocoa Touch frameworks, Model-View-Controller architecture, and best practices for iOS development such as project structure, constants, minimum iOS version requirements, and coding style conventions.
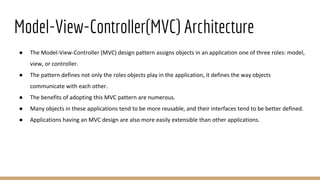


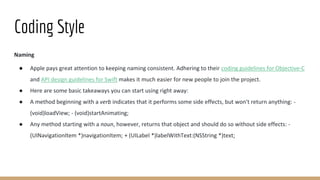
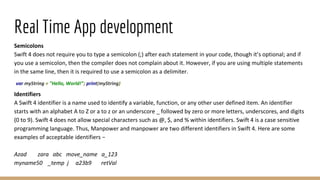
![Coding Style - Contd.
● Acronyms and initialisms that commonly appear as all upper case in American English should be uniformly up-
or down-cased according to case conventions:
var utf8Bytes: [UTF8.CodeUnit]
var isRepresentableAsASCII = true
var userSMTPServer: SecureSMTPServer
● Other acronyms should be treated as ordinary words:
var radarDetector: RadarScanner
var enjoysScubaDiving = true
● More Information about the styling and conventions can be found in
https://github.com/raywenderlich/swift-style-guide](https://image.slidesharecdn.com/iostraining-part1-180520043847/85/Basic-iOS-Training-with-SWIFT-Part-1-16-320.jpg)
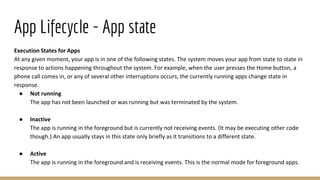
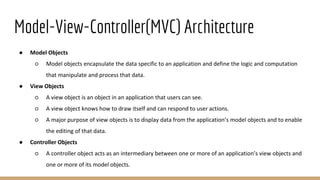
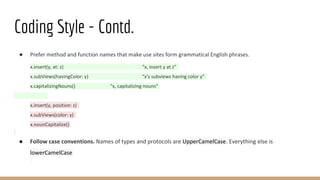
![App Lifecycle
The Main Function
The entry point for every C-based app is the main function and iOS apps are no different. What is different is that
for iOS apps you do not write the main function yourself. Instead, Xcode creates this function as part of your basic
project.
#import <UIKit/UIKit.h>
#import "AppDelegate.h"
int main(int argc, char * argv[])
{
@autoreleasepool {
return UIApplicationMain(argc, argv, nil, NSStringFromClass([AppDelegate class]));
}
}](https://image.slidesharecdn.com/iostraining-part1-180520043847/85/Basic-iOS-Training-with-SWIFT-Part-1-19-320.jpg)