Call Now ≽ 9953056974 ≼🔝 Call Girls In New Ashok Nagar ≼🔝 Delhi door step de...
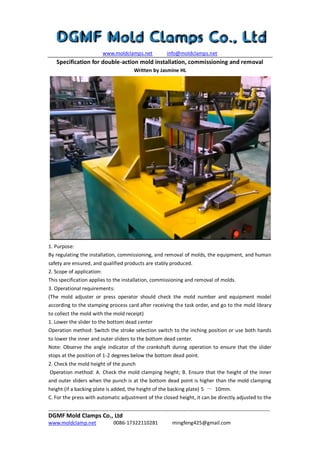
Specification for double action mold installation, commissioning and removal -- DGMF Mold Clamps Co., Ltd
1. www.moldclamps.net info@moldclamps.net
____________________________________________________________________________________________
DGMF Mold Clamps Co., Ltd
www.moldclamp.net 0086-17322110281 mingfeng425@gmail.com
Specification for double-action mold installation, commissioning and removal
Written by Jasmine HL
1. Purpose:
By regulating the installation, commissioning, and removal of molds, the equipment, and human
safety are ensured, and qualified products are stably produced.
2. Scope of application:
This specification applies to the installation, commissioning and removal of molds.
3. Operational requirements:
(The mold adjuster or press operator should check the mold number and equipment model
according to the stamping process card after receiving the task order, and go to the mold library
to collect the mold with the mold receipt)
1. Lower the slider to the bottom dead center
Operation method: Switch the stroke selection switch to the inching position or use both hands
to lower the inner and outer sliders to the bottom dead center.
Note: Observe the angle indicator of the crankshaft during operation to ensure that the slider
stops at the position of 1-2 degrees below the bottom dead point.
2. Check the mold height of the punch
Operation method: A. Check the mold clamping height; B. Ensure that the height of the inner
and outer sliders when the punch is at the bottom dead point is higher than the mold clamping
height (if a backing plate is added, the height of the backing plate) 5 ~ 10mm.
C. For the press with automatic adjustment of the closed height, it can be directly adjusted to the
2. www.moldclamps.net info@moldclamps.net
____________________________________________________________________________________________
DGMF Mold Clamps Co., Ltd
www.moldclamp.net 0086-17322110281 mingfeng425@gmail.com
specified height according to the mold number.
Note: If the die mounting height of the punch is lower than the mold clamping height or the sum
of the die height and the thickness of the shim, the die will be easily damaged during the
installation and commissioning of the die.
3. Inspection, trimming and cleaning of mold mounting surface
Operating methods: A. Lift the inner and outer sliders to the top dead point and open the
workbench; B. Carefully clean the bottom surface and workbench of the punch slider; C. Trim the
workbench and the uneven surface of the iron; D. Clean the mold surface.
Precautions: A. Pay attention to whether the surface of the table is uneven, if it is uneven, use oil
stone to repair; B. Confirm that the unused supporting rod holes are blocked; C. When using the
air cushion, confirm whether the air cushion top rod is deformed, whether the placement
position is suitable, and the length Whether it is suitable and whether the waste is sandwiched.
4, the mold is placed on the workbench of the punch
Operation method: A. Use a crane to compare the mold equipment center and place the mold in
the correct position; B. Confirm the installation direction, structure, and status of the mold; C.
Enter the workbench.
5.Mold installation
Operation method: A. The mold is installed in the center of the workbench, and the position and
direction are adjusted; B. Confirm the position of the horn; C. Use the jog mode to lower the
inner slider to the bottom dead point, and use the fine adjustment to make the inner slider and
the convex mold Fit the upper plane and install at least four fastening screws; D. Lower the outer
slider to the bottom dead point by jogging. Use the fine adjustment to make the outer slider fit
the upper plane of the blank holder and install at least four fastening screws. Screws.
Note: A. The operation must be performed at the bottom dead point; B. The mold with marking,
bulletproof boss, bending and deep drawing must be debugged with parts; C. The mold with the
supporting rod, the air cushion should be raised before fine adjustment To ensure that the
supporting rod is installed correctly; D. For molds with supporting rod, make sure to use fine
adjustment after the top dead point or air cushion is unloaded; E. Tighten the bolts in a diagonal
order; F. Pay attention to confirm the mold fixing bolts, Are there any damage to the nuts and
pressure plates?
6.Fixed lower die
Operating method: A. Use the inching method to raise the inner and outer sliders to the top dead
point. Be sure to take out the storage block. After running the inner and outer sliders for three or
four strokes, fix the lower mold at the bottom dead point.
Note: A. Tighten the lower mold fixing bolts by hand and run the slider for three or four strokes. If
there is no abnormal phenomenon such as chattering and abnormal sound, then use a wrench to
tighten the fixing bolts from light to heavy; B. The fixing bolts of the mold should be installed
near the mold side as much as possible; C. The mold fixing part should not be suspended below;
D. Pay attention to the abnormal sound at the guiding part.
7.Confirm the internal state of the mold
Operating methods: A. Clean the inside of the mold; B. Check the mold parts; C. Fill the guidepost,
3. www.moldclamps.net info@moldclamps.net
____________________________________________________________________________________________
DGMF Mold Clamps Co., Ltd
www.moldclamp.net 0086-17322110281 mingfeng425@gmail.com
guide bush, guide plate, oblique flange, and other sliding parts.
Note: Inspect all parts of the mold for damage, wear, and installation errors.
8. Fine adjustment of the closing height of punch (DH value)
Operation method: A. Adjust the closing height of the inner and outer sliders appropriately
according to the DH value or the state of the workpiece specified in the work standard book; B.
Put in a piece of paper and check the degree of mold closing.
Note: A. When debugging the bending die and drawing die, you must bring the parts to debug,
and pay attention to the indentation, pull marks, and changes in angle, depth, and shape of the
workpiece surface; B. Pay attention to confirm whether there is gap unevenness, Anomalies such
as molds; C. For molds using a supporting rod, the slider must first be raised to the top dead
point, and the limit screw is adjusted to make the supporting rod contact reliably.
9. Adjust other processing conditions
Operation method: A, confirm the oil and its equipment for stamping; B. confirm whether the
feed gap, pressure, release time, feed center and height are suitable; C. confirm whether the air
cushion pressure is appropriate; D. confirm whether the stamping stroke speed is appropriate; E.
The pressure of the balance cylinder of the press should be adjusted according to the weight of
the upper mold.
Note: The mold adjuster will tell the operator about the relevant work instructions and
precautions.
10. Tryout
Precautions: A. Care should be taken to ensure that the surrounding state is carefully carried out
during mold adjustment. Pay attention to the positioning of the mold, whether there is
anti-reflection, and how to correctly place the part. If you are unsure, you should contact the
quality inspector or the squad leader; Relevant liaison work; C. Submit the self-inspected test
model to the quality inspector for inspection.
Operation method: A. After the commissioning, it needs to be confirmed by the quality inspector,
and the relevant responsible person must give necessary guidance; B. The mold adjuster tells the
operator about the precautions for stamping operation.
11. Prepare for mass production
Operating methods: A. Organize tools and utensils after the test is finished; B. Clean up the test.
Note: A. It is forbidden to disperse tools on the punch and feeder during normal operation; B.
Clean the test molds on the workbench; C. Clean the scraps in time during the use of the mold,
pay attention to the status of the mold and the product, Whether wrinkling, leakage, cracking,
etc .; D. Fill the guidepost, guide sleeve, guide plate, oblique cymbal, and other sliding parts with
oil every 100 pieces or so, and lubricate the parts according to the actual situation, and apply
drawing oil.
12. Remove the mold
Operating methods: A. Clean up the debris inside the mold; B. Check the technical status of the
mold; C. Apply oil to the moving part of the mold and apply anti-rust oil to the sliding part of the
mold that has not been used for a long time; D. Lower the inner and outer sliders to the bottom
Dead point, you must use the "two-hand button" to lower the slider to the bottom dead point,
4. www.moldclamps.net info@moldclamps.net
____________________________________________________________________________________________
DGMF Mold Clamps Co., Ltd
www.moldclamp.net 0086-17322110281 mingfeng425@gmail.com
and remove the outer slider blanking ring bolt; E. After adjusting the outer slider by 5mm with a
fine adjustment, use an inch to raise the outer slider to the top dead point; F. Remove the convex
mold bolt on the inner slide block, and then adjust the inner slide block by 5mm to raise the
inner slide block to the top dead point; G. Remove the lower mold bolt.
Precautions: A. In particular, clean up large molds carefully before taking and unloading; B. For
the next production, check whether there is any maintenance, and report the class leader
immediately if there is any abnormality; C. Keep the final D. Observe the limit and storage block
for damage before mold unloading. If it is damaged, contact the mold and mold personnel to
measure and unload the mold. If there is an elastic working part (spring, nitrogen cylinder, etc.) in
the mold, the storage block must be placed; E. Keep the last piece in the mold; F. For molds with
storage blocks, use the fine adjustment to adjust the outer slider to the appropriate height at the
bottom dead point, and install the storage blocks; G. For molds with supporting rods, first place
the air cushion Unload, run the slider for 2-3 strokes, make sure that the supporting plate,
supporting rod and air cushion device is lowered to the bottom; H. Pay attention to completely
loosen its fixing bolts, and remove the bolts from the T-slot to prevent the slider of the punch
from being brought up. Mold, accident.
13. Open the workbench, mold cleaning, and storage
Operation method: A. Clean the mold surface; B. Use a crane to lift the mold to the mold storage
area.
Note: Be careful when handling and placing the mold.