This document outlines the mold installation and commissioning operation specifications for DGMF Mold Clamps Co., Ltd. It details the purpose of standardizing mold installation and maintenance to ensure mold quality and production needs. The process includes trained workers installing molds according to equipment specifications, cleaning molds, adjusting heights and ejectors, lubricating parts, test runs, and post-use maintenance before storage. The stamping and manufacturing departments are responsible for guiding mold installation and use according to these specifications.
1. www.moldclamps.net info@moldclamps.net
____________________________________________________________________________________________
DGMF Mold Clamps Co., Ltd
www.moldclamp.net 0086-17322110281 mingfeng425@gmail.com
Mold installation and commissioning operation specifications
Written by Jasmine HL
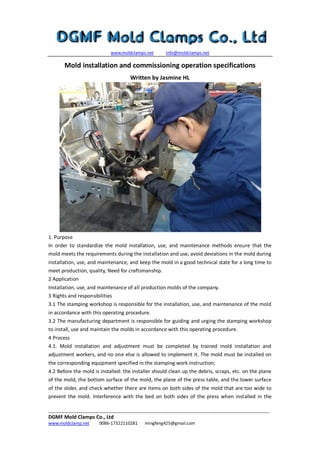
1. Purpose
In order to standardize the mold installation, use, and maintenance methods ensure that the
mold meets the requirements during the installation and use, avoid deviations in the mold during
installation, use, and maintenance, and keep the mold in a good technical state for a long time to
meet production, quality, Need for craftsmanship.
2 Application
Installation, use, and maintenance of all production molds of the company.
3 Rights and responsibilities
3.1 The stamping workshop is responsible for the installation, use, and maintenance of the mold
in accordance with this operating procedure.
3.2 The manufacturing department is responsible for guiding and urging the stamping workshop
to install, use and maintain the molds in accordance with this operating procedure.
4 Process
4.1. Mold installation and adjustment must be completed by trained mold installation and
adjustment workers, and no one else is allowed to implement it. The mold must be installed on
the corresponding equipment specified in the stamping work instruction;
4.2 Before the mold is installed: the installer should clean up the debris, scraps, etc. on the plane
of the mold, the bottom surface of the mold, the plane of the press table, and the lower surface
of the slider, and check whether there are items on both sides of the mold that are too wide to
prevent the mold. Interference with the bed on both sides of the press when installed in the
2. www.moldclamps.net info@moldclamps.net
____________________________________________________________________________________________
DGMF Mold Clamps Co., Ltd
www.moldclamp.net 0086-17322110281 mingfeng425@gmail.com
press, causing an accident;
4.3 Single-acting drawing die to Select the ejector and ejector position according to the ejector
drawing on the "Punching Work Instruction". After placing ejector, check it to ensure the
consistency of ejector position and length;
4.4 When the mold is lifted to the press table, make sure that the center of the mold is aligned
with the center of the table of the press. After the mold is set, check the alignment of each
mounting slot and the T-shaped slot of the press to facilitate installation. The mold platen bolts
or automatic clamps should be installed as close to the side of the mold as possible, and the mold
should not be suspended under the fixed part. The installation sequence is to move the mold first
and then lower the mold. When fixing the mold platen bolts, install two or more diagonally. For a
100 kg upper mold, 4 to 6 fastening bolts must be fixed;
4.5 Adjust the installation height of the mold (the installation height of the mold = the storage
height of the mold + 100mm), and it is strictly forbidden to go down to the installation height for
the first time;
4.6 The drawing die must first adjust the ejection height of the ejector to 20-30mm and test the
ejector. After the ejector is correct, the air cushion is dropped;
4.7 After opening the slider until the bottom surface of the slider is in contact with the upper
surface of the mold, the upper mold is clamped with an automatic clamper. The automatic
clamper cannot be installed with the clamp bolt and locked, and the lower mold clamp bolt can
be put on. , Remember not to lock;
4.8 Slide the slider to the top dead point, take out the remaining sample, and remove the pad on
the limiter;
4.9 Clean and lubricate the mold, including applying lubricating oil to sliding parts such as guide
posts, guide plates, and oblique cymbals;
4.10 Fine adjustment of mold mounting height: put the sheet or new process parts, close the
mold after the slider has two empty strokes, and tighten the lower mold plate bolts (pay
attention to whether the mold parts are working properly during empty strokes, if any Notify the
mold repairer in time if abnormal);
4.11 The drawing die should adjust the balance air pressure value and air cushion pressure value
of the press according to the requirements of the "Stamping Instructions";
4.12 Put into production after the first commissioning is qualified;
4.13 During the use of the mold, the operator should carefully observe it frequently to ensure
that the working part and the guiding part of the mold are free of foreign objects, such as
punches, punches, concave dies, blank holders, return plates, ejectors, guides, etc. Columns,
guide plates, etc. should be stopped immediately if there is a foreign object, and the mold can be
resumed after cleaning is completed;
4.14 For blanking molds, the operator should regularly check the waste discharge and clean up in
time during the production process;
4.15 After each use of the mold, the operator should perform maintenance on the mold, wipe
the surface clean, remove waste, sundries, etc., and return the limiter pads to their original