Best Practices for Longitudinal Joints Construction
•
1 like•651 views

Presentation delivered by Bob Humer, P.E., Senior Regional Engineer, Asphalt Institute, at the CalAPA Fall Asphalt Pavement Conference Oct. 24-25, 2018 in Sacramento, Calif.

Recommended
More Related Content
What's hot
What's hot (20)
Similar to Best Practices for Longitudinal Joints Construction
Similar to Best Practices for Longitudinal Joints Construction (20)
More from California Asphalt Pavement Association
More from California Asphalt Pavement Association (20)
Recently uploaded
Recently uploaded (20)
Best Practices for Longitudinal Joints Construction
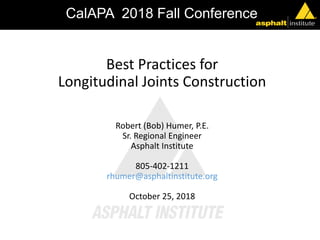
- 1. Best Practices for Longitudinal Joints Construction Robert (Bob) Humer, P.E. Sr. Regional Engineer Asphalt Institute 805-402-1211 rhumer@asphaltinstitute.org October 25, 2018 CalAPA 2018 Fall Conference
- 2. “ In recent years, it has become evident how critical longitudinal joint construction is to the life of the pavement structure… Many pavements have been or are in the process of being resurfaced as a direct or indirect result of longitudinal joint deterioration.” CalAPA 2018 Fall Conference
- 3. Too often longitudinal joints are the weak link in an otherwise long-lasting asphalt pavement. - Agency and industry concern! - Offers greatest opportunity to improve overall life.
- 4. Alaska Some States have more challenges than others!
- 7. • Note condition of the rest of the mat • Also sealed each side of patch
- 8. -Contains: - Workshop information - Handout of workshop slides (180+) - Video of entire 4-hr Workshop in OH, Feb 2013 - 2-hr webinar, Oct 2012 - Project report - 5-page “Summary of Recommendations” - Magazine articles on project and findings http://www.asphaltinstitute.org/public/engineering/ longitudinal-joint-information FHWA – AI National study
- 9. CalAPA 2018 Fall Conference How can we improve Longitudinal-Joint performance? • A National FHWA-AI Study was conducted to determine “Best Practices for Longitudinal-Joint Construction” • Conclusions and recommendations: Mix selection Design of the joints Construction practices Specifications evolution
- 10. Mix Selection • Joint Permeability • NMAS (Nominal Maximum Aggregate Size) • VMA and %Air Voids (MS-2 Mix Design Manual) • “Production” Variability
- 11. DENSITY VS. PERMEABILITY 12.5 mm WEARING COURSE 86.0% 88.0% 90.0% 92.0% 94.0% 96.0% 98.0% 0 500 1000 1500 2000 2500 3000 3500 4000 4500 5000 Coefficient of Permeability (K) (cm x 10 -5 / sec) Density(%Gmm) LONGITUDINAL JOINTS MAT Dean Maurer, P.E. Permeable Below 92% Density
- 12. Effect of In-Place Voids on Life Washington State DOT Study 50 60 70 80 90 100 7 8 9 10 11 PercentServiceLife In-situ Air Voids, %
- 13. E. Zube - California Dept. of Highways - 1962 8 L. Cooley, B. Prowell, R. Brown – NCAT - 2002 7.7 R. Mallick, et al - (fine graded) 8.5 B. Choubane, et al – Florida DOT - 1998 7 J. Westerman – Arkansas HTD - 1998 6 NCAT 03-02 – (coarse graded) - 2003 7 Critical Voids where permeable9.5 mm 12.5 mm Various Research Reports on Critical Air Void Level for Permeability
- 14. A pavement is permeable when the voids are interconnected. Coarse-graded 9.5mm and 12.5mm Superpave mixes become permeable at 7.7% voids. Coarse-graded 19mm mixes at 5.5%, and 25mm mixes at 4.4%. (ref: NCAT study) At what % the voids become interconnected depends on the type of mix. What we do know!
- 15. Mix Selection Recommendations To avoid permeability: • NMAS: ½” mixes better than ¾” mixes • VMA and %Air Voids: with 4% Air voids and the required VMA there is sufficient binder! • “Production” Variability: Target in production should be JMF. (Most of the detected variability is caused by sampling and testing). • Any segregated mix is not the optimum mix determined in mix design! • WMA can help as a compaction aid.
- 16. Design of Joints • Wedge or Butt Joint • 2nd paving pass 1/8” higher than 1st pass. To avoid; starving the joint of material needed for roll-down roller bridging across the joint • rain water butting up against the joint (height difference) • Plan passes from low side up to center • Require use of a joint sealer.
- 17. Butt (Vertical) Joint Milled or Cutback Joint Notched Wedge Joint Defining Different Types of Longitudinal Joints
- 18. Proper Overlap Sufficient Material for Roll-Down Low Density Area Unsupported Edge Will Have Lower Density Cold (unconfined) side Hot (confined) side Please note “Cold side” and “Hot side” definitions.
- 19. Typical Density Profile across the mat. Unconfined Middle of Mat Hot Side Lowest Highest In-between Value Value Value
- 20. Typical Spec requirements (of the past) • “It is recommended to specify minimum compaction level at the longitudinal joint (generally 2% lower than that specified for the mat away from the joint).” NCAT / PaDOT, 2002 • “Maximum of 2% less than the corresponding mat density and minimum of 90% of TMD at the specific location.” Nevada, 2004 • “The evaluation is considered failing if the joint density is more than 3.0 pcf below the density taken at the core random sample location and the correlated joint density is less than 90%.” TTI, 2006 • “Joint density, 2% less than mat density, is achievable when measured with cores.” NCAT, 2007
- 21. Construction recommendations • If not specified, use WMA as a compaction aid. • Tack coats provide lateral confinement. • Pave a straight edge or cut back (for consistent 1” overlap by 2nd pass) • Use a “Joint-Matcher” on last lift (to have sufficient mix at the joint for roll-down). • Avoid segregation (specifically at the augers, and by the rakers). • Use proper joint rolling techniques.
- 22. Tack Full Width to Minimize Lateral Movement
- 23. First Pass Must Be Straight! Unanimous that a string-line should be used to assure first pass is straight Stringline for reference, and/or Skip Paint, Guide for following
- 24. Tough to get proper overlap (1”) with next pass
- 25. Cutting Back the Joint - Eliminates low density area - When HMA still warm - Straight is critical Cutting-back when mat is still warm.
- 26. http://www.highwaysmaintenance.com/kraktext.htm Cutting Wheel Fixed to Roller in Europe • Best practice in Europe on Dense Graded mixes on large projects when traffic is managed • Cut when mix is warm and plastic. • Watering of blade prevents tearing • Joint then painted with 50 pen binder • Cutting and painting not done on open mixes
- 27. Uniform head of material across entire screed to joint …Do Not Overload Auger Extend auger and tunnel within 12 to 18 inches of the end gate Avoid Segregation at the Augers!
- 28. to control material flow at outer edges of screed and deliver homogenous HMA at joint Extend Tunnels the Same Distance Extend the Tunnels to 12 to 18” from the end-gates
- 29. Examples of Auger Overload… Likely to Segregate Tunnel Tunnel not present?
- 30. Paver automation using Joint Matcher (versus ski) to always achieve sufficient amount of mix needed for roll-down. • If hot-side is starved of material, the roller drum will “bridge” onto cold mat and no further densification occurs at joint • NEVER STARVE JOINT by targeting a final height difference of +0.1” on hot-side. • NH spec requires compacted hot-side to be 1/8” higher than cold side Use Joint Matcher on last lift.
- 31. Types of Joint Matchers Non-contact sensor Contact sensor
- 32. Contact Grade Sensor Ultrasonic Grade Sensor More Joint Matchers Types of Joint Matchers
- 33. Do NOT scalp the Joint and broadcast mix
- 34. Destined for Failure Hot side of joint starved of material where bridging occurred?
- 35. Best way to roll a Joint • Depending on mix characteristics, lift thickness and surface conditions, compaction of the joint can behave differently. • In the first hours of paving try what works best, and stick with it. • Hopefully the mix will be consistent in composition and behavior. • Do a lot of joint testing early on.
- 36. Roller 6” 4”- 6” 4”- 6” Option 1 Hang over 4-6” Roller Roller Option 2 1st Pass 4”-6” inside 2nd Pass hang over 4”-6” Rolling Unconfined Side? 50-50 on Where to Put 1st Pass
- 37. Edge of drum inside unsupported edge can cause cracking near the edge Rolling Unsupported Edge (First Paver Pass) What We Don’t Want Rolling Unsupported Edge With First Roller Pass If edge of drum is located just inside the unsupported edge, a stress crack can occur here. A stress crack can occur
- 38. 1st pass all on hot mat with roller edge off joint approx 6-12 inches 2nd pass overlaps on cold mat 3-6 inches Rolling the Supported Edge Our Recommendation: Holding back 6” to 12”
- 39. Roller Roller in vibratory mode with edge of drum overhanging 2 to 4-inches on cold side. Versus an Alternate Method of 1st Pass over the Supported Edge Concern with this method is: if insufficient HMA laid on hot side at joint, then bridging occurs with first pass (roller supported by cold mat) Hot side Cold side
- 40. With Recommended Method, Still Must Watch for Stress Cracks Staying off 6” on 1st Pass Stress cracks evident at edge of the drum (while more likely from rolling unsupported edge, can also occur from rolling supported edge)
- 41. Potential Problem with Hot Side “Pinch”
- 42. Compacting Notched Wedge Vibrating wedge Wheel compactor
- 43. Paint the Side of the open Joint (Butt or Wedge) Emulsion (Good), PG Asphalt (Better), or Joint Adhesive (JA) (Best)
- 44. Proper Overlap: • 1.0 + about0.5 inches • Exception: Milled or sawed joint should be 0.5 inches Aim for approximately 1” overlap.
- 45. Don’t Rake Overlap Across the Joint! – Starves the Joint Photo by James Scherocman, P.E
- 47. Lute the Avoid unnecessary rakingJ This Raker is doing a great job
- 48. To control material flow at outer edges of screed and deliver homogenous HMA at joint Extend Tunnels the Same Distance Tunnels
- 49. Examples of Auger Overload… Likely to Segregate Tunnel Tunnel?
- 50. Auger and Tunnel likely not extended within 12 to 18-inches of the end gate. The Result - SEGREGATION at joint
- 51. •Mill & Pave One Lane at a Time •Cut Back joint •Joint Heaters •Joint Adhesives (hot rubberized asphalt) •Surface Seals Over Joint •Longitudinal Joint Seal (LJS) / VRAM •Rubber Tire Rollers •WMA, IC, IR Bar SECTION 5Other Options / New Products
- 52. PA Story on Longitudinal Joint Density • Increasing density was viewed as key • 2007 - began measuring joint density • 2008 - method spec. of best practices • 2008 and 2009 - continued gathering data on joints • 2010 - New joint density specification. Transition year with no bonuses or penalties. • 2011-2014 – bonuses and penalties on joint density Article in NAPA’s magazine, Asphalt Pavement, Sept/Oct 2012 http://www.nxtbook.com/nxtbooks/naylor/NAPS0512 Specifications Evolution for L-J in PA, CT, and MI
- 53. PA Joint Density Spec Highlights • Both type of LJs allowed (butt or notch wedge) • Joint Lot = 12,500’. Core every 2,500’. 5 cores per lot. • Core location o For Butt: directly over visible joint o For Notch Wedge: middle of wedge • Percent Within Limits (PWL) • Incentive starts at 80% PWL • Disincentive at <50% PWL • Lower Specification Limit o 2010-2013: 89% TMD (Theoretical Maximum Density = Gmm) o 2014: 90% TMD • Corrective action for < 88% TMD
- 54. -$10,000 PA: Impact on Lot Payment Summary +$5,000 Disincentive 0 50 80 100 % PWL IncentiveNo Pay Adjustment
- 55. PA: How Did it Work?In-place Density Summary, Reported by PA DOT Year # Lots Avg. Roadway Density, %TMD Avg. Joint Density, %TMD Criteria 2007 18 93.9 87.8 begin measuring at Jt. 2008 43 94.1 88.9 method spec 2009 29 94.1 89.2 method spec 2010 No data, transition to PWL spec 2011 137 94.1 91.0 PWL, LSL 89% 2012 162 94.0 91.6 PWL, LSL 89% 2013 167 93.9 91.4 PWL, LSL 89% 2014 316 94.1 92.3 PWL, LSL 90% 2015 493 92.6 PWL, LSL 90%
- 56. Increased Projected Joint Life due to Improved Density 50 60 70 80 90 100 PercentServiceLife 93% 92% 91% 90% 89% Compaction Level 2012-2013 2007 2011 2009 2008 2014-2015
- 57. PA: Annual Statewide Totals on Incentives/Disincentives for Joint Density Year Incentive Payments Disincentive Payments 2011 $268K $99K 2012 $489K $63K 2013 $588K $25K 2014 $1,002K $127K
- 58. Connecticut Joint Density Spec •Prior to 2011, acceptance from gauges only •Tested joints only on hot side of joint •Require notch-wedge joints (12:1 to 8:1) •In 2011, moved to cores •92% min average required in mat •91% min average required over joint •Requirement only for surface lifts •typically 2” lifts of 12.5 Superpave mix •Cores taken over middle of wedge
- 59. CT DOT Average In-Place Lot Density on Cores for Entire Year Roadway (Non-Bridge) Year Mat (Rqd. Min. of 92%) Joint (Rqd. Min. of 91%) Prior to 2010: Acceptance from gauges 2011 92.6% 91.6% 2012 93.0% 91.4% Std. Dev. 2.07 (on 2082 measurements) 2.40 (on 1863 measurements) 2013 93.1% 91.8%
- 60. MI DOT Joint Densities 6” cores directly over visible joint 1 core per 2,000 ft, 10,000 ft per section Bonus/penalty based on averages, not PWL • 2009 • Avg: 89.77% • 2011 • Avg: 90.71% • 2012 • Avg: 91.59% • 53% sections received bonus (Avg > 91.5%) • 20% sections received penalty (Avg < 90.5%) • 27% sections had no adjustment (90.5 < Avg < 91.5%)
- 61. Proposed Acceptance Criteria LJ Density Spec Six-inch Cores located either directly over visible joint for butt joint, or middle of wedge for wedge joint. This gives a 50/50 split, in order to average the Gmm of both lots. • > 92% of Gmm: maximum bonus • Between 92% and 90% of Gmm: 100% pay, pro-rated bonus, need to “overband” or “surface seal” joint • < 90% of Gmm: reduced payment, overband or surface seal the joint
- 62. GOAL 14 year old surface I-65 in IN: SR252 to US31 12 inches HMA over Rubblized JCP Warranty Project
- 63. With proper focus, proper training, proper construction and proper specifications, we can build long-lasting longitudinal joints! Questions?