'1916 Drypoint Prints'
•
2 likes•303 views

Art Class scheme - St. Peter's College, Dunboyne, Co. Meath

Recommended
More Related Content
What's hot
What's hot (20)
Viewers also liked
Viewers also liked (17)
Similar to '1916 Drypoint Prints'
Similar to '1916 Drypoint Prints' (20)
More from Angela Clarke
More from Angela Clarke (15)
Recently uploaded
Recently uploaded (20)
'1916 Drypoint Prints'
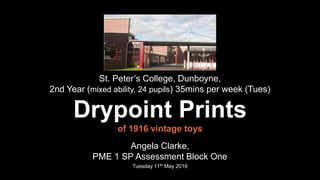
- 1. St. Peter’s College, Dunboyne, 2nd Year (mixed ability, 24 pupils) 35mins per week (Tues) Drypoint Prints of 1916 vintage toys Angela Clarke, PME 1 SP Assessment Block One Tuesday 11th May 2016
- 2. Aim of the Scheme To create a Dry-point print through the exploration of drawing and the art elements line, value, form and texture based on indivdual observation of toys based on the theme 1916 vintage toys. Considerations when writing this scheme I first took into consideration the scheme I had previously finished with this. It was ’ Focus on the eye ’- Self portraits through the medium of collage. After such a free and self-expressive based scheme ,and reflection on the differentiation within the class, I wanted to continue the theme of childhood, but to bring it back in history to the 1916 Easter Rising, to tie in with the events that were unfolding around the school. By looking at another child’s point of view, in a time of war , a hundred years ago would build further on the concepts of self-identity and evoke self reflection. I wanted the students to: 1. engage in the techniques of drawing and the print process 2. Make connections and possible ideas for their Drypoint print within the theme 3. work independently and/or in pairs and as part of a team 4. engage in dialogue with their teacher and their peers 5. reflect on themselves and their fellow students in a positive way 6. evaluate their own learning as individuals and together with their peers 7. express themselves through their art
- 3. Support studies: My Drypoint Types of Printmaking Printmaking terms Plate example Print example
- 4. Visual aid: Instructions of how to make a drypoint print Examples of feathers Examples to convey procedure of creating a drypoint print. To discuss how they were achieved and how they create lines patterns and texture
- 5. Visual aid: Supporting artists Examples of three artists who have worked in Drypoint Albrecht Durer (1471-1528) Rembrandt Van Rijn (1606-1669) Angie Hoffmeister Formally analyse the prints according to the line, shapes, forms, texture and patterns.
- 7. Visual aid: Advertisements, then and now Compare and contrast
- 8. Student’s work: Lesson 1 Personal observation To accurately observe the line, shape, value, form texture and pattern of vintage and modern toys through indivdual observational drawing from primary source and an awareness of the different angles the object is being viewed.
- 9. Analysing Supporting artists examples Learning outcomes: To analyse the examples of the supporting artist in relation to line, value, form, texture and pattern. To list a number of features in the work of these three artist examples.
- 10. Student’s work: Lesson 2 – test plates Learning outcomes To understand how line can be used to define pattern, texture and form on a sample of perspex. To develop a general and artistic awareness of drypoint plate artmaking. To examine the possibilities of toys as structures in drawings and to make connections between their previous drawings , the samples and ideas suitable for a drypoint print.
- 11. What is value Word list : Thin Thick Busy Calm Zigzag Curved Broken Vertical Diagonal Straight Horizontal How to create form using line
- 12. Supporting artist Maurice Sendak
- 13. Student’s work: Lesson 3 Learning outcomes To make a value grid using line To develop value further by creating form
- 14. How to create texture and pattern using line
- 15. Student’s work: Lesson 4 Learning outcomes To have used their imaginations to look for new ways of interpreting line, texture and patterns. Looking at worksheets for reference, eg. overlaying, repeating, reversing, interlocking or simplifying elements. To have visually recorded a range of different ideas. To make connections between the print samples and possible ideas for their final artwork. To analyse the techniques used in printmaking.
- 16. Visual aid: The elements and principals of art Composition
- 17. Student’s work: Lesson 5 Learning outcomes To be aware how different tools and materials can be manipulated and combined to create lines, value, form, texture and patterns. To be be aware of how different tools and materials can enable realisation of their design. To be aware of composition in terms of the art and design principles - space, balance, rhythm and movement.
- 18. Test prints Too light Too dark
- 19. Student’s work: Lesson 6 Learning outcomes To be aware of the development and construction of a drypoint plate and how it can be used as a way for the transfering of images within the print process. To be able to effectively make a drypoint print.
- 20. Students work: lesson 7 To be able to effectively make a drypoint print by applying media, techniques, and process. To reflect upon and assess the characteristics and merits of their work and the work of others. To communicate their experiences and ideas.
- 21. Successful aspects of the project: 1. The pupils engaged well with the project and produced artwork of a high standard. 2. The pupils enjoyed learning new techniques, especially how to cross hatch and create new patterns and textures. 3. The most positive outcome was the class working together as a group in the printing process, discussing and advising how to improve each others prints. Evaluation Things to improve on: 1. It would have been better if students had more time to do their own research on artists whose work is based around toys. 2. It was only over time, as I evaluated the student’s abilities, that I was able to assign appropriate roles. 3. Incorporating their preliminary drawings in to a sketchbook would be better for students to see the development and to keep a diary of their work.